Amazon Onboarding Process
Description
To get onboarded with Amazon, the following steps need to be performed:
Based on the seller's store/warehouse setup, the Fynd onboarding team will suggest the SmartConnect or the Easy Ship - Multi Location Fulfilment model.
The seller must have at least 2 selling locations to be onboarded to the SmartConnect model. Sellers that have a single selling location will be onboarded onto the Easy-Ship MLF single-node model
The Seller needs to be approved by Amazon to sell via Easy Ship MLF (Multi-Location Fulfilment) program. Refer to the following document for more details on the program.
Mode of Integration
The Seller or Fynd can provide the preferred mode of integration.
Seller Account and Shipping Channel
- The seller will need to have an active seller central account.
- If the seller doesn’t have an active account, they need to register for one. Click here to setup the seller account.
- Seller will need to provide the GST details for the business address. Navigate to Settings > Tax Settings.
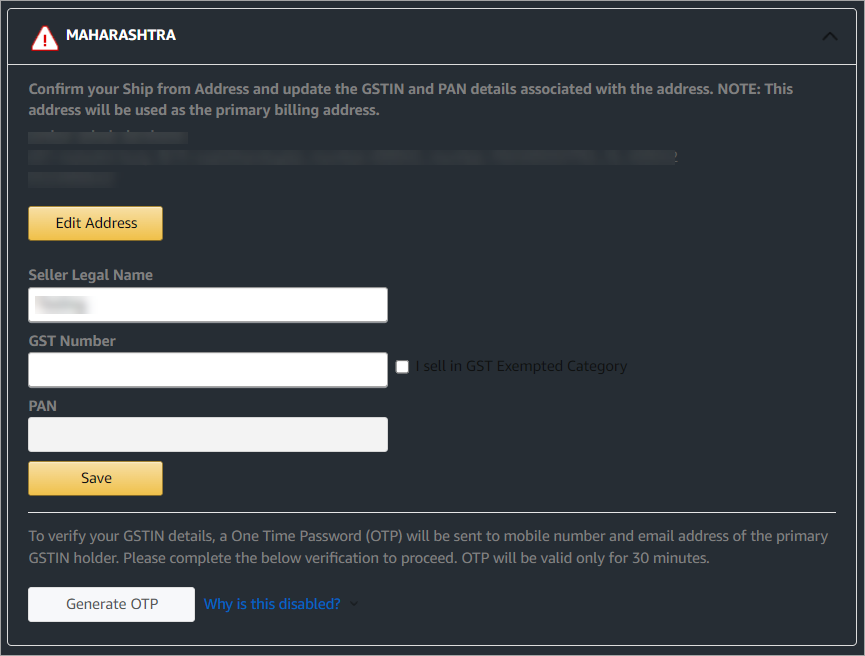
- Select Easy Ship as the fulfilment channel (not required for SmartConnect). Navigate to Settings > Shipping Settings and scroll to the bottom of the page.
.png)
- Enter the details and click Save to enable Easy Ship (not required for SmartConnect).
.png)
Store Details
The seller will have to provide the store/warehouse (node) details to Amazon via lead format.
The seller must check ‘Yes’ on row 7 of the lead form as consent to communicate with store point of contact.
Once Amazon receives the lead details via email, they will review the details and send the configuration details in 7 - 10 business days. After the seller receives the configuration details (Merchant Key and KMS key alias), Fynd will enable MLF for the seller.
The seller will need to enroll in a Guaranteed delivery program and then enable Prime. To do this, the seller will have to navigate to Settings > Shipping Settings > Easy Ship and turn on Guaranteed delivery
Amazon will initiate the node and connector configuration process based on the preferred mode of integration.
This process will allow the seller’s system to connect with Amazon and provide the real-time inventory details to Amazon for successful order processing.
Once the above process is done, Amazon will enable prime for the seller as a part of the “Day 1 prime” feature in the ES-MLF program.
To enable Prime, Seller will need to navigate to Settings > Shipping Settings > Easy Ship > Turn on Prime badge near Eligibility for Prime. For more information, watch Easy Ship Prime.
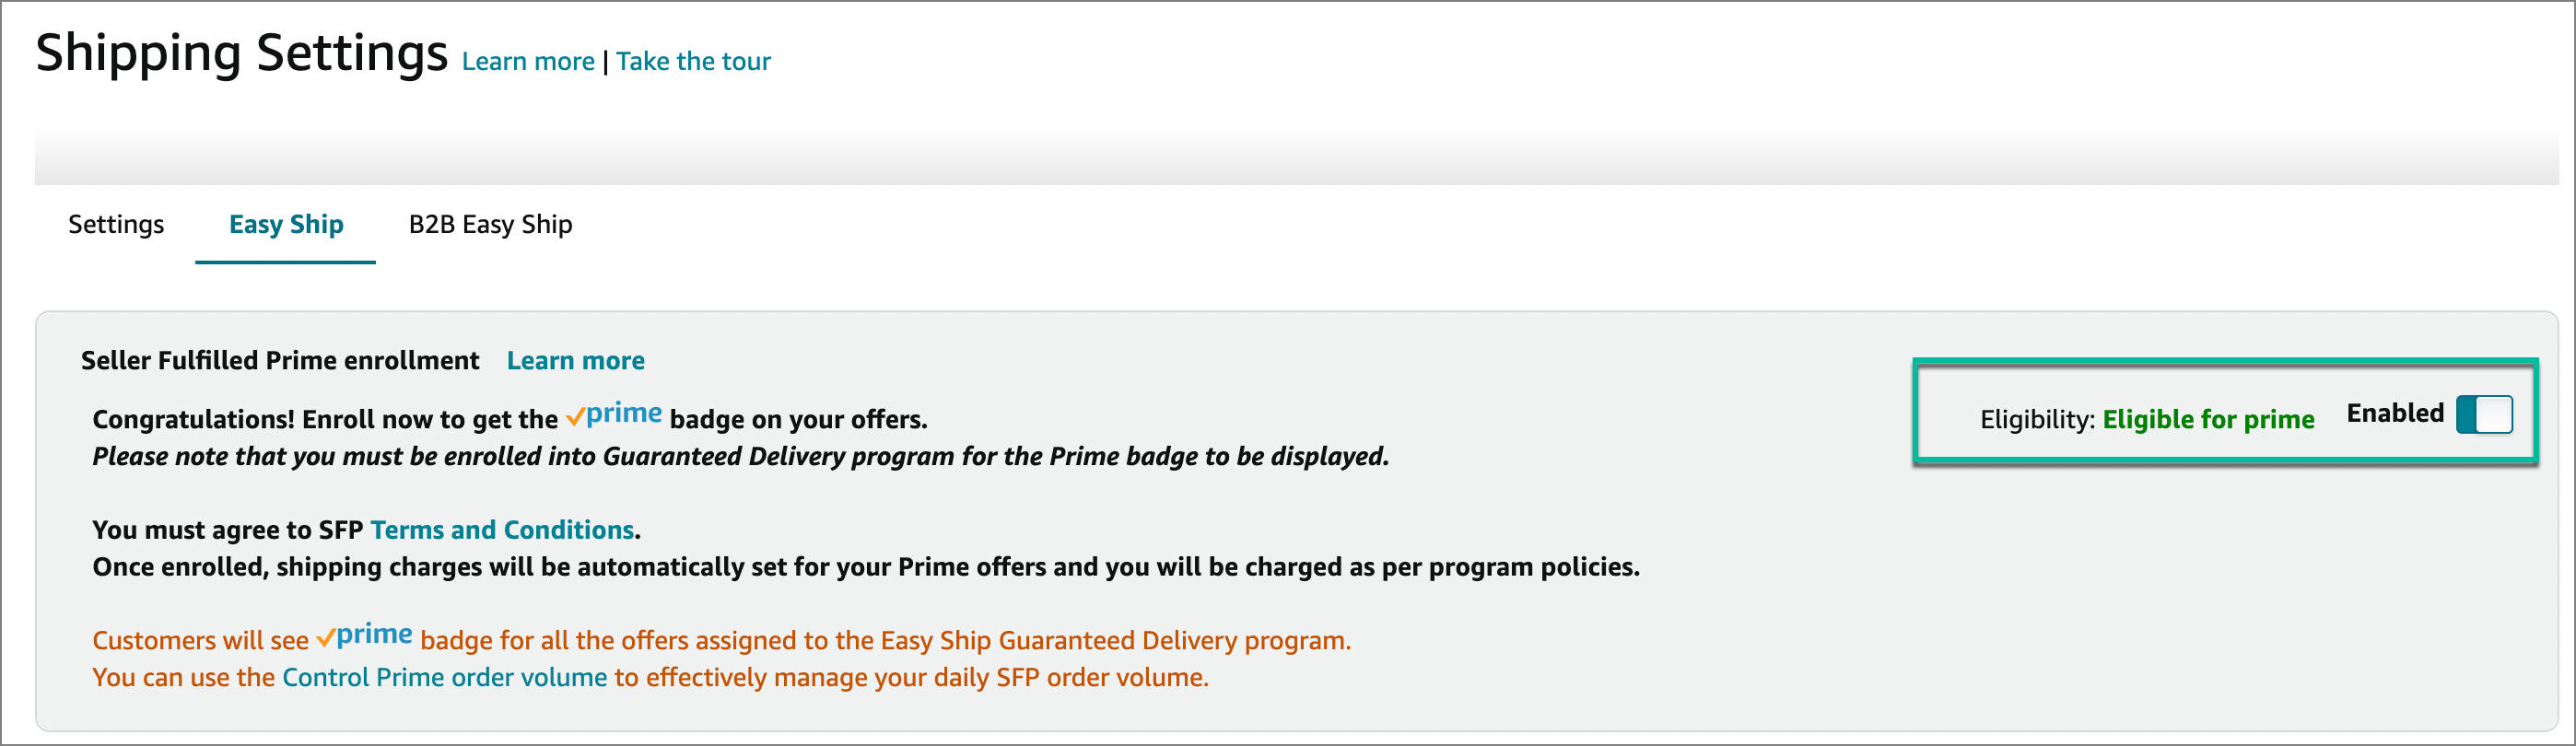
The prime tag will not be available for sellers that are onboarded with a single node
After completing the above steps, Amazon will confirm the seller launch.
For the ES-MLF model, sellers must opt for ‘Easy Ship’ as the only shipping channel.
Once the launch is complete on MLF, sellers can add GSTs for multiple states based on the store location. The seller will also need to add the Trademark certificate (if applicable).
Adding Catalog
The seller will need to upload catalog and create listings on seller central. For information on how to upload catalog and create listings, visit the Amazon Cataloging process.
Fynd will do the following once the catalog process is complete:
- Install the Amazon MLF extension. Navigate to the Fynd Platform > Extensions > Explore > Amazon MLF.
.png)
- Use the brand’s login credentials and seller ID to complete the extension installation.
- Do a test run by pushing inventory of 2 - 3 SKUs for stores and check the forward and backward journey of the bag before the full inventory push.
Train the brand for future mapping of products and triggering the inventory from the Fynd Platform to Amazon.