Promotions Introduction
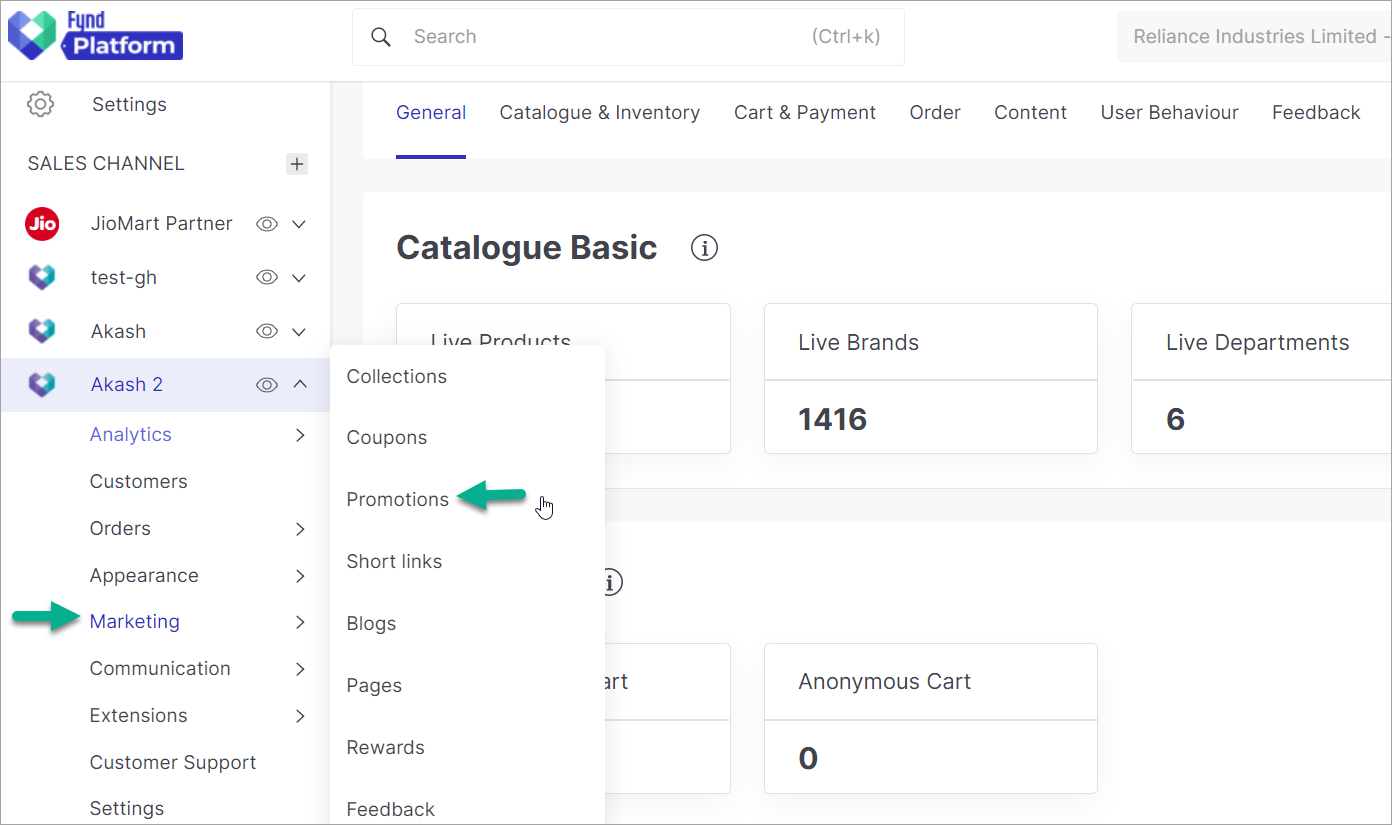
How to access on Fynd Platform
Introduction
This section is for creating promotions for your customers. These entitle the customer for a discount on the purchase of one or more products. Select the type of promotion and enter all its eligibility criteria.
note
Customers can manually apply promotions by entering a promotional coupon code.
Main Screen
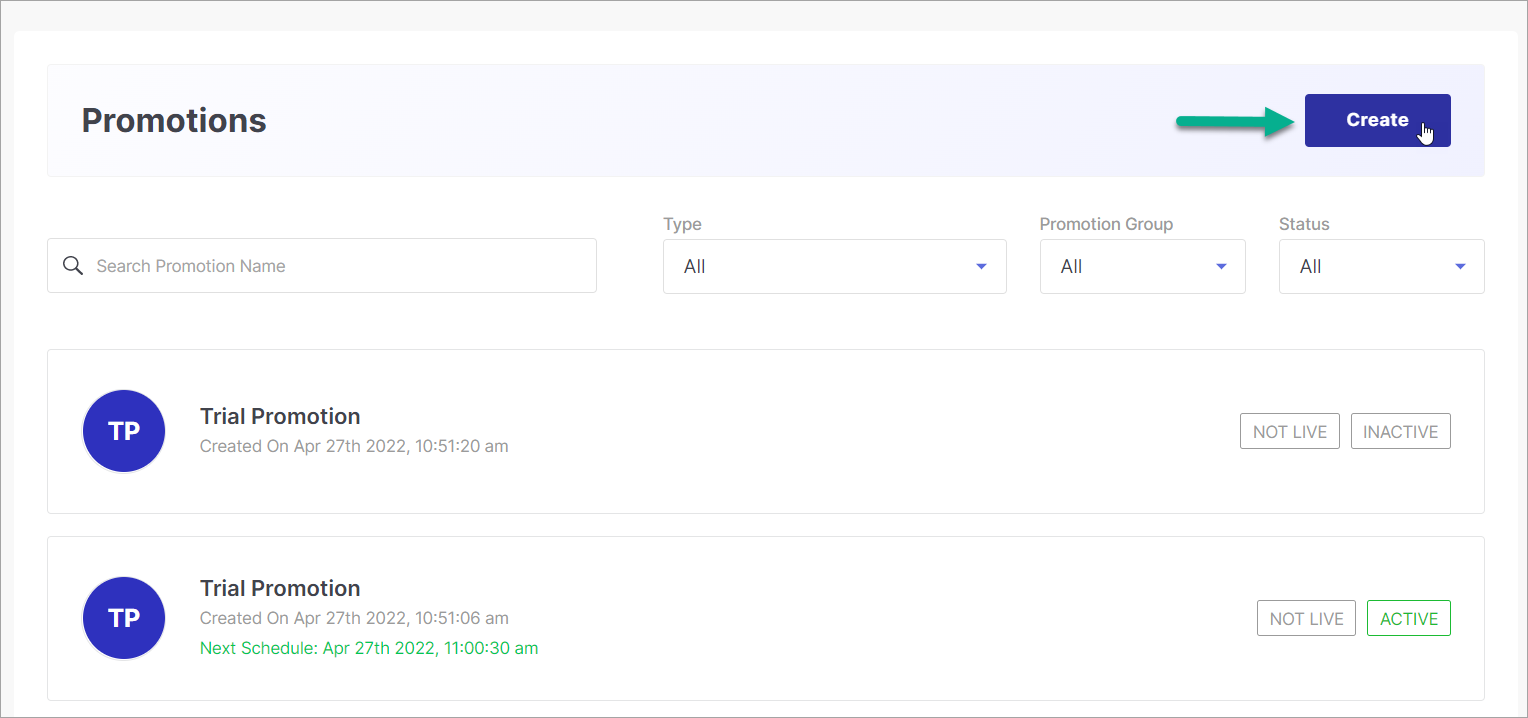
Creating a promotion
Click on Create (refer fig. 2).
Select the type of promotion, check its description and proceed.
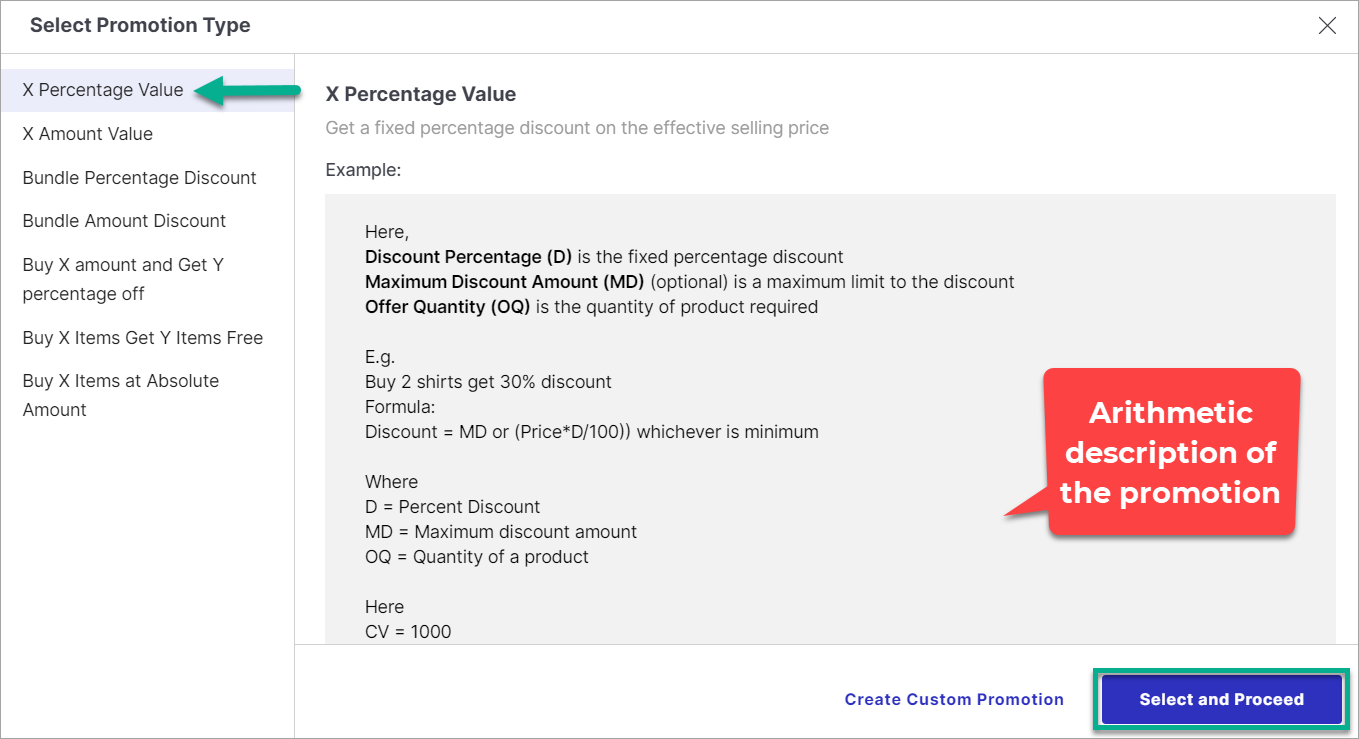
- A typical promotion creation process.
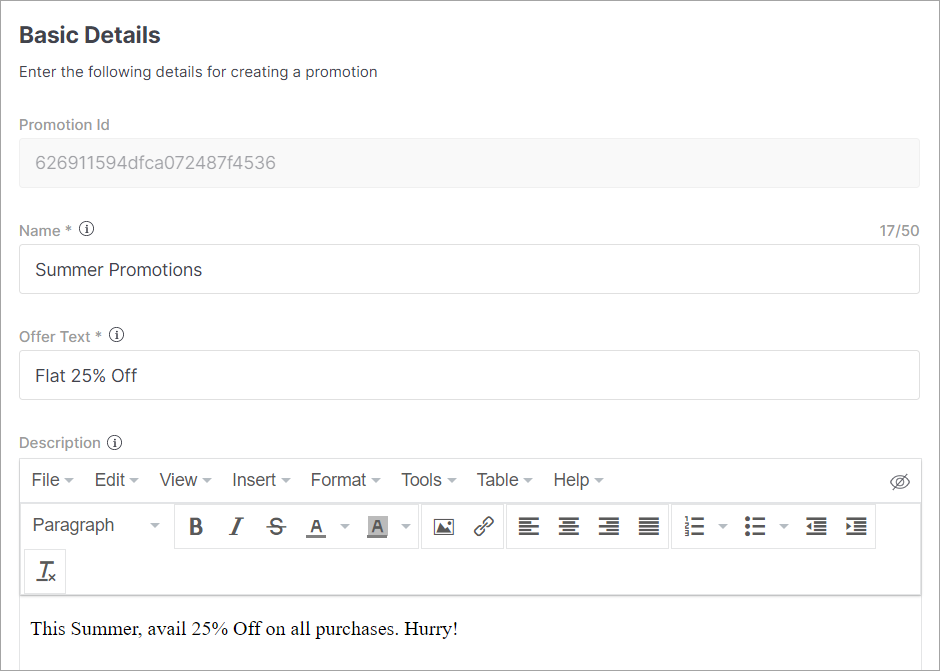
- Name - Enter the promotion name
- Offer Text - Enter the text that will be displayed on the PDP
- Description - Provide a brief description for the promotion
- Currency - Set to default as INR
- Platform - Select one or all from the dropdown options, Web, Android and iOS
- Enter the priority, promotion group and schedule. Selecting Hero Promotion will automatically set the promotion as a higher priority over other groups.
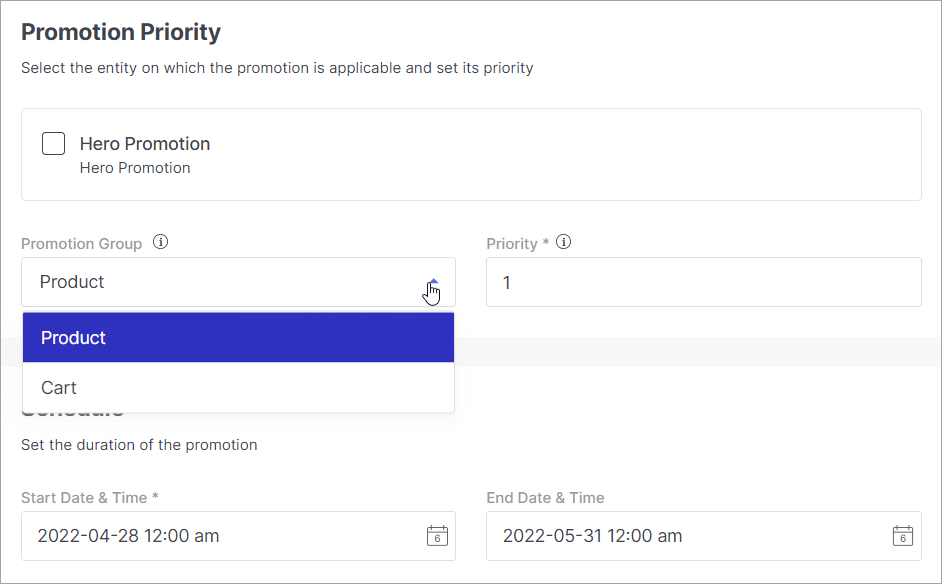
- Promotion Group - Here you can select whether the promotion will be applied at product level or directly at cart level
- Priority - Enter the priority that you want to set for your promotion. Higher the value, higher the priority of the promotion Product level promotion will have a higher prioirity compared to cart level promotions
- Hero Promotion - This type of promotion has a higher priority compared to product level and cart level promotions.
- Schedule - Specify a start and end(mandatory for Hero promotions) date and time
- Set the restrictions whether you want the promotion to be stackable, final. For e.g. if you set it to stackable then this promotion can be applied to the product with other promotions. If you select final then no other promotions can be added after this.
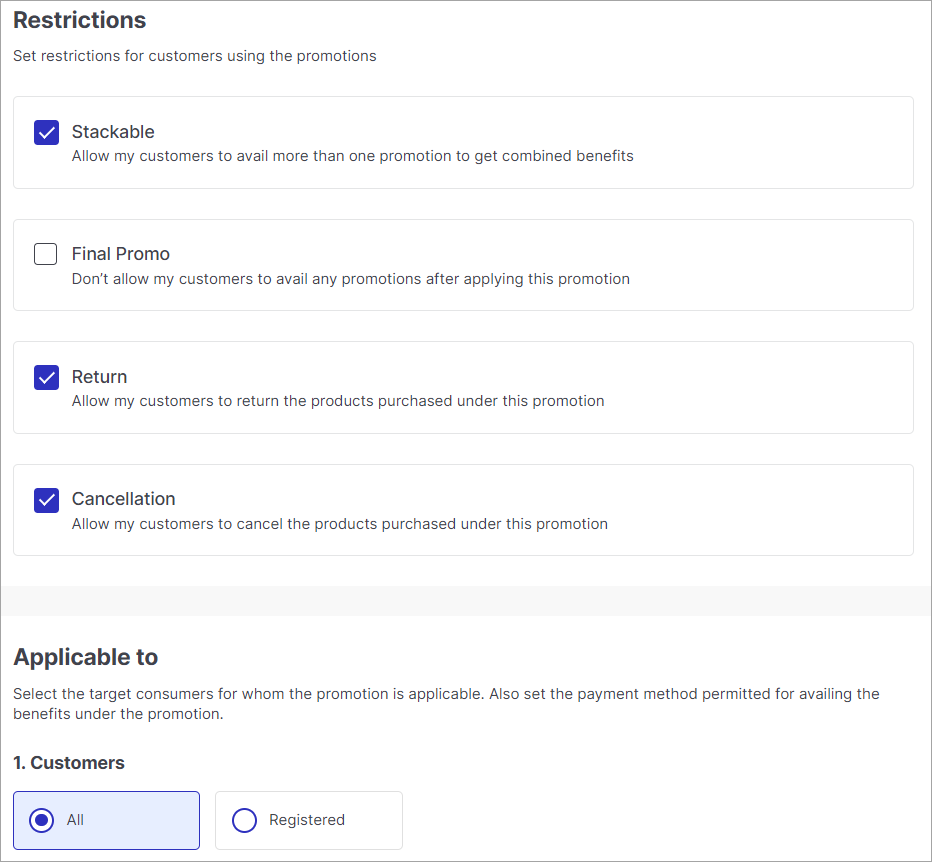
- Stackable - Select this if you want customers to avail other promotions along with this to get combined benefits. The promotions will be applied in terms of group and priority. If both group and priority are same then the promotion that was created first will be applied first
- Final Promo - Selecting this will make the promotion final and no other promotions can be applied after this. Make sure you set the group and priority to the correct value while selecting this option
- Return - Select this if you are allowing the products to be returned that are purchased under this promotion
- Cancellations - Select this if you are allowing the customers to cancel the products that are purchased under this promotion
- Customers - You can select if you want all customers or only the registered customers to avail this promotion
- Add eligibility rules. In this example, we have selected the selling locations and brands where the promotion will be applicable.
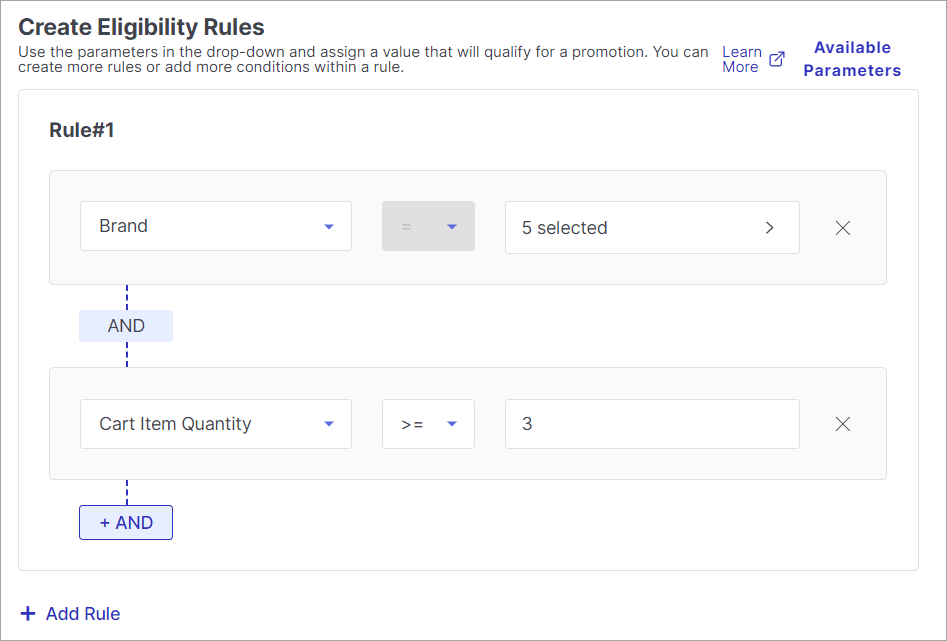
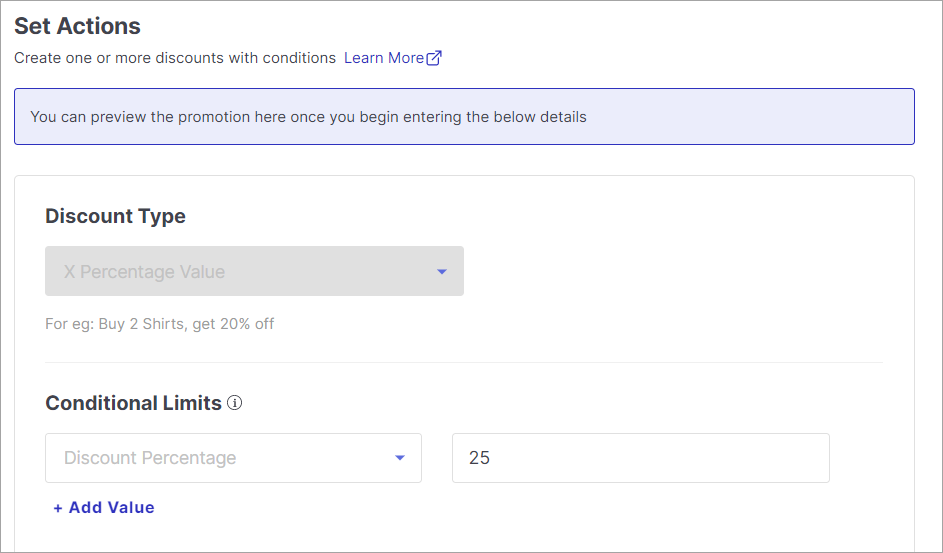
- Set actions. In this example for percent discount, we set the value for the discount percentage.
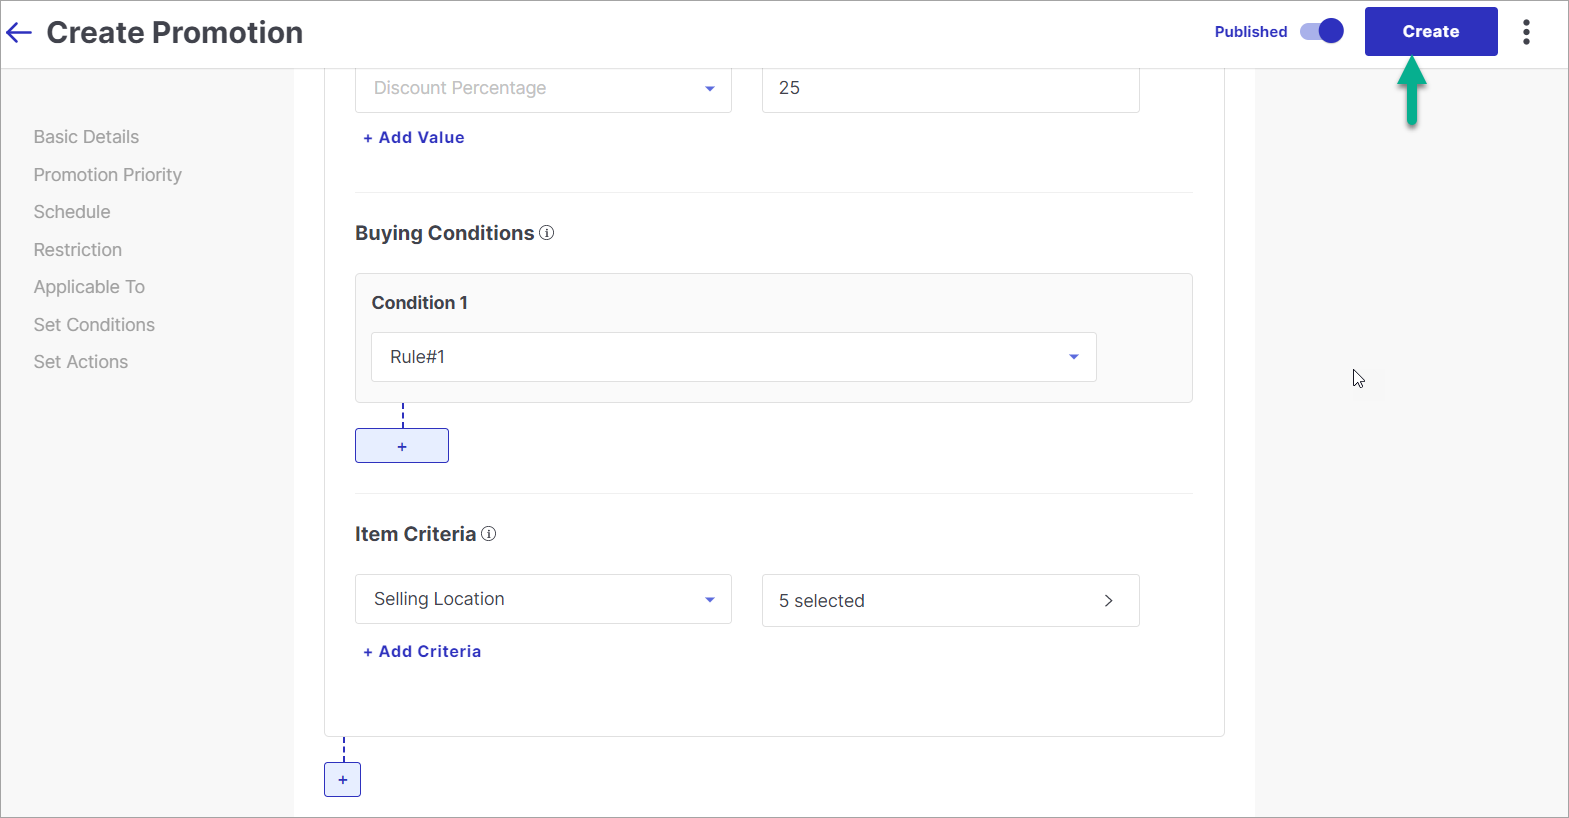
- Add buying conditions. Buying conditions are determined by the set of eligibility rules that we created. In this example, we have applied the condition that we would offer 25% discount on the selected brands and locations as per the rule.
note
You can click the '+' button below the item criteria to add another set of conditional limits, buying conditions and item criteria based on different rules.
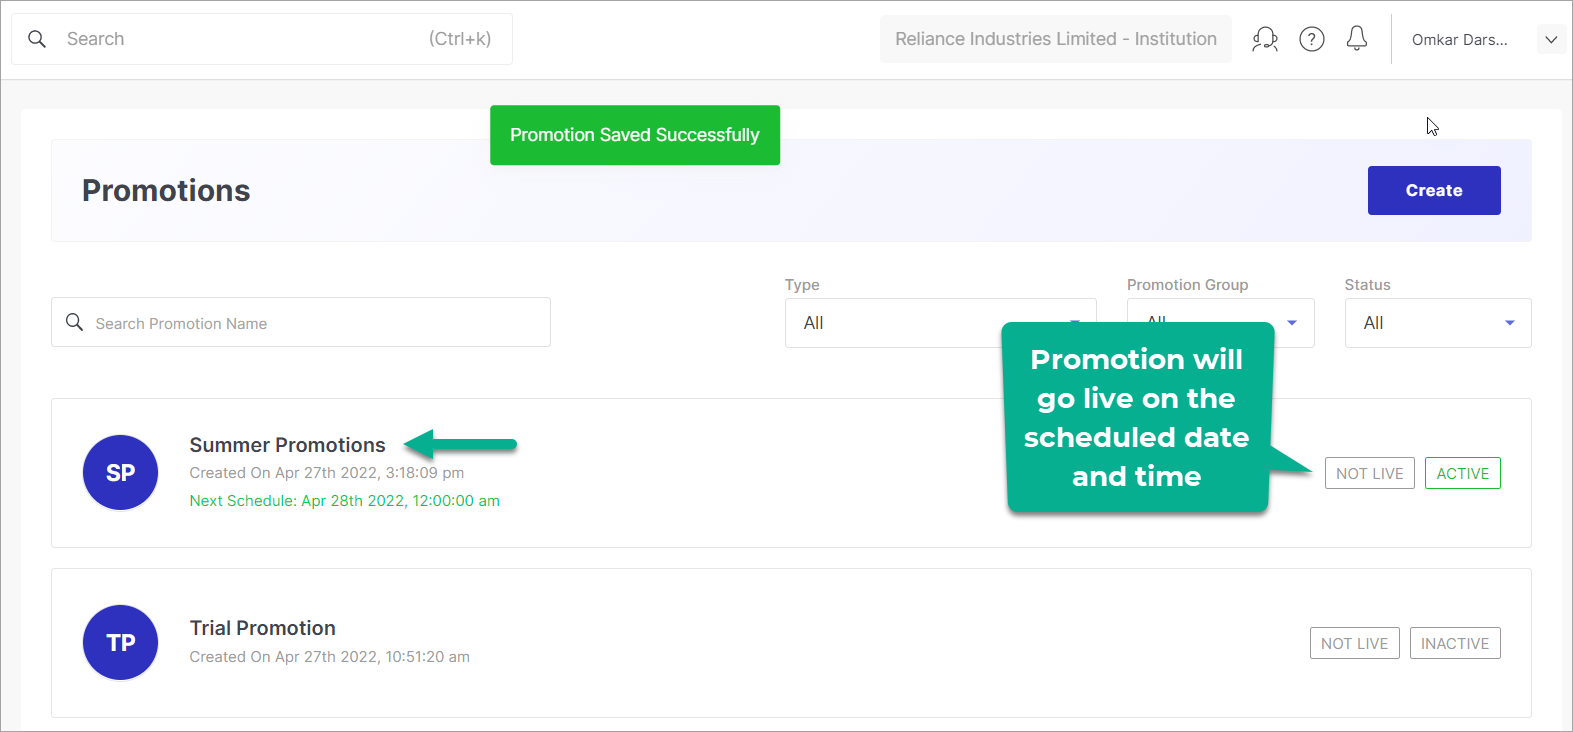
- Promotion is created. It will go live on the specified date and time.