Payments
Abbreviations Used
- Payment Gateway: PG
- Mode of Payment: MOP
- Sub Mode of Payment: Sub-MOP
- Point of Sale: POS
- Electronic Data Capture: EDC
- Cash on Delivery: COD
Introduction
Discover the powerful payments feature within the platform, designed to give merchants complete control over their payment ecosystem. With Payments feature, merchant can effortlessly configure payment options, customise the sequencing of MOPs and Sub-MOPs, and manage EDC machine mappings.
Whether it is setting up online or offline, sellers can easily tailor their payment offerings to meet the unique needs of their customers. Take charge of your payment strategies, drive customer satisfaction, and unlock new opportunities for seamless transactions on your website and POS machines with the Payments from the platform.
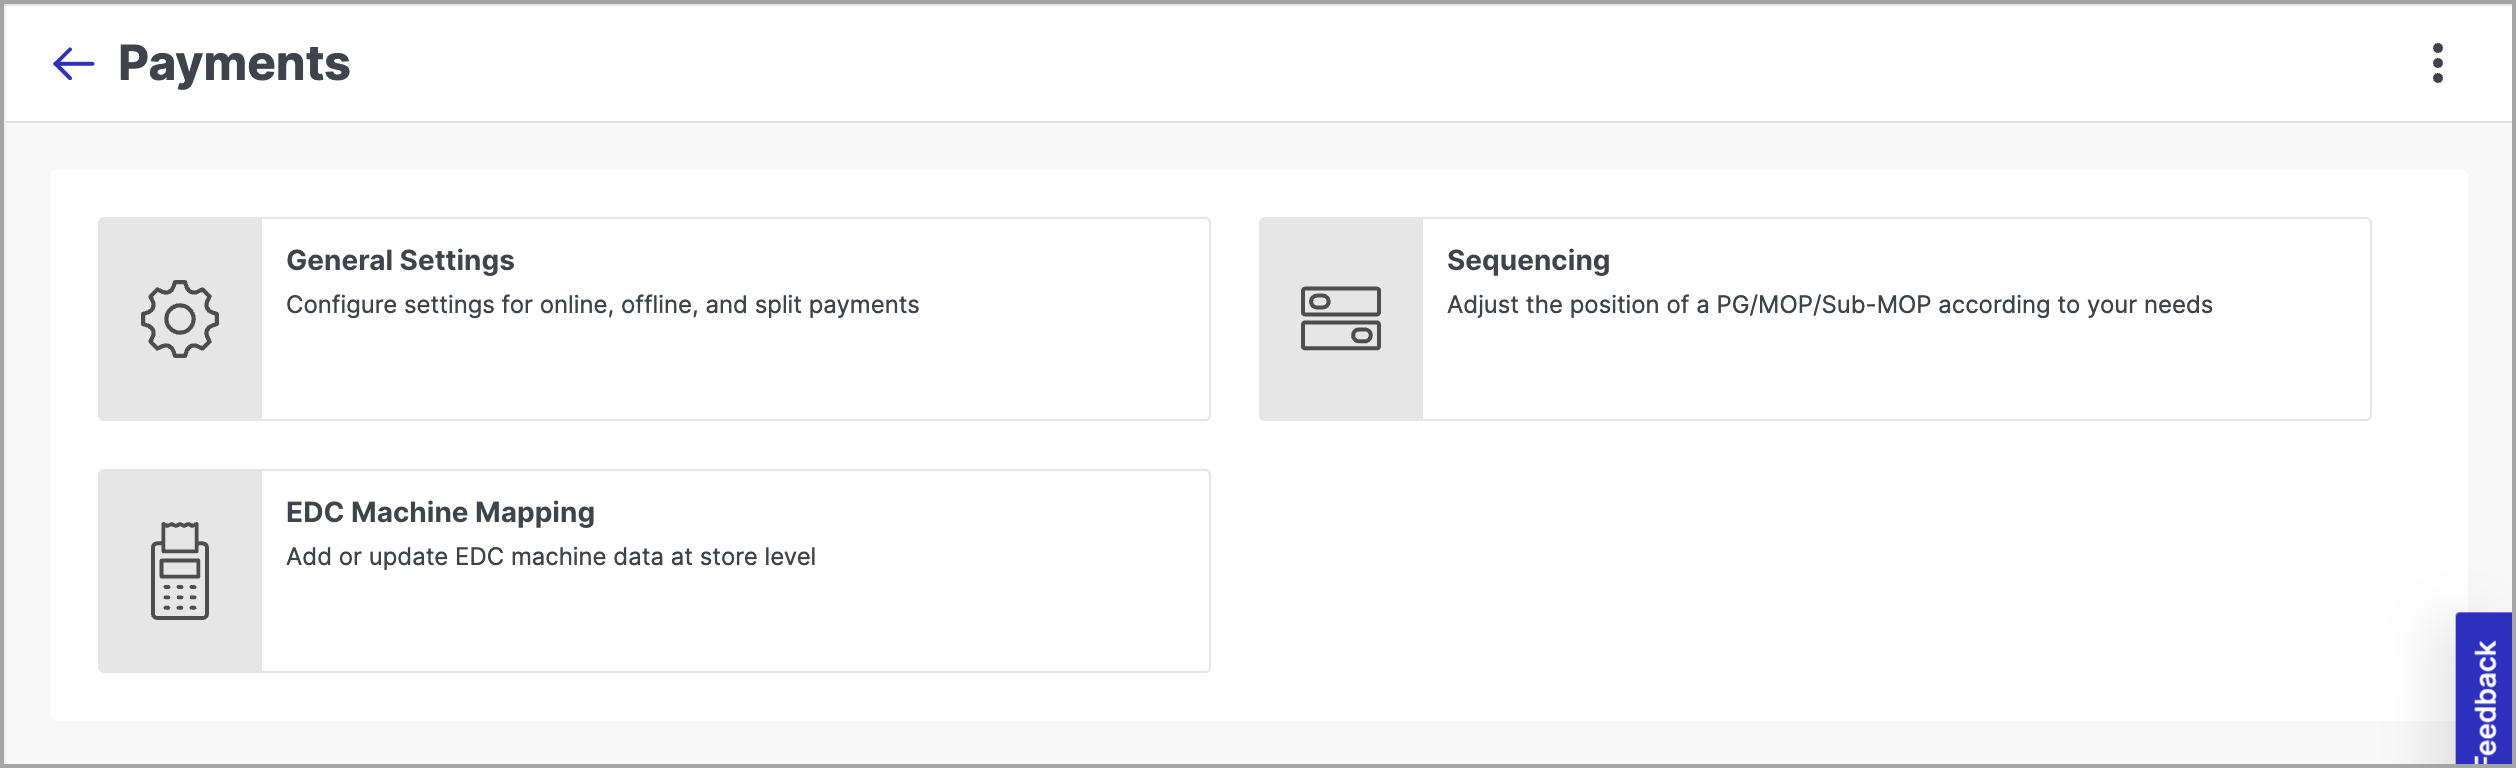
General Settings
Here, you can configure different payment options like online and offline payment.
Online Payment
Use this section to configure PGs on your website.
How to Add a Payment Gateway
This procedure is intended for the Razorpay setup only and may not be applicable with other payment systems.
There are two types of Razorpay accounts you can add:
- Assisted Merchant Account
Process payments without the hassle of setting up complex systems or worrying about compliance. Fynd enables merchants to accept payments and process refunds using Razorpay and view these transactions seamlessly. The merchant can choose between instant settlements or auto settlements managed by Razorpay for their refunds and PG charges. The transaction charges with Razorpay can be lower than using Own Merchant Account, thanks to Fynd’s negotiated rates.
For instance, when a merchant sells clothing online through the Fynd Platform, Razorpay calculates the transaction charges (based on Fynd’s negotiated rates) and auto-settles the remaining amount directly to the merchant’s bank account. - Own Merchant Account
Set up your PG on the Fynd Platform using your credentials. The API key and Webhook secret serve as security credentials for user authentication. The transaction charges are deducted by Razorpay and settled directly into the merchant’s bank account.
For example, when a merchant sells clothing online through the Fynd Platform, Razorpay calculates the transaction charges and settles the remaining amount directly into the merchant’s bank account.
Own Merchant Account
Before beginning the procedure, please collect your API Key and Secret from Razorpay. Refer to API Keys and Webhooks Setup to get these credentials.
Do the following steps to add the PG:
Click Add Payment Gateway.
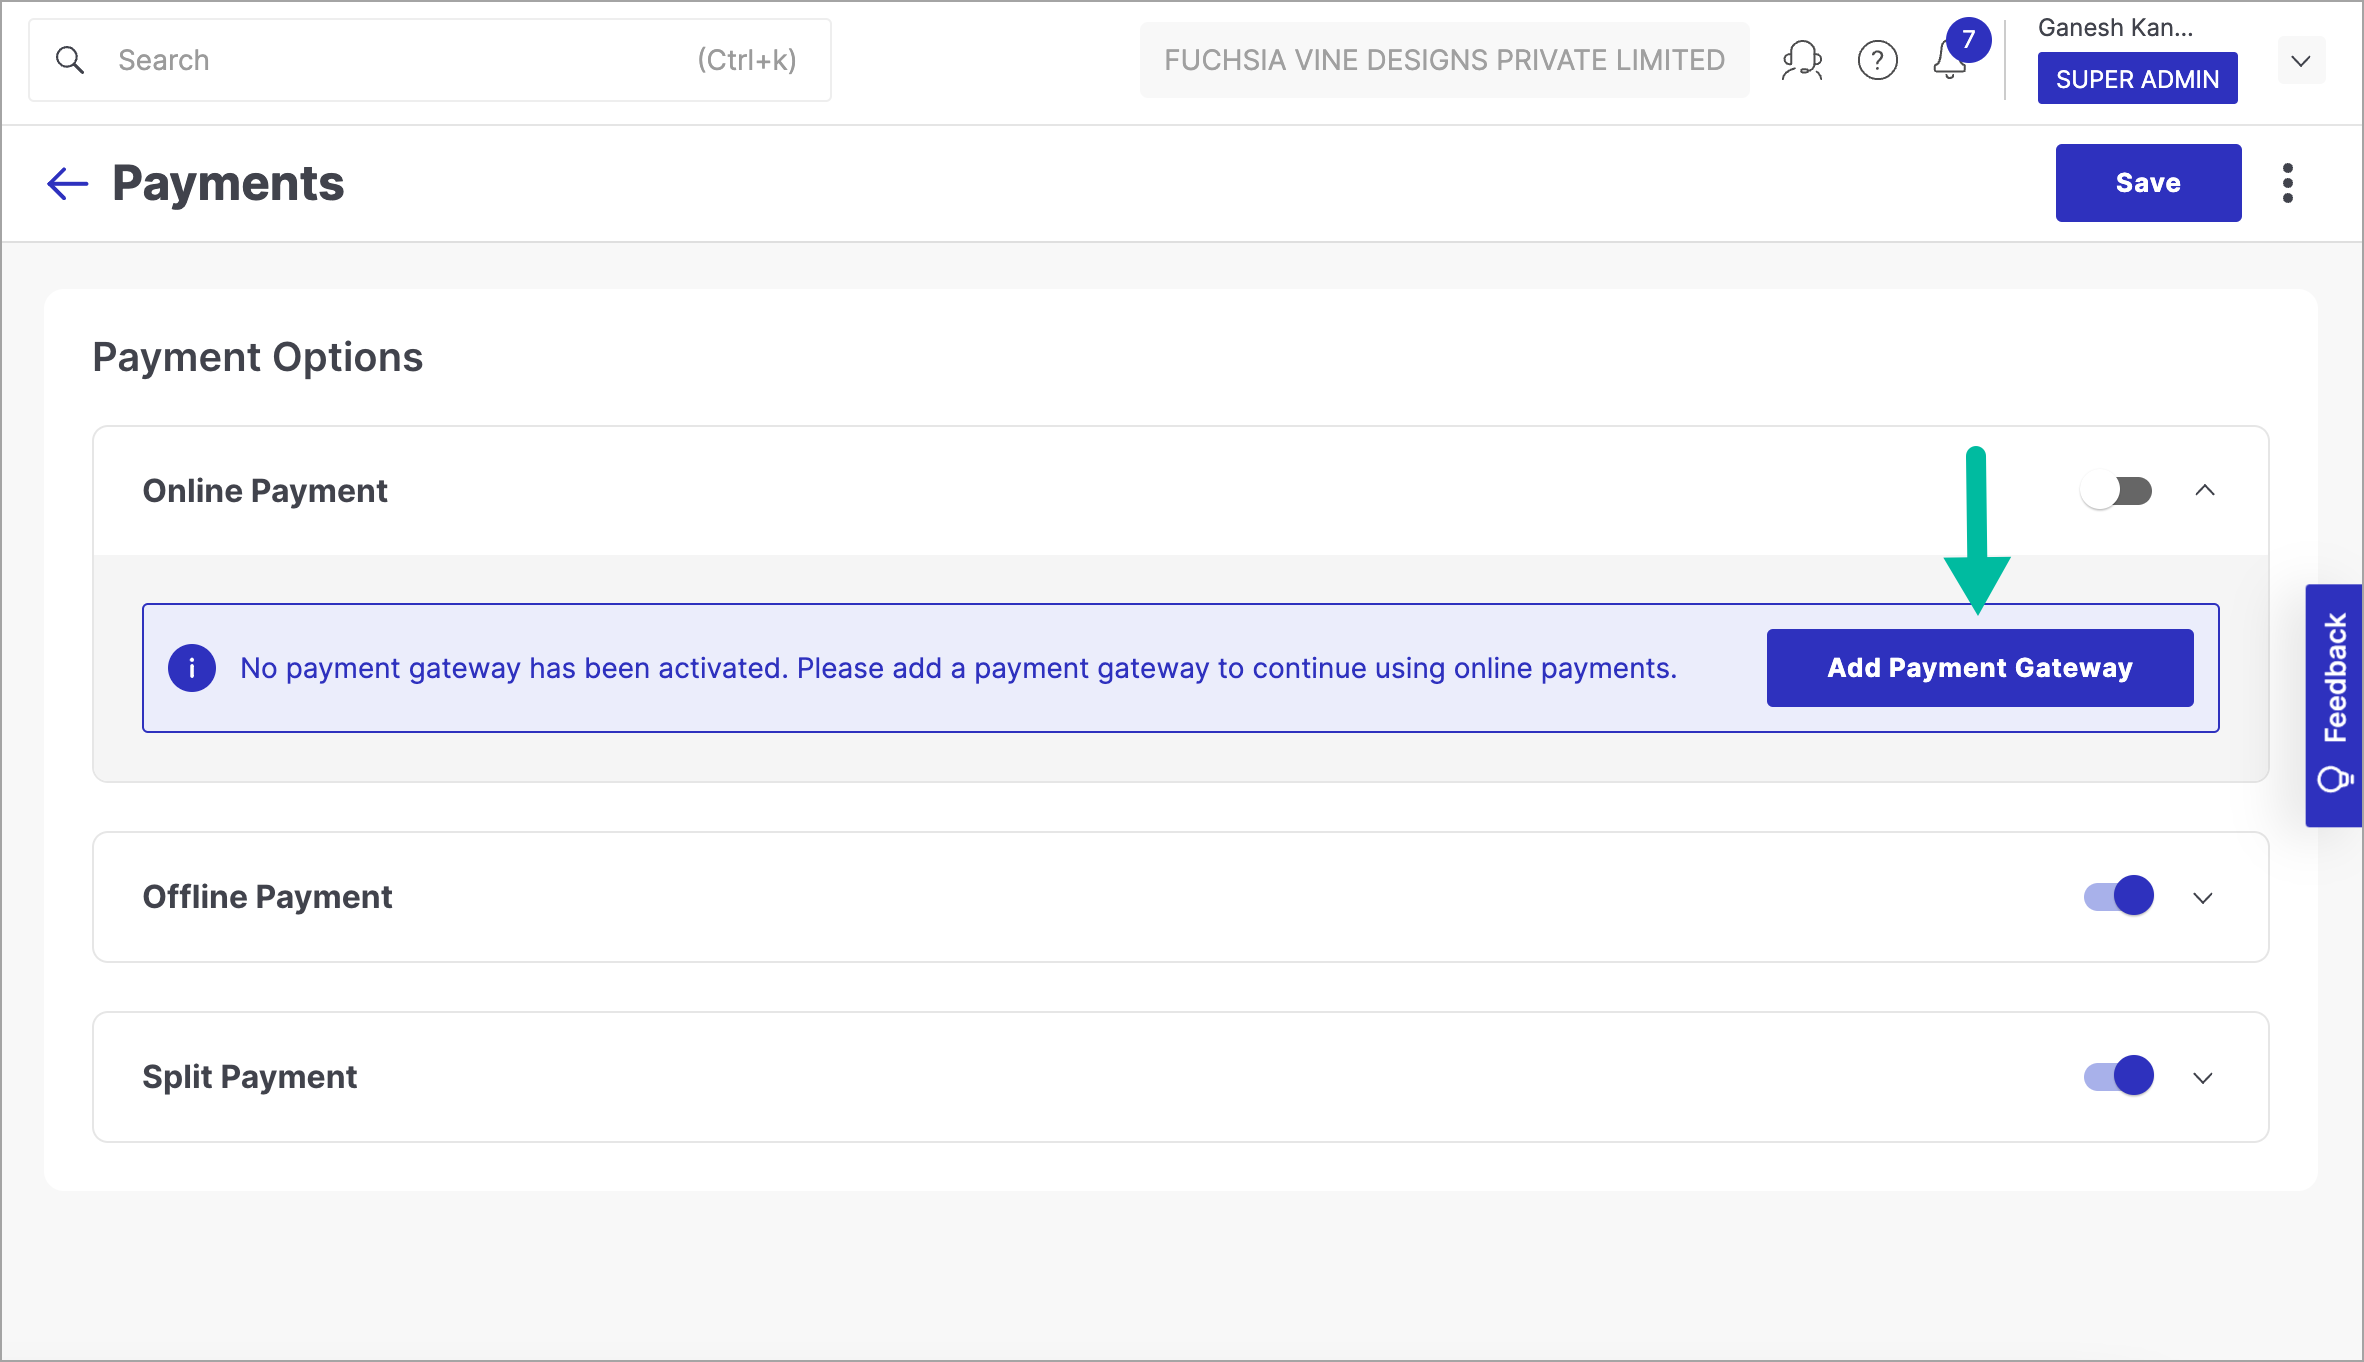
Figure 2: Clicking Add Payment Gateway Button Click Razorpay.
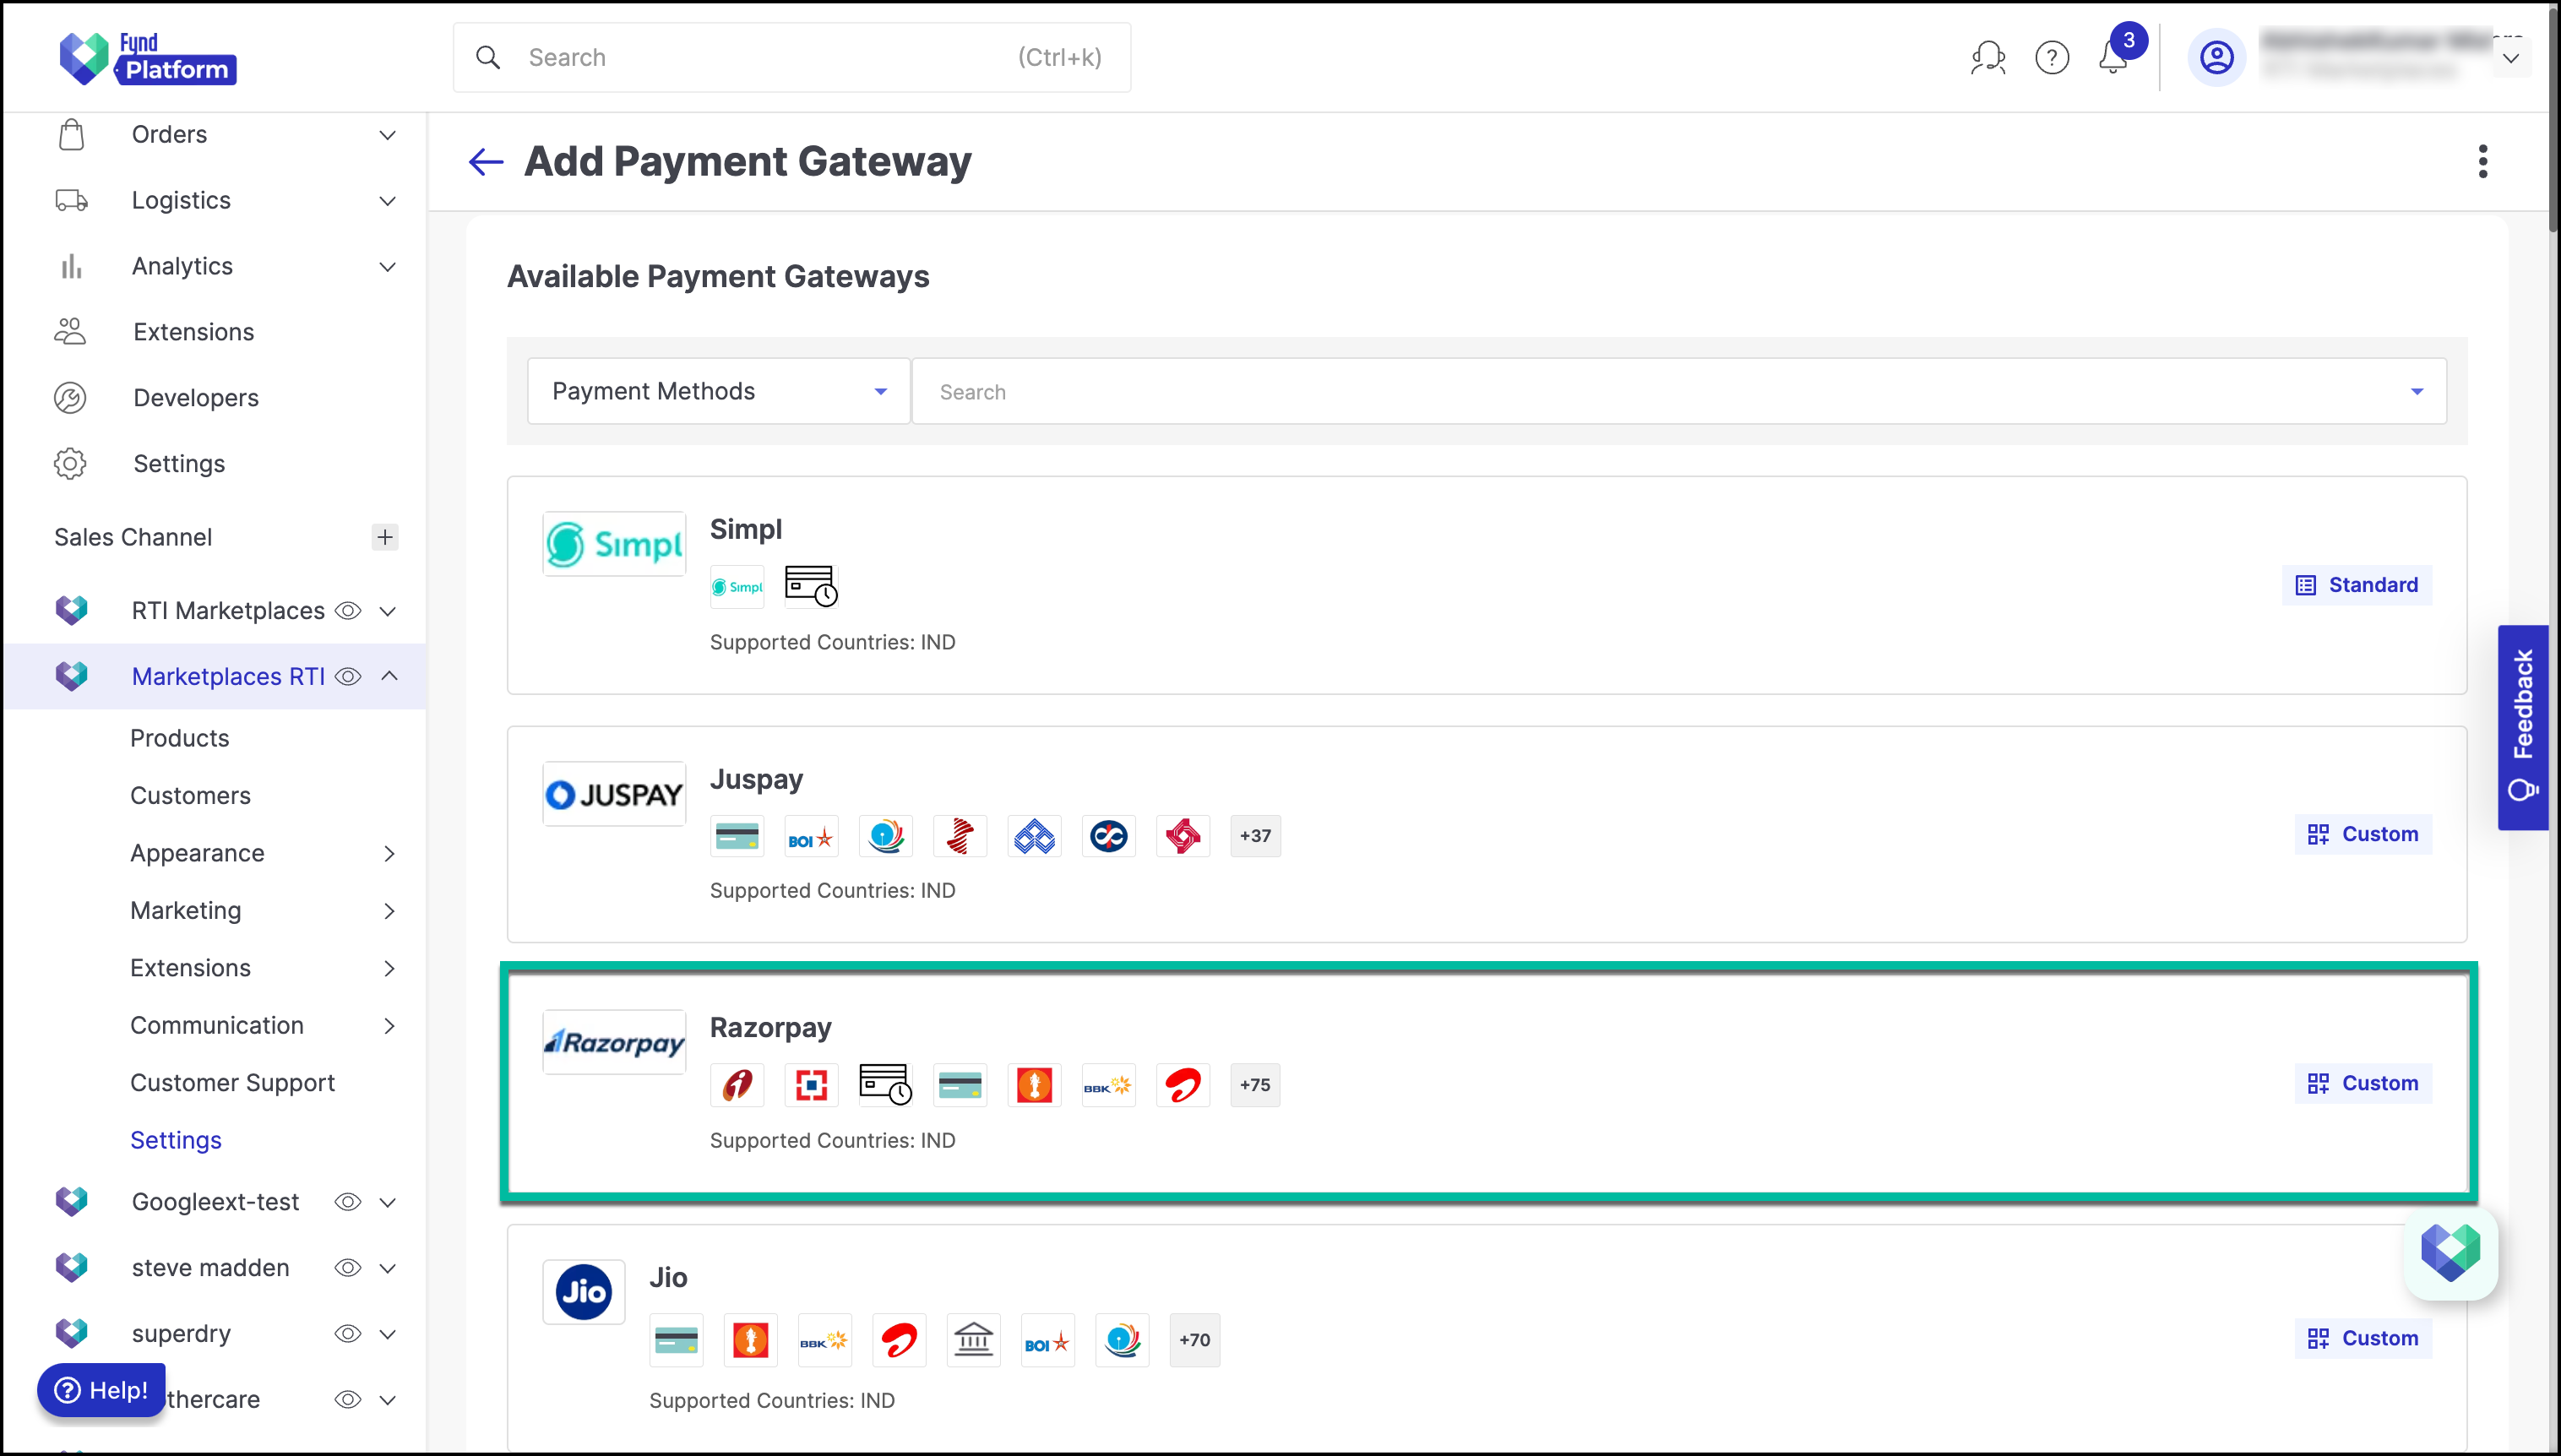
Figure 3: Selecting Razorpay from multiple payment options Choose Own Merchant Account.
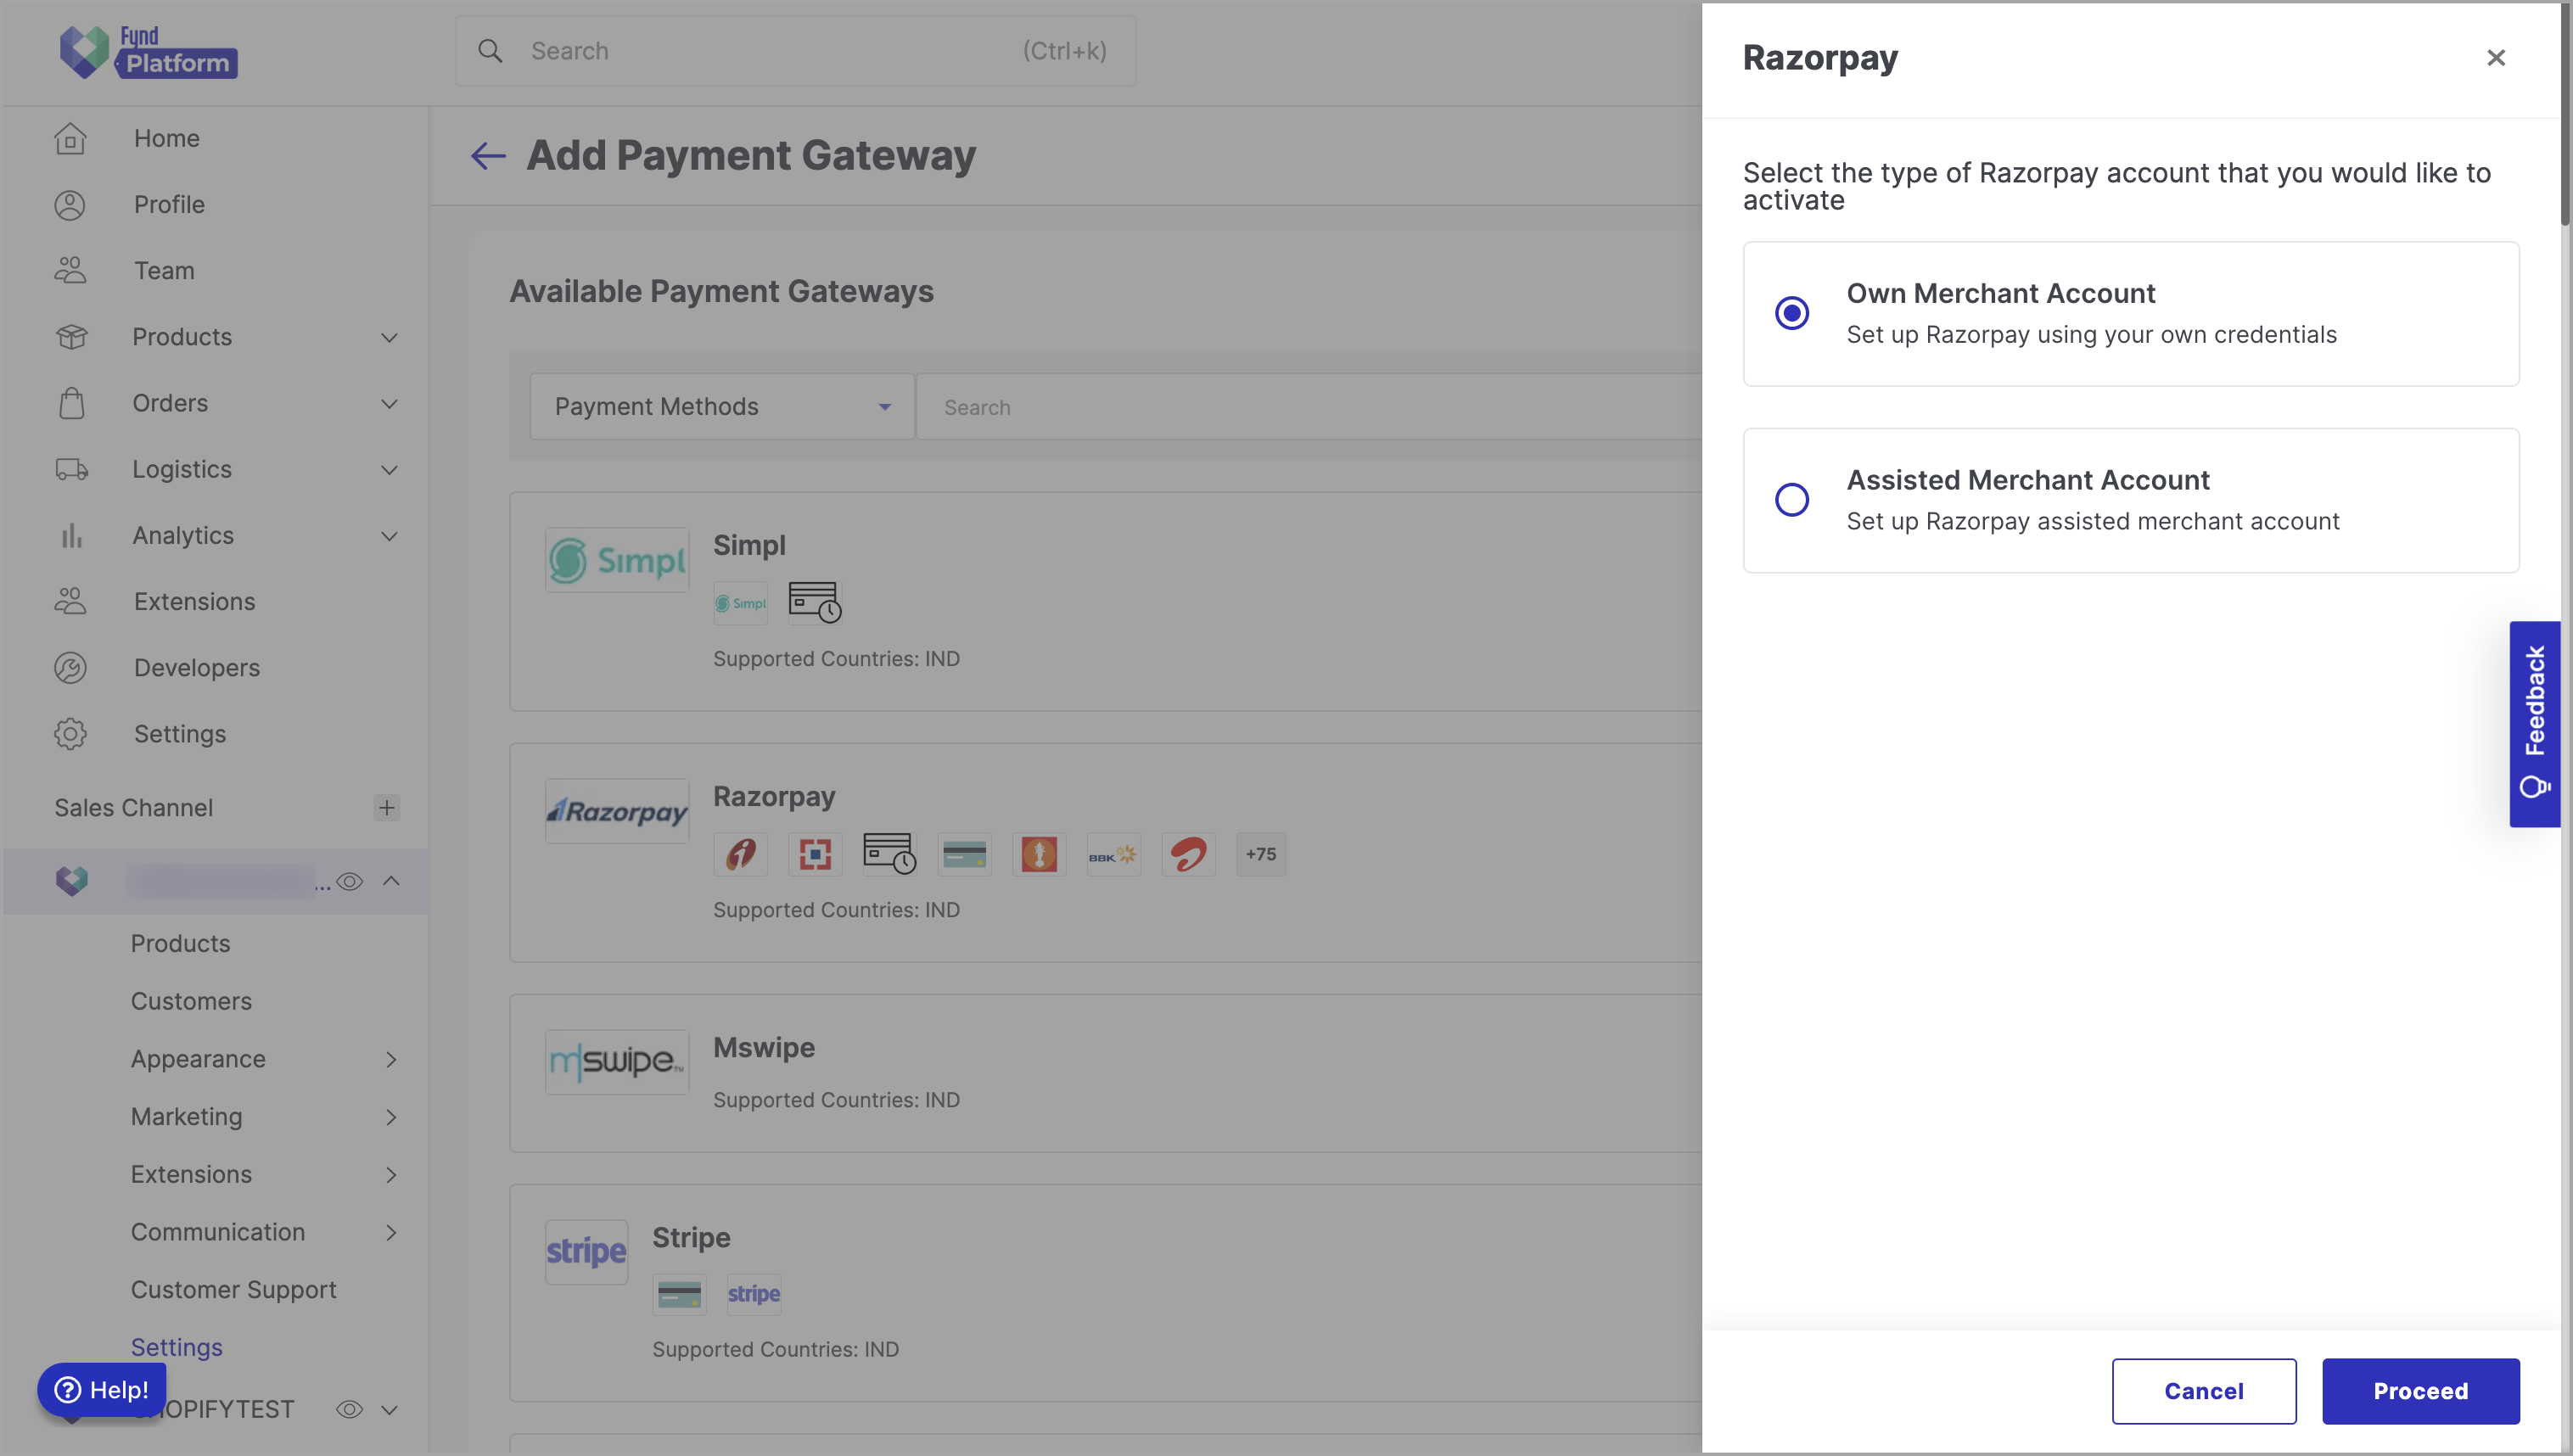
Figure 4: Selecting Own Merchant Account Click Proceed.
Enter the Key, Secret, and Webhook Secret collected from the Razorpay site.
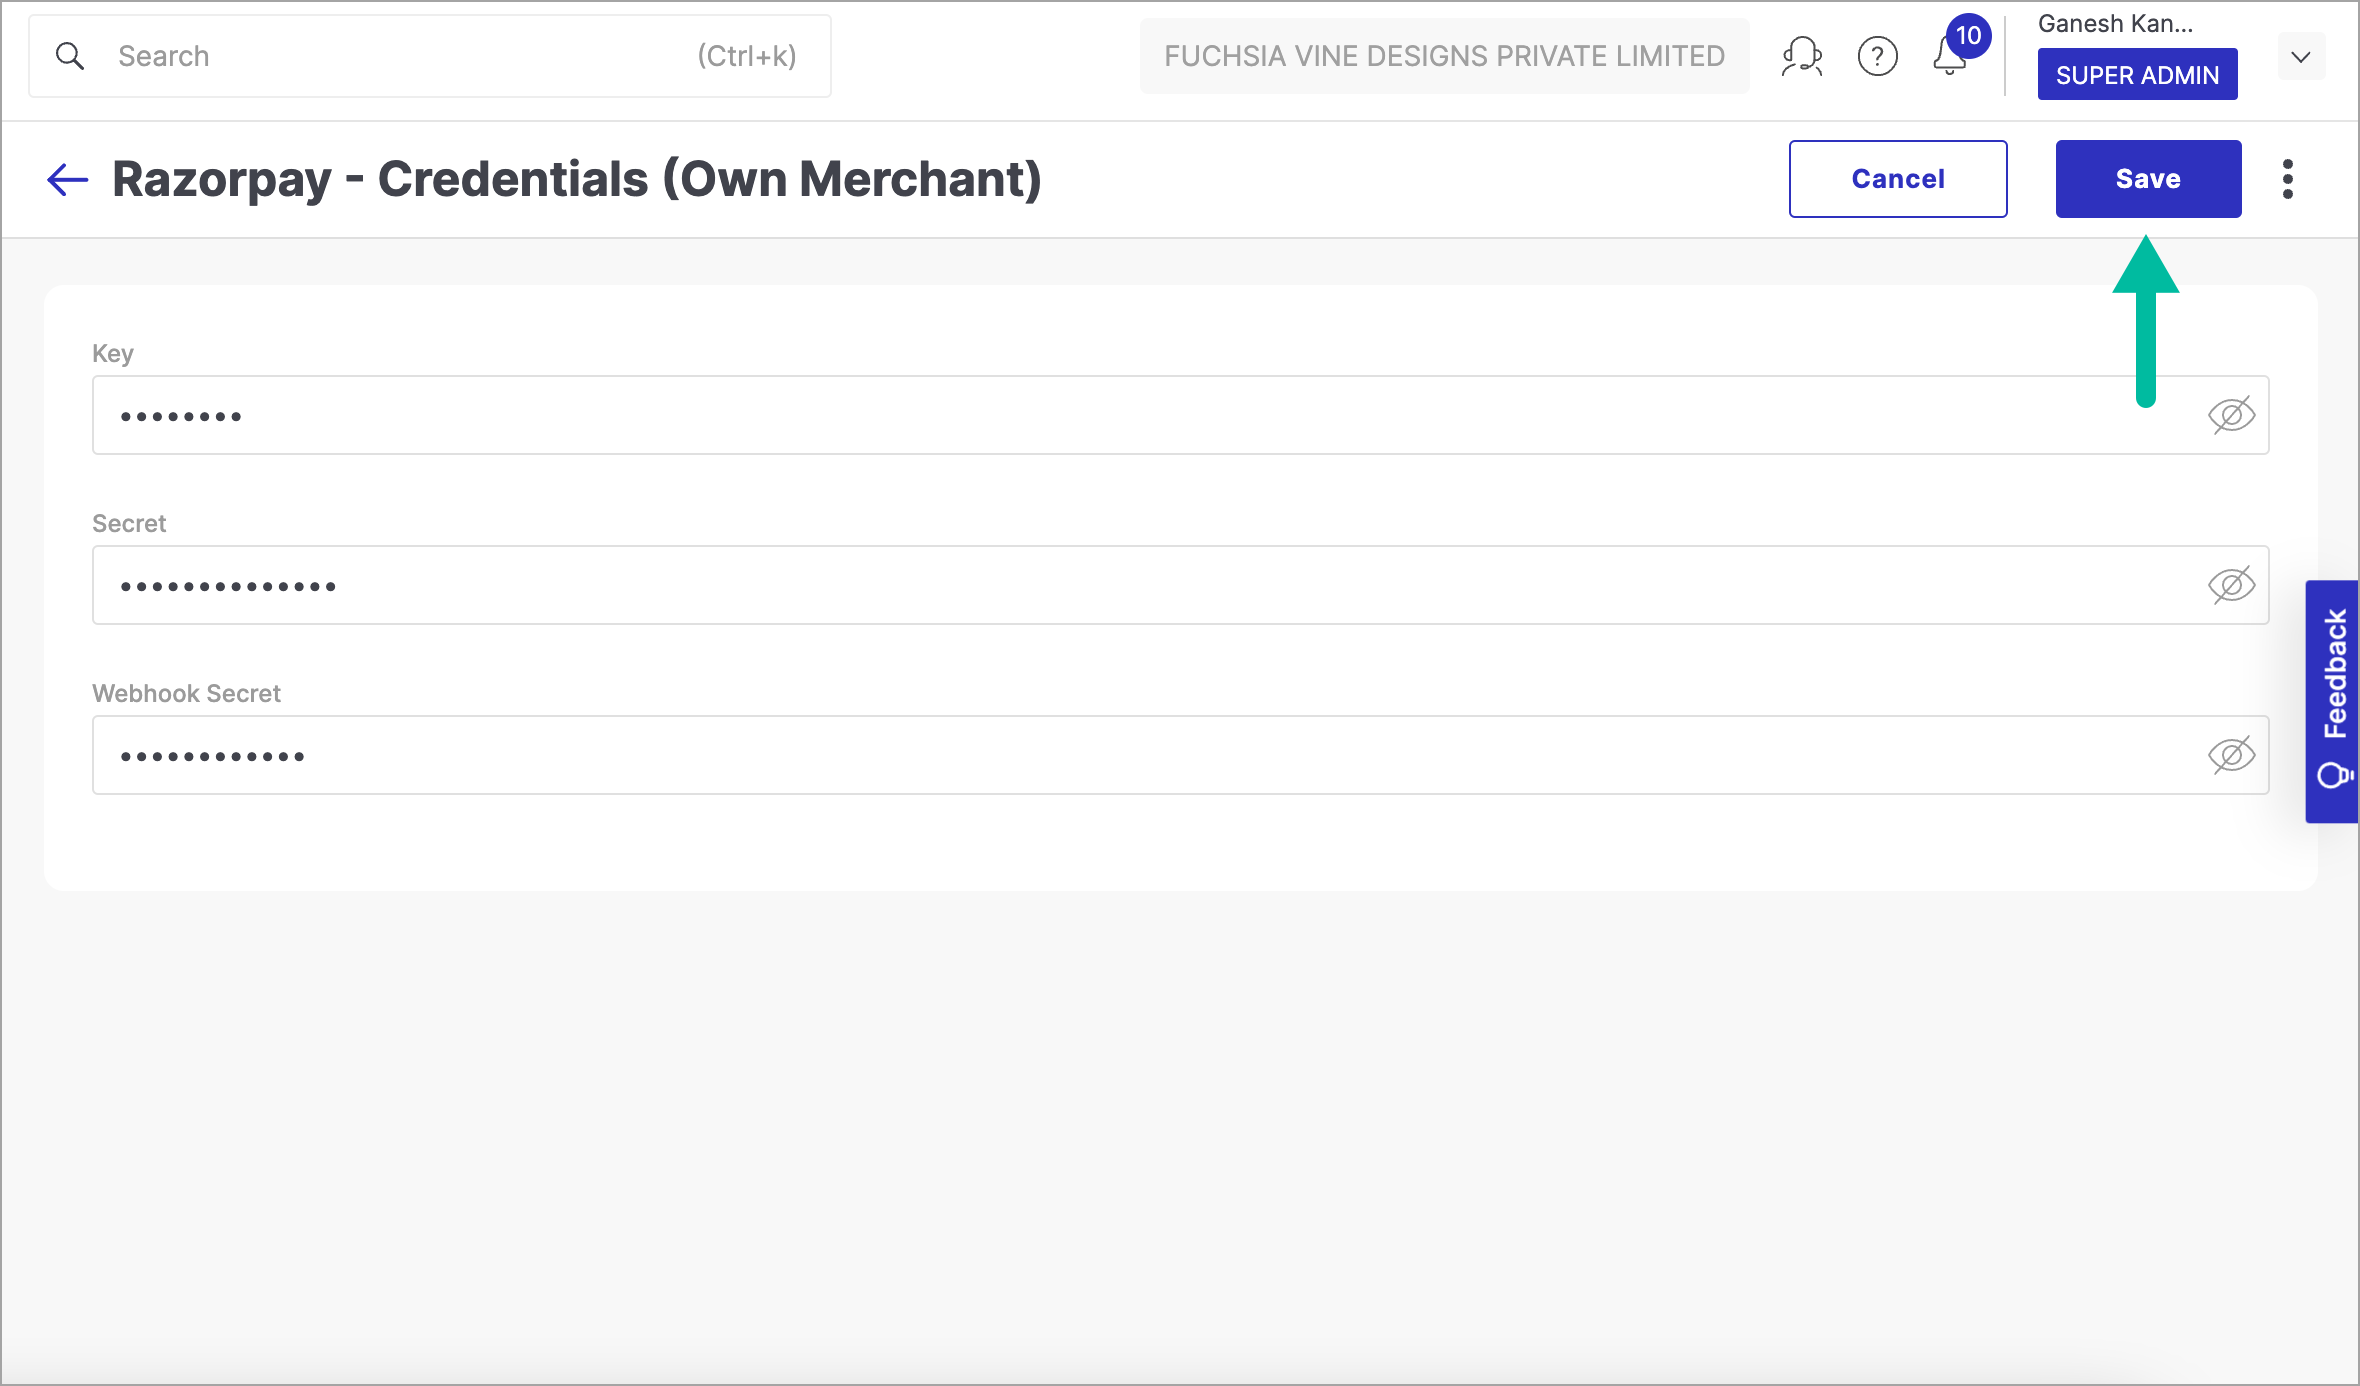
Figure 5: Entering Key, Secret and Webhook Secret Click Save.
Provide your confirmation to save the changes.
You can revoke the access anytime.
Open the Razorpay PG.
Slide the Active toggle to the right to activate the PG.
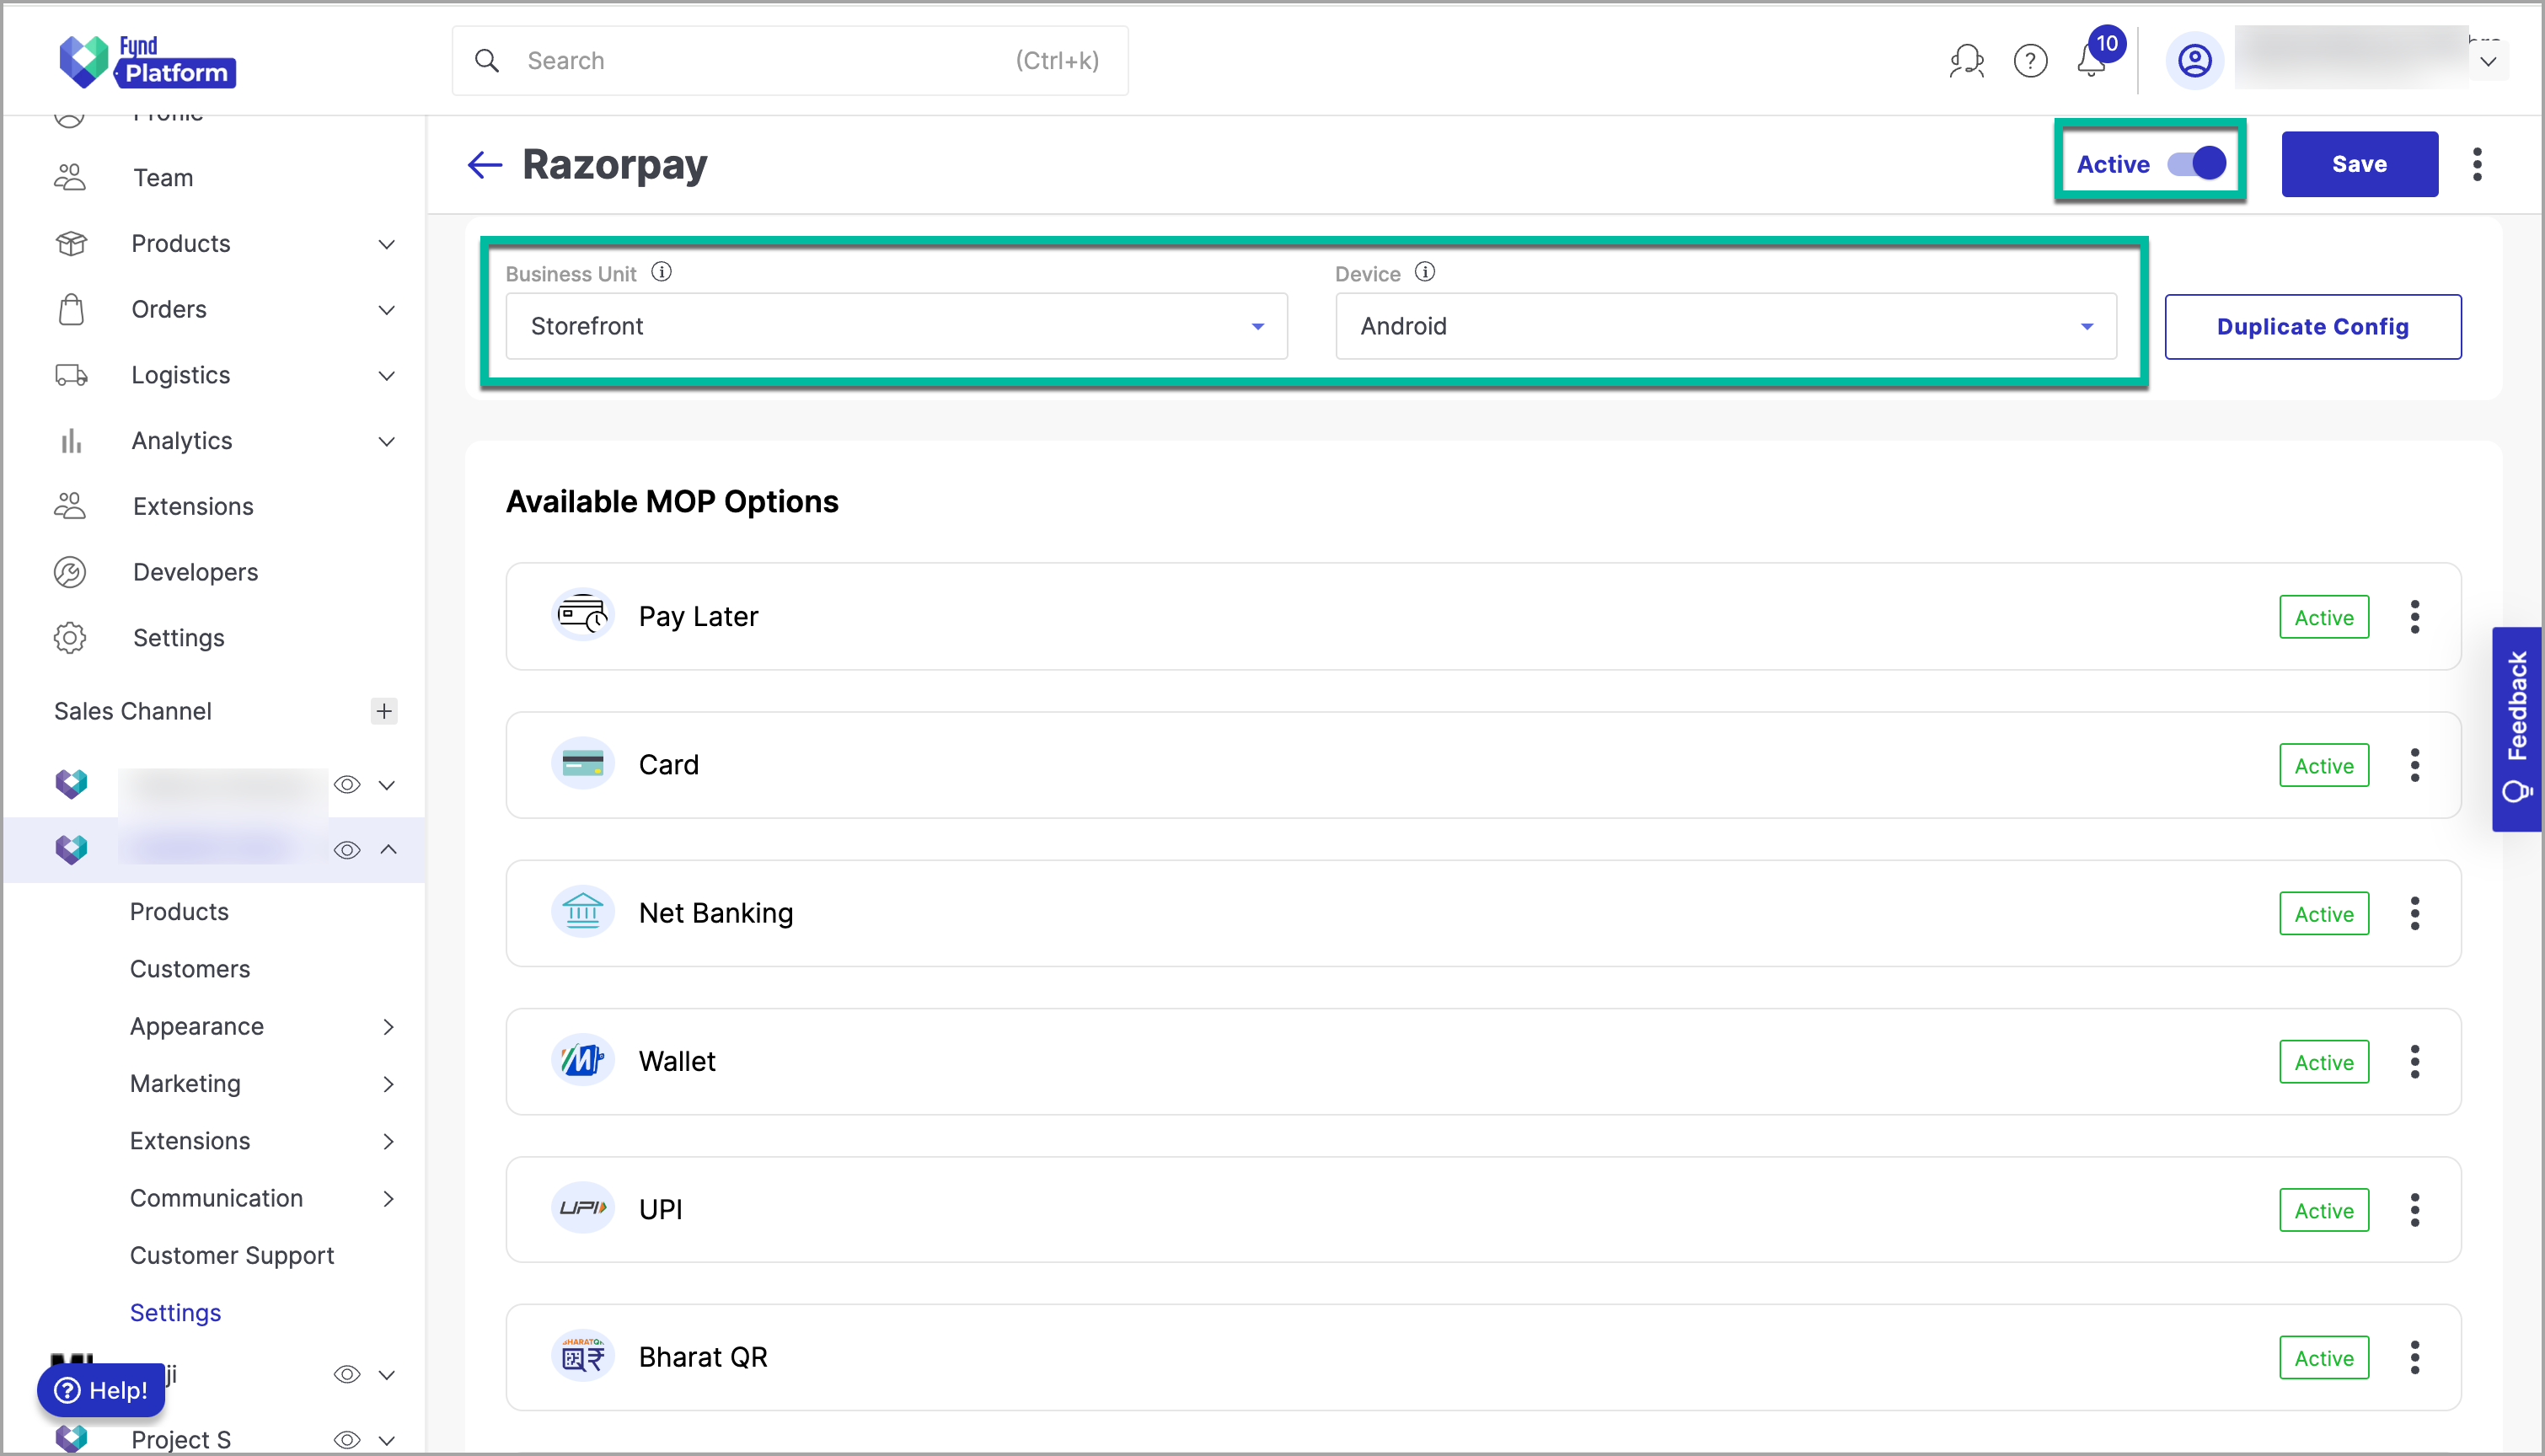
Figure 7: Sliding the Active Toggle Choose the desired business unit (Storefront or POS) and device (Website, iOS, or Android).
Navigate to the required MOP that you need to activate.
Click three dots (
⋮) to the right of MOP.
Figure 8: Clicking Three Dots ( ⋮)Click Active.
Click Save to save the changes.
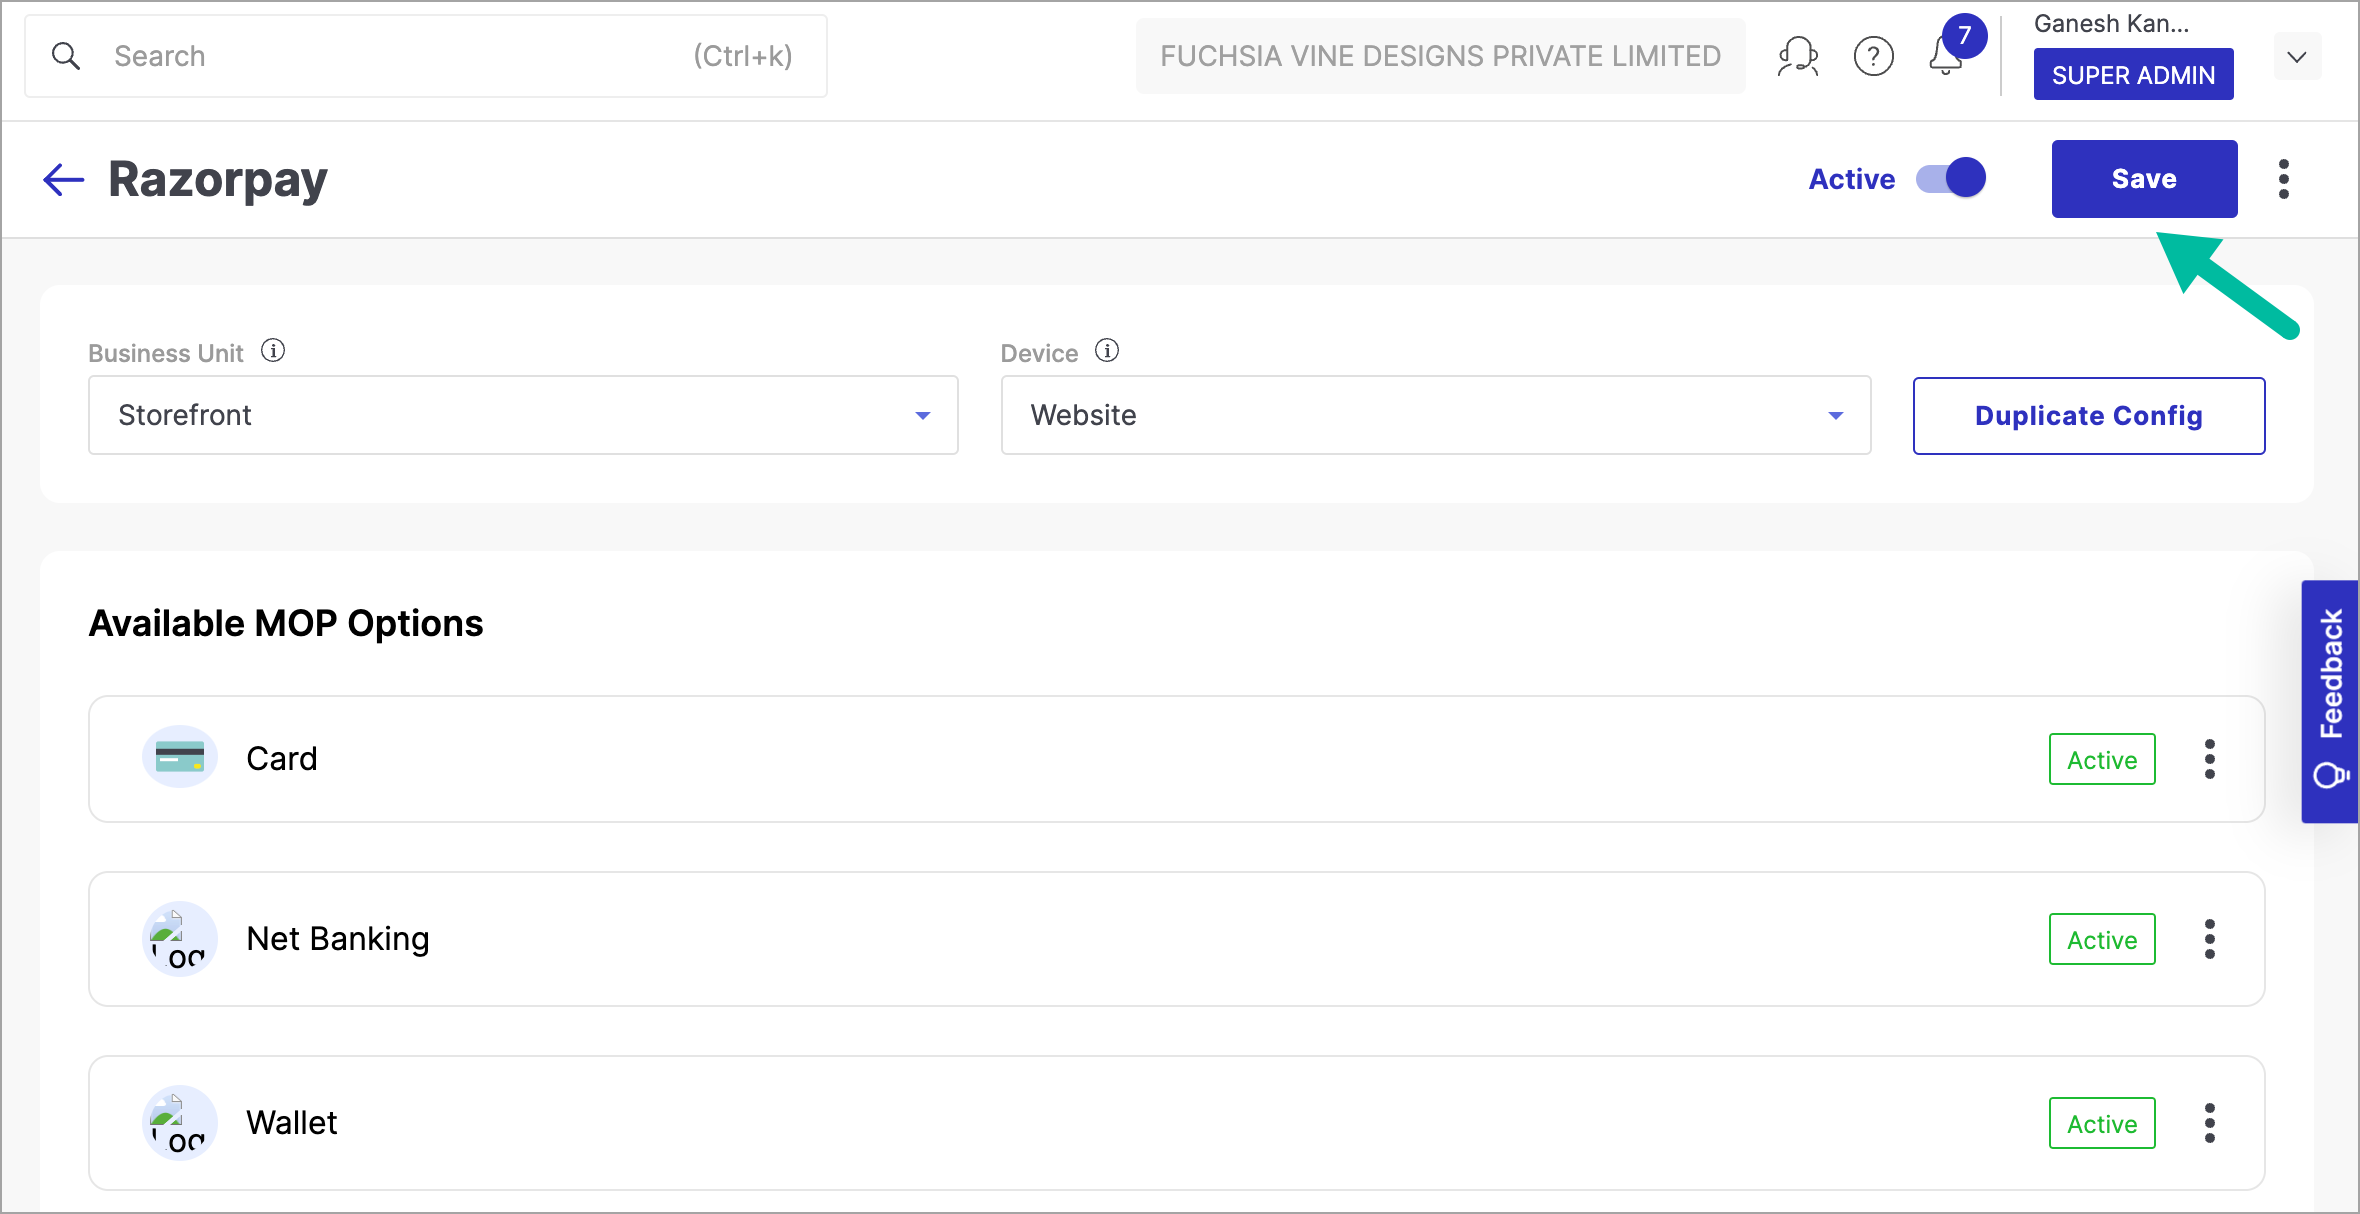
Figure 9: Saving the Changes
MOP like Net Banking can have multiple Sub-MOPs. You can open such MOPs to activate Sub-MOPs in it.
In this way, the PG will be added to your website. Also, you can deactivate it anytime.
You can slide the Active toggle in the upper-right side of the window to disable the PG. But it will be disabled only for the options selected in the Business Unit (Storefront or POS) and Device (Website, iOS, or Android) dropdown list.
You can click Duplicate Config if you wish to map the MOP settings of one device to others.
Activating an MOP in one PG for a particular business unit and device prevents its activation in another PG for the same business unit and device.
Assisted Merchant Account
Do the following steps to add the PG:
Click Add Payment Gateway.
Figure 10: Clicking Add Payment Gateway Button Click Razorpay.
Figure 11: Selecting Razorpay from multiple payment options Choose Assisted Merchant Account.
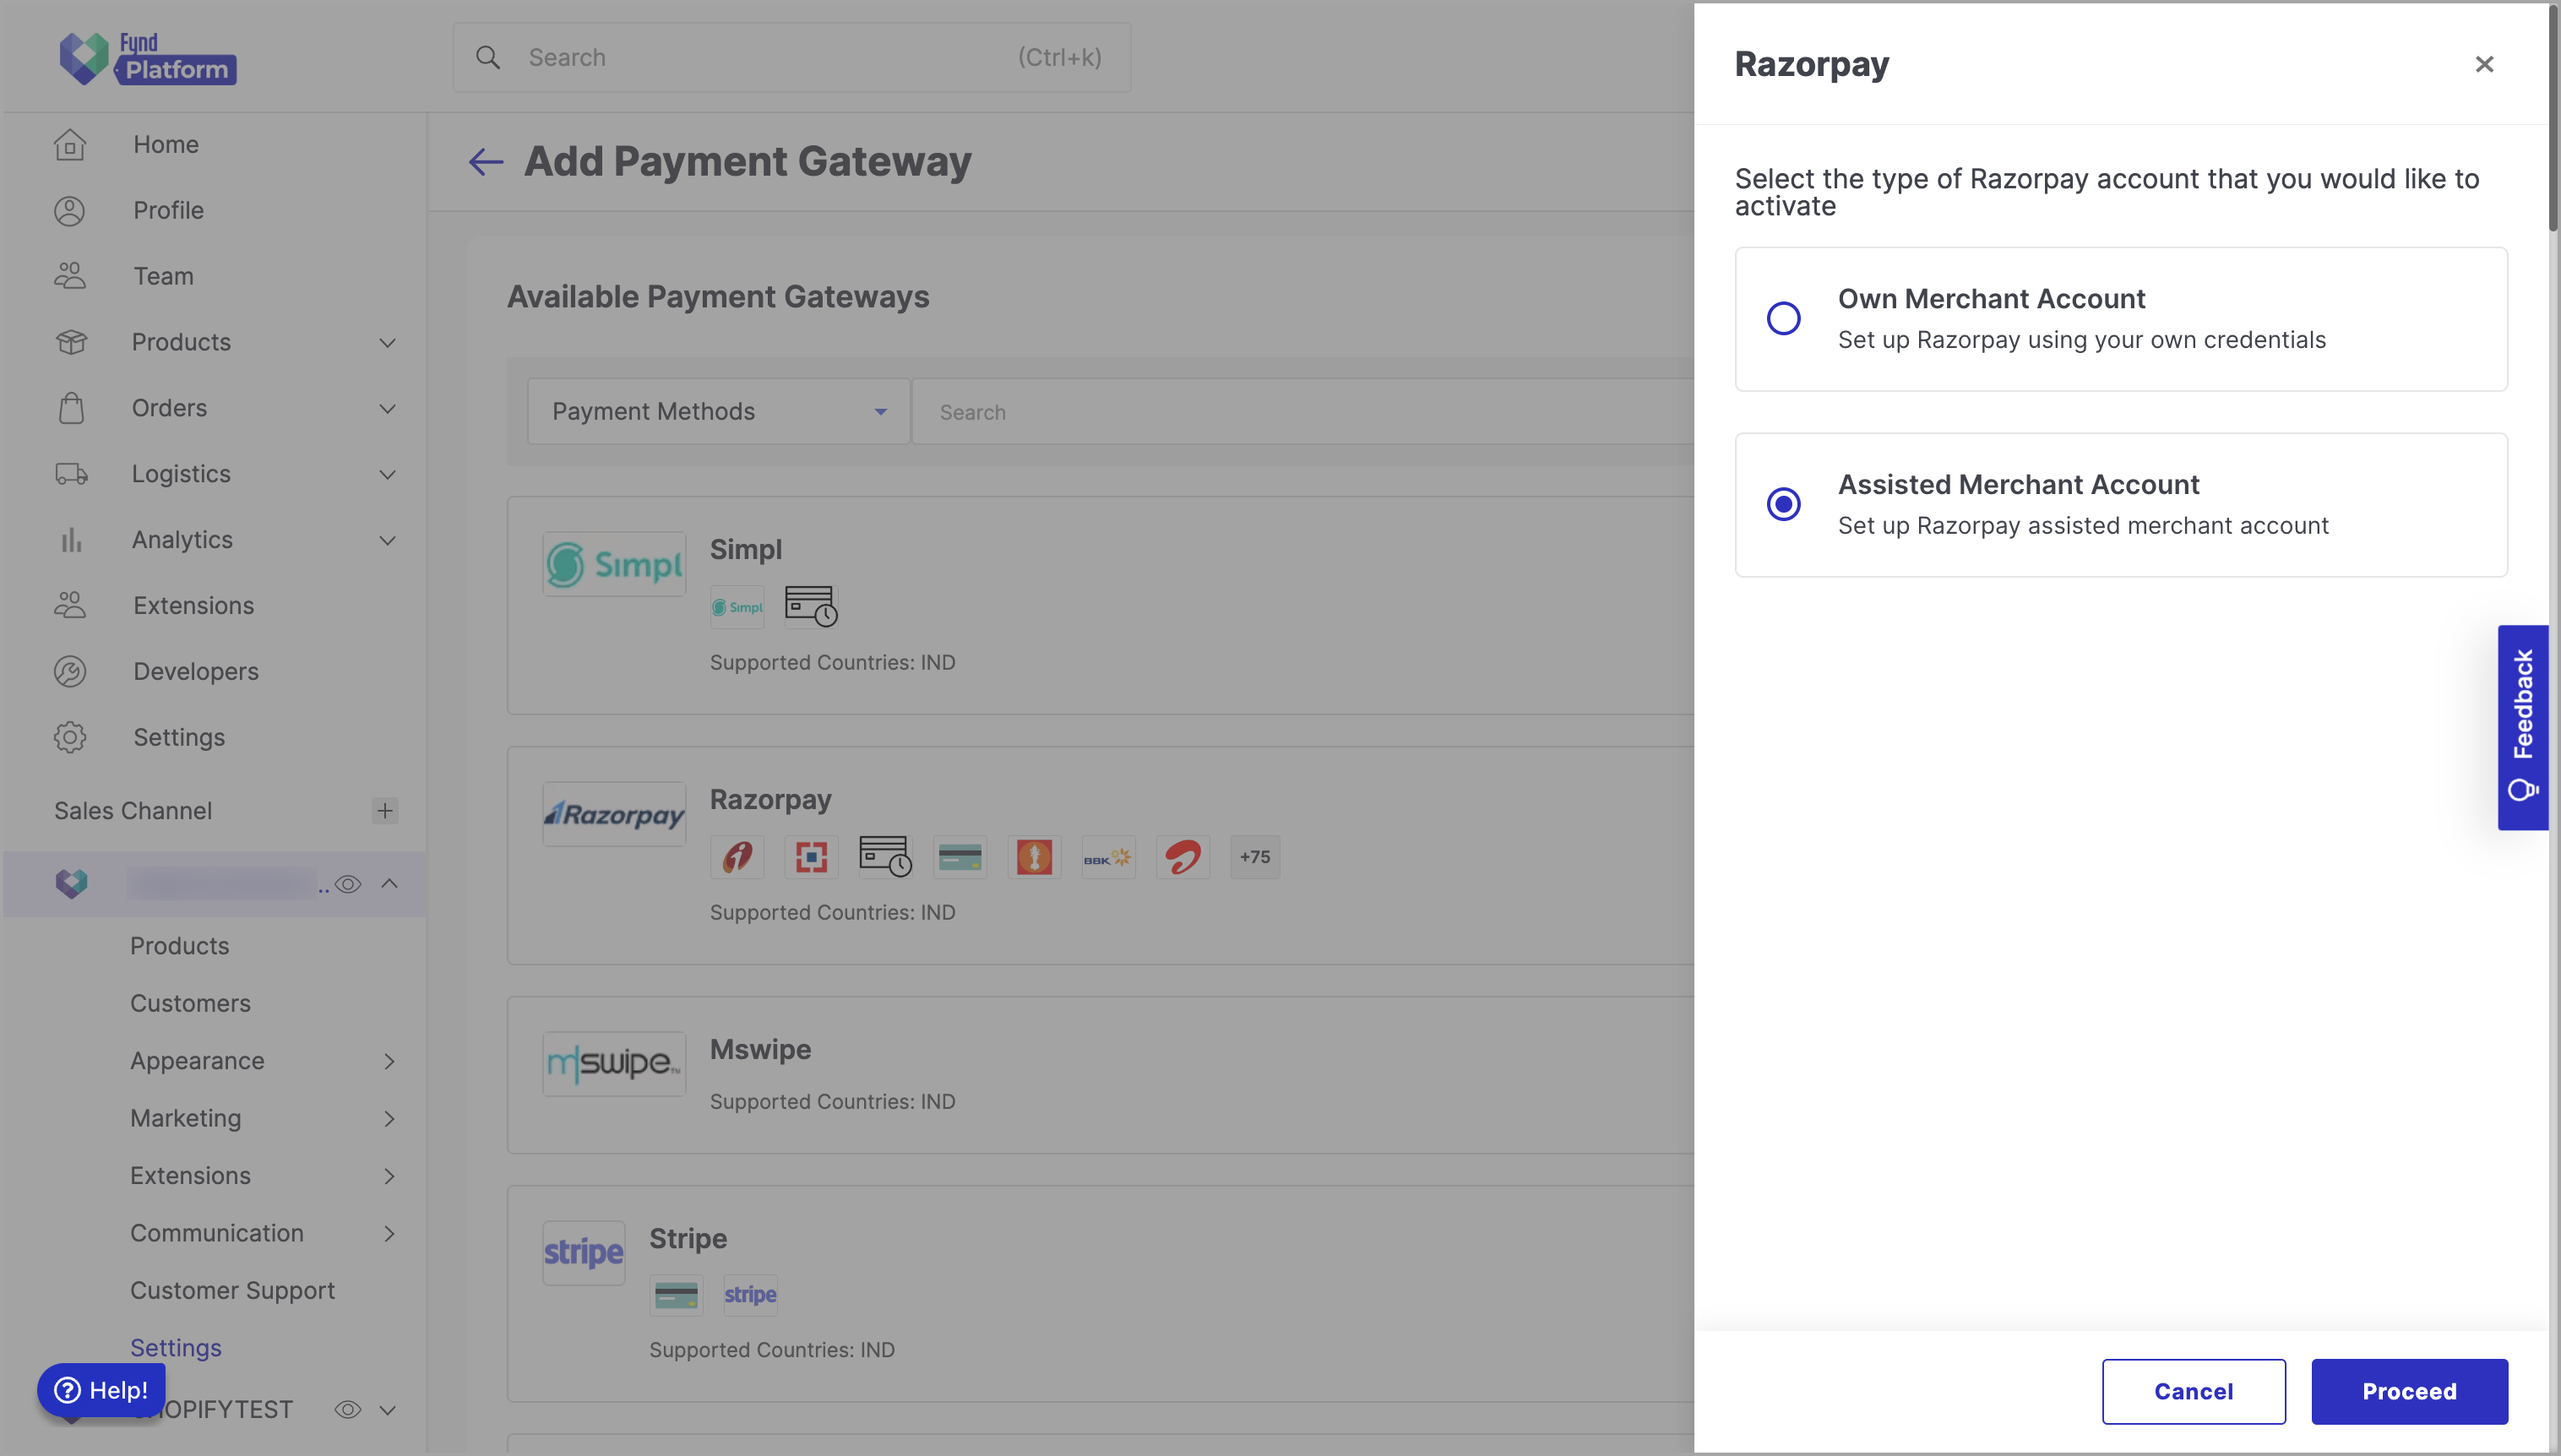
Figure 12: Selecting Assisted Merchant Account Click Proceed. You will be directed to the Razorpay login dashboard.
Click Login to navigate to the login page if you have a Razorpay account.
OR
Click Create Account to create a new account. Refer to Create Account for more details.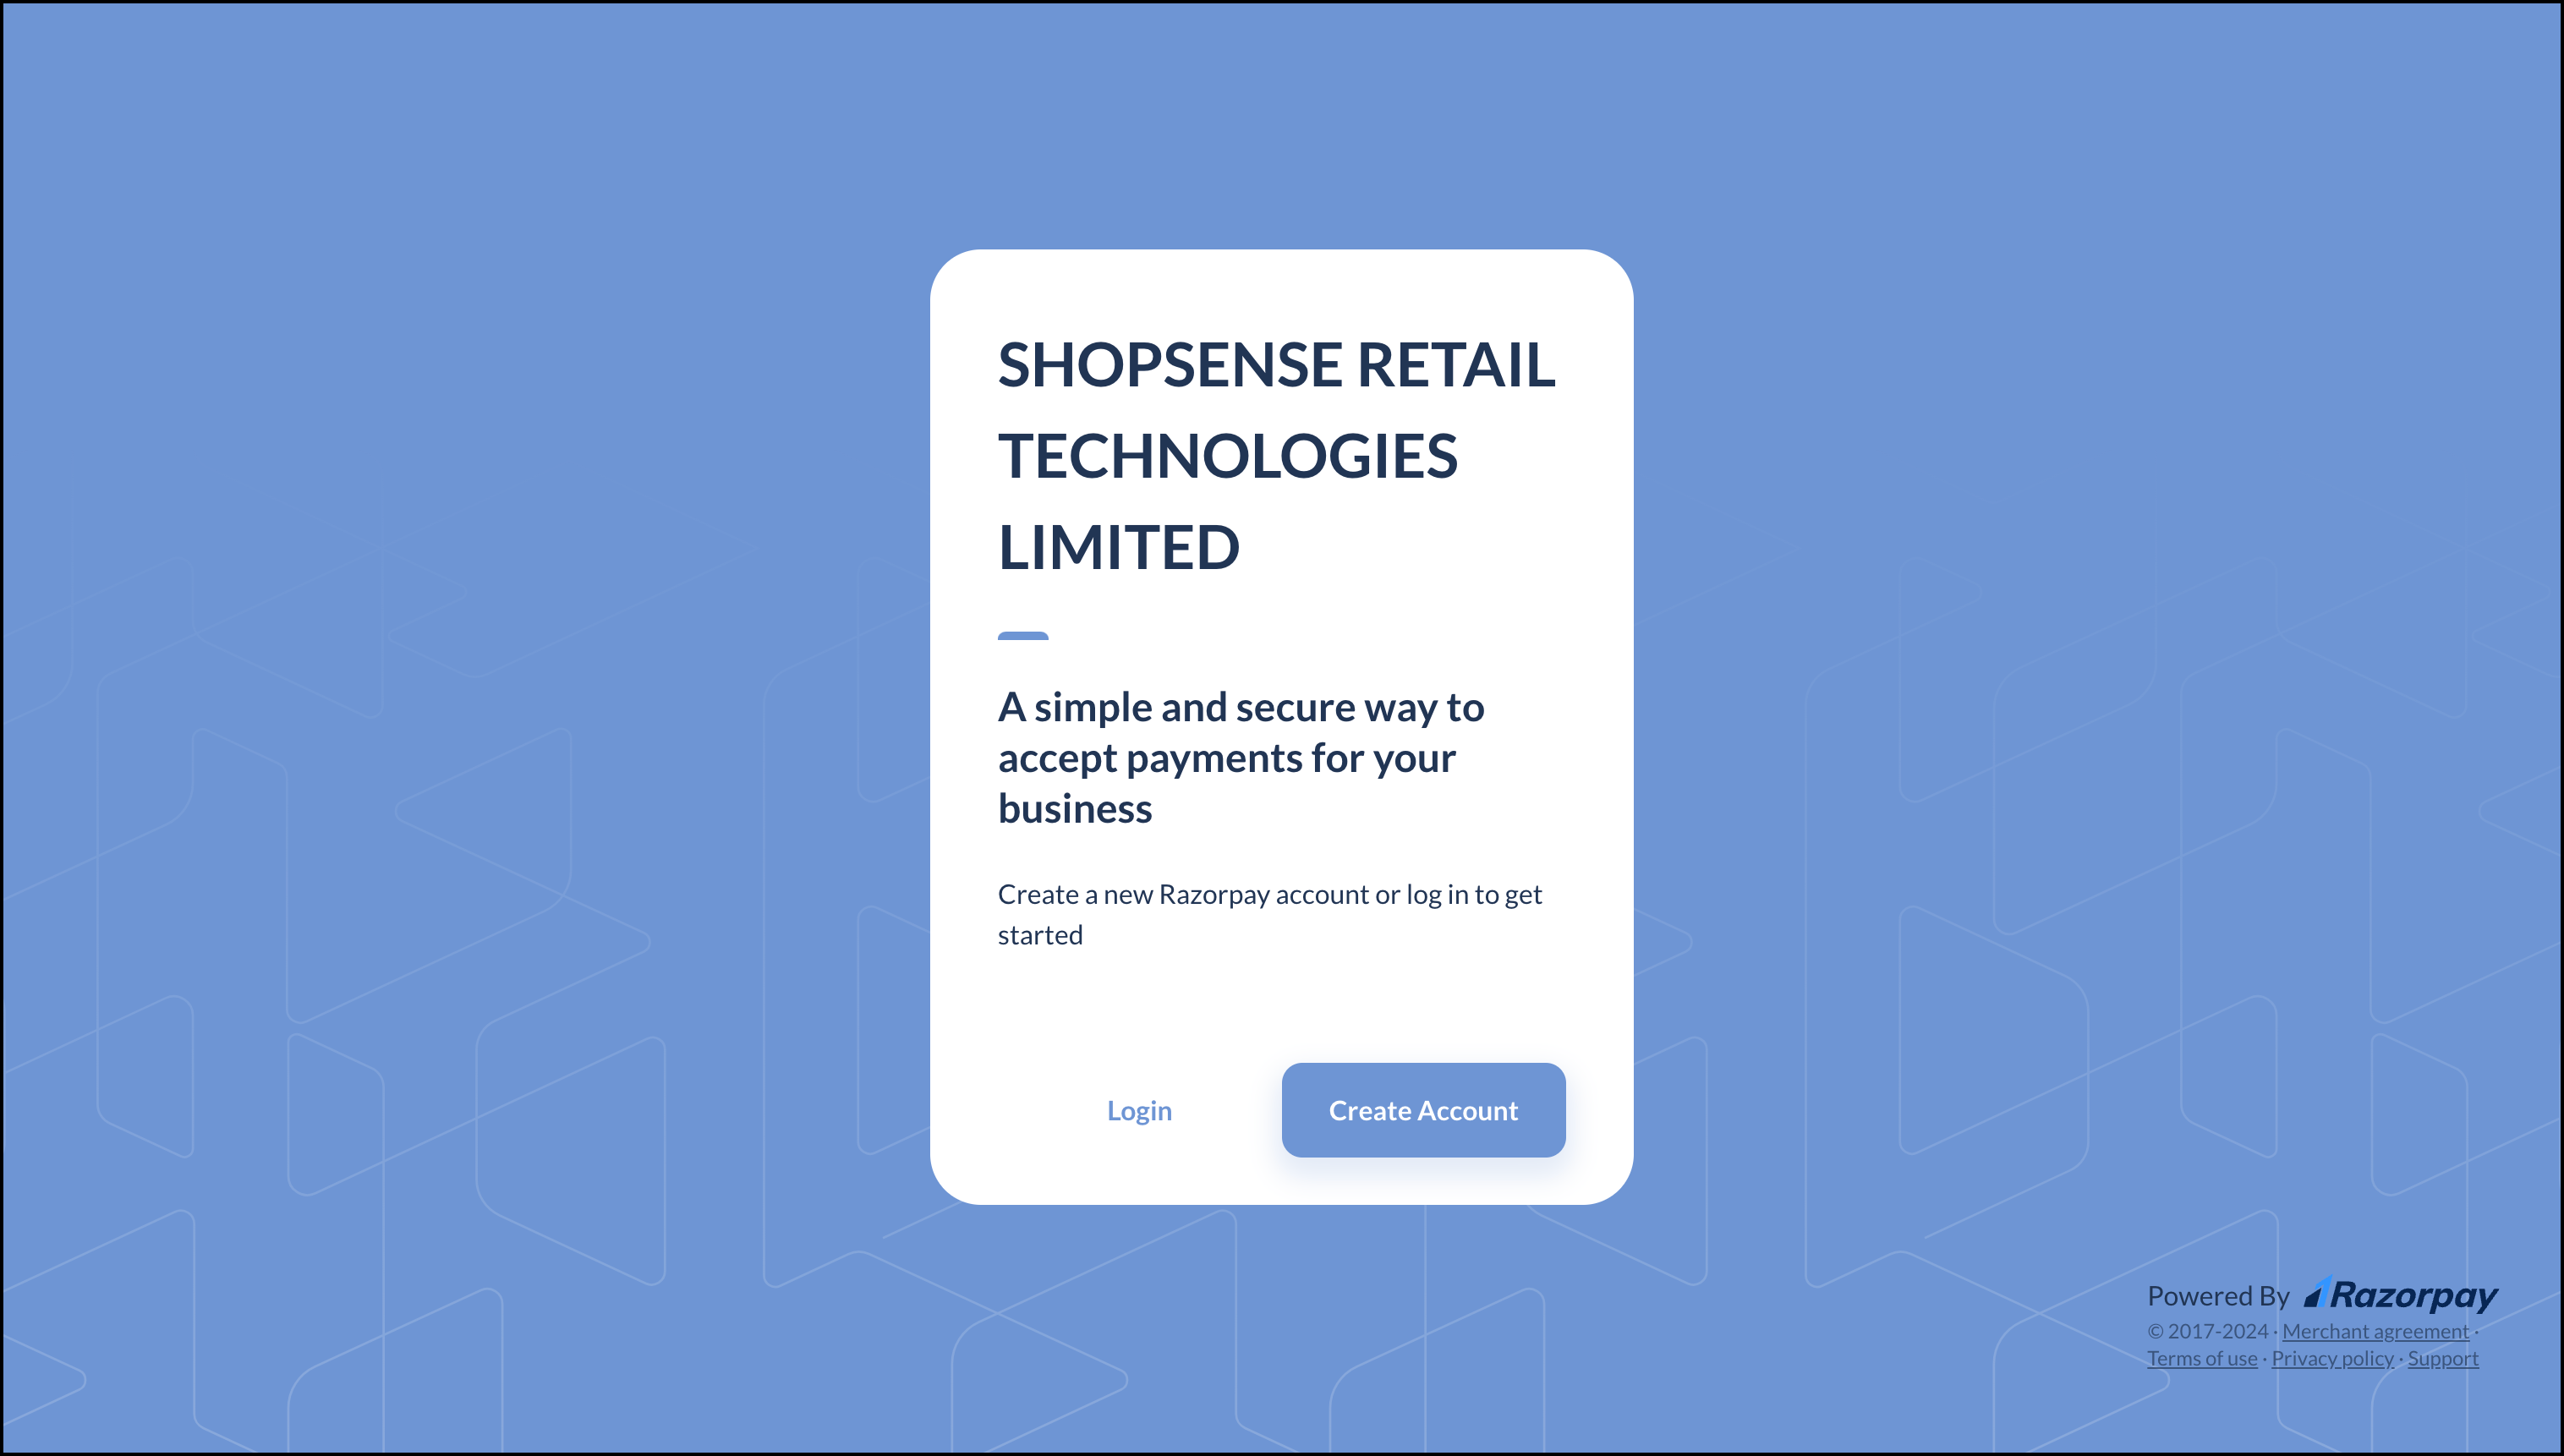
Figure 13: Authentication Page Enter user credentials to login.
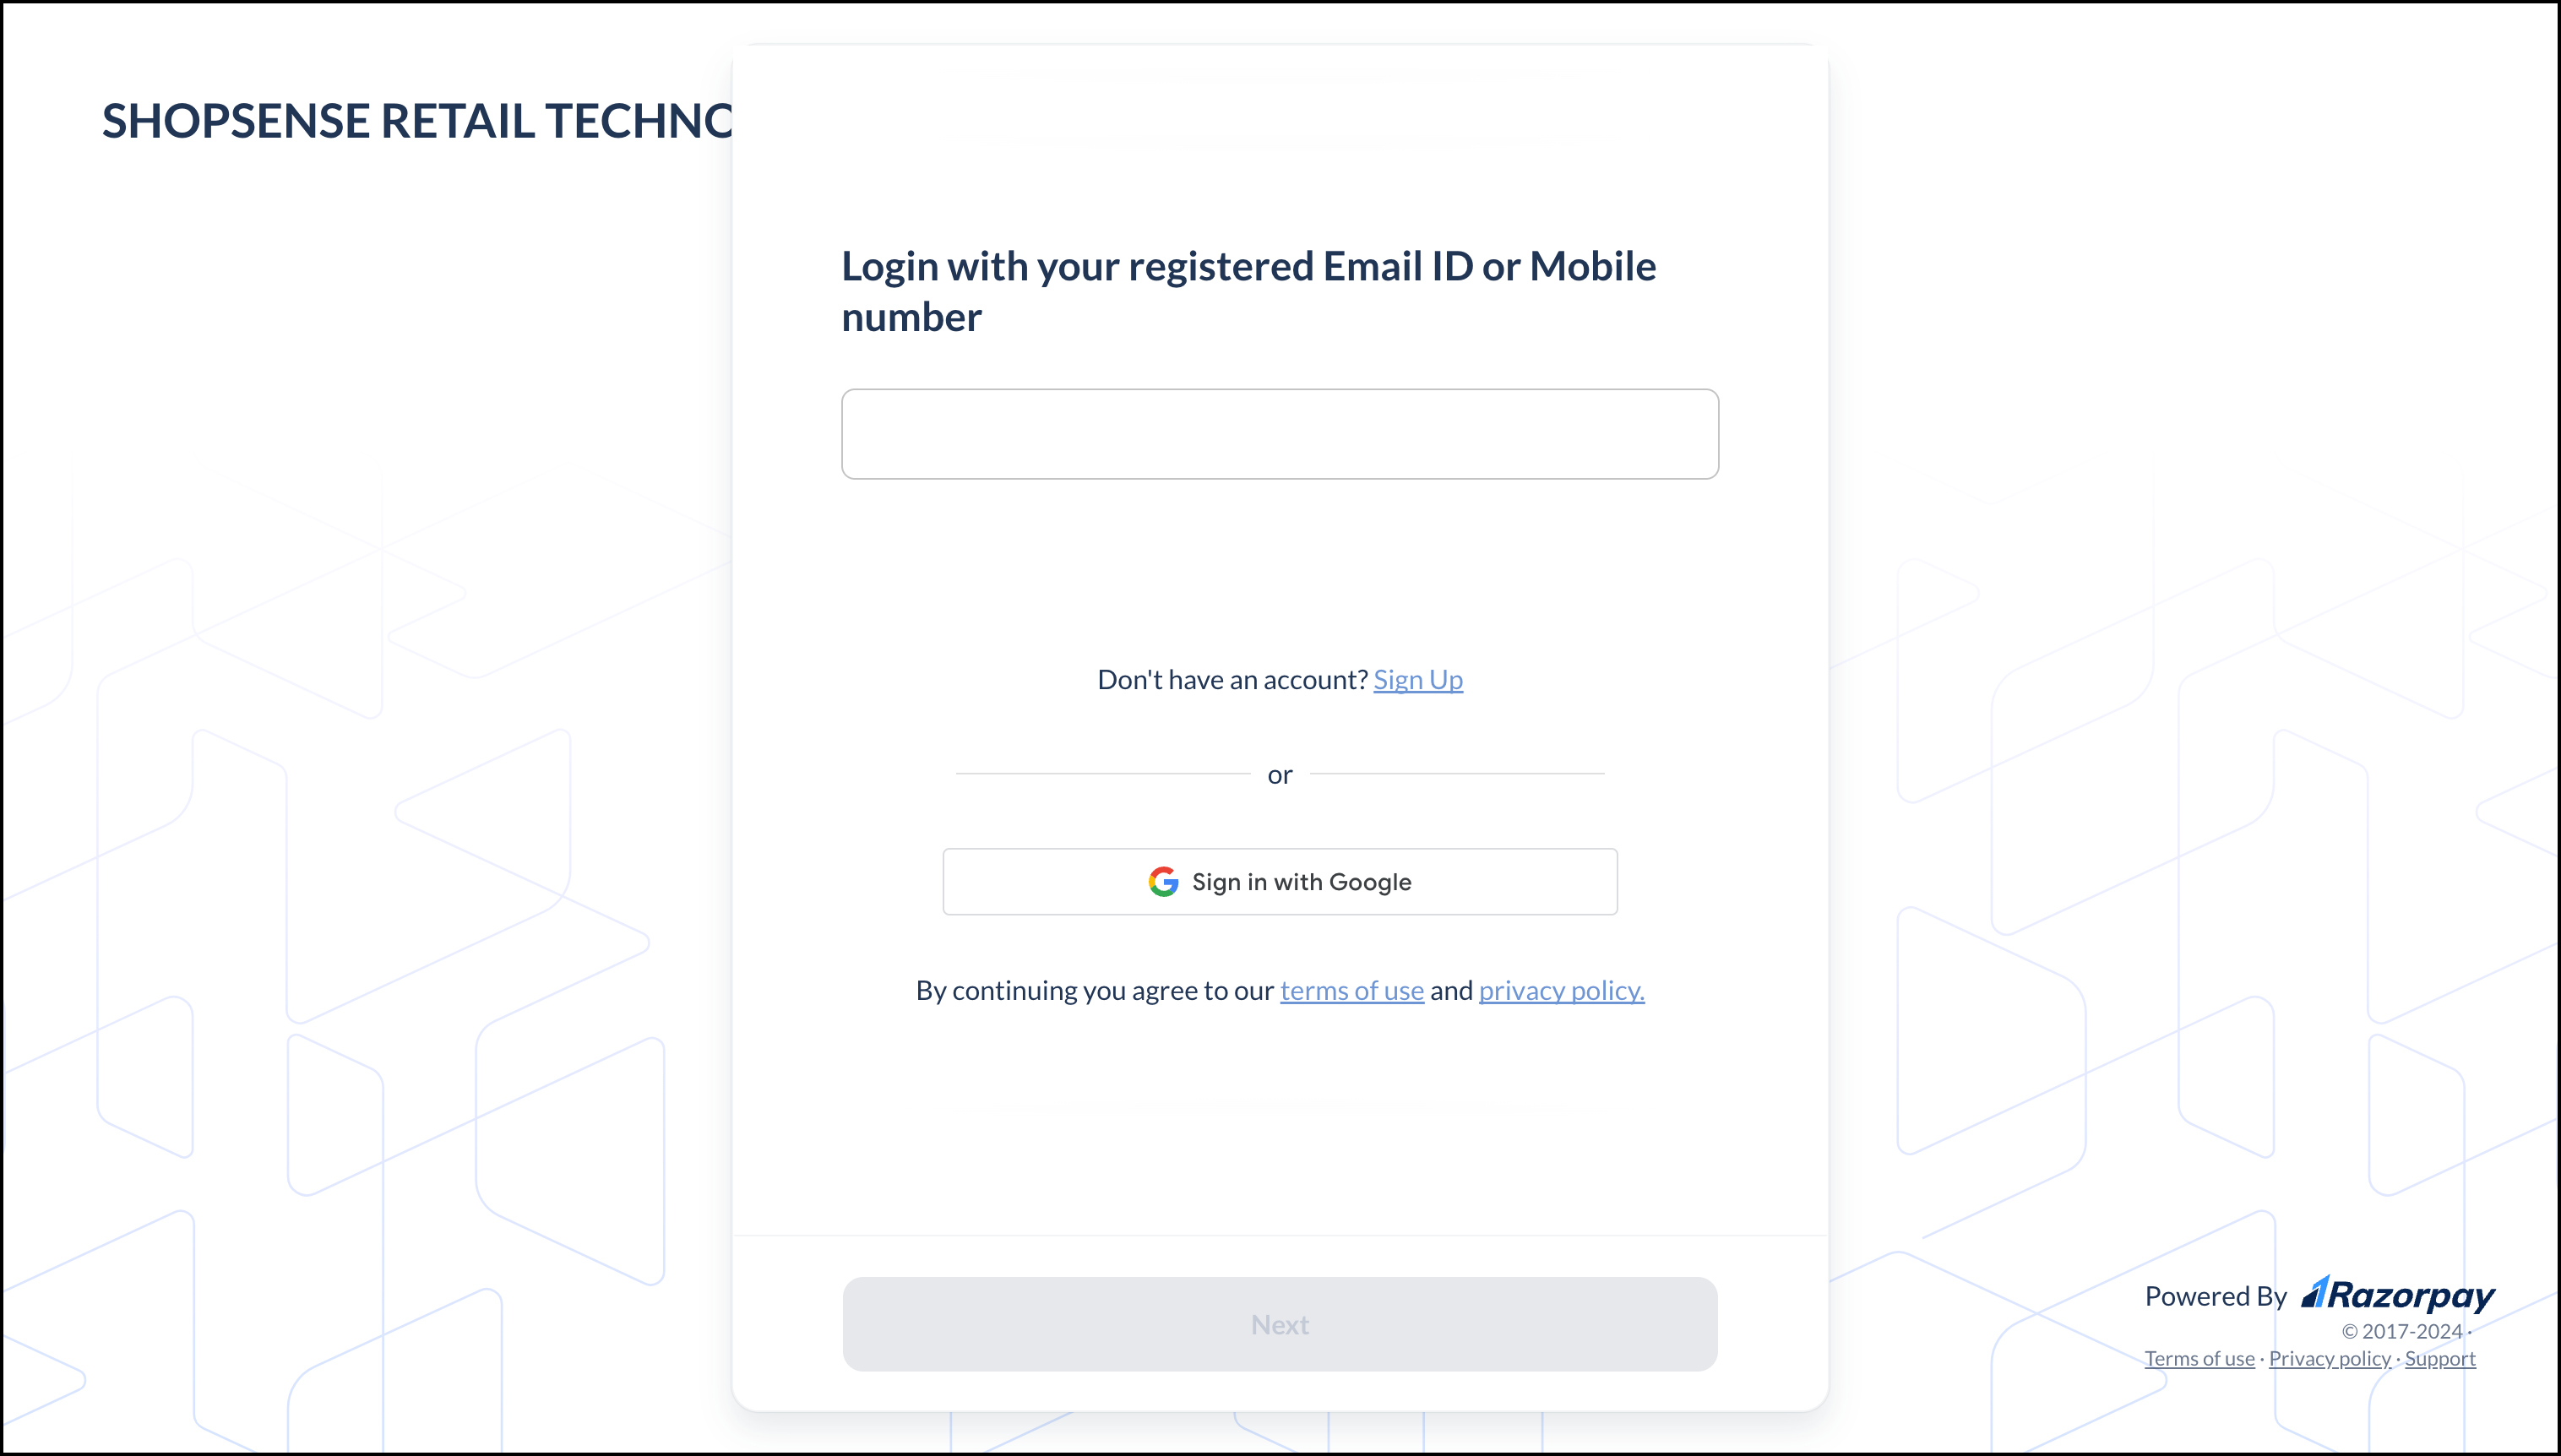
Figure 14: Login Page to Enter Razorpay Credentials and Authorize Click Authorize. The Razorpay PG gets added successfully.
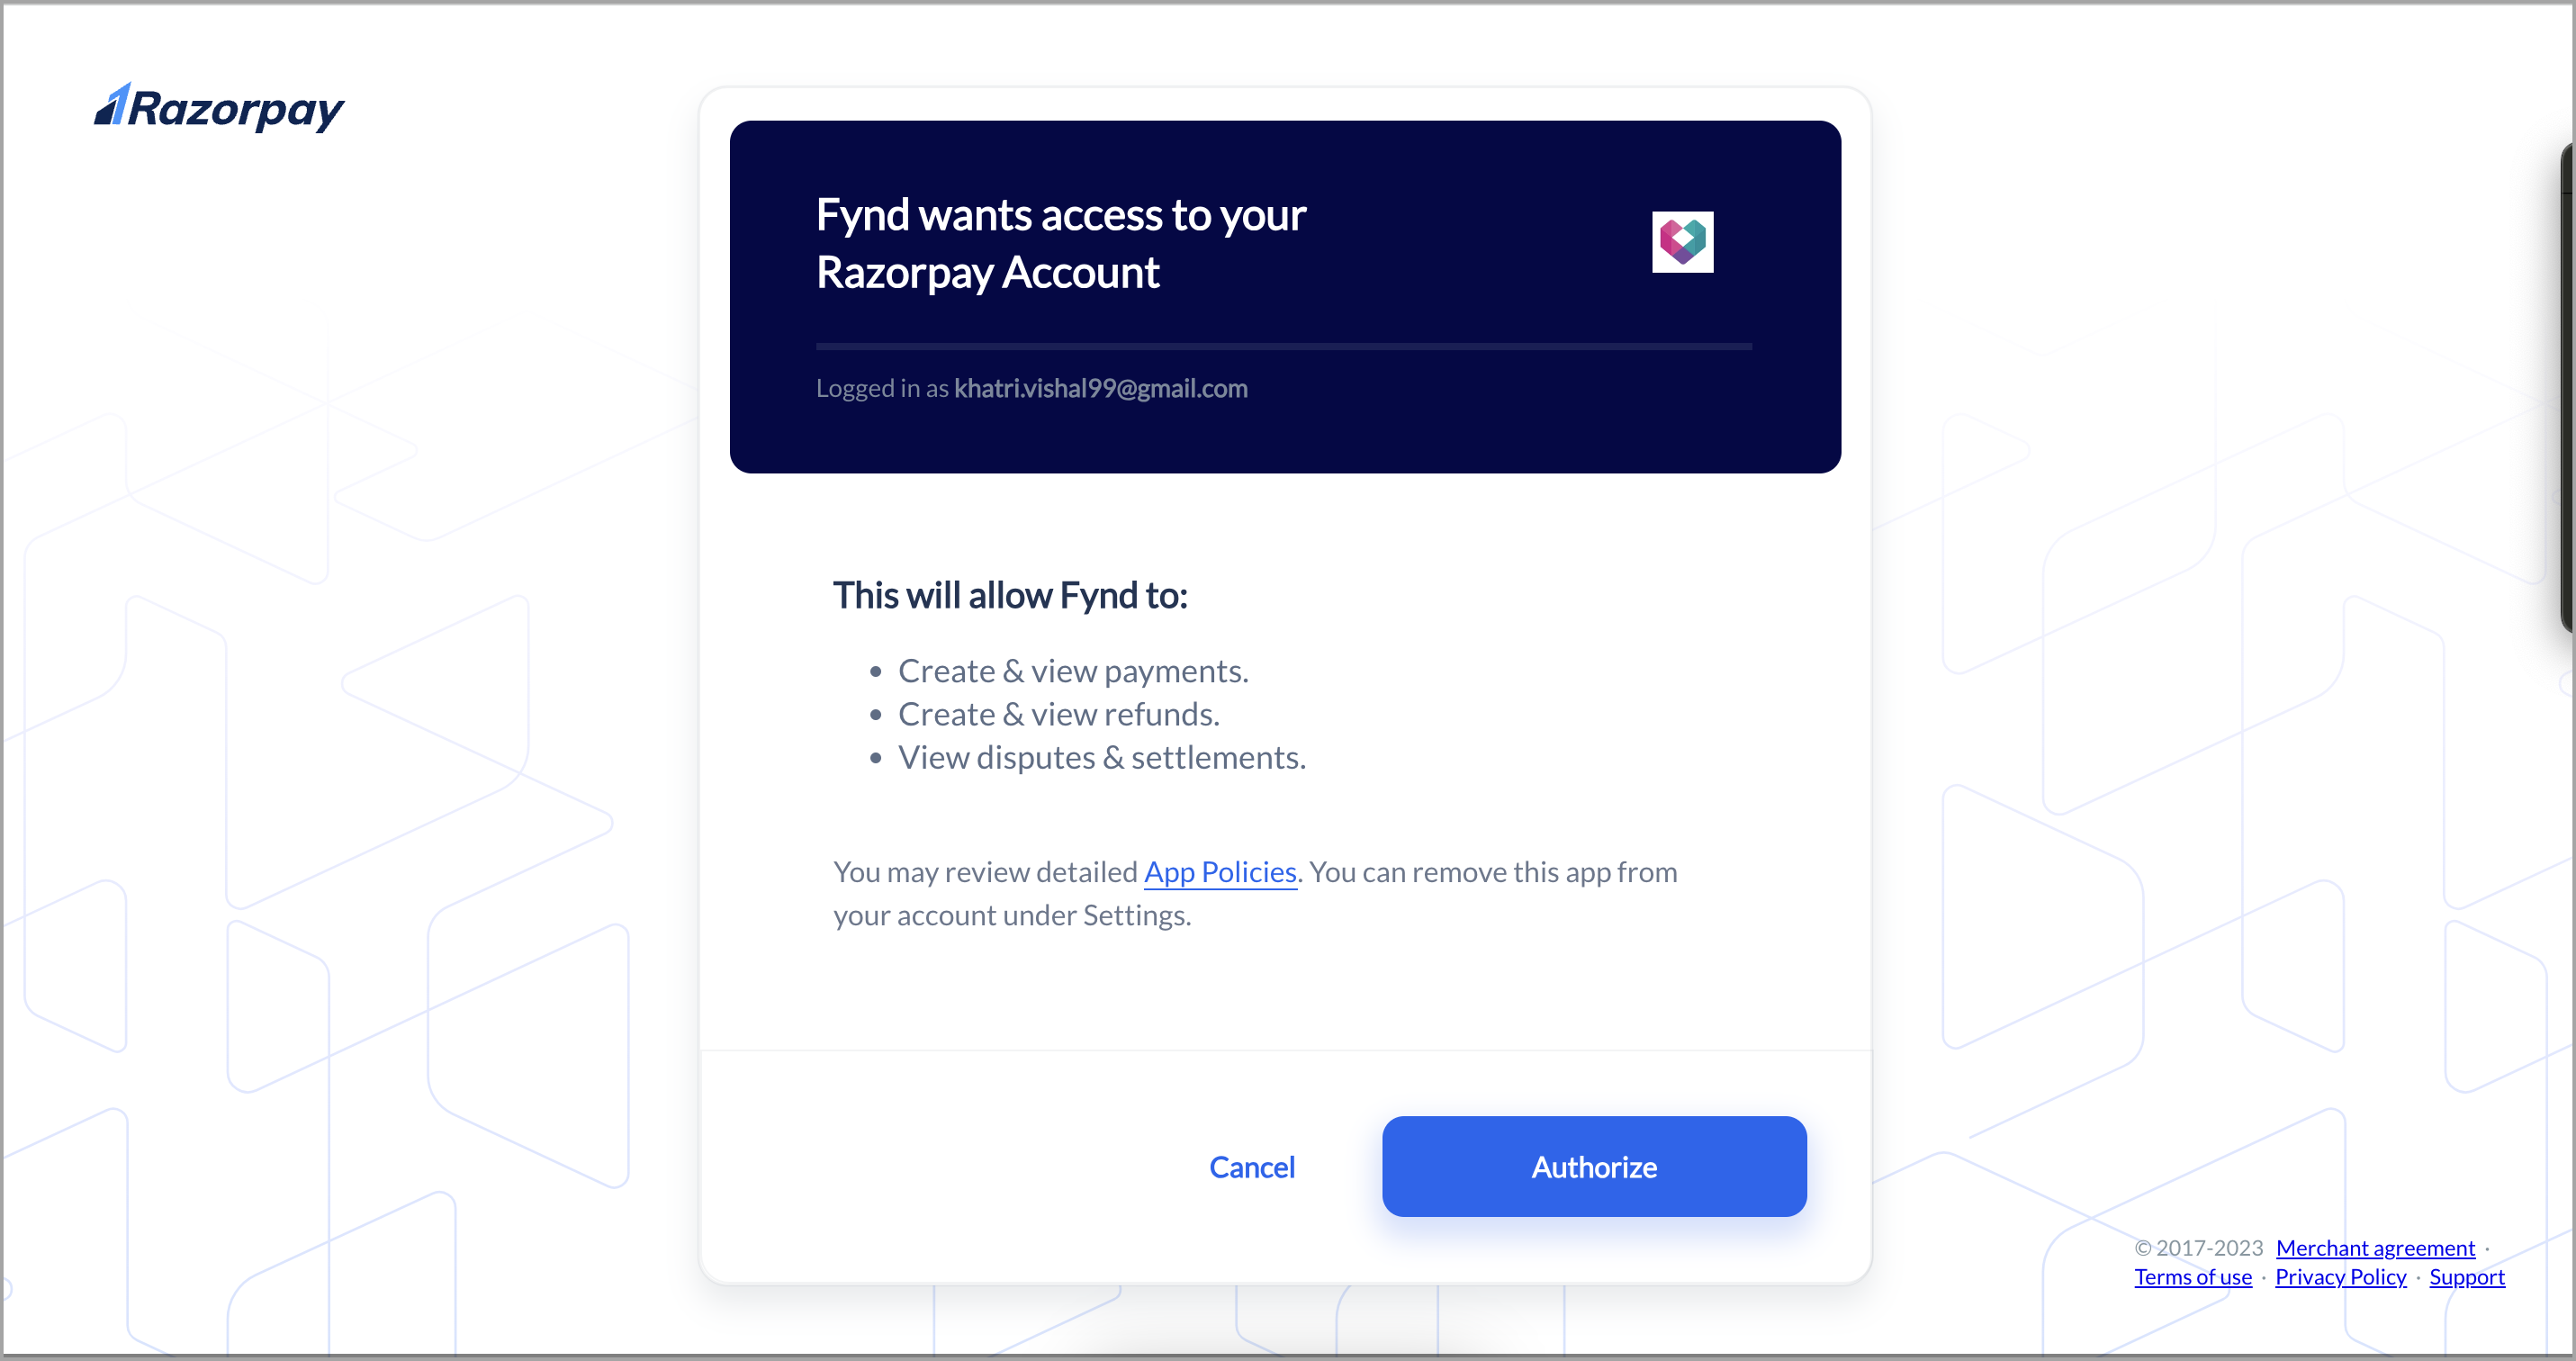
Figure 15: Clicking Authorize
You can revoke this access anytime.
Open the Razorpay PG.
Slide the Active toggle to the right to activate the PG.
Figure 17: Sliding the Active Toggle Choose the desired business unit (Storefront or POS) and device (Website, iOS, or Android).
Navigate to the required MOP that you need to activate.
Click three dots (
⋮) to the right of MOP.Figure 18: Clicking Three Dots ( ⋮)Click Active.
Click Save to save the changes.
Provide your confirmation to save the changes.
Figure 19: Saving the Changes
MOP like Net Banking can have multiple Sub-MOPs. You can open such MOPs to activate Sub-MOPs in it.
In this way, the PG will be added to your website. Also, you can deactivate it anytime.
You can slide the Active toggle in to the left upper-right side of the screen to disable the payment gateway. But it will be disabled only for the options selected in the Business Unit (Storefront or POS) and Device (Website, iOS, or Android) dropdown list.
You can click Duplicate Config if you wish to map the MOP settings of one device to others.
Activating an MOP in one PG for a particular business unit and device prevents its activation in another PG for the same business unit and device.
How to Switch Account Type in PG
This procedure is intended for the Razorpay setup only and may not be applicable to other payment systems.
Before beginning the procedure, please collect your API Key and Secret from Razorpay. Refer to API Keys and Webhooks Setup to get these credentials.
Do the following steps to switch to another payment account type in the configured PG:
Open the PG.
Click three dots (
⋮) on the upper-right side of the window.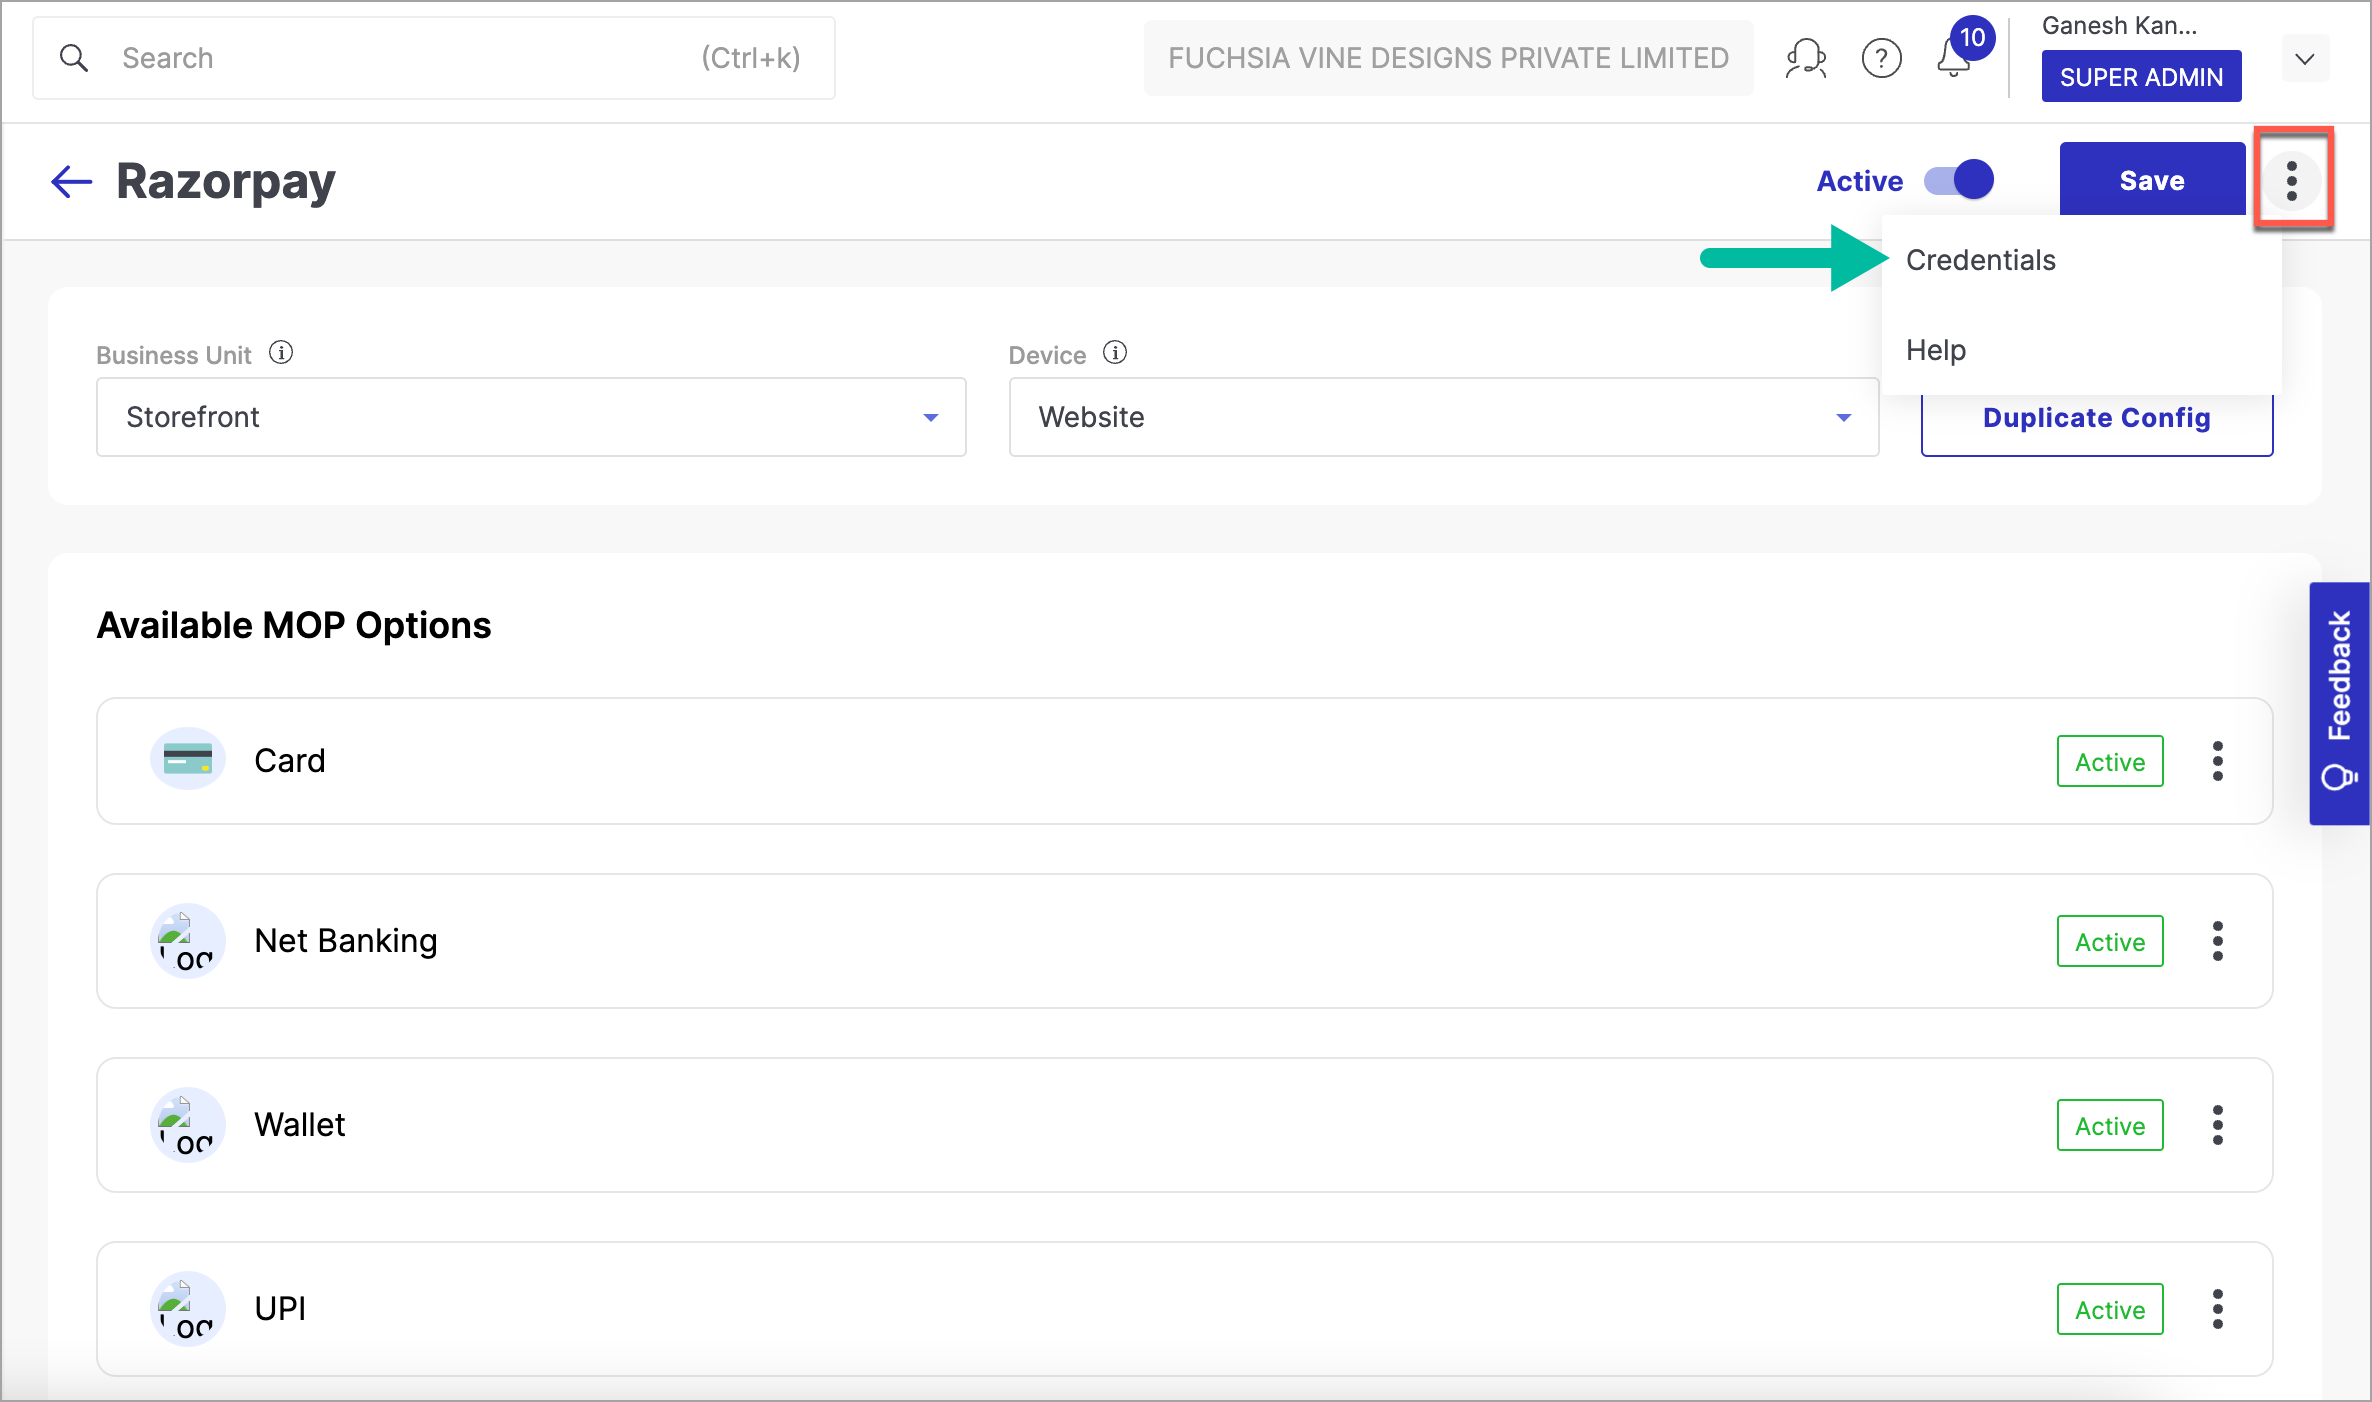
Figure 20: Payments Configuration Option Click Credentials.
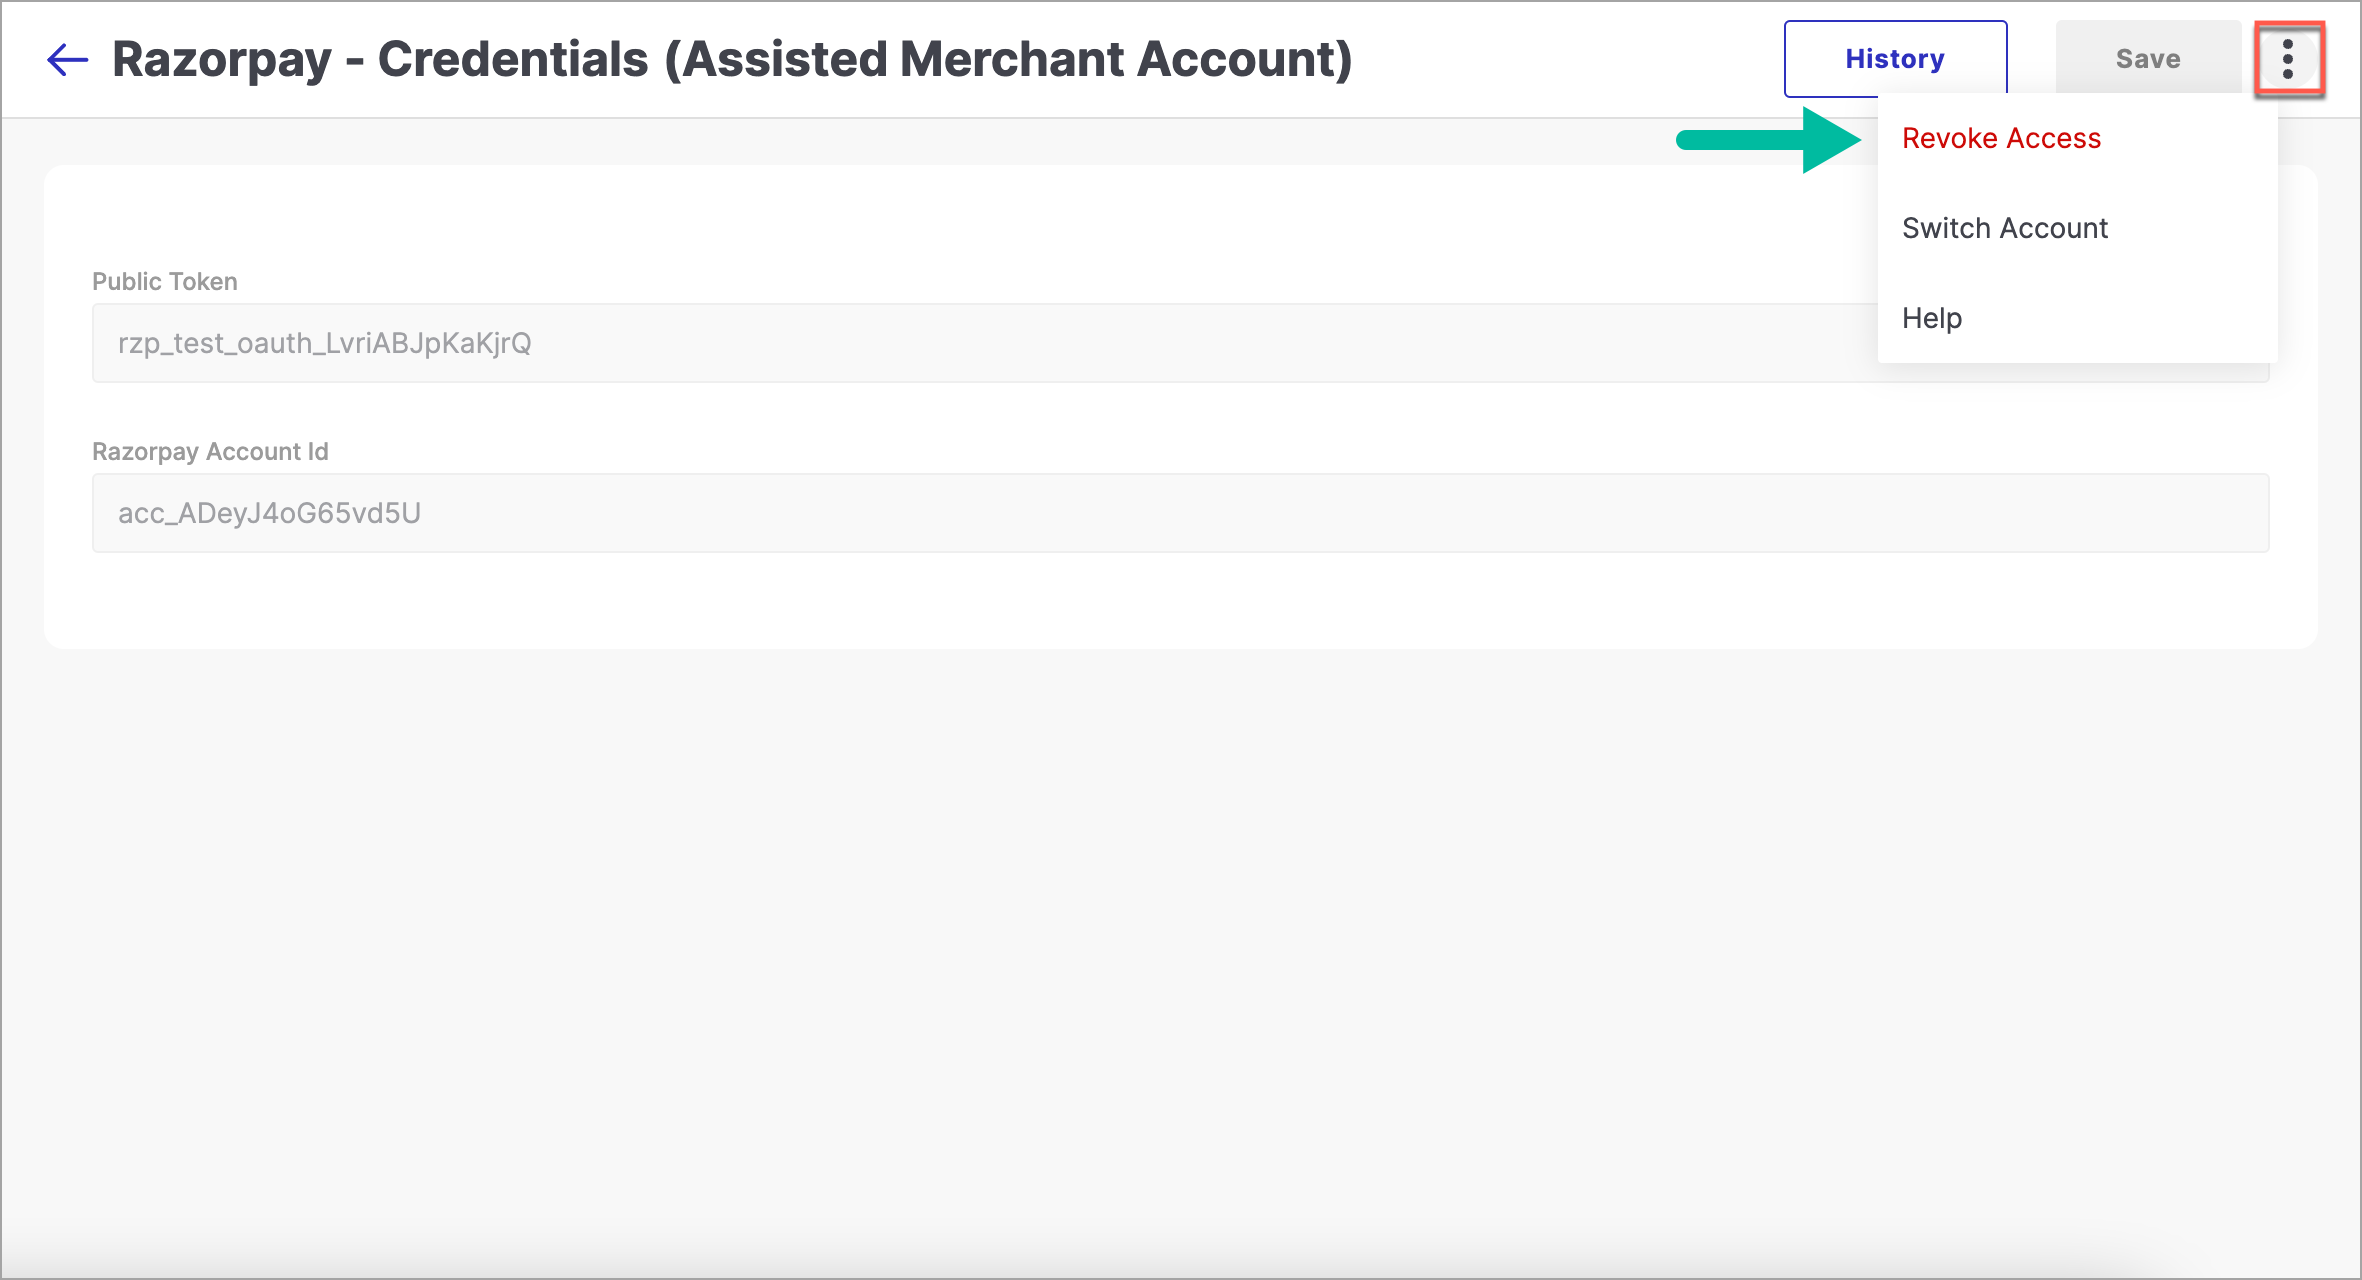
Click three dots (
⋮) on the upper-right side of the window.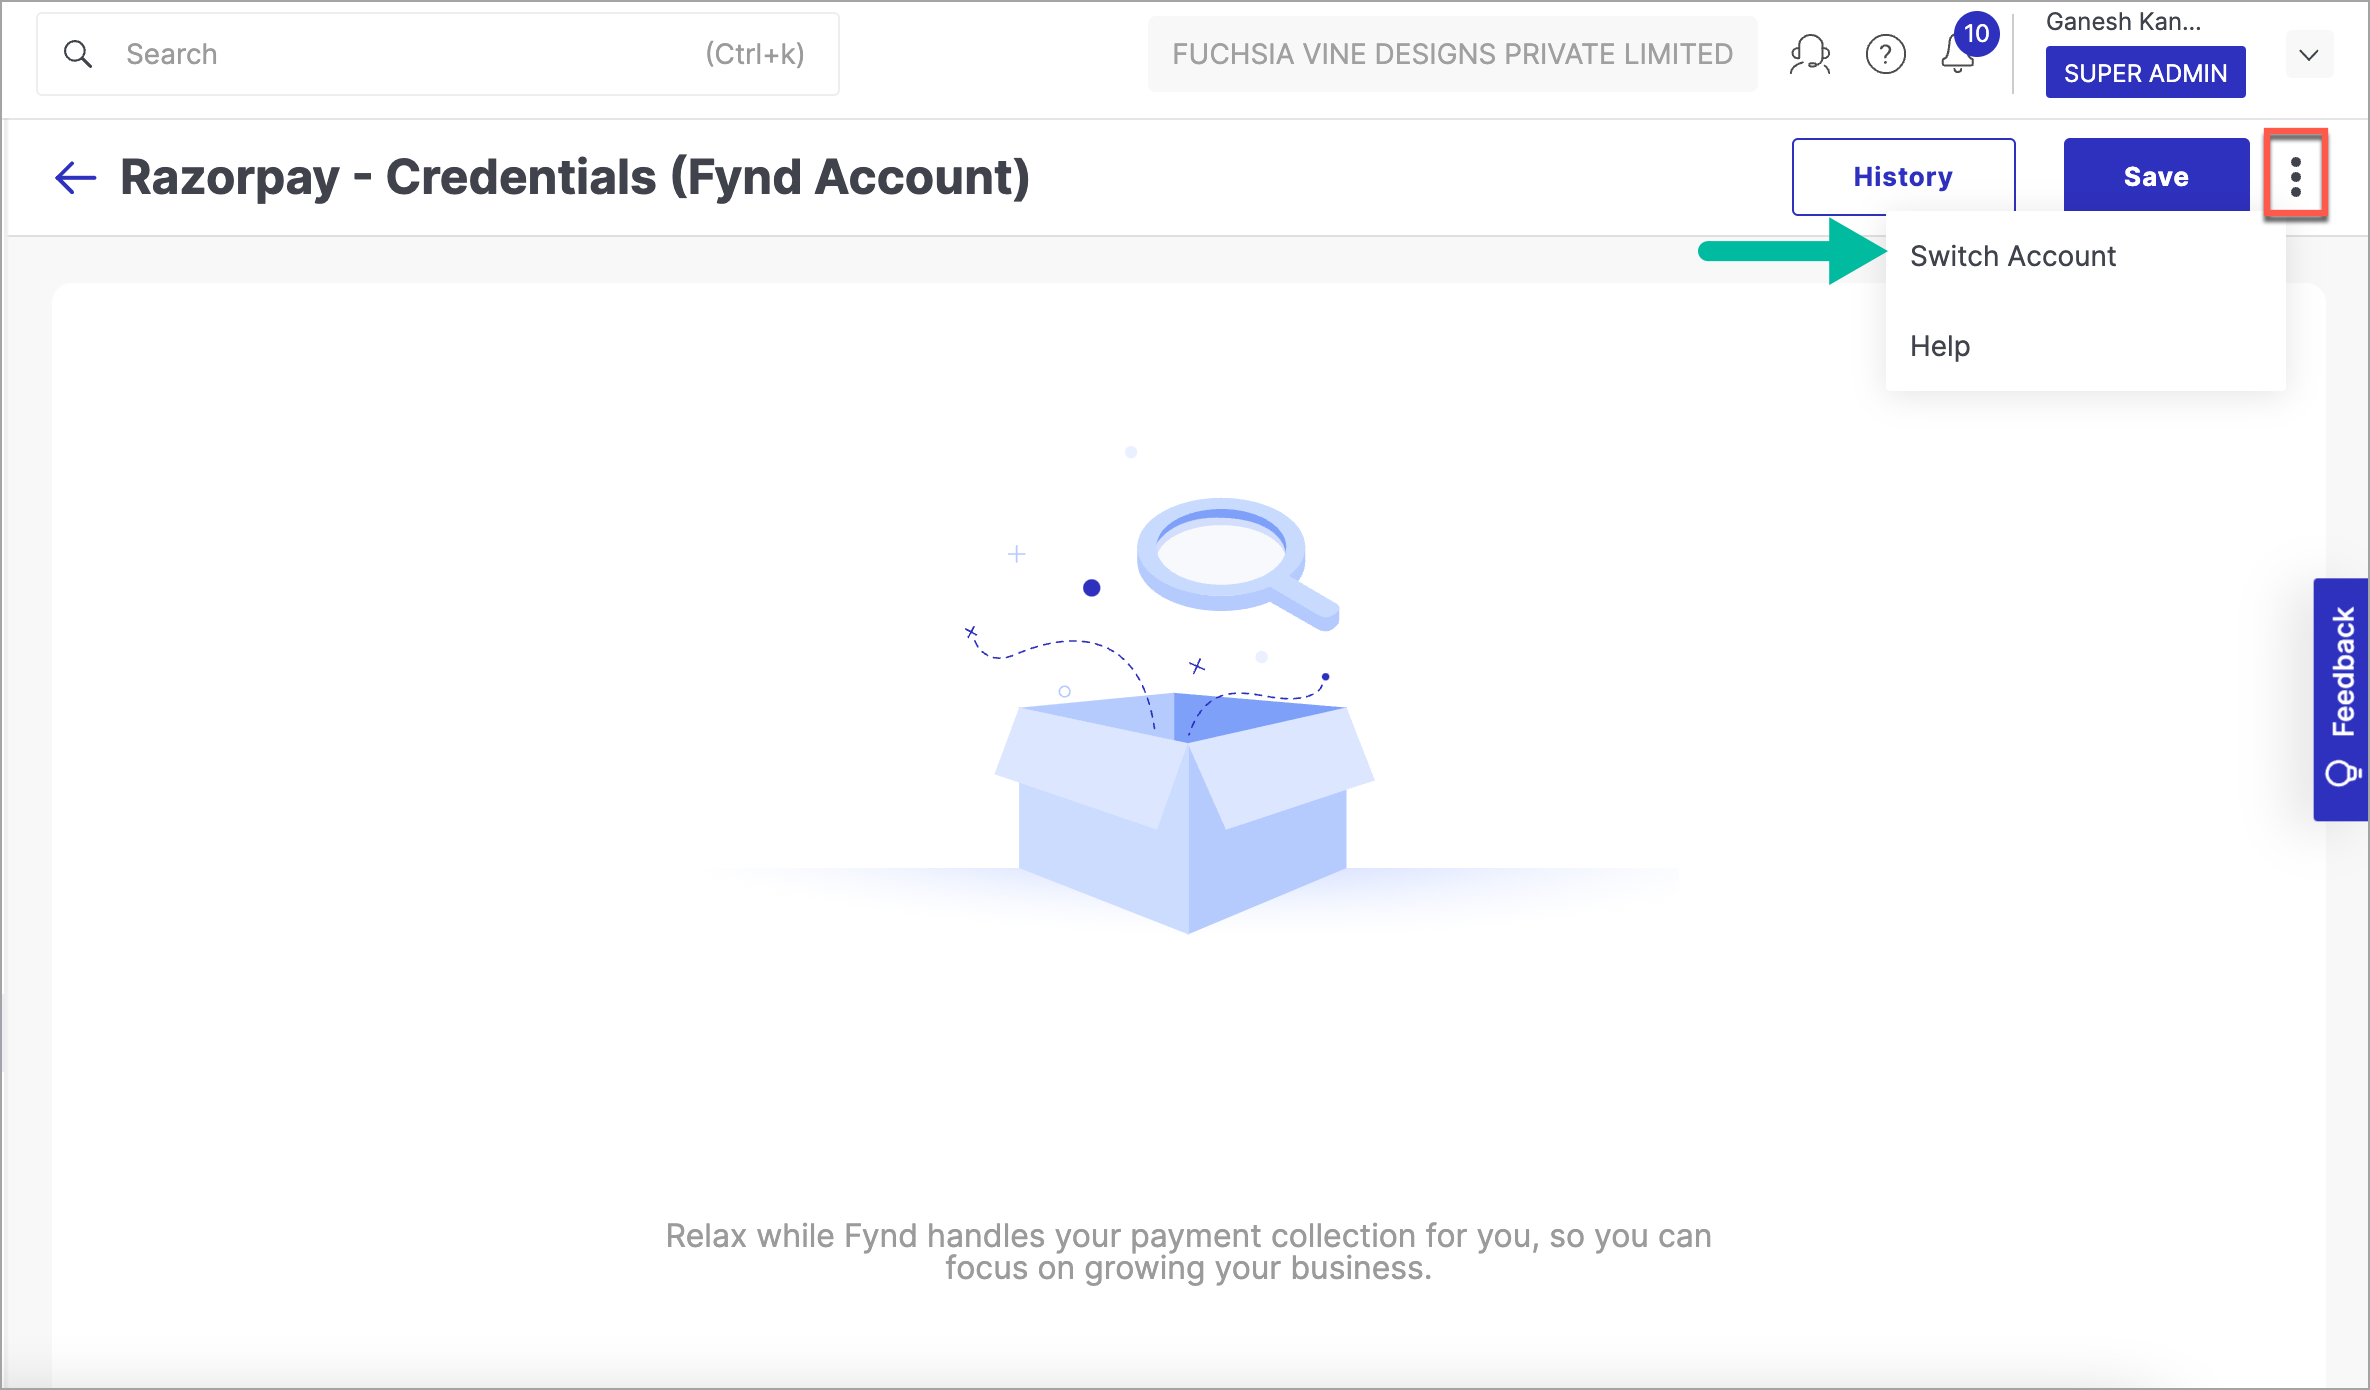
Figure 21: Payments Configuration Options Click Switch Account.
Select the type of account. Here, we have selected Own Merchant Account.
Figure 22: Selecting Own Merchant Account Click Proceed.
Enter the Key, Secret, and Webhook Secret collected from the Razorpay site.
Figure 23: Entering Key, Secret and Webhook Secret Click Save.
Provide your confirmation to save the changes.
Supported Payment Gateways

Simpl
Simpl is a credit-based payment method that supports 'Buy Now, Pay Later’.

What will you need to integrate Simpl: Key and Secret from your Simpl Merchant Account.
Juspay
Juspay is a mobile payment platform that offers digital payment solutions. Juspay is not a Payment Gateway (like Citrus, CCAvenue, PayU) but it works with any gateway or aggregator with zero interference in the Merchant-PG relations.

What will you need to integrate Juspay: Key, Secret and Merchant Key from your JusPay Merchant Dashboard

Mswipe
Mswipe card swipe machines are safe and secure and accepts all debit and credit cards. Mswipe provides mobile POS solutions for cards, QR and contactless payments.

What will you need to integrate Mswipe: Key, PIN, Secret, User ID and Merchant ID from Mswipe

Razorpay
Razorpay is a comprehensive payments platform that facilitates online payments through various methods, including:
- Credit Cards
- Debit Cards
- Net Banking (e.g., Lakshmi Vilas Bank - Retail Banking, Bank of Bahrain and Kuwait, Airtel Payments Bank, etc.)
- UPI (e.g., PhonePe, Paytm, etc.)
- BharatQR
- Wallets (Airtel Money, CredPay, PhonePe, etc.)
Razorpay offers robust support for all these payment modes, providing complete management throughout the payment lifecycle.

What will you need to integrate Razorpay: Key, Secret and Webhook Secret from your Razorpay Dashboard


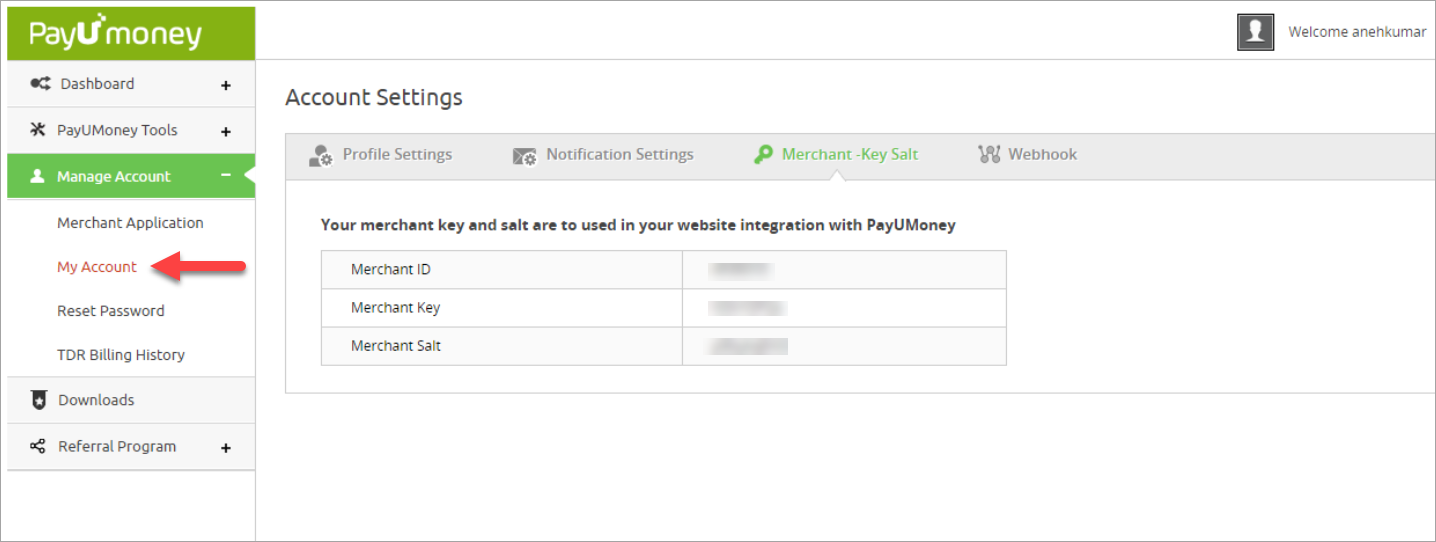
PayUMoney
PayUMoney supports wide range of options for making online payments via wallets, UPI, cards, and netbanking.
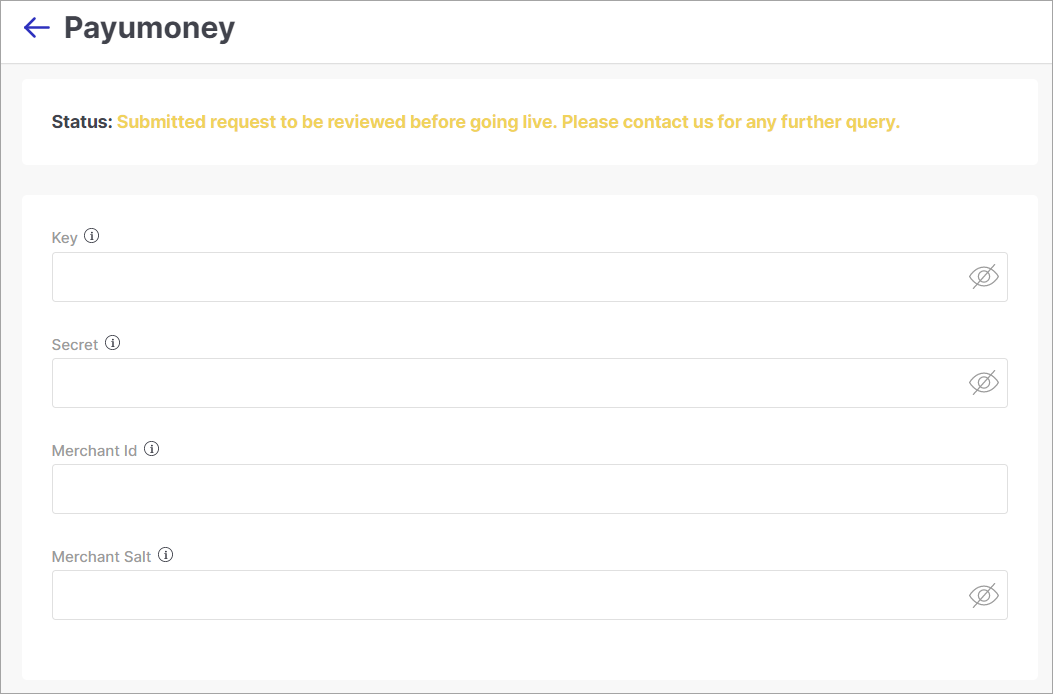
What will you need to integrate PayUMoney: Key, Secret, Merchant ID, Merchant Salt from your PayUMoney Dashboard
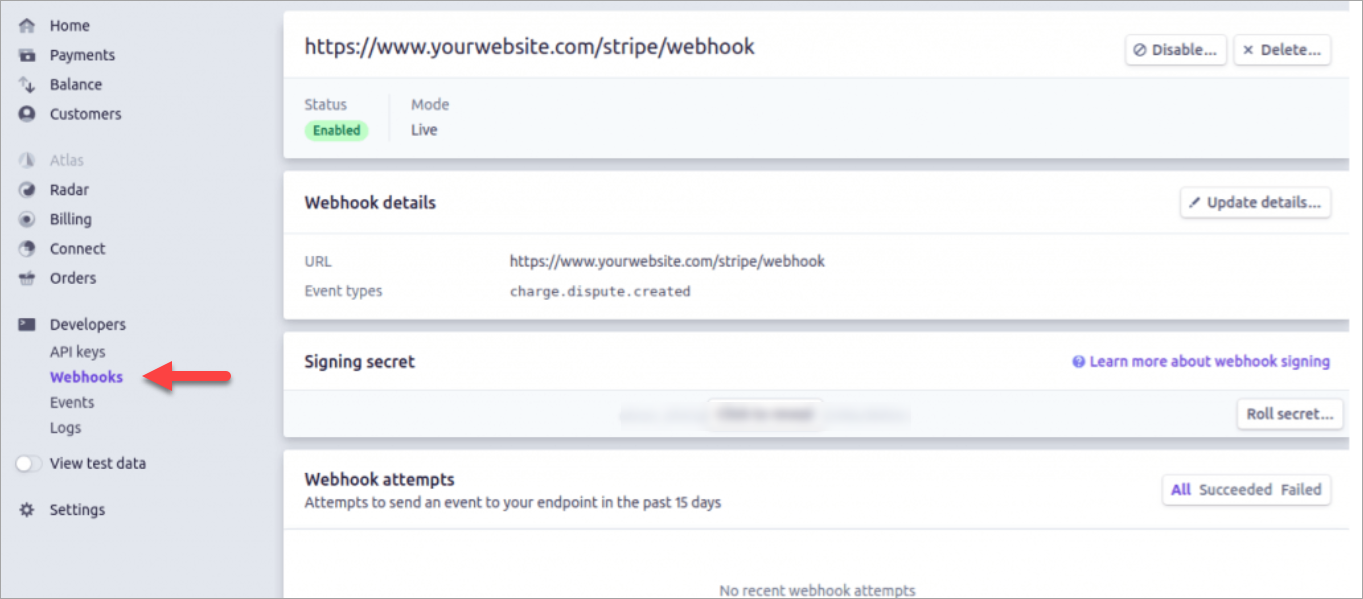
Stripe
Stripe is a payment processor that supports online payments, credit cards, recurring subscriptions and direct payouts to bank accounts.
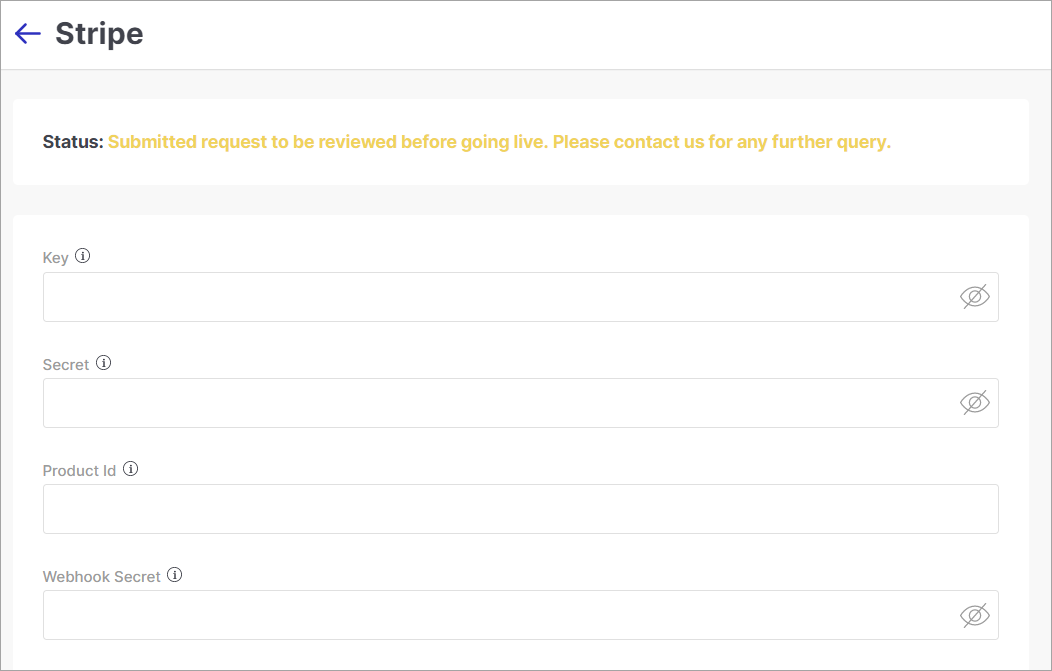
What will you need to integrate Stripe: Key, Secret, Product ID, Webhook Secret from your Stripe Dashboard

Rupifi
Rupifi enables businesses to avail credits and allows a 'Buy now, Pay later' system for making transactions and purchases. Fynd has partnered with Rupifi to provide credit to provide B2B credit for SMEs.
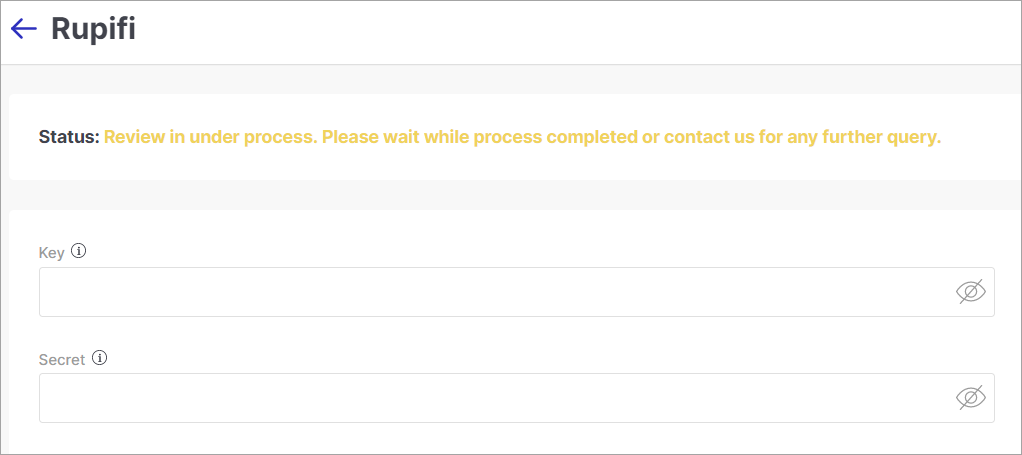
What will you need to integrate Rupifi: Key, Secret from your Rupifi Dashboard
Rupify helps businesses make purchases on credit on its Uniket platform.
Checkout.com
This payment gateway extension enables the utilization of Checkout.com's payment services through the convenient use of payment links. These links can be easily generated to represent the checkout amount, and they can be shared via email, SMS, or QR codes. Customers can seamlessly make payments using these links, enhancing the overall payment process.
What will you need to integrate JioPay: Key & Secret from Checkout.com.
JioPay
JioPay extension facilitates payment gateway support for Advanced Payment S2S (Server-to-Server) transactions. One notable addition is the JioOPay link as an extension, which forms an integral part of the extension. With this link, customers can receive payment requests and proceed to make payments using various payment methods, thereby enhancing the overall transaction experience.
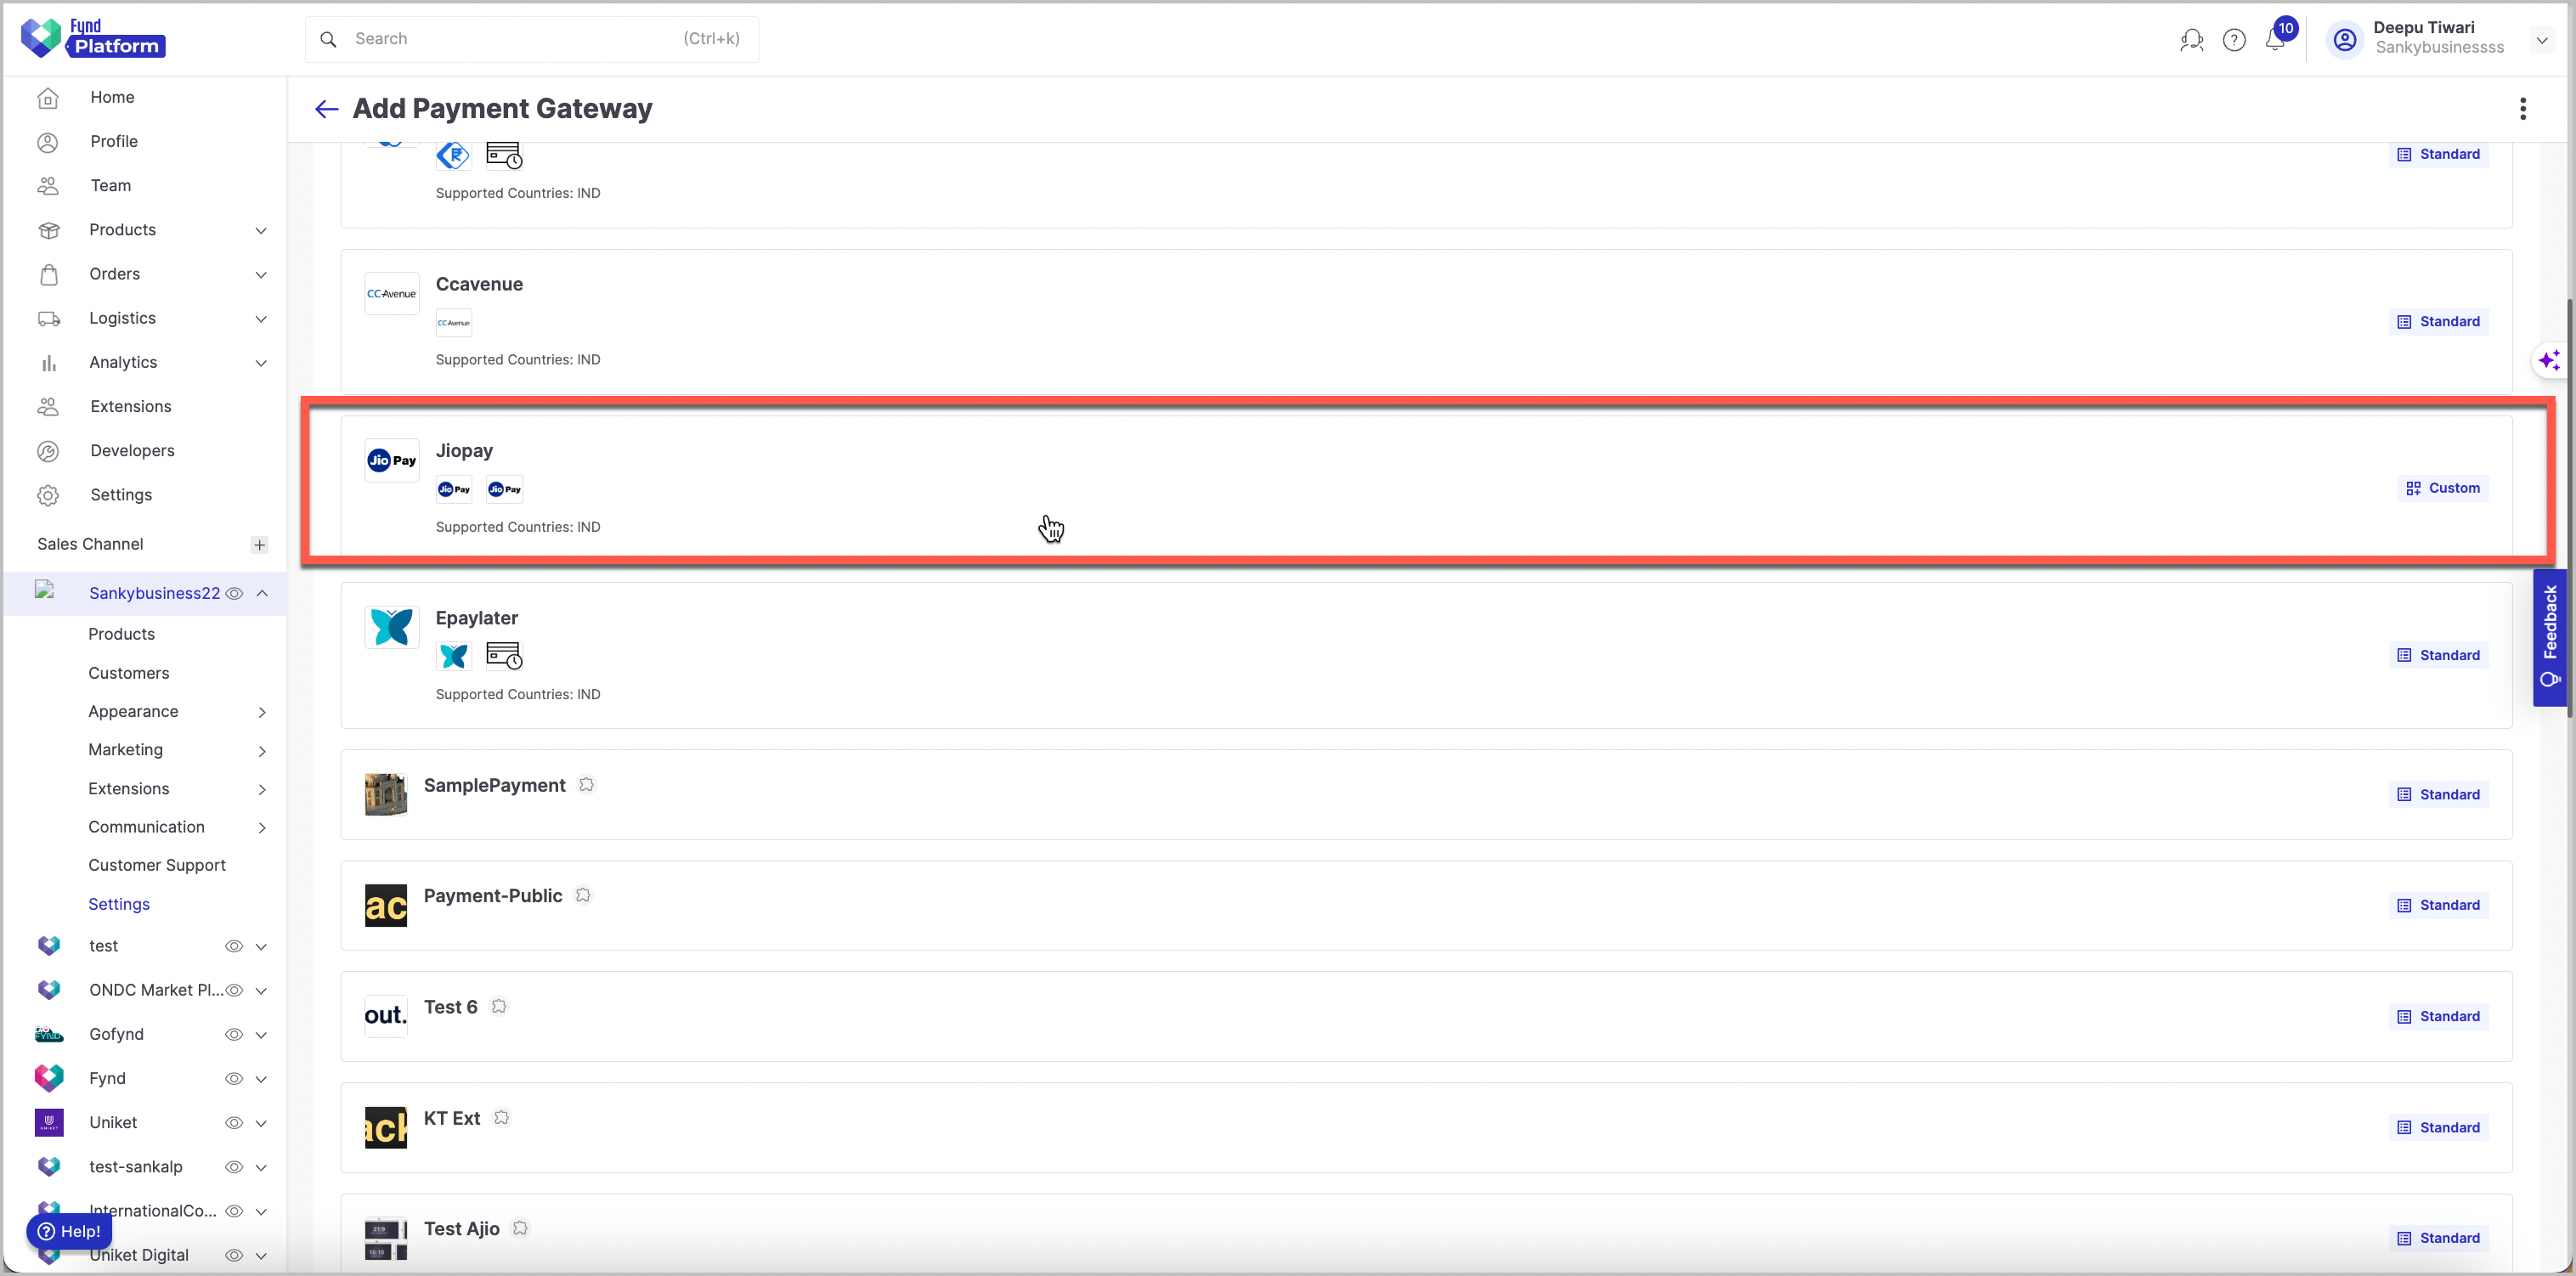
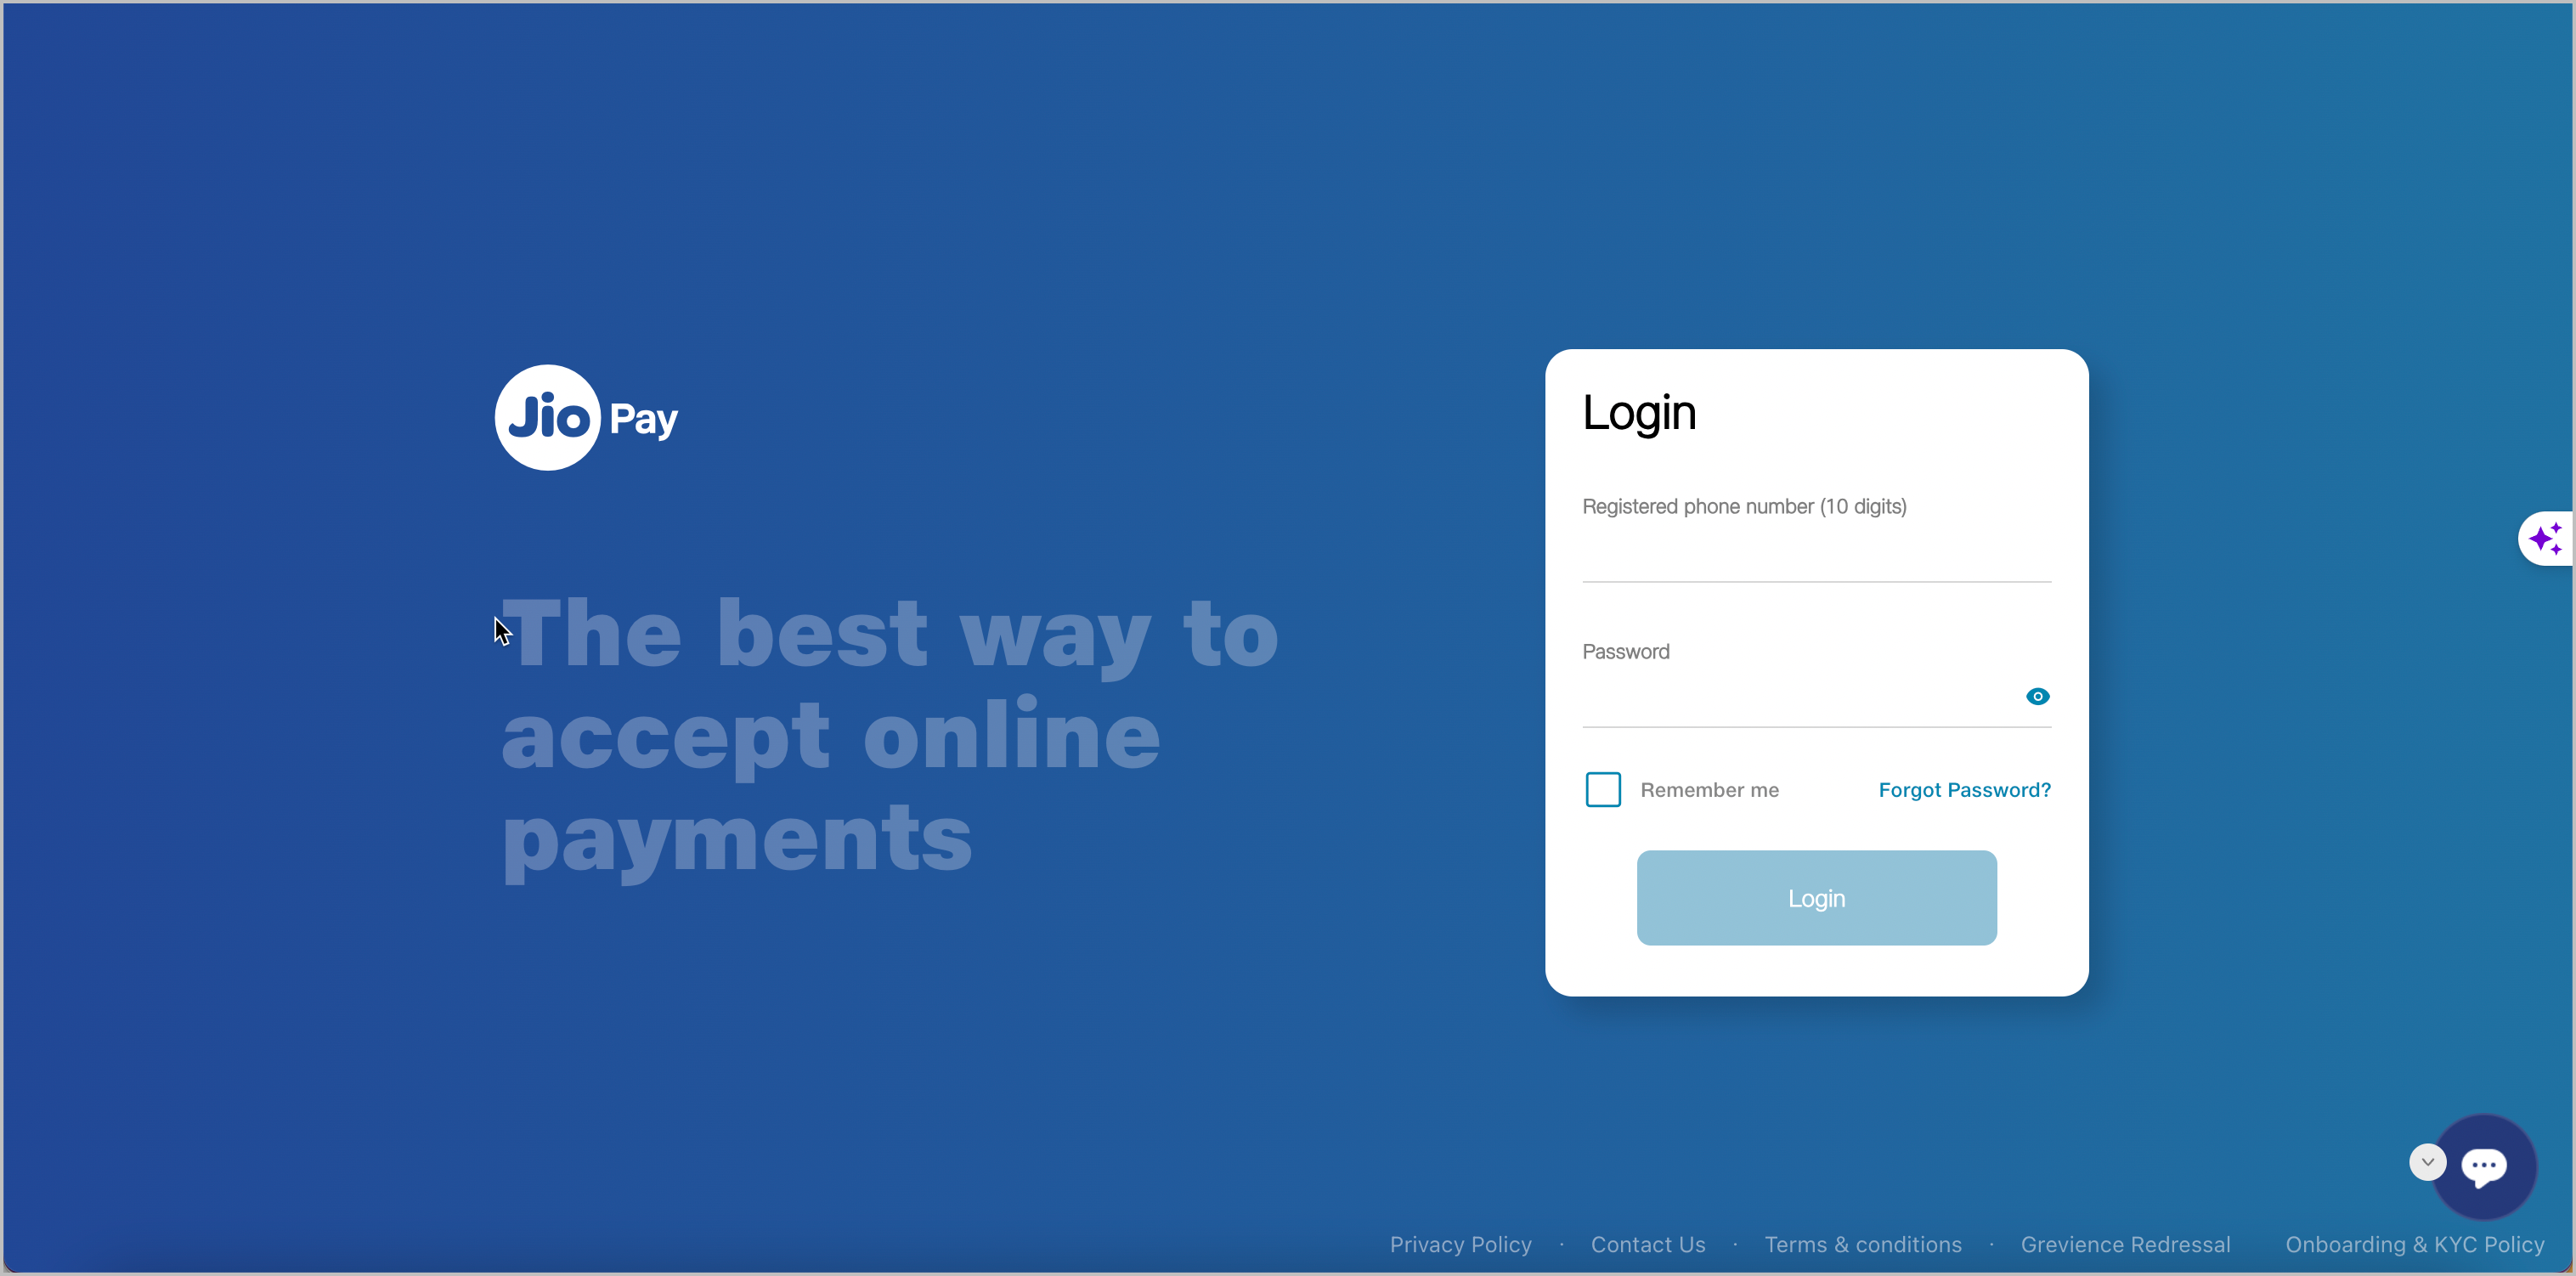
What will you need to integrate JioPay: Key & Secret from JioPay account.
Offline Payment
Use this section to avail customers to make a cash payment upon getting your order. Turn ON the toggle button to enable this option and click Save.
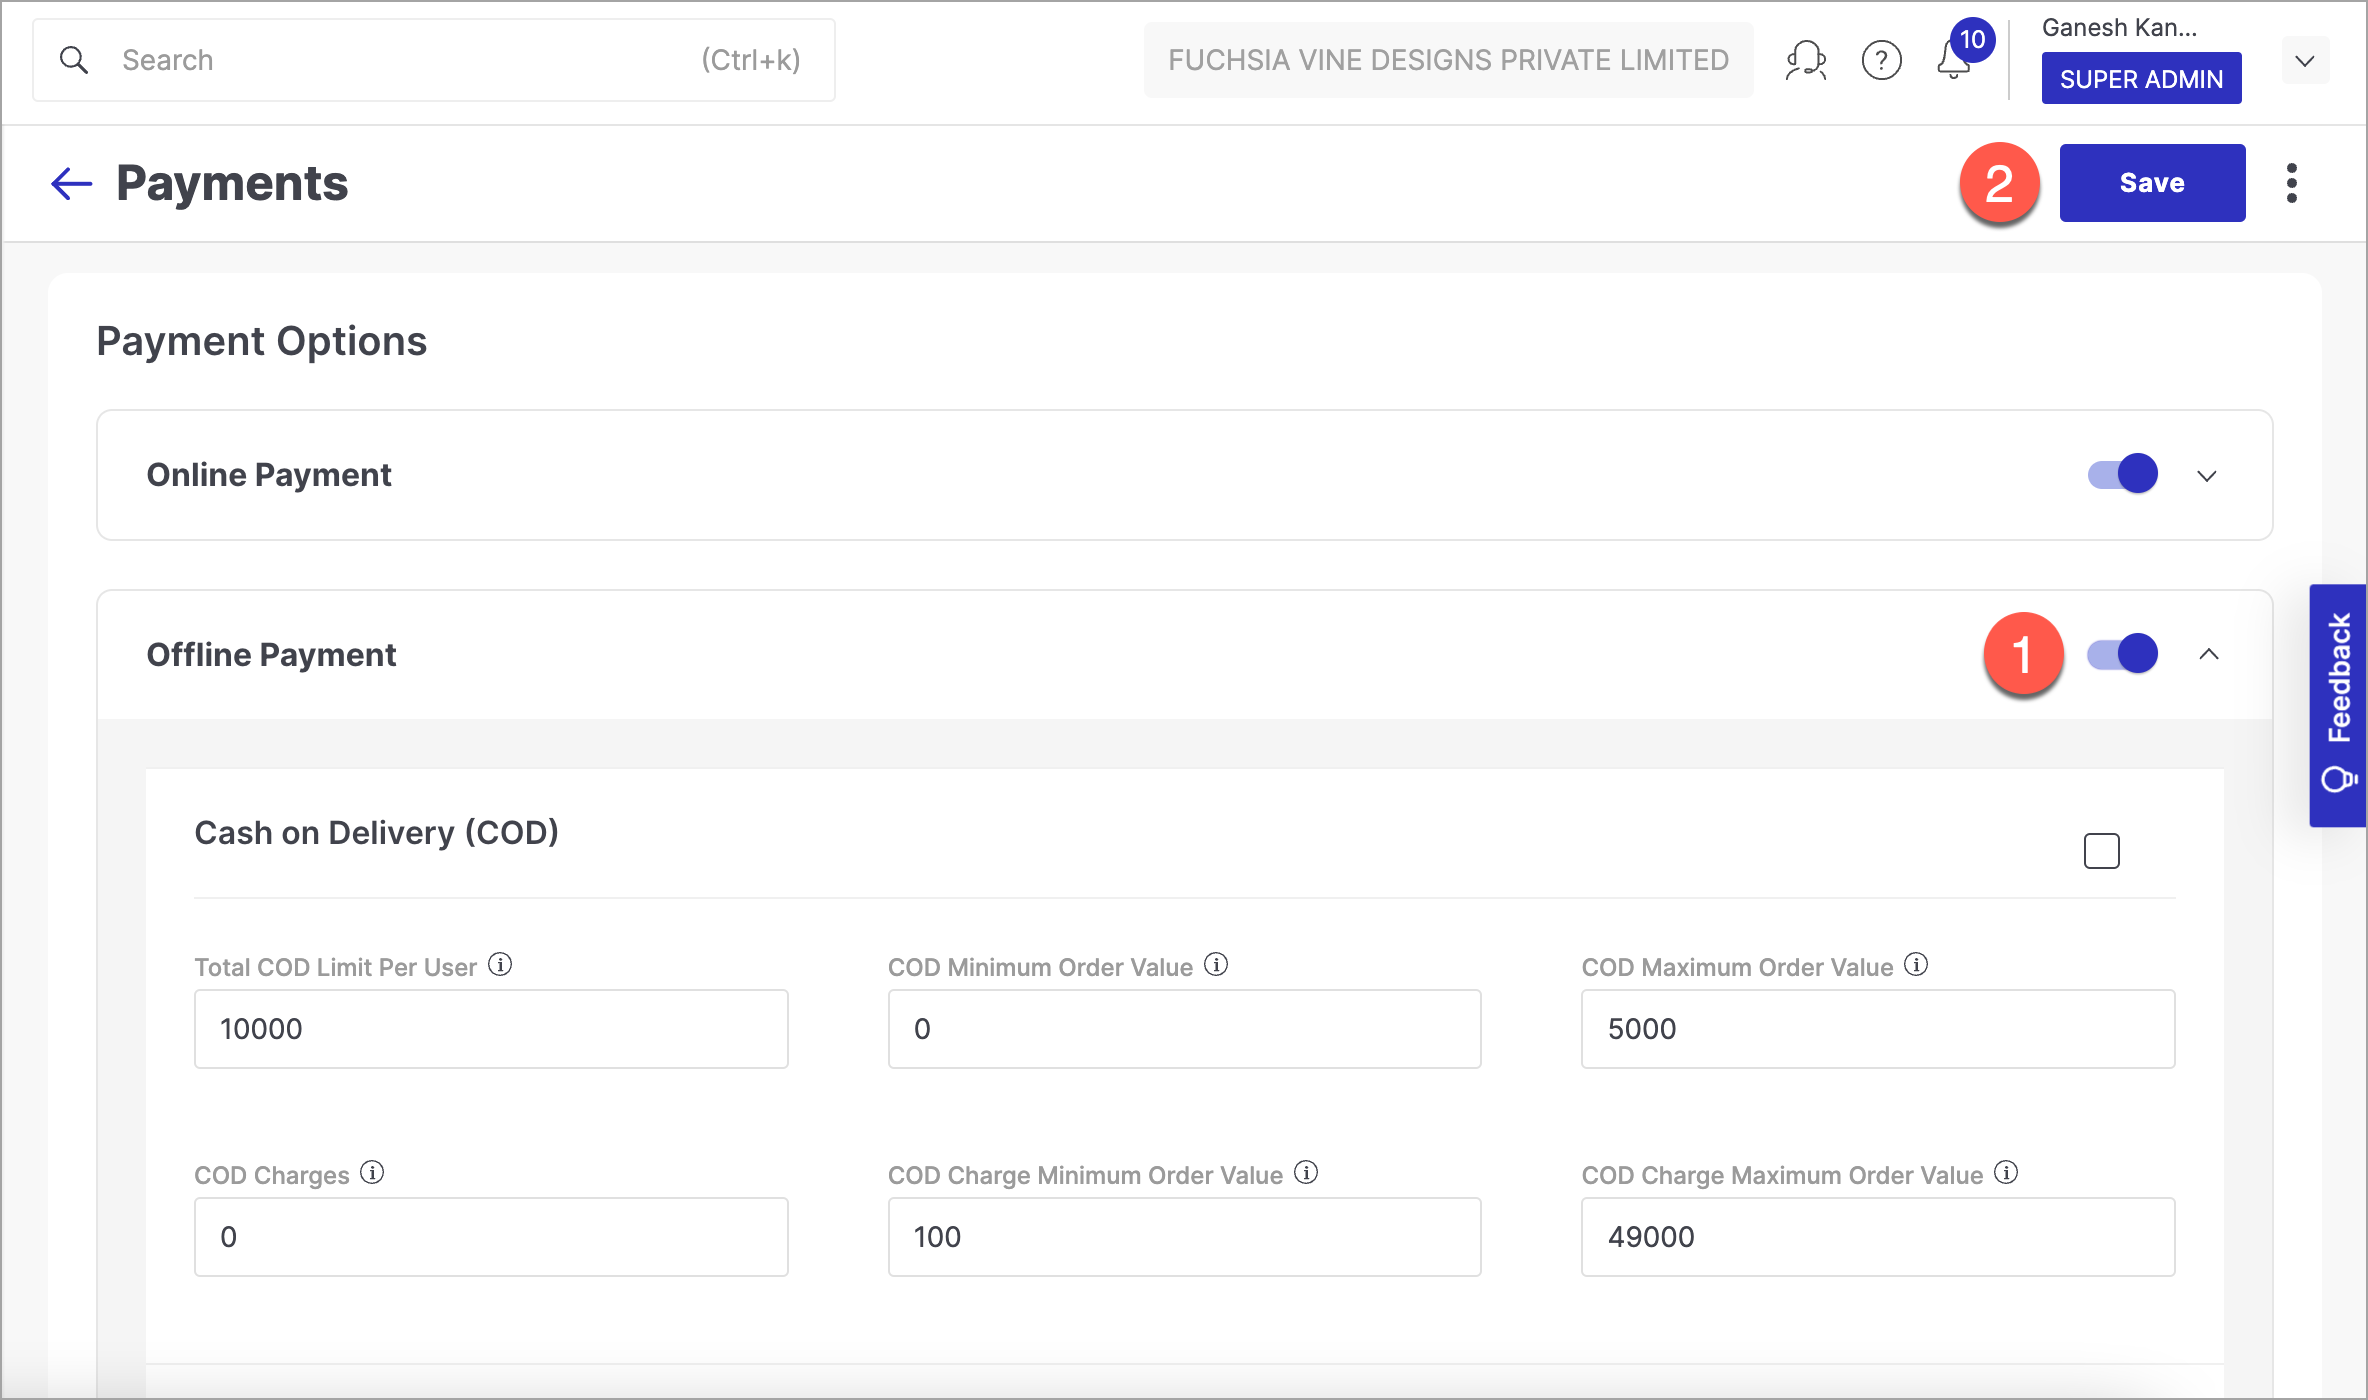
Cash on Delivery (COD) is permitted only when:
- The customer is a registered user. COD will not be available for guest users.
- The delivery partner has the capability to collect COD payments upon delivery at a serviceable PIN code.
- The COD amount is below the maximum threshold.
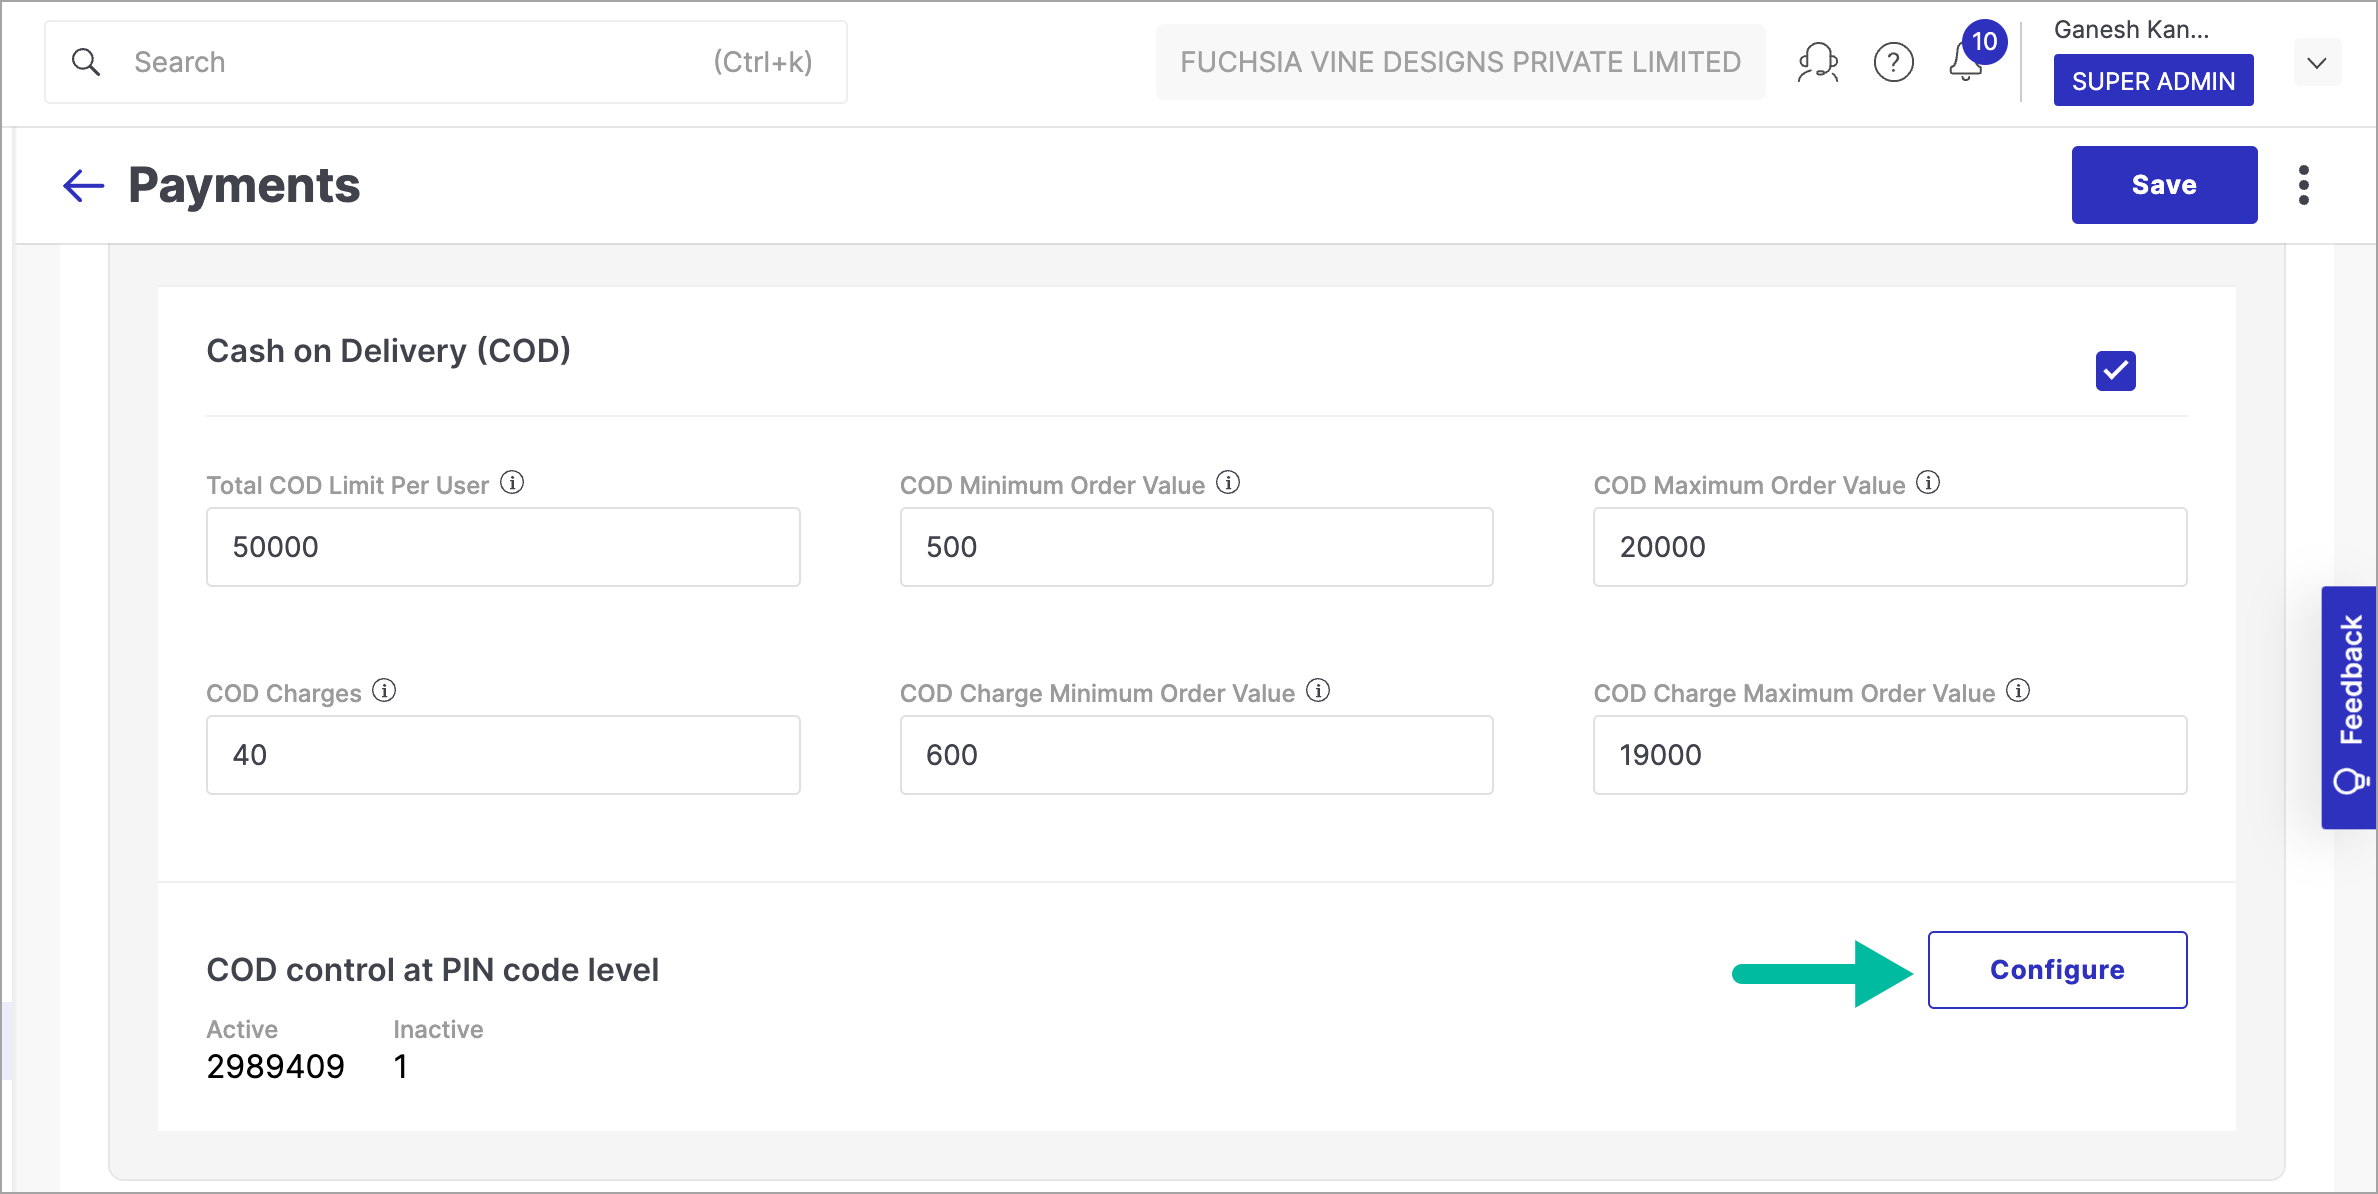
Setting Up COD Configurations
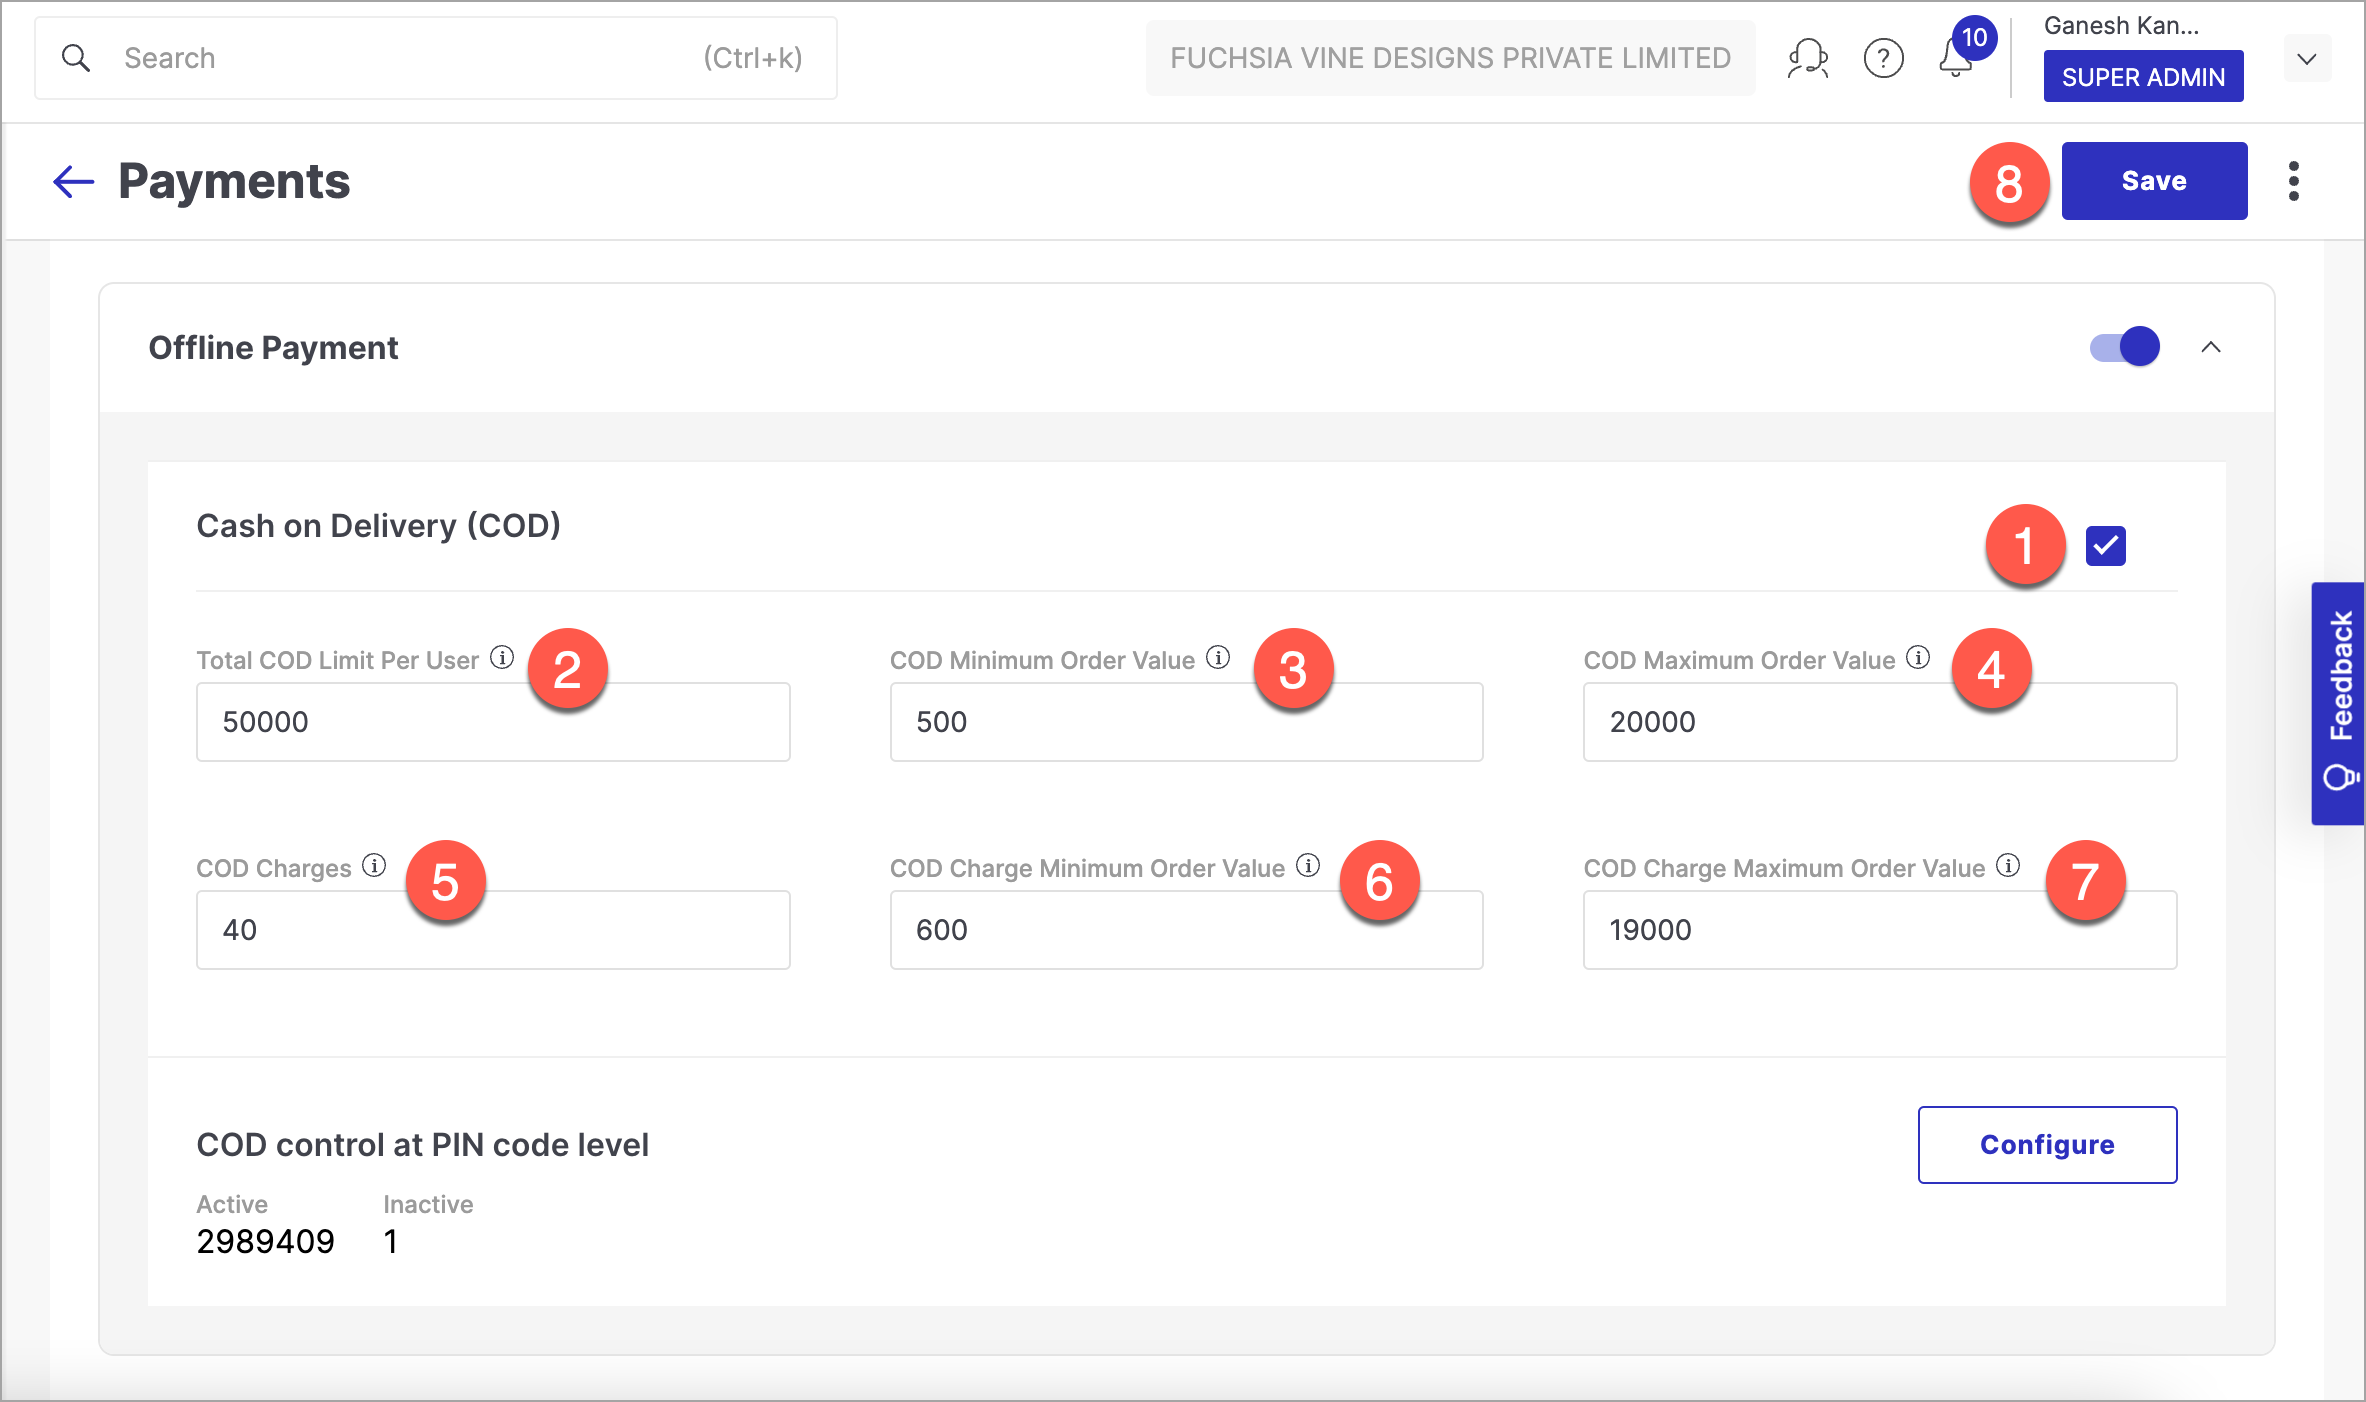
- Tick the checkbox if you wish to opt COD in offline payments.
- Total COD Limit Per User - It is the total COD limit set for each user. This limit keeps decreasing whenever a customer places a COD order, and replenishes after the order is successfully delivered. To learn more, read how to configure COD for specific customers.
- COD Minimum Order Value - The minimum order value below which COD is not applicable. For e.g., if you set this limit as ₹500, any order value that is below ₹500 will not get a COD option during checkout.
- COD Maximum Order Value - The maximum order value above which COD is not applicable. For e.g., if you set this limit as ₹20,000, any order value that is above ₹20,000 will not get a COD option during checkout.
- COD Charges - It is the additional fee customers will need to pay when they choose COD as a payment option at checkout.
- COD Charge Minimum Order Value - COD charges will be applicable if the order value is greater than or equal to the amount set here.
- COD Charge Maximum Order Value - COD charges will be applicable if the order value is less than or equal to the amount set here.
- Upon clicking this button, your COD configurations will be saved.
Cash on Delivery at PIN Code level
Using this feature, you can activate/deactivate COD option for desired PIN Code(s). Click Configure and use following ways which are explained below.
Adding Individual PIN Code(s)
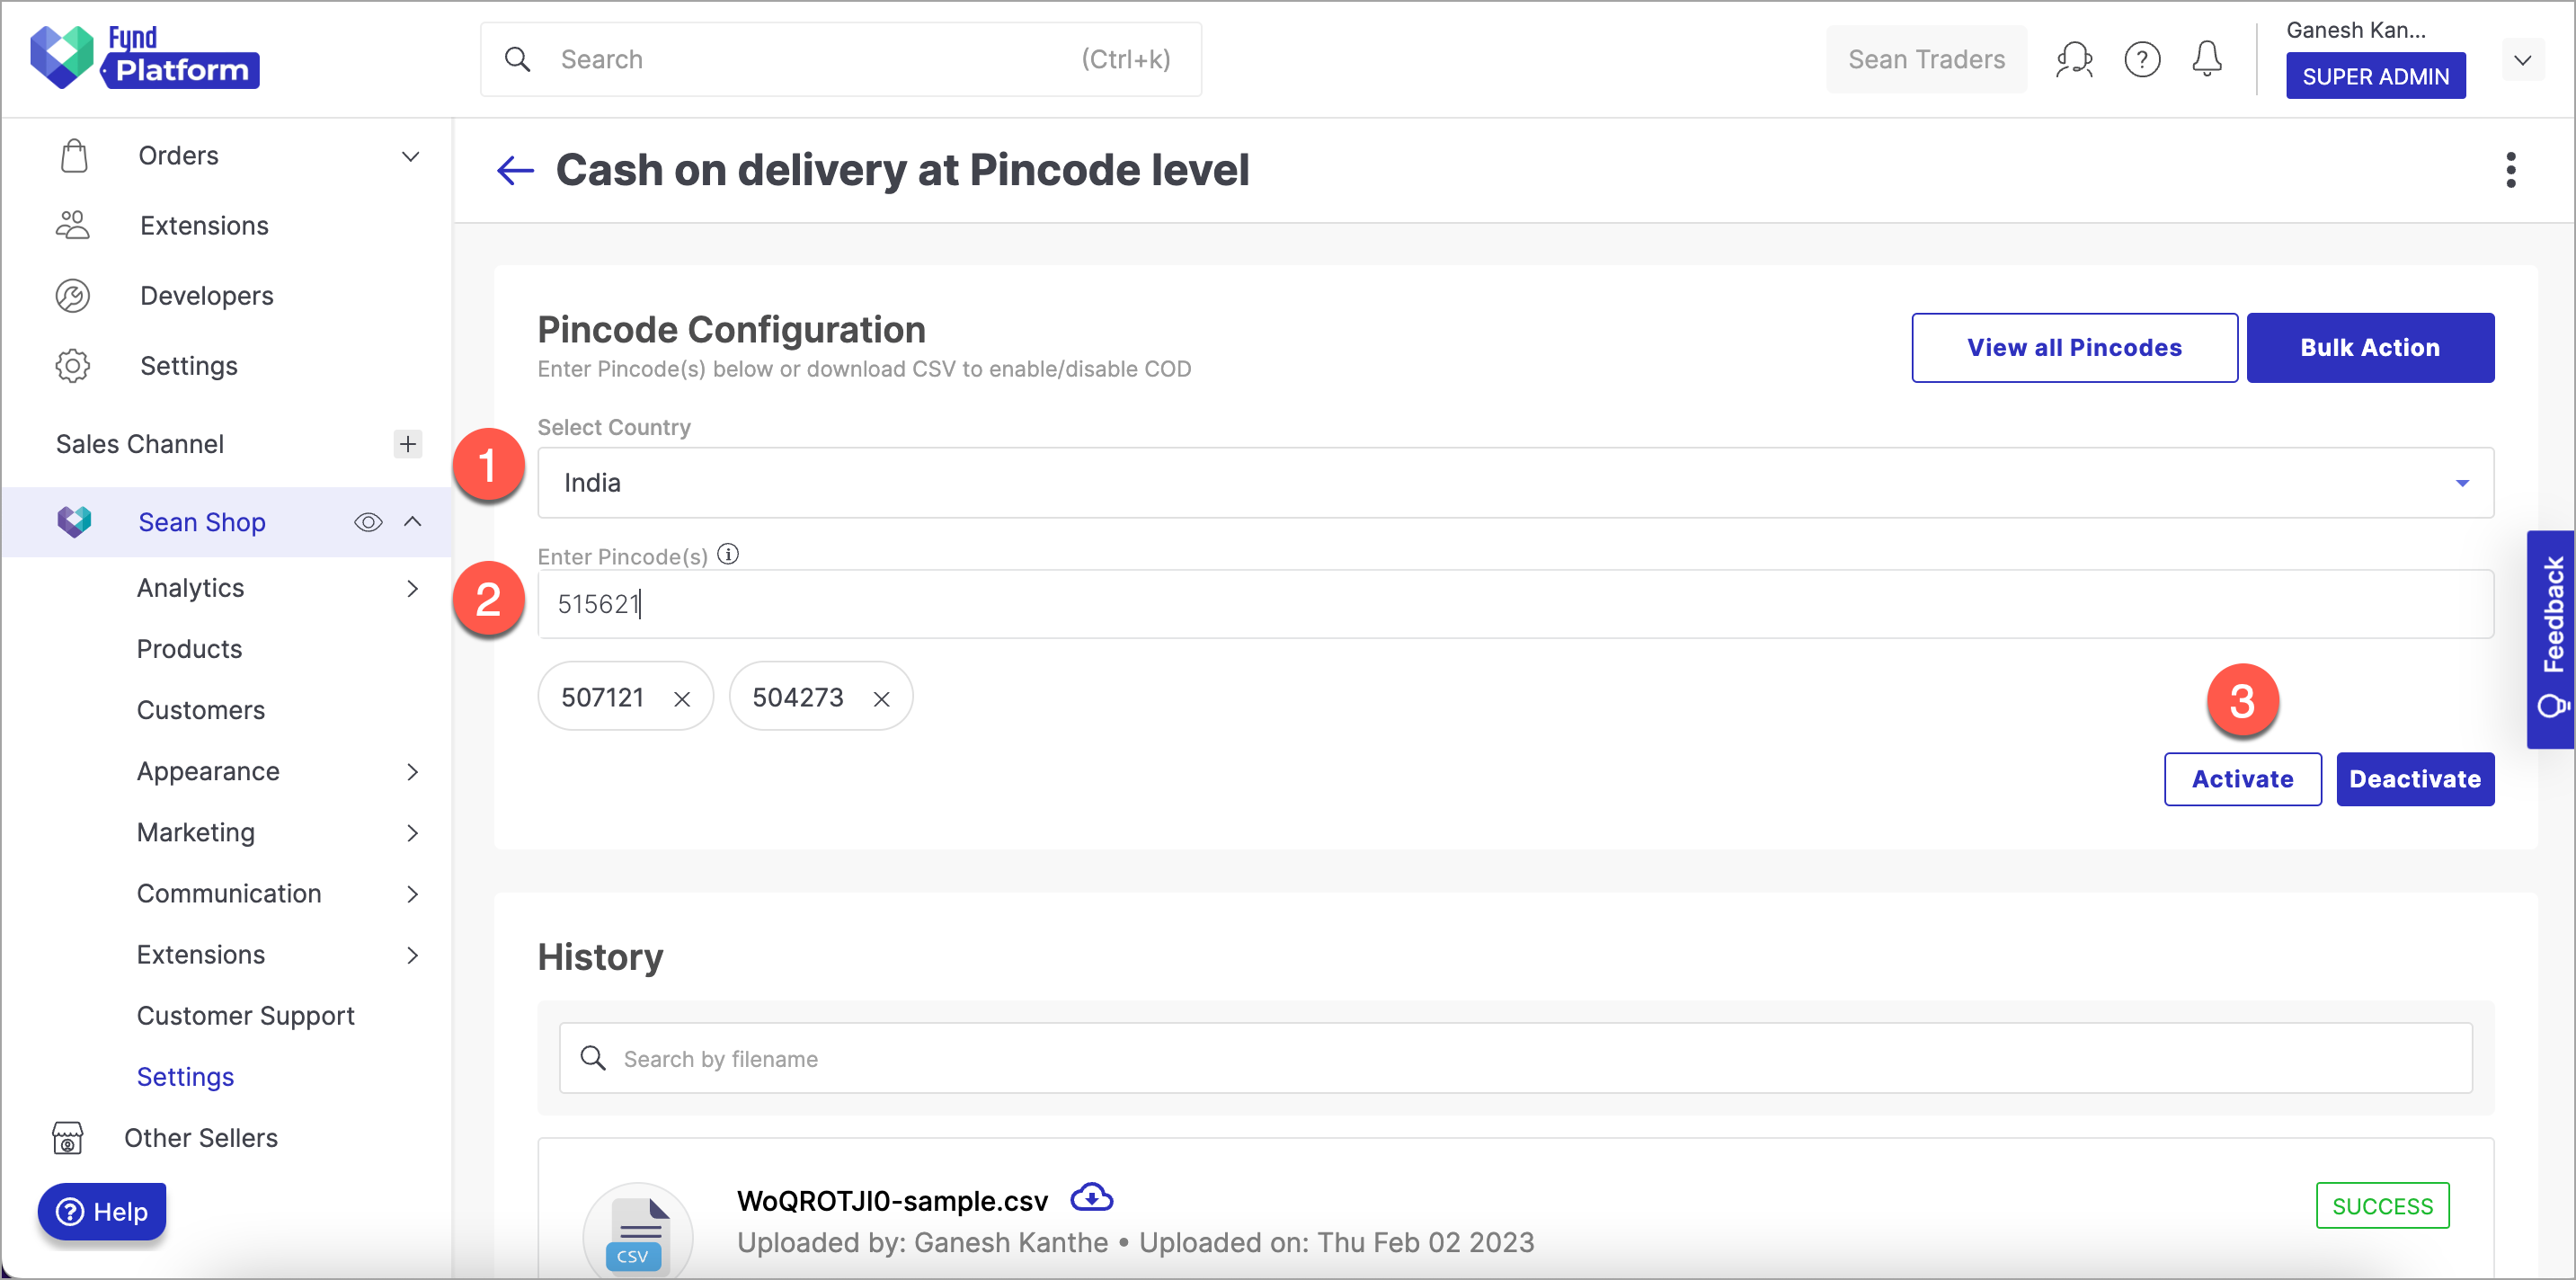
Select the country from the dropdown. Here, we have selected India.
Add PIN Code and press 'Enter' key. Repeat the same step if you wish to add multiple PIN Codes.
Click Activate to enable COD for added PIN Code.
noteThis method supports processing of maximum 10 PIN Codes. If you wish to process more than 10 PIN Codes, please use Bulk Action which is explained below.
Adding PIN Codes in Bulk
Click Bulk Action.
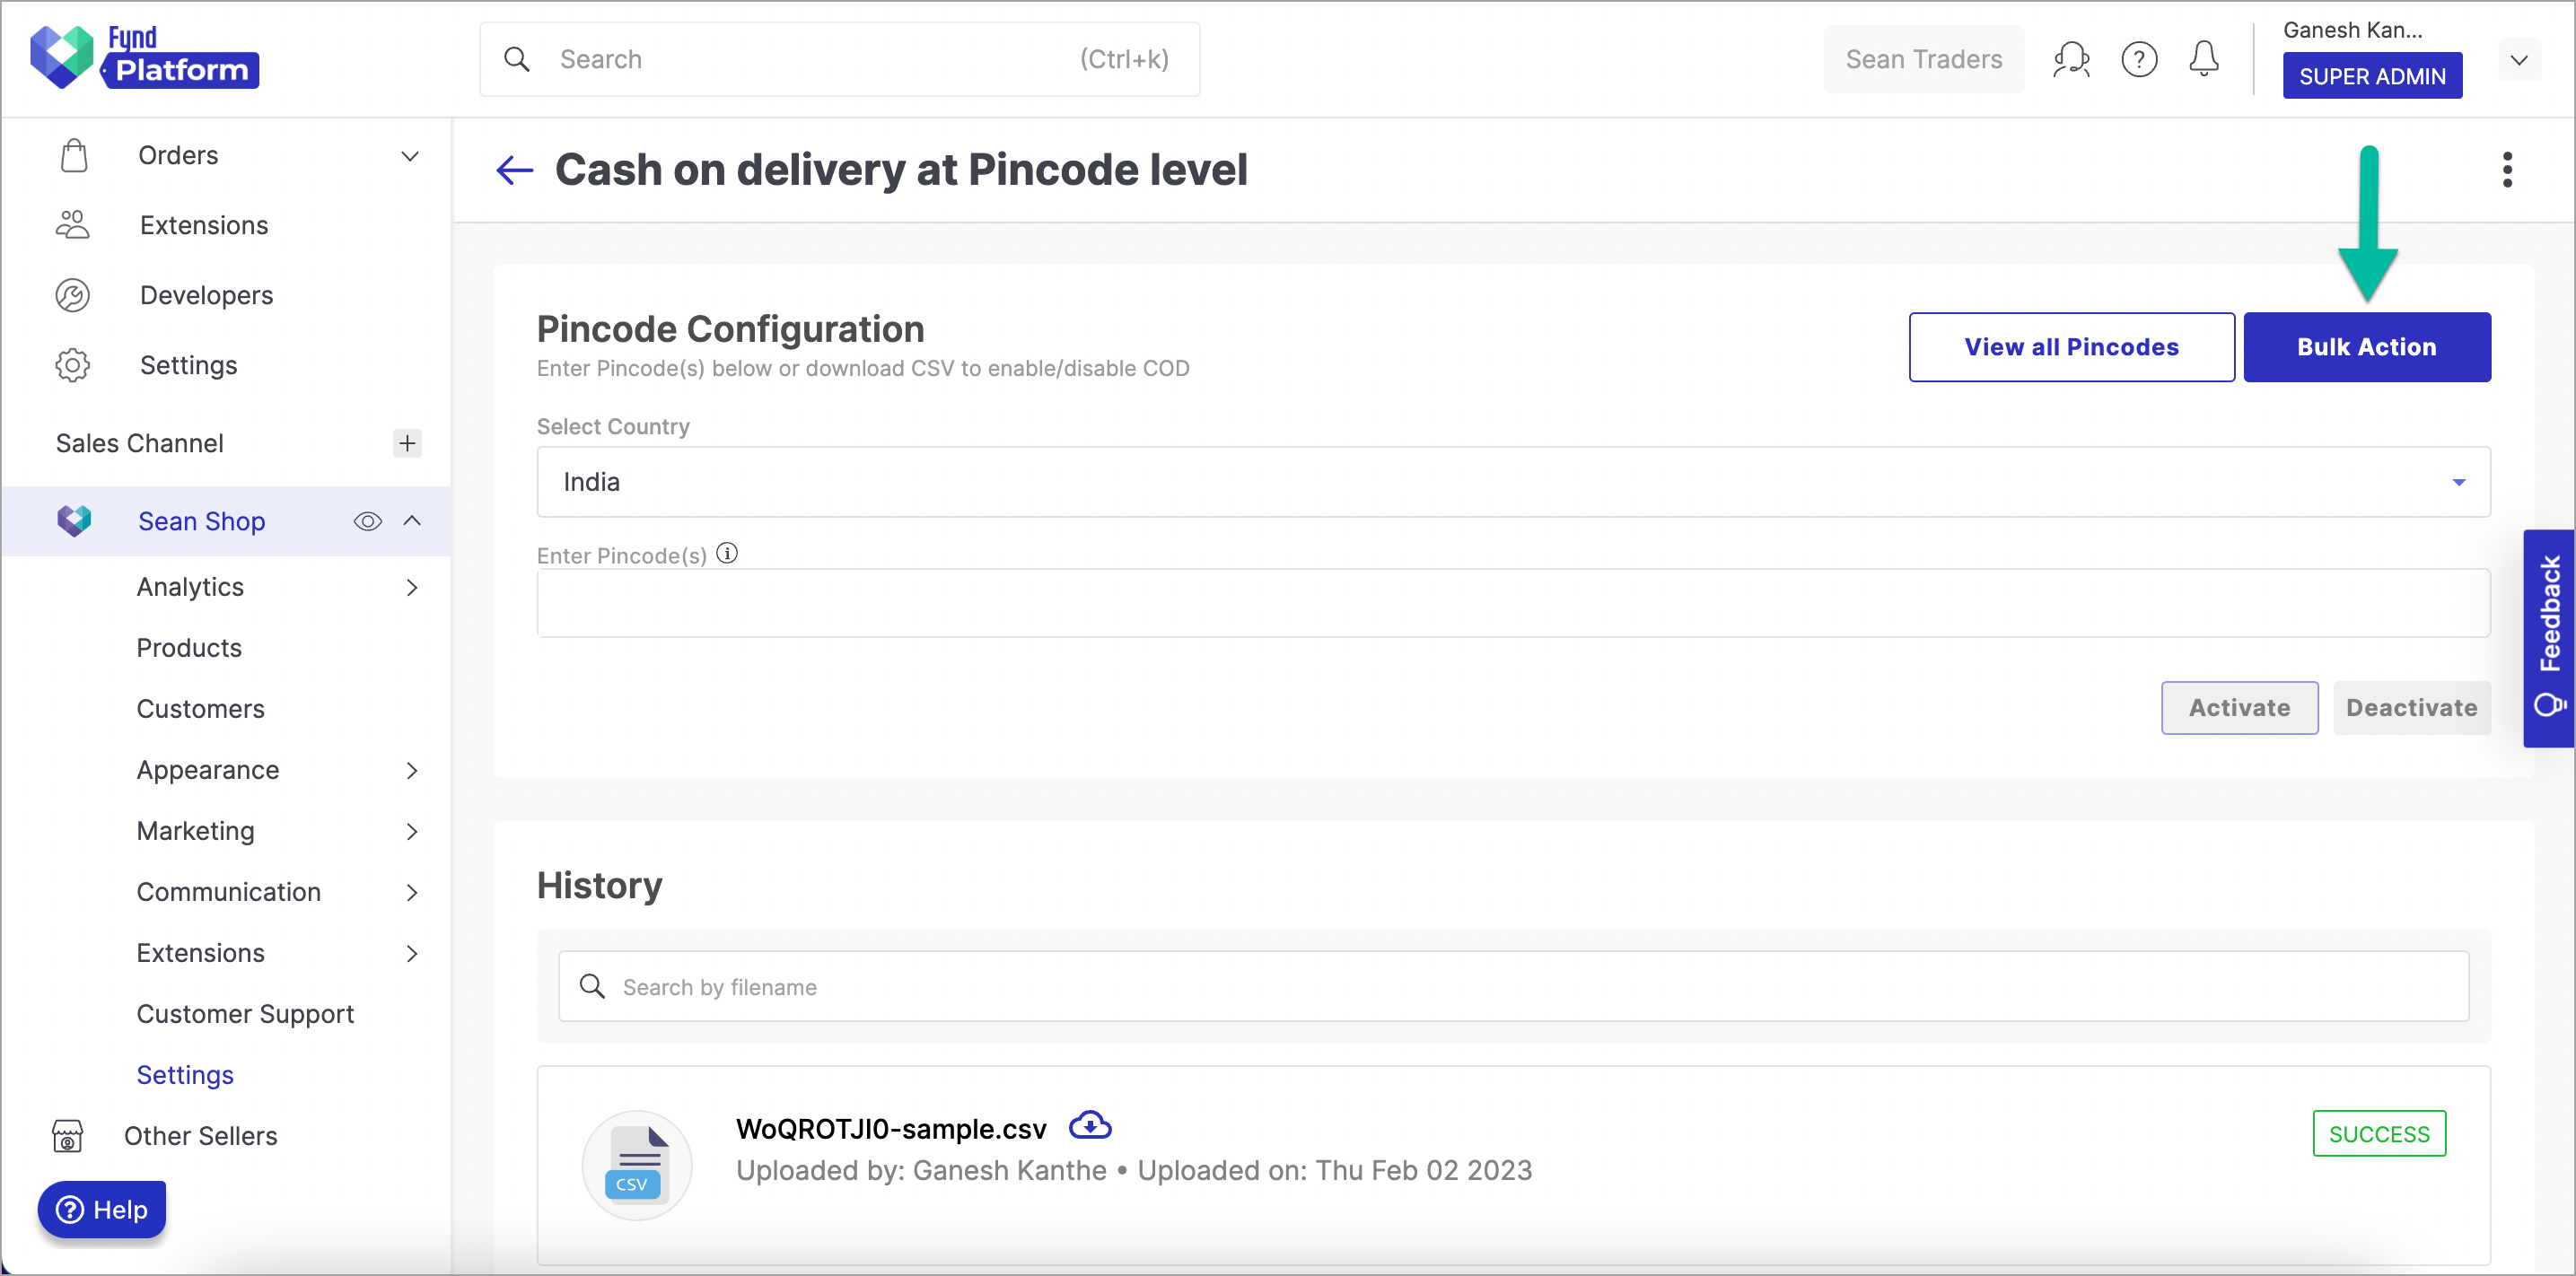
Figure 40: Clicking Bulk Action Button Click Download. It will download a CSV template file.
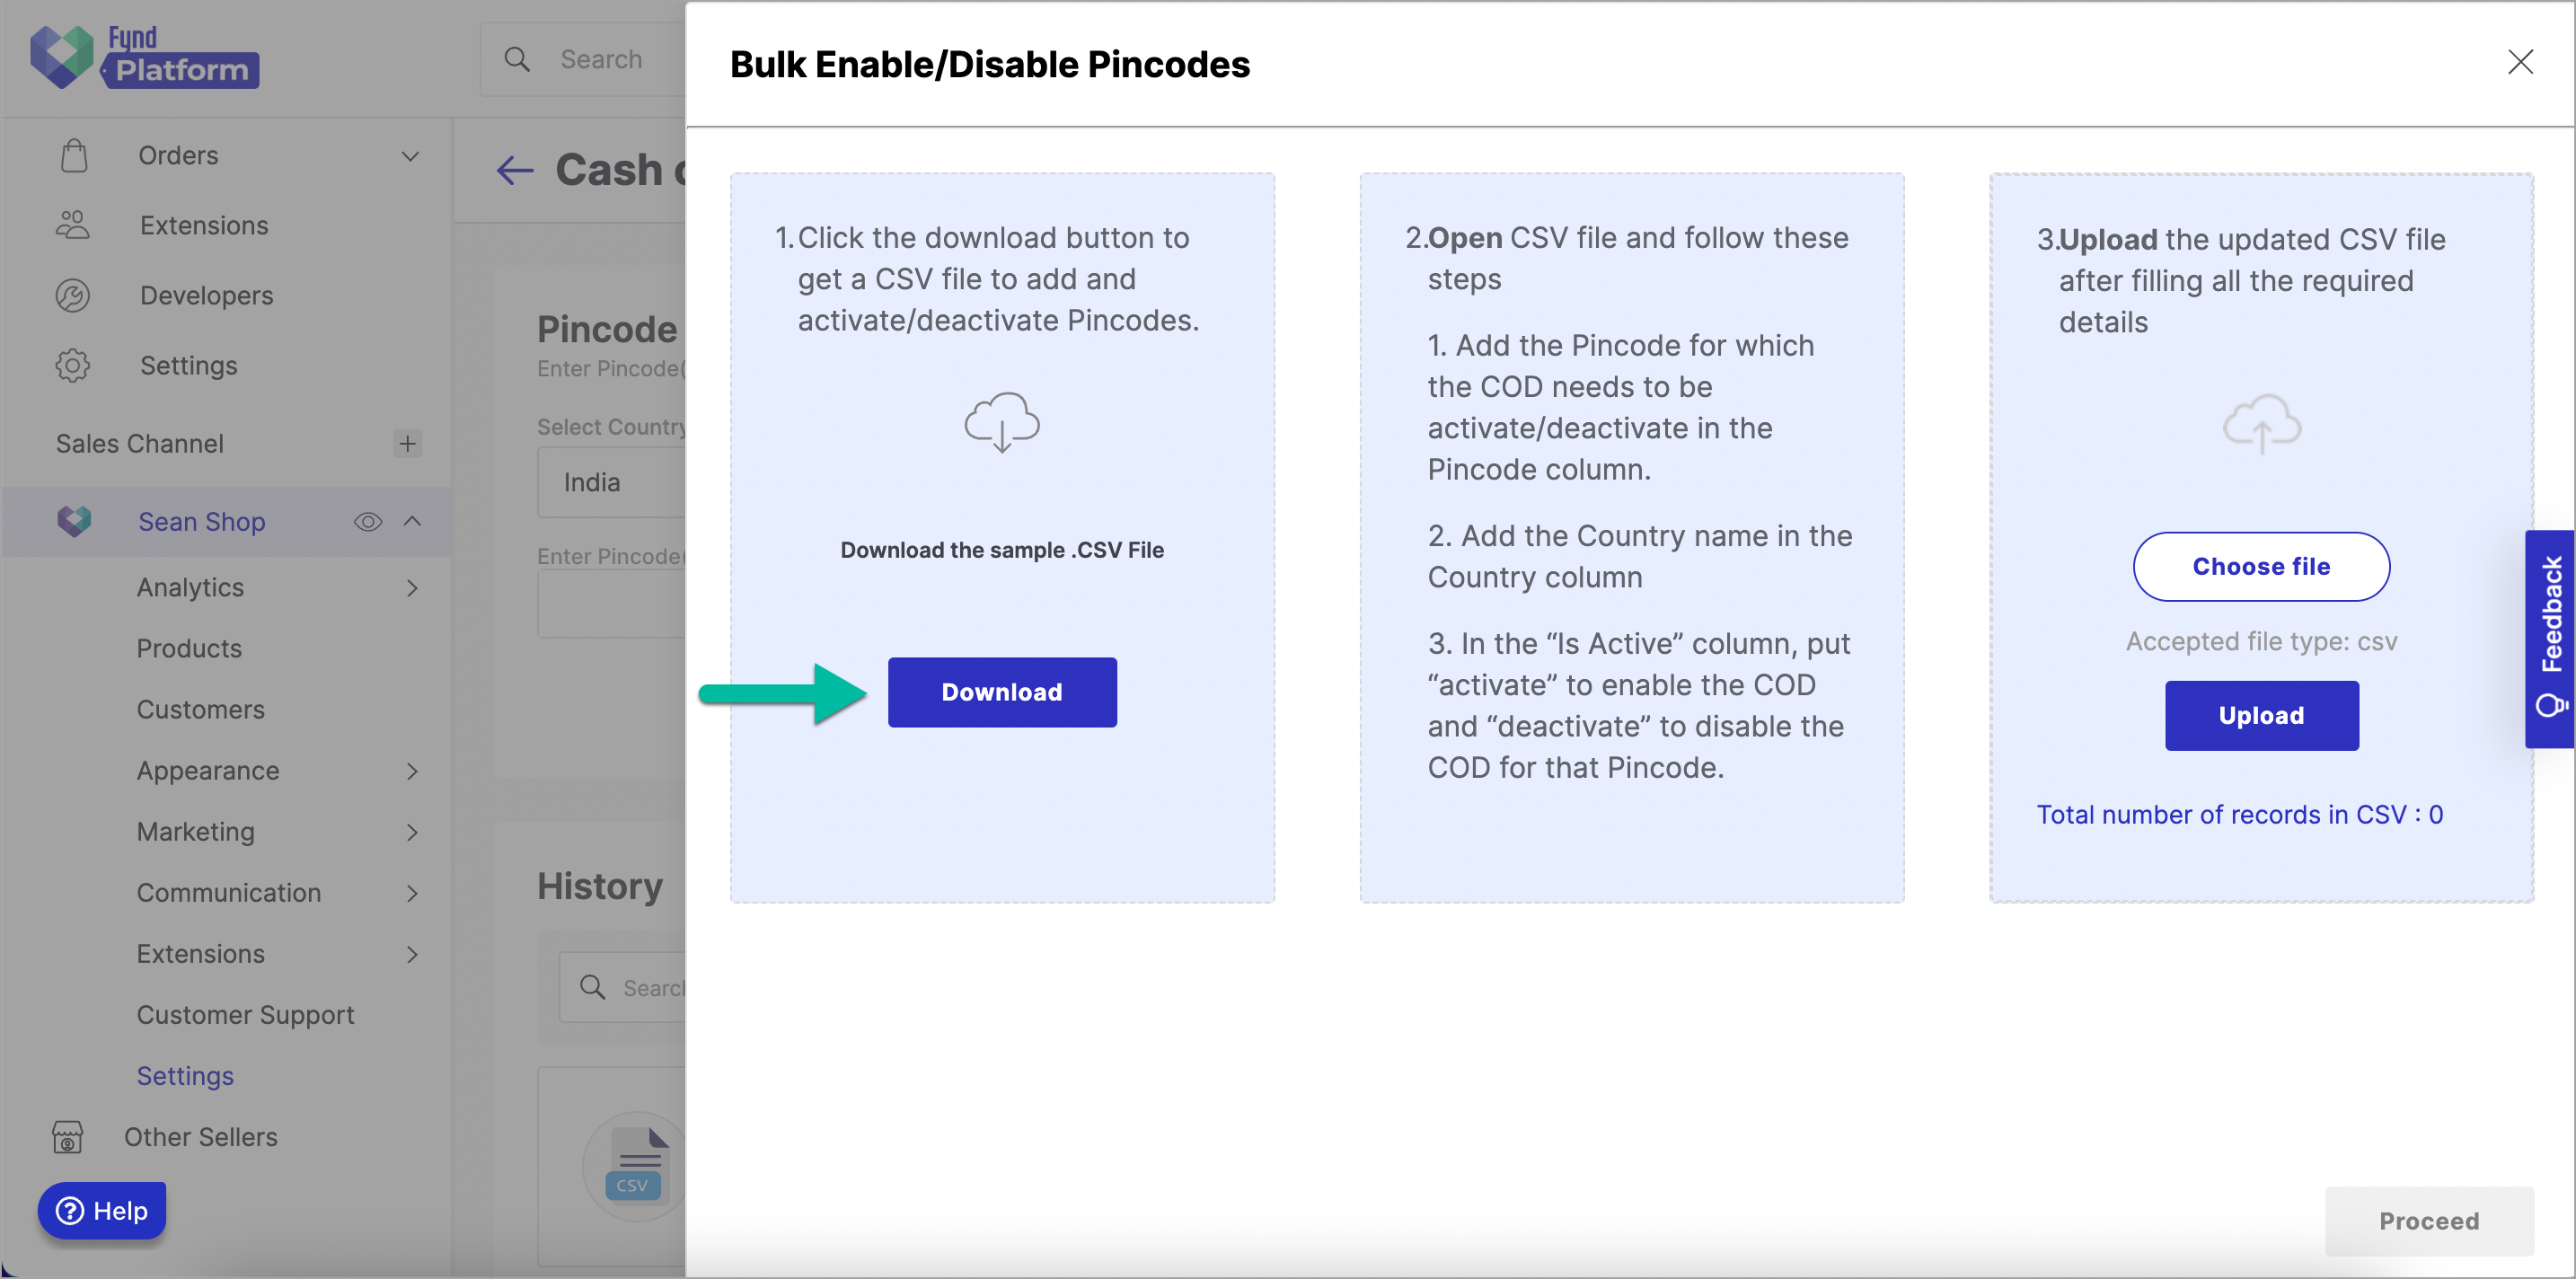
Figure 41: Clicking Download Button Open the sample file.
Fill details like Pincode, Country, and Is Active. Only 'activate' and 'deactivate' values are allowed for Is Active attribute.
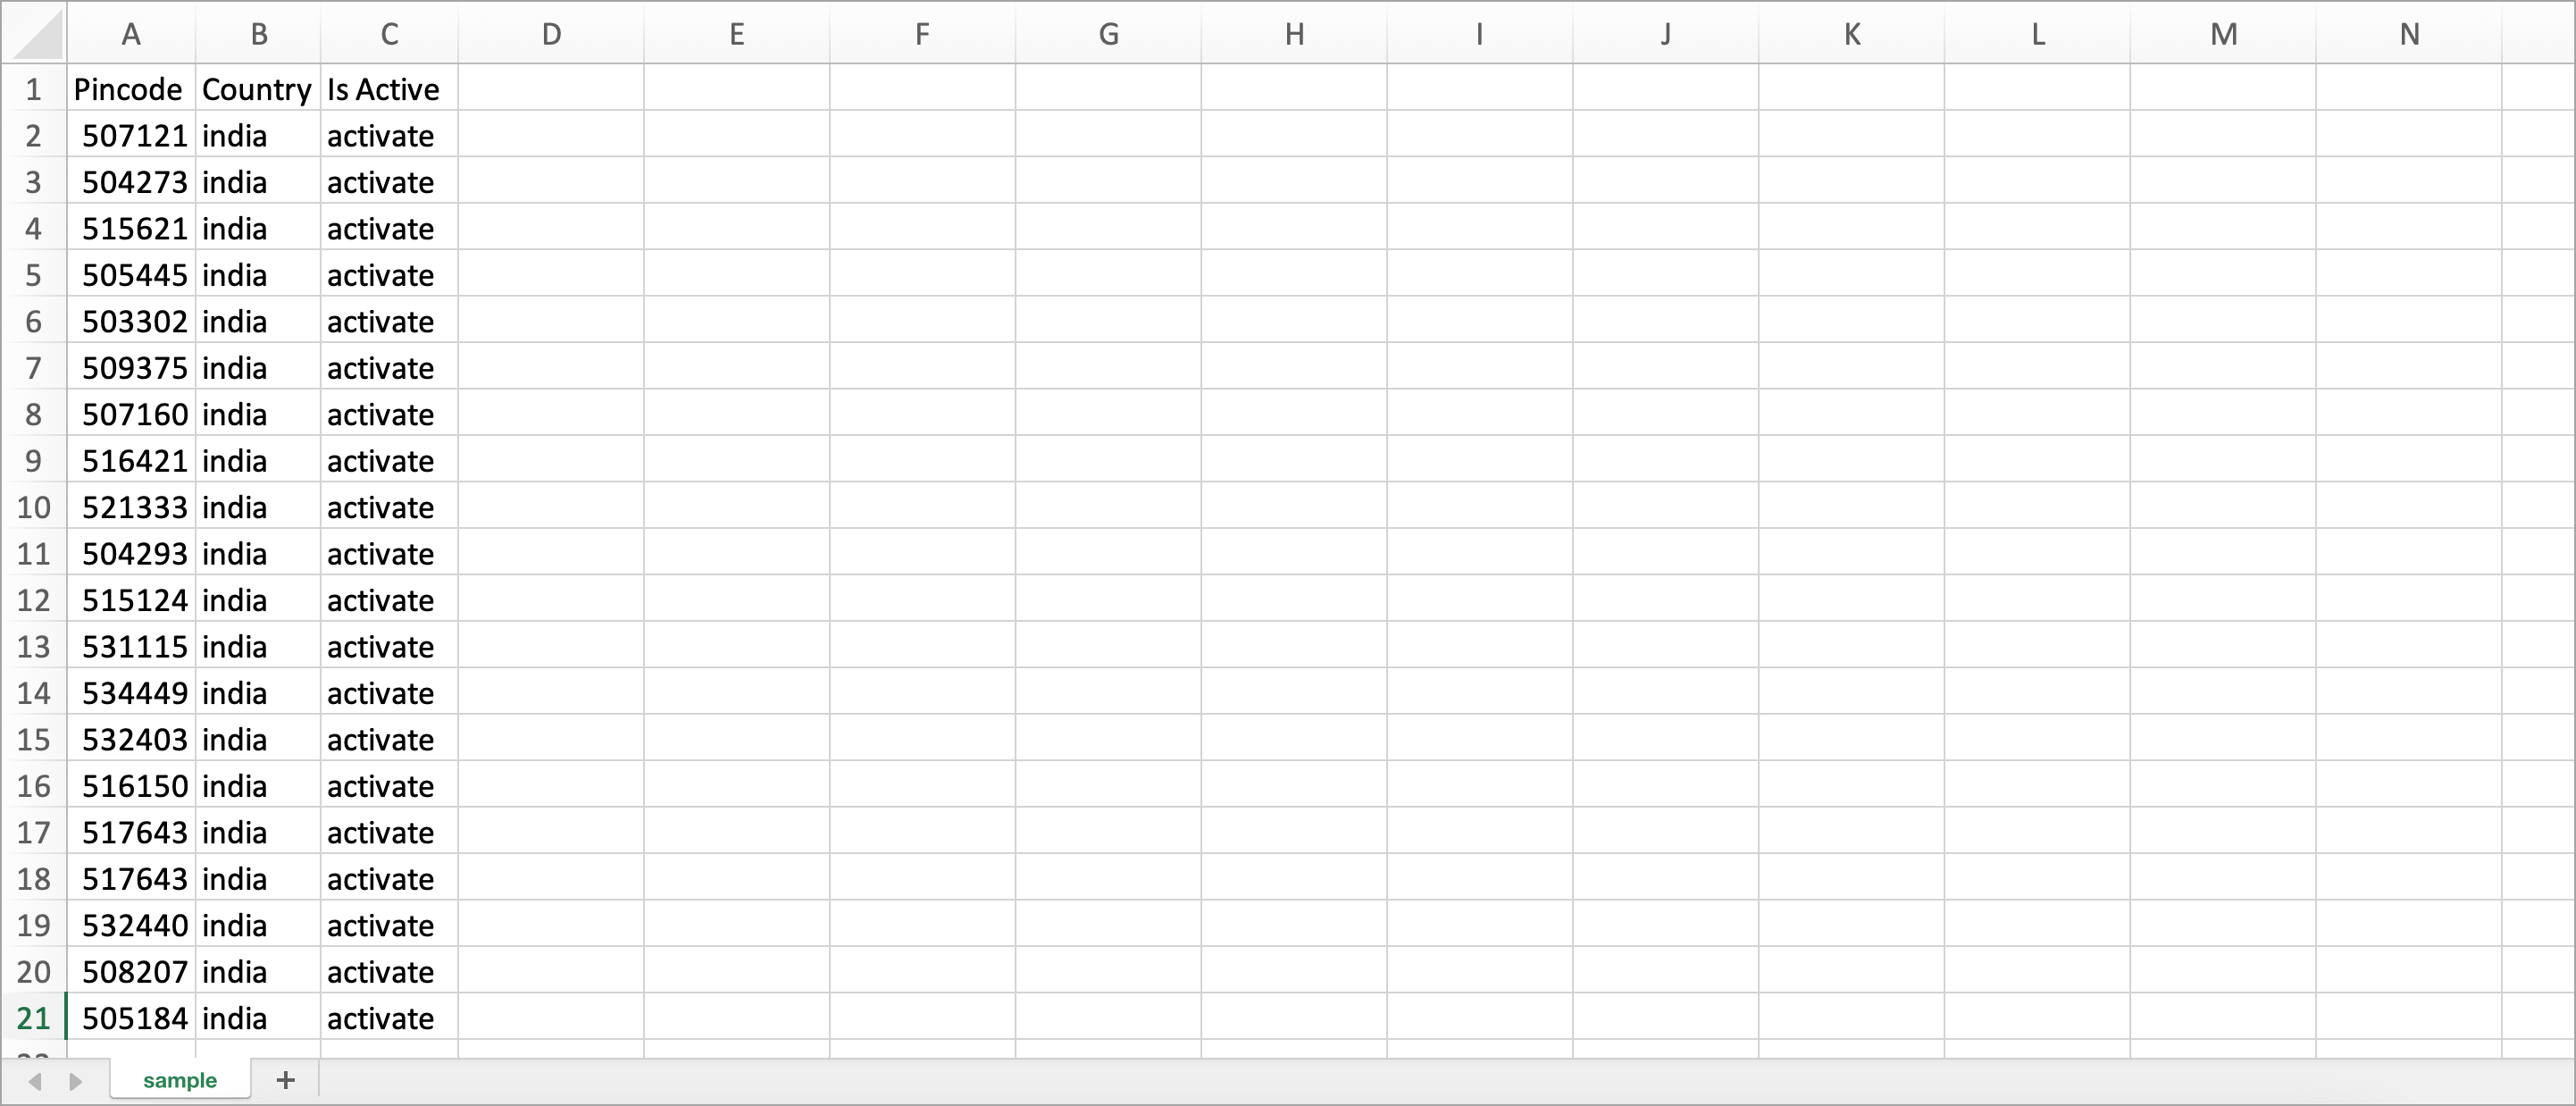
Figure 42: Details of PIN Codes
Add 'activate' to enable COD for particular PIN Code or add 'deactivate' to disable COD for the same.
Save the file in your system.
Click Choose file to select the saved file from your system.
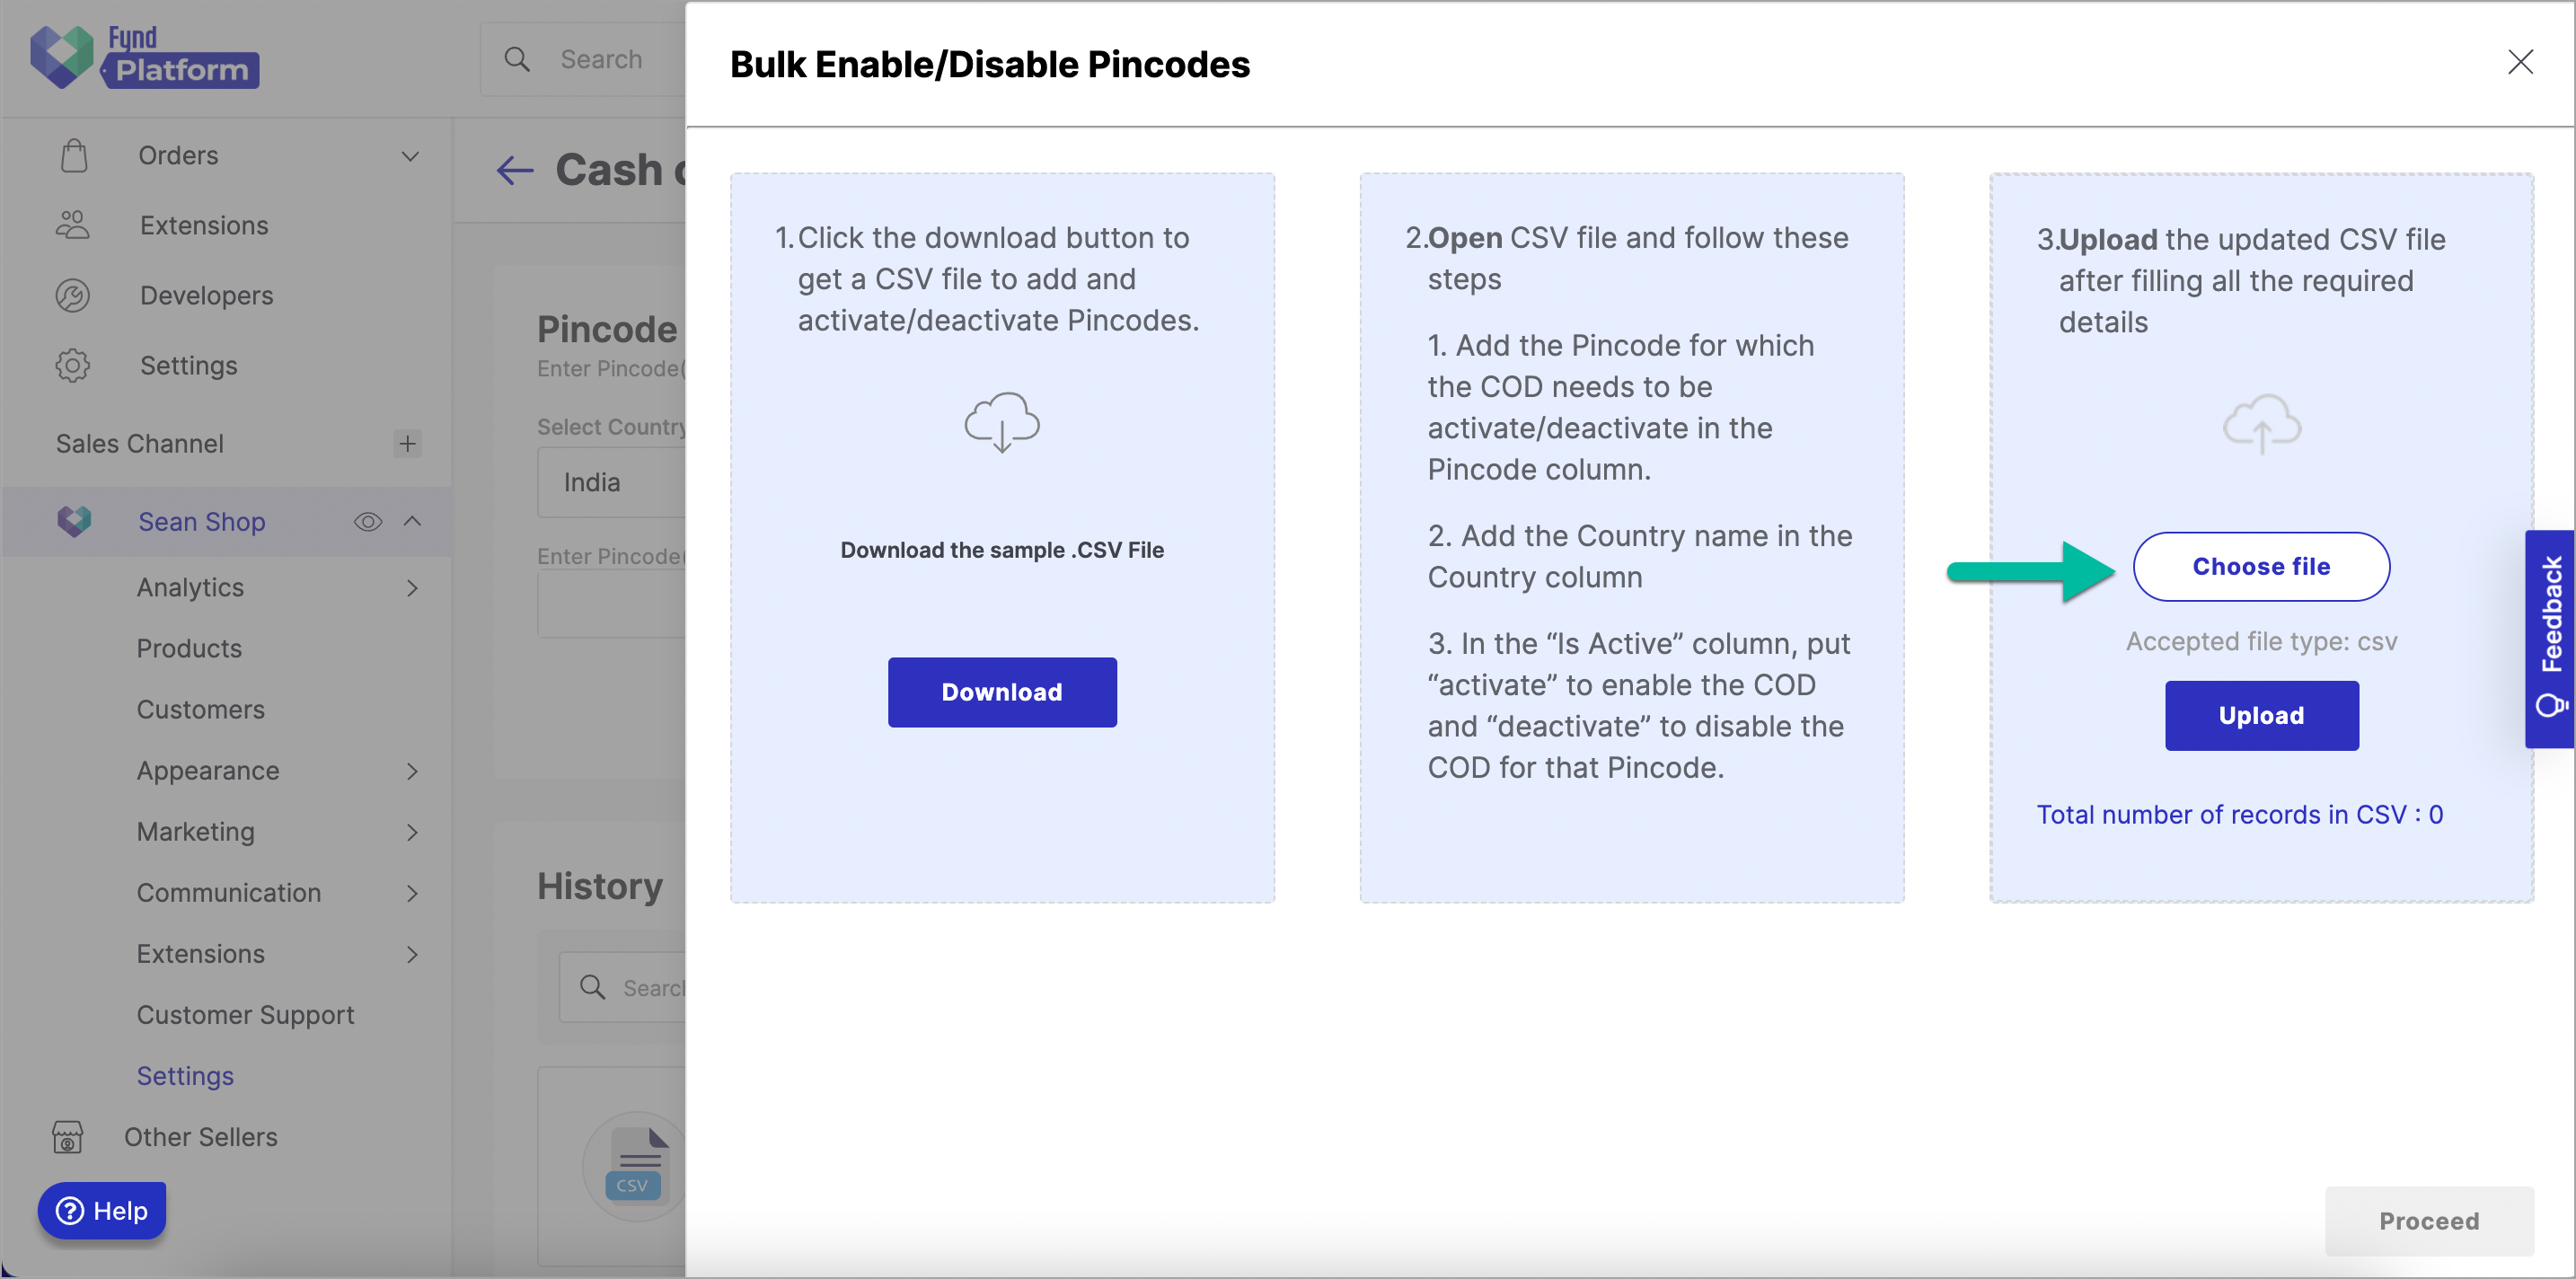
Figure 43: Clicking Choose File Option Click Upload.
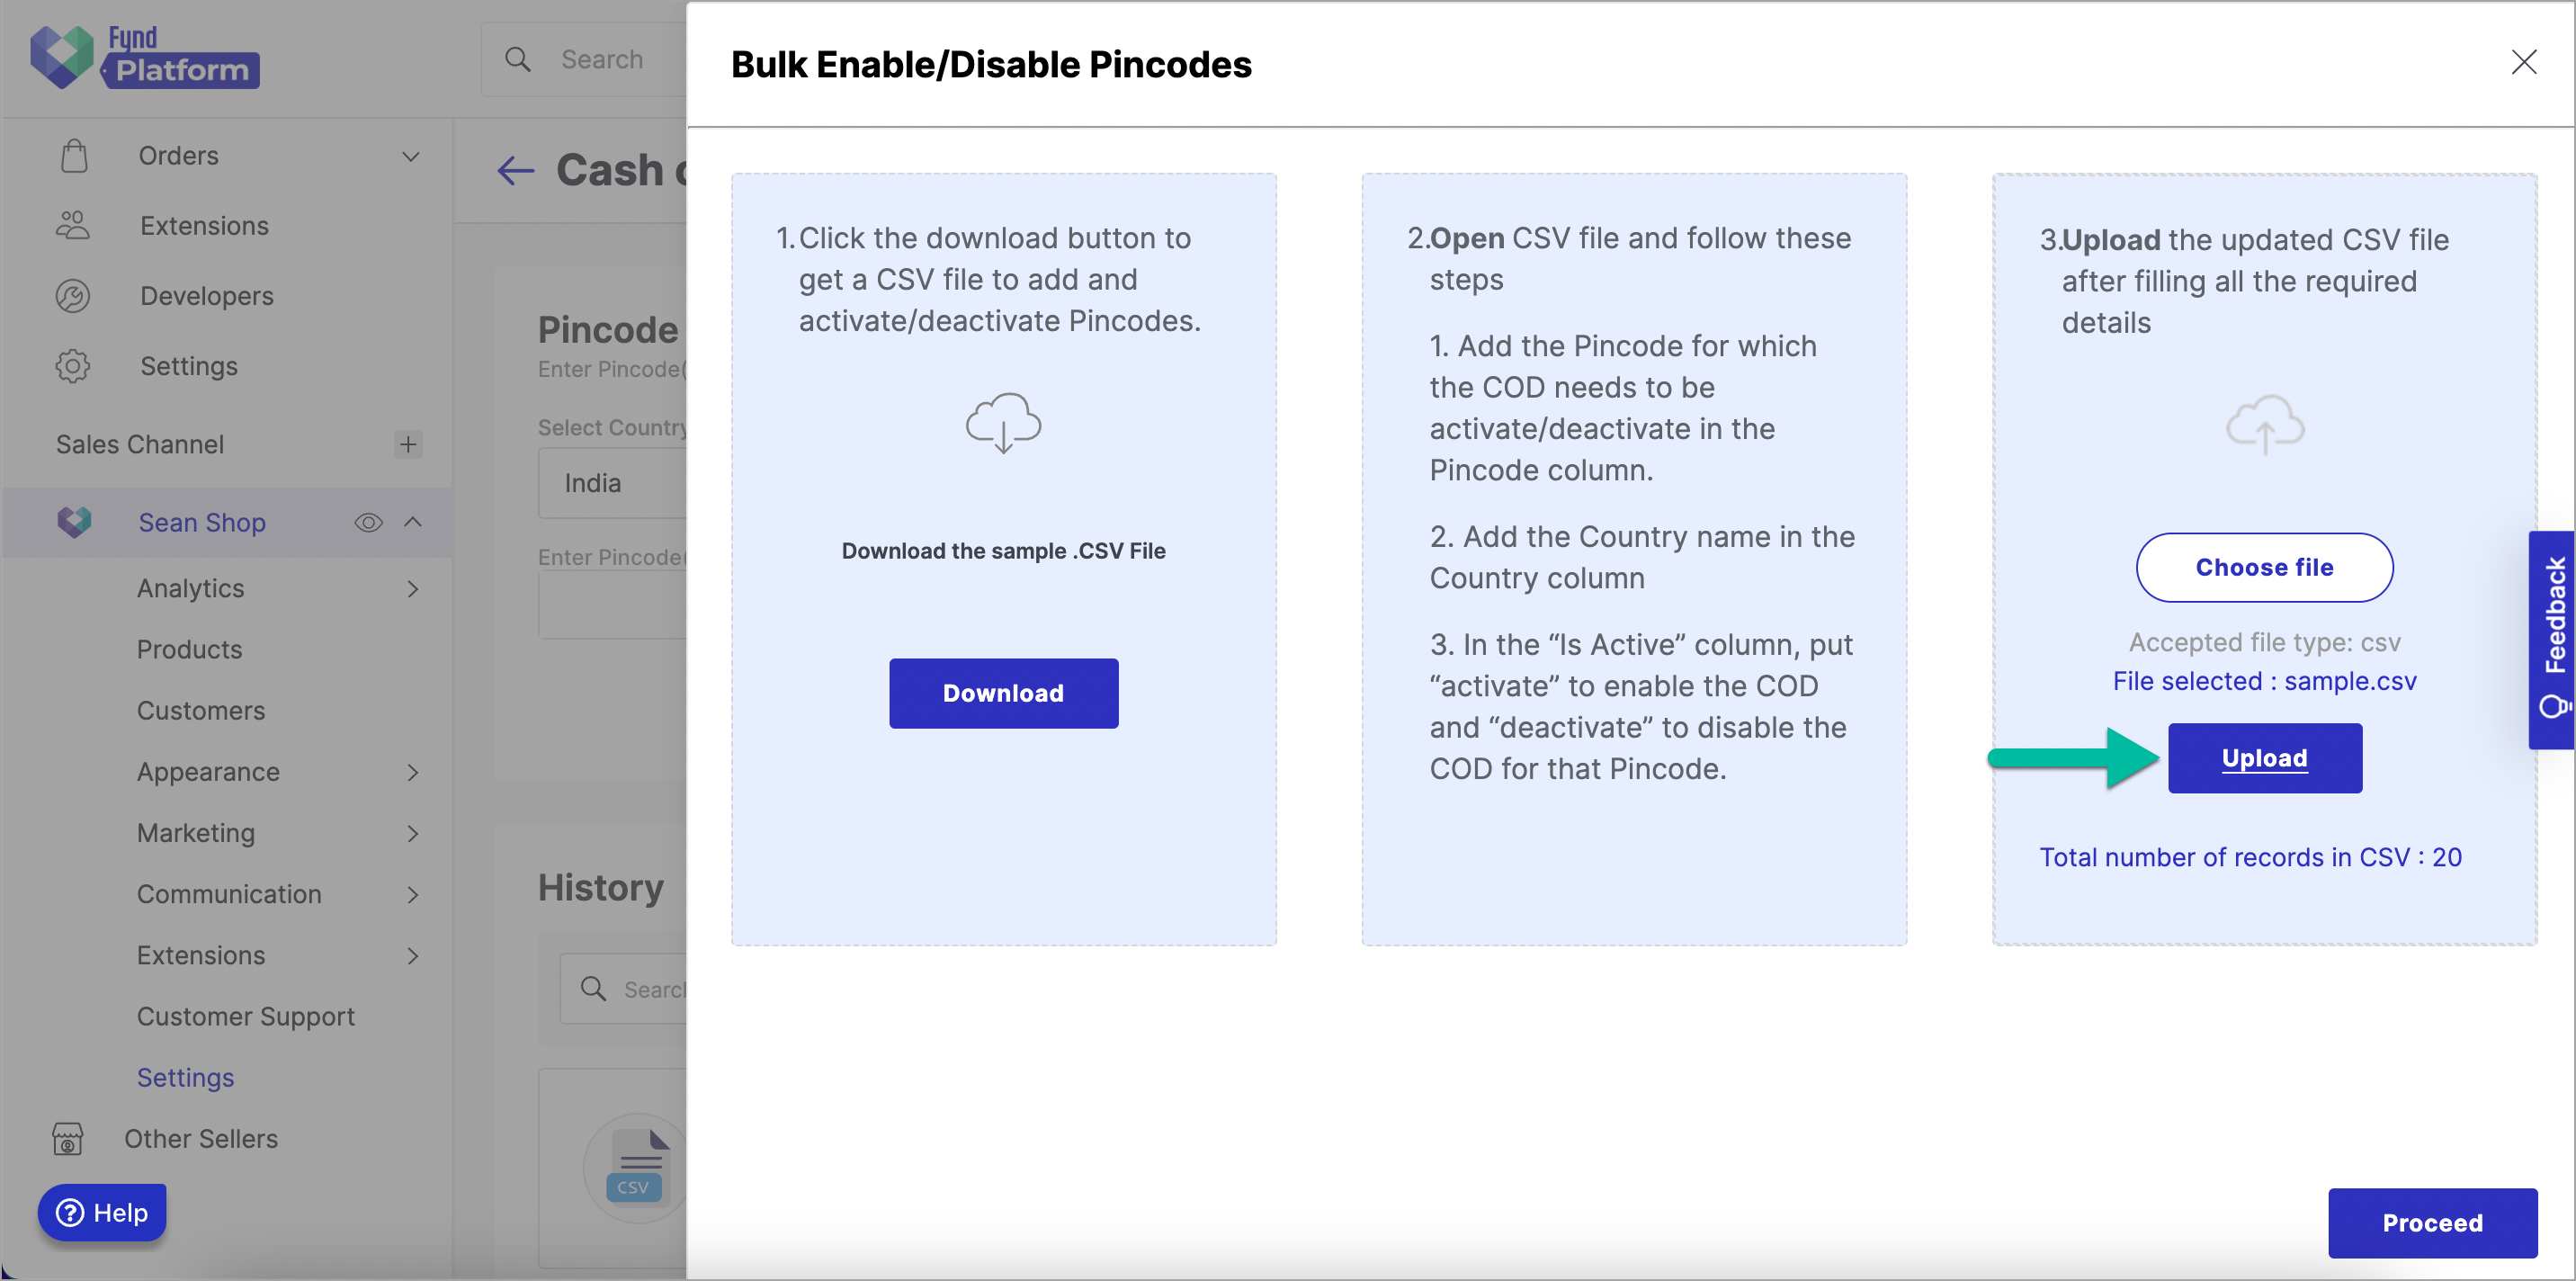
Figure 44: Clicking Upload Button Click Proceed.
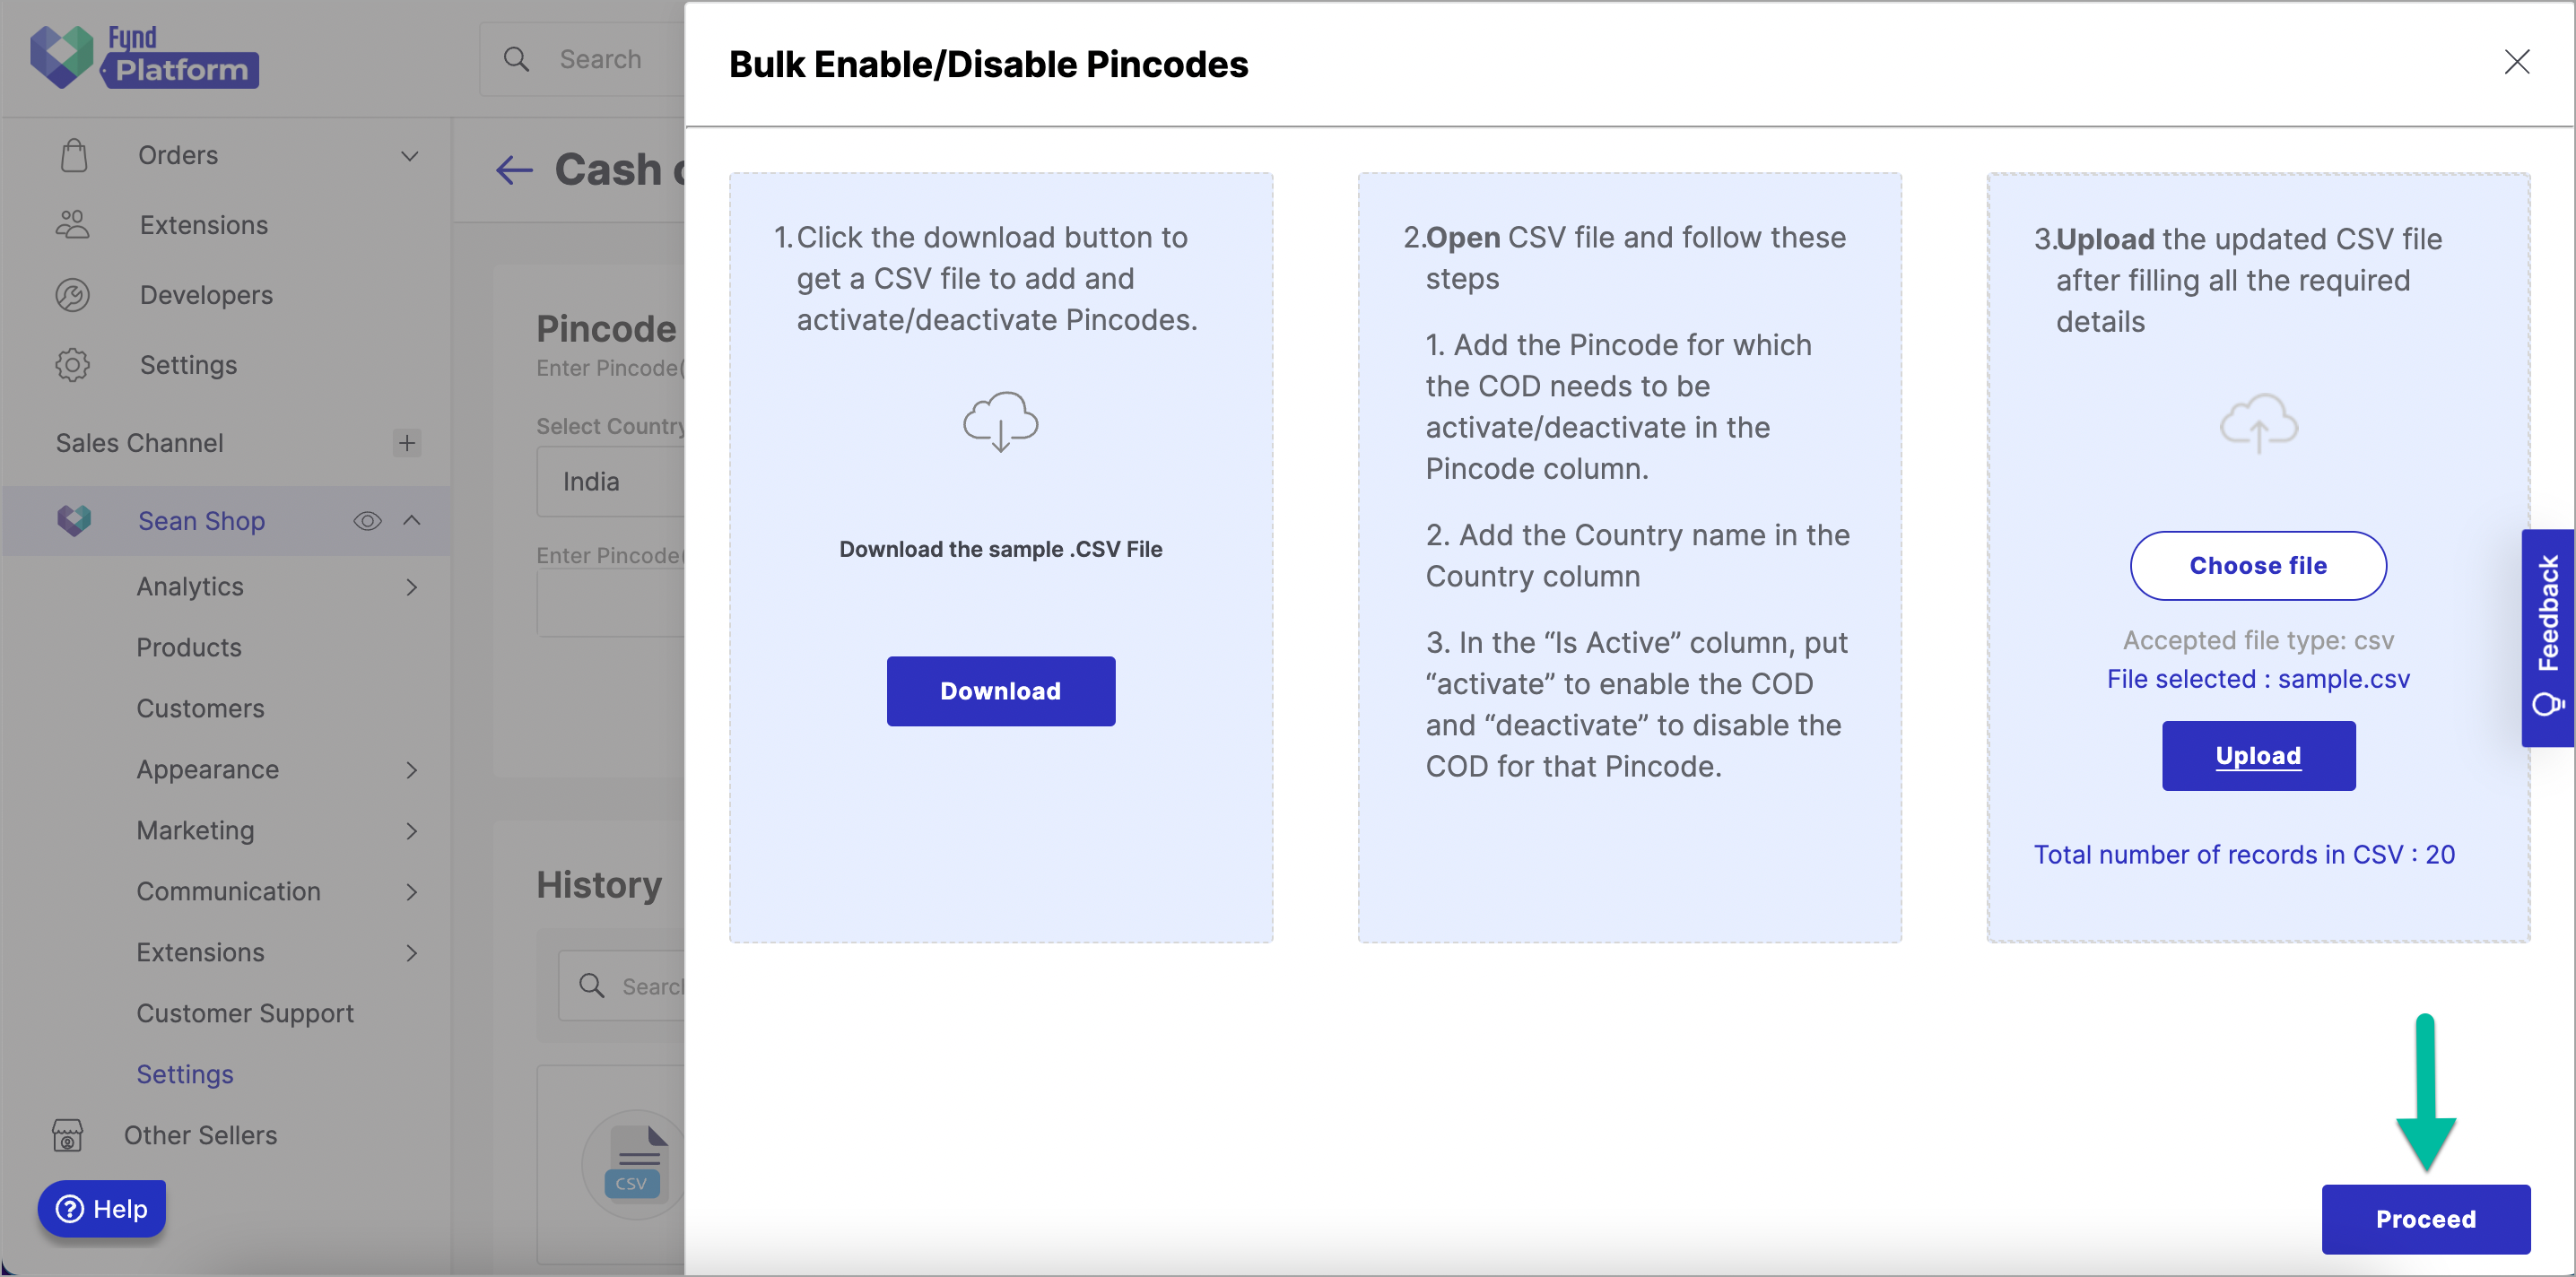
Please wait until its status changes to SUCCESS.
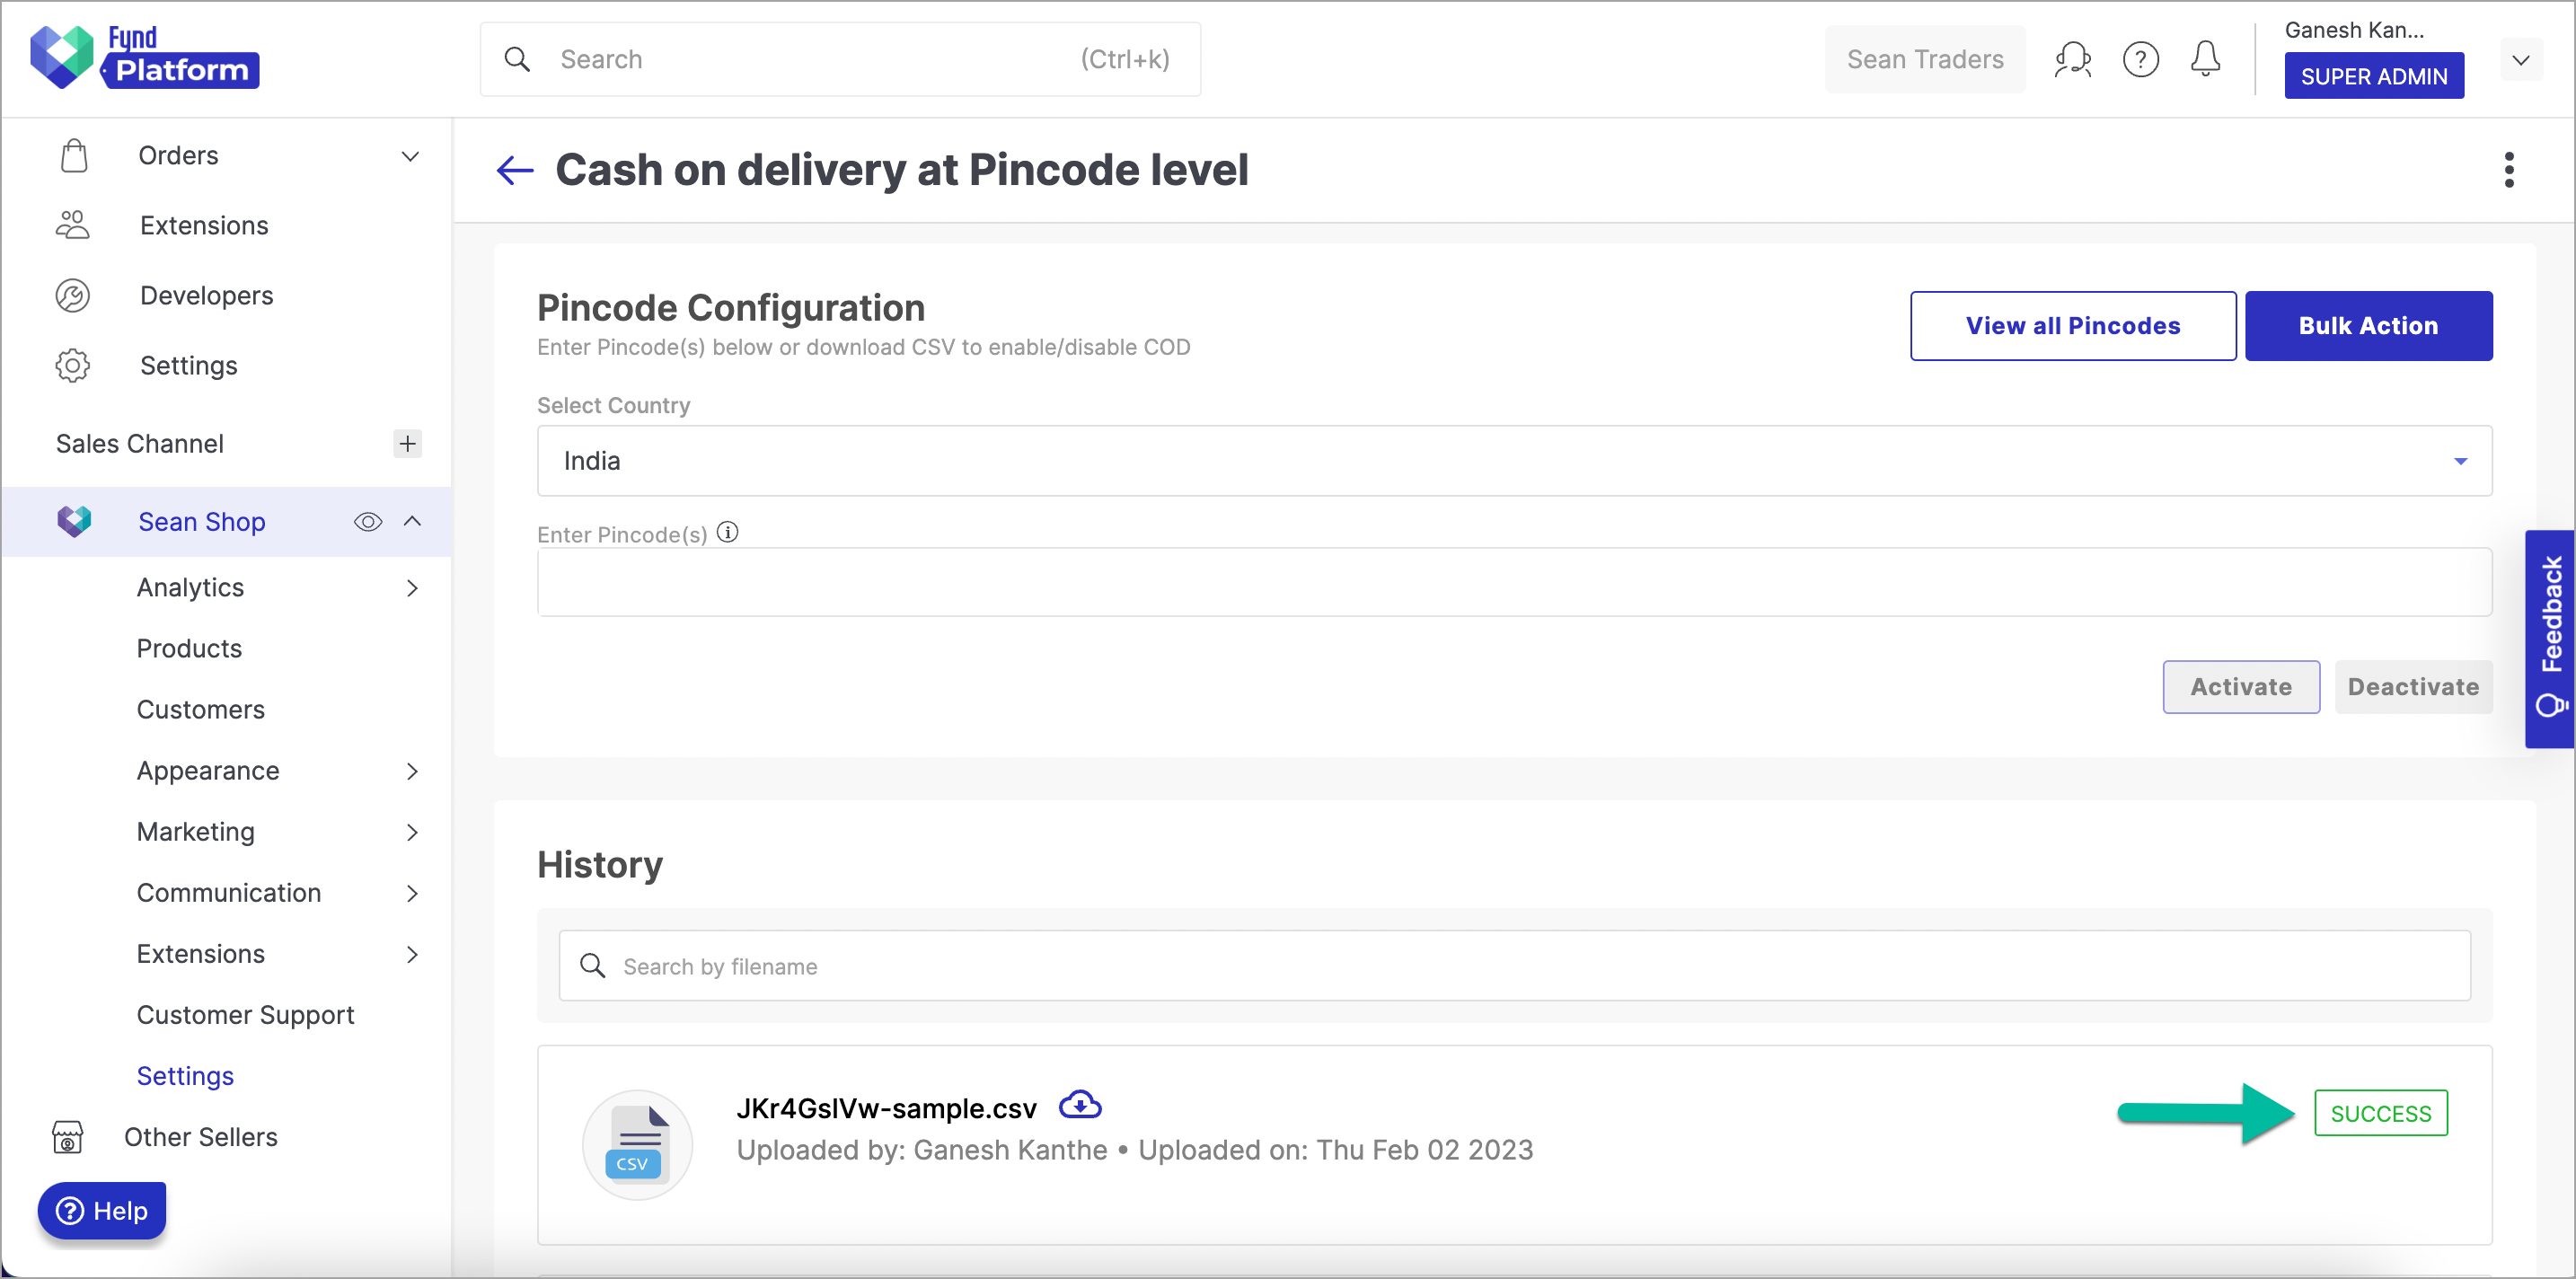
In this way, COD option is enabled for multiple PIN Codes using bulk action successfully.
You can click View all Pincodes to get a list of all active and inactive PIN Codes that you have uploaded to date.
There are other COD-related configuration present in platform. Refer this document: Where to configure Cash On Delivery (COD)?
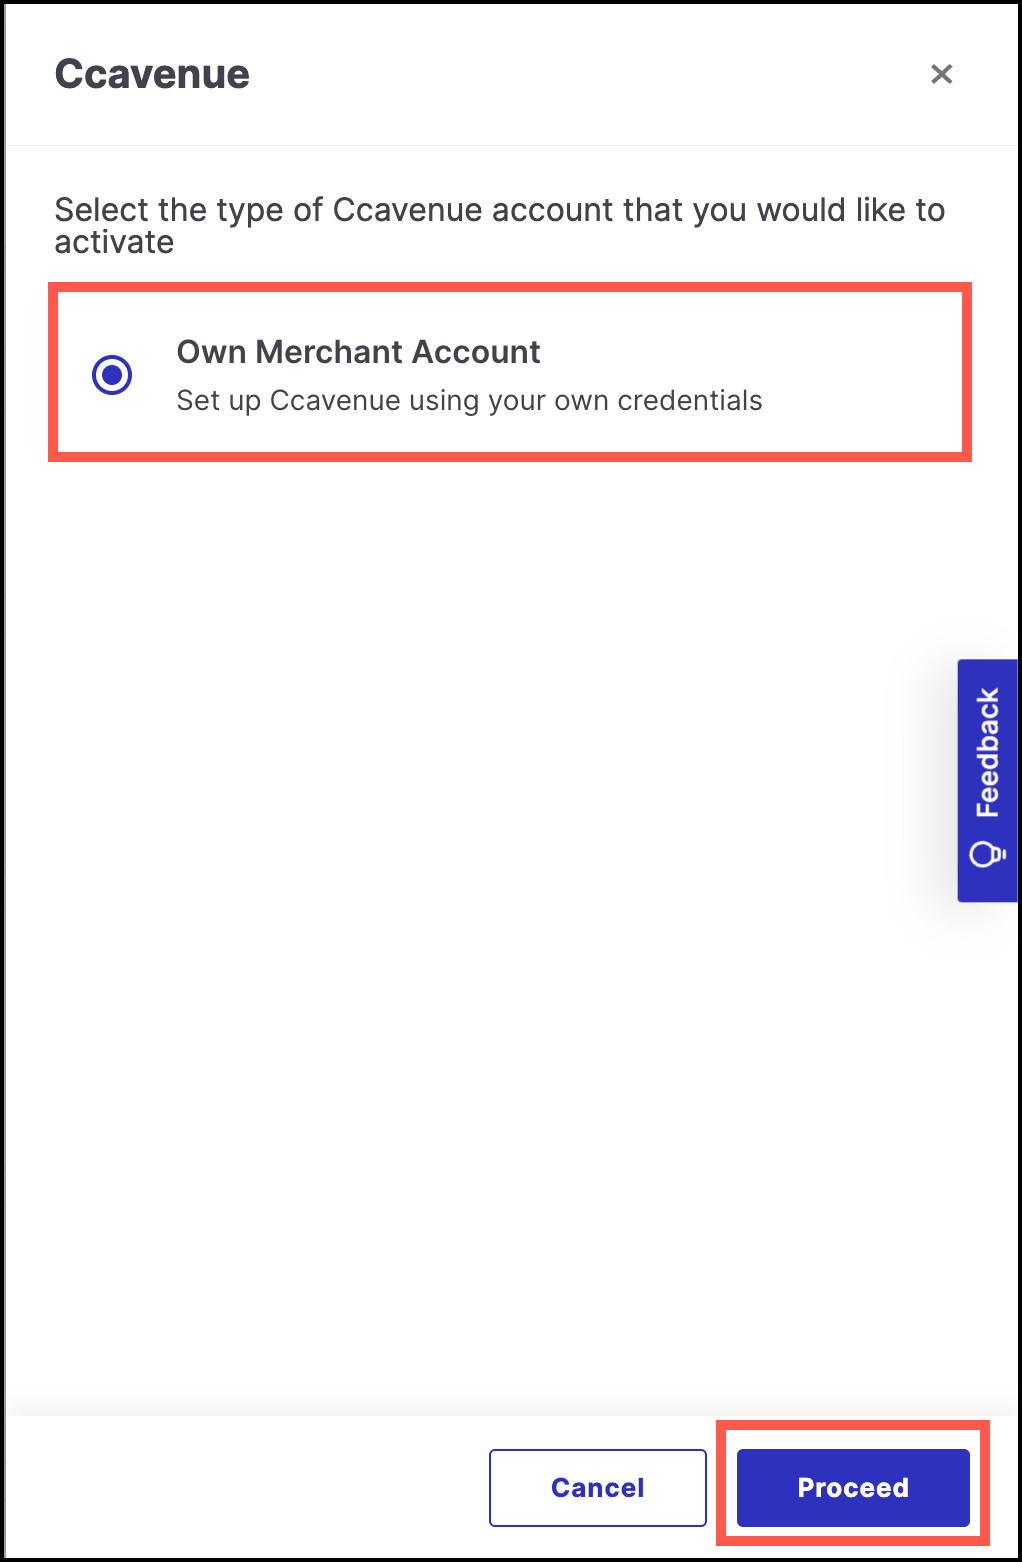
CCAvenue
CCAvenue payment integration facilitates payment gateway support to accept payments seamlessly through various modes, including credit cards, debit cards, cash cards, and net banking. The integration ensures a smooth user experience while securing against payment fraud and addressing regulatory complexities.
.png)
To activate CCAvenue payment extension, select the type of CCAvenue account you want to activate by choosing Own Merchant Account and click Proceed.
What will you need to integrate CCAvenue: Key, Secret and Merchant ID from your CCAvenue Dashboard.
- In the dashboard, go to Settings > API Keys.
.png)
Copy the merchant_id from your CCAvenue dashboard and paste the copied merchant_id in the Merchant field on the Fynd platform.
Identify the environment you are using on the Fynd platform, and find the corresponding access code for the identified environment. For example, for the x1 environment with the URL https://fynd.hostx1.de, use the access code associated with this environment. Copy the identified access code and paste it into the Key field on the Fynd platform.
Similarly, find the corresponding working key for the identified environment. For example, for the x1 environment with the URL https://fynd.hostx1.de, use the working key associated with this environment. Copy the identified working key and paste it into the Secret field on the Fynd platform.
.png)
- Click Activate.
CCAvenue Dynamic Event Notification
CCAvenue allows you to register URLs for various account events. When an event, such as a successful payment occurs, CCAvenue creates an event object containing relevant information and sends it as an HTTP POST request to the configured URL in your account's webhook settings.
From the CCAvenue - Credentials (Own Merchant) page, sellers can copy the URL provided and paste it directly into the CCAvenue dashboard.
.png)
You can configure URLs for specific events as needed.
- Go to Settings > Dynamic Event Notification.
.png)
Copy the URL from the field Register this Webhook URL on Payment Gateway to integrate Payment Webhook on the Ccavenue - Credentials (Own Merchant) page on Fynd Platform and paste it under Order Status echo URL.
Copy the URL from the field Register this Webhook URL on Payment Gateway to integrate Payment Webhook on the Ccavenue - Credentials (Own Merchant) page on Fynd Platform and paste it under Order Reconciliation Status.
.png)
- Similarly, copy the URL from the field Register this Refund Webhook URL on Payment Gateway to integrate Refund Webhook on the Ccavenue - Credentials (Own Merchant) page on Fynd Platform and paste it under Refund_ARN_Update.
.png)
The URL for Webhook integration varies depending on the environment, such as SIT (x1), UAT (x5), and production (Fynd). When integrating CCAvenue in a specific environment, ensure to add the corresponding URL from that environment to the CCAvenue dashboard for proper configuration.
- Email the CCAvenue team the Merchant ID along with the environment (e.g., SIT, UAT, Prod) to whitelist it for proper integration.
Sequencing
Duplicating the sequence of payment modes from one device to another (e.g., Android to iOS or vice versa) will overwrite the previously saved sequence on the target device. Please note that this action applies to all available devices, including Android, iOS, and Website.
Use this section to arrange the sequence of MOP/Sub-MOP options on various devices. This order will be visible on the payment window of the device. Also, you can duplicate the sequence of payment modes of one device with the others.
How to sequence MOPs/Sub-MOPs?
Select the desired business unit. It can be either storefront or POS.
Select the desired device. It can be either Android, iOS, or website.
Drag and move MOP to adjust their position according to your needs.
Click Save.
noteYou can open the desired MOP if you wish to adjust the position of Sub-MOP options present in it and save the changes.
How to duplicate a sequence?
Click Duplicate Sequence.
Choose device(s) in which you wish to map the sequence of payment modes of other device.
Click Proceed.
Save the changes.
In this way, sequence will be duplicated successfully.