Import Inventory
-
Click Import.

Figure 1: Import Button
-
Select Inventory.
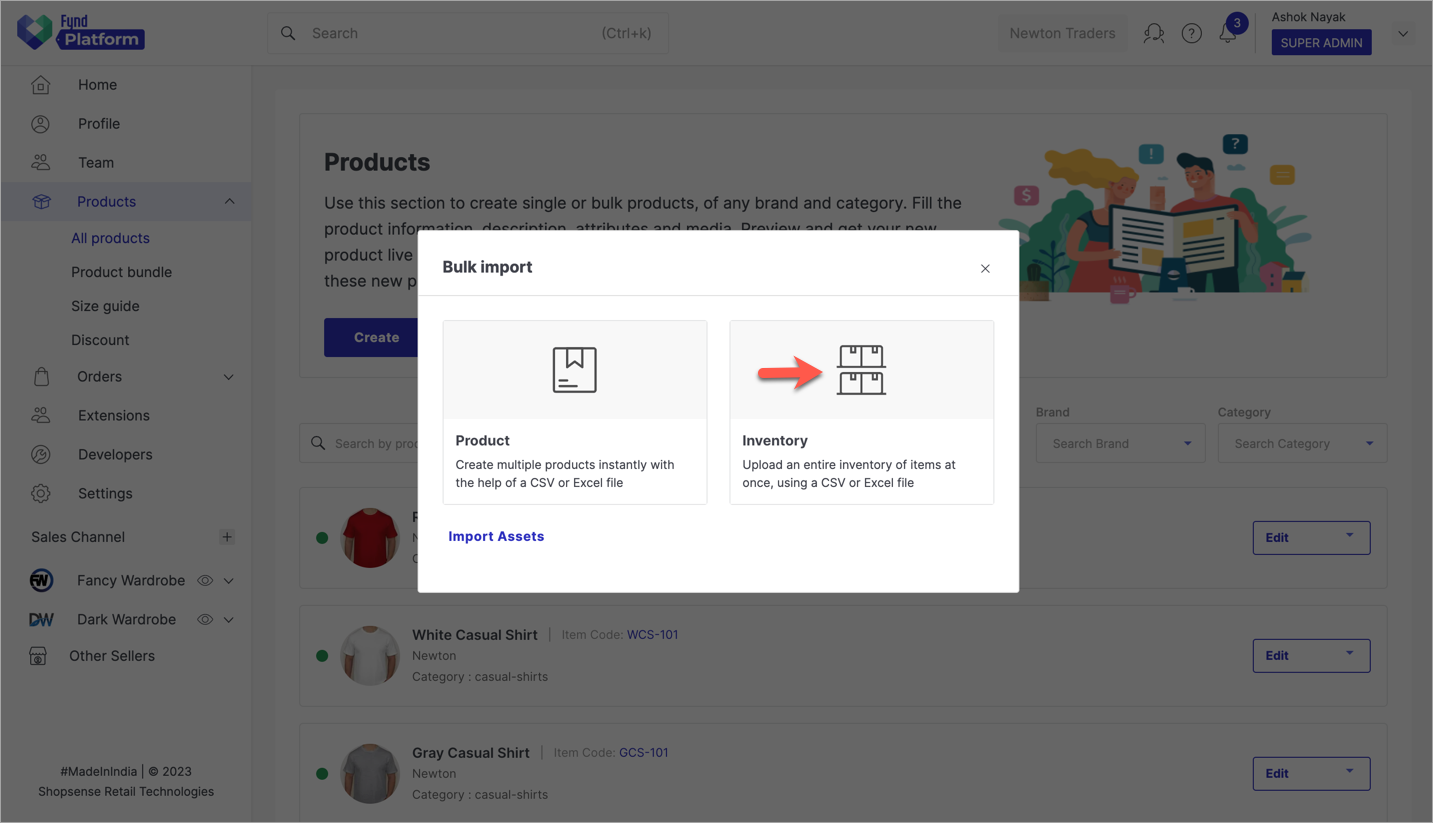
Figure 2: Import Options
-
Here, you can download a sample file for adding the inventory of products, either in Excel or CSV format.
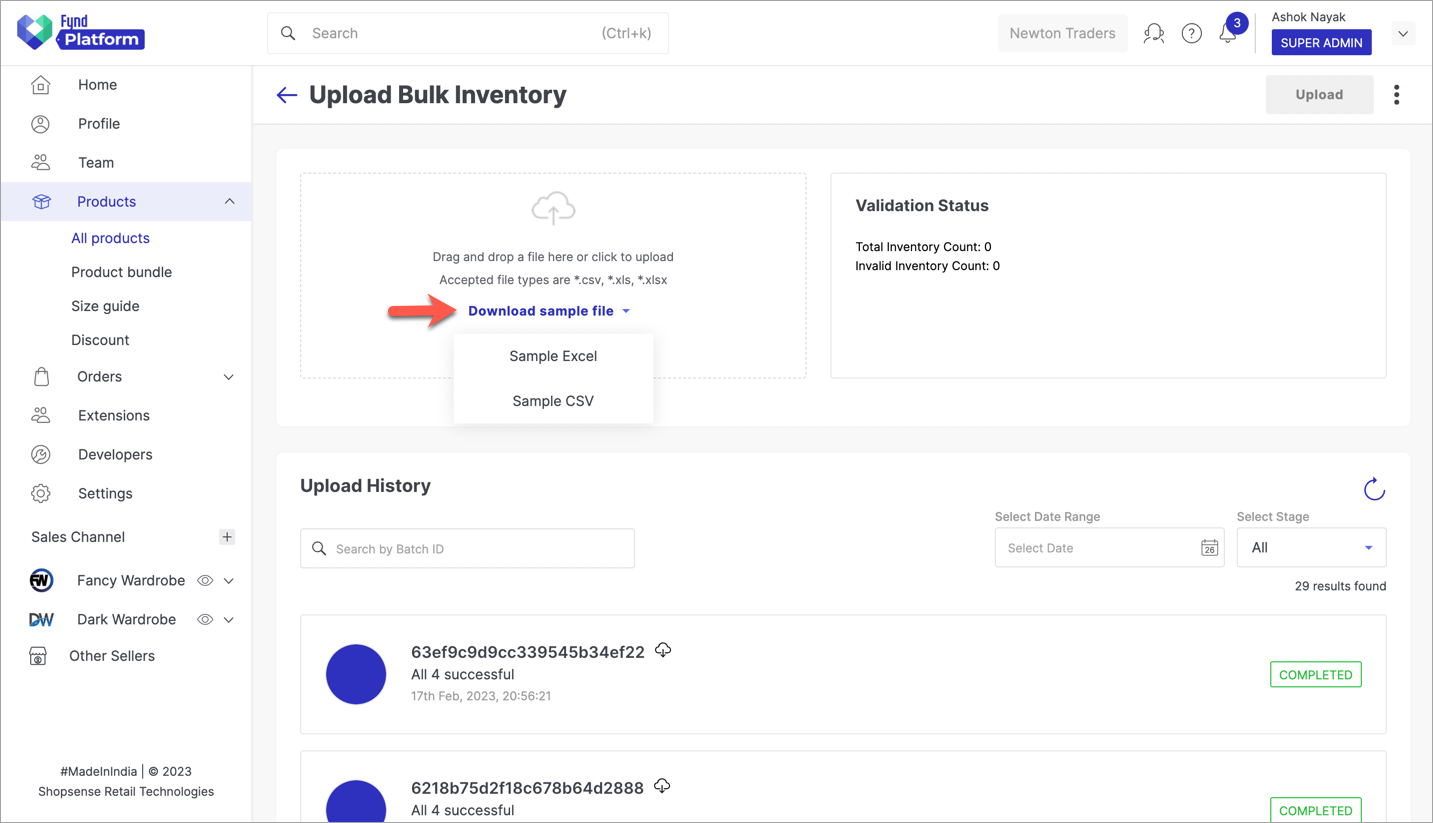
Figure 3a: Download Excel Or CSV

Figure 3b: Sample Excel For Inventory Upload
noteThe columns that are highlighted in green are mandatory to fill. You will get drop-down boxes for certain columns in the Excel file. Example: Gtin Type, Currency, etc
-
You can start filling the inventory details as shown below. This is similar to the Edit Inventory section which you saw before. In this case, add the inventory details of those 3 products which were earlier imported using Excel.

Figure 4: Inventory Details In Excel
infoIf you don't fill Actual Price and Selling Price columns, those price values will be taken from the product instead. Click here to know more.
-
Now, you are ready to validate your Excel file. Upload your Excel file as shown below.
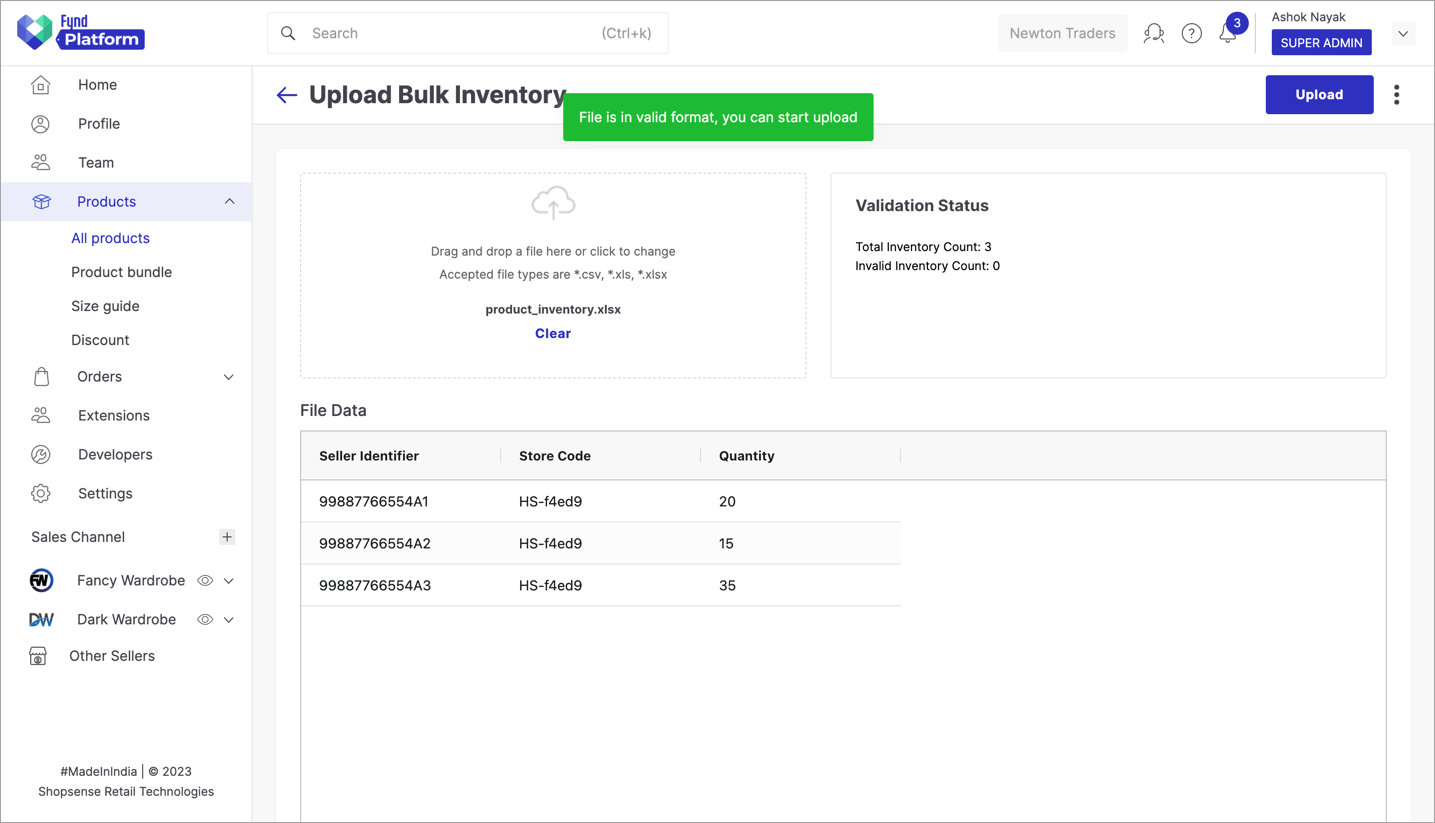
Figure 5: Validating And Uploading Excel File
-
If the file is valid, you can upload your inventory. Click on Upload in the top-right corner. The bulk upload will initiate and it can be viewed under 'Upload History' as shown below. The upload status will be shown as 'Pending'. Wait till the status turns to 'Completed'.
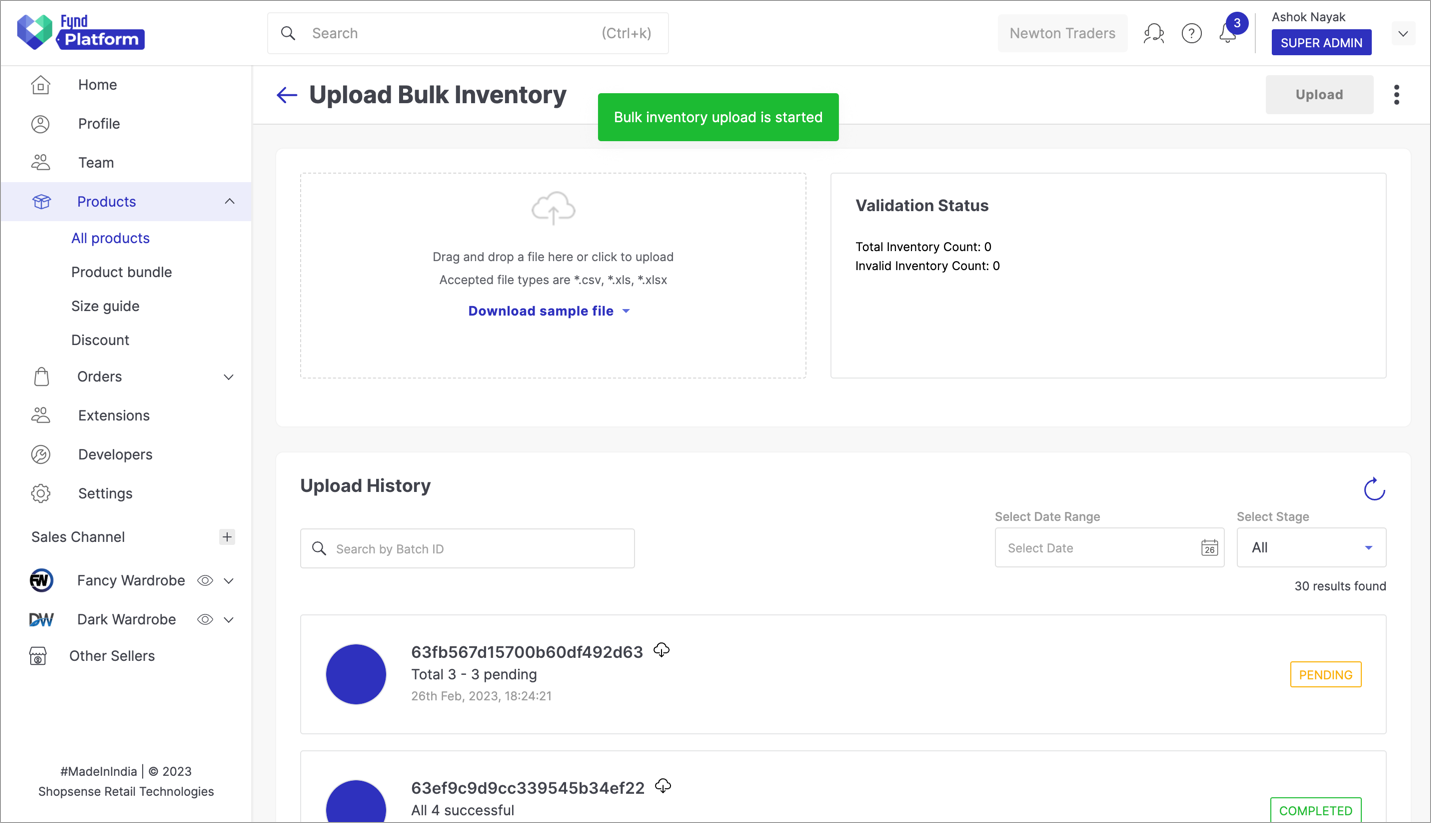
Figure 6a: Batch Job In Progress
You have successfully added an inventory to your products.

Figure 6b: Batch Job Successful
Your products will now appear on your website, with positive inventory.
What to do if the Excel file doesn't validate?
Use the Check Errors functionality, to find the issues and rectify them.
![]()
![]()