How to update MRP and ESP of products
The MRP (Actual Price) and ESP (Effective Selling Price) of products are initially set by you at the product level. You can change these prices anytime. However, updating the prices in the product doesn't affect or replace the prices you've set in the inventory. Your website displays the prices mentioned in the inventory.
For changing the MRP or ESP of products at any of your selling locations, you can update the prices in the inventory rather than the product. Moreover, you can maintain different prices at each selling location than the ones you've set in the product.
![]()
In this document, you'll learn the following:
Updating Product Prices
For Single Product
-
Search a product whose prices you wish to edit, and click Edit Product.
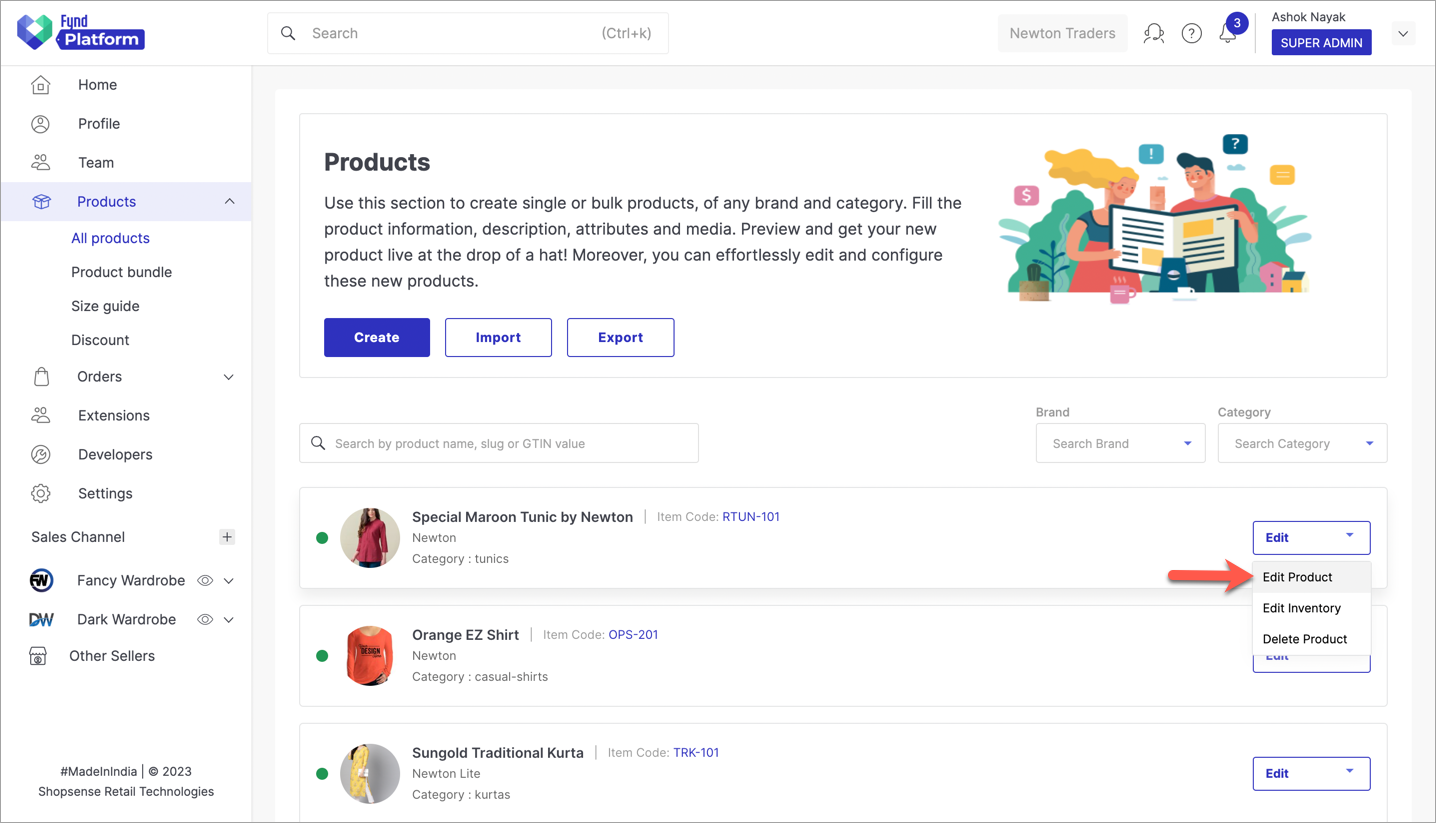
Figure 1: Drop-down In Products section
-
Scroll down and click the edit icon (available for each size).
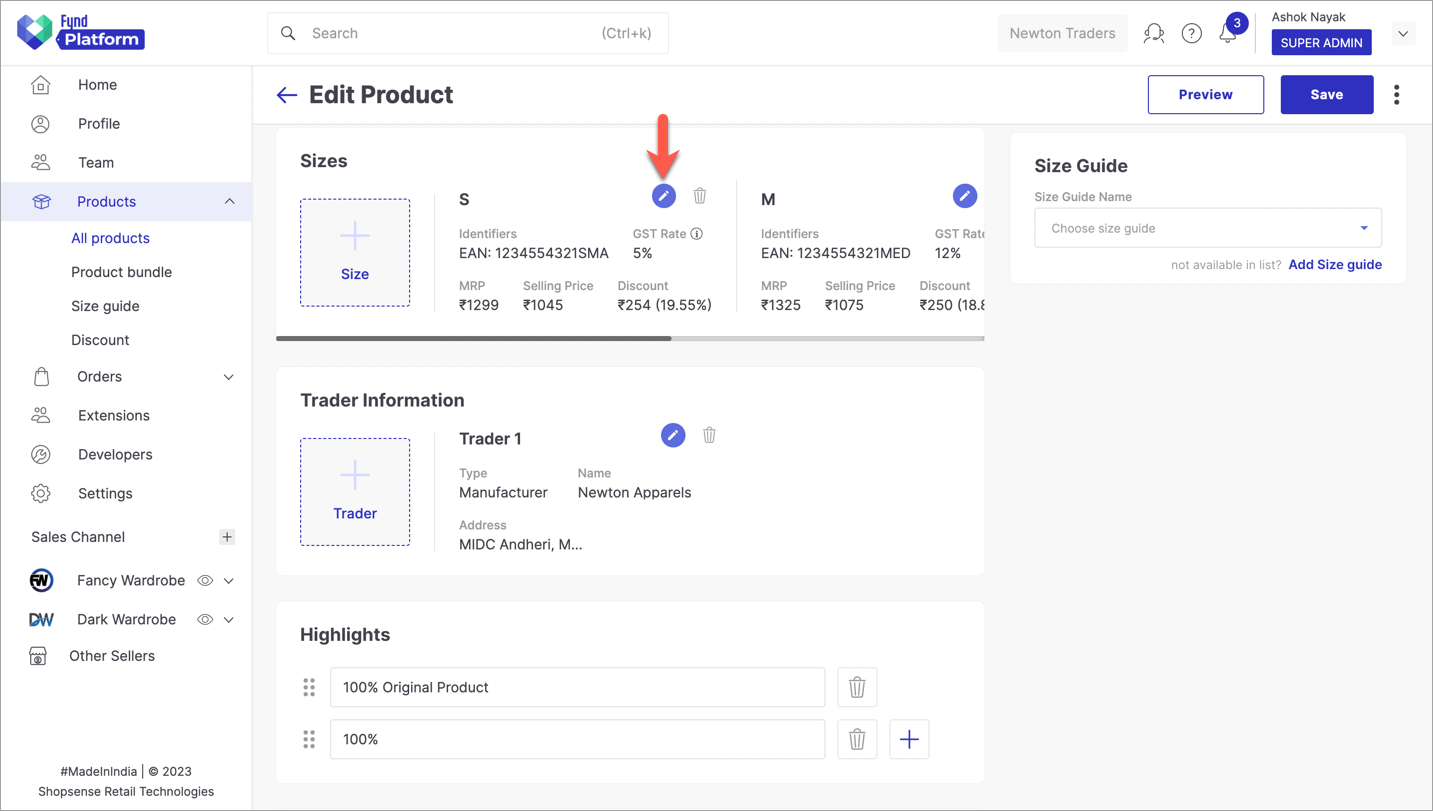
Figure 2: Edit Details
-
Locate the existing Maximum Retail Price (MRP) and Selling Price.
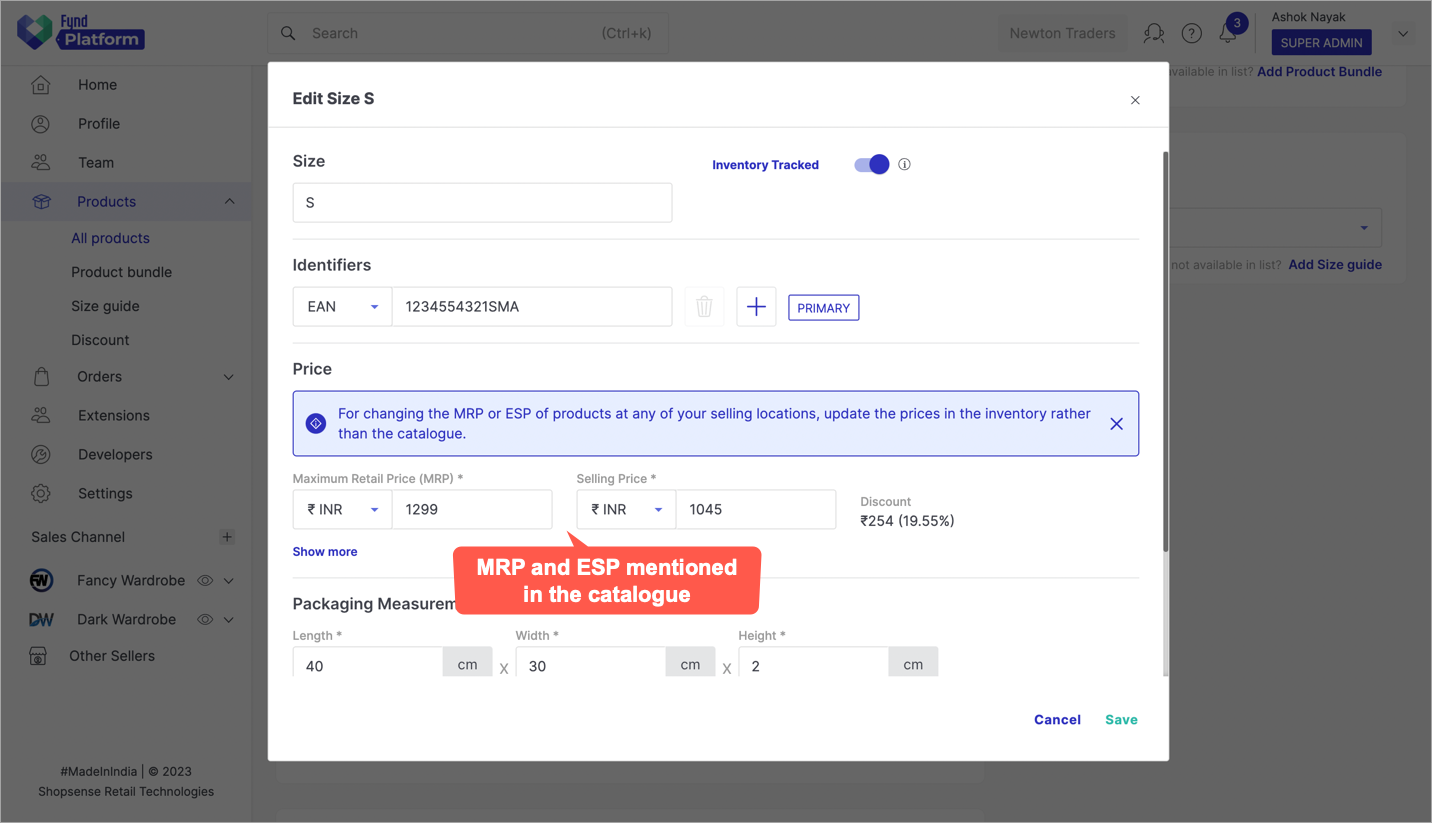
Figure 3: MRP And ESP Fields
-
Edit and enter the new prices, and click Save.
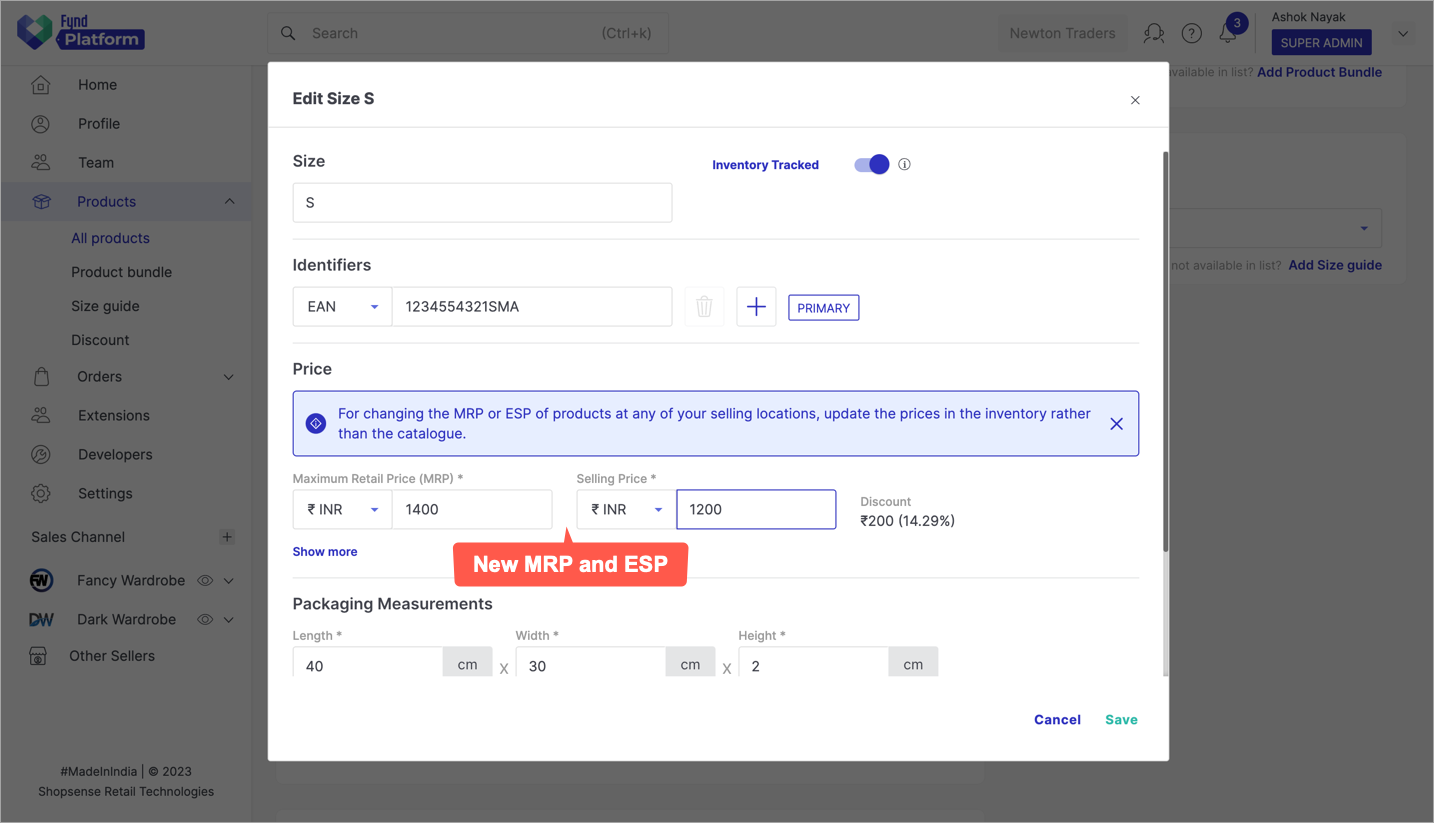
Figure 4a: Saving The New Prices
Watch OutYour product MRP in the product cannot be less than the highest MRP you defined in the inventory of your selling locations. Check fig. 4b, 4c, and 4d.
Let's say you have entered a product MRP lower than the MRPs mentioned in the inventory.
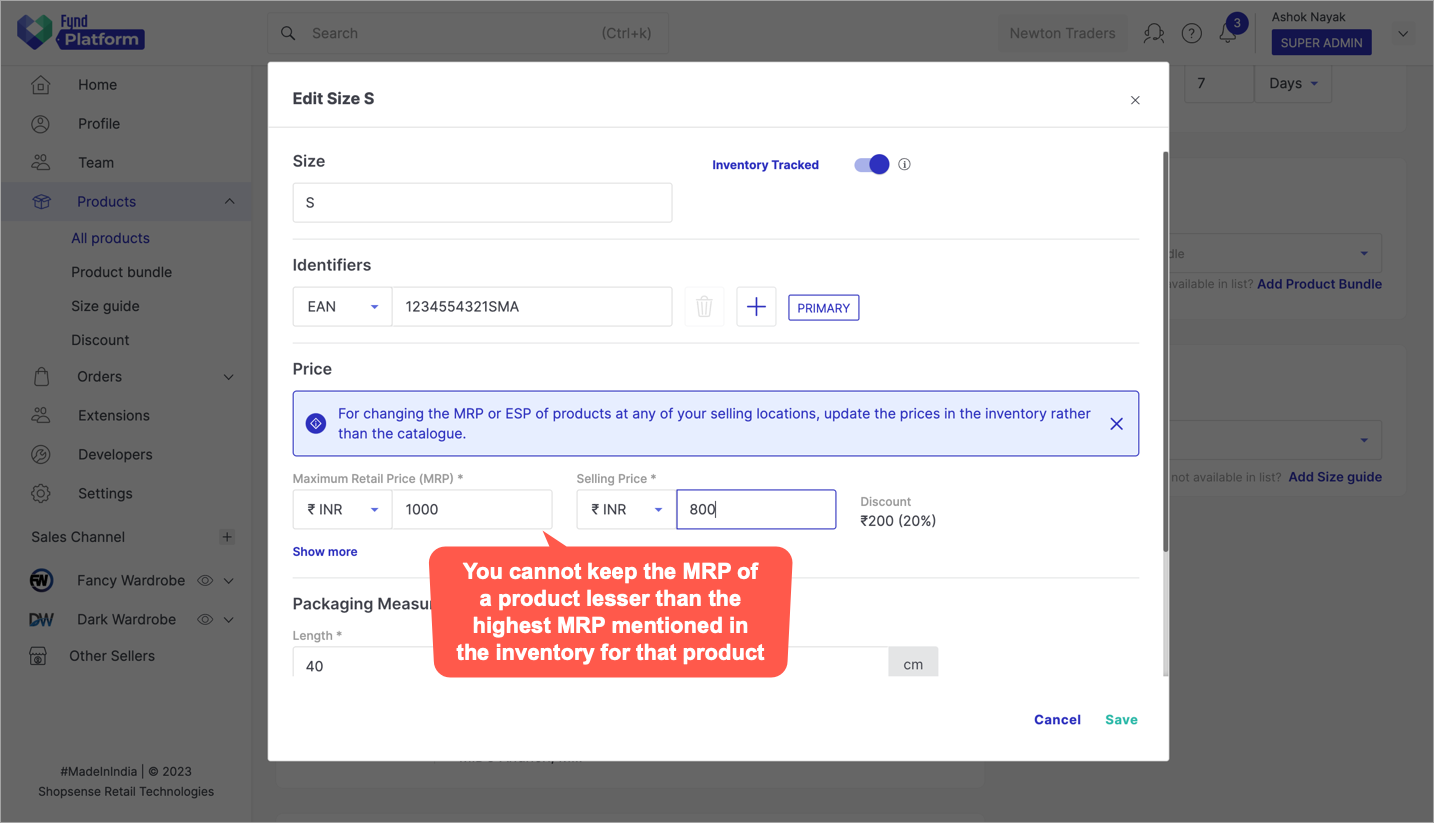
Figure 4b: Product MRP Lesser Than Inventory MRP
While saving the changes, you might get an error as shown below.
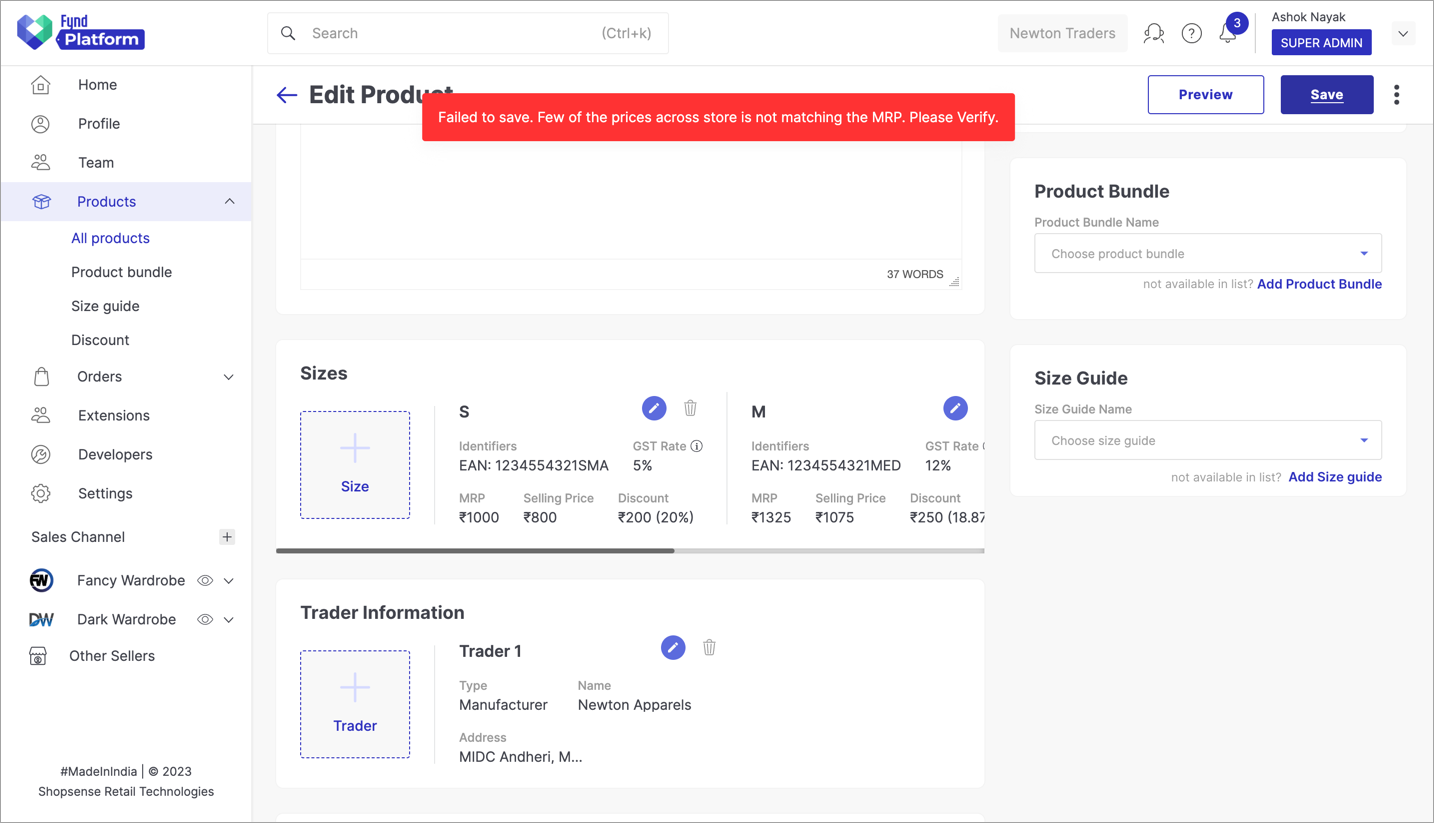
Figure 4c: Error Encountered While Saving
In such a case, check the inventory of that product to get the highest of all the MRPs mentioned across your selling locations. Go back and fix the product MRP.
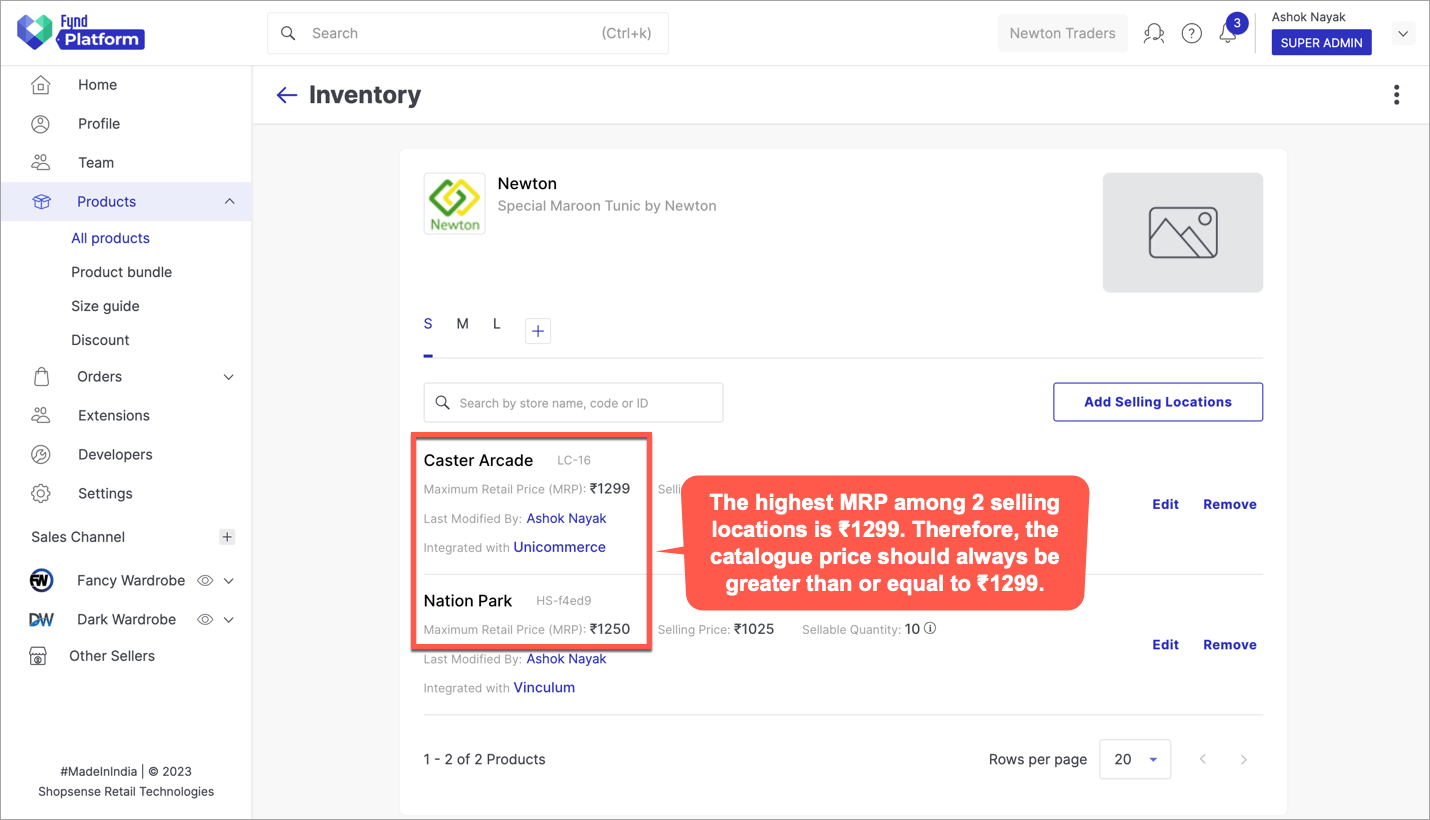
Figure 4d: Checking Inventory-level MRP
-
Save the changes.
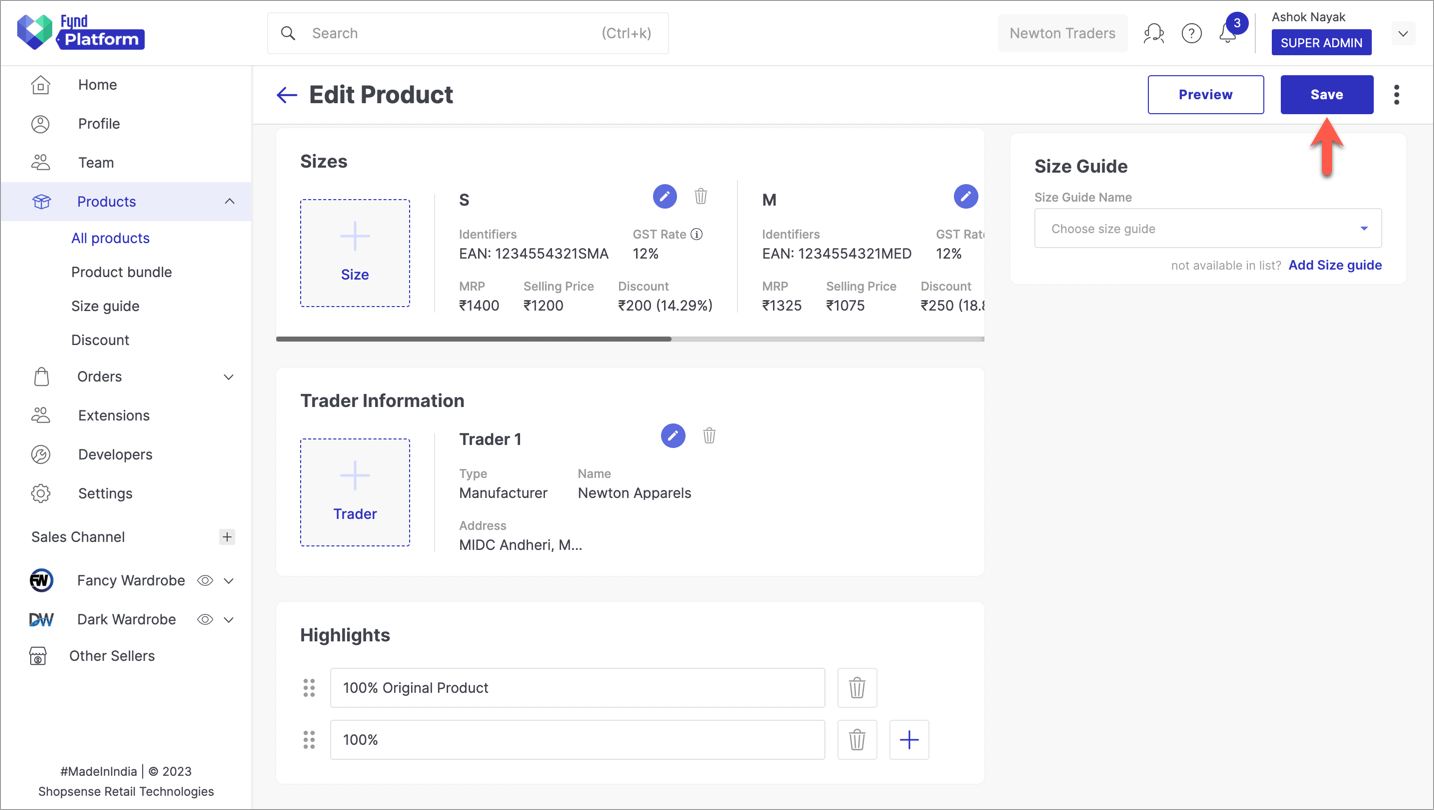
Figure 4d: Clicking The Save Button
If you are unable to set a lower MRP in the product because the inventory MRPs are higher, reduce the inventory MRPs first. Later, you can bring down the product MRP.
For Multiple Products
-
Go to the All Products section on Fynd Platform, and click Export.

Figure 5: Export Button
-
Click Product.

Figure 6: Choosing Product Export
-
Click the Generate button to get your existing product files in a format used by Fynd Platform.

Figure 7: Downloading All Product Files
-
You can use the filters to download a product of your choice:
- Template - The template you wish to download, e.g. topwear, bottomwear, etc.
- Brand - The brand whose products you wish to download in the product, e.g. Reebok, Nike, etc.
- Type - The file type of the product you wish to download, e.g. Excel or CSV

Figure 8a: Filters For Generating Catalogue
The product file(s) will be generated. This might take some time depending on the number of products in the product.
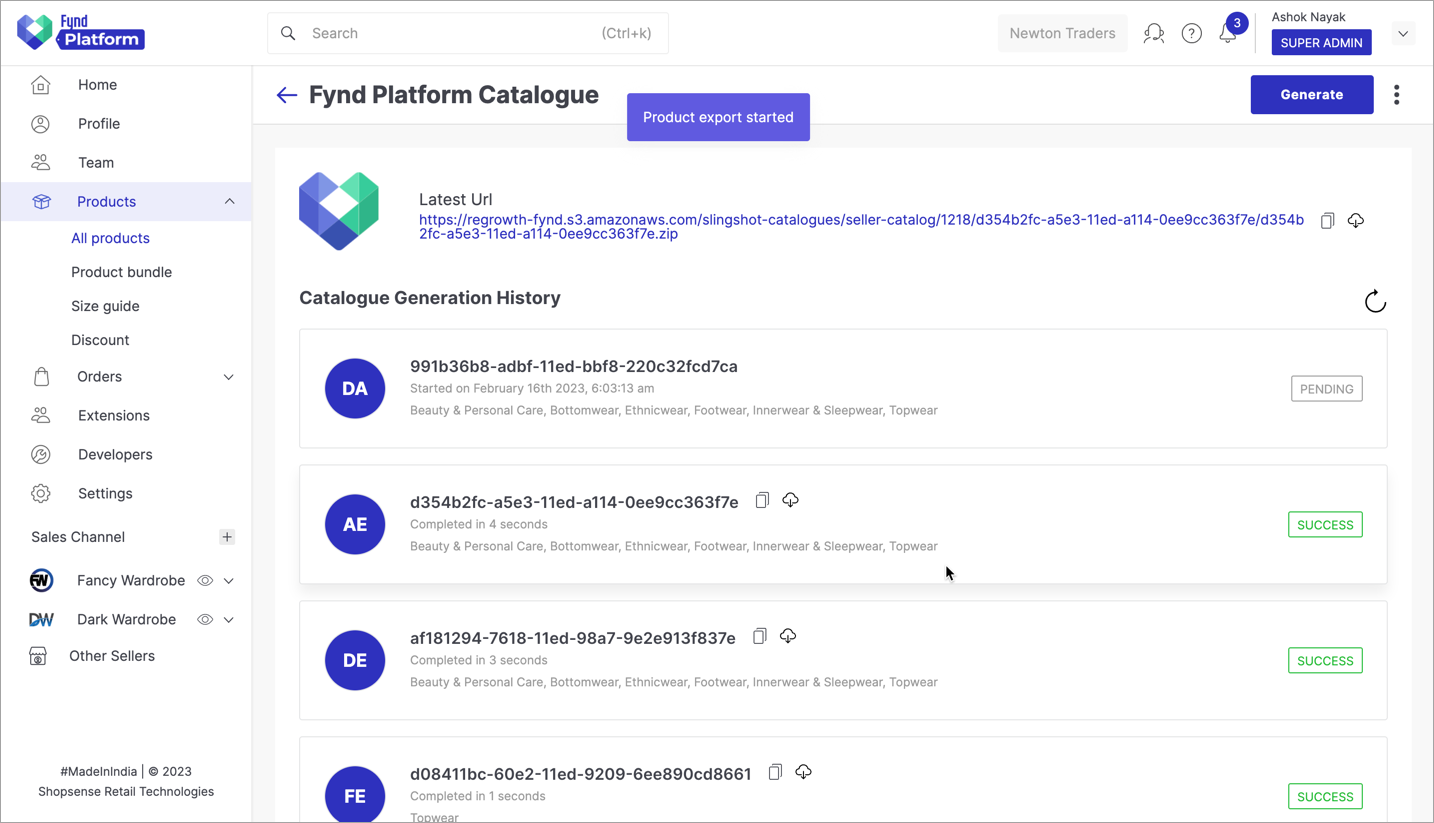
Figure 8b: Product Generation (In Progress)
-
A zip file will be downloaded, extract it to get all the product files.
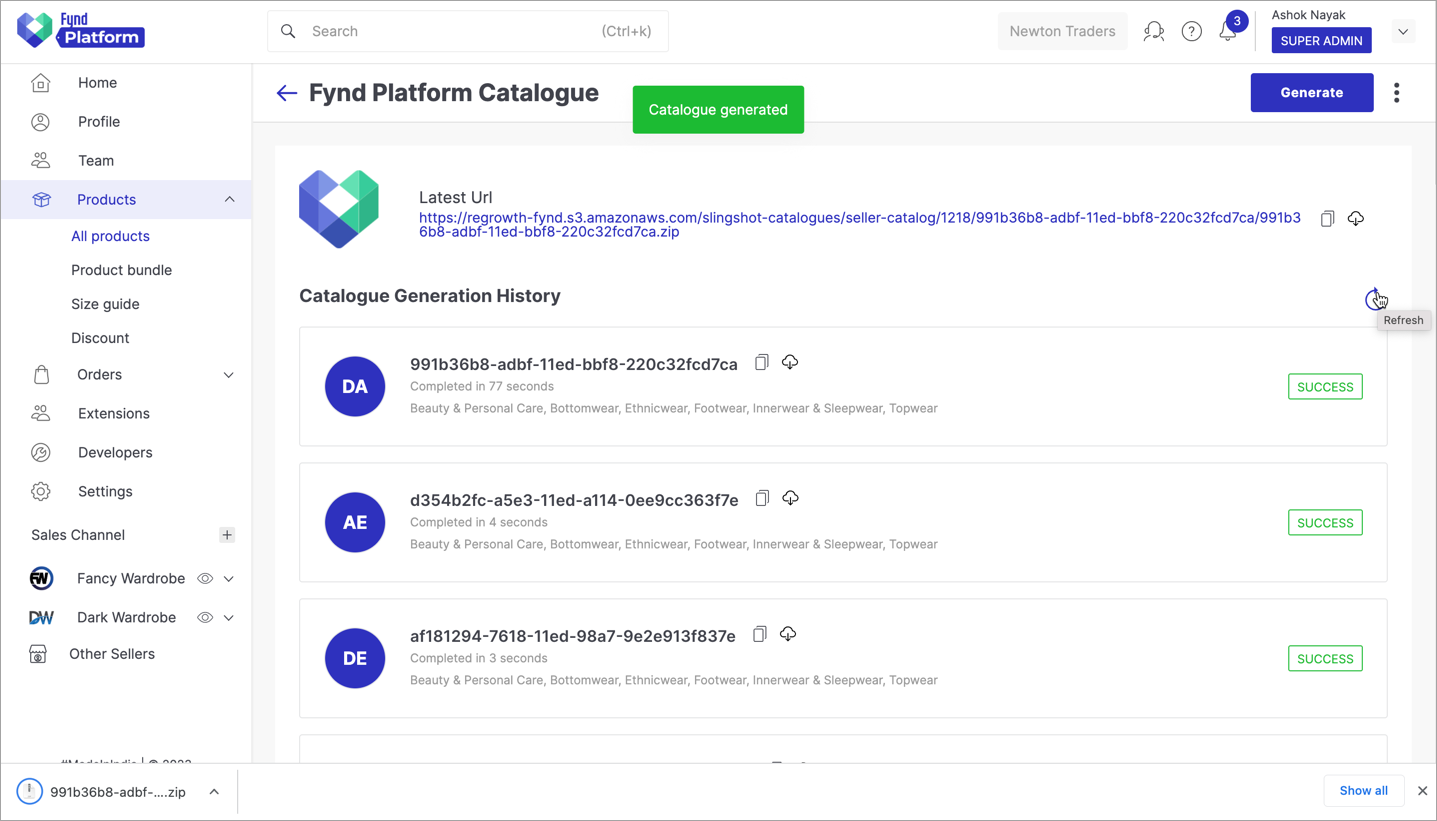
Figure 9a: Product Export (Completed)
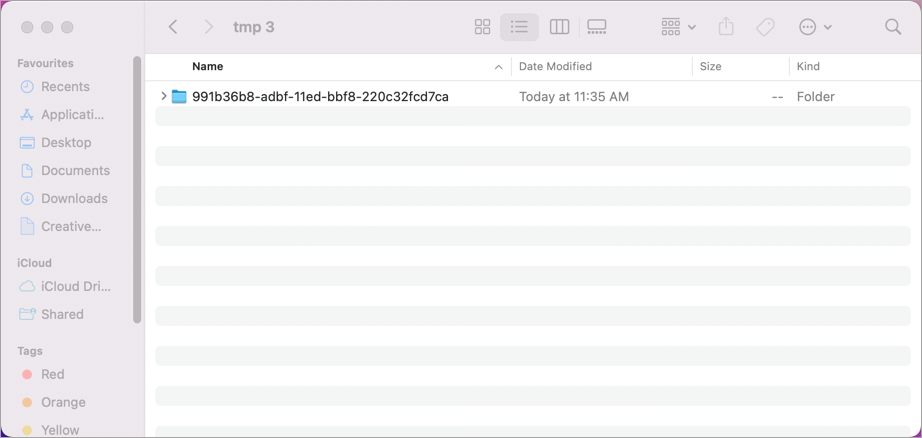
Figure 9b: Extracting The Zip File
-
Open the required product file for editing.
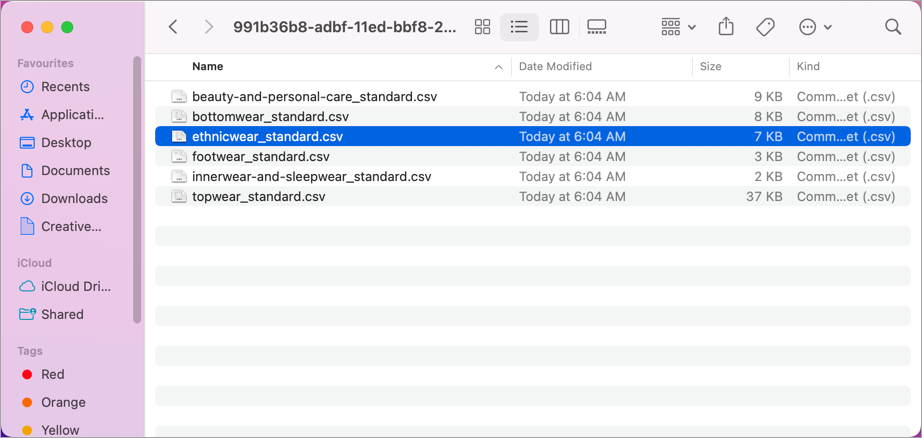
Figure 10a: Content Within Zip File
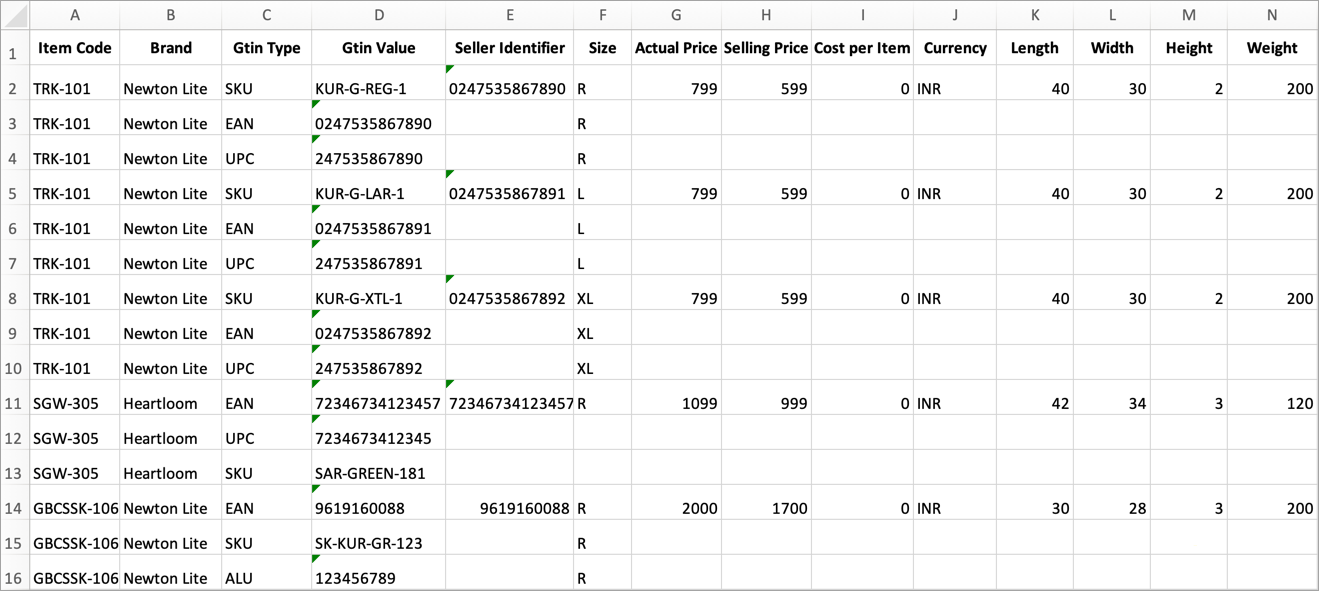
Figure 10b: Product
-
There are several headers (columns) in the product file. The following headers are mandatory to keep:
- Item Code
- Brand
- Gtin Type
- Gtin Value
- Seller Identifier
- Size
- Actual Prize
- Selling Price
- Currency
- Length
- Width
- Height
- Weight
Except for the above, you may delete all other columns.
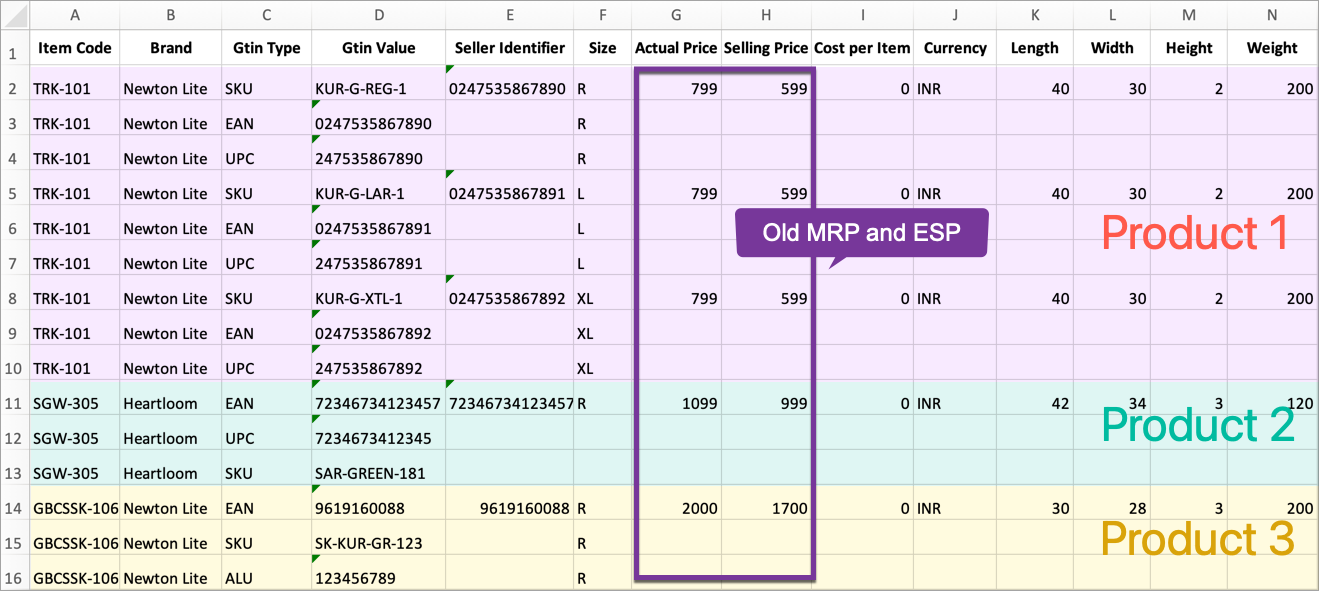
Figure 11: Keeping Relevant Details
-
Enter the new values in the Actual Price and Selling Price columns. Add a new column named Command and type Update in the rows where you have modified the prices.
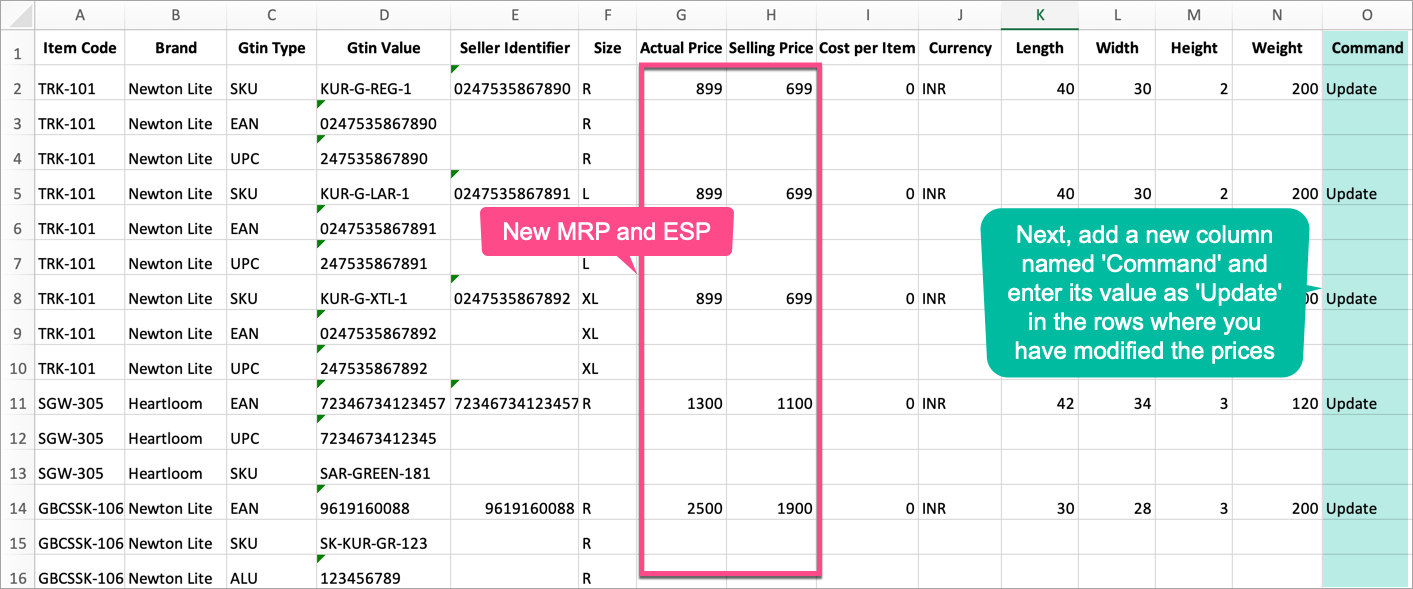
Figure 12: Editing The Prices
Watch OutActual Price in the product cannot be less than the highest actual price you defined in the product's inventory.
-
Upload the edited file by clicking on Import → Product.

Figure 13a: Import Button
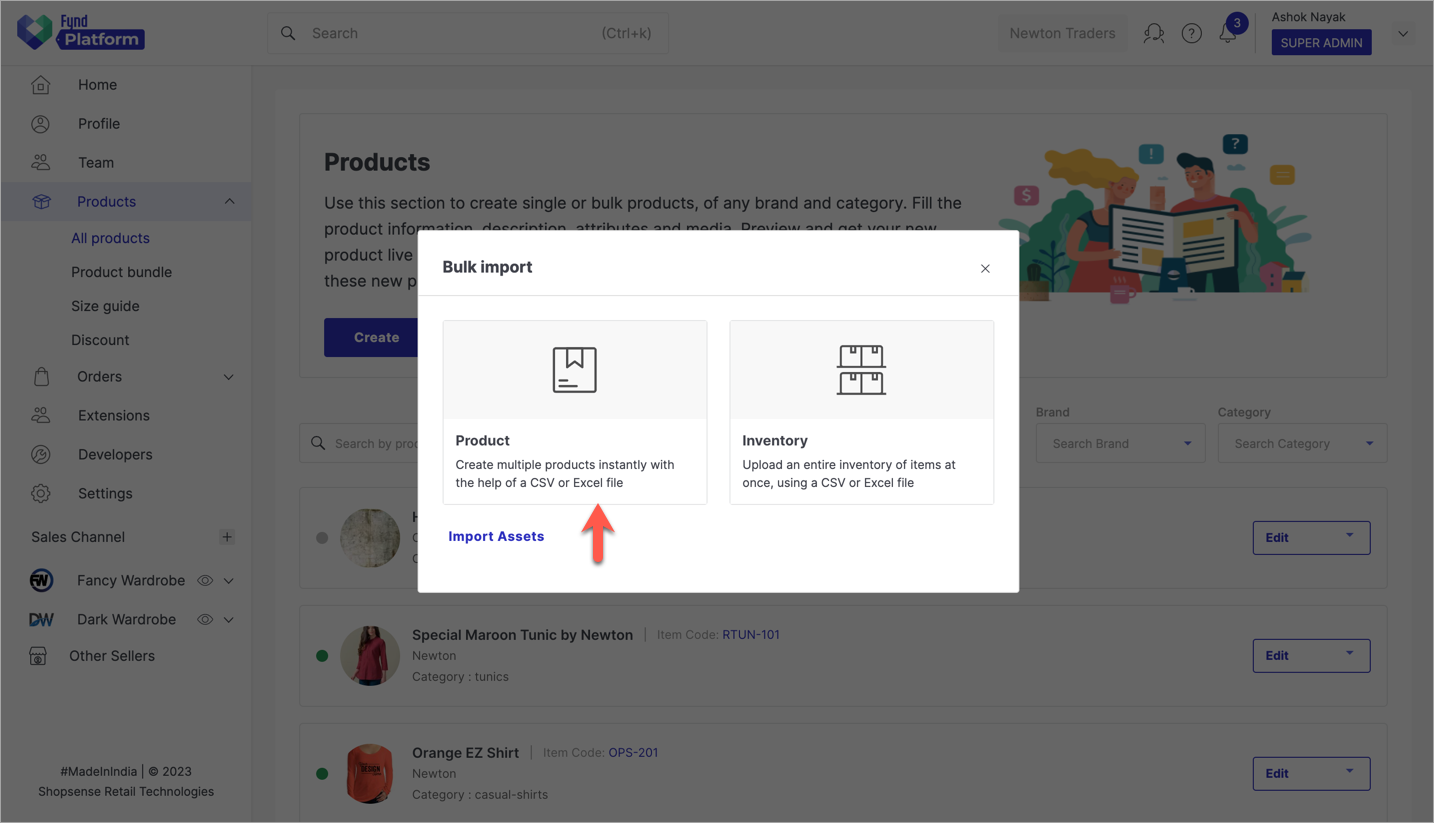
Figure 13b: Import Products
-
Depending on the product you've edited, choose the applicable Type, Departments and Template from the drop-down. Next, use the file uploader on the right side to upload the edited file.

Figure 14: Choosing Template To Upload
-
You may re-check the
File Datawhich shows all the fields of the uploaded file. If there is no error, you can use the Upload button to push your data.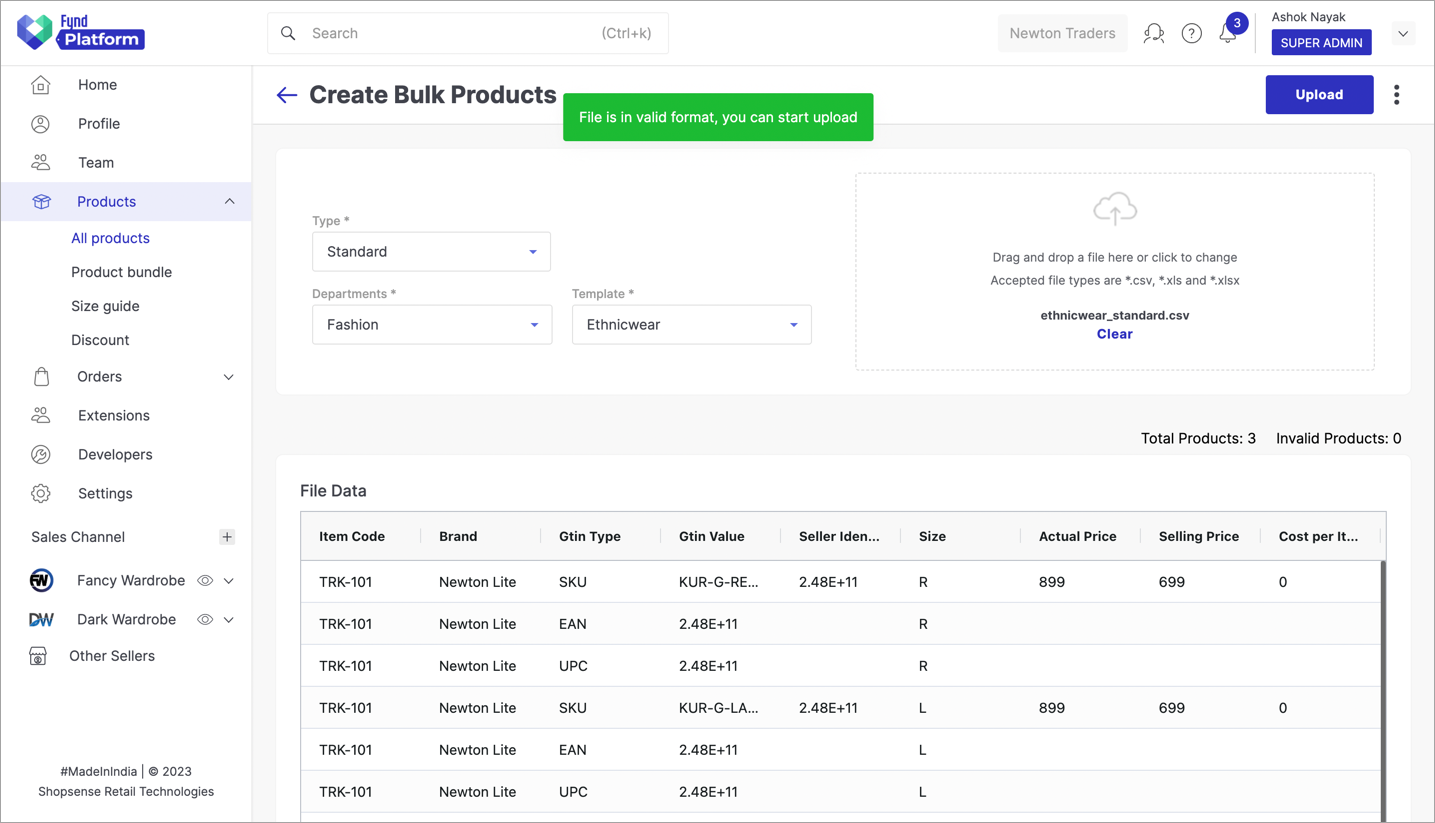
Figure 15: Uploading The File Data
-
A batch job will run for uploading the data. The status will move from
PENDINGtoCOMPLETEDstage once all the data uploads successfully.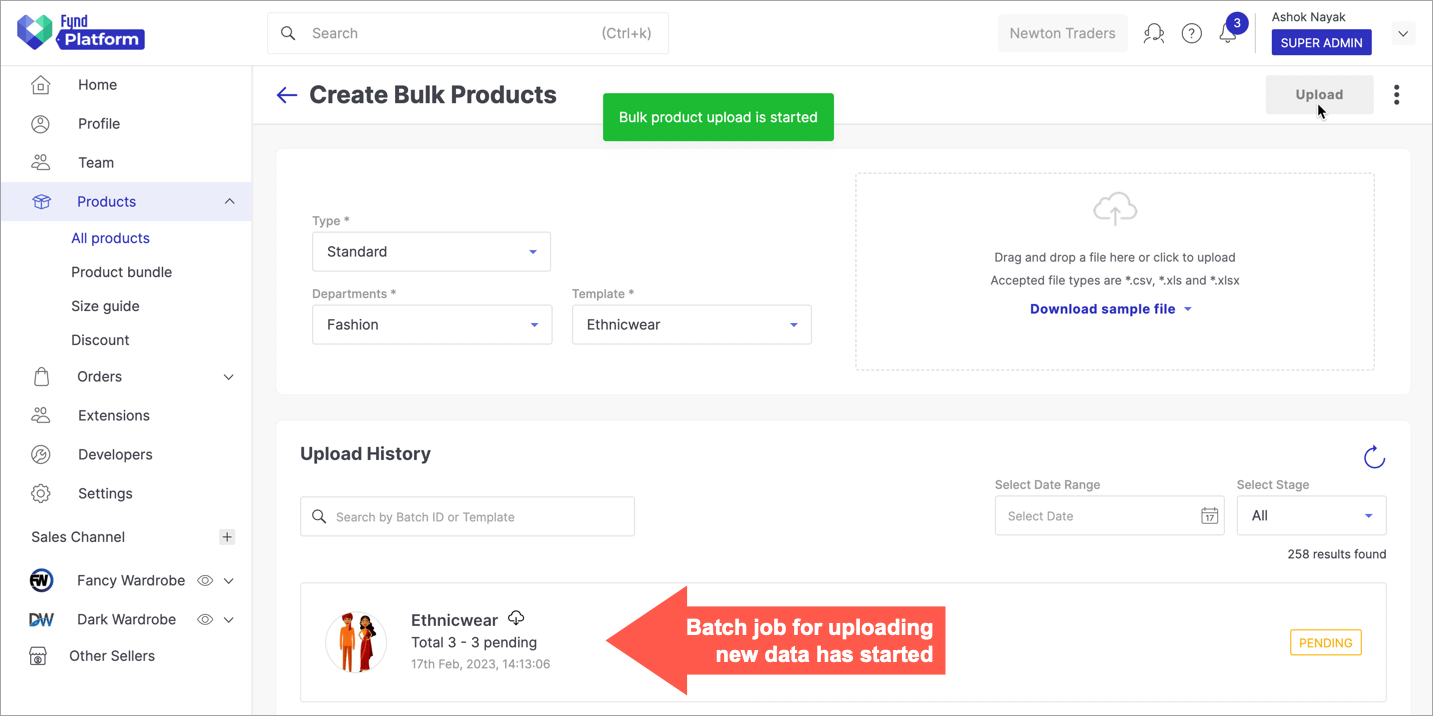
Figure 16a: Batch Job Initiated
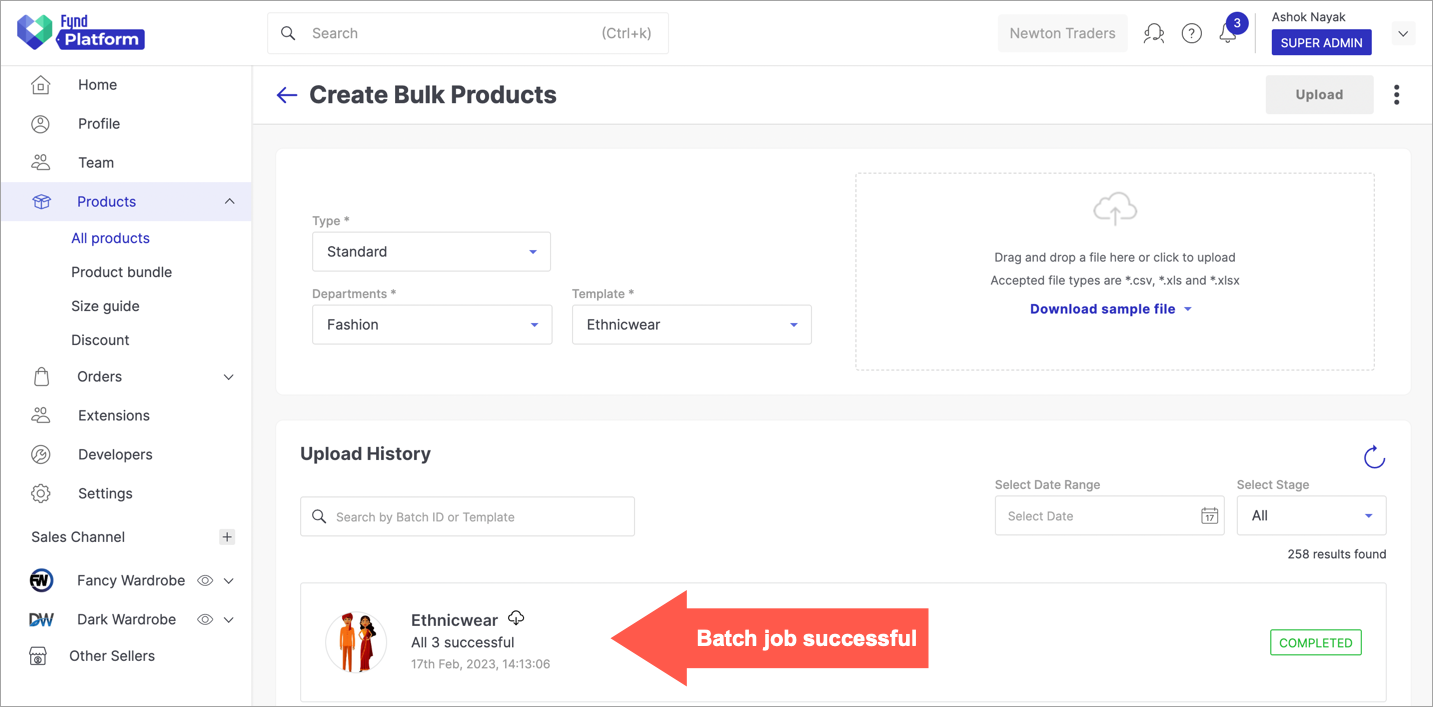
Figure 16b: Batch Job Successful
For changing the MRP or ESP of products at any of your selling locations, update the prices in the inventory rather than the product.
Updating Inventory Prices
For Single Product
-
Search a product whose prices you wish to edit, and click Edit Inventory.
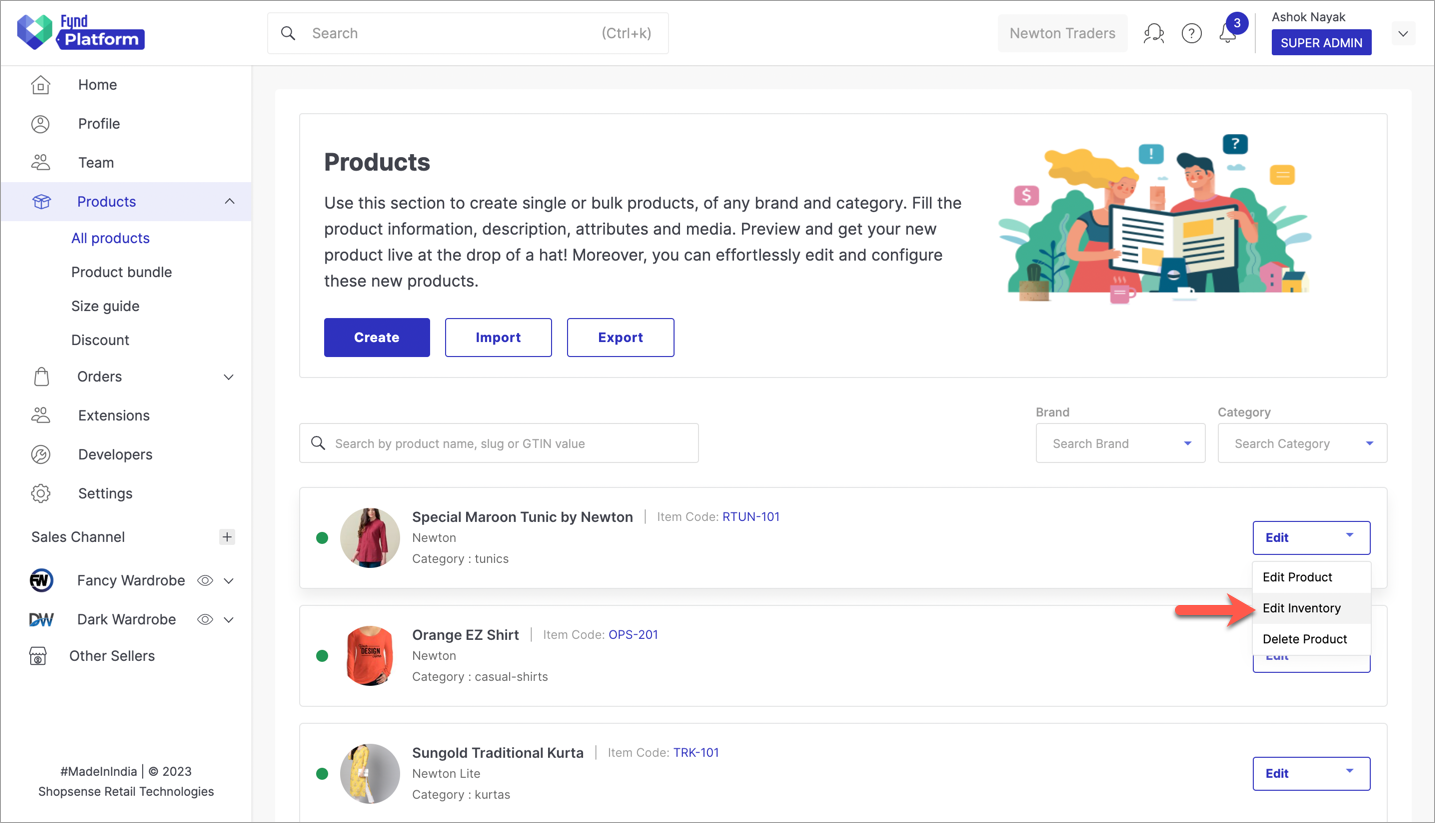
Figure 17: Edit Inventory Option
-
Click on a particular size, and you will see a list of selling locations with respective Maximum Retail Price and Selling Price. Click on Edit.
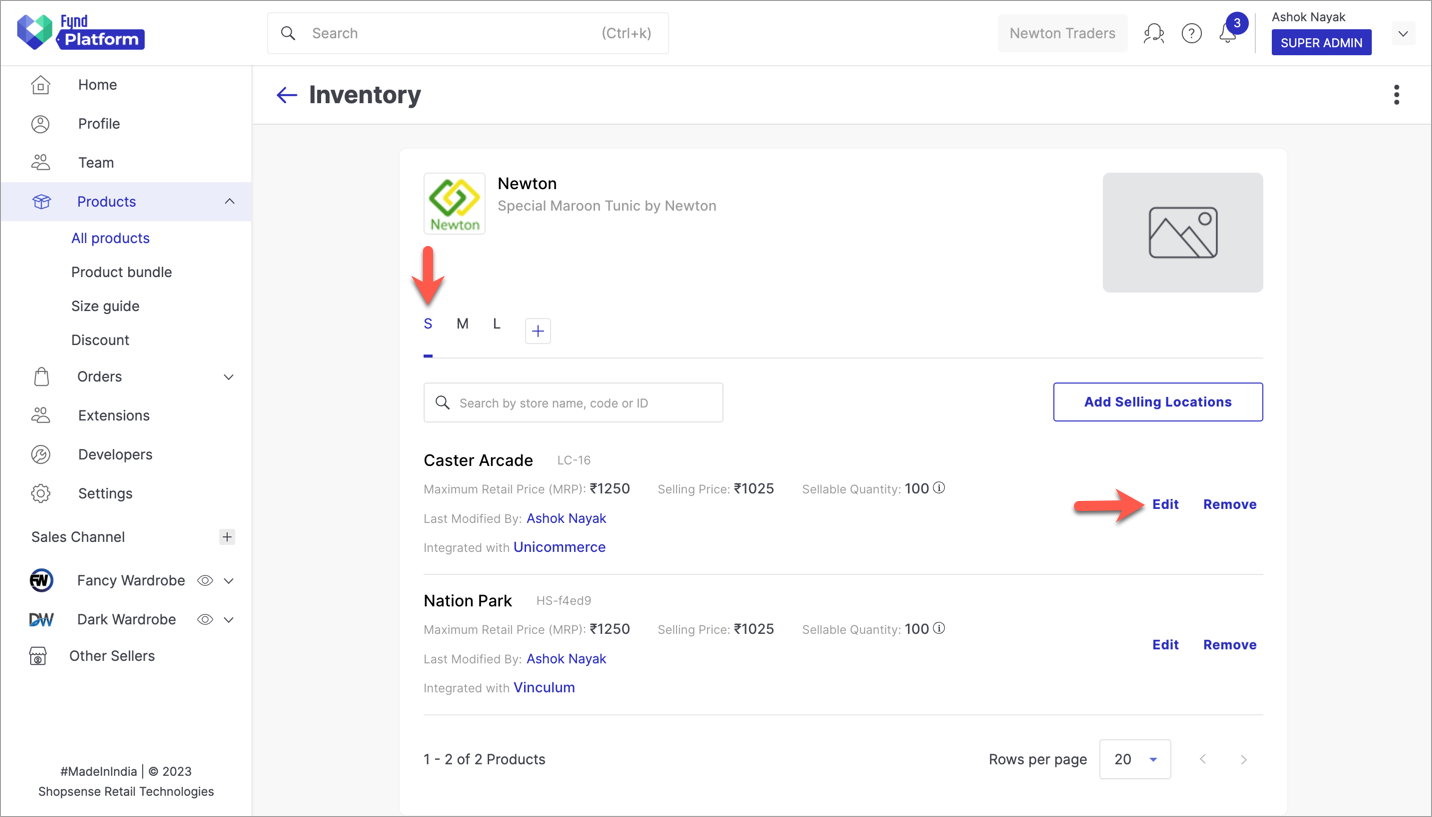
Figure 18: Editing Inventory
-
Enter your new values in Maximum Retail Price (MRP) and Selling Price. Click on Save.
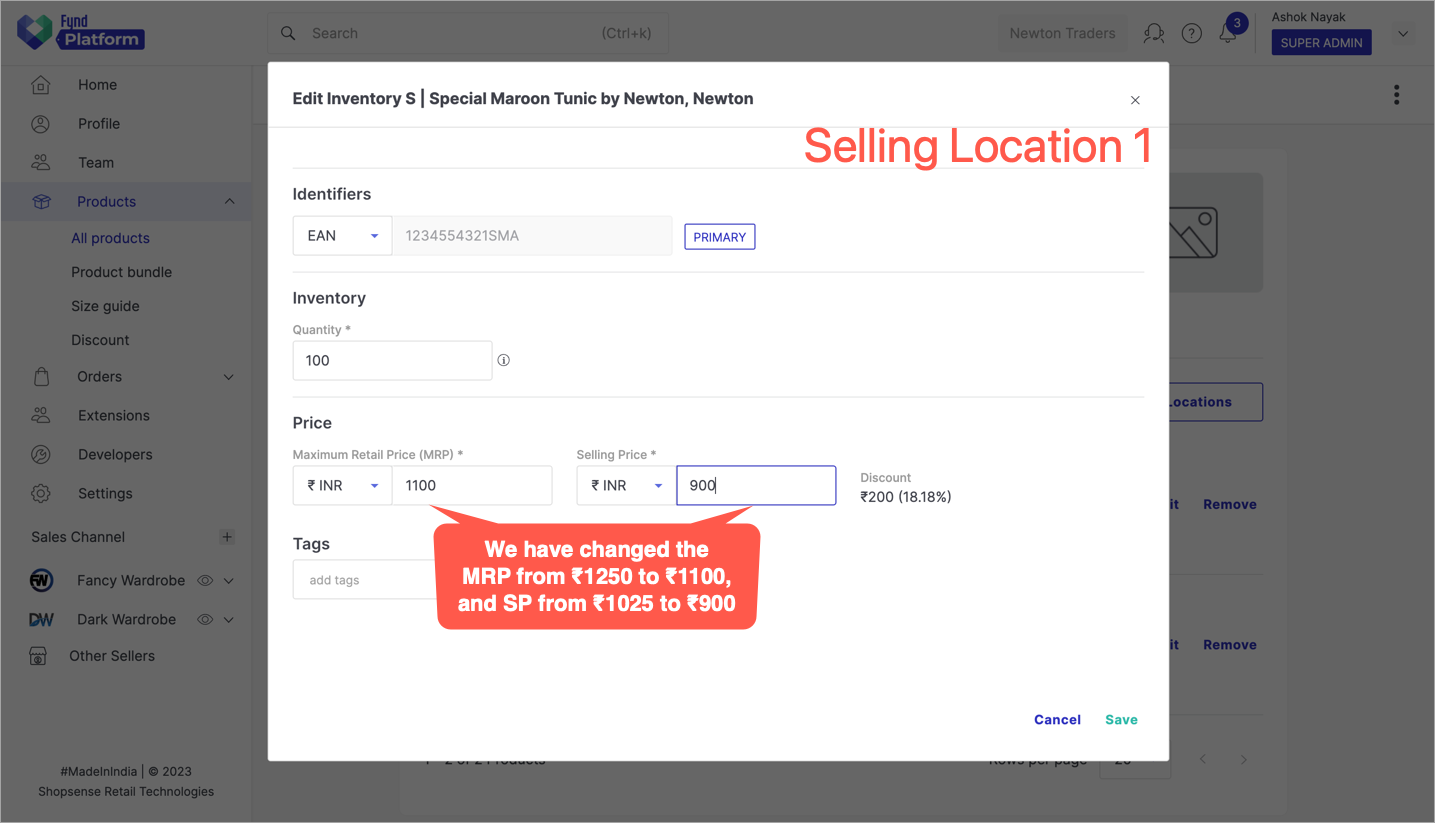
Figure 19a: Changing MRP And ESP For First Location
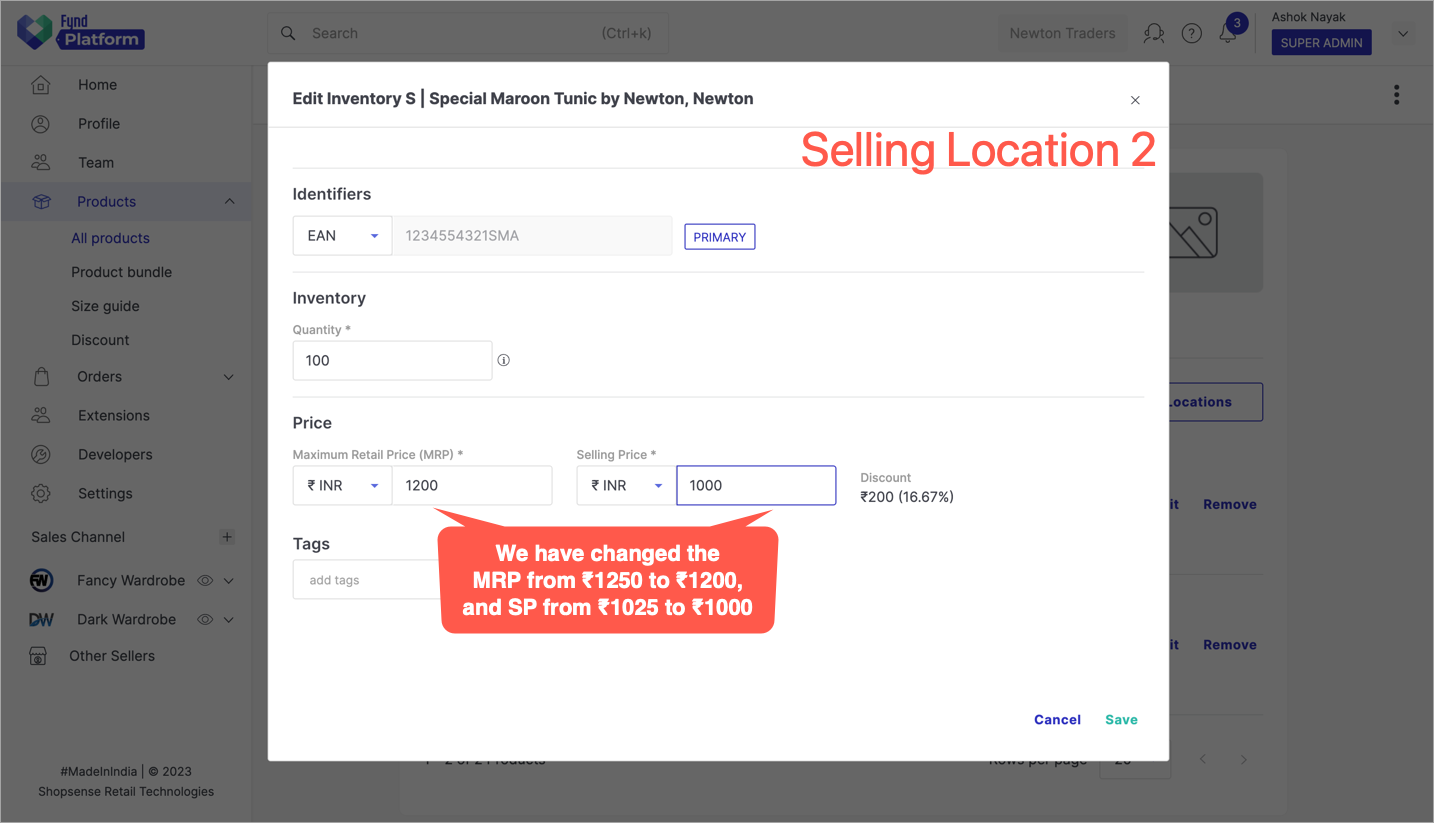
Figure 19b: Changing MRP And ESP For Second Location
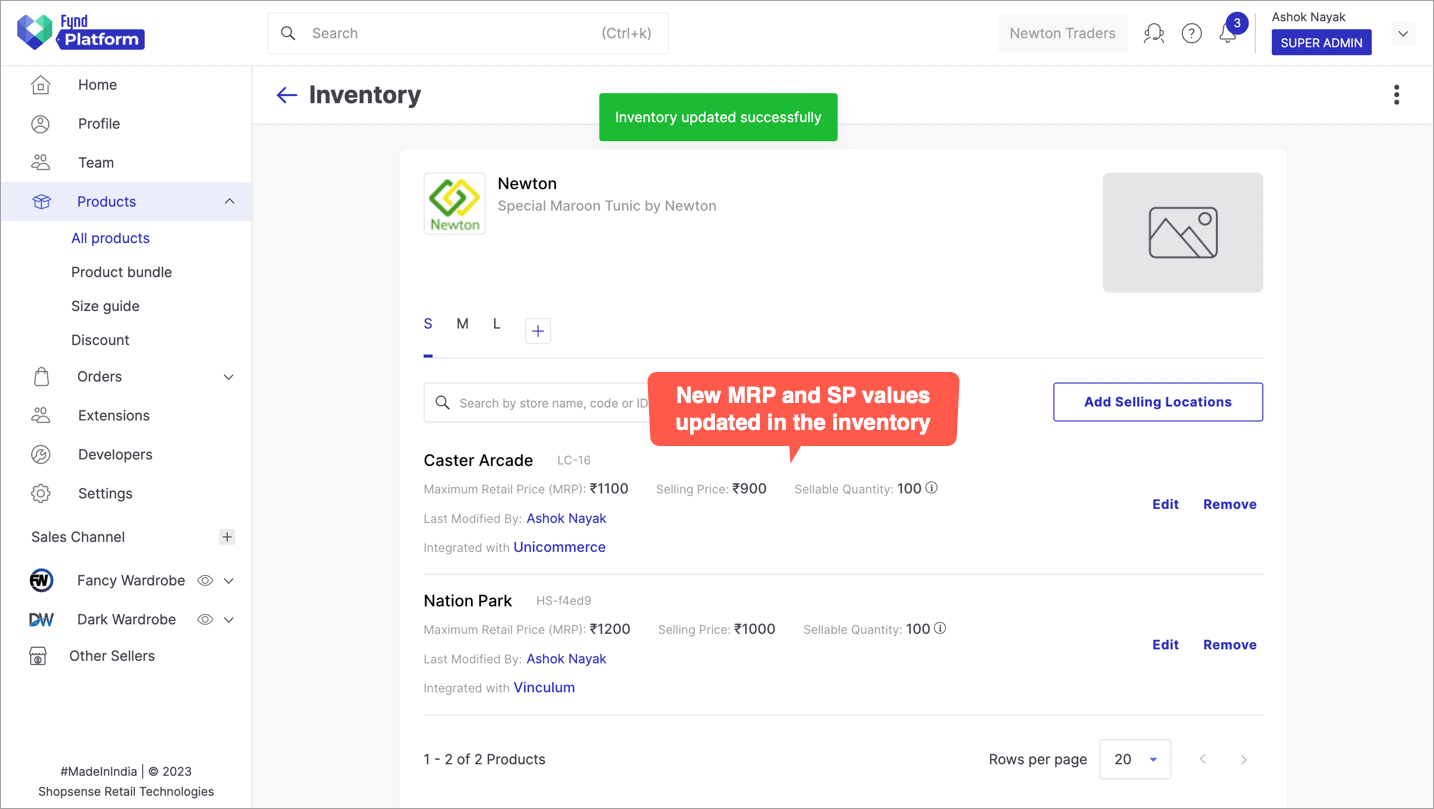
Figure 19c: Updated MRP And ESP values For Selling Locations
noteAs guided in step 3, you can update Maximum Retail Price and Selling Price values for other selling locations too.
Watch OutMRP in the inventory should be less than or equal to the MRP you defined in the product, but not greater.
-
You can check the updated prices on your website. Simply select the product size, and you'll see the new MRP and SP for each location.
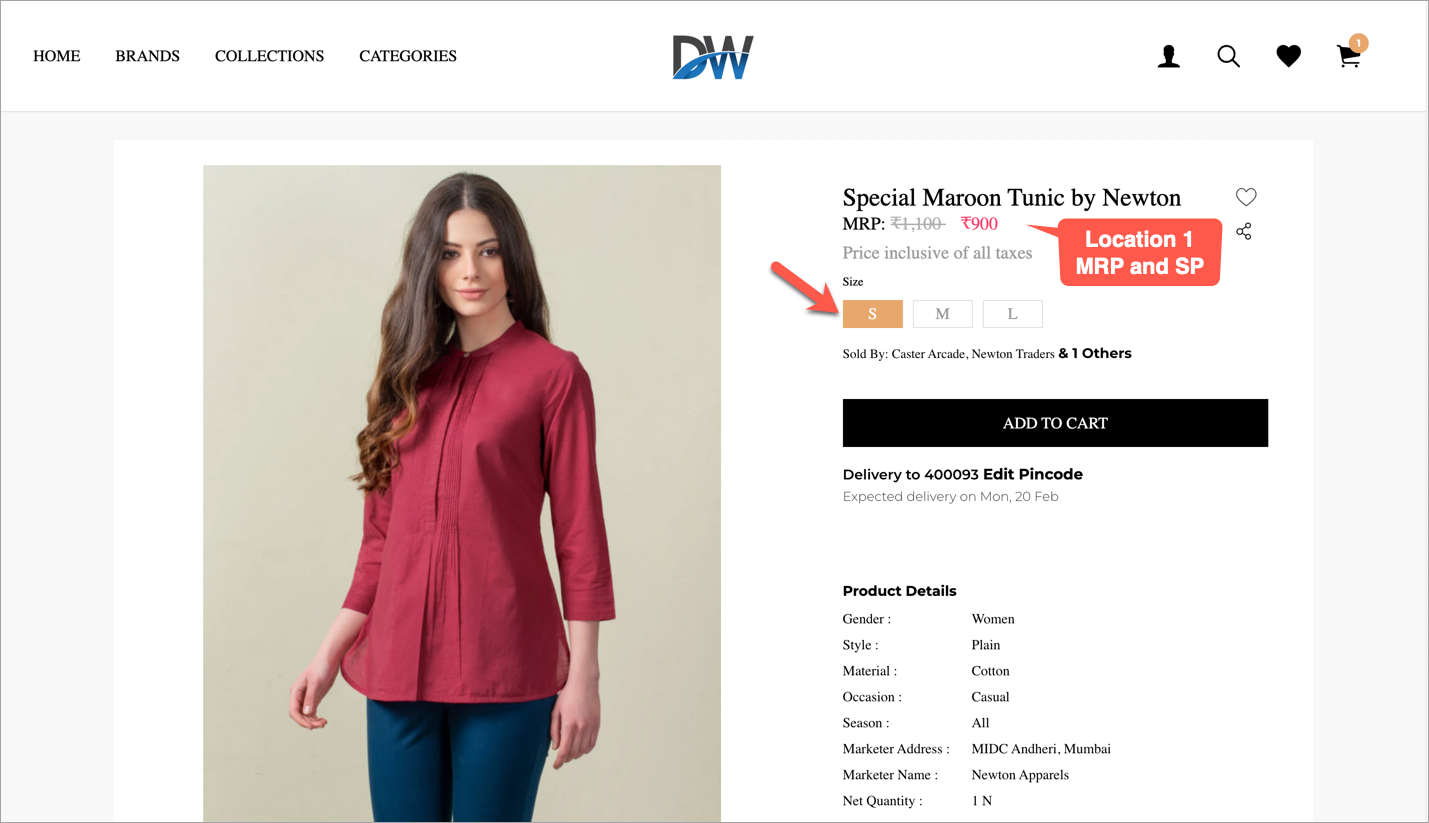
Figure 20a: Selecting Size
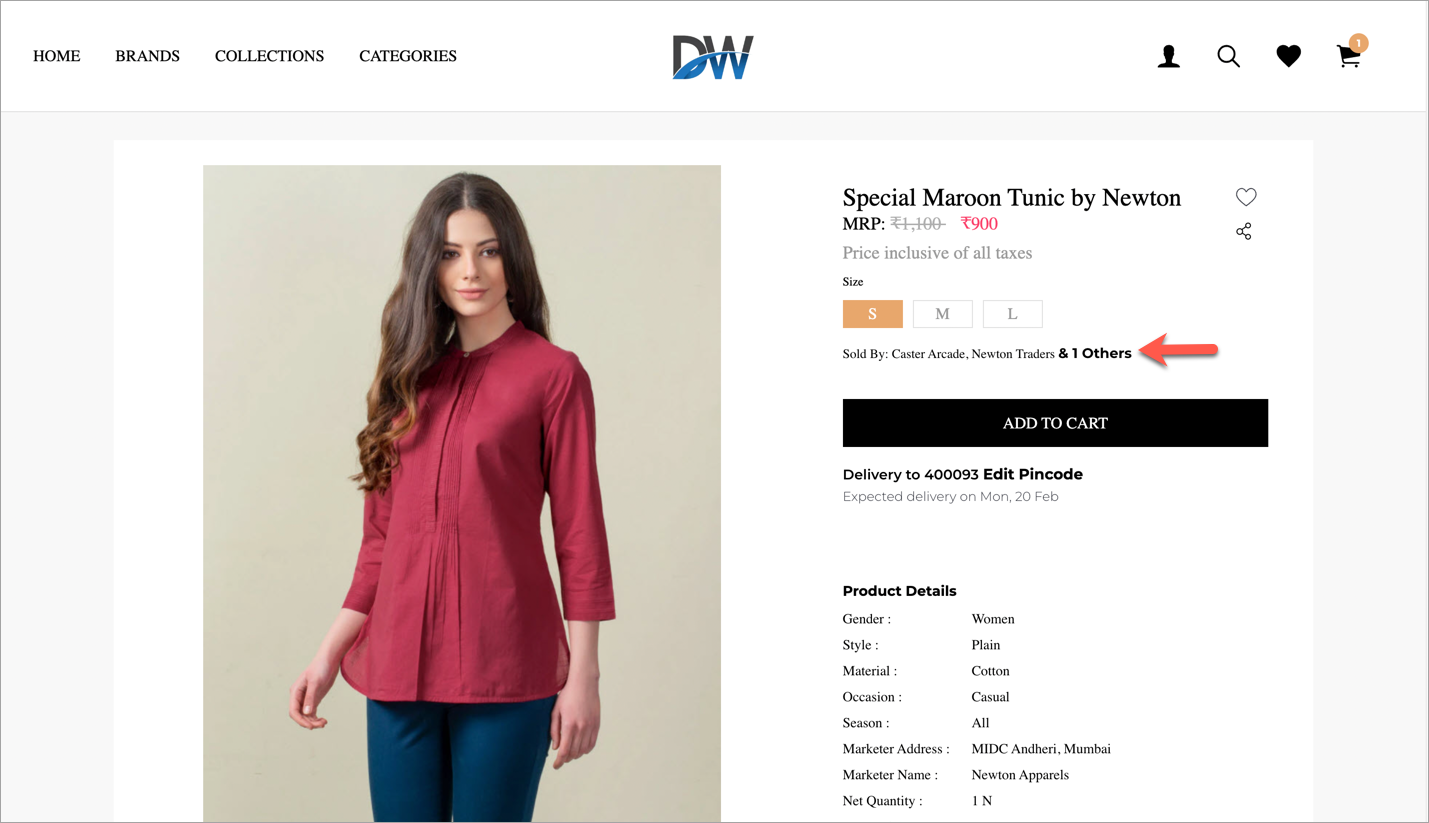
Figure 20b: Changing Selling Location
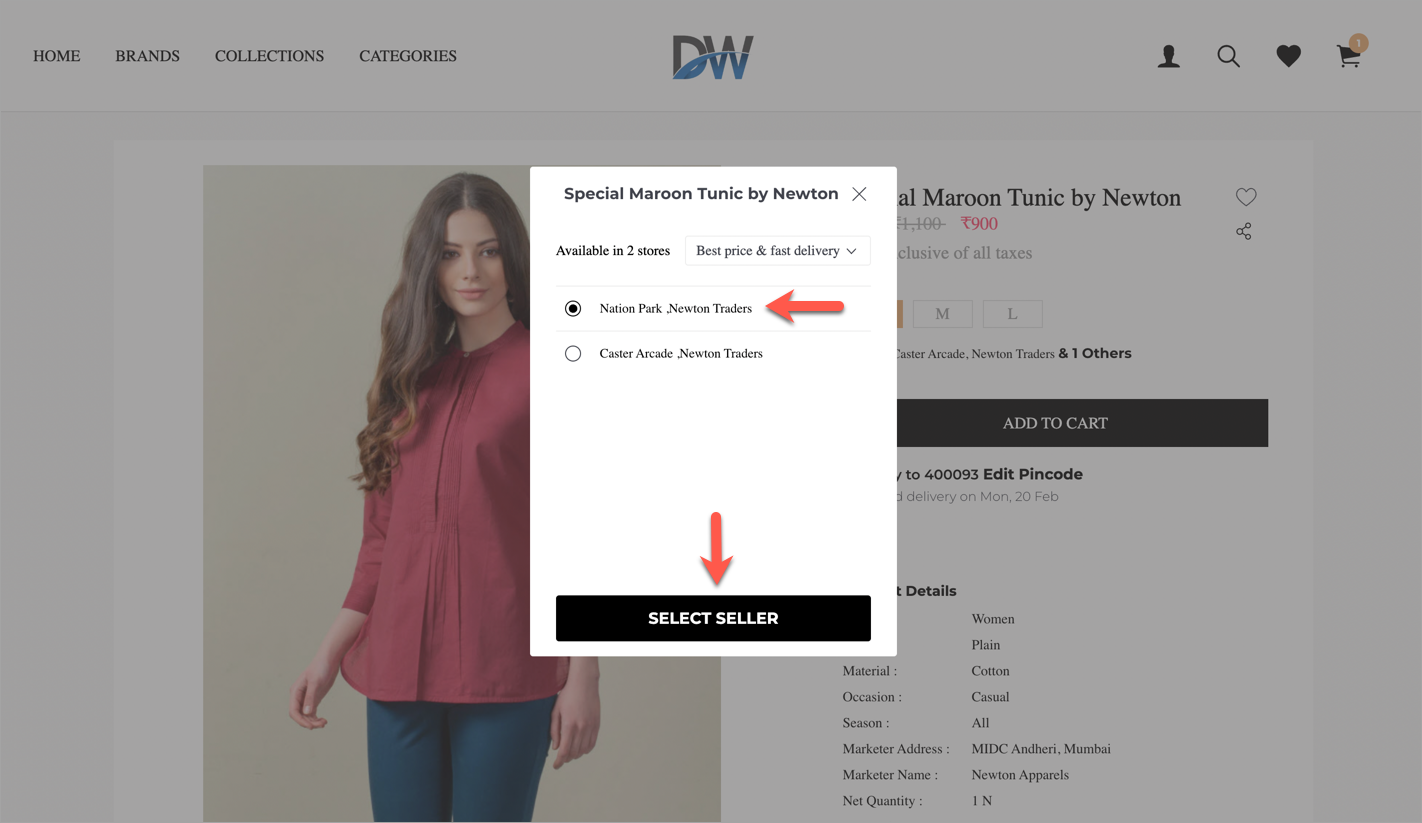
Figure 20c: Selecting Selling Location
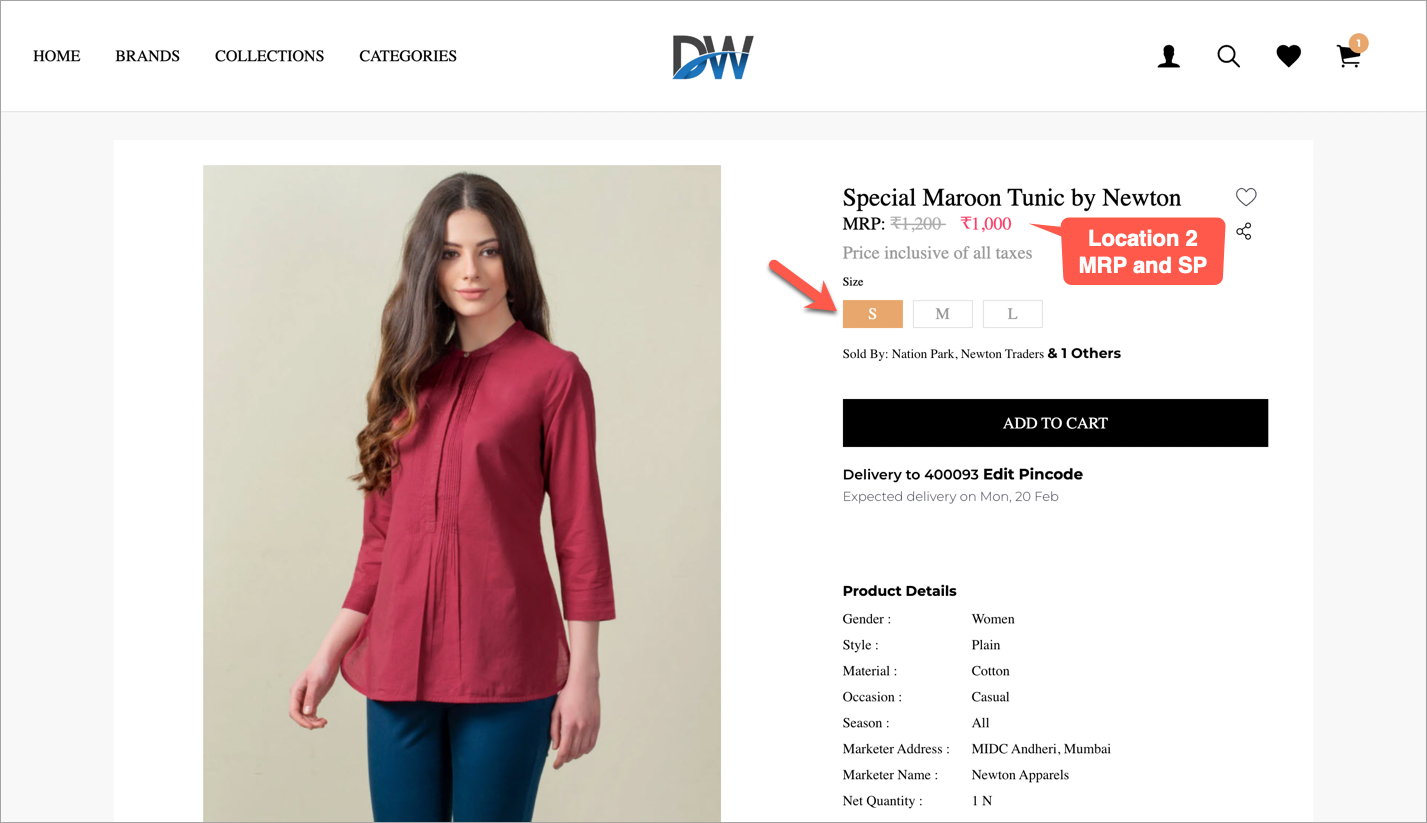
Figure 20d: New MRP And ESP Values Displayed
For Multiple Products
-
Go to the Products section in Fynd Platform, and click the Export button.

Figure 21: Products Section
-
Click Inventory in the pop-up.
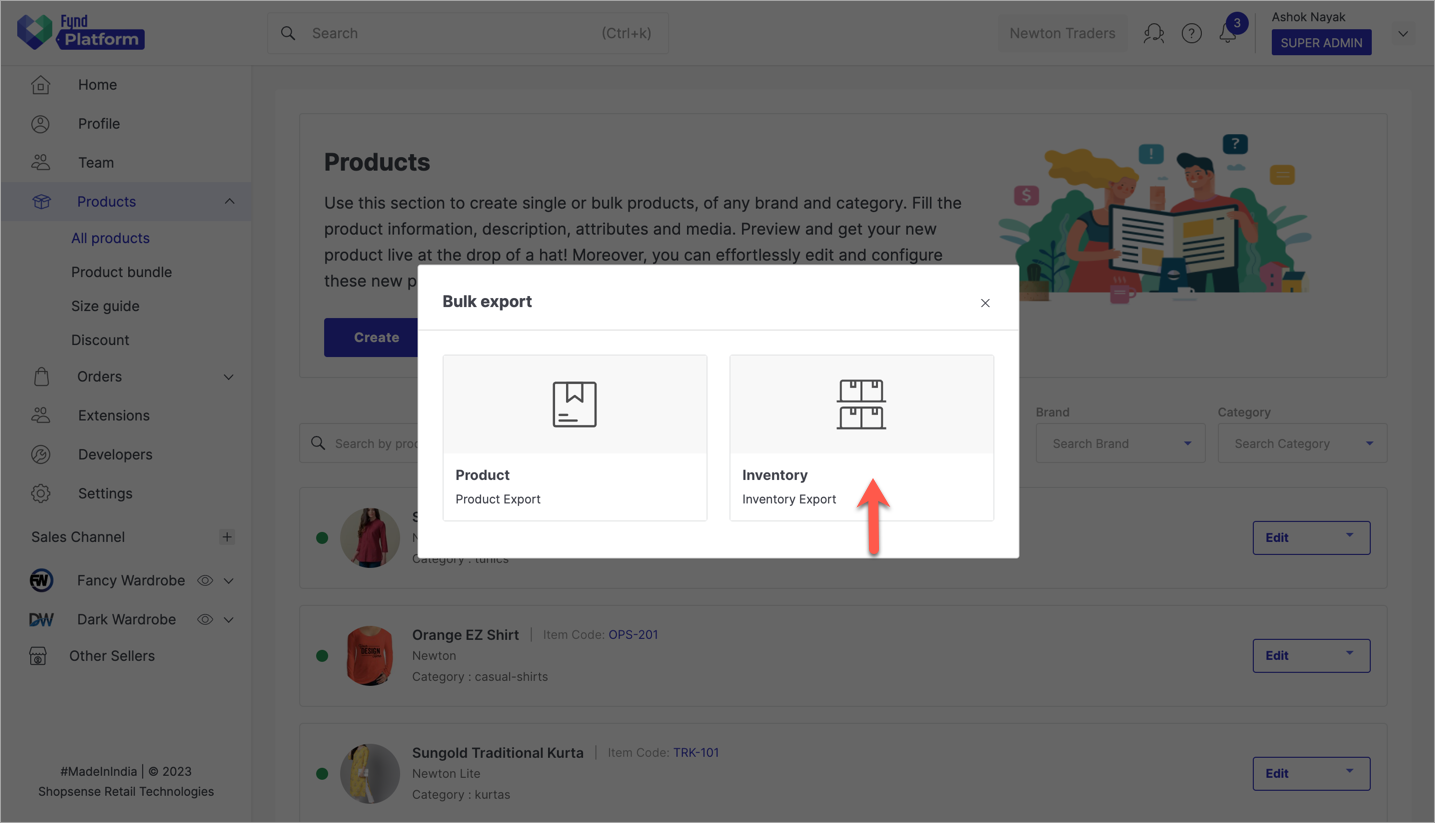
Figure 22: Bulk Inventory Export
-
Click the Generate button on the top-right.
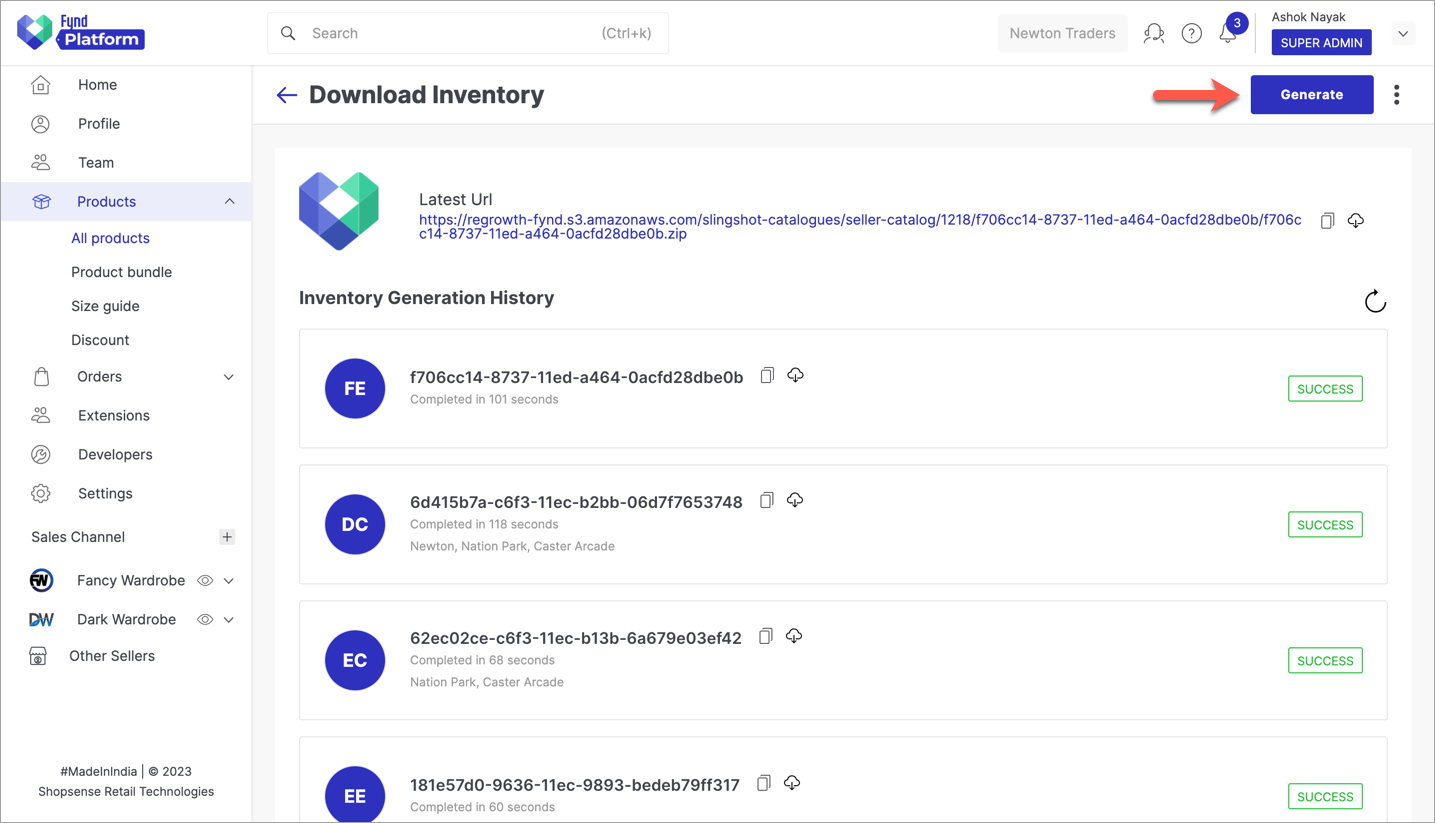
Figure 23: Clicking the Generate Button
-
Select Store, Brand, and Type from the drop-down available in each option. Here, we have selected all stores and brands. Now, click on Export.
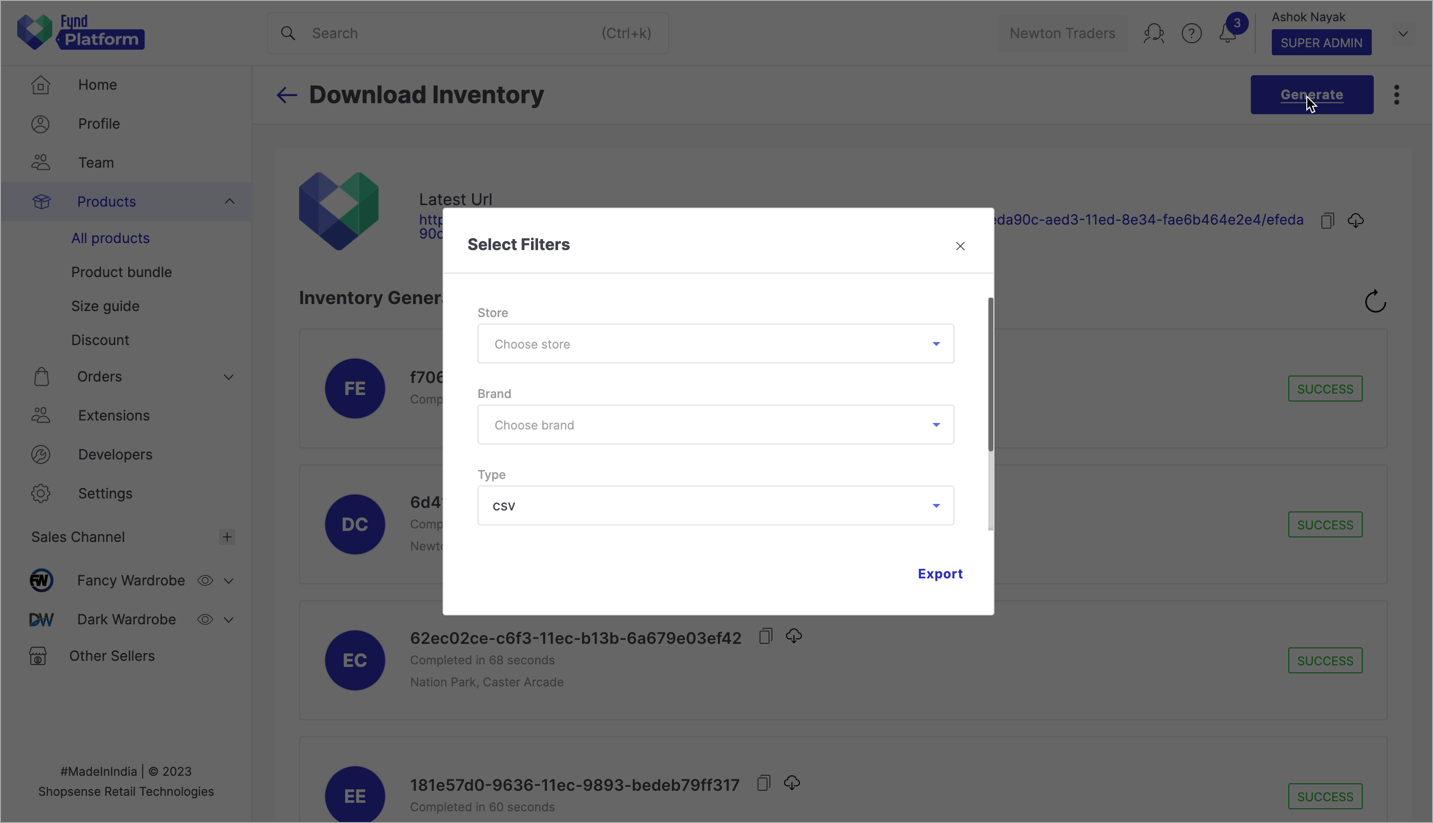
Figure 24a: Selecting Filters
Inventory export job will begin with RUNNING status as shown in the figure below.
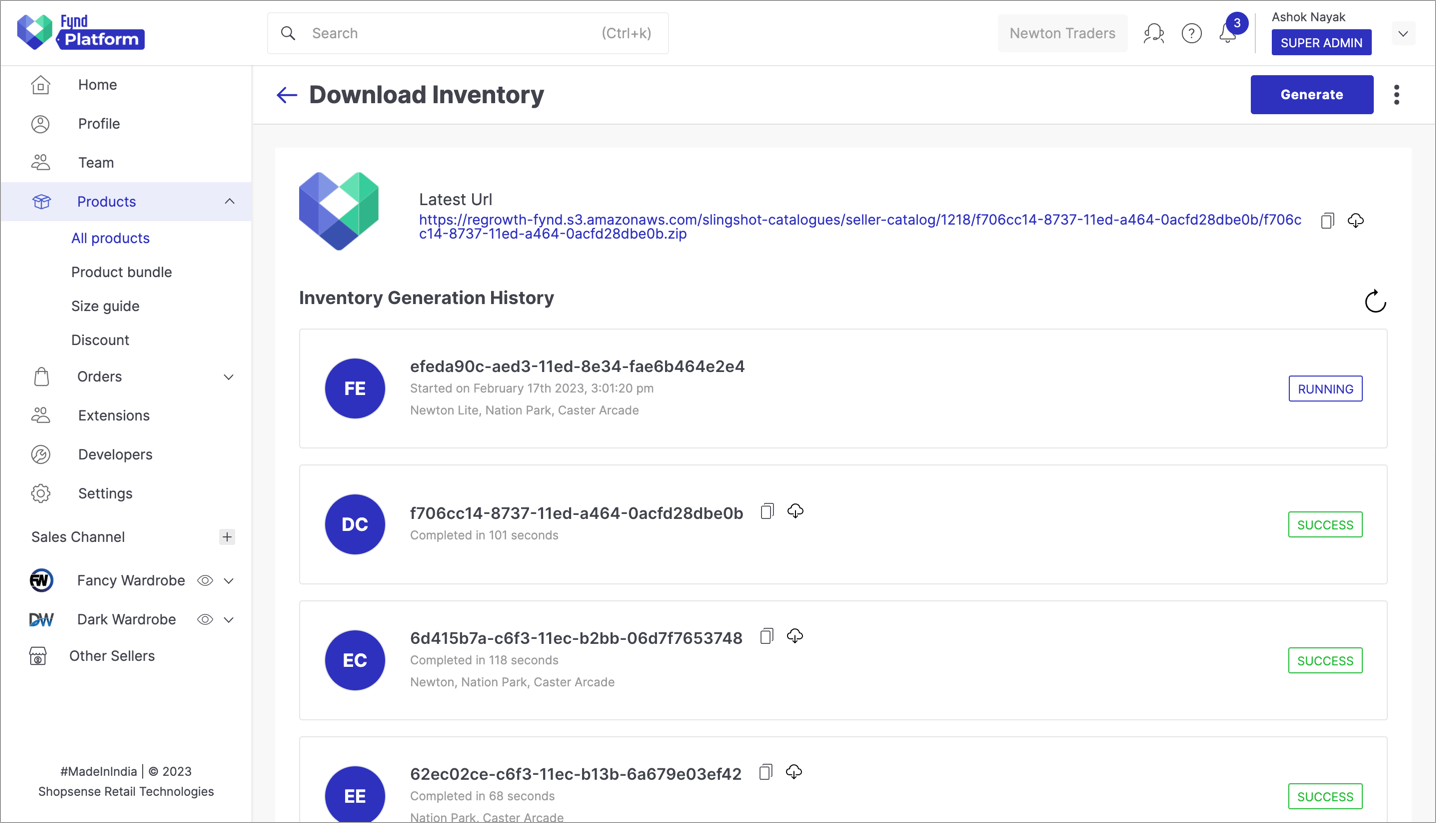
Figure 24b: Running A Batch Job
-
Click the download icon once the status changes to SUCCESS. A zip file will start downloading to your PC.
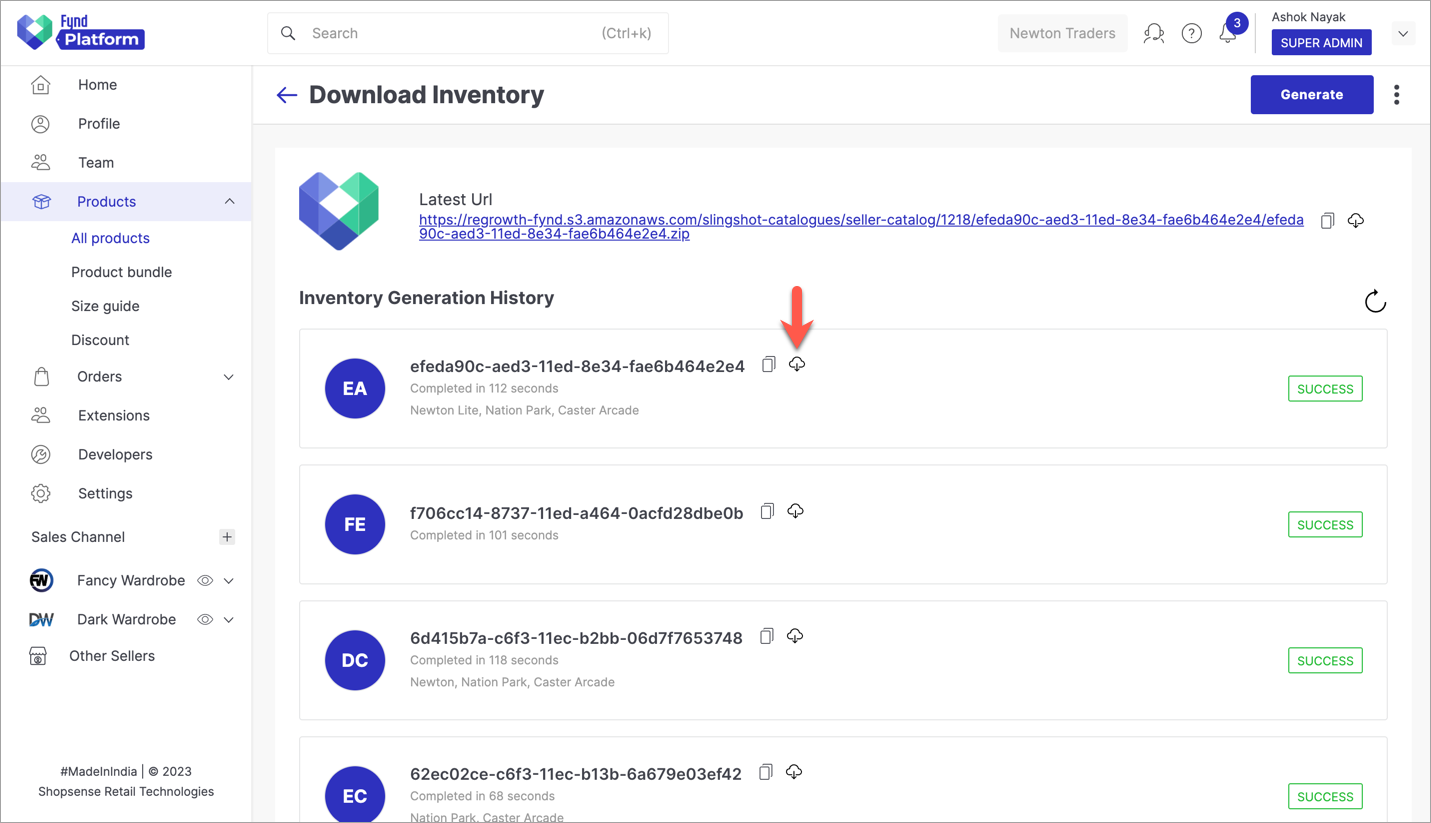
Figure 25: Downloading Generated Inventory File
-
Open the downloaded zip file and extract it.
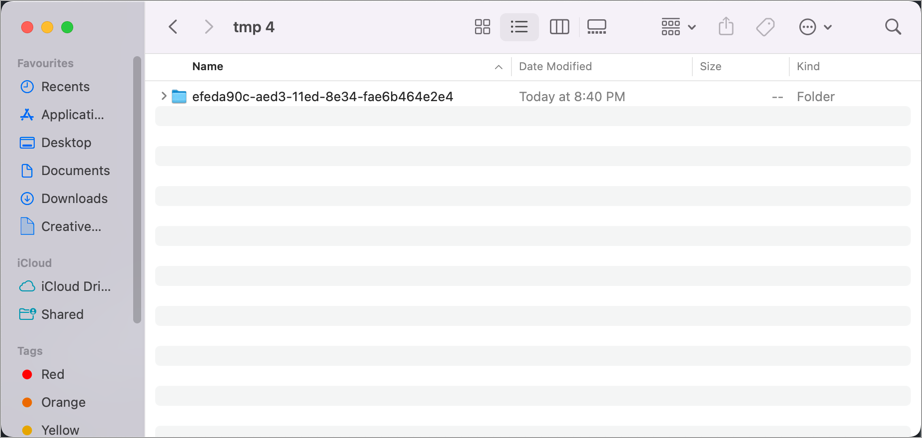
Figure 26a: Extracting Zip Content
Find the exported Excel/CSV file within the extracted folder.
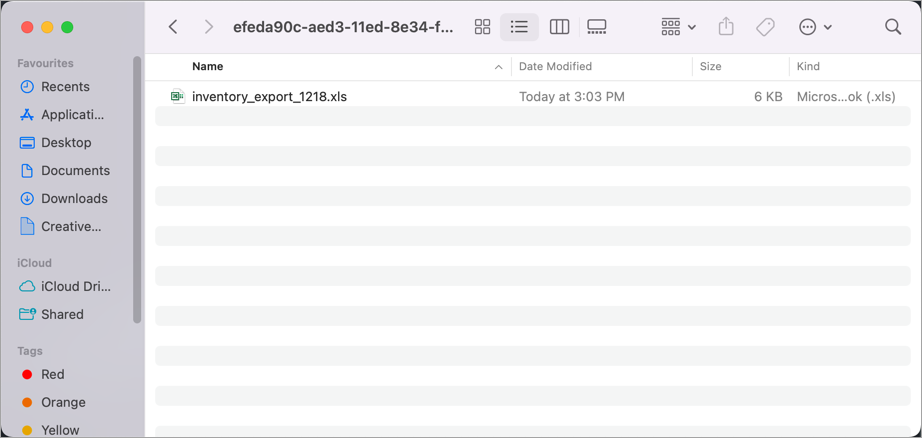
Figure 26b: Locating Excel/CSV File
-
Open the Excel file, and locate the seller identifier of products whose Maximum Retail Price and Selling Price you wish to update. Here, we have selected two products and we will change their prices at each selling location.
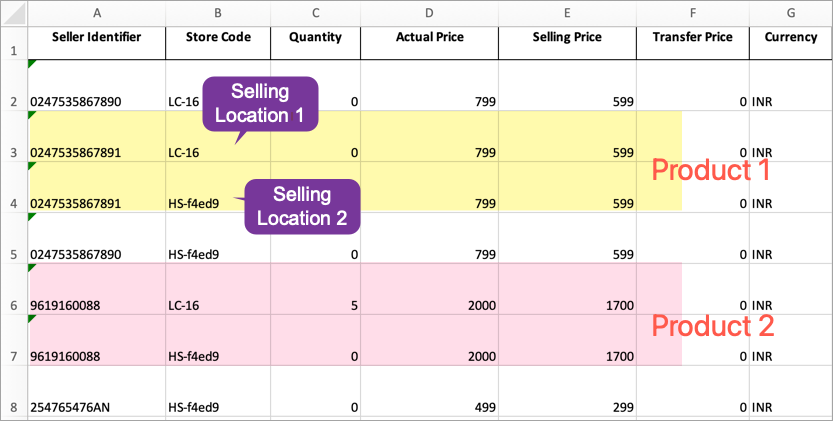
Figure 27: Locating Products To Update note(Optional) You may delete the rows where the prices aren't changed.
-
Enter the new Actual Price and Selling Price, and save the file.
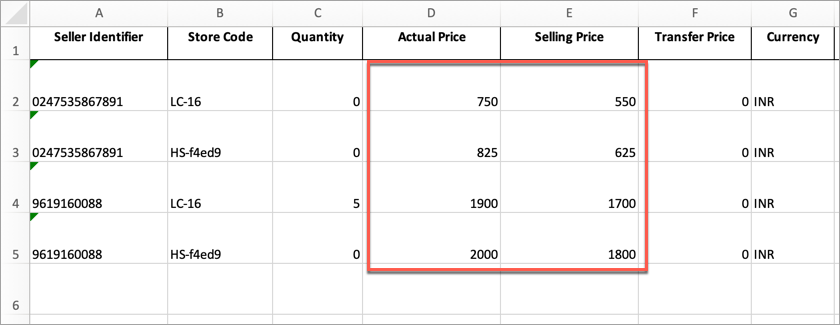
Figure 28: Updating MRP And ESP
Watch OutActual Price in the inventory should be less than or equal to the actual price you defined in the product.
-
Go back to the Products section.

Figure 29: Download Inventory Screen
-
Click the Import button.

Figure 30: Products Section
-
Click Inventory in the pop-up.
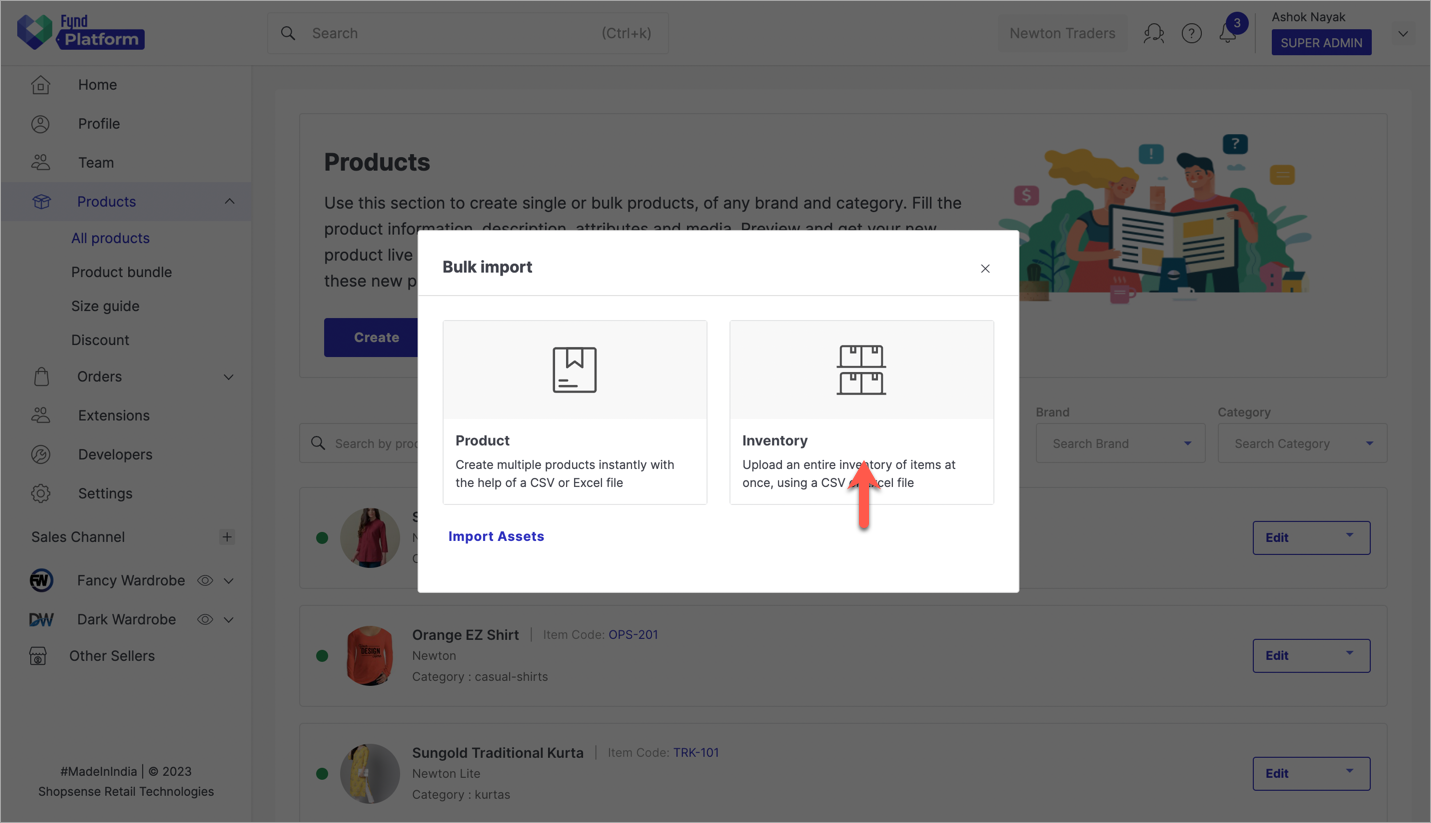
Figure 31: Bulk Inventory Import
-
Use the file uploader to upload your Excel file.
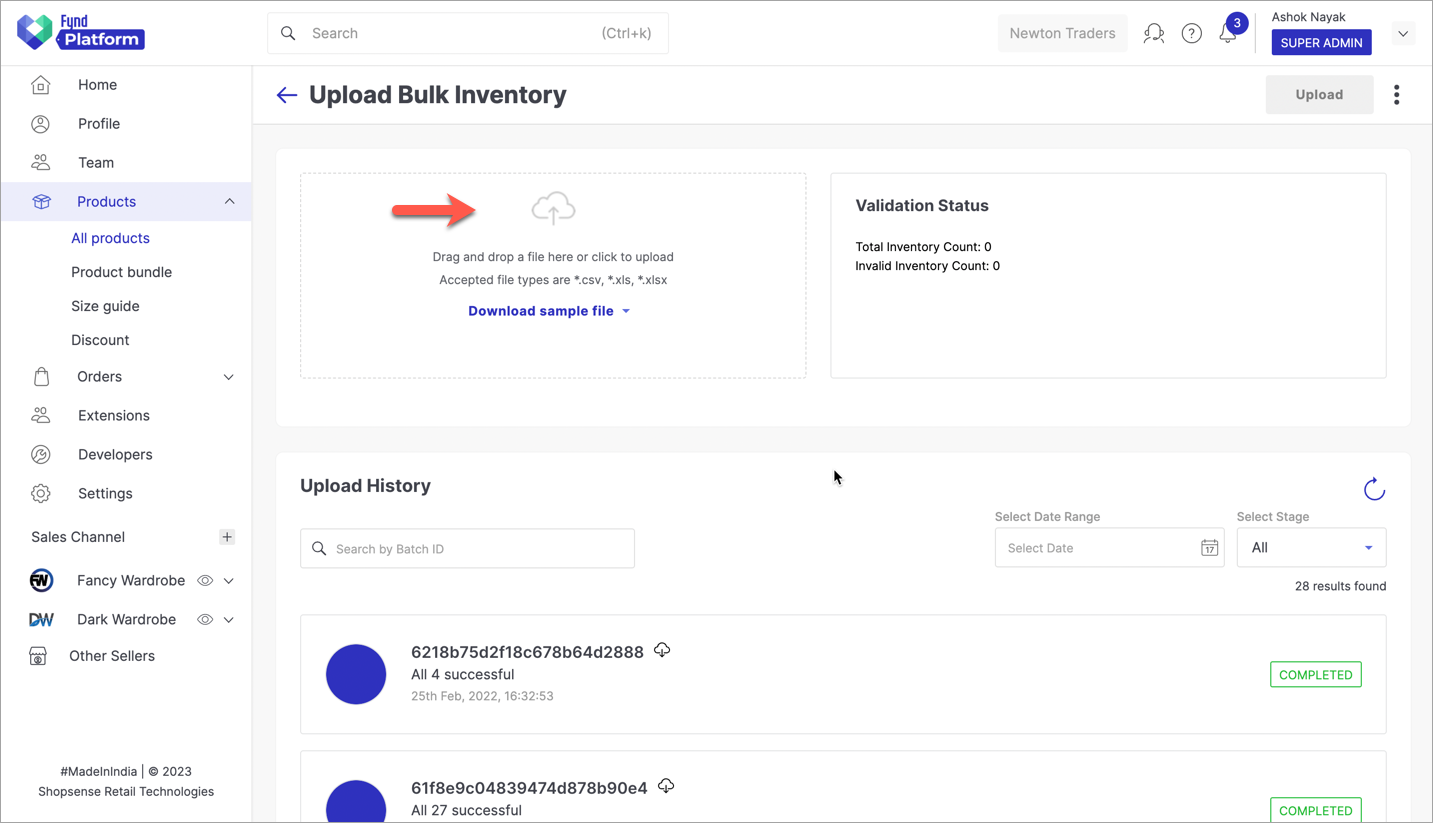
Figure 32: Uploading Excel File
-
Verify the data once. Click on Upload in the top-right corner.
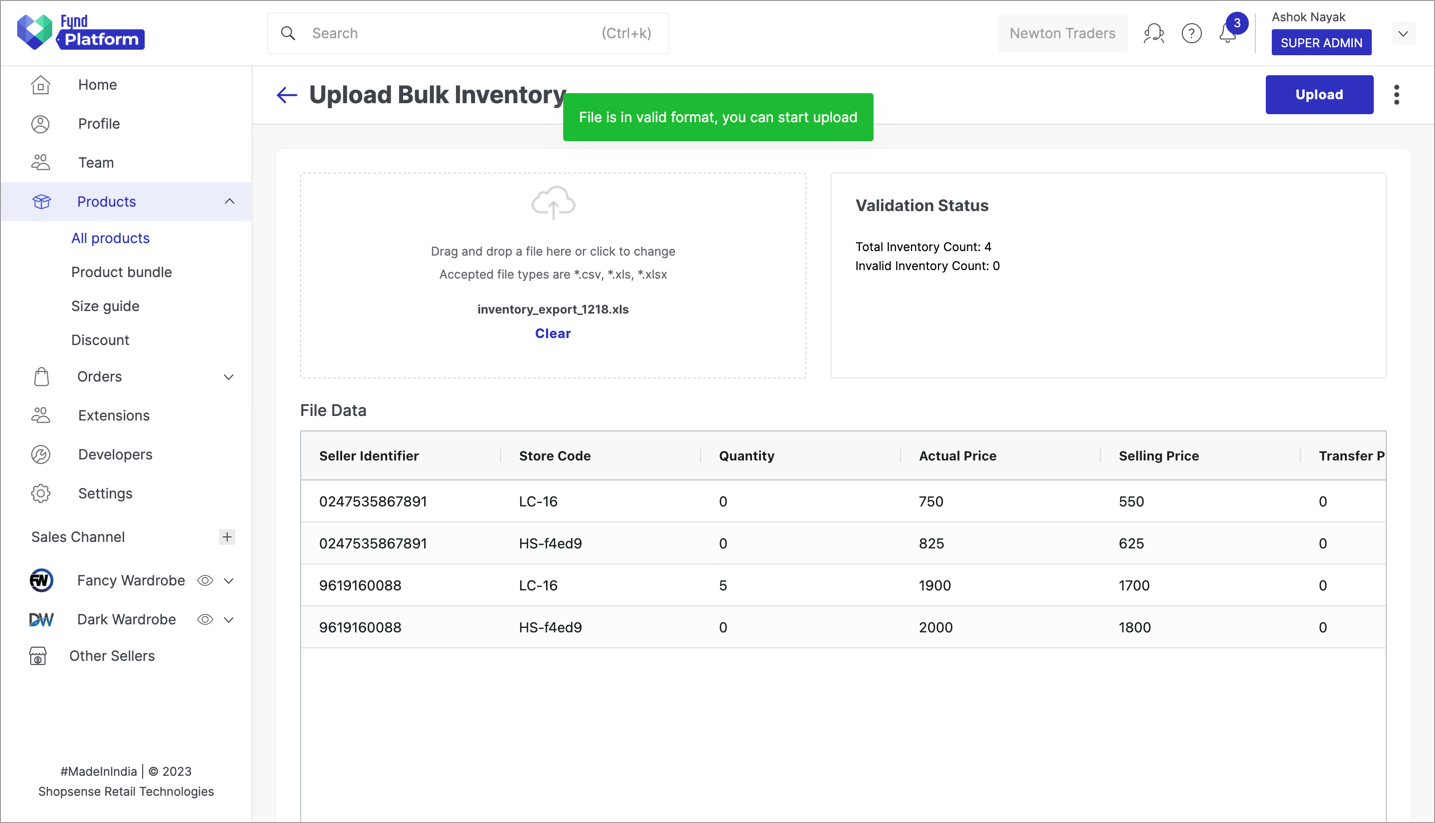
Figure 33a: Uploading Inventory
The bulk upload will initiate and it can be viewed under 'Upload History' as shown below. The upload status will be shown as
PENDING. Wait till the status turns toCOMPLETED.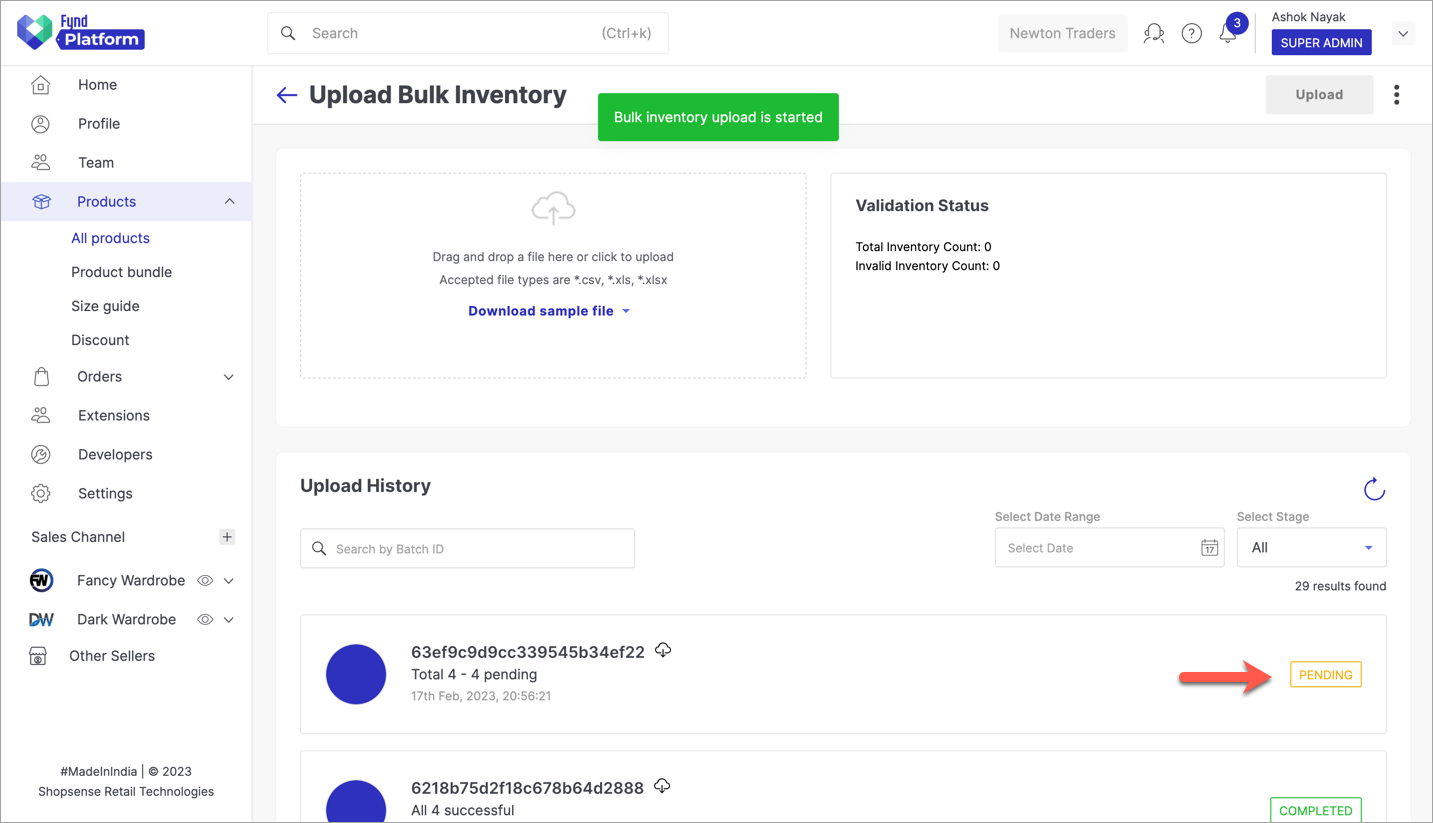
Figure 33b: Batch Processing Started
-
Visit your website, and you will see the updated Maximum Retail Price and Selling Price for the products modified in the Excel file.
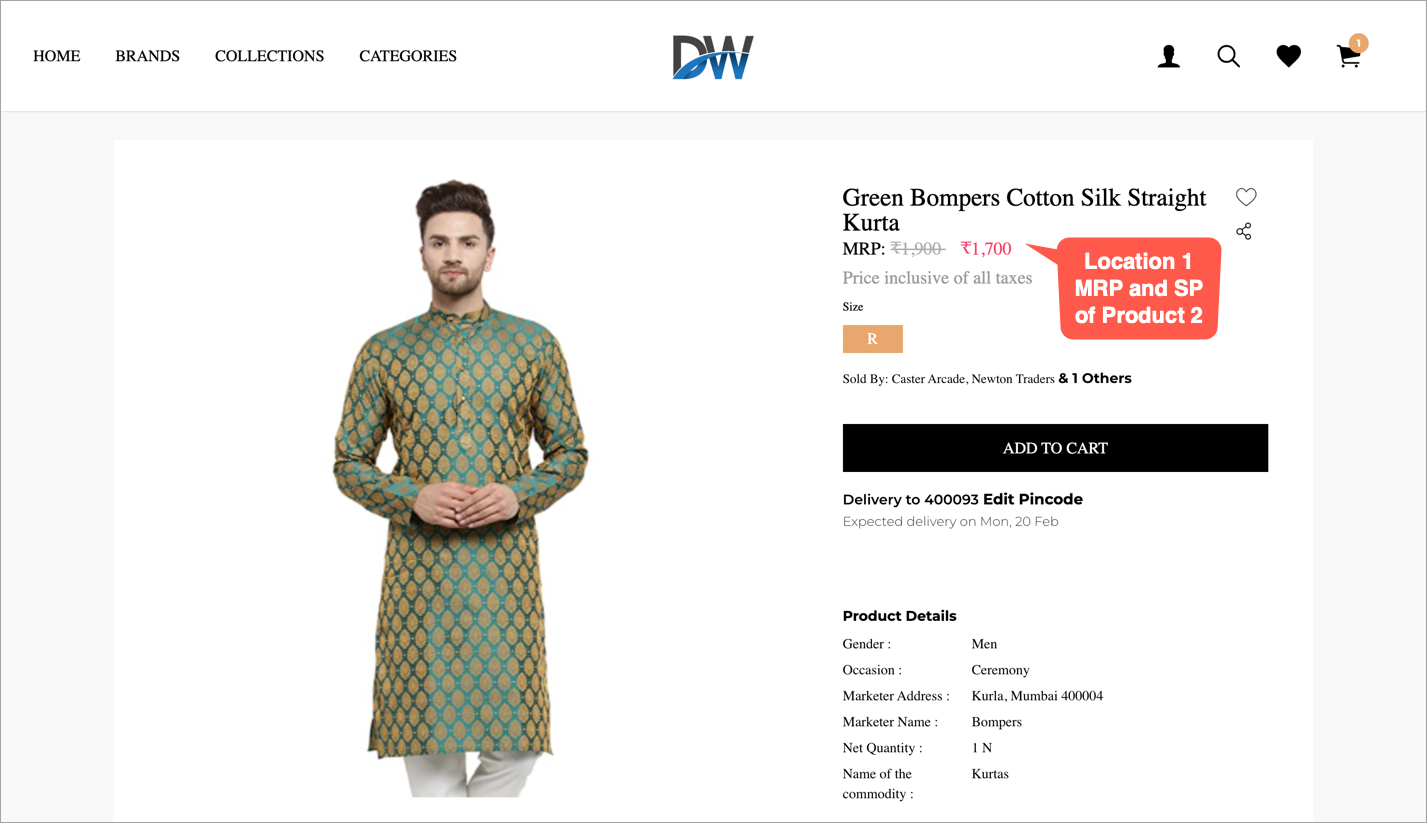
Figure 34: New MRP And ESP Of A Product On PDP