ONDC Seller App
Introduction
This extension allows sellers to integrate with the Open Network for Digital Commerce (ONDC) platform through the Fynd Seller platform. The ONDC Extension simplifies the onboarding process, enabling sellers to configure their brand, locations, and product catalogs for compatibility with ONDC.
Steps to Use ONDC Extension
Installation Process
- Go to the Fynd Platform.
- Navigate to the Extensions section.
- Click Extension Marketplace.
- Locate the ONDC Seller App Extension.
- Click Install to begin the installation process.
- A permission page will appear.
- Click Accept and Continue.
- A term and conditions page will open.
- Click Accept to continue.
The ONDC Extension has now been successfully installed.
Complete Onboarding Checklist:
After installation, sellers are guided through an onboarding checklist (figure 1), which includes:
.jpg)
- Legal Documents: Upload GST, PAN, and Digital Signature. Refer to the document for instructions on how to update the files.
- Brand: One generic brand will always be present; however, we recommend adding a non-generic brand for better visibility and branding. Refer to the document for instructions on how to update the files.
- Selling Location: Add at least one location with complete details. Refer to the document for instructions on how to update the files.
- Business Description: Provide a description of the business. Refer to the document for instructions on how to update the files.
- Support Details: Add at least one phone number and one email address. Refer to the document for instructions on how to update the files.
- Bank Account Details: Add at least one bank account. Refer to the document for instructions on how to update the files.
Update the information asked in the checklist to complete the onboarding flow. Once the required steps are done, the following screen will appear (figure 2). Click Finish Setup to continue.
.jpg)
Home Sections
Business Information
This section allows you to manage and update essential details related to your company. To view or edit the business related information follow the instruction below:
Company Logo
This allows seller to upload or update their company logo. To upload the company logo follow the instruction:
- Click Upload File.
- Choose a logo image file.
- Upload the company logo.
Legal Documents
This allows you to manage and update mandatory legal documents for business verification on ONDC. The following components are give on the legal documents:
- GST Details: View or update the GST information linked to your business.
- PAN Details: View or update the PAN Card details associated with your business.
- Digital Signature: View or update your digital signature used for official documentation.
To edit the legal documents follow the instruction below:
- Click Edit.
- This will redirect you to the edit document section within the platform where you can make changes.
- Update the information here.
- Click Save.
Bank Details
Manage and update the bank account details for receiving payments. The following components are given on the bank detail section:
- Account Holder Name: The name of the account holder.
- Bank Name: The name of the bank where the account is held.
- Account Number: The bank account number (partially masked for security).
To edit the bank details follow the instruction below:
- Click Edit in the Bank Details section.
- You will be redirected to the Finance & Payments page on the Platform where you can update your bank account details.
Business Details
Manage and update the general description of your business. The following components are given on the business detail section:
- Business Description: A brief overview of your business.
Ensure that the Business Type is updated, as it is mandatory to save the business details as a whole, even though the Business Description itself is not mandatory.
To edit the business details, follow the instruction below:
- Click Edit next to the Business Details section.
- This will take you to the profile section on the Platform where you can update the description.
- Update the business description and save the changes.
Support Details
Manage and update the customer support contact details. The following components are given on the support details section:
- Email: The primary email address for customer support.
- Phone: The primary phone number for customer support.
To edit the support details, follow the instruction below:
- Click Edit next to the Support Details section.
- This will direct you to the Edit Support Details page where you can update the support details.
- Update the email and/or phone number as needed and save the changes.
Selling Locations
This section allows you to manage the enablement of your selling locations on ONDC for inventory management.
Location List
You can view a list of your verified selling locations.
- Search Bar: Allows you to search for a location by name or location code.
- Location Details:
- Location Name: Displays the name of the location.
- Code: The unique code assigned to the location.
- City: The city where the location is based.
- State: The state where the location is based.
- Status: A toggle switch to enable or disable the location on ONDC.
Hover over the Verify Instruction button to see the details that are missing and preventing the location from being verified. Once you've identified the missing information, click Verify. This will direct you to the relevant section where you can update the necessary details to complete the verification process.
Enable/Disable Locations
- Toggle the switch to enable or disable specific location from appearing on ONDC. Or, Click checkbox next to the location name to enable or disable a location.
- Once the checkbox is selected, the Enable/Disable button will become visible.
- You can select the locations and enable or disable them at once.
Bulk Upload
Follow the steps below to update the status of multiple locations at once using a bulk upload feature.
-
Click Bulk Upload located at the top right corner of the Selling Locations page.
-
Bulk Upload Interface:
- Download Sample: Click to download a sample template to understand the format required for the bulk upload. Add your verified selling location codes and specify the desired status (enable/disable).
- Upload File: Drag and drop your file into the upload area or click Choose File to select it manually.
- Validation Summary: View the validation summary to check if the file has been uploaded successfully. In case of errors, download the file, correct it and re-upload it.
-
Once the file is uploaded, the location statuses will be updated based on the information provided in the file.
-
You can also view the History of bulk uploads to track past uploads and their outcomes.
Brands
The Brands page within ONDC allows you to manage the brands associated with your business that will be visible on ONDC. This section provides the ability to view, enable/disable, and manage multiple brands. A bulk upload feature is also available for updating brand statuses efficiently.
Brand List
You can view a list of all your verified brands.
- Search Bar: Allows you to search for a brand by name or brand code.
- Brand Details:
- Brand Name: Displays the name of the brand.
- Brand Image: Shows the logo or image associated with the brand.
- Status: A toggle switch to enable or disable the brand on ONDC.
Enable/Disable Brands
- Toggle the switch to enable or disable the brand from appearing on ONDC.
Or,
- To enable or disable a brand, click checkbox next to the brand’s image.
- Once the checkbox is selected, the Enable/Disable button will become visible.
Bulk Upload
Update the status of multiple brands at once using a bulk upload feature.
-
Click Bulk Upload located at the top right corner of the Brands page.
-
Bulk Upload Interface:
-
Download Sample: Click to download a sample template to understand the format required for the bulk upload. Add your brands and specify the desired status (enable/disable).
-
Upload File: Drag and drop your file into the upload area or click Choose File to select it manually. This upload, include the brand code, brand name, and status.
noteThe brand code can be found in the URL of the brand page.
- Validation Summary: View the validation summary to check if the file has been uploaded successfully. In case of errors, download the file, correct it and re-upload it.
-
-
Once the file is uploaded, the brand statuses will be updated based on the information provided in the file.
-
You can also view the History of bulk uploads to track past uploads and their outcomes.
Product Catalogue
The Product Catalogue section within the ONDC Seller extension allows sellers to manage their product listings and optimize their catalogue for integration with ONDC. This section is divided into two main areas: Catalogue Enrichment and Product Listing.
Catalogue Enrichment
Manage and optimize your product catalogue by filling in missing attributes required for ONDC compliance.
-
Template List: Displays templates associated with your product categories.
-
Optimization Instructions: Guidance on how to optimize your product catalogue, such as reviewing and filling in missing mandatory attributes highlighted in red and optional attributes highlighted in yellow.
-
Template Details:
- Template Name: The name of the product category or template.
- Total Products: The total number of products associated with this template.
- Synced Products: The number of products successfully synced with ONDC.
- Incomplete Products: The number of products with missing attributes required for ONDC. Red indicates mandatory missing field, whereas, yellow indicates optional missing fields.
- Fill Rate: The percentage of attributes filled in for products under this template.
- Download: Option to download the template file to update all missing attributes. Missing info cells will be highlighted — check the UI for details already mentioned.
-
Export History: Track past exports of template files.
-
Upload: Upload the updated template file after filling in missing attributes to sync the products with ONDC.
-
Search Bar: Allows searching within the templates, categories, or products.
Instructions for Catalogue Enrichment
- Review the templates that have products with missing attributes.
- Download the template and fill in the missing information as per the optimization instructions.
- Re-upload the updated file in the Import Products section to sync your products with ONDC.
Product Listing
Product List:
Displays all the products that are part of the catalogue.
- Product Details:
- Product Name: The name of the product.
- Category: The category under which the product is listed.
- Template: The template associated with the product.
- Identifier: Unique identifier or SKU for the product.
- Size: Available sizes for the product.
- Status: A toggle switch to enable or disable the product on ONDC.
- Search Bar: Allows searching for a product by name, identifier, brand, or category.
- Update: Provides a link to update specific details of the product, such as pricing, inventory, or descriptions.
Enable/Disable Products
- Toggle the switch to enable or disable specific product from appearing on ONDC.
Or,
- Click checkbox next to the product name to enable or disable multiple products in bulk.
- Once the checkbox is selected, the Enable/Disable button will become visible.
- You can select now enable or disable the products at once.
Bulk Upload
Update the status of multiple products at once using a bulk upload feature.
- Click Bulk Upload located at the top right corner of the Products Listing page.
- Bulk Upload Interface:
- Download Sample: Click to download a sample template to understand the format required for the bulk upload. Add your products and specify the desired status (enable/disable).
- Upload File: Drag and drop your file into the upload area or click Choose File to select it manually.
- Validation Summary: View the validation summary to check if the file has been uploaded successfully. In case of errors, download the file, correct it and re-upload it.
- Once the file is uploaded, the product statuses will be updated based on the information provided in the file.
- You can also view the History of bulk uploads to track past uploads and their outcomes.
Delivery Management
The Delivery Management section within the ONDC Seller extension allows sellers to configure and manage their delivery preferences, zones, and charges for products listed on ONDC. This section is divided into three main areas: Delivery Preference, Delivery Zones, and Delivery Charges.
Delivery Preference
Choose between Fynd Delivery and Self Delivery to manage how your products will be delivered to customers.
- Fynd Delivery: Select this option if you want to use delivery services managed by Fynd for a seamless experience.
- Self Delivery: Choose this option if you prefer to manage deliveries independently, using your own logistics services.
- Save: After selecting your delivery preference, click Save to apply the changes.
Instructions to manage delivery preference
- Navigate to Delivery Preference section under Delivery Management.
- Select either Fynd Delivery or Self Delivery as per your business needs.
- Click Save.
Delivery Zones
Selling locations are set to PAN India by default; however, sellers have the option to configure limited zones for each location. This can be done by selecting specific states and cities, or by specifying pincodes, either manually or through a bulk upload.
- Selling Location Details: Lists the details of your selling locations including location code, city, and state.
- Geographical Region(s): Specifies the delivery regions covered by each selling location.
- Area: Shows the specific cities or pincodes within the geographical regions.
- Action: Provides options to edit the delivery zones associated with each selling location.
Instructions to manage delivery zones
Manage the geographical areas where your products can be delivered by configuring delivery zones.
- Navigate to the Delivery Zones section under Delivery Management.
- Review the list of selling locations and their corresponding delivery zones.
- Click Edit icon under the action column to edit the delivery areas for a location.
- Select the delivery areas from the following options:
- PAN India (Default Selection)
- Limit by Zone: Select Limit by Zone, additional options will appear.
- Limit By: Allows you to further specify the delivery zone.
- Limit by Pincode: Select this option if you want to limit delivery to specific pincodes. You can add these pincodes manually or via bulk upload. If limiting by pincode:
- You can add pincodes manually or opt for a bulk upload.
- Once added, the selected pincodes will be displayed in the area below.
- Limit by States and Cities: Choose this option to limit delivery to certain states and cities. If limiting by states and cities:
- Click Add dropdown.
- You can add pincodes manually or opt for a bulk upload.
- Once added, the selected pincodes will be displayed in the area below.
- Limit by Pincode: Select this option if you want to limit delivery to specific pincodes. You can add these pincodes manually or via bulk upload. If limiting by pincode:
- Limit By: Allows you to further specify the delivery zone.
- Click Save.
Delivery Charges
Set and manage the delivery charges that will be applied to customer orders.
- Free Delivery: Choose this option if you want to offer free delivery on all orders.
- Charges Based on Order Value: Select this option to apply delivery charges up to a certain order value.
- Save: After configuring the delivery charges, click Save to apply the changes.
Instructions for manager delivery charges
- Navigate to the Delivery Charges section under Delivery Management.
- Choose between Free Delivery on All Orders or Charges upto a certain order value.
- If opting for delivery charges, specify the order value threshold (order value) and the corresponding delivery fee (delivery charges).
- Click Save.
Analytics
The Analytics section provides insights into your sales performance. This page allows sellers to monitor their total orders, order values, and identify the top-performing products.
Orders
View a summary of your total orders and their corresponding values.
-
Total Orders: Displays the total number of orders received.
-
Total Order Value: Shows the cumulative value of all orders.
-
Top 10 Products: You can Identify the top 10 products for which orders were placed
- Product Name: Lists the names of the top 10 products.
- Quantity: Displays the quantity sold for each top product.
- Average Sold Price: Shows the average selling price for each top product.
Discovery
Track how your products are being discovered on various buyer apps within the ONDC network.
- Buyer Apps: Lists the buyer apps where your products are being discovered.
- Hits: Number of times your products have been viewed or interacted with on these buyer apps.
- NACK: Indicates if there were any issues or rejections from the buyer apps regarding your product listings.
Products
Monitor the performance of your products, identifying top hit products as well as those that are frequently dropped by customers.
- Top 10 Hit Products: List of top 10 products which were added to cart.
- Quantity: Shows the number of products added to cart for each top product.
- Average Sold Price: Displays the average selling price for each top product.
- Top 10 Dropout Products: List of top 10 products which user added to cart but did not place order.
- Quantity: Shows the number of products added to the cart but but were not ordered
- Average Sold Price: Displays the average selling price for each top product.
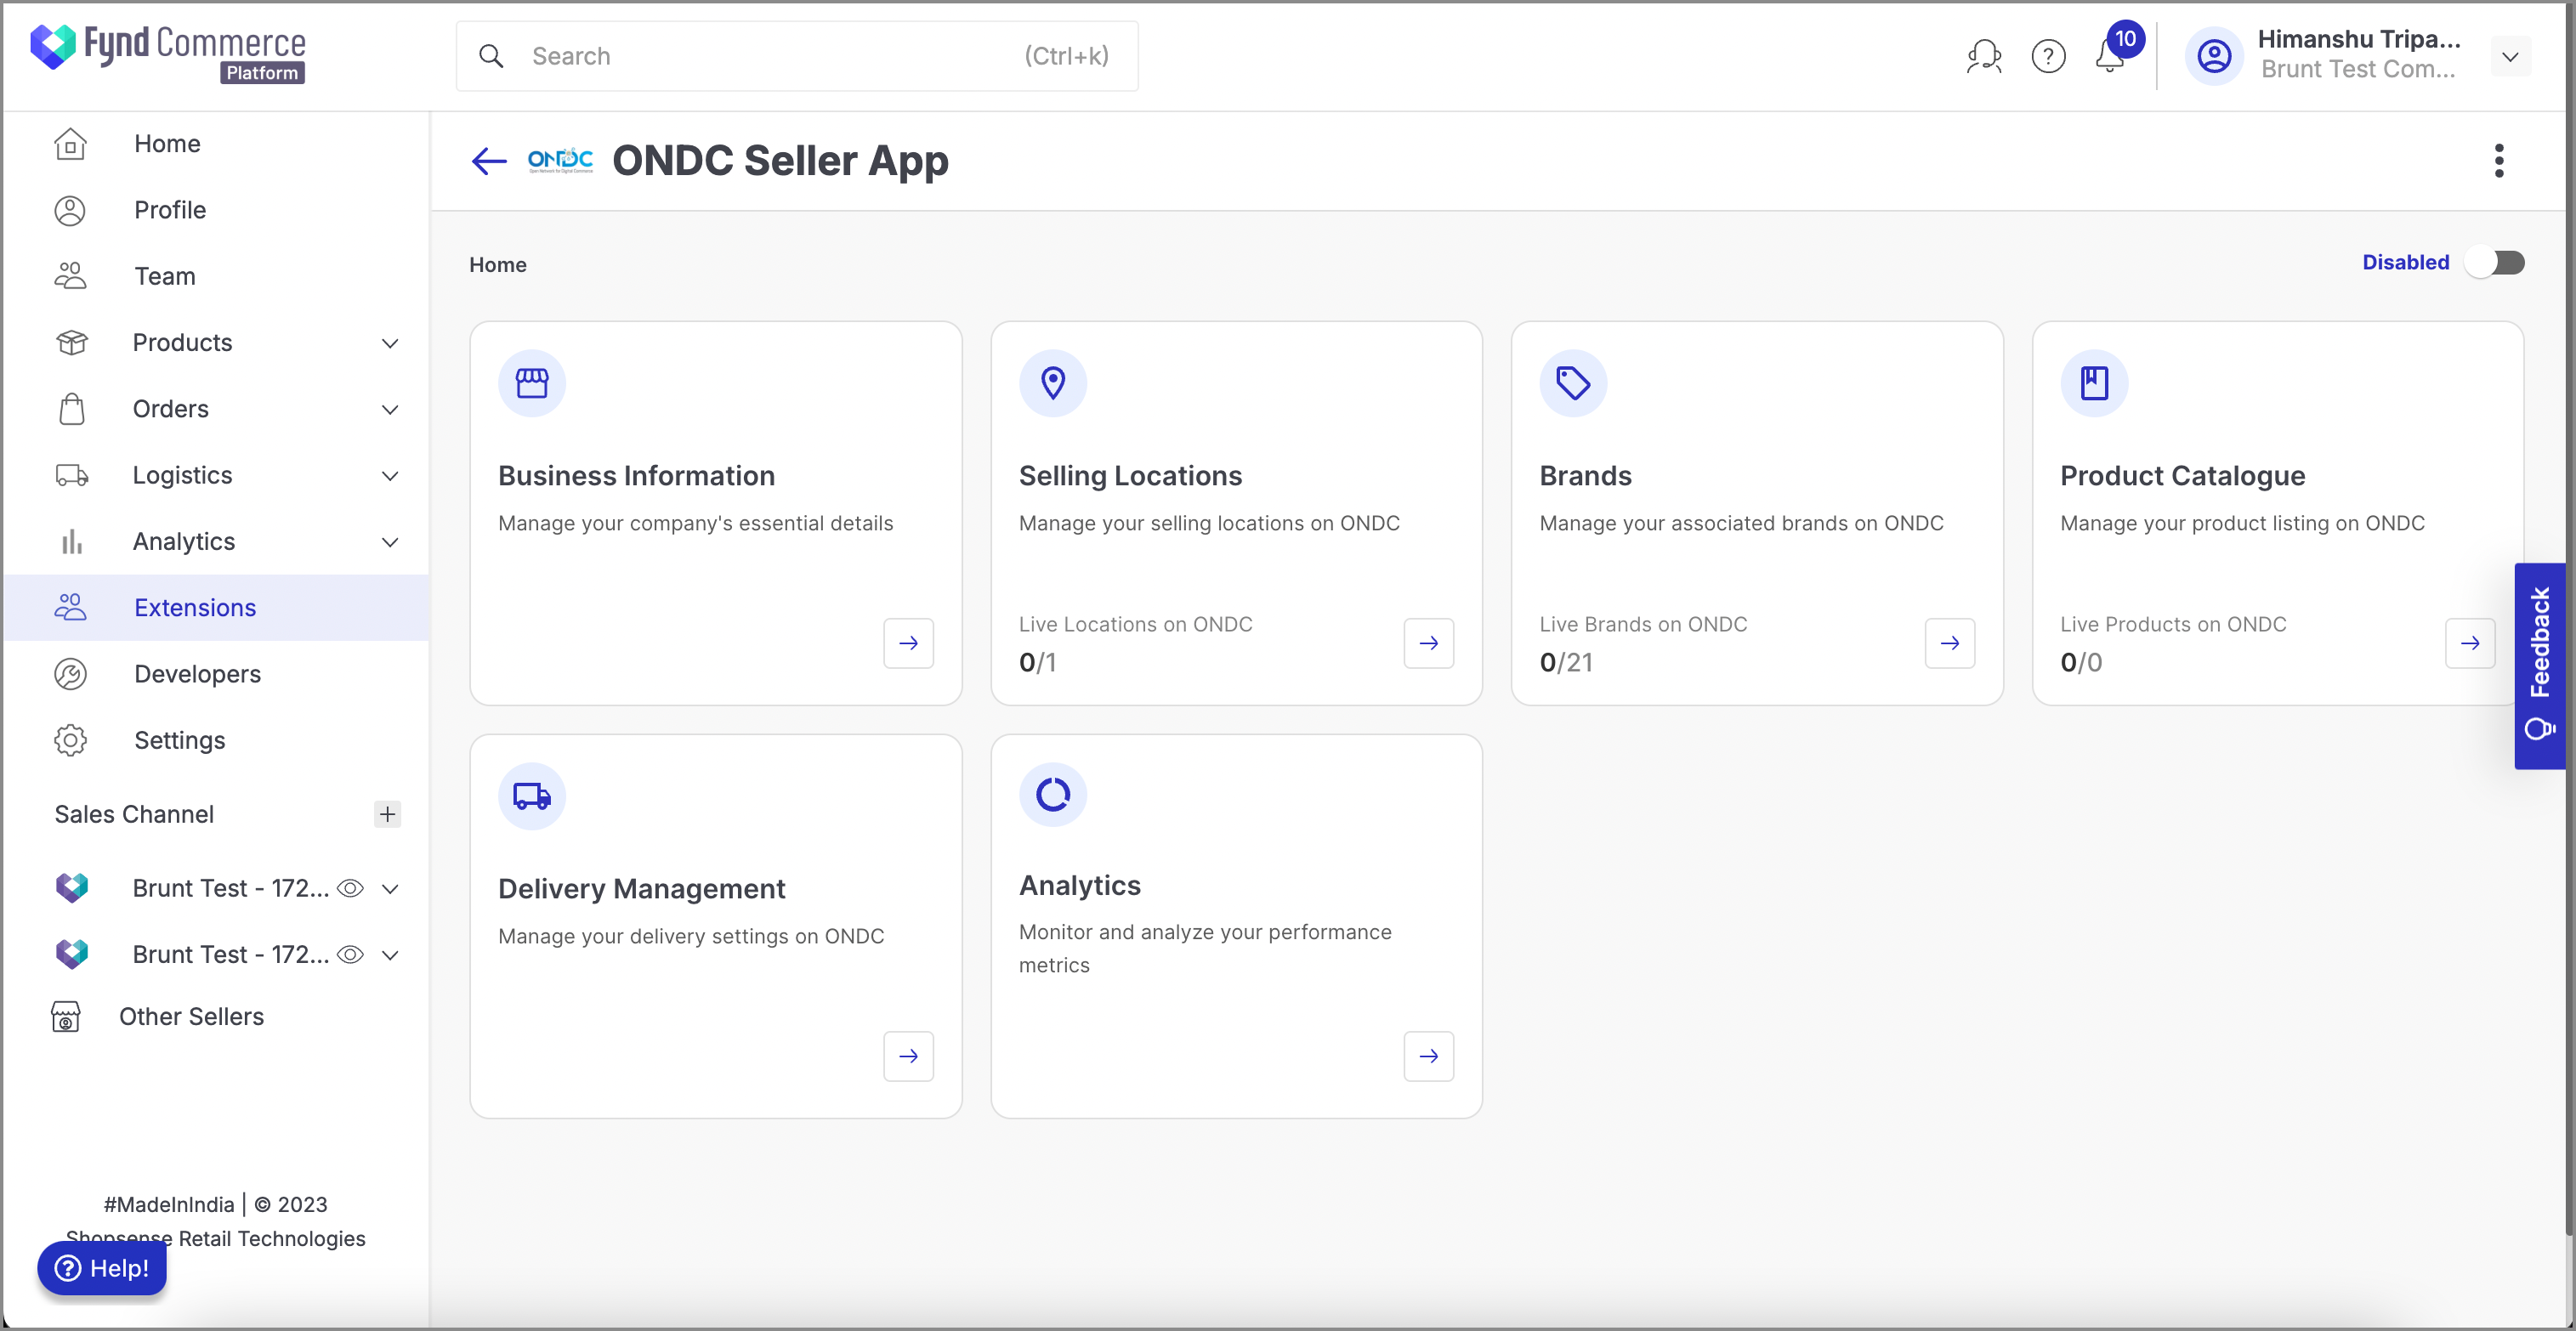
Active or Inactive Extension
Use the toggle switch located at the top-right corner of the dashboard to enable or disable the ONDC Extension. This will determine whether your business and products are actively listed on ONDC.
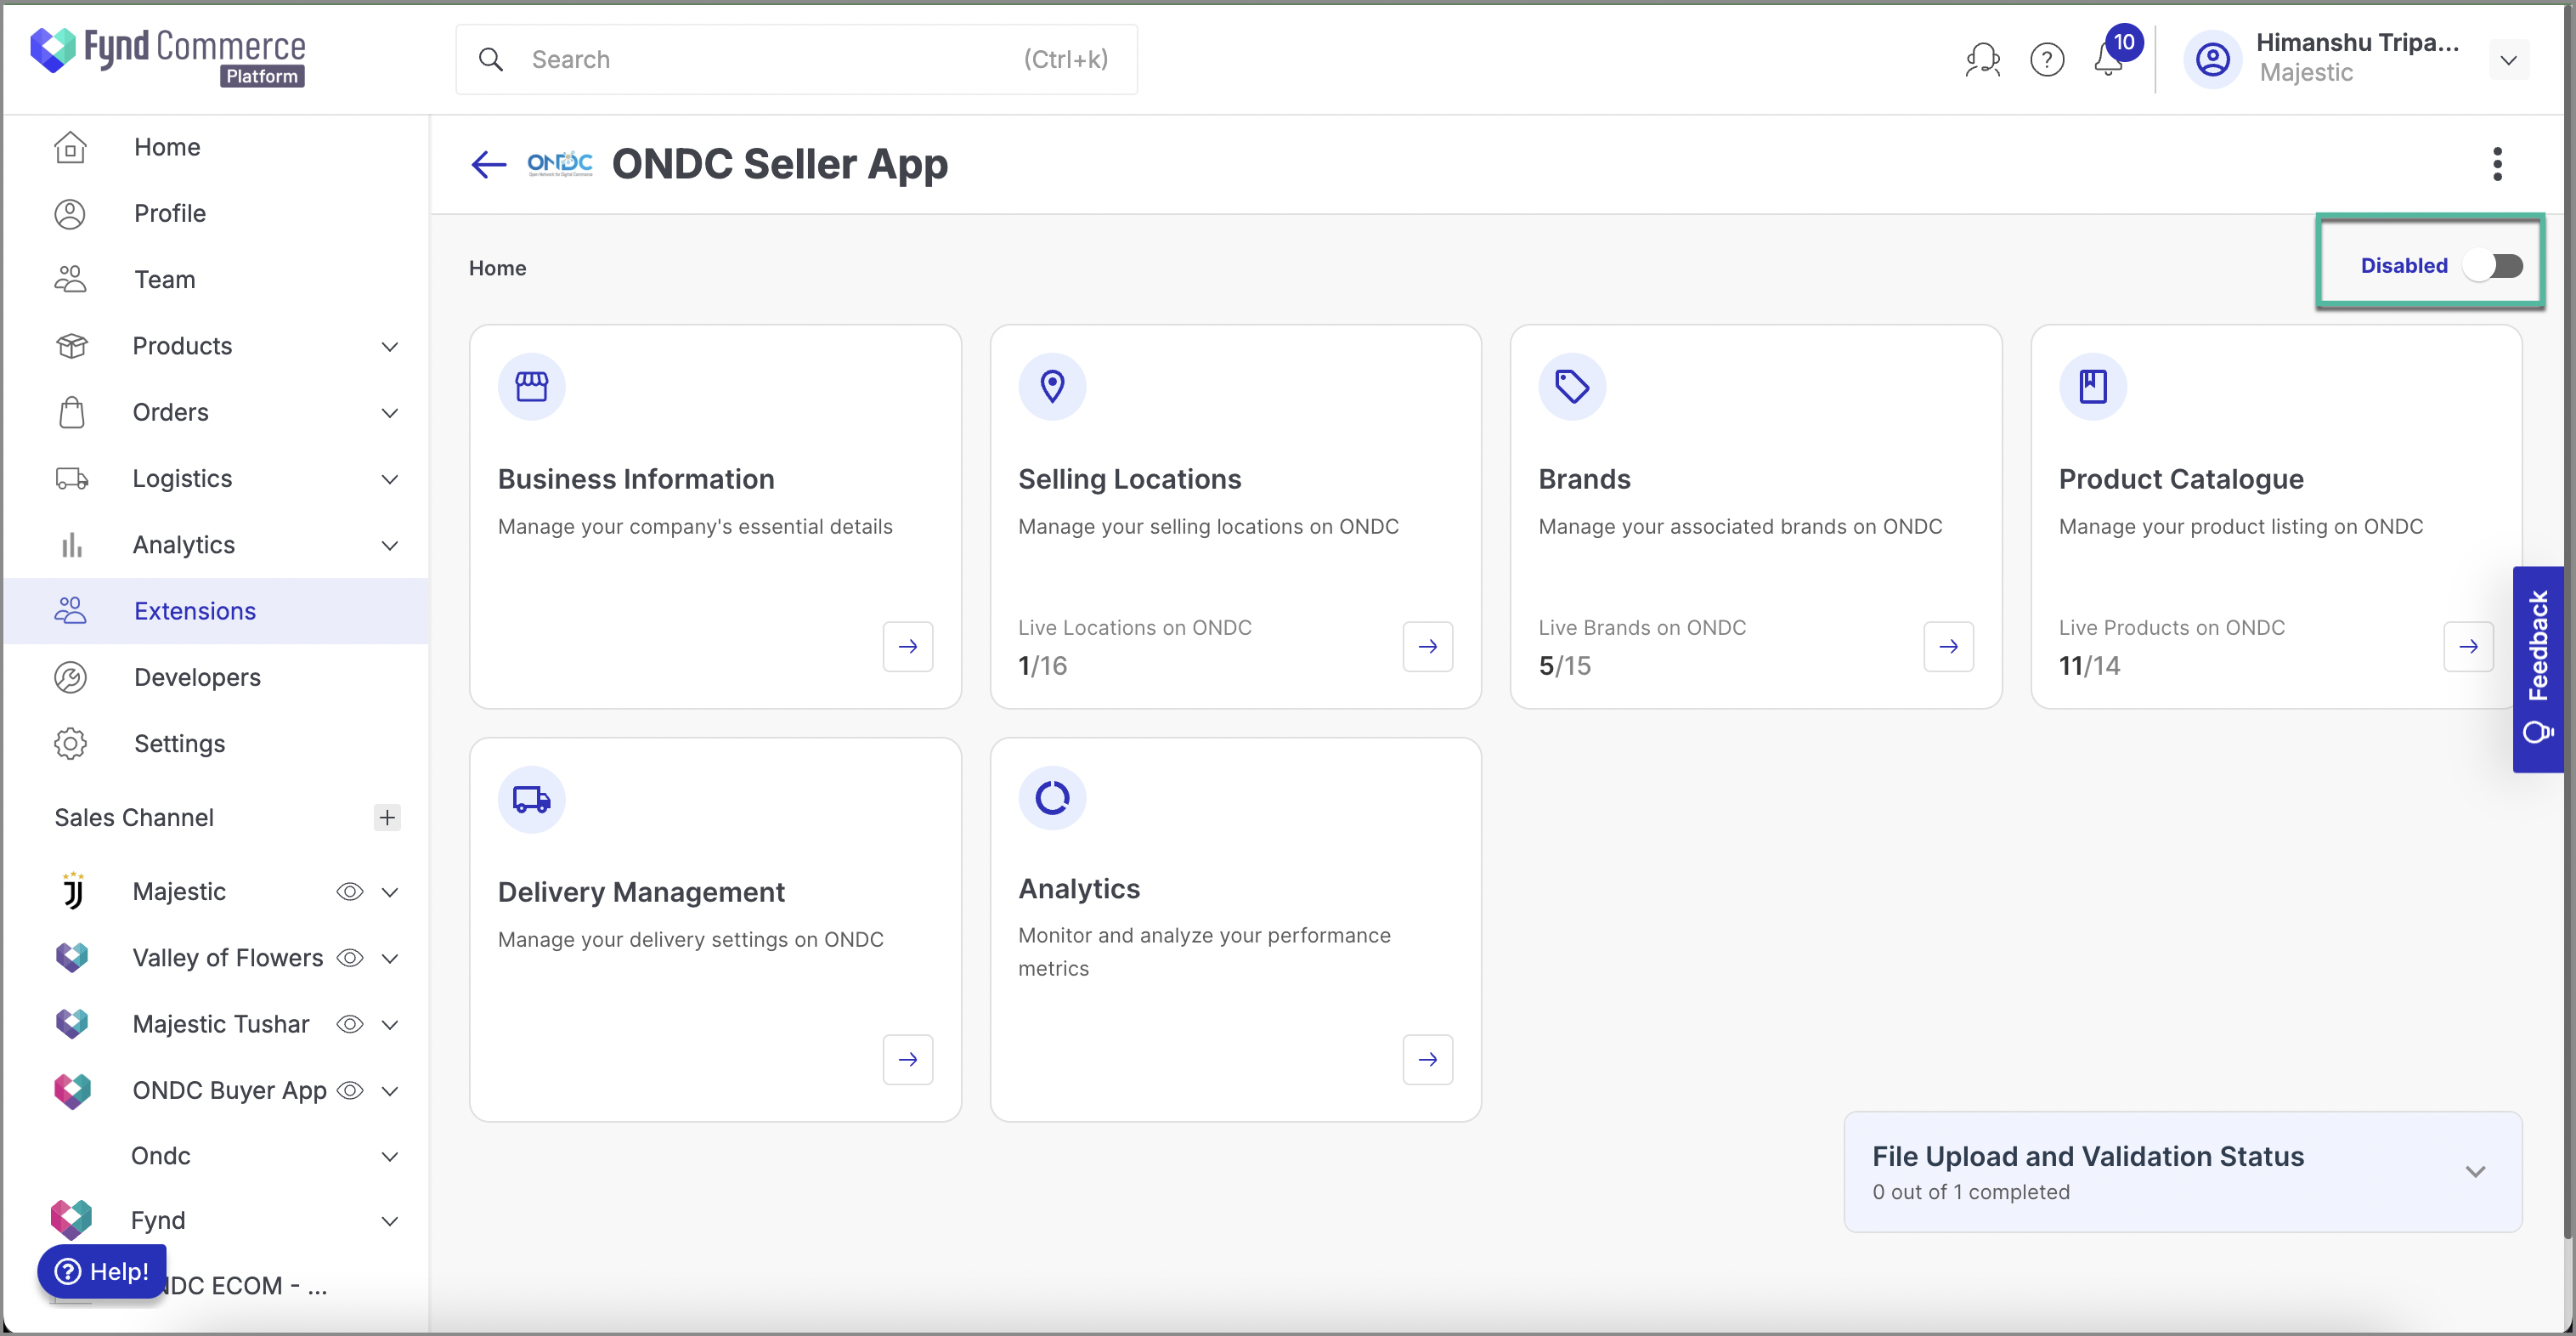
The seller logo needs to be uploaded, and at least one selling location and one brand need to be enabled before enabling ONDC.