Product Bundle
Introduction
A product bundle is formed by grouping one or more products and selling them as add-ons to another product, for e.g. grouping a mobile cover and screen guard together, and selling them along with a smartphone.
![]()
Creating A Product Bundle
Step 1: Click Add Product Bundle option.
![]()
Step 2: Click Select Products.
![]()
Step 3: Search and select the existing products to form a bundle. You may select products that belong to different categories.
![]()
![]()
You may add upto 10 products in a bundle
Step 4: Fill all the required fields.
![]()
Let's understand all the elements shown in fig. 4
- Drag and Drop - Use this option to change the sequence of products in the bundle.
- Min and Max Quantity - Enter minimum and maximum number of a bundle item that a customer can purchase (between 1 to 99 quantities).
- Enable to automatically add to the cart - Turn on this option to add this bundle item directly to the customer's cart when he/she adds the main product. Else, customer may manually add this bundle item to the cart.
- Allow to remove from cart - Turn on this option to allow your customers to remove this bundle item from the cart (if added).

Possible Outputs Yielded By The Two Checkbox - Allow setting multiple item from a group - If your bundle contains more than one product, you may turn on this option to allow your customers to choose products from the bundle. Else, customers will be able to select only 1 item from the whole bundle.
- Enable to display on associated product page - Turn on this option to allow your customers to see this bundle on the PDP page of your main product.
Step 5: Give a name to your product bundle and click Save.
![]()
![]()
Attaching The Bundle To Your Product
Since you have created a product bundle, it's time to attach it as an add-on to your products. There are 3 ways of attaching a bundle:
Through UI
-
Go to All Products.
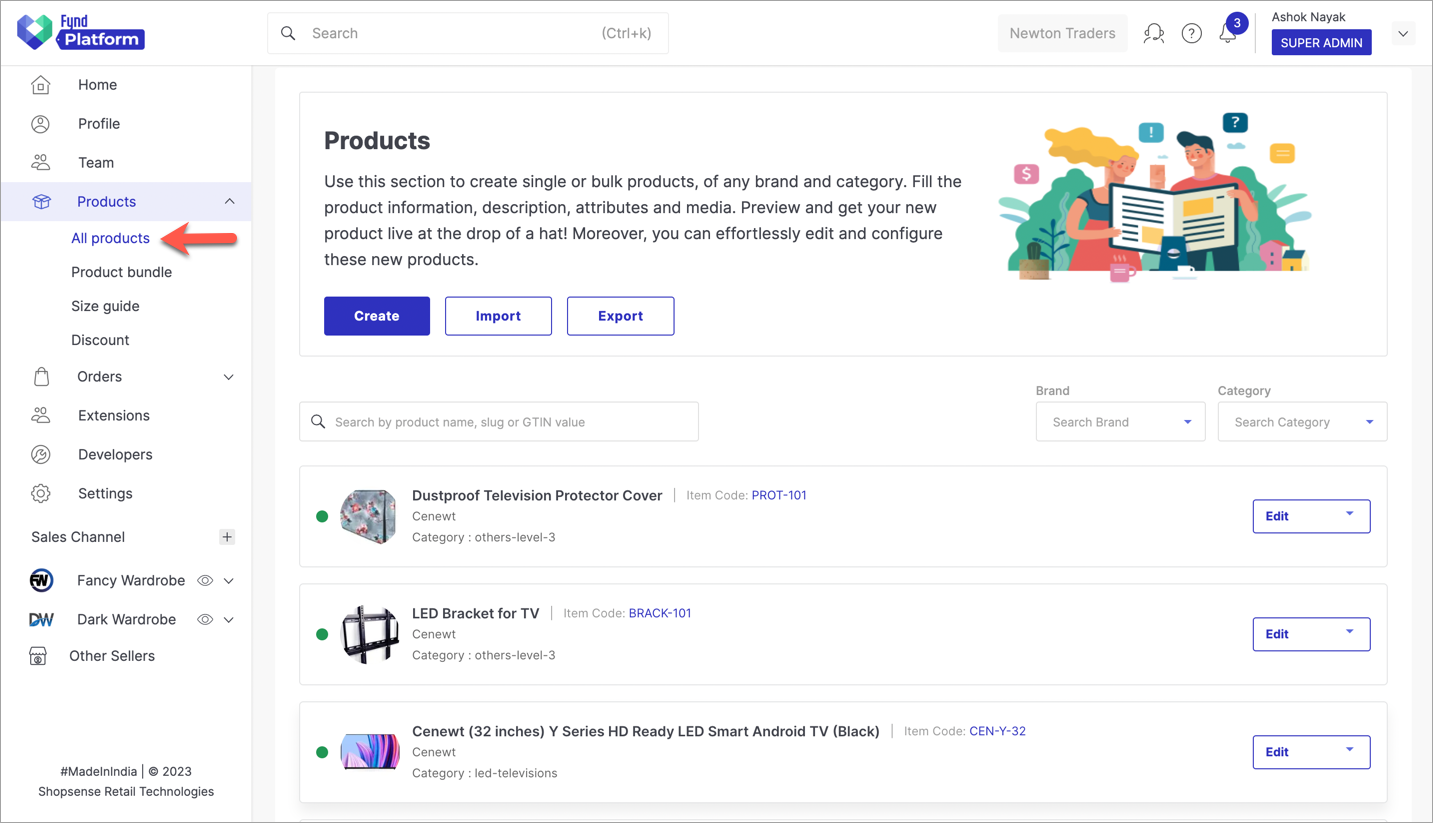
Figure 7: Product Section
-
Search and edit the product to which you want to add the bundle.
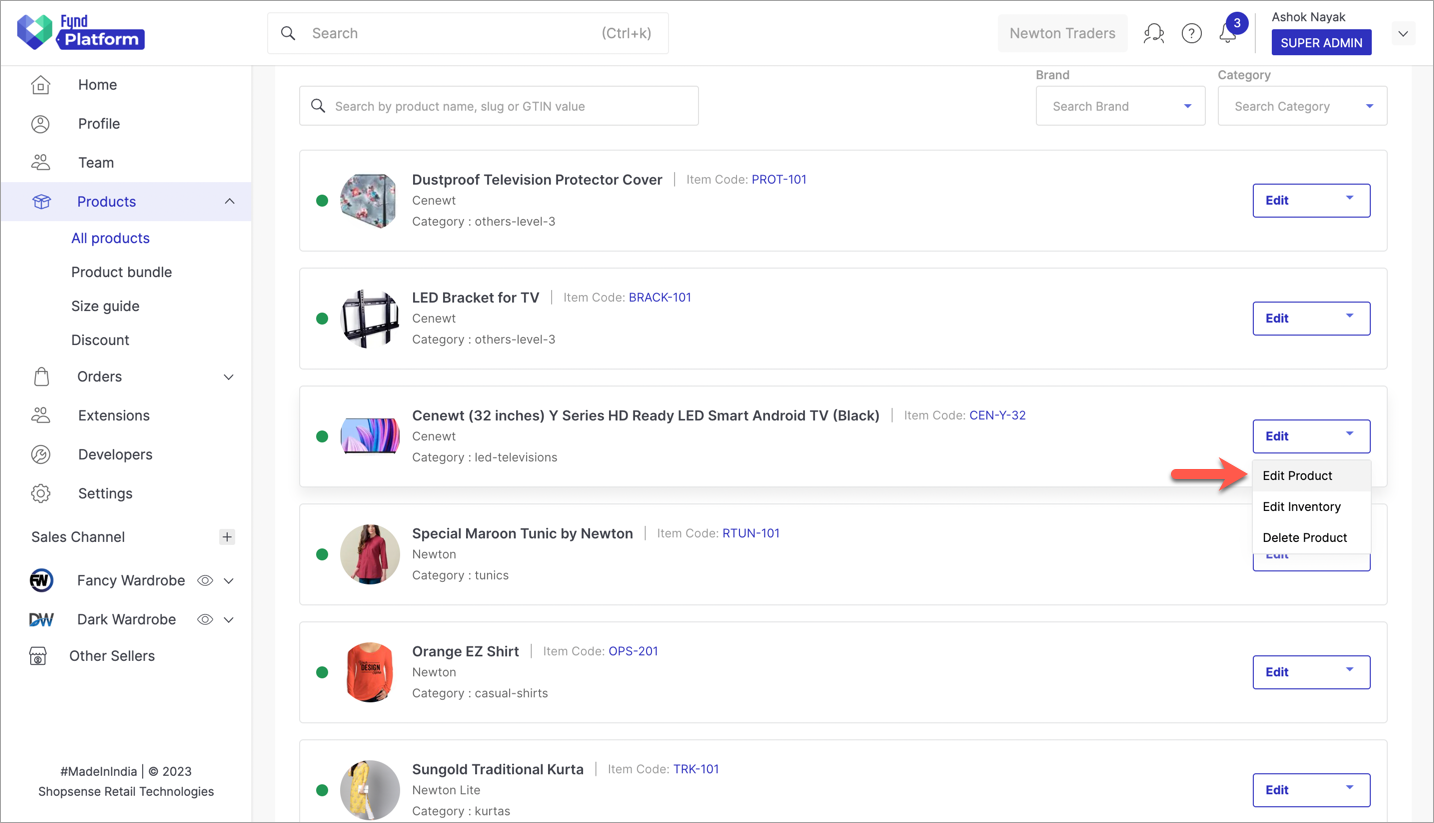
Figure 8: Editing Products
-
Scroll down and select your product bundle from the drop-down and click Save.
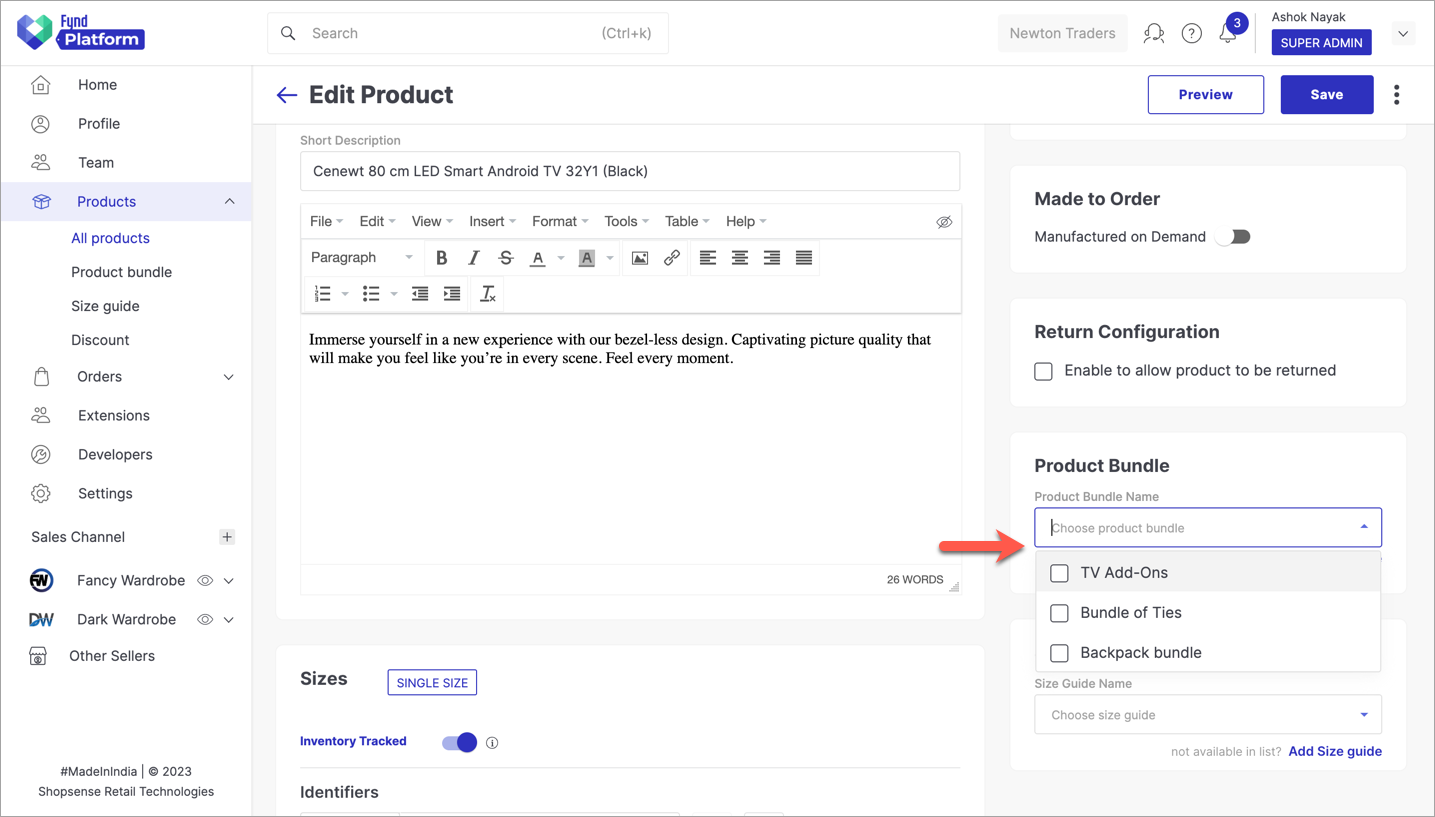
Figure 9: Choosing A Bundle
Through Import Products
If you haven't created a product yet, use the Import Product feature to download a sample excel file, fill all the product attributes, choose your bundle from the drop-down and upload the excel file.
![]()
If you aren't familiar with this feature, click How To Import Products to know more.
Through Partial Update
This is applicable if you already have products and you want to attach a bundle to them. In the excel sheet, add a column header named 'Product Bundle', enter the 'Title' of your product bundle and upload the excel file.
![]()
If you aren't familiar with this feature, click How To Update Existing Products to know more.
Deactivating A Bundle
If you do not wish to use a particular bundle, you may deactivate it. The bundle will become inactive and will no longer appear on product pages that uses it. Moreover, you won't be able to attach the deactivated bundle to any product as seen in the above section.
-
From the list, click the product bundle which you want to deactivate.
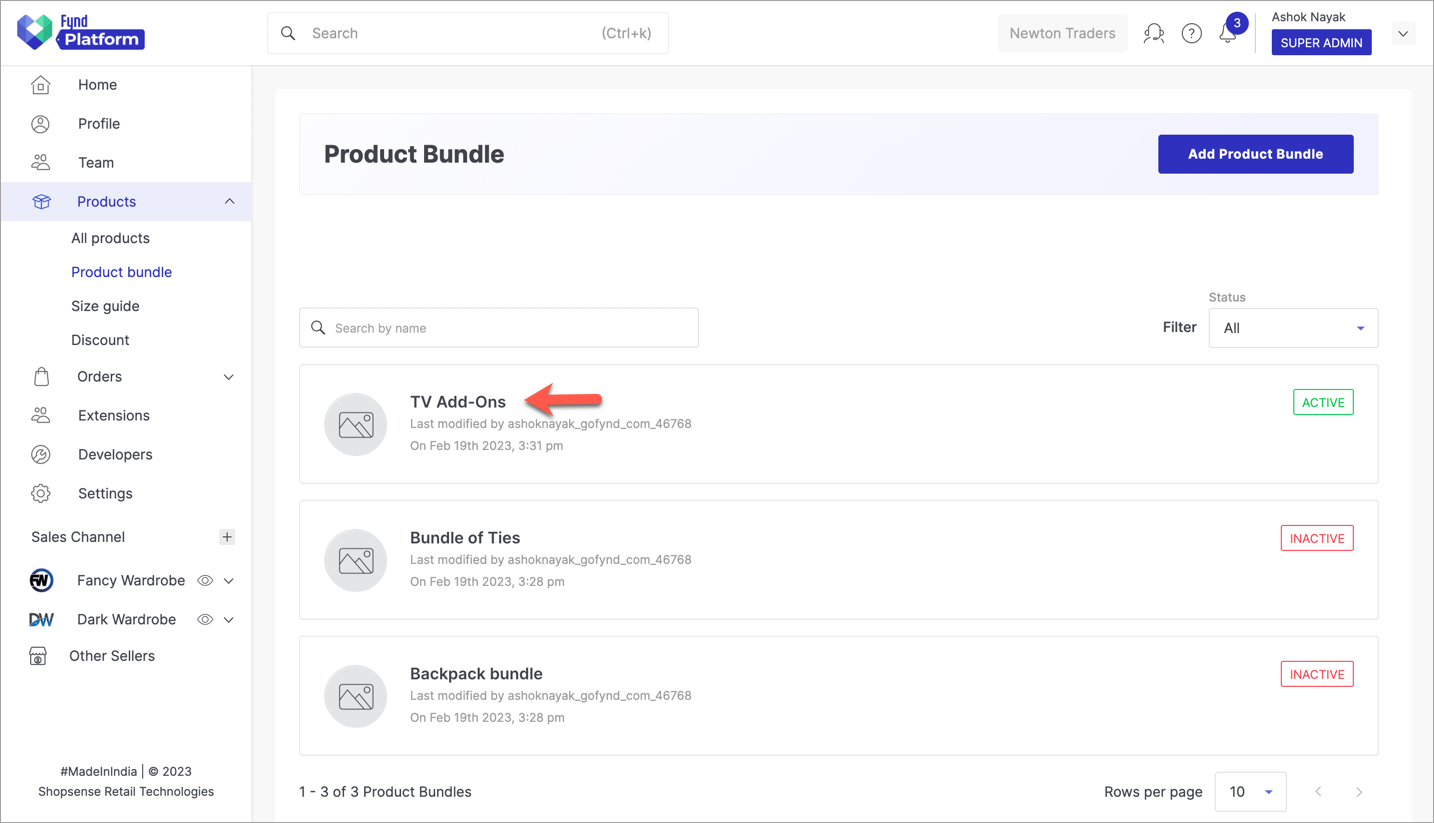
Figure 12: List Of Product Bundles
-
Use the toggle button to disable the size guide and click Save.
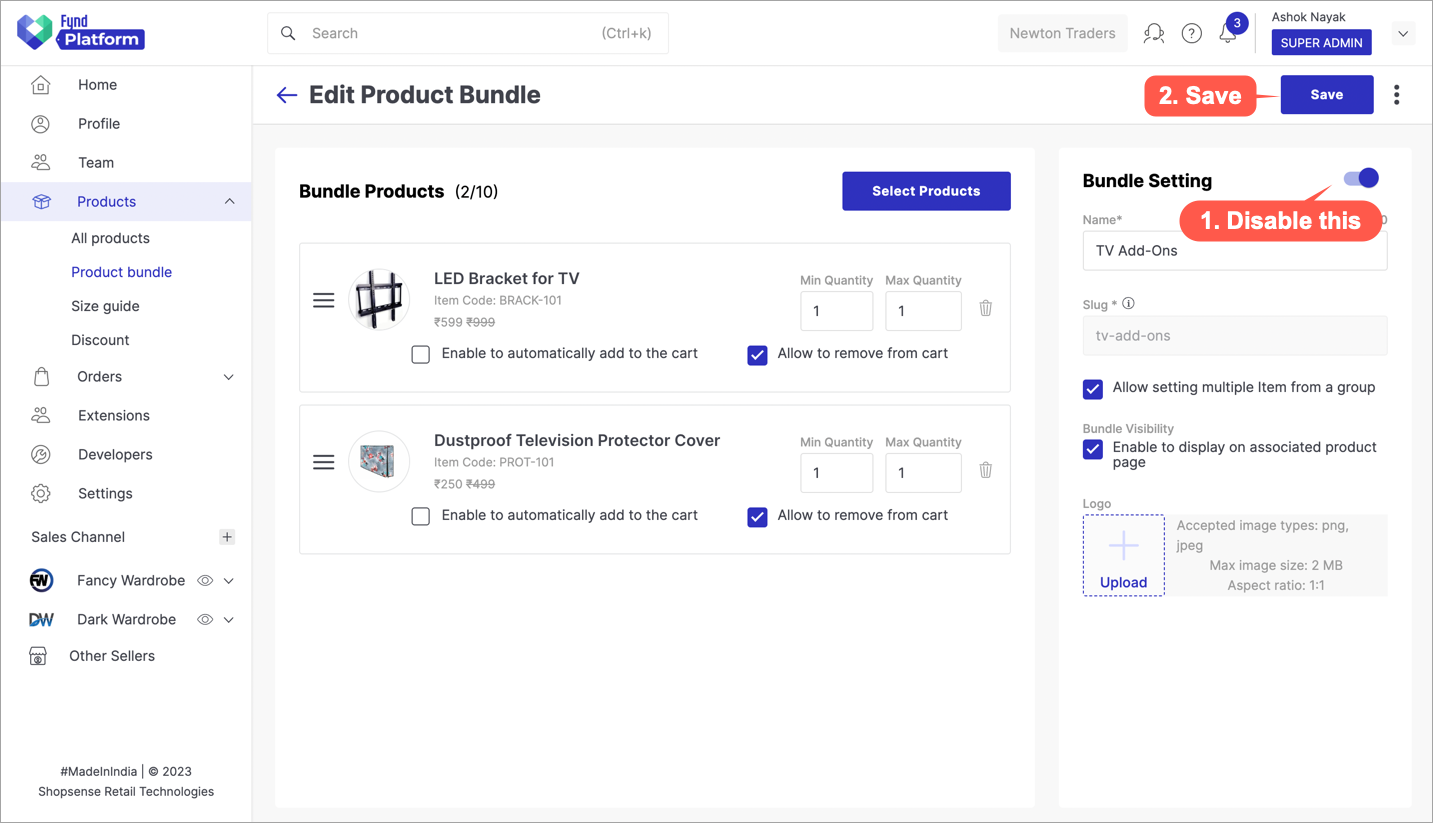
Figure 13: Disabling A Bundle
-
Product bundle is successfully deactivated.
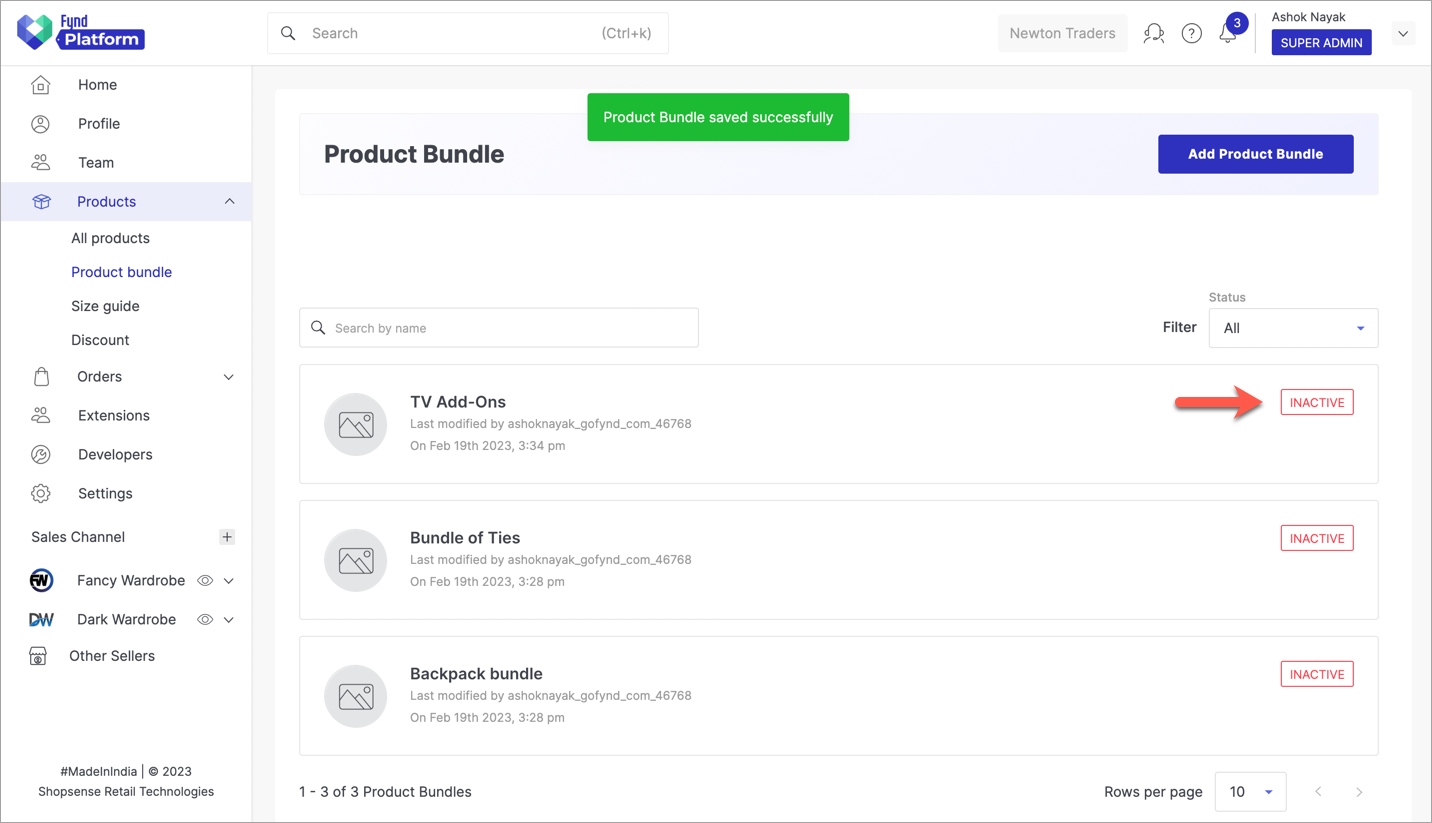
Figure 14: Bundle Deactivated Successfully
Example
You can attach create and attach multiple bundles to a product.
![]()
This is how the bundles (say warranty services) appear on the product details page (of a laptop) on the website.
![]()
For better understanding, you can see the configuration of Bundle 2 on the platform, and its appearance on the website.
![]()