AJIO Order Processing
Overview
Pulse OMS is a dashboard that the stores use to fulfil orders. Fynd provides the stores with the dashboard and in this document, we will discuss the steps that the sellers need to do in order to fulfil an order from marketplaces.
- Click on the Login button on pulse.fynd.com.
- Enter your credentials and login. If you don’t have an account, you will need to register.
Shipment Processing
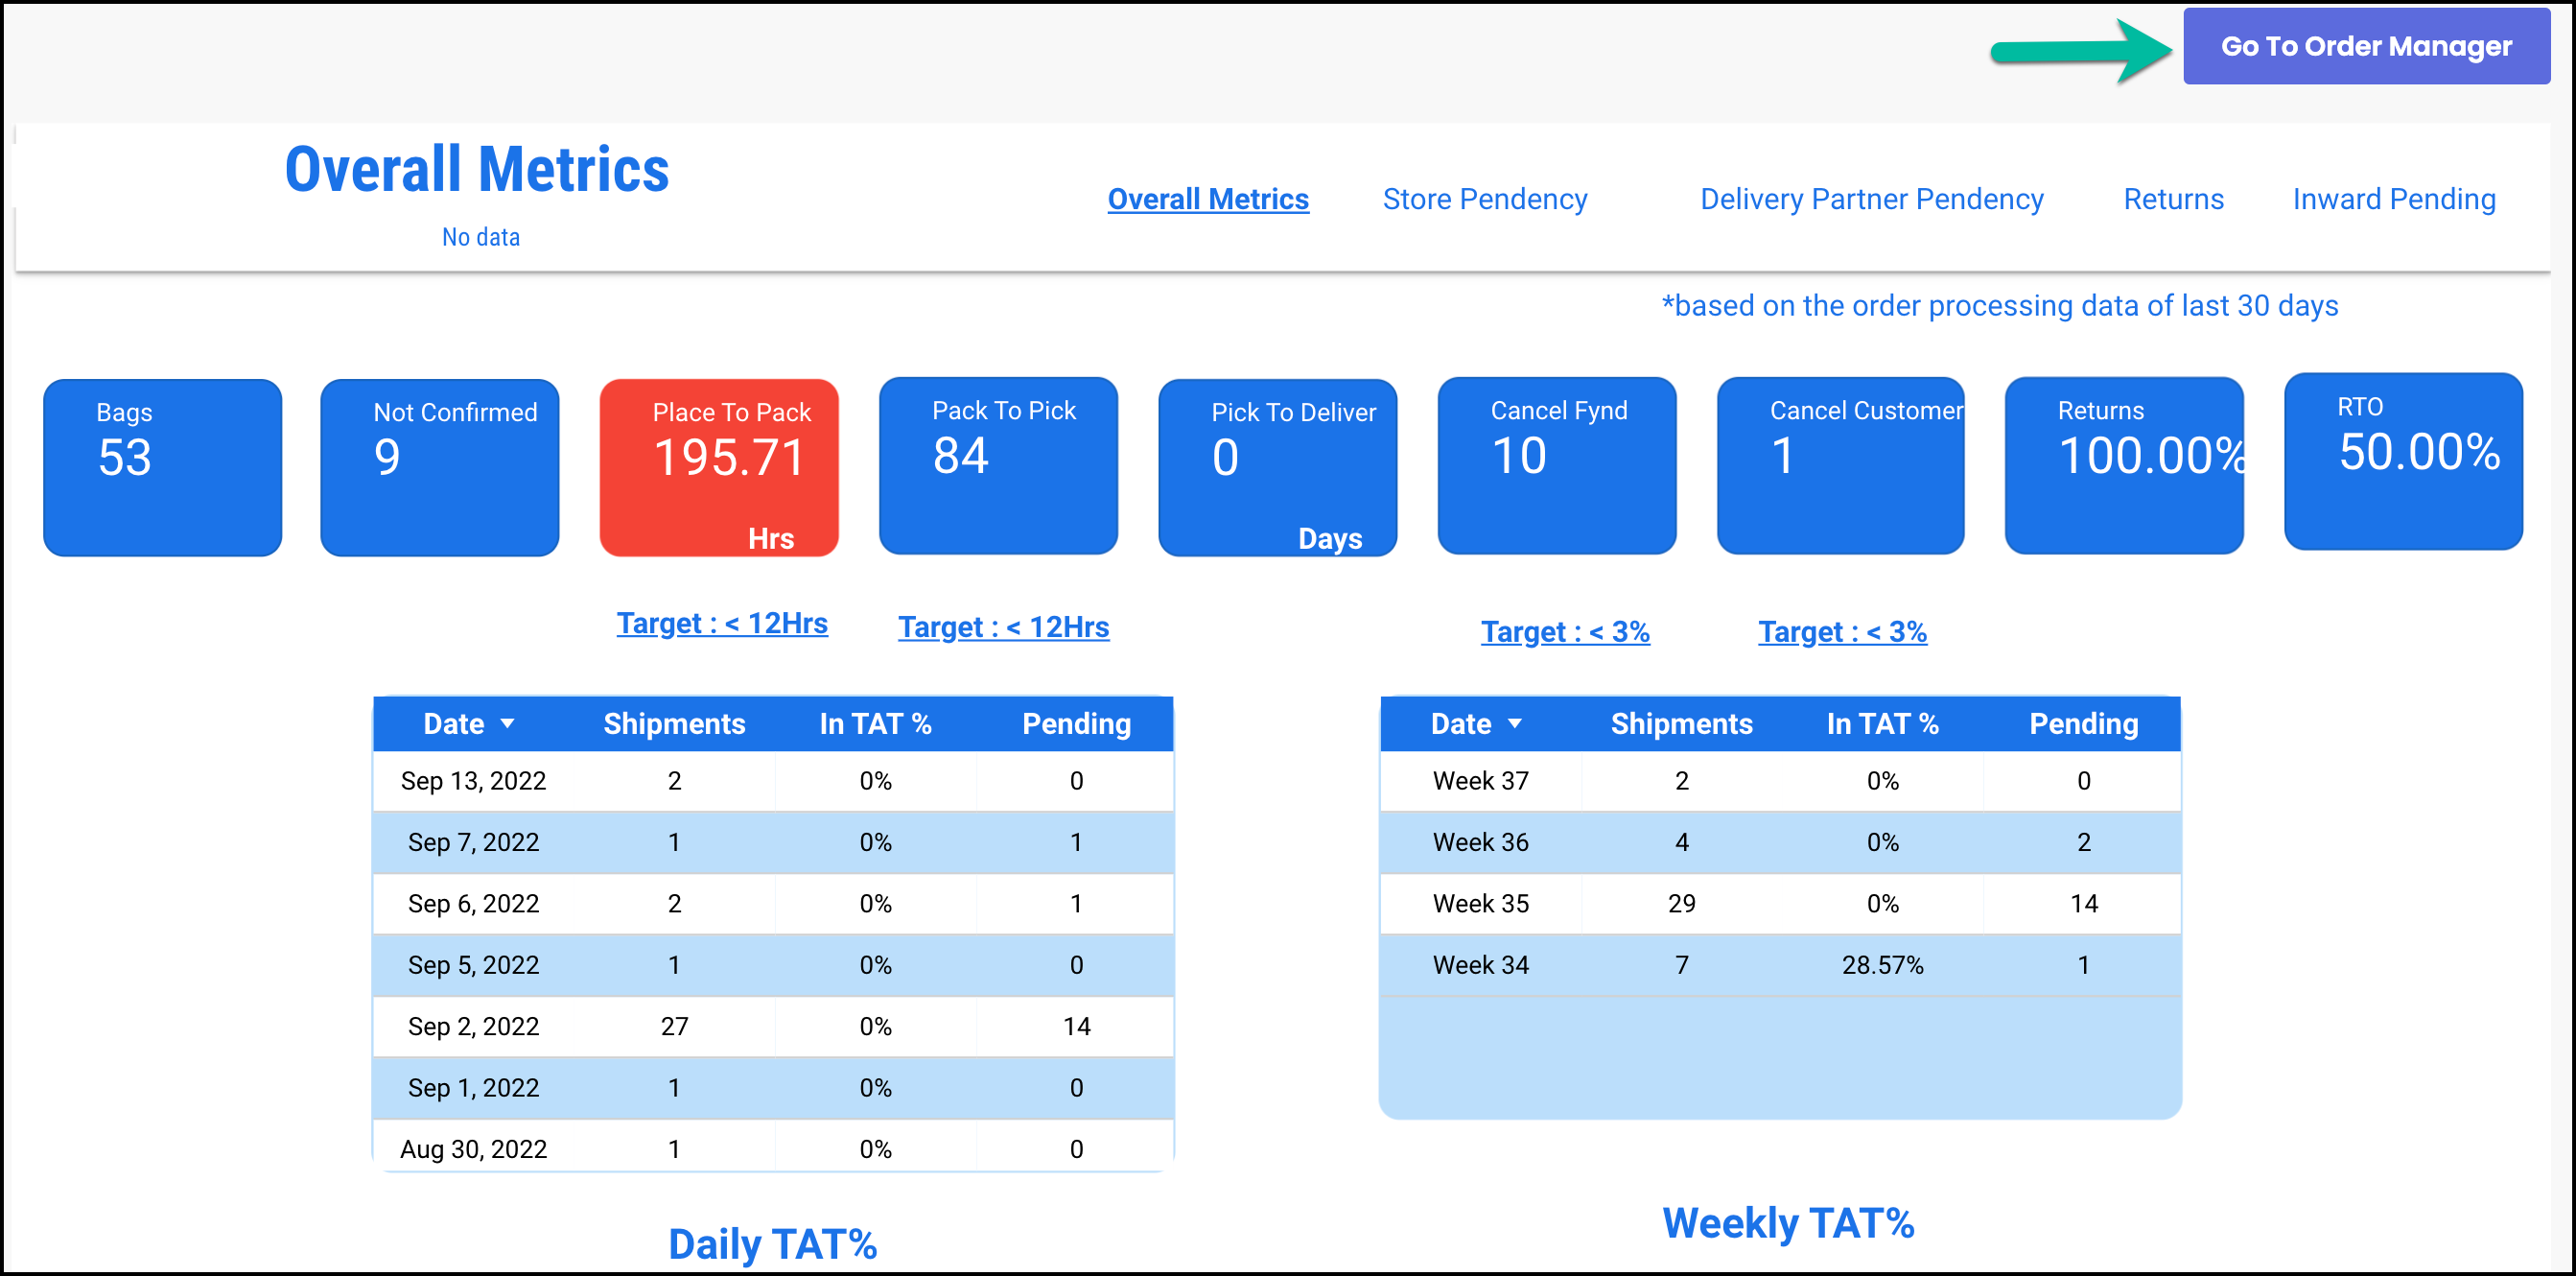
After logging in, click on Order Manager on the top right corner of the screen to go Orders home screen
.png)
- You can navigate the tabs to check the orders that are in different stages of processing.
- You can set the date filter for the orders to view orders in a certain date range.
- You can search for orders by their details like Bag, Shipment ID, Customer email etc.
- Clicking this will reveal detailed information about the order.
- These are the action items, here you can either confirm or cancel the orders, report issues with the orders and view order history.
Order Confirmation
After the seller receives an order from the marketplace, they will have to confirm or cancel the order.
- Before confirming the order, they will have to check for product availability and if the product is in saleable condition.
- If the product is unavailable or not in saleable condition, click Cancel. The order will then be auto reassigned to another store,
After an order is Confirmed by the seller it will be in Locked status, no actions can be performed by the seller when the order is locked.
.png)
The order can stay in this status from 5 minutes to 2 days.
Billing and Invoicing
After the order is confirmed, you will need to processed as follows:
- Click on the Confirmed tab to view the order.
- Since AJIO is a B2B2C system, you will need to scan the product in your POS system.
- Enter all the required billing details.
.png)
- Click on the link to open and view the Purchase Order (PO) Invoice.
- Click on the arrow under the order details to get the customer details.
- Select the mode of payment on your POS.
- Enter the bill number that is generated from your POS system into the Invoice No box on the OMS.
- Click the Save button next to it to update the invoice number for the order.
For any issues related to the order, contact your retail IT team.
Order Packing
For printing the invoice, shipping label and packing, follow these steps
- Click on the To be Packed tab on the home screen.
.png)
- Keep the invoice inside the packaging with the product.
- Stick the shipping label on the top of the package so that it can be scanned by the delivery partner during pickup.
- After the order is packed and ready, click on the Packed button.
- You can download and print the invoice by clicking the buttons below Packed (invoice download can be in A4, A6 and POS sizes).
Manifest & Dispatch
The Manifest will contain the consolidated shipment invoices for the orders that we handover to the Logistics partners. To generate a manifest, do the following:
- Click on Ready for Dispatch tab and click on Manifest
.png)
.png)
- Click on Download
.png)
You will need to take 2 copies of the manifest
- On the 1st copy, put the store stamp and the signature, then hand that over to the delivery partner.
- On the 2nd copy, take the details of the delivery partner (name, phone, company name, employee number, signature, pick up date).
It is mandatory to take the details of the delivery person on the manifest.
Once the package is handed over to the delivery person, go to the Ready for Dispatch tab and click Dispatched
.png)
The order will then move to the History tab
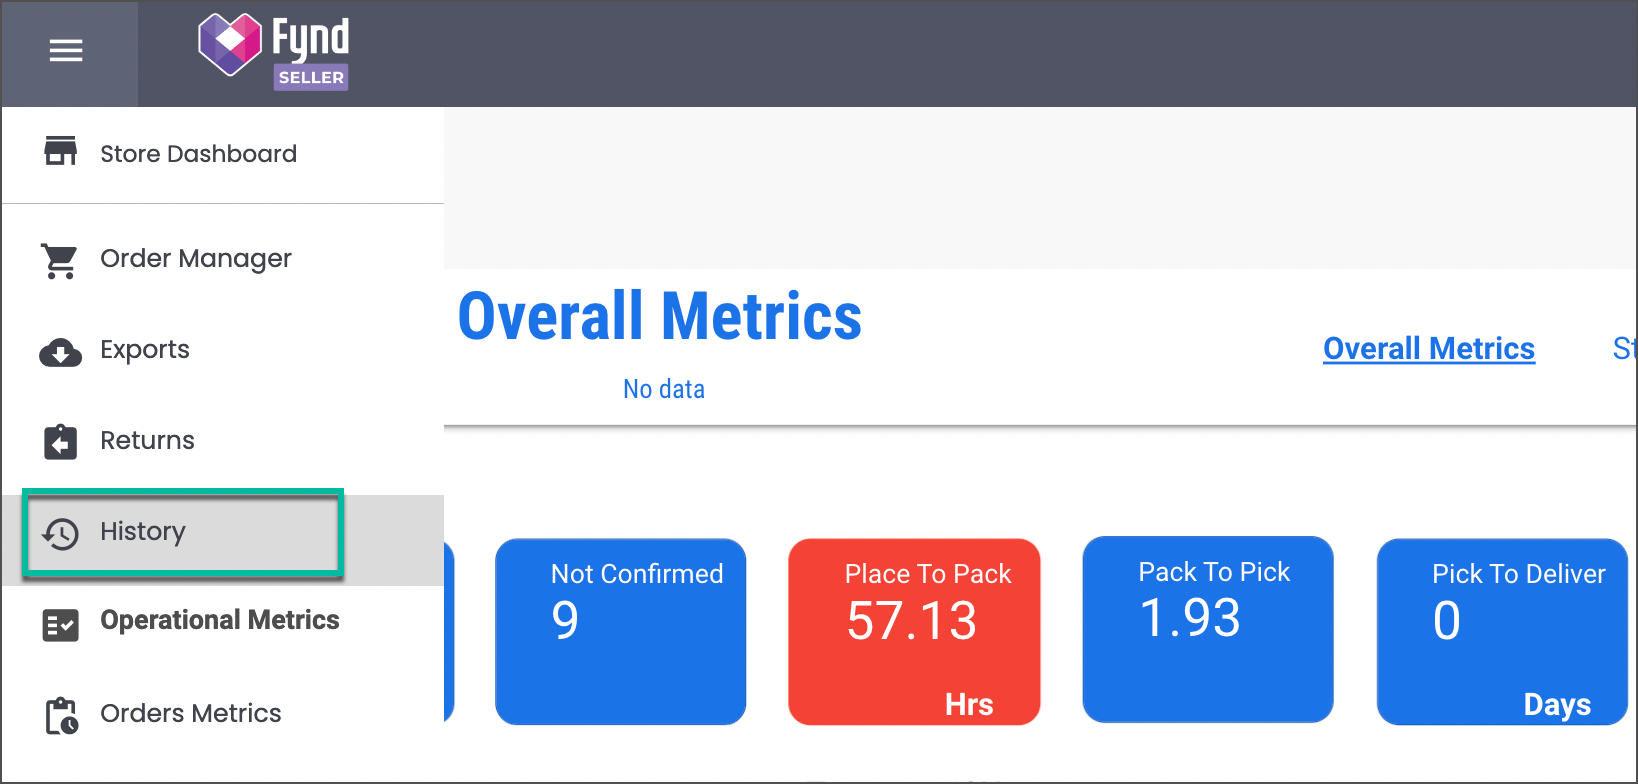
Order History
Navigate to Home > History.
.png)
You can view the order history in this tab.
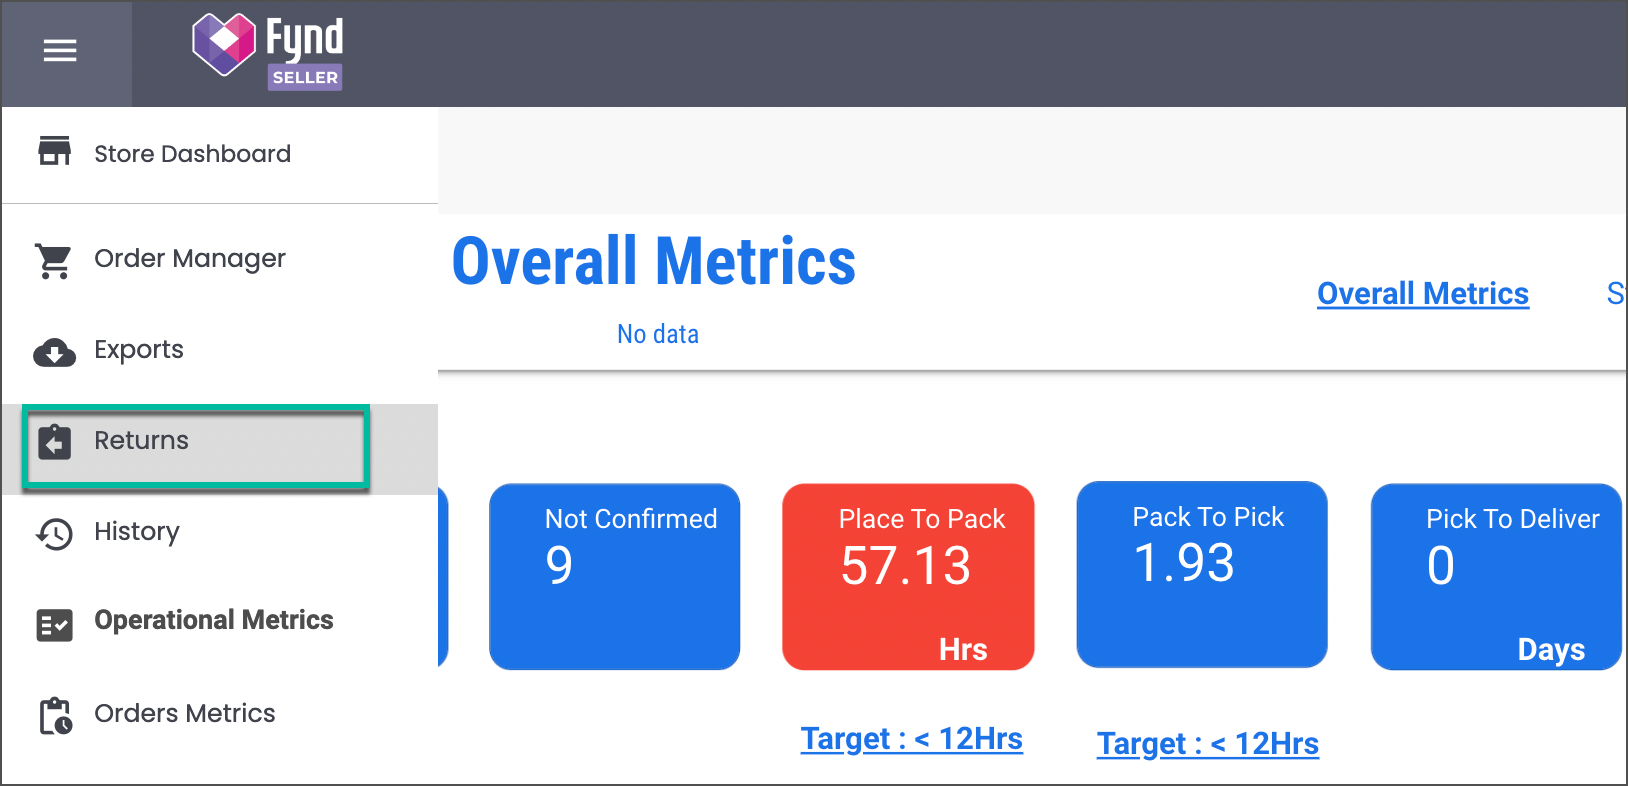
Return Order Management
Go to the Returns tab to check for any order returns.
.png)
To accept returns, click on Return Accepted. If the package is damaged/fake/wrong then do not accept the return, escalate the matter to AJIO team.
Request RTO
After the RTO order is delivered, it will reflect in the returns tab. You will need to click on Request RTO.
.png)
Add the Forward order number and the forward shipment number and click Submit.
.png)
The order will now reflect in the Returns tab, you can accept that by clicking on the Return Accepted.
Escalations
For any issues related to the dashboard or order processing,
- Click on Report an issue.
.png)
- A window will pop up and you can select your issue from the list in the dropdown.
- Select the issue, priority, provide a brief description of the problem and click submit. After clicking Submit, you can track its status in the escalation lane.
Guidelines
.png)