Wizzapp
Introduction
The Wizzapp extension facilitates real-time synchronization of inventory and order data between the Fynd Platform and Wizzapp, ensuring that your stocks are up-to-date and that all orders are tracked and fulfilled accurately. This makes the process of selling on marketplaces and websites seamless for sellers.
Once you have installed this extension, it will be available in the Extensions section on the Fynd Platform.
Pre-requisites to Use This Extension
- Your entire product catalogue should be available on the Fynd Platform. Proceed only if you have uploaded your catalogue. For a tutorial, watch How to Upload Product Catalogue.
- Add selling locations in the Fynd Platform. Refer to Add Selling Locations for details. For a tutorial, watch How to Add Selling Locations.
First-time Installation Setup
For first-time installation, you are required to set up an inventory job. Follow the steps shown below:
-
Navigate to your Fynd Platform account and go to Extensions.
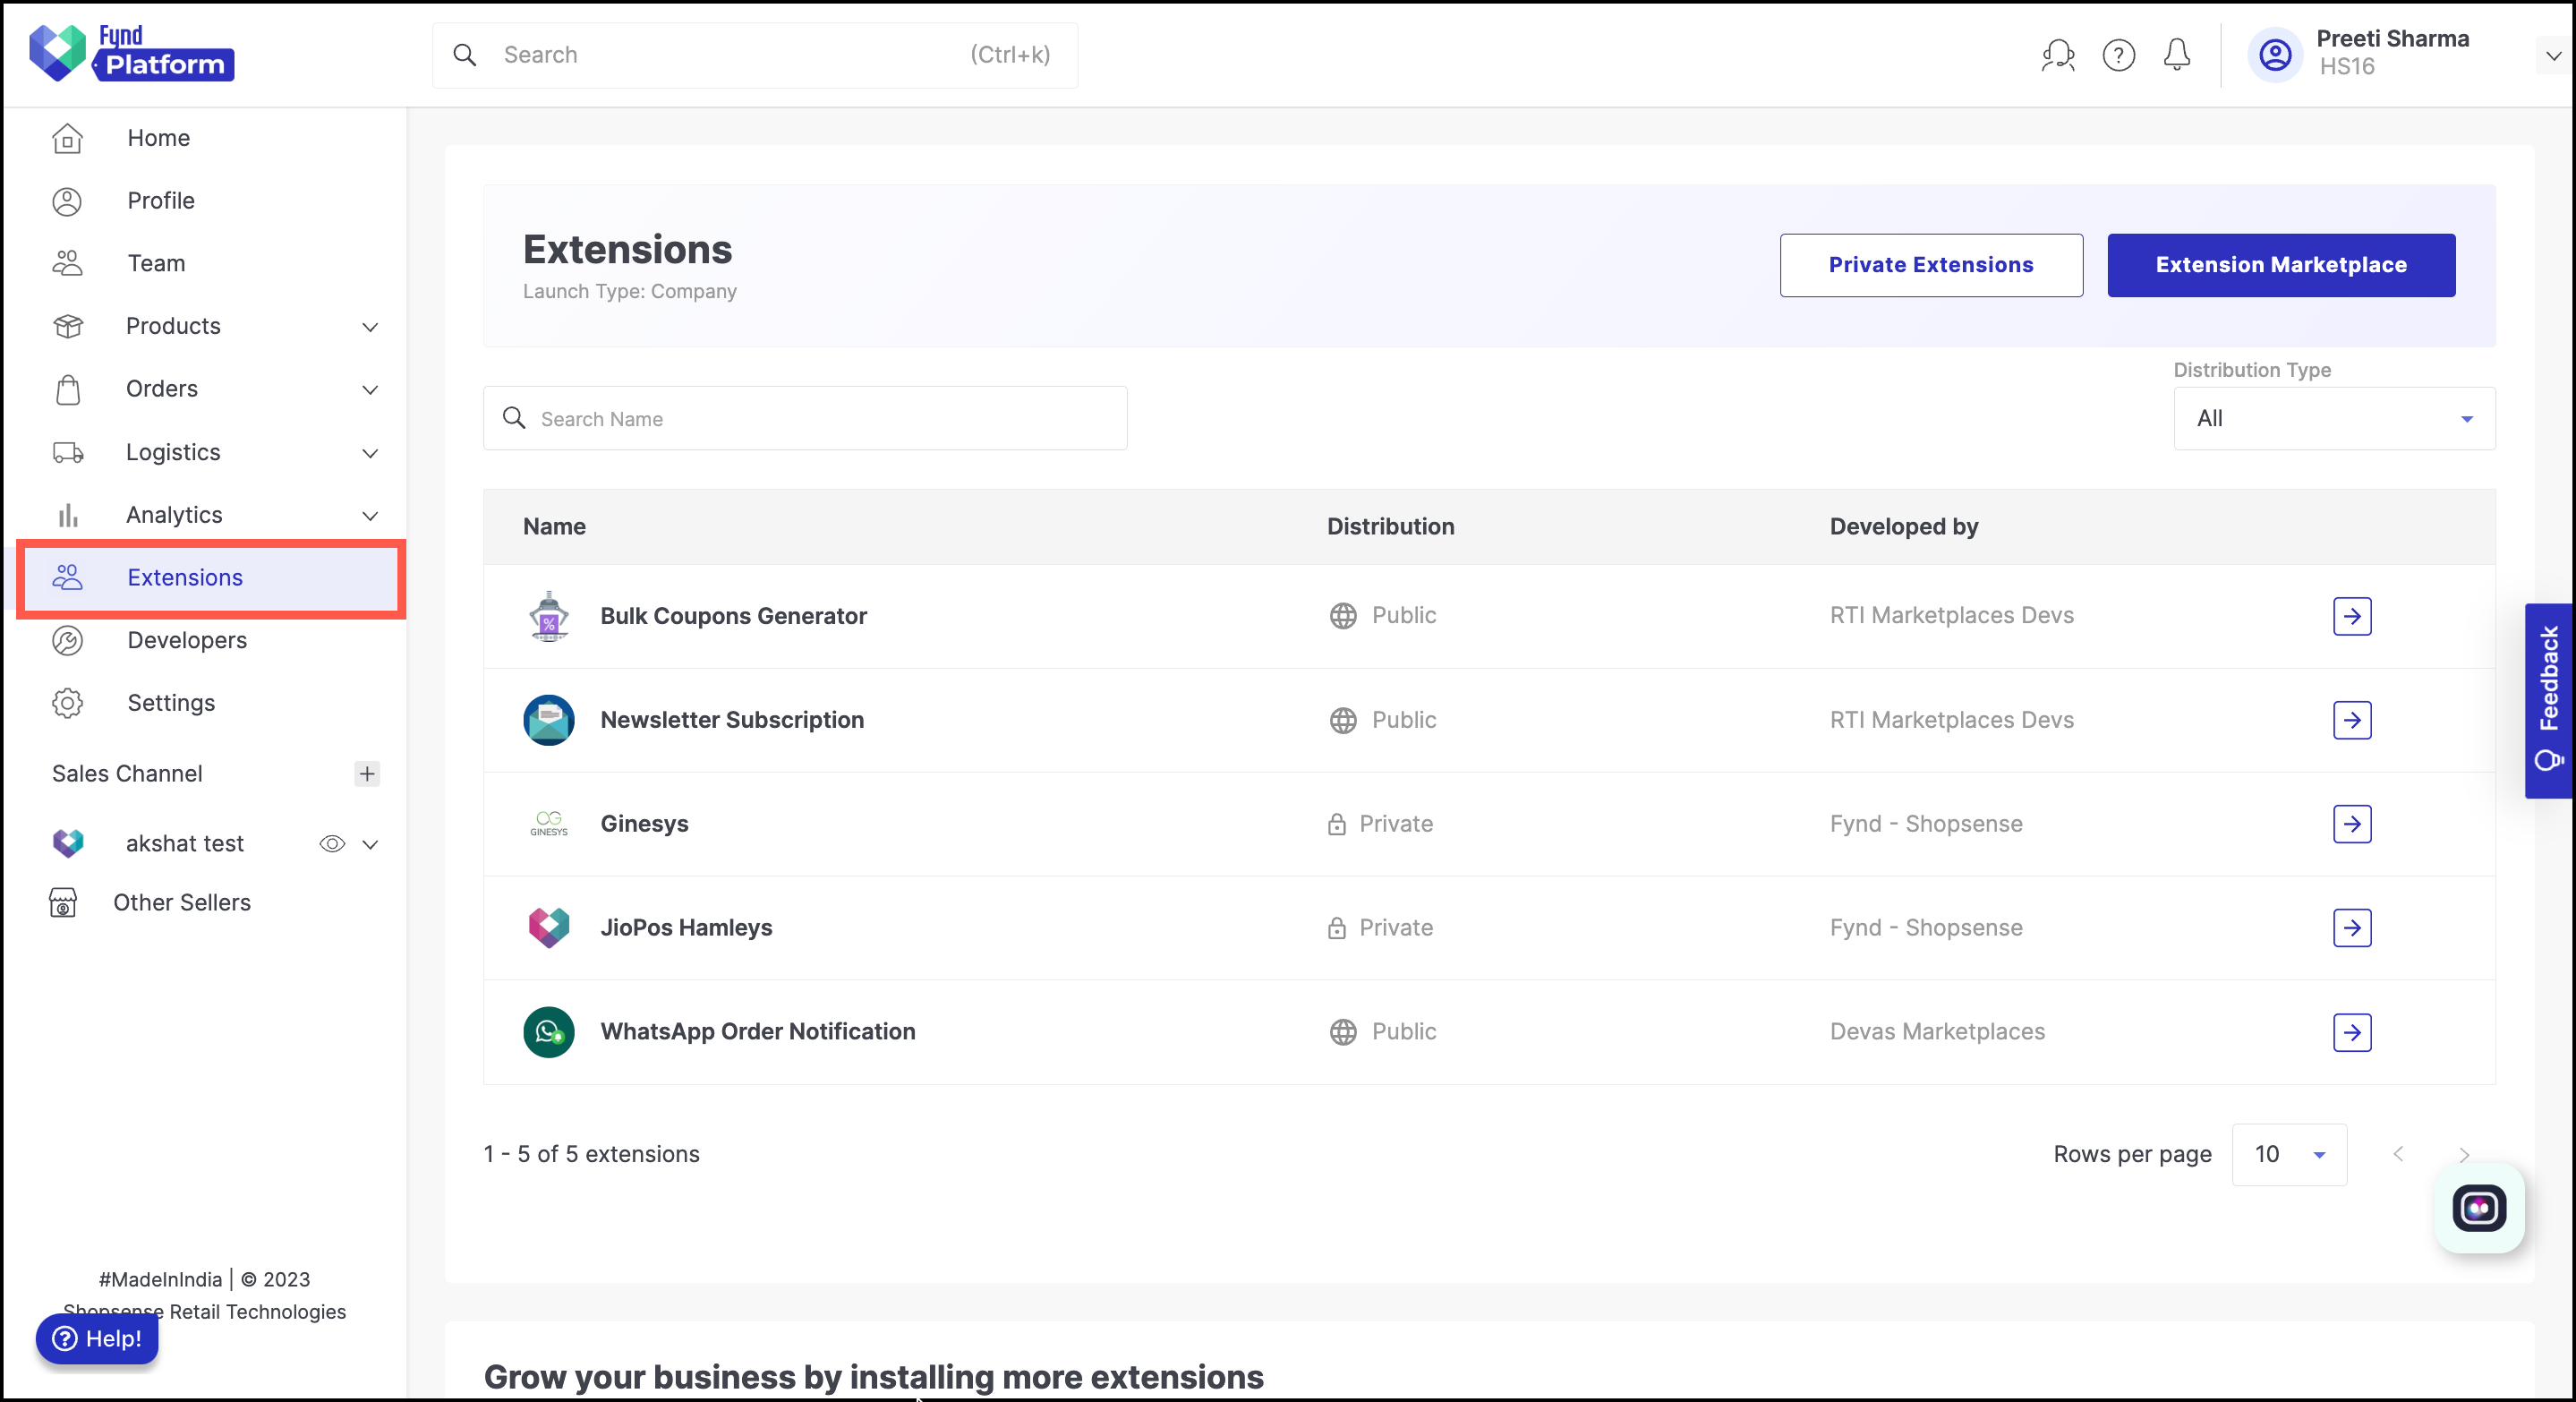
Figure 1: Extensions Section - Fynd Platform
-
Go to Private Extensions and select the Wizzapp extension from the list and click Install.
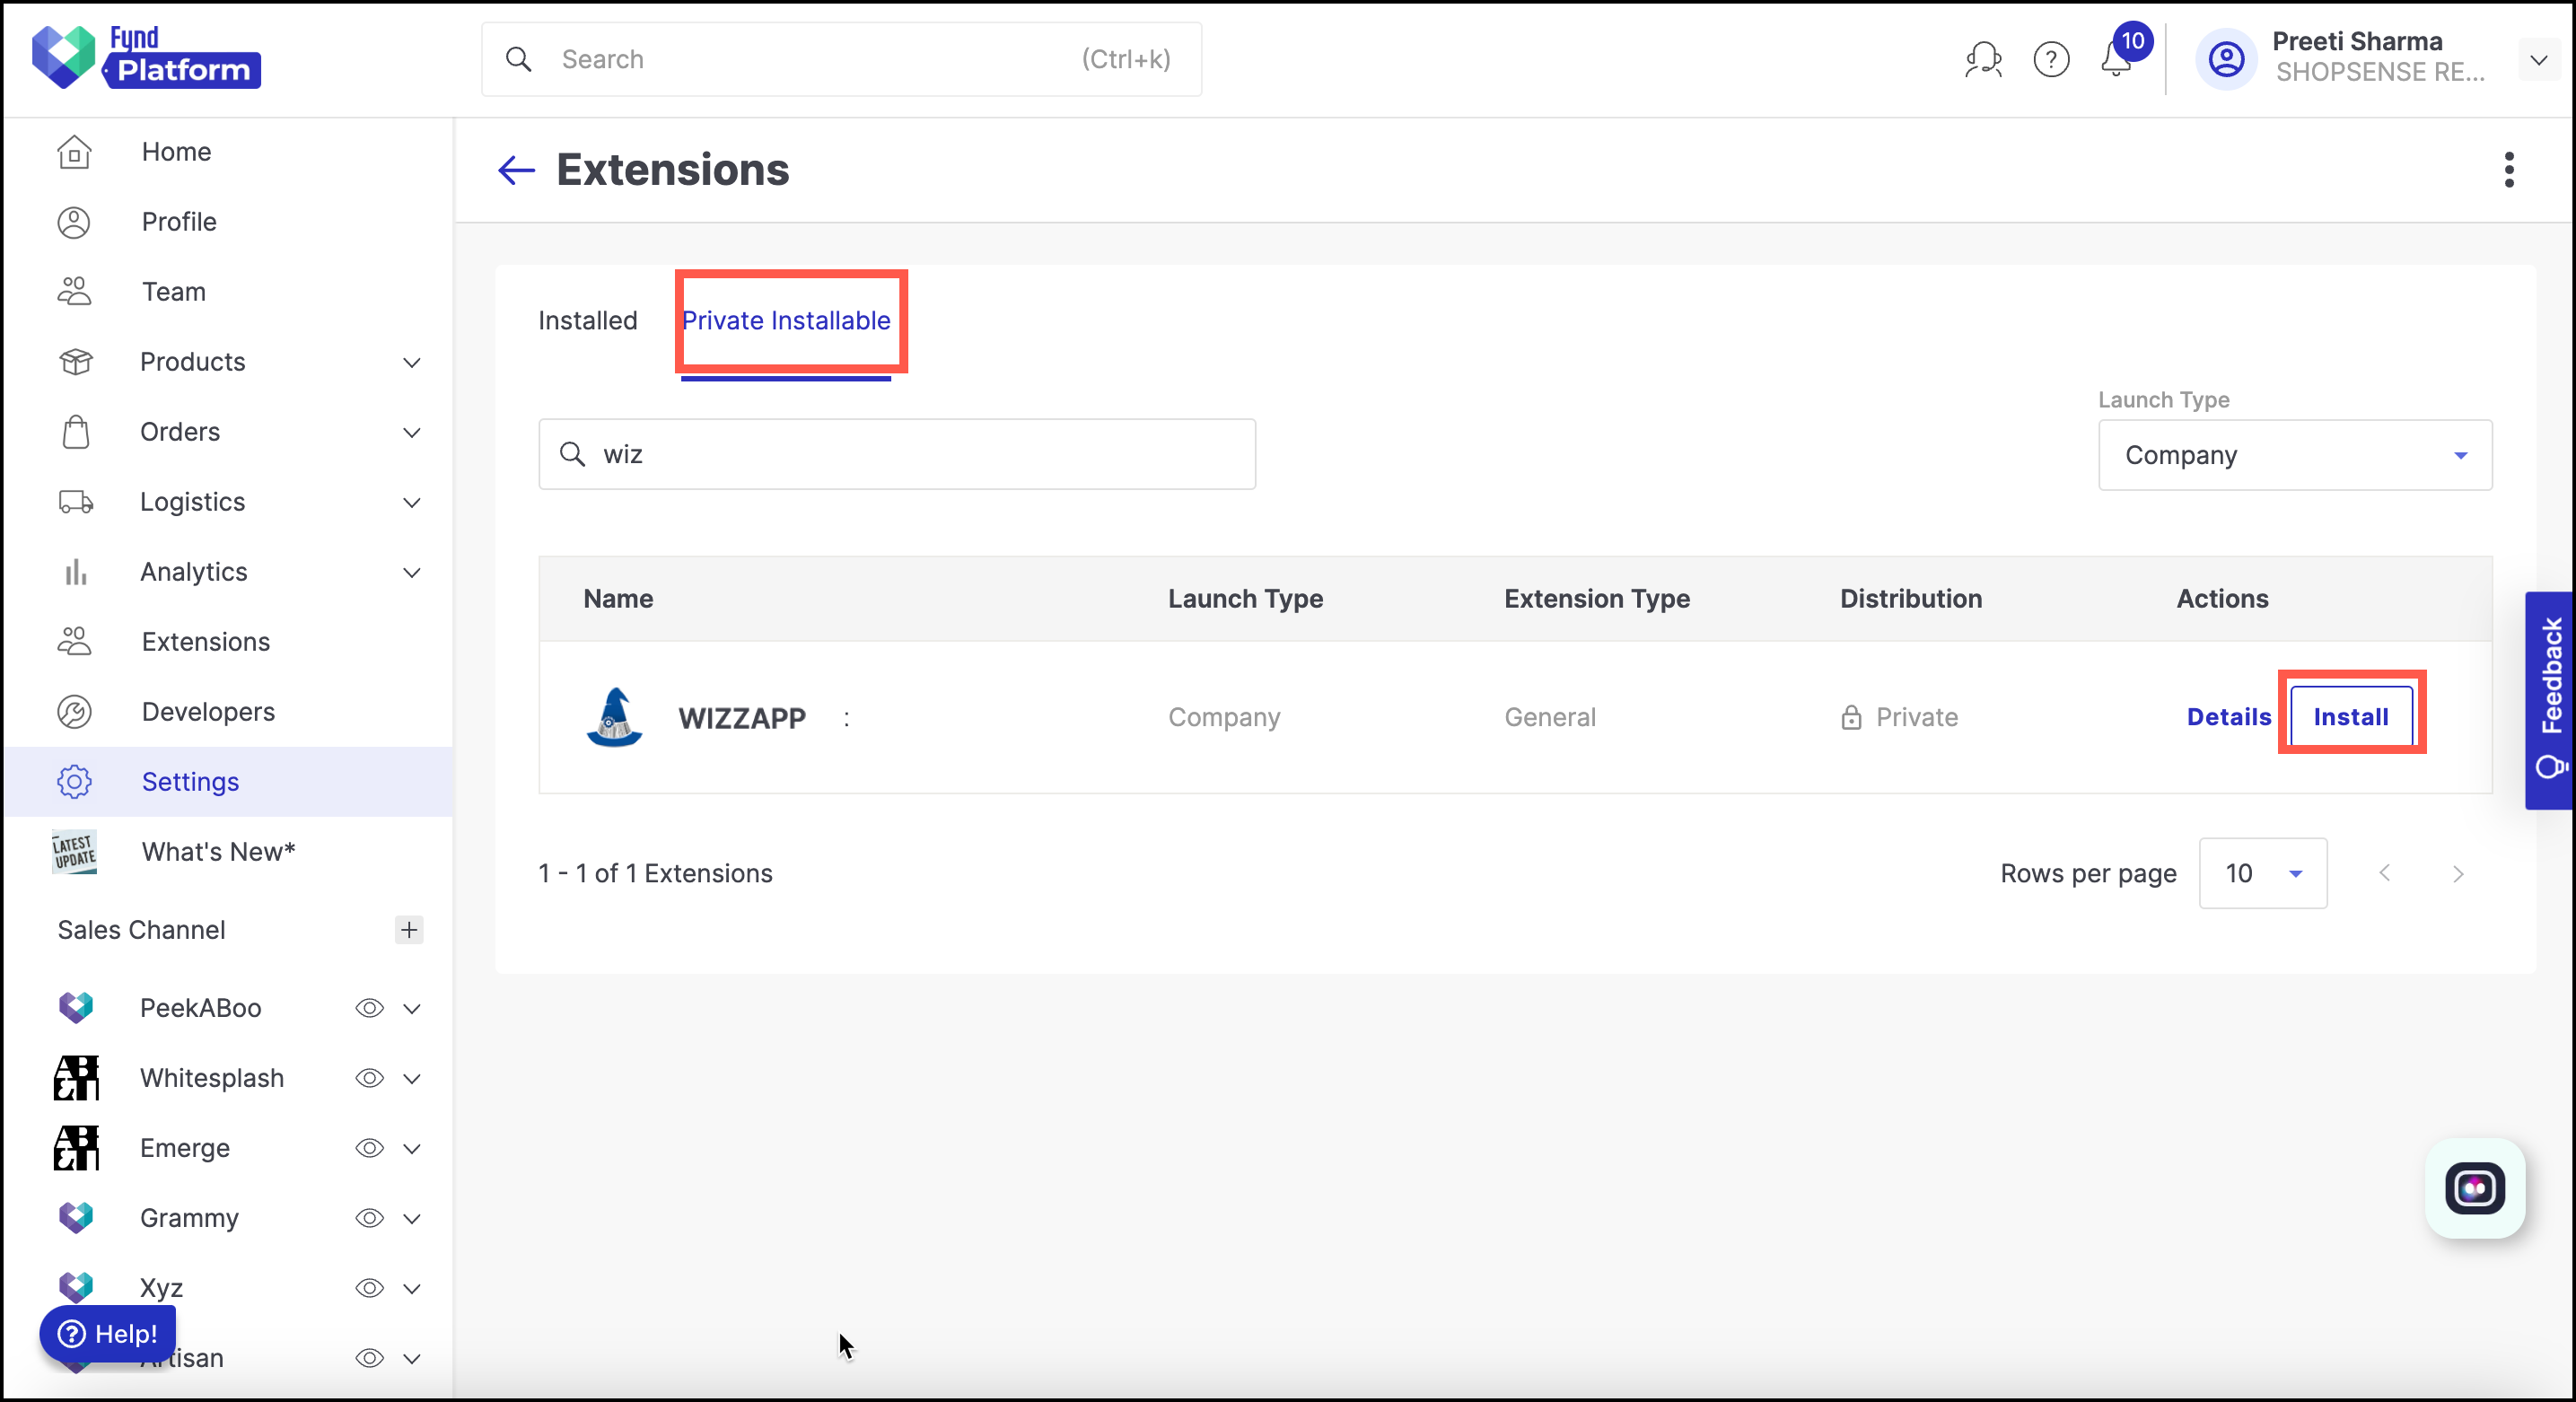
Figure 2: Wizzapp Extension
-
Click Accept & Continue to proceed.
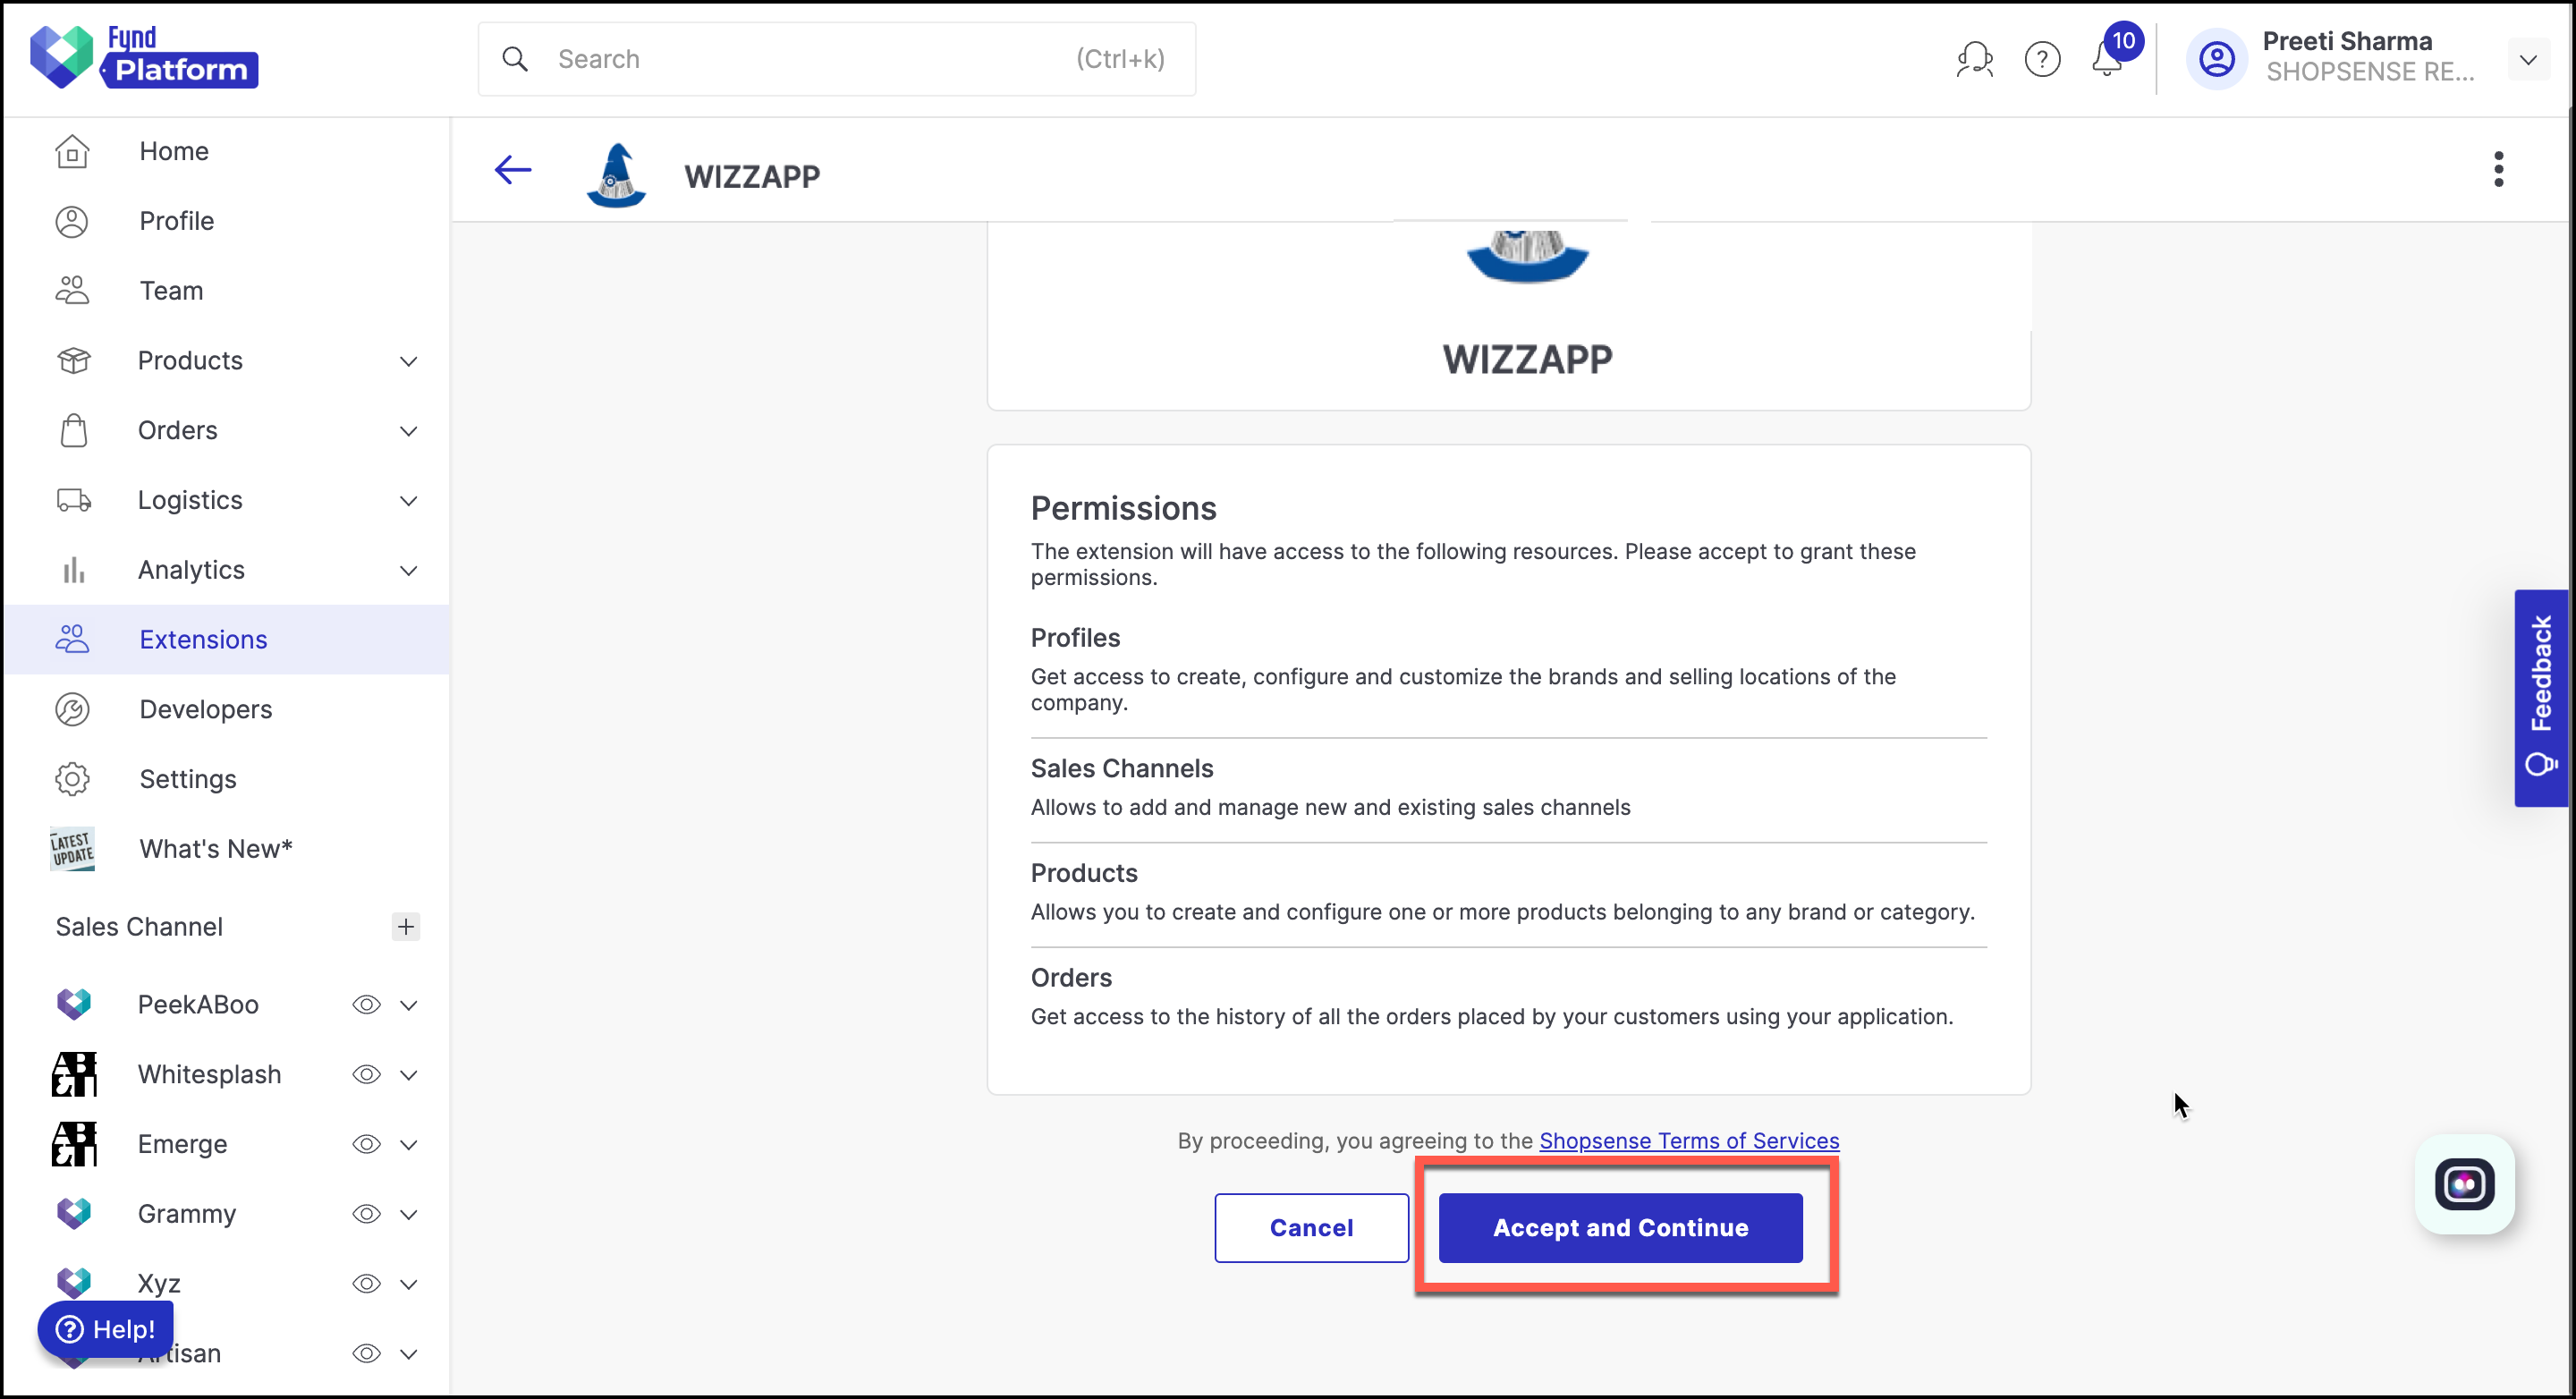
Figure 3: Install Extension
When you set up the Wizzapp extension for the first time, two sync operations will be performed, post which you will be able to use the extension:
- Catalog Sync - This operation will sync all the catalogs present in the Fynd Platform to the extension.
- Location Sync - This operation will sync all the selling locations added by you in the Fynd Platform to the extension.
Once the sync is completed, you have to opt-in selling locations so that you can then proceed to use the extension to send supply chain updates and accept orders from Fynd platform panel. Any changes made to the catalog or locations in the Fynd Platform after the initial setup will be communicated to the extension via webhook events, ensuring that the extension is always up-to-date.
To accept and update your supply chain using Wizzapp, use the below configurations.
Inventory
Inventory gets synced from Google bucket as JSON file format.
Selling Location
All the locations present in the section are reflected in the Profile section. Opt-in selling locations to send inventory updates and process orders via the Wizzapp panel. Use bulk action to opt-in multiple selling locations at once.
How to opt-in for a selling location?
-
Open **Selling Location **widget present on the homepage of this extension.
-
Search for a particular location by entering its Location Code in the search box. For example, MRVLB20 which is a location code for 'THE MANDHANA RETAIL VENTURES LTD' in the Fynd Platform.
-
Click the Edit button present under the Action column.
-
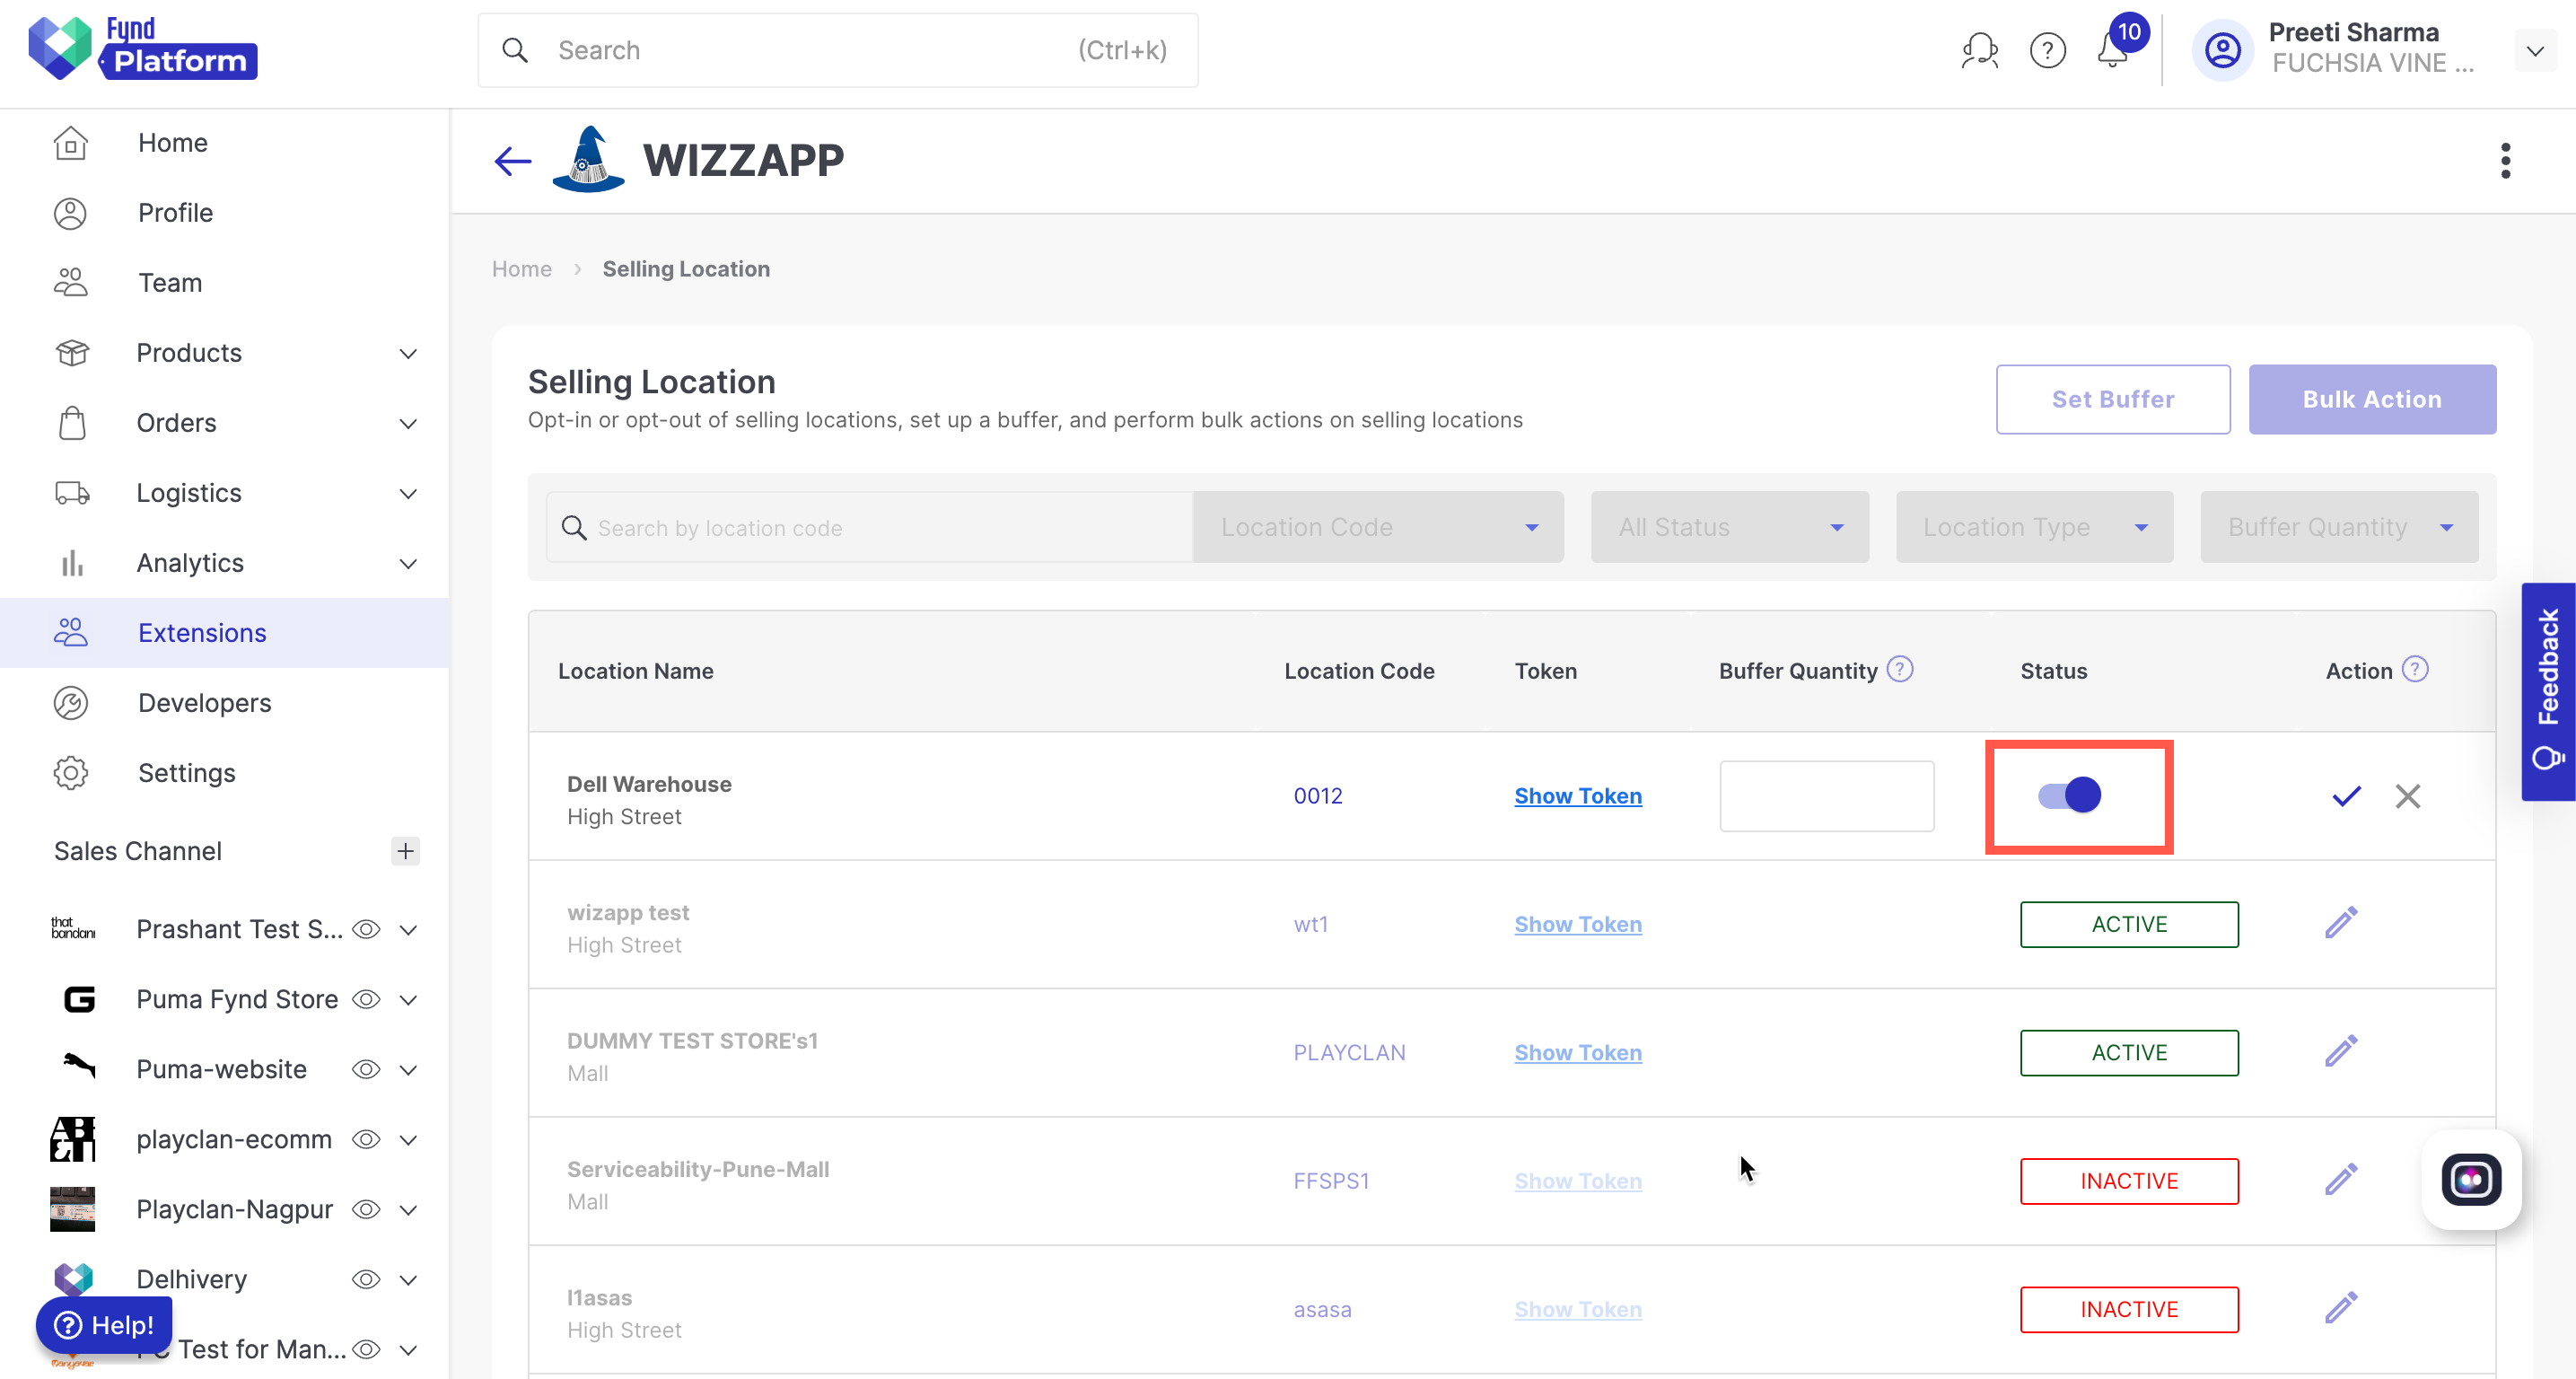
Turn ON the toggle to start sending inventory and receiving orders for this location (push inventory data and pull orders data).
-
Disable the location and reset its inventory count to zero by toggling the status button.
.png)
Figure 5: Disable Selling Location
-
You can also set a buffer on a selling location, which will be applied to all articles mapped to that selling location.
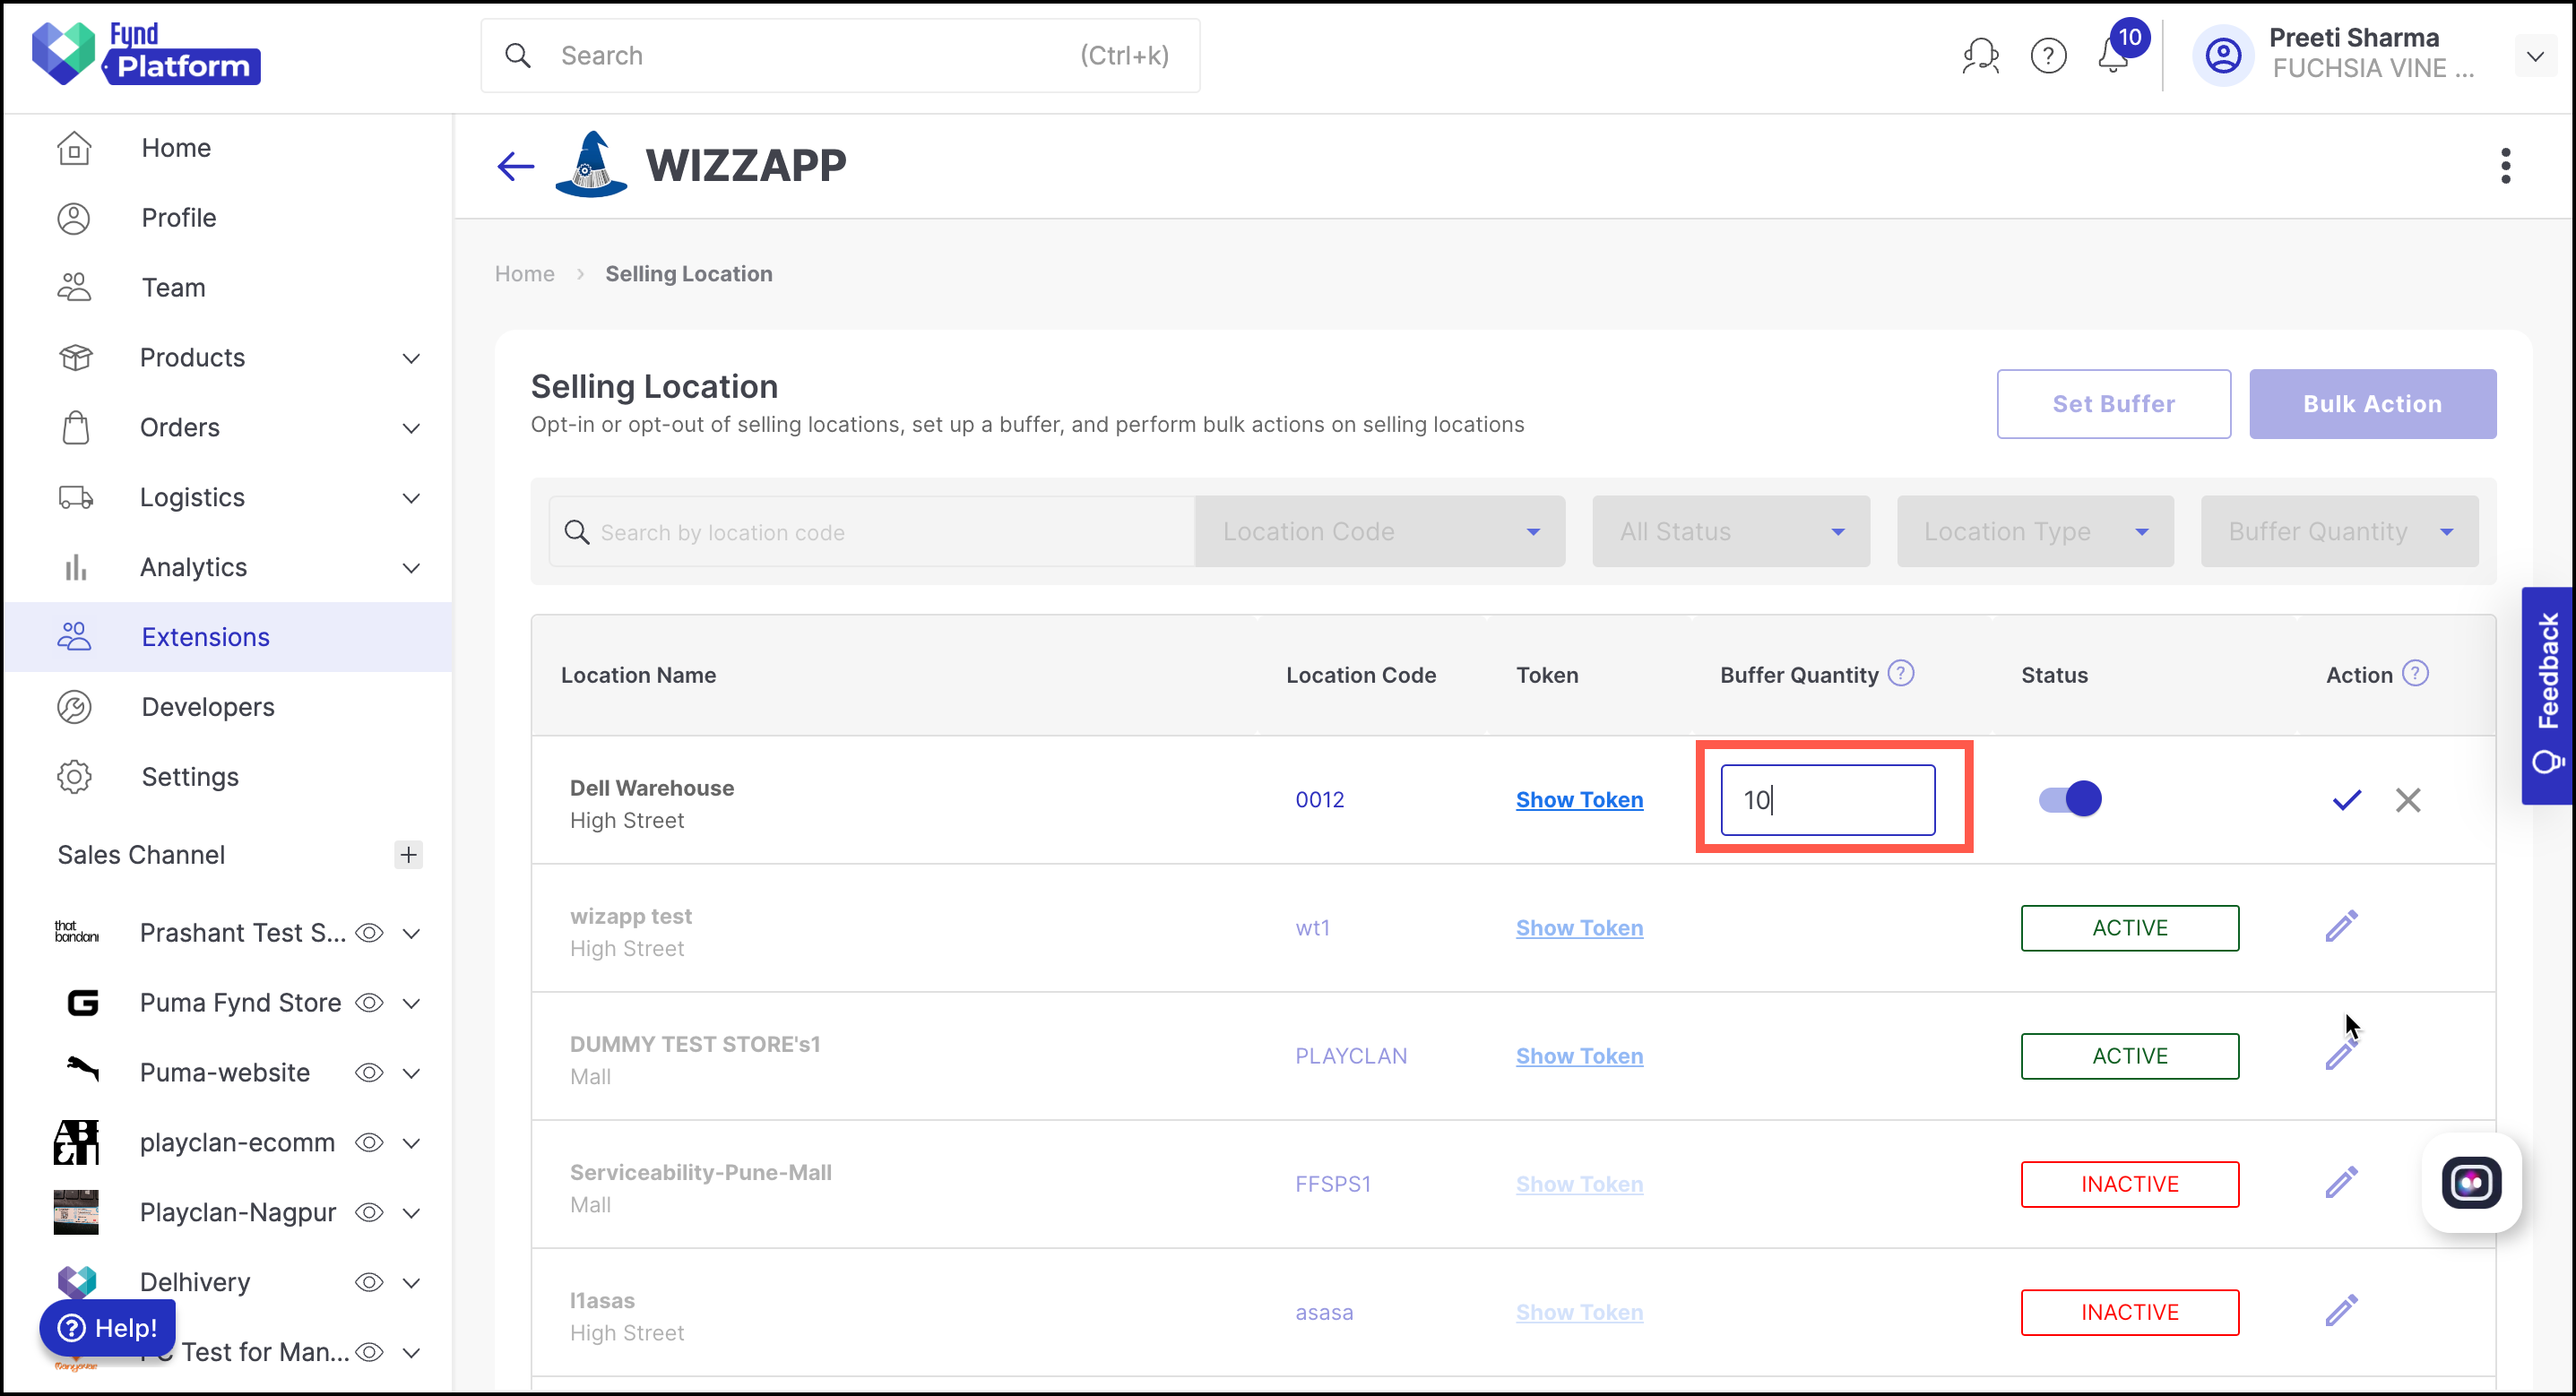
Figure 6: Buffer Quantity
-
Click Confirm to save the changes.
-
On successful opt-in, a unique username and token will be generated for that selling location, which has to be used to send inventory to Fynd Platform and receive order updates from Fynd Platform.
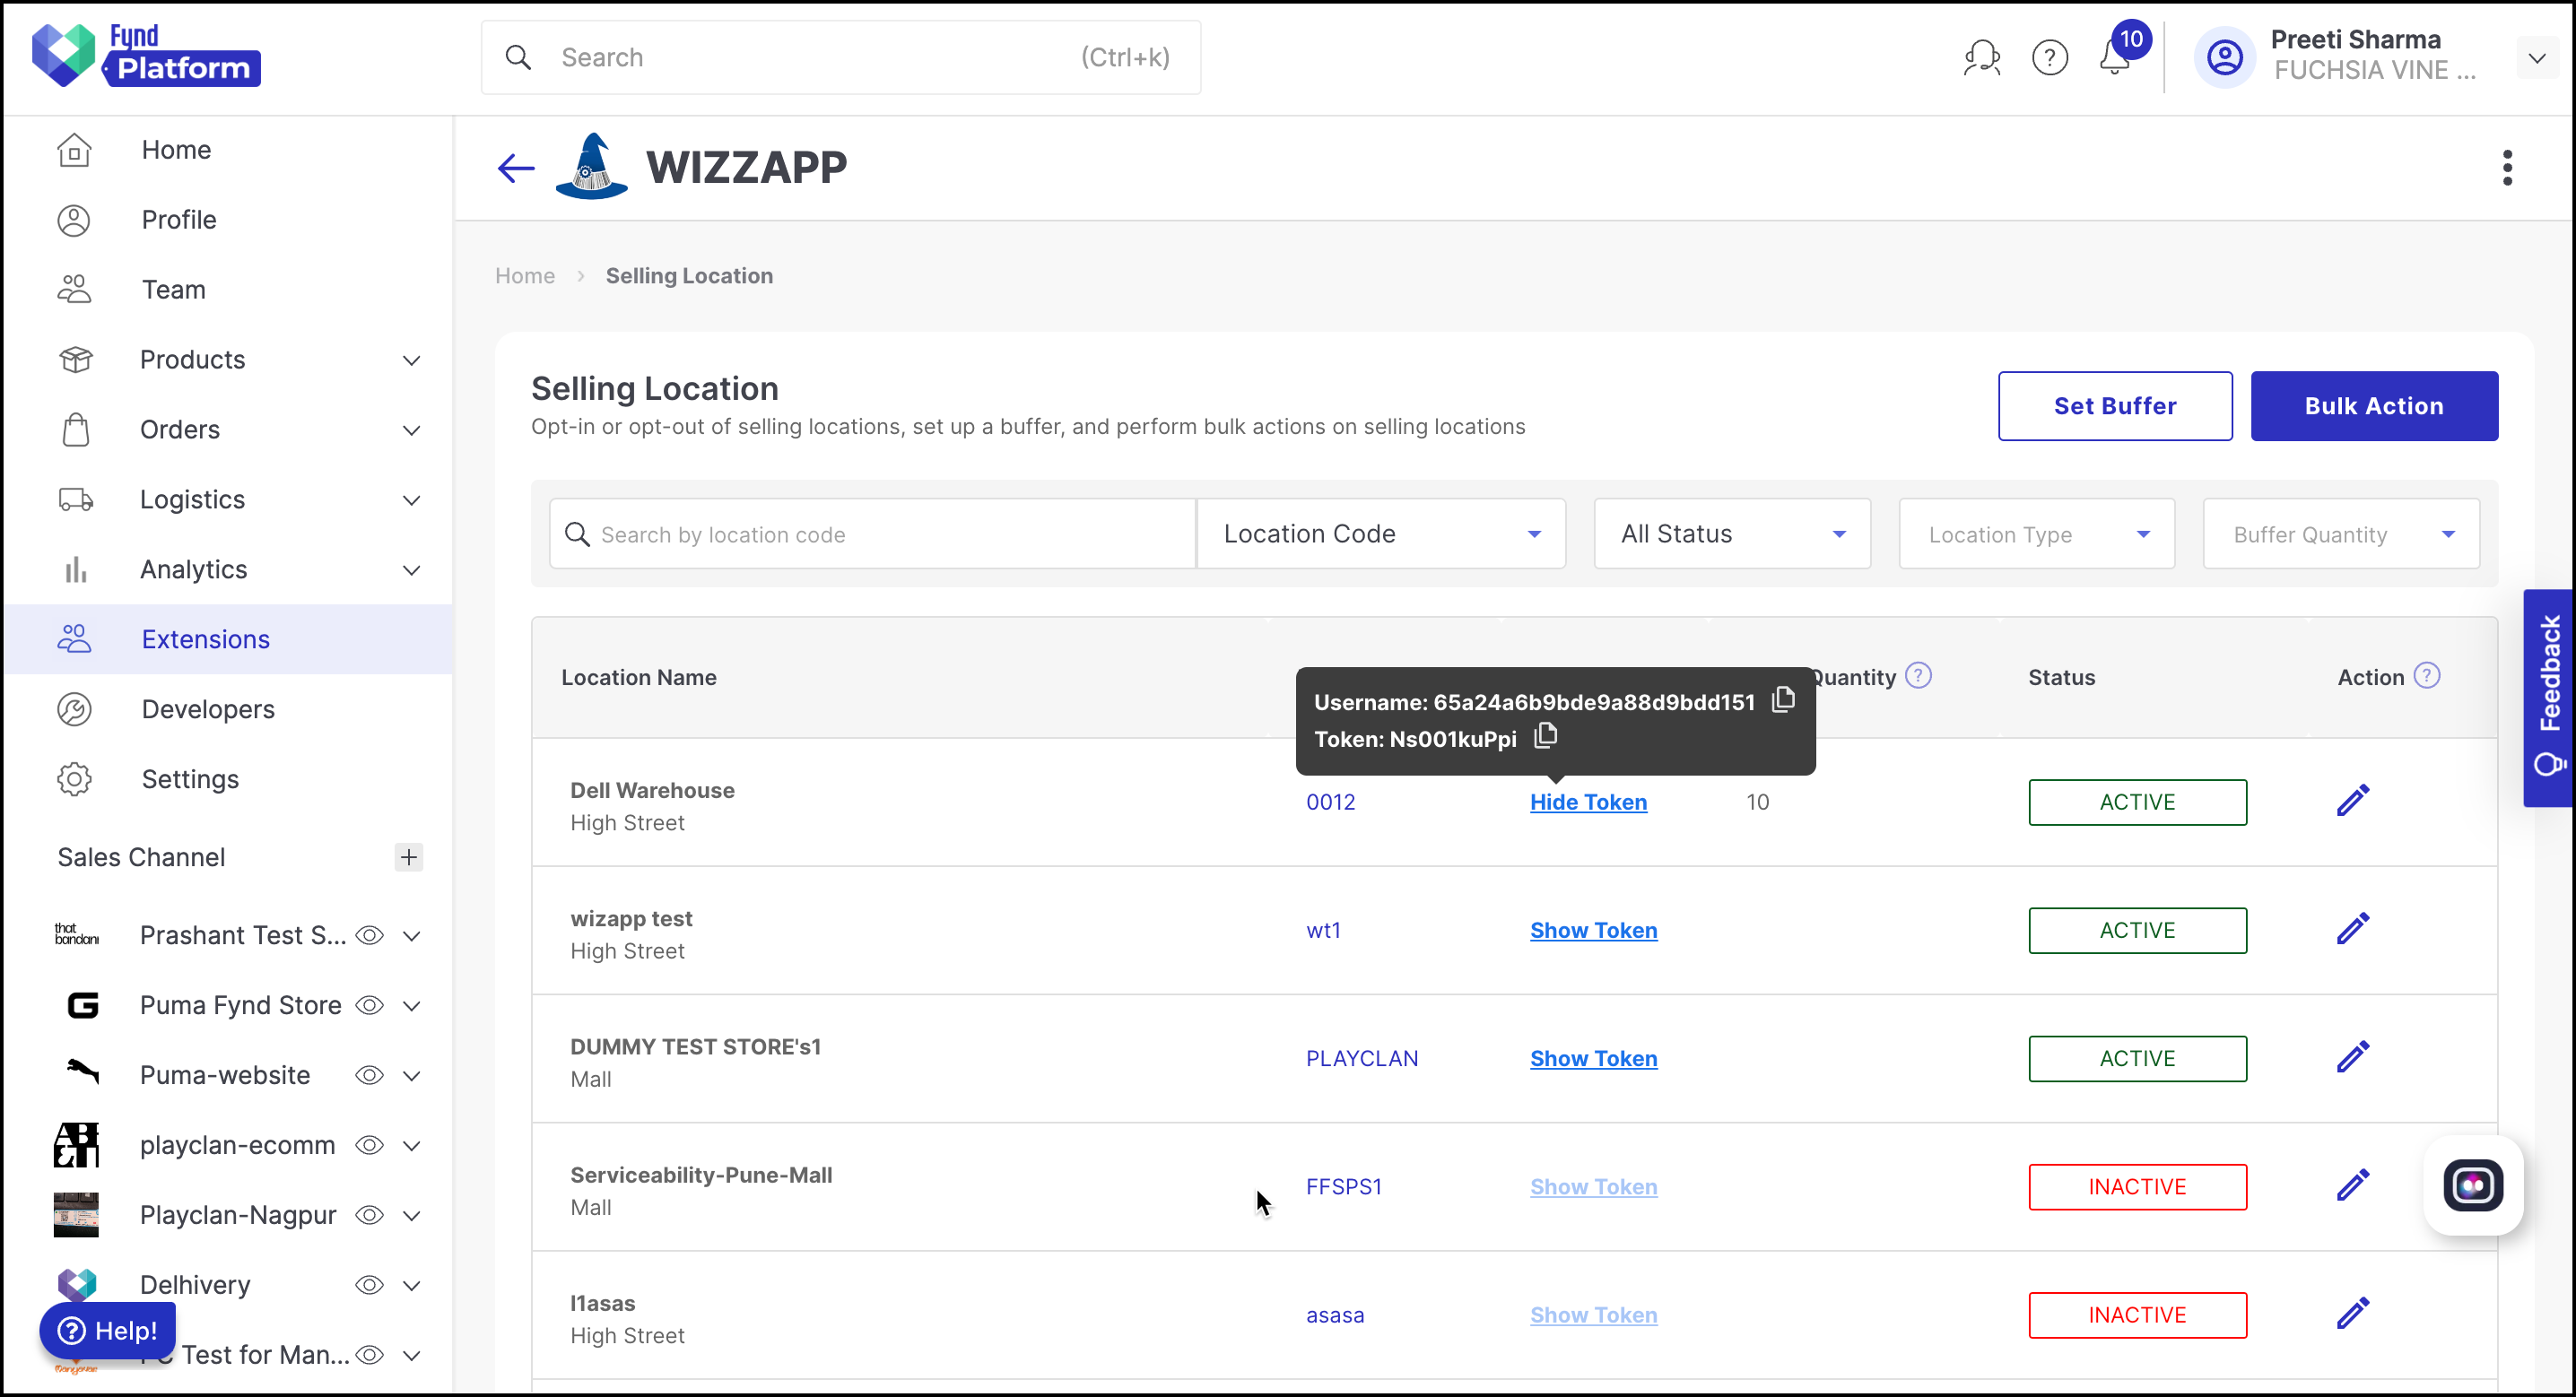
Figure 7: Username and Token for Selling Location
After opting out of a selling location, you must wait for at least 10 minutes before re-opting into the same selling location.
Click Set Buffer to set a global buffer for all selling locations. This buffer will be applied to all active and inactive selling locations.
How to opt-in selling locations in bulk?
-
Click Bulk Action.
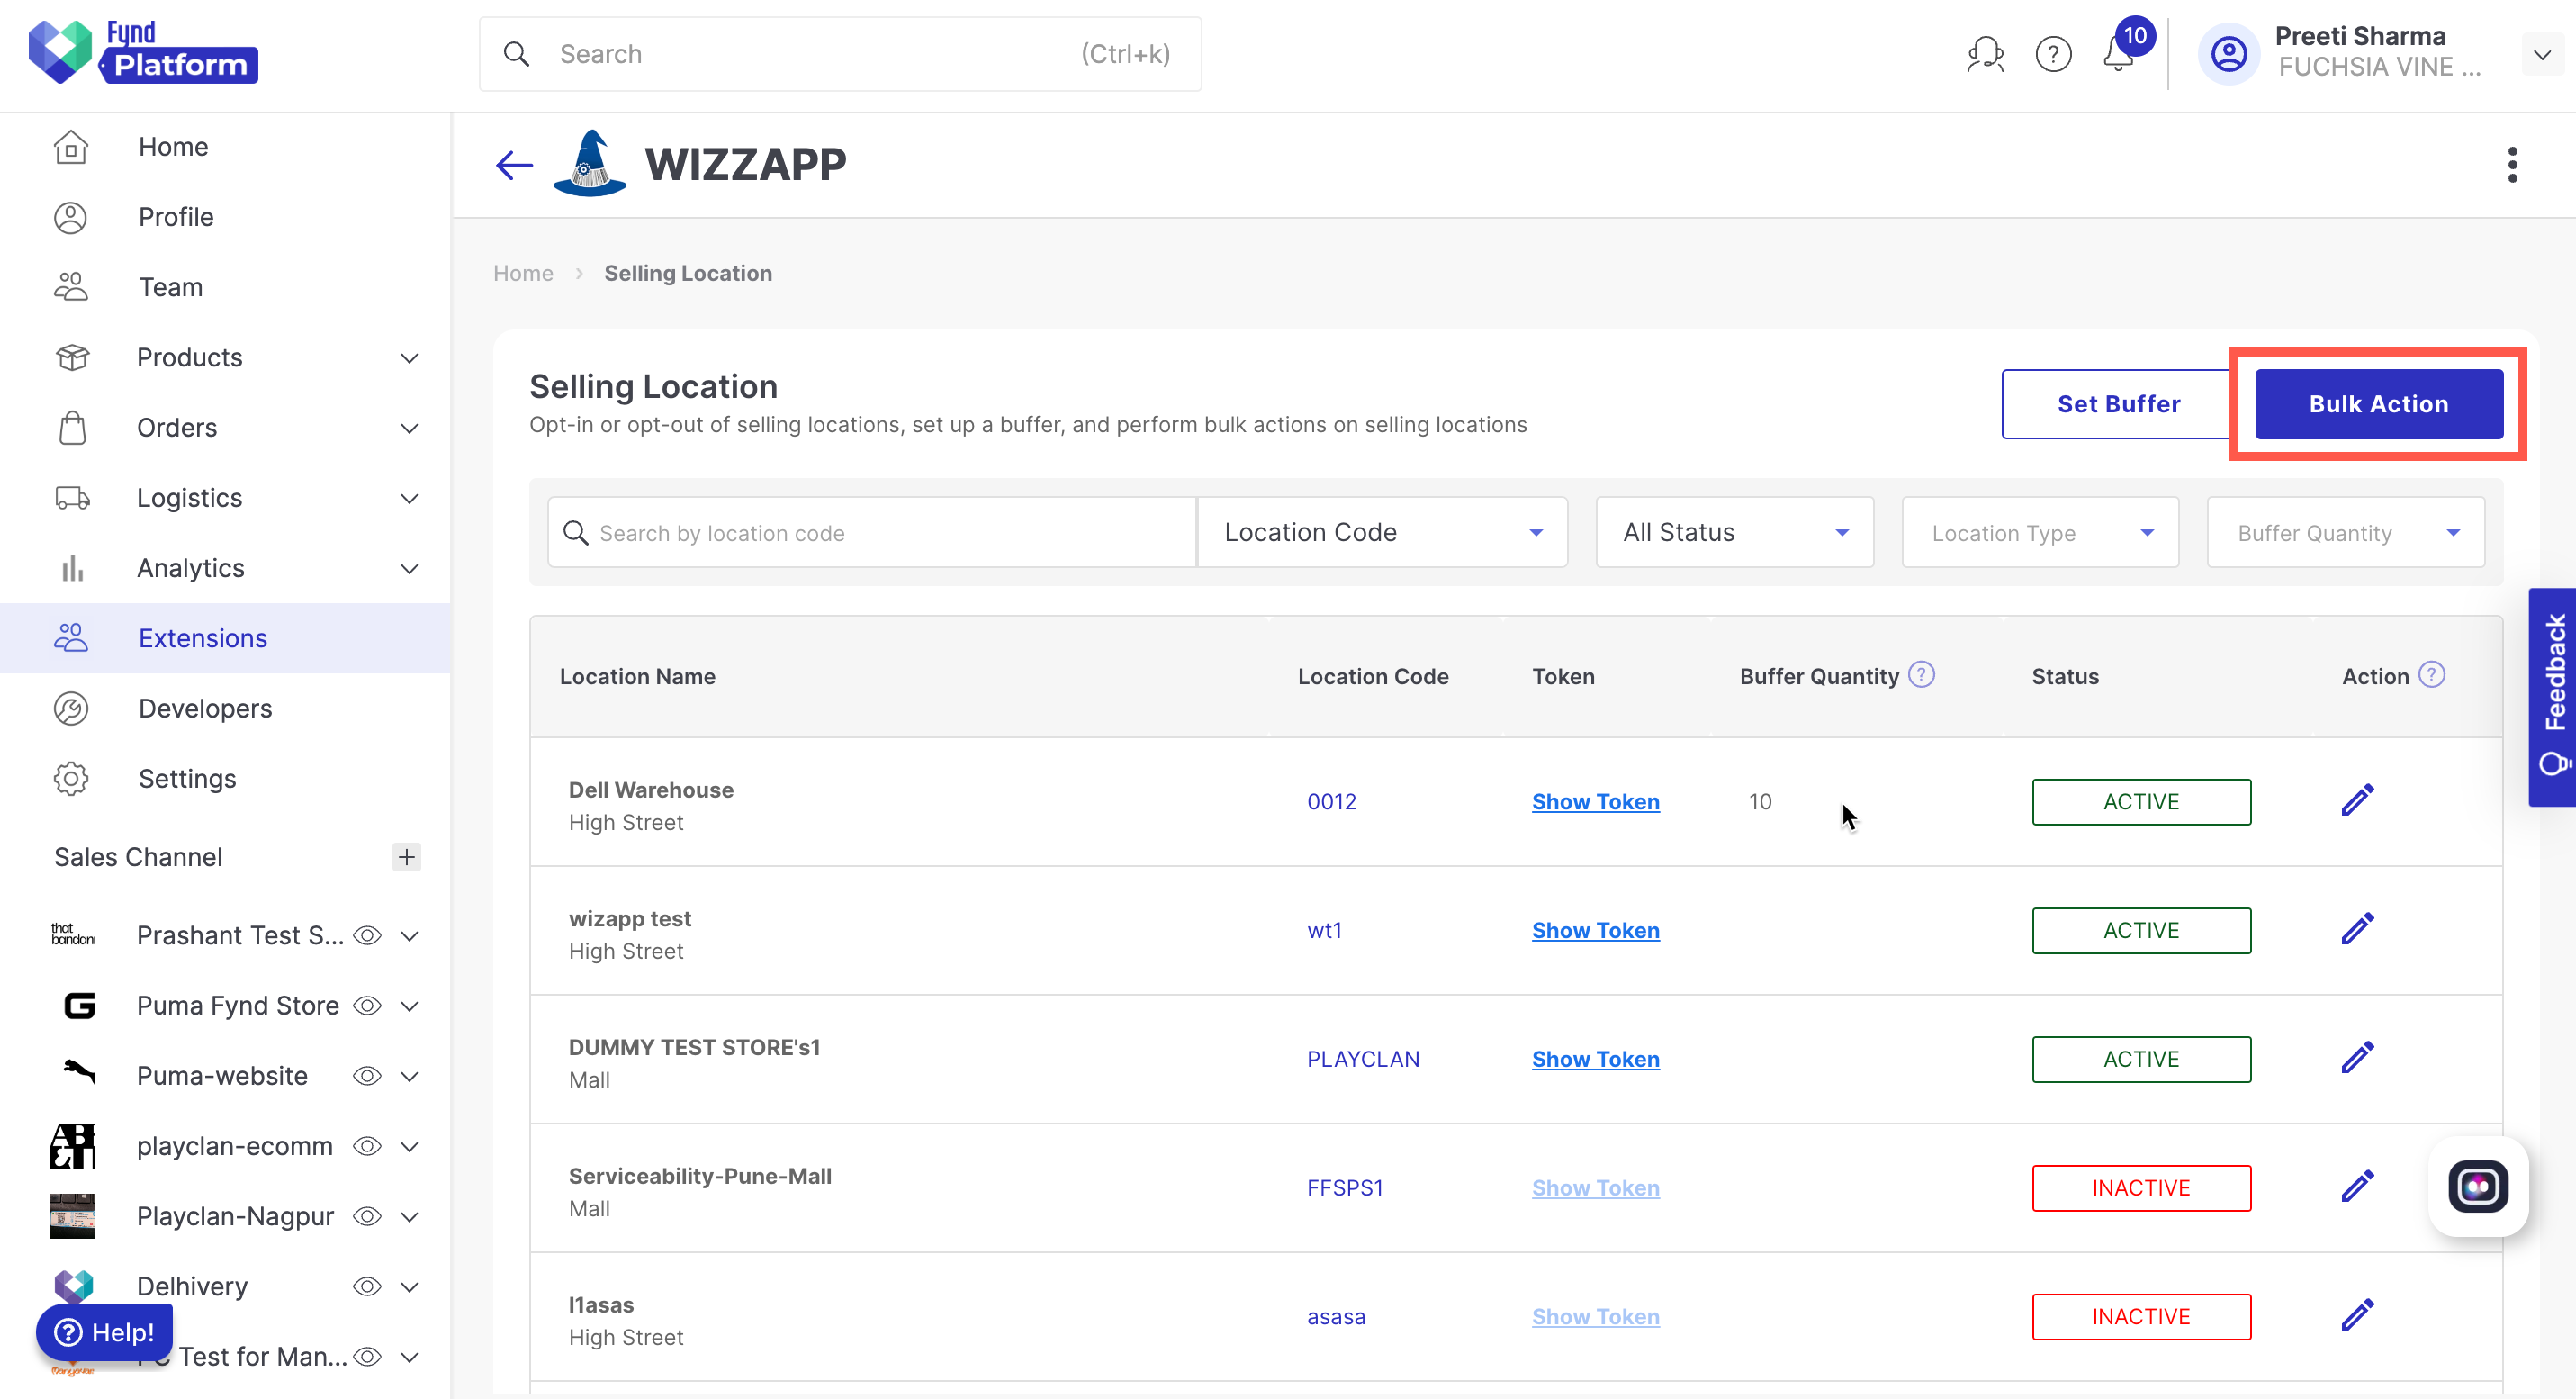
Figure 8: Bulk Action
-
Choose the status of locations from the dropdown. Here, we have selected** All Locations**.
-
Choose either EXCEL or CSV from the Download dropdown. A file will be downloaded.
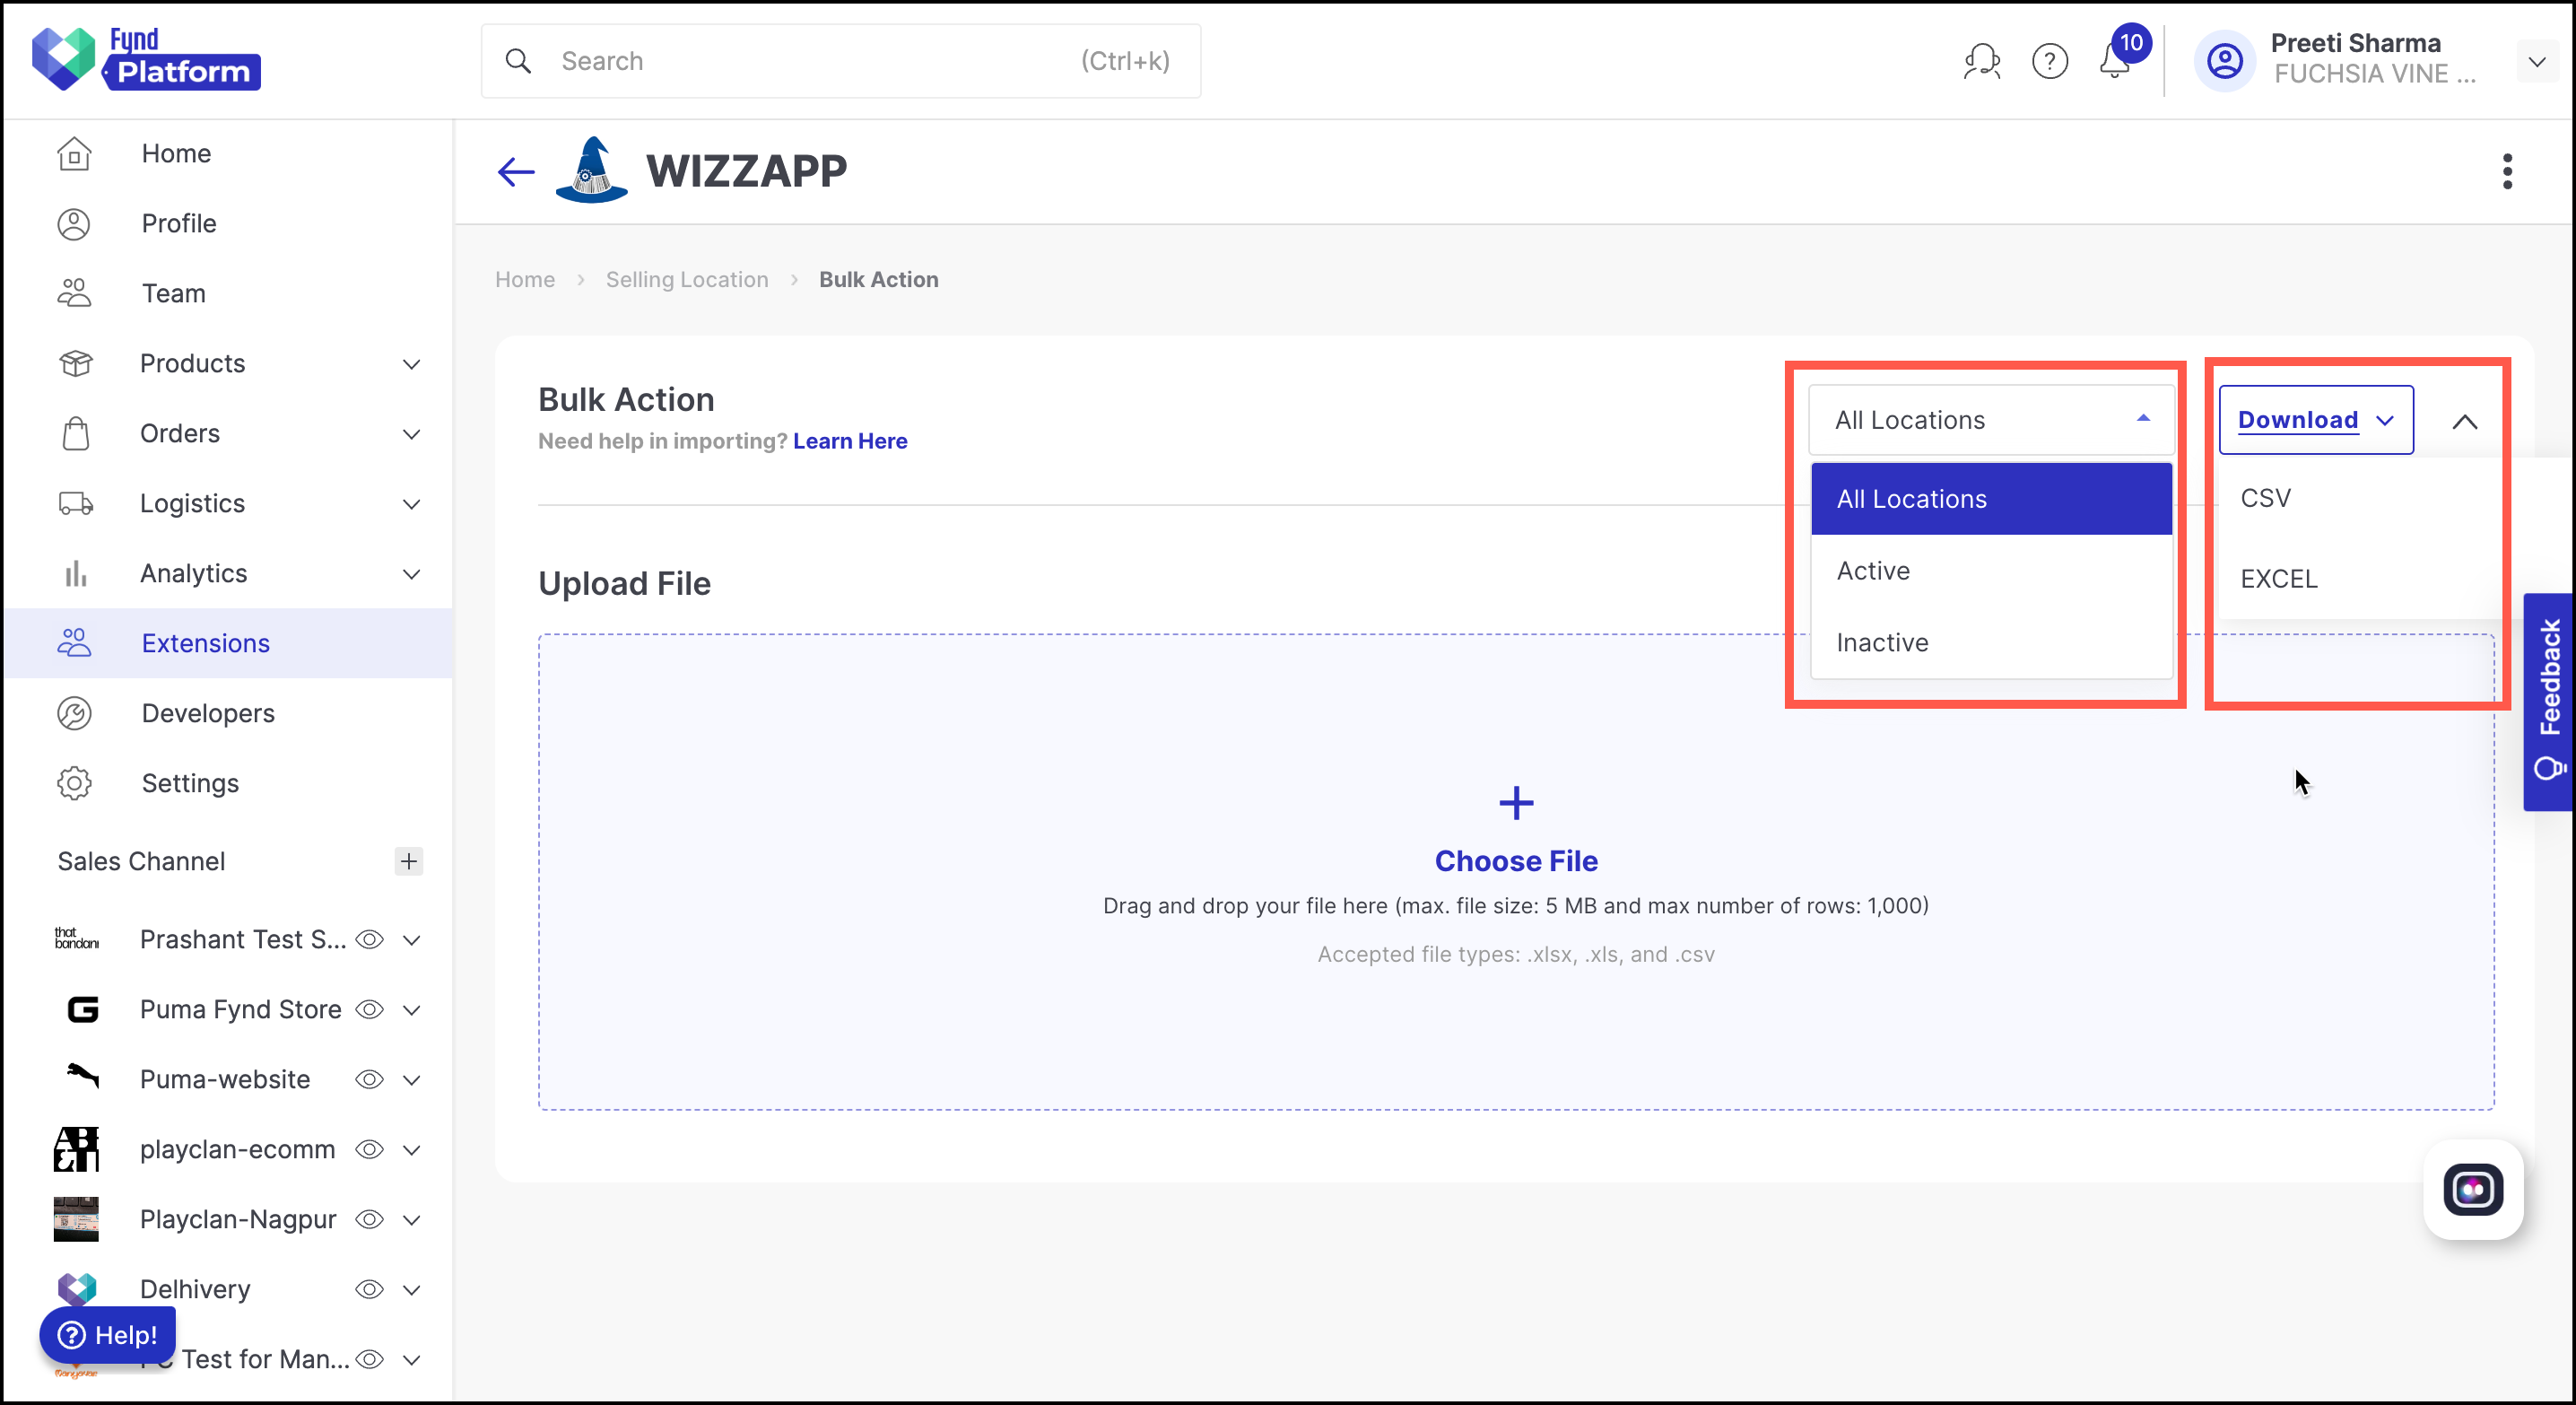
Figure 9: Download Template
-
Save the file in your system.
-
Open the file.
-
Make the following changes in the downloaded file.
-
Opt-in selling locations by marking Status as ACTIVE.
-
Opt-out of selling locations by marking Status as INACTIVE.
-
Set Buffer Quantity for multiple selling locations.
-
Reset inventory to 0 for any location you marked as Active/Inactive by marking the Reset Inventory column as Yes.
.png)
Figure 10: Bulk Action Template
-
-
Save the file.
-
Click Choose File to upload the saved file. Please wait until its status changes to COMPLETED
-
In this way, you can opt-in selling locations in bulk.
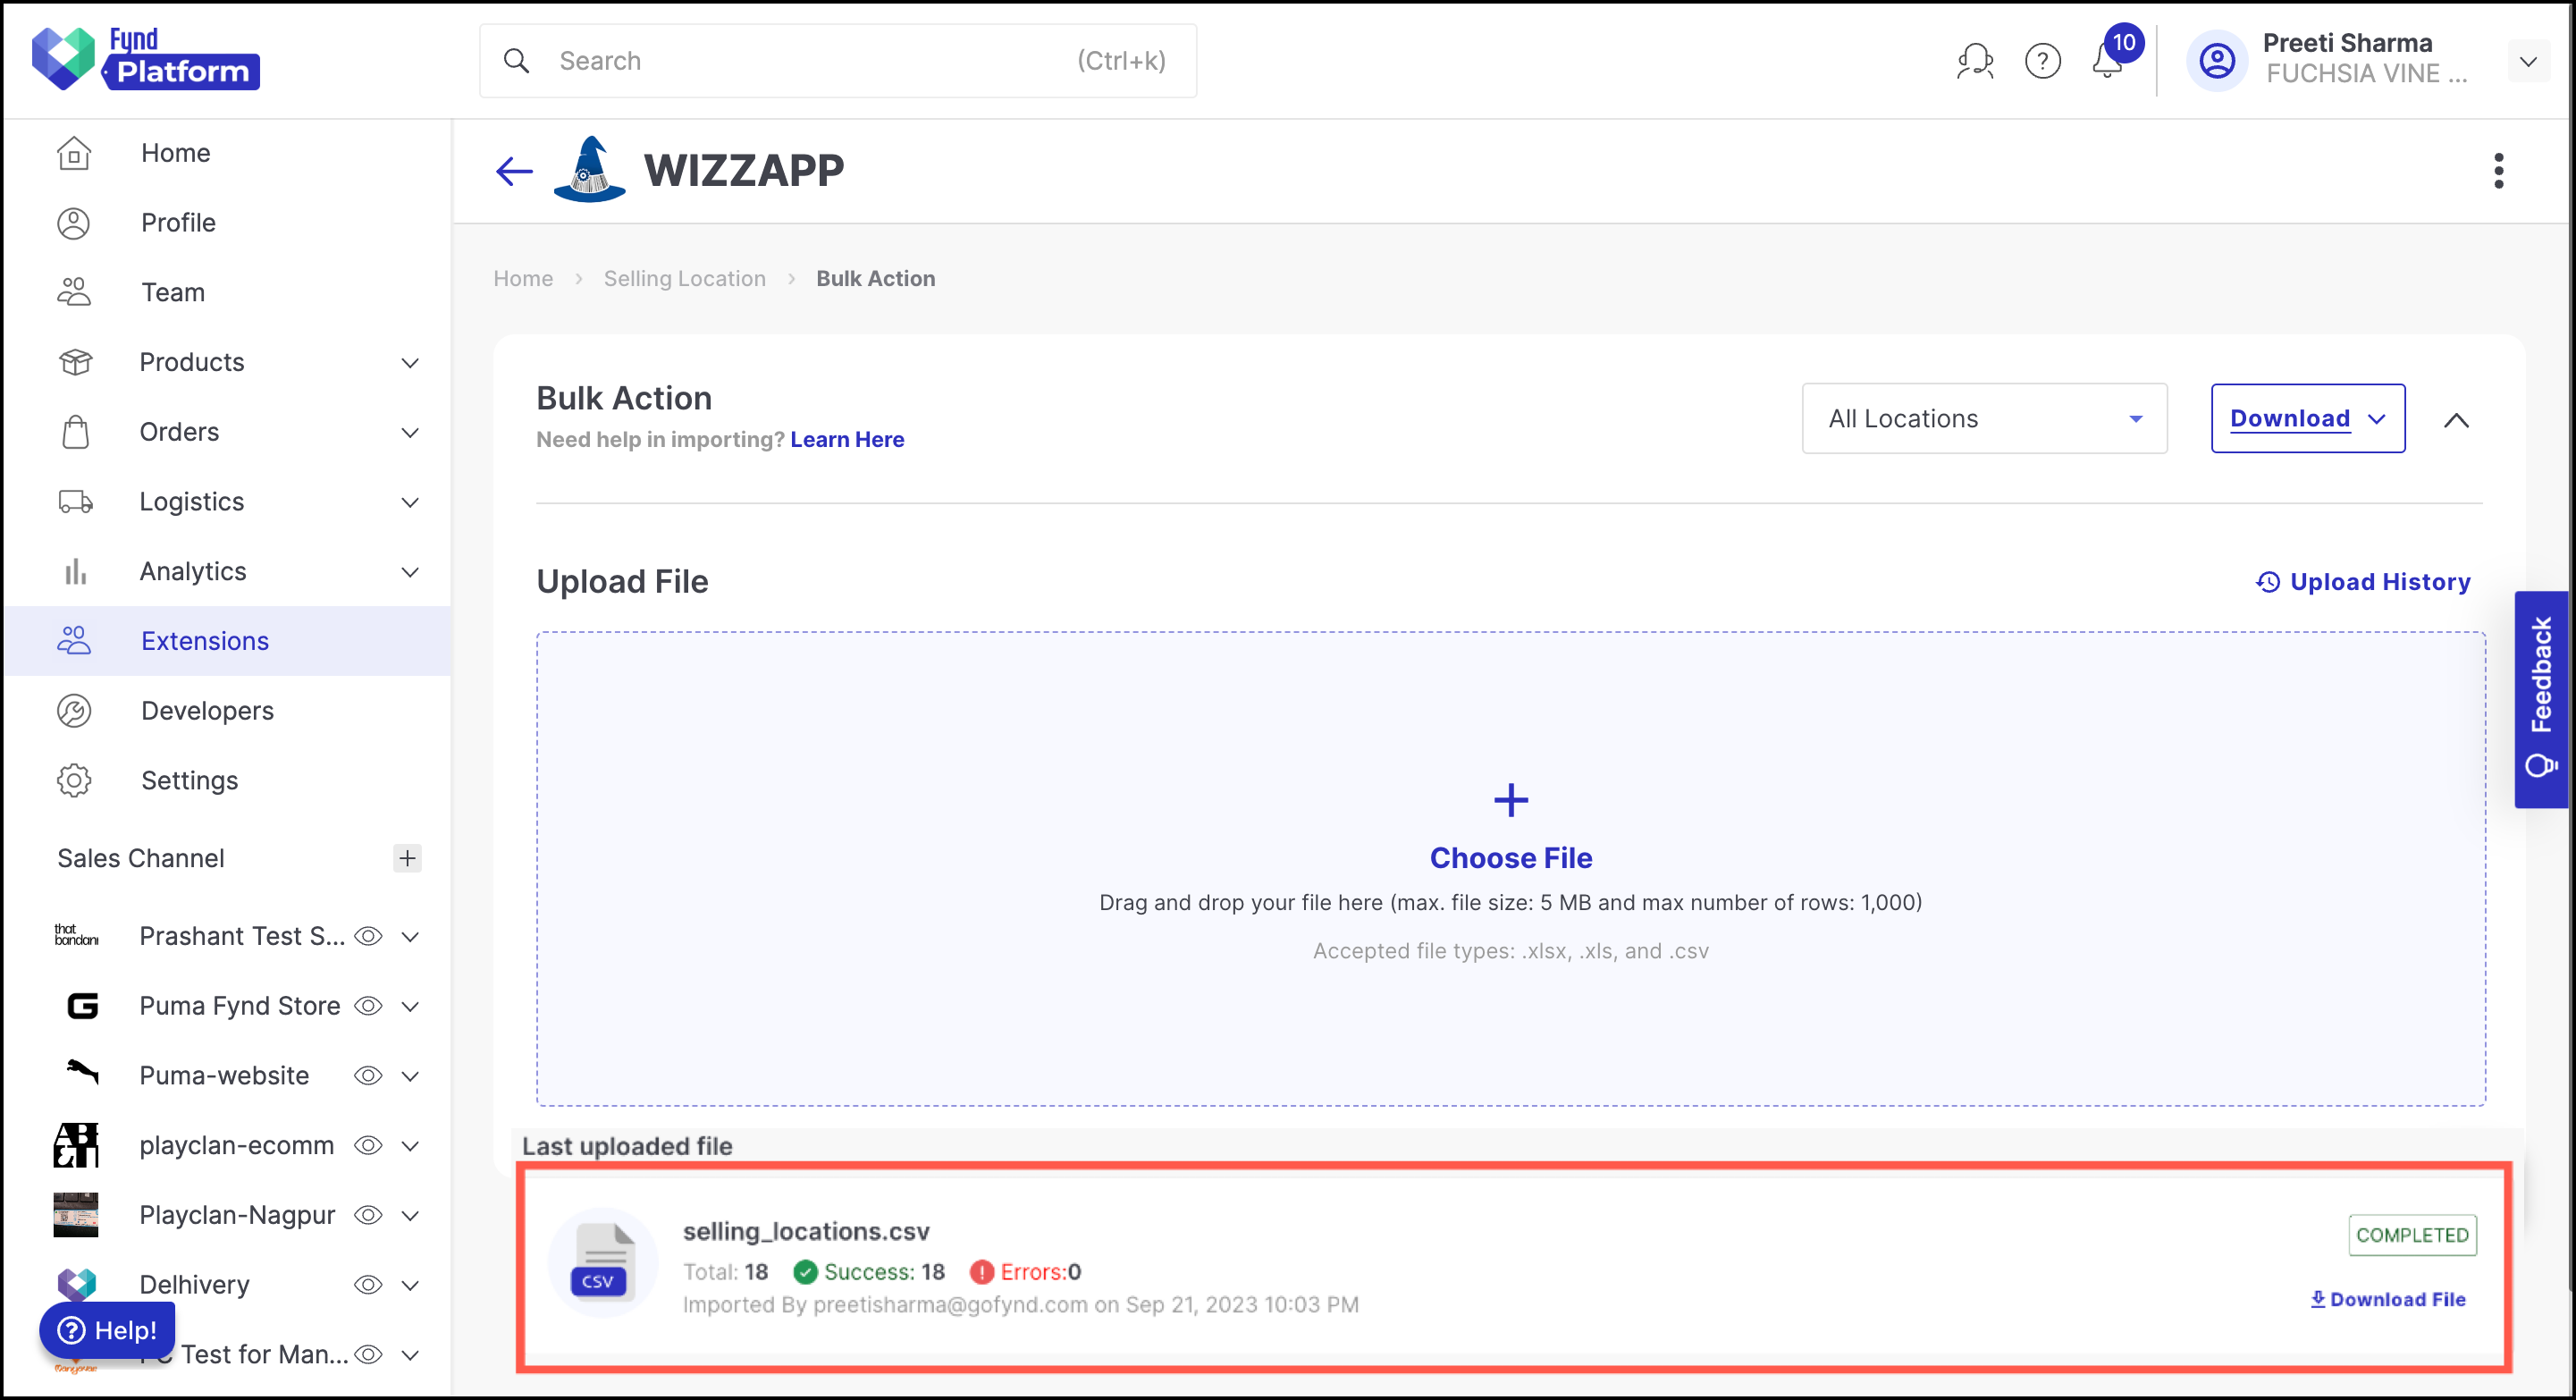
Figure 11: Bulk File Upload
If there are errors in uploading the file, there will be an error file which will be generated. Download the error file, fix the errors mentioned, and re-upload the file.
After applying buffer to any selling location:
you need to manually sync inventory for that specific location or all locations for the updated inventory (Inventory received from Wizzapp–Buffer Quantity) to be pushed to the Fynd Platform.
OR
the updated inventory (Inventory received from Wizzapp–Buffer Quantity) will be pushed to Fynd Platform automatically upon receiving new inventory updates from Wizzapp.
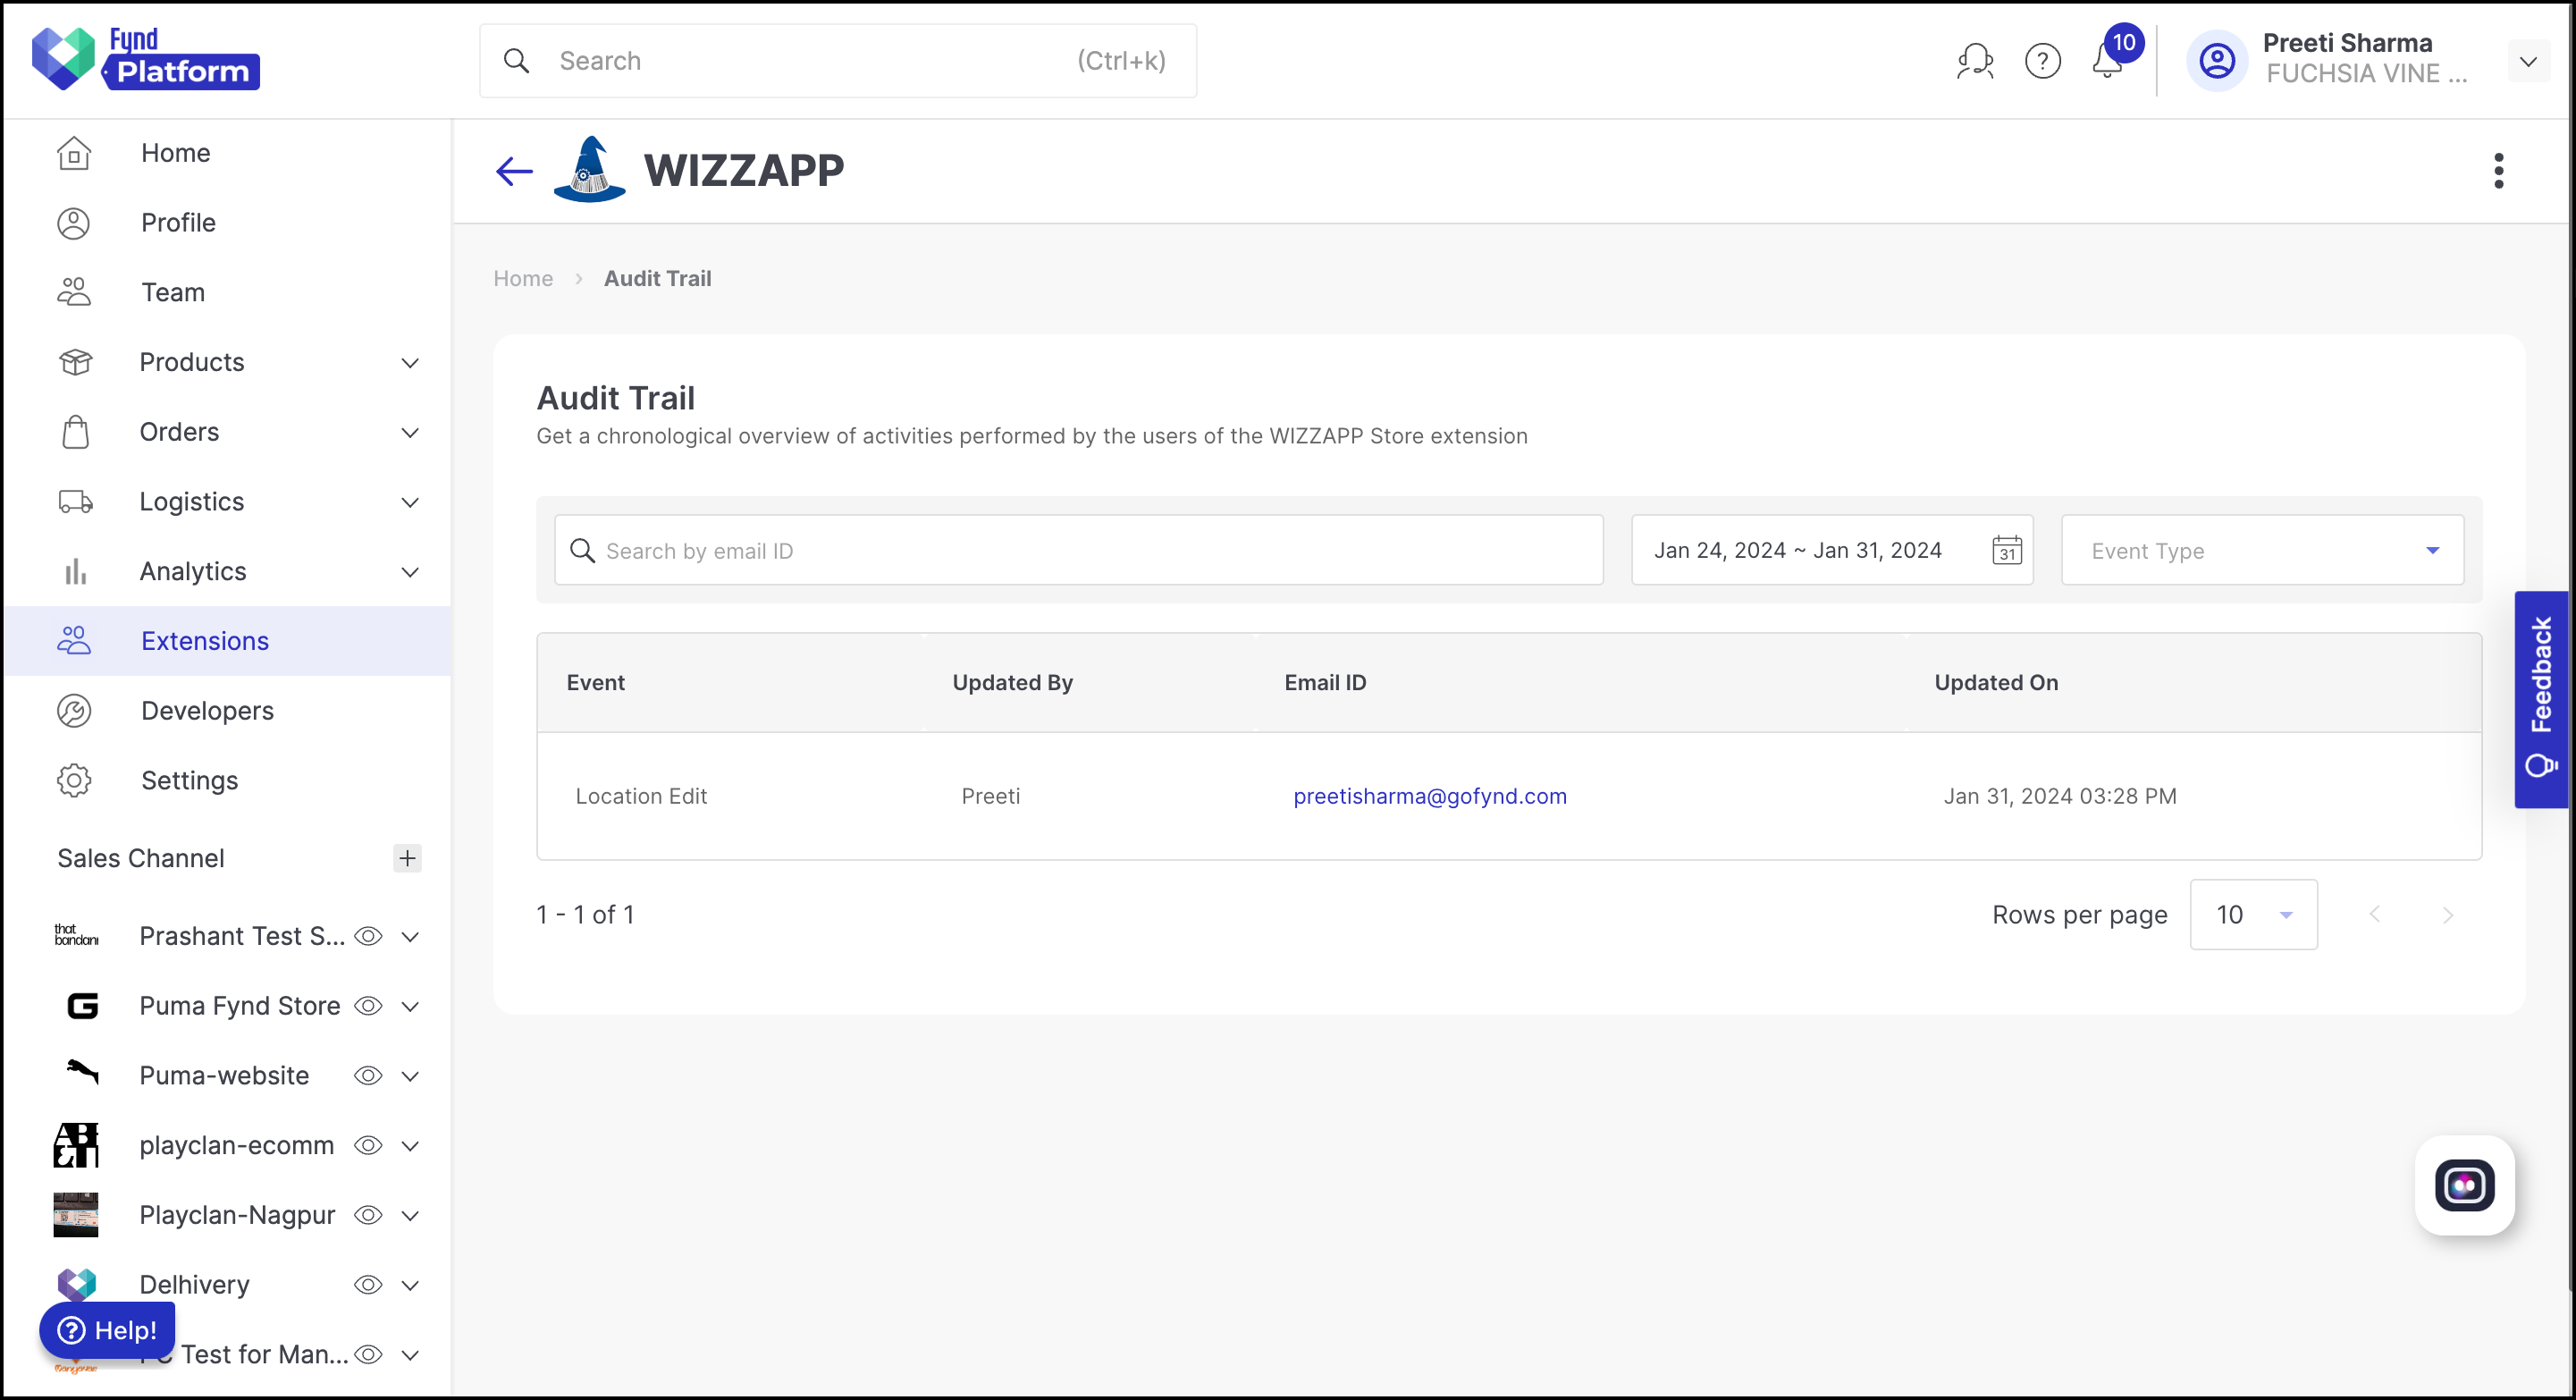
Audit Trail
- Audit Trail tracks all the actions performed by the user in the Wizzapp extension.
- It helps you pinpoint the exact source of a problem in case someone does something unexpected within the extension.
- List of events that get captured:
- Catalog Sync
- Disable Inventory Permission
- Disable Order Permission
- Enable Inventory Permission
- Enable Order Permission
- Event Action Edit
- Event Status Update
- Extension Disable
- Extension Enable
- Extension Install
- Extension Uninstall
- Inventory Batch Retry
- Inventory Manual Sync
- Location Edit
- Store Sync
Order Analytics
You can review all event reports in this section. Each shipment has a distinct shipment ID. You can access comprehensive report details and data insights, including response status and the complete payload of the corresponding event.
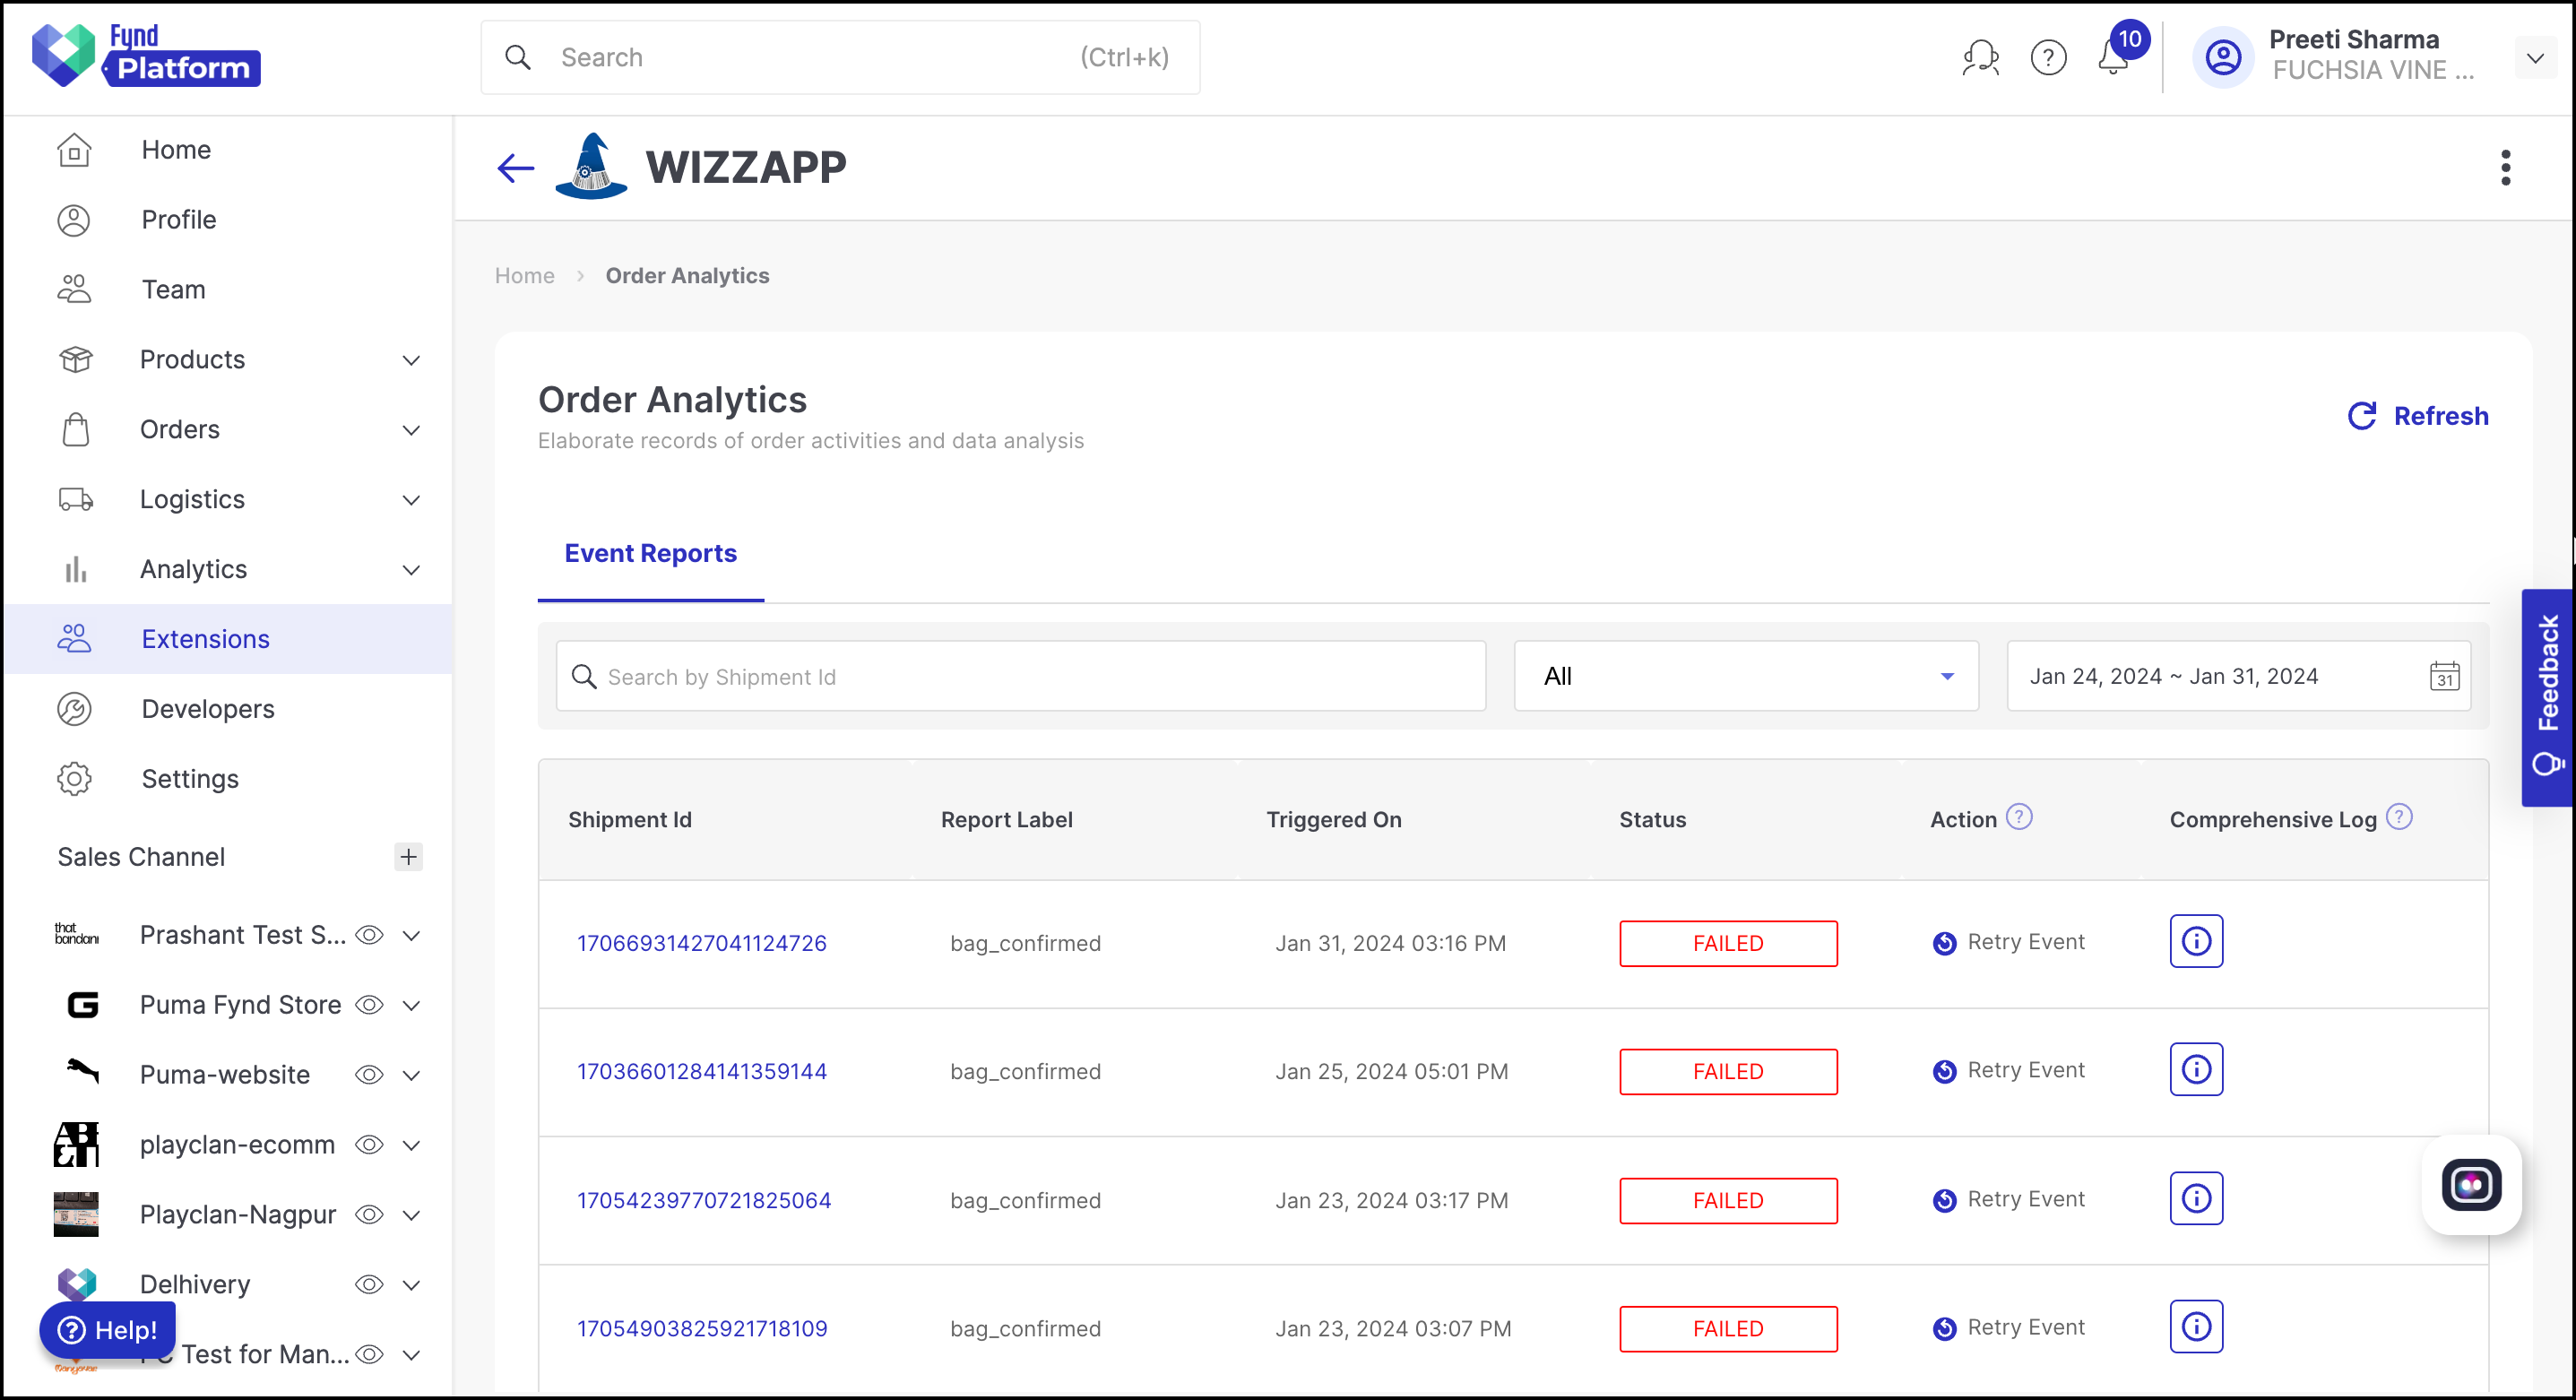
Failed shipments are automatically retried at the backend every fifty minutes. This frequency of retry attempts can be configured at the backend.
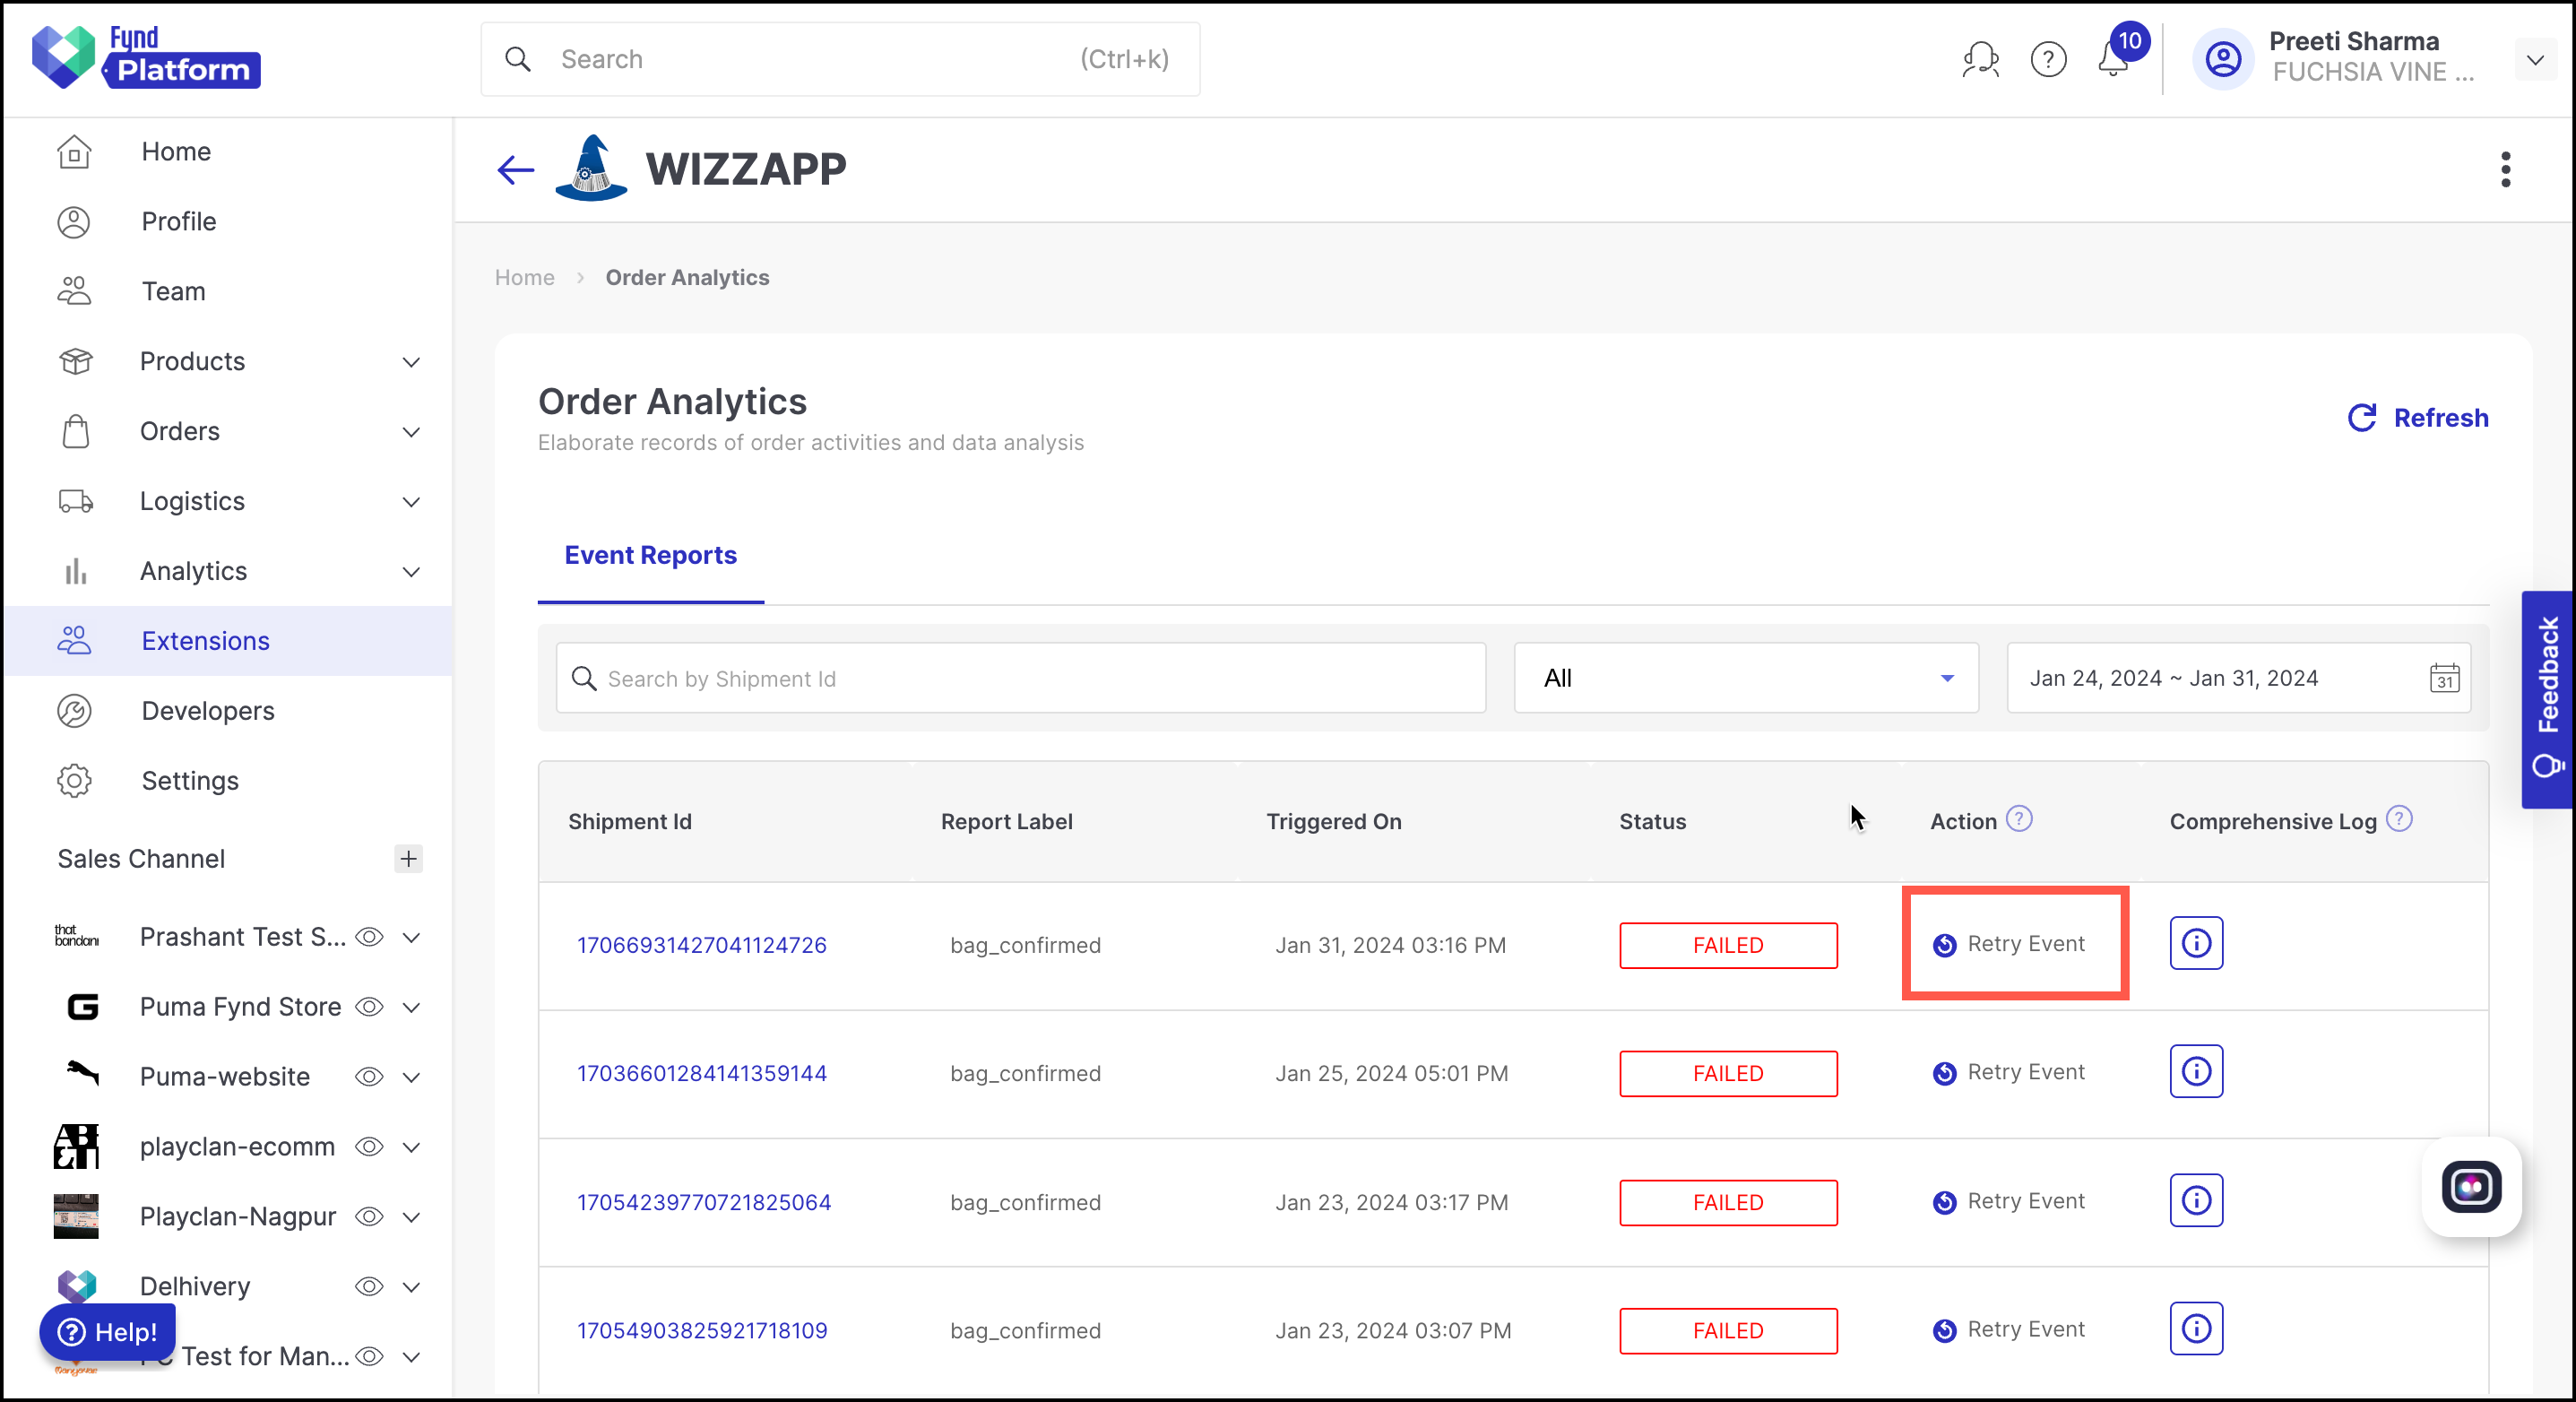
If the event continues to fail after these retries, it remains in a failed state. Sellers also have the option to manually retry failed events every five minutes, with a limit of three additional attempts.
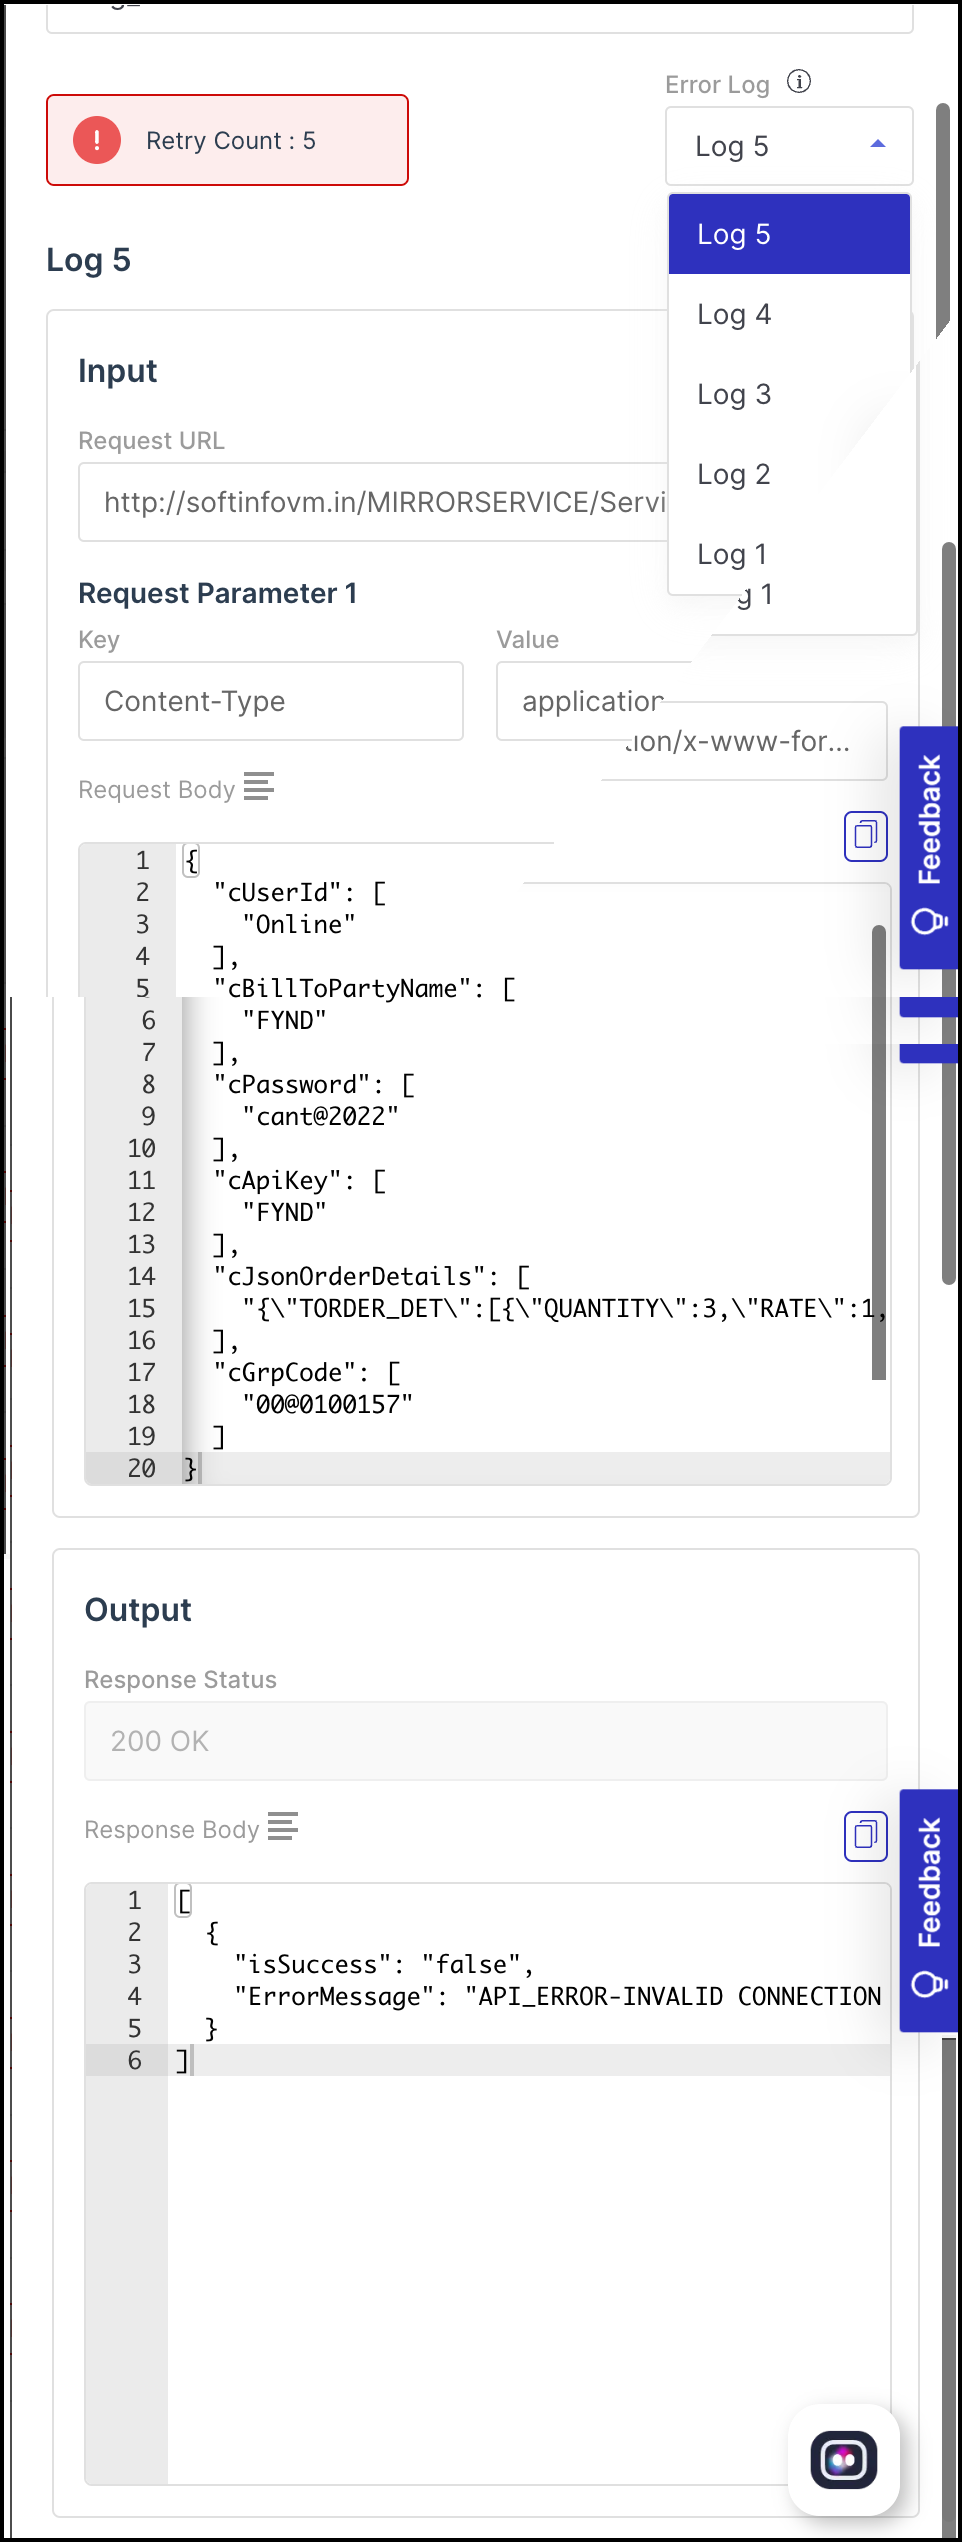
Comprehensive Logs: For every event retry, there is an associated log that sellers can access. The default view displays the most recent log entry. Seller can view any log by selecting the same from the dropdown.
Event Triggers
The events listed in the sections are preloaded and presented as read–only data. Initially, their statuses are set to inactive.
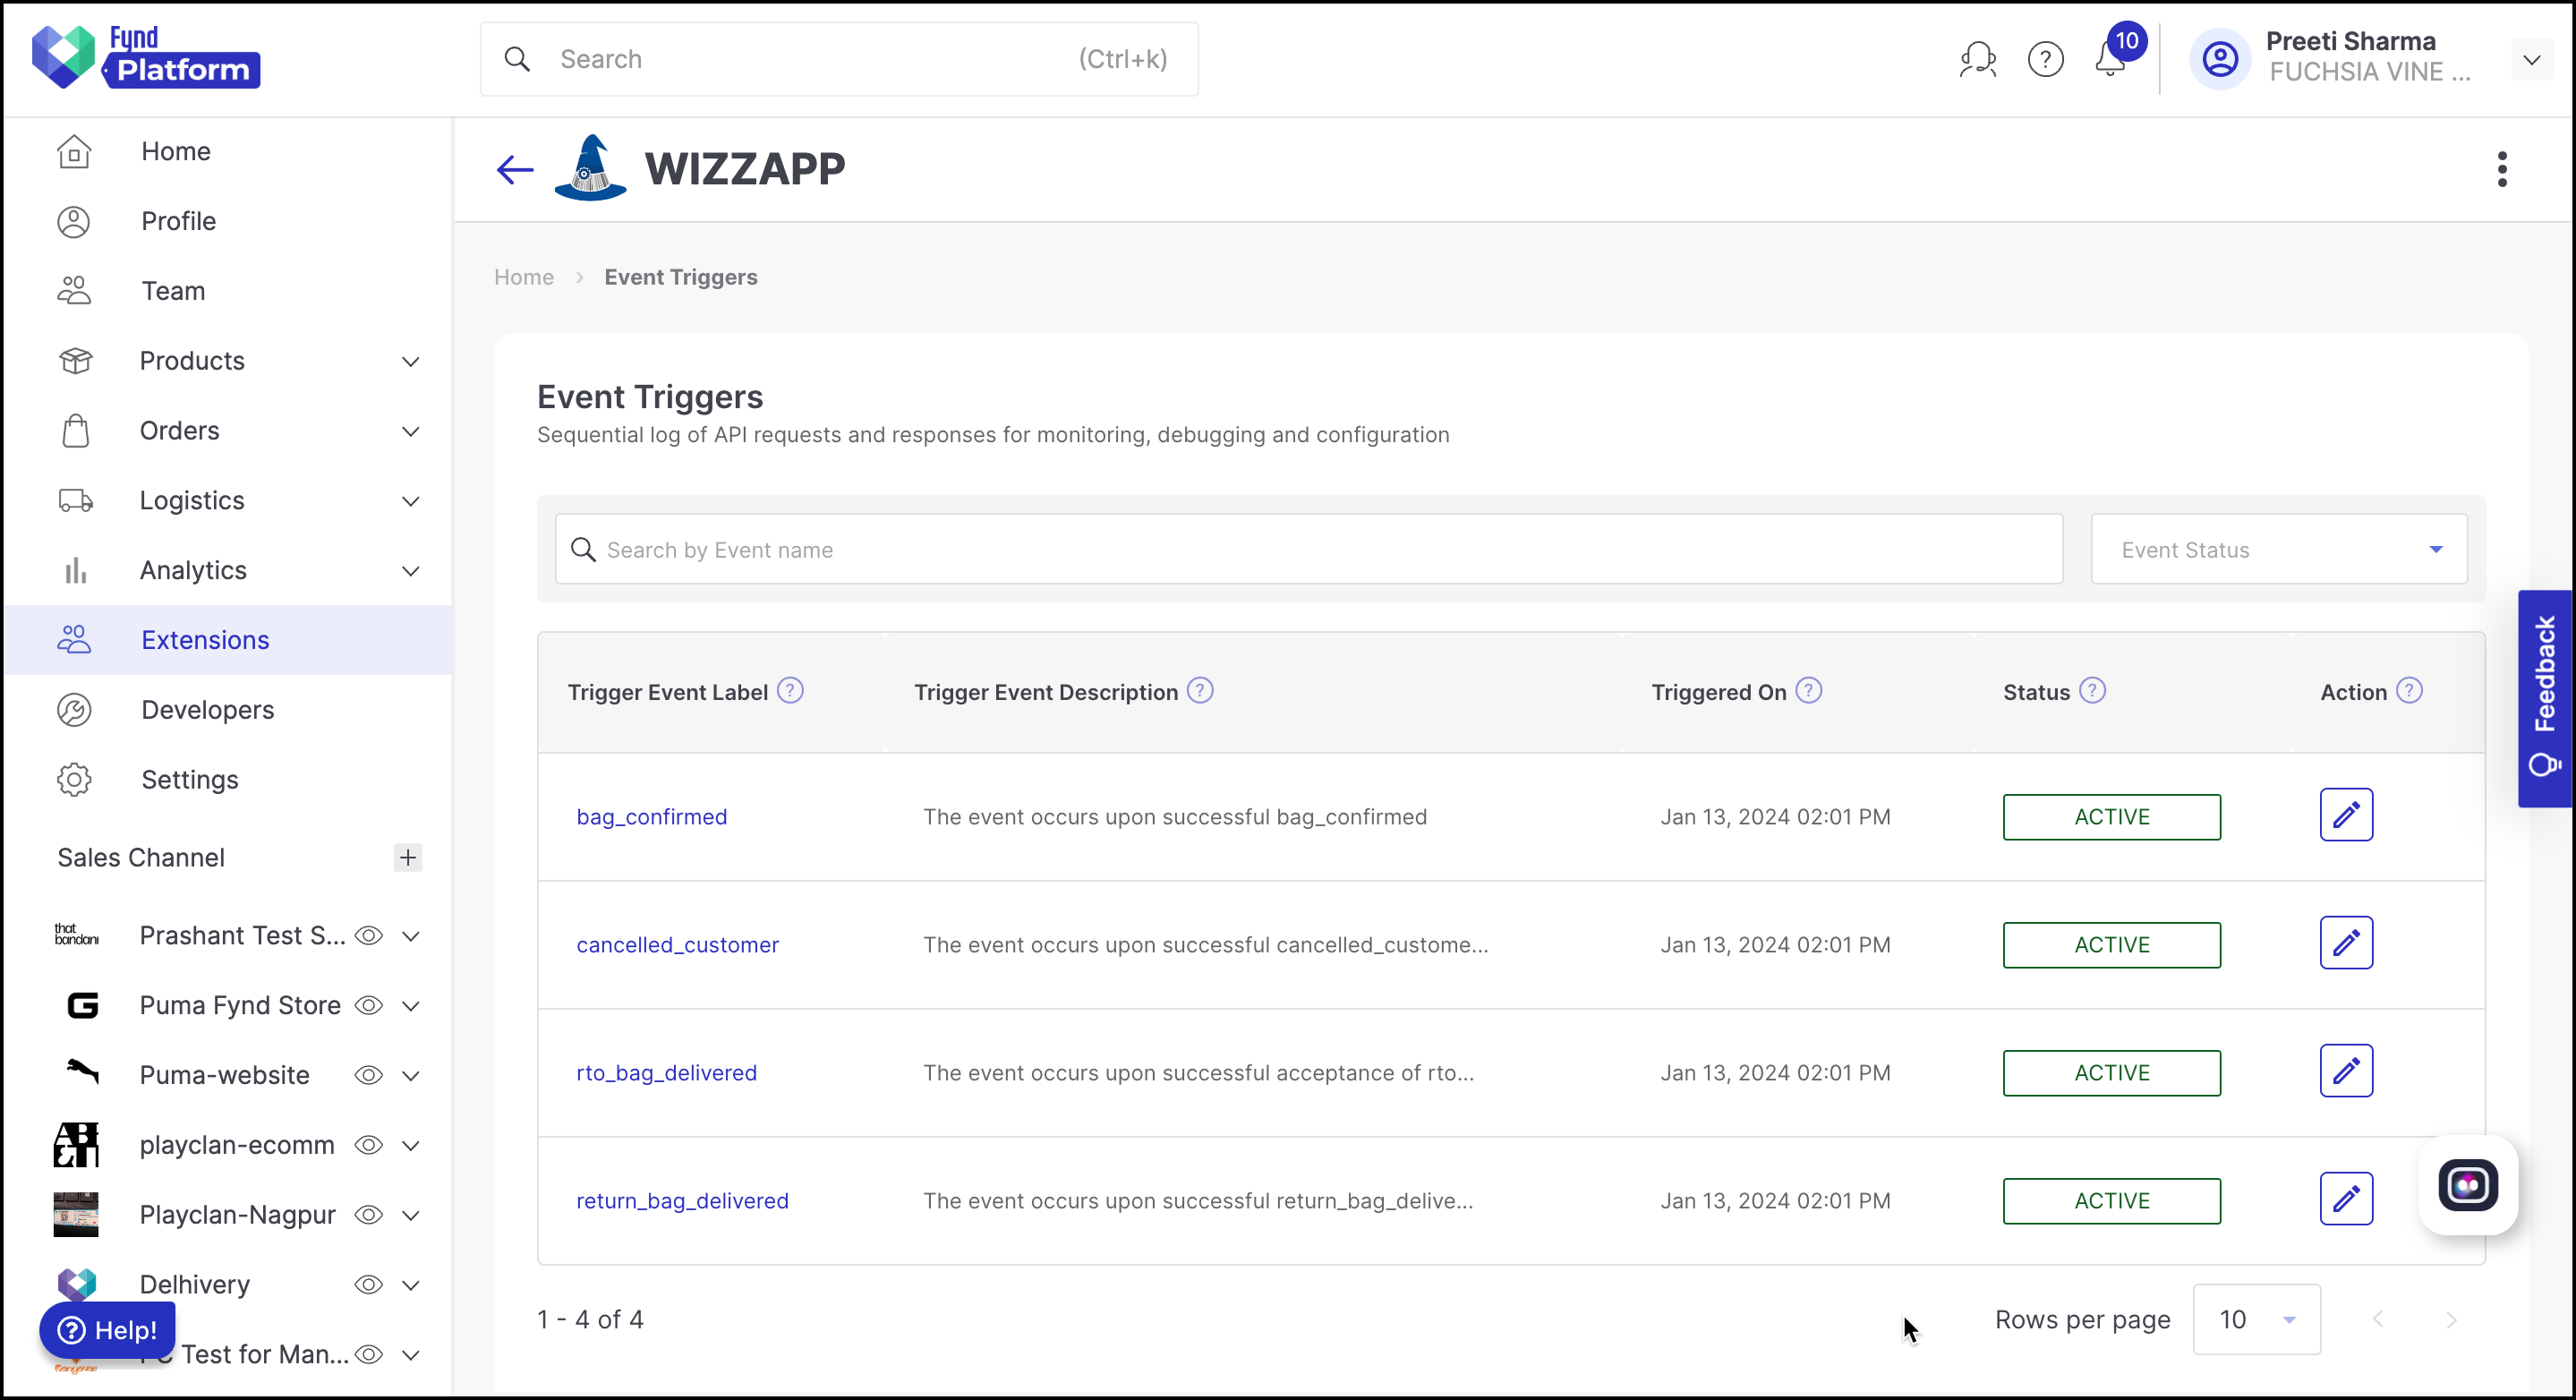
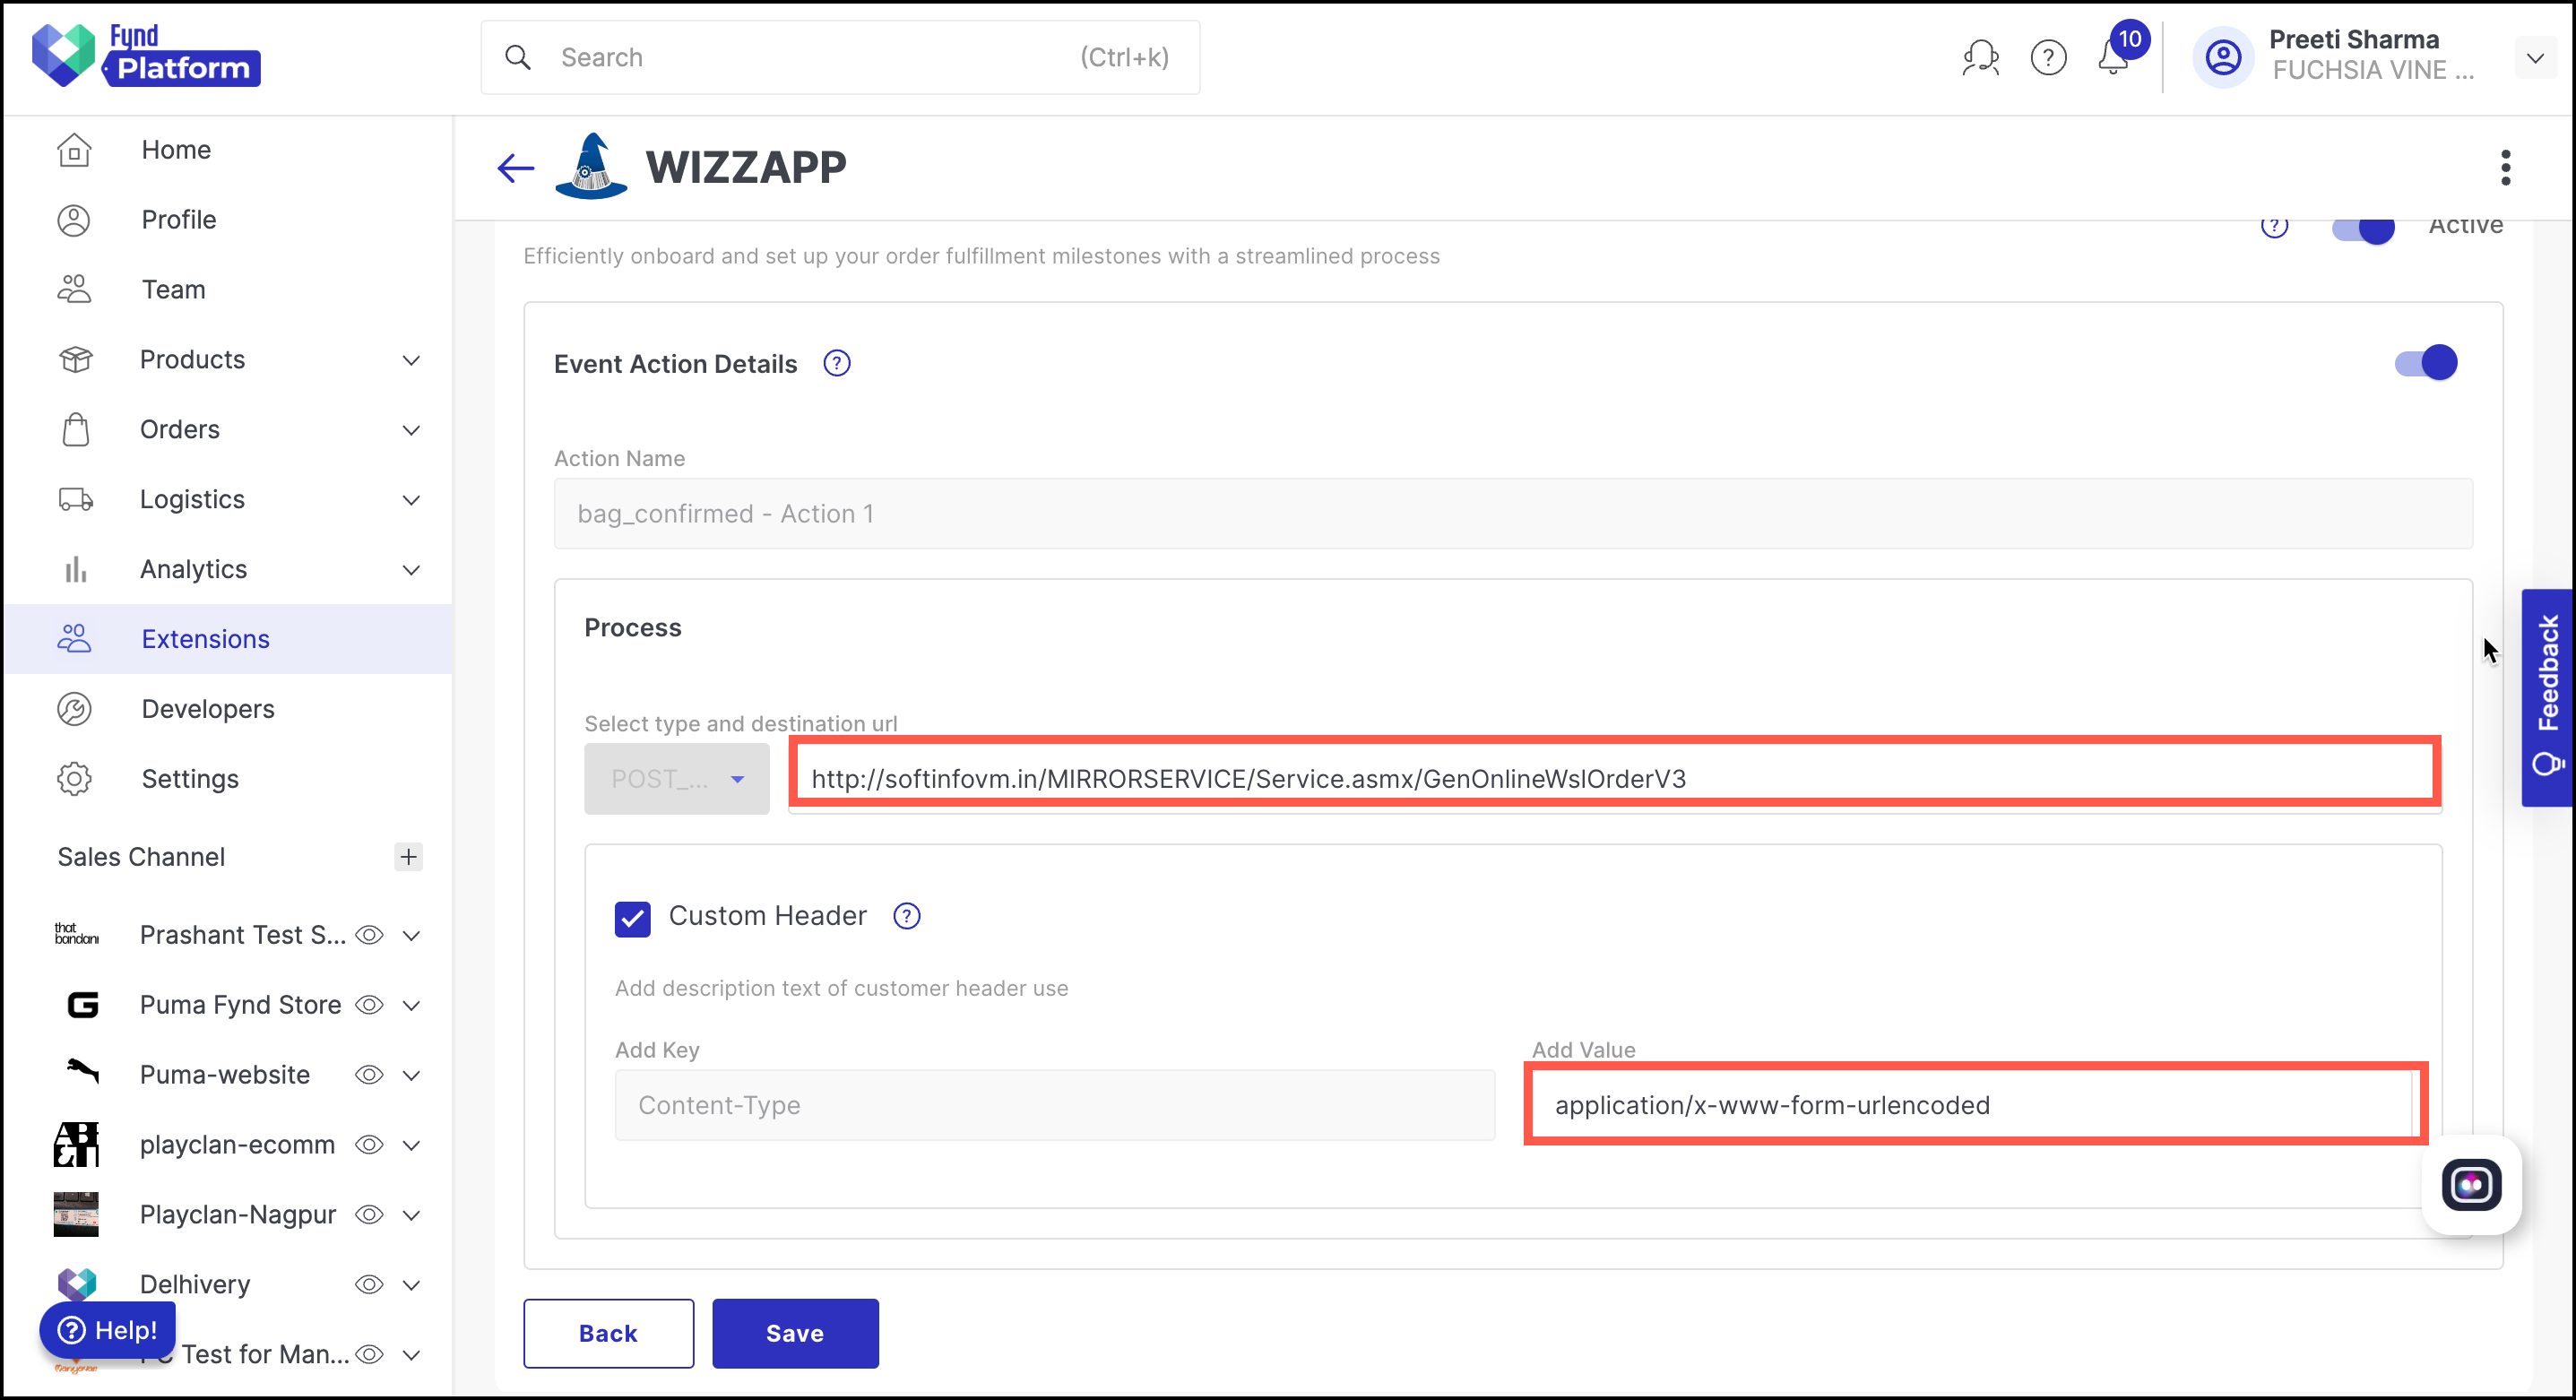
Sellers need to navigate to the configuration settings of the respective event through the Action column. There, they can input the URL and API key, and subsequently save the changes.
Settings
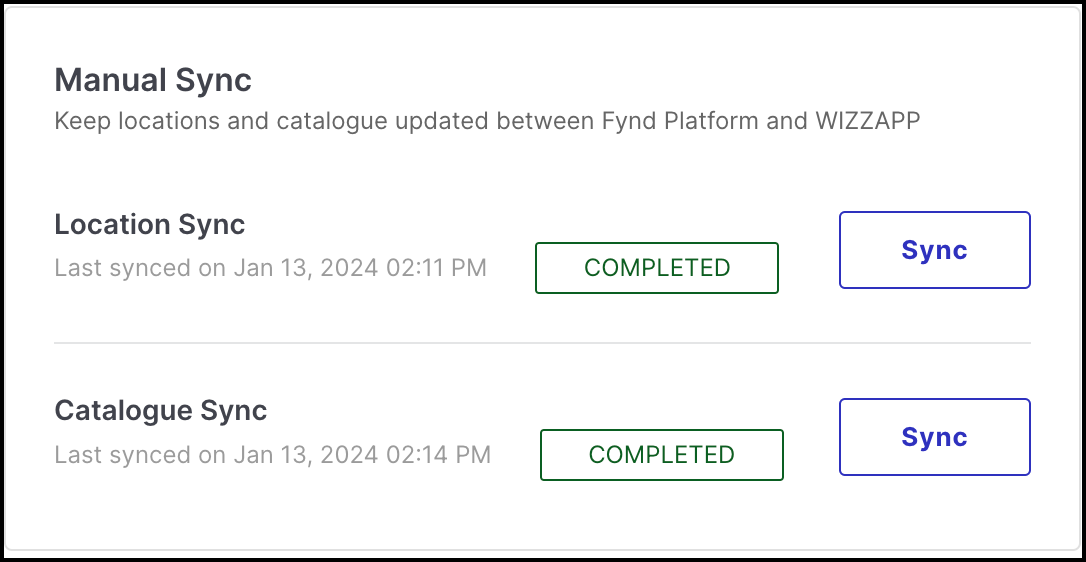
Manually sync your catalog and selling locations from Fynd Platform to Wizzapp, and customise your Order and Inventory permissions as well as enable or disable this extension according to your preferences.

Activating/Deactivating Wizzapp Extension
Upon deactivating this extension,
- You will get a popup asking if you want to reset the inventory of all active selling locations to 0 in Fynd Platform
- If you select the checkbox, inventory for all articles mapped to the selling locations will be reset to 0 in Fynd Platform
- If you deselect the checkbox, the current existing inventory will be retained.
- No tabs and functionalities will be accessible. Only the Settings widget will be enabled so that you can re-enable the extension.
- Inventory flow from Wizzapp to Fynd Platform and orders syncing from Fynd Platform to Wizzapp will be stopped.
.png)
Manually Sync catalog and Selling Locations
Click Sync to manually sync the catalog and selling locations data present in the Fynd Platform to the Wizzapp extension. When catalog or location sync jobs are in progress, the extension will not be usable.
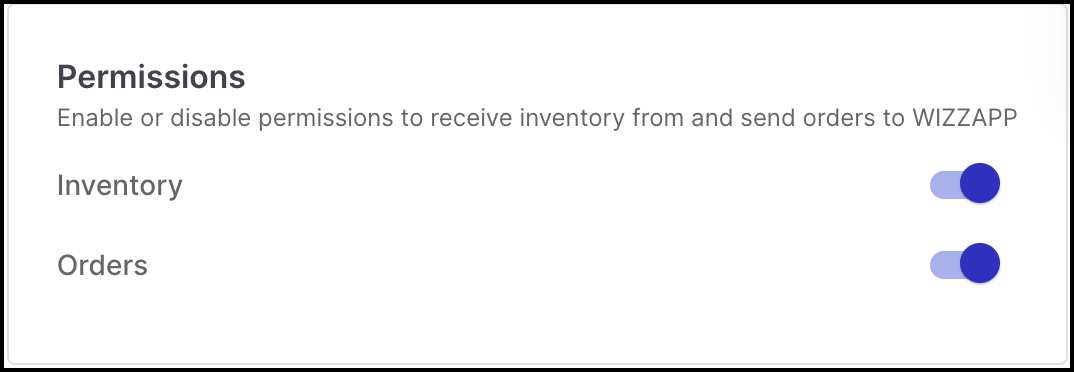
Enable/Disable Inventory and Order Permissions
Both order and inventory permissions will be enabled by default if the extension is enabled.
Inventory - If you remove the permissions for inventory, the inventory flow from Wizzapp to Fynd Platform will be stopped.
- If you select the reset Inventory checkbox, the inventory will be reset in Fynd Platform and you will stop receiving new orders.
- If you do not select the reset Inventory checkbox, the inventory will stay as it is in the Fynd Platform and the seller will continue receiving orders.
Orders - Removing the permissions for orders, it will stop the flow of orders from Fynd Platform to Wizzapp.
If there is inventory present in the Fynd Platform, the seller might still receive new orders but will not be able to see them in the Wizzapp panel. Thus, you will have to process all these new orders using the Orders section of the Fynd Platform.
Older orders that had been placed before the extension was disabled will also have to be processed Orders section of the Fynd Platform.
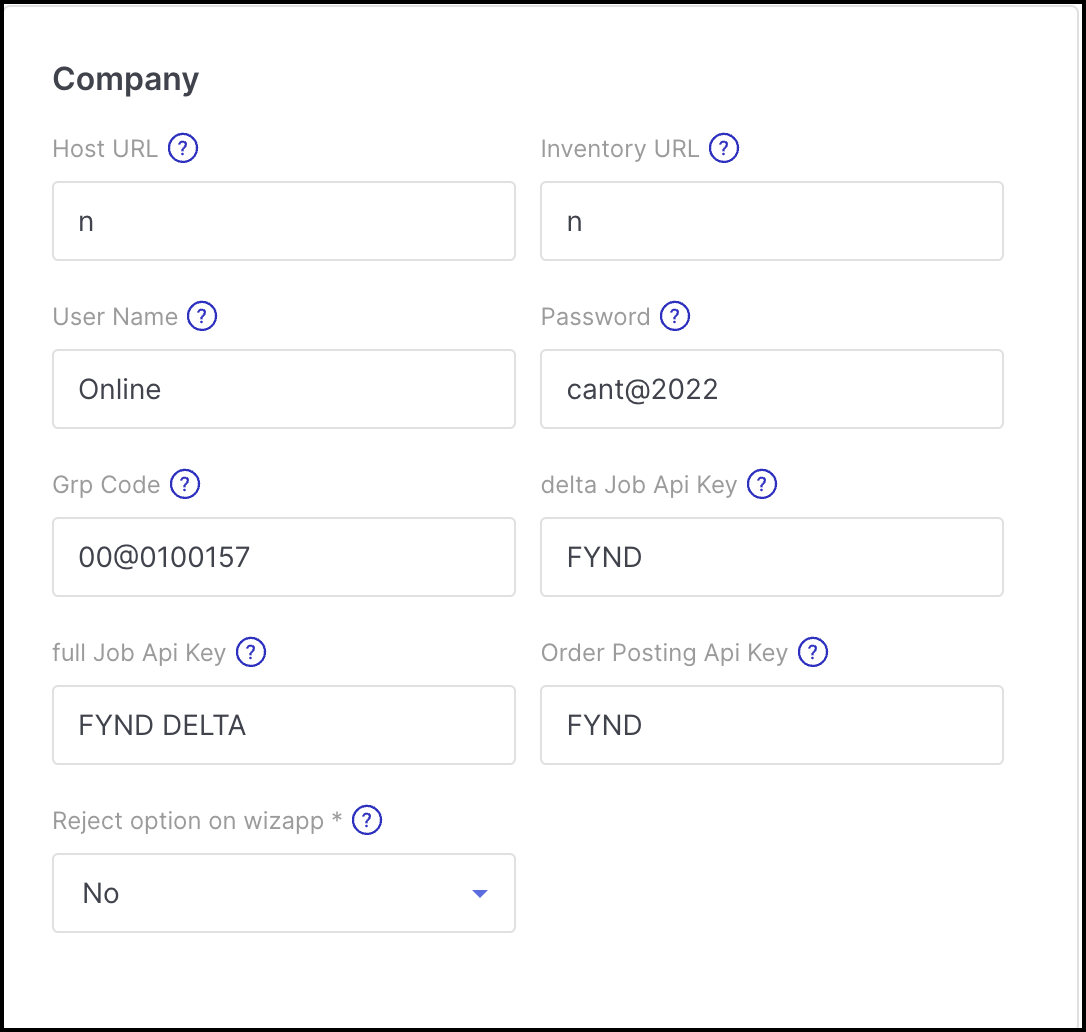
Company
The headers mentioned here are derived from the Company Schema established by the admin, and these fields are set as write-only.