Product Customization
Introduction
Product customization is an extension that helps you to sell products on your website that can be customised as per your customer’s needs. The user will be able to order this customised items from Fynd website. It offers options like color, text, and graphics, showing real-time previews, etc. This enhances the shopping experience and enables businesses to offer unique, personalized items.
Steps to Use Product Customisation Extension
- Go to Extensions in Fynd Platform.
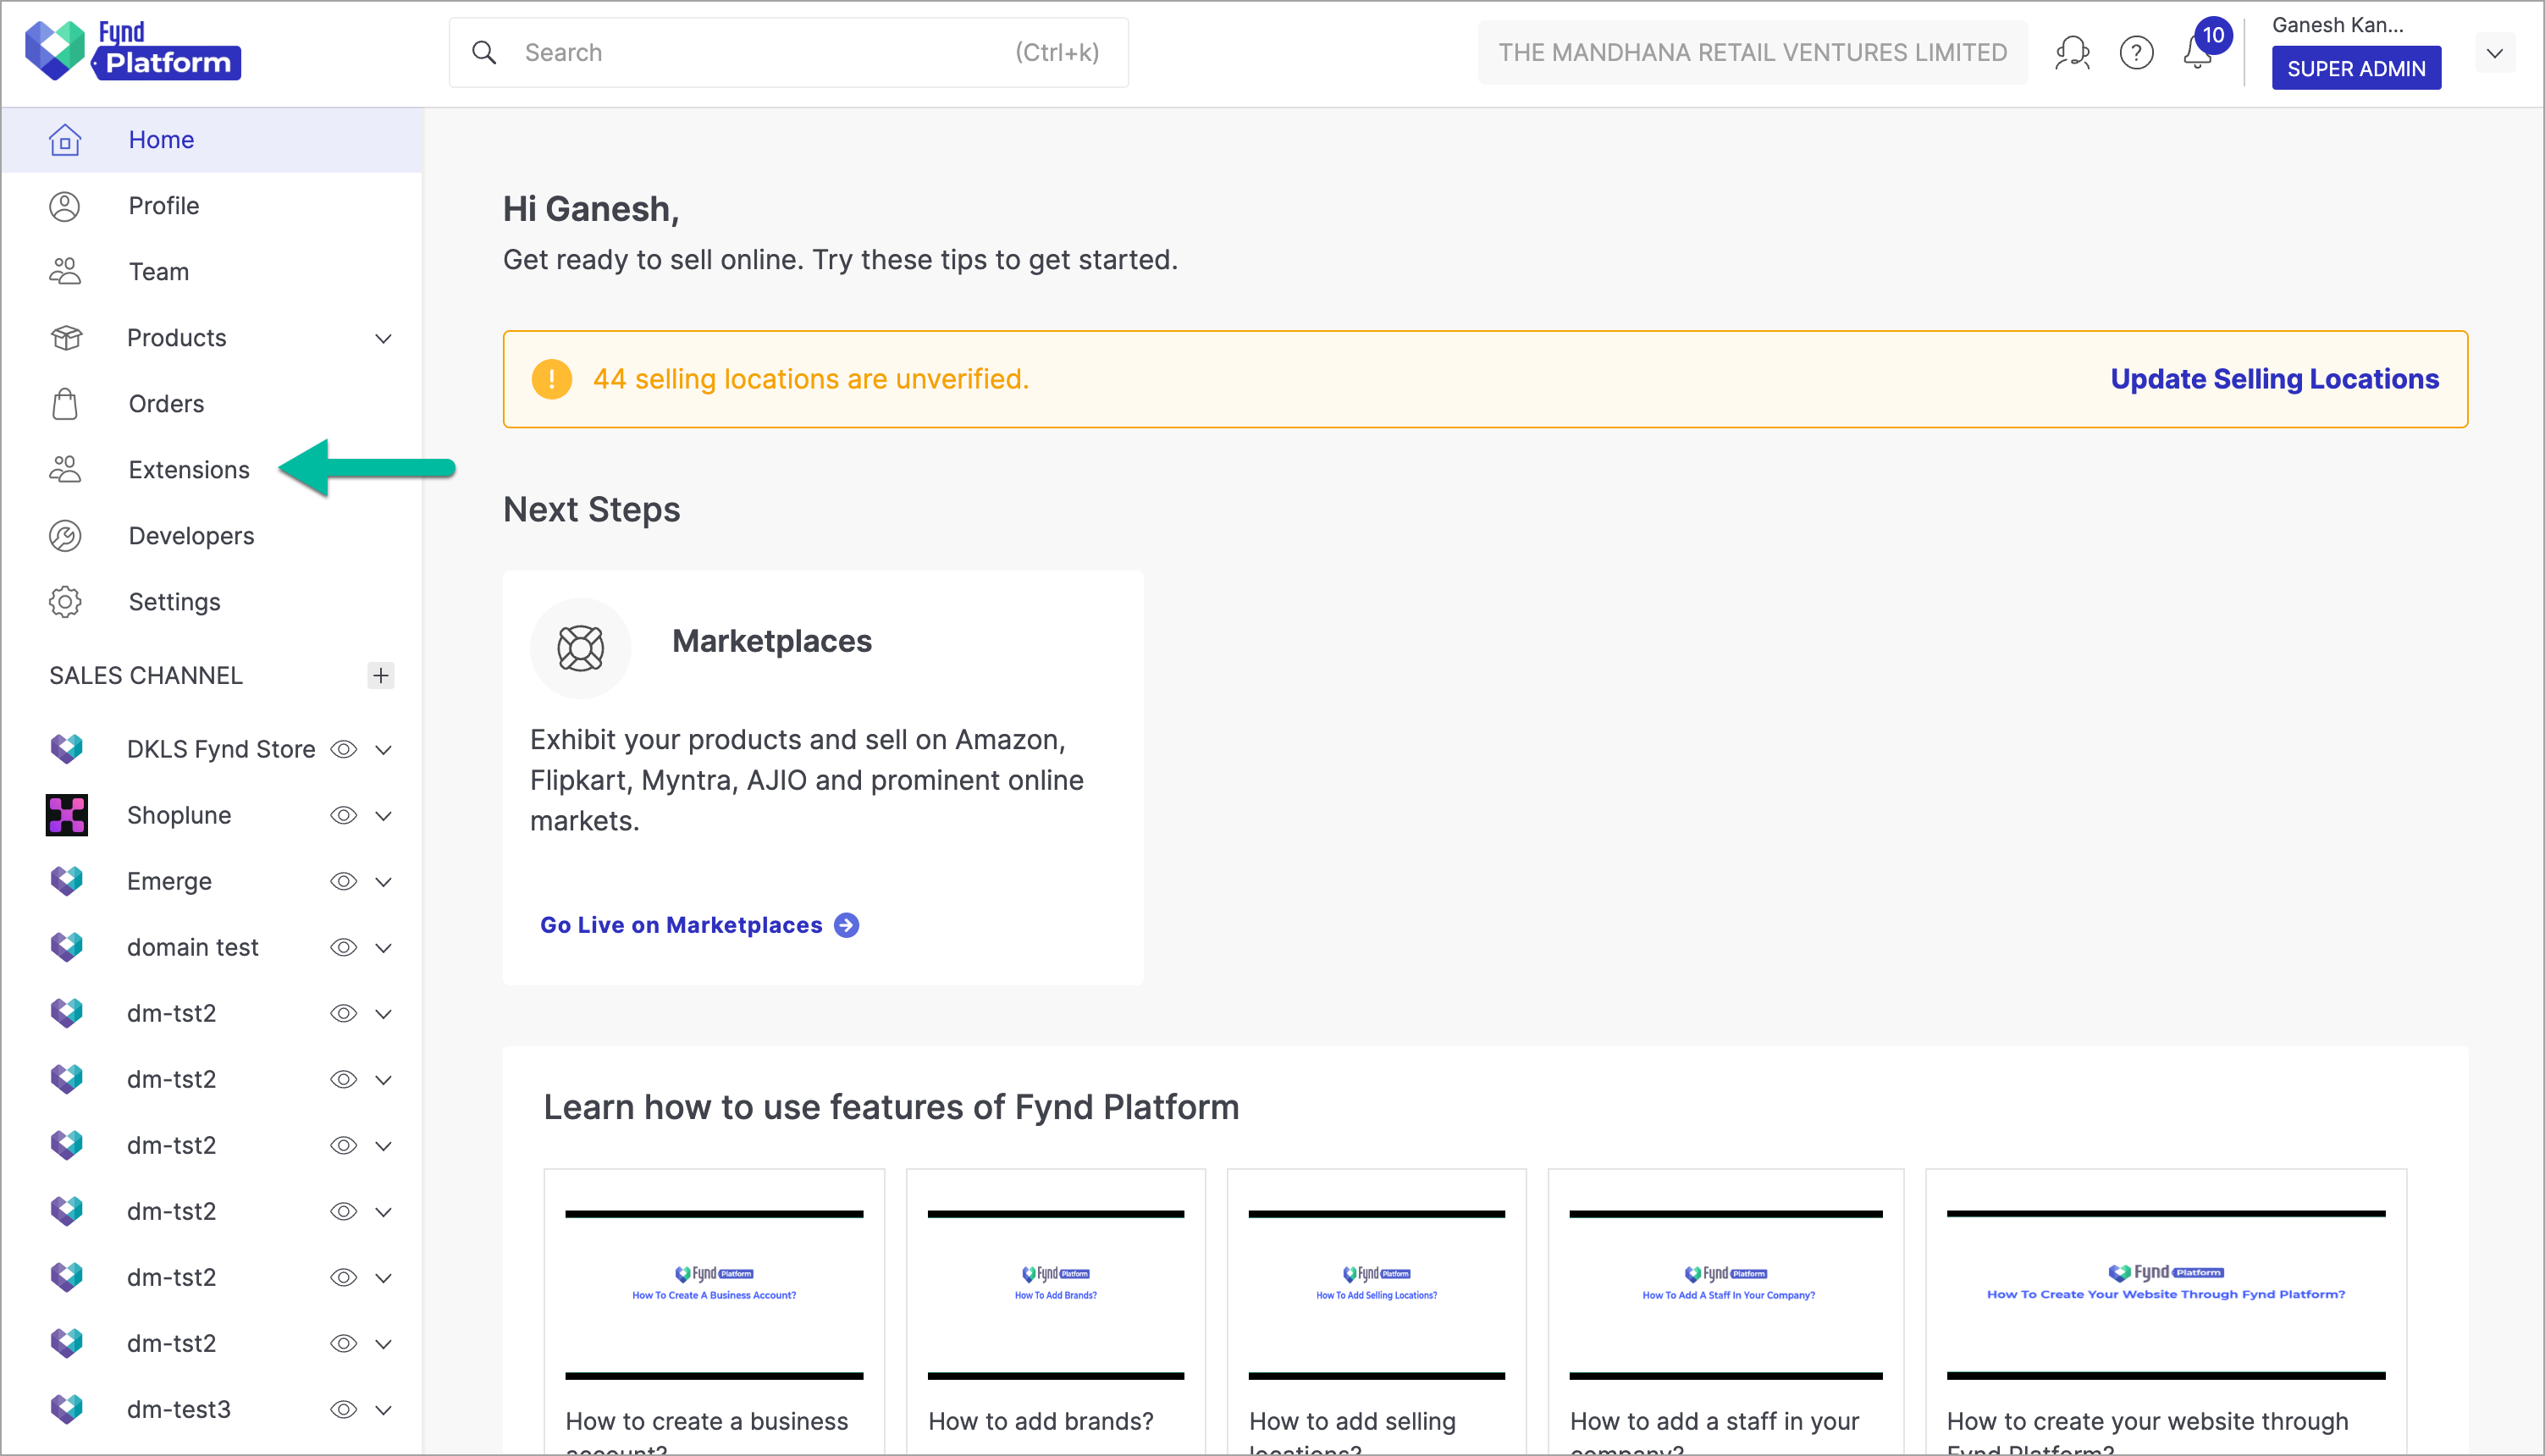
Figure 1: Extensions Section - Fynd Platform - Click Product Customisation extension.
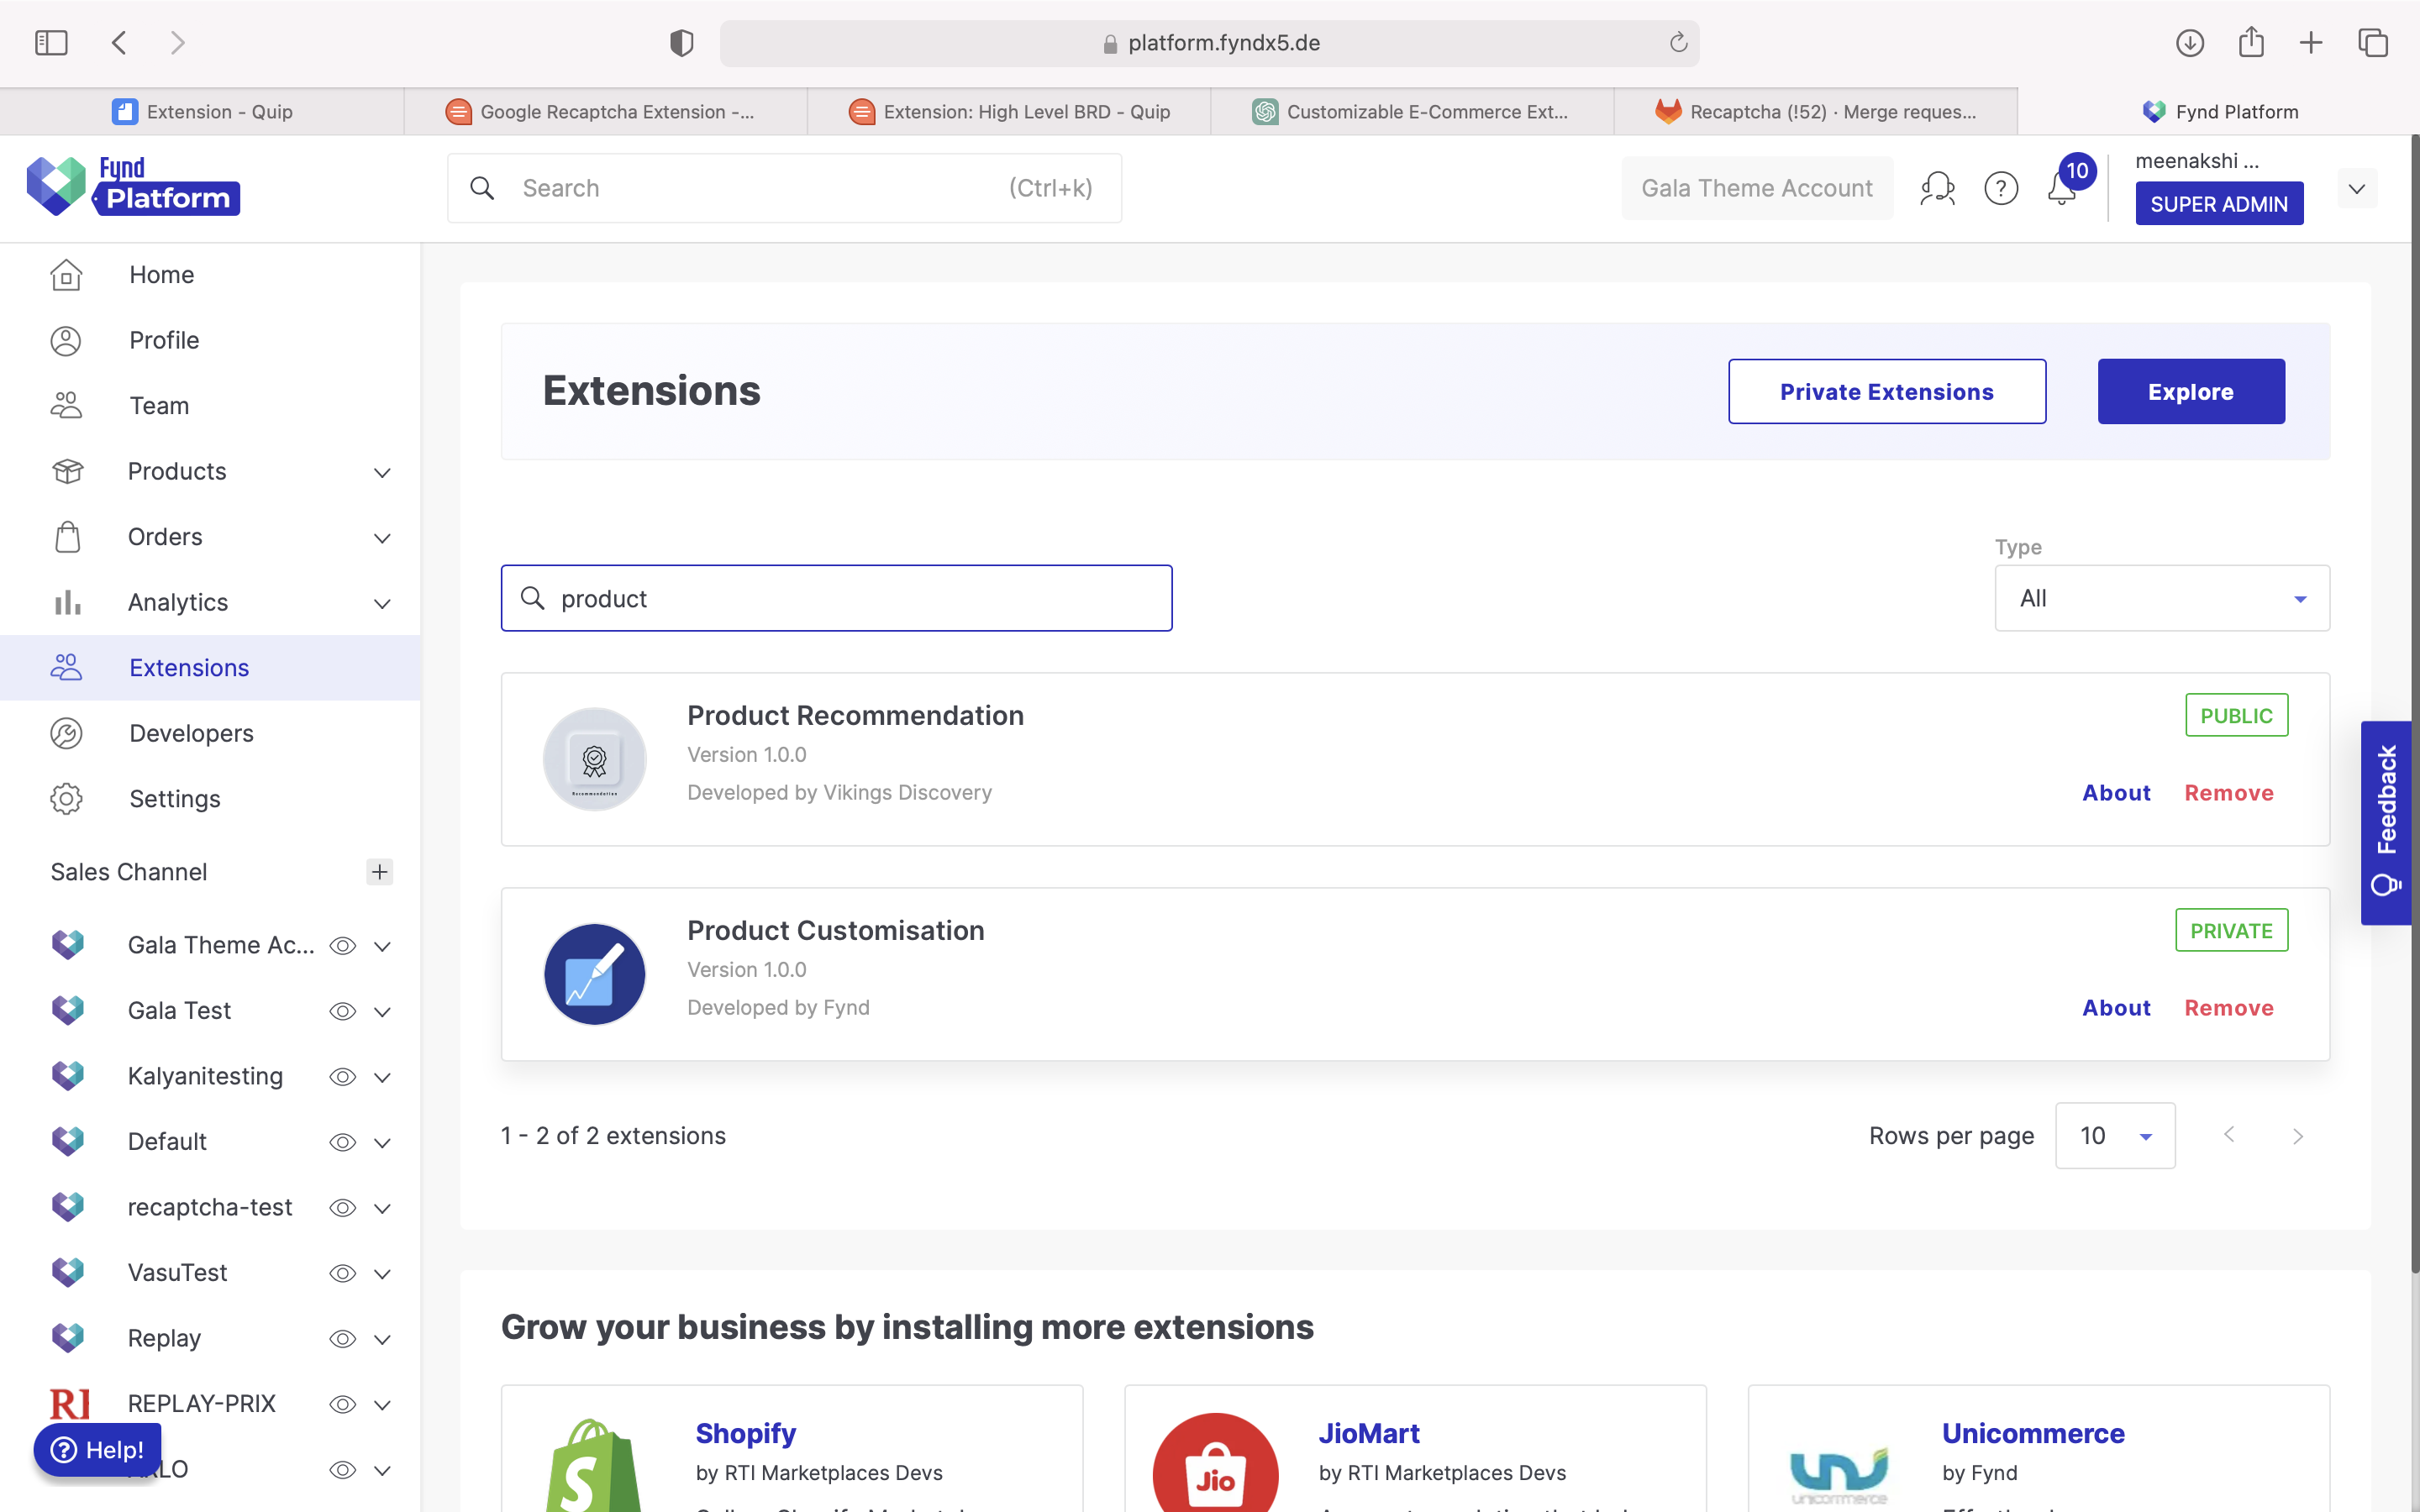
Figure 2: Product Customisation Extension - Select the desired sales channel. Here, we have selected ‘Whitesplash’.
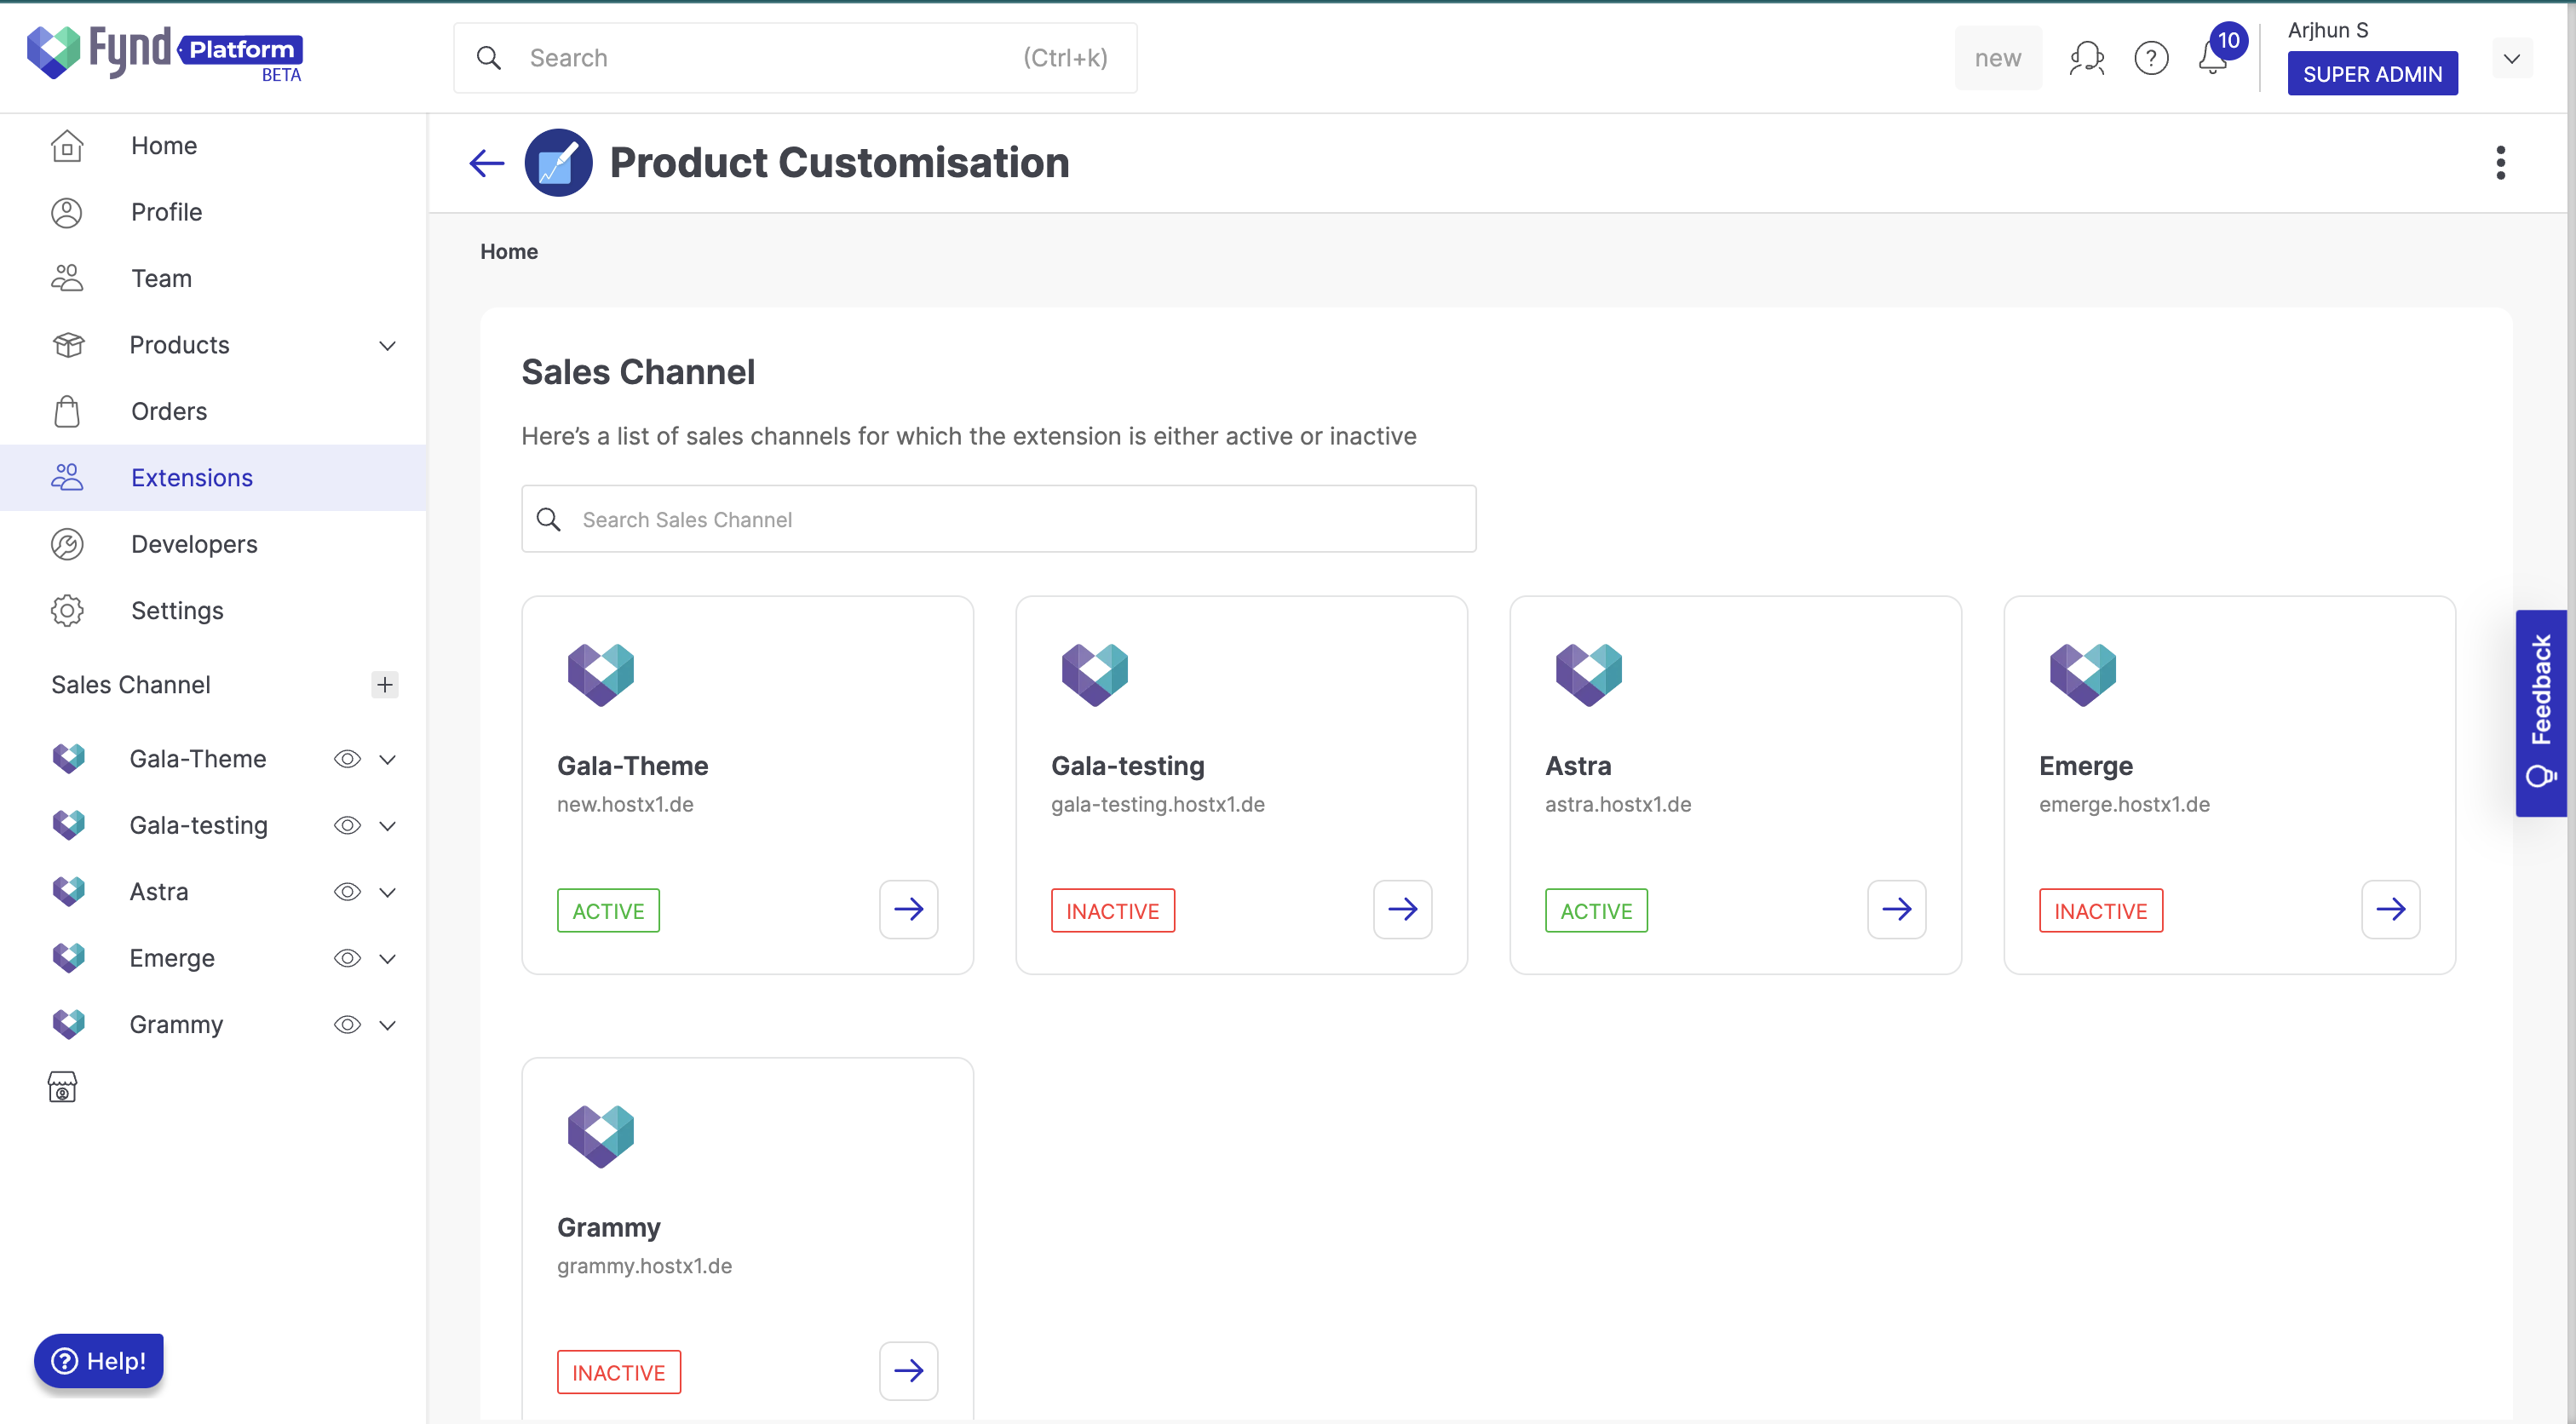
Figure 3: Selecting Desired Sales Channel - On the features page, you get two options-
.png)
Figure 4: Choosing the feature option
- Add Product Customisation
- Customisation Management
Add Product Customisation

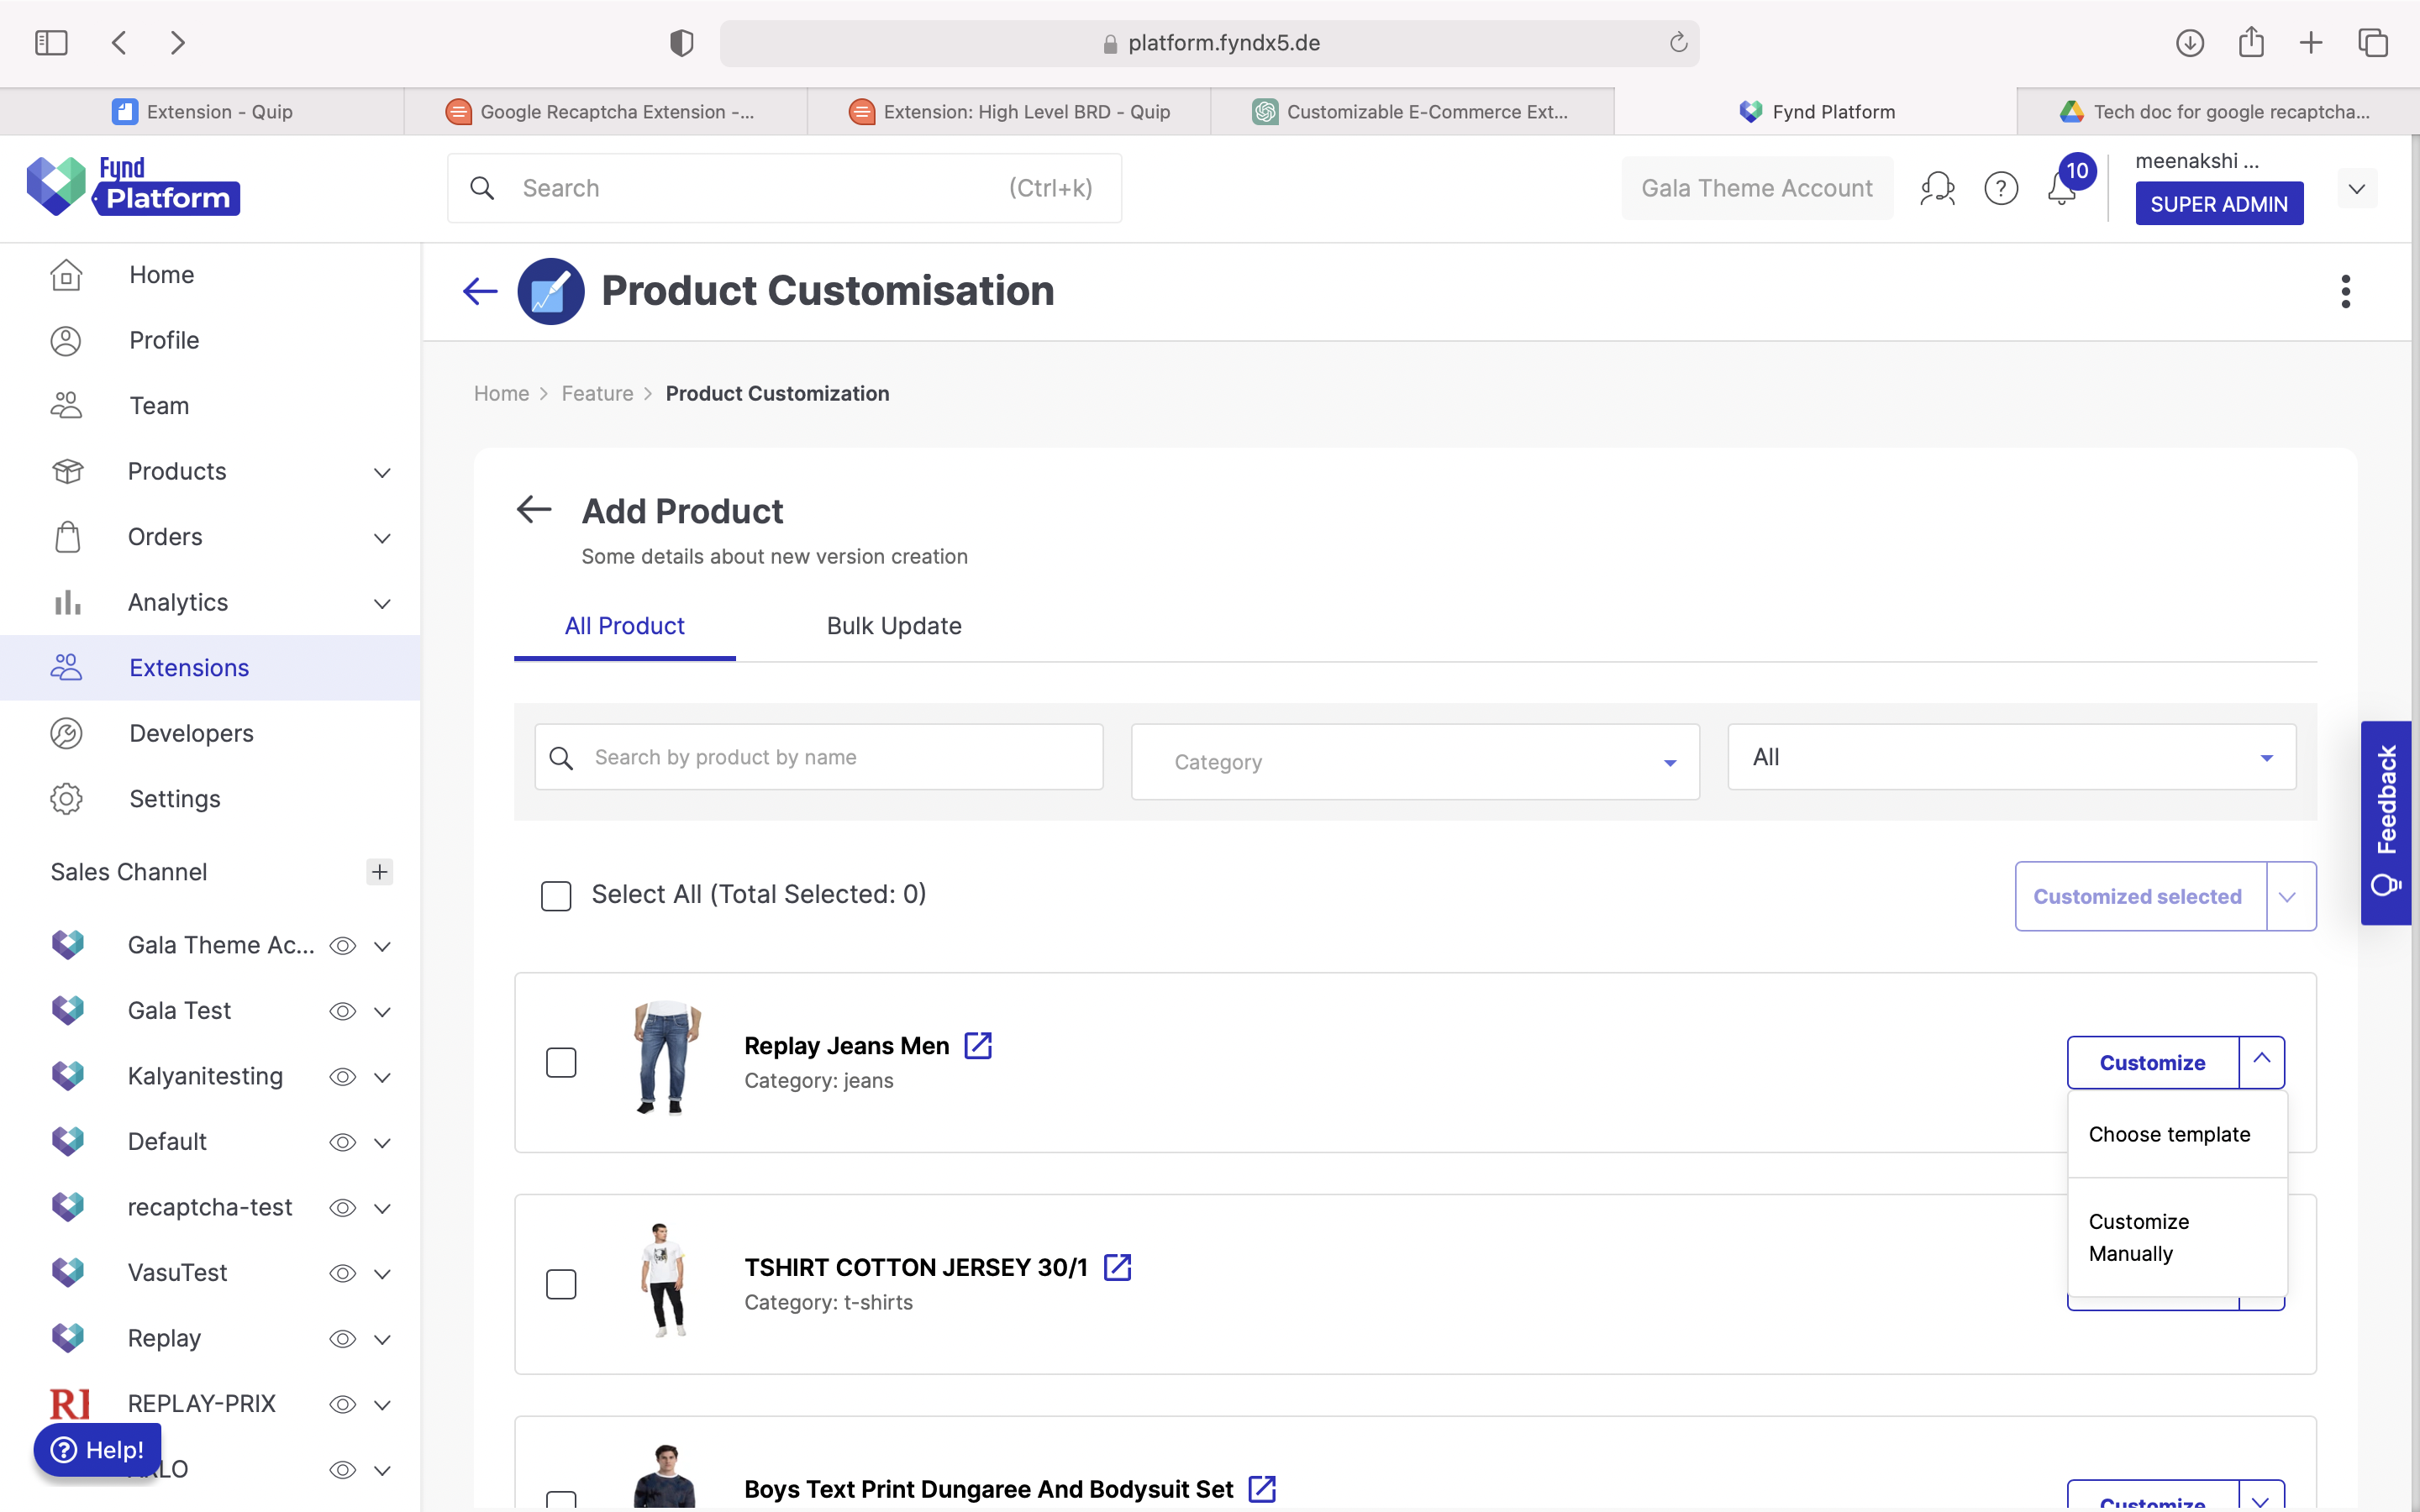
All Products
You can review and pick products for customer customization. For each chosen product, you have two choices: select a template or manually customize the product.
-
Choose Template-You can pick a template from your list and use it.
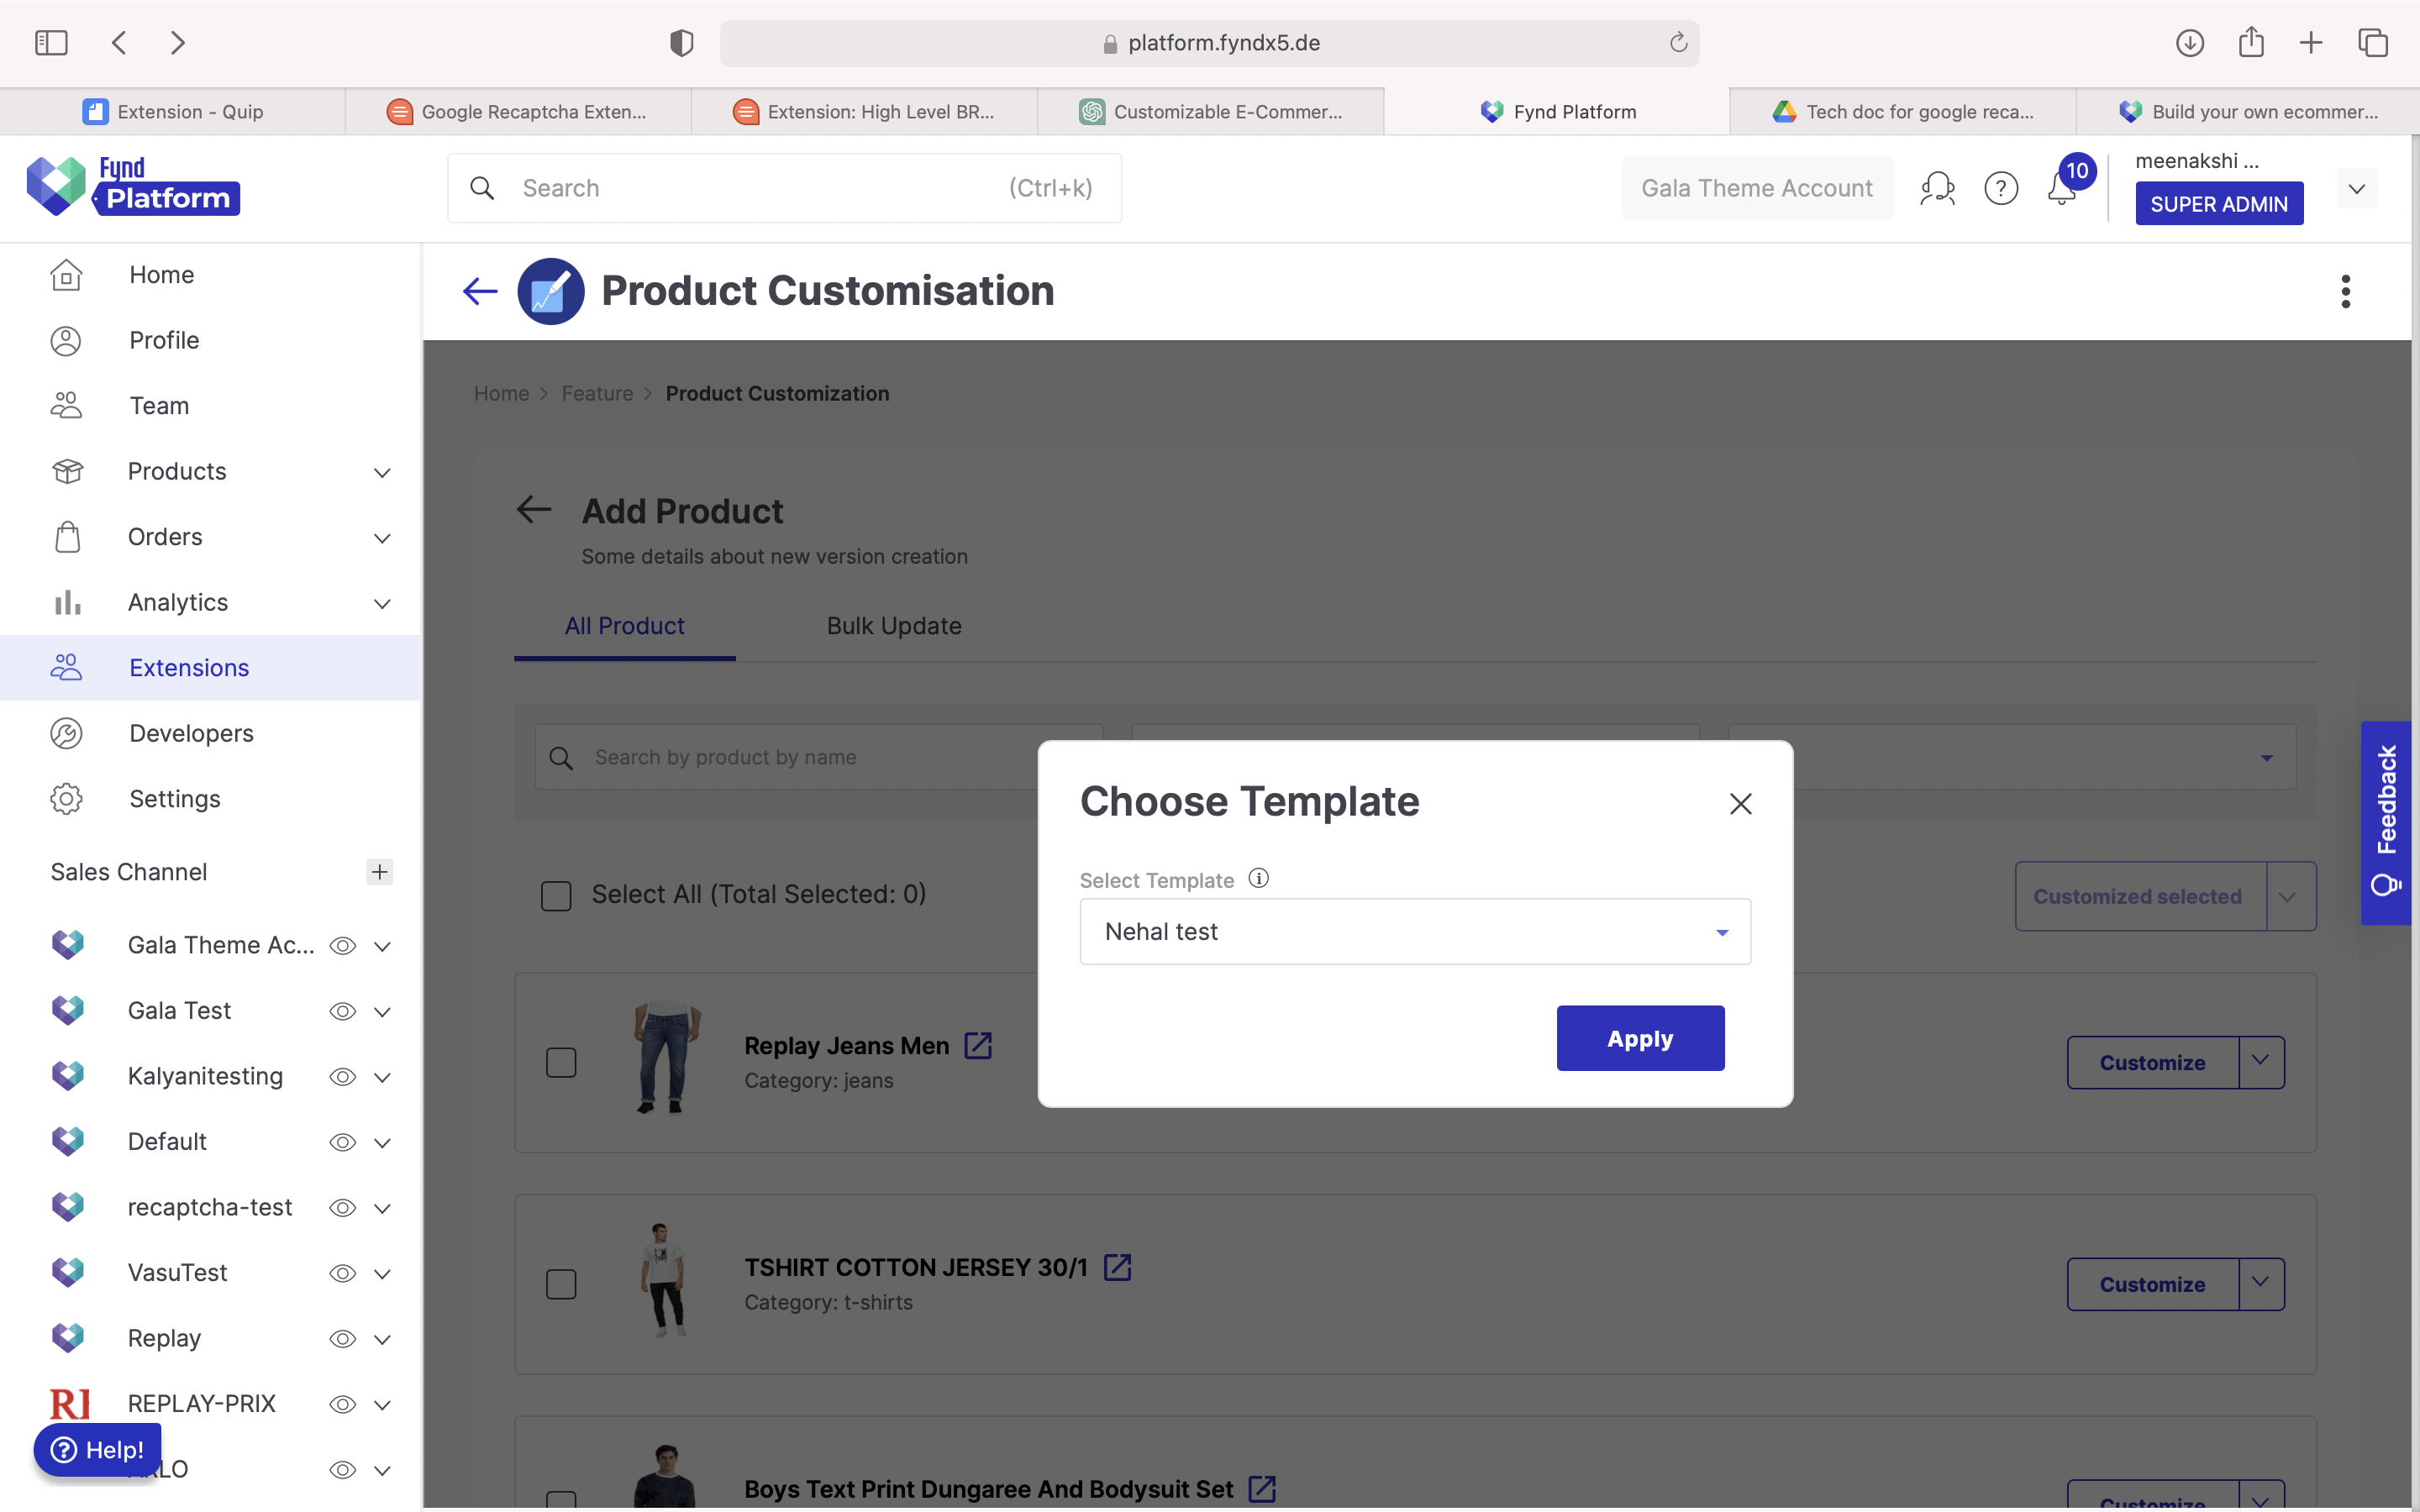
Figure 7: Choosing the template
-
Customise Manually- When you choose this option, you can personally customize and set up the template.

Figure 8: Customizing the features manually
Building upon the example provided above, the fields that have been configured consist of
- Customization Name: Provide a name for your template.
- Text: Enter a fitting product name.
- Number: Input the product number.
- Upload Sample Pic: Attach a sample picture of the product.
- Select Image: Choose an appropriate product image.
- Select Image Grid: Pick a personalization image from the available grid or gallery.
Bulk Update
The bulk update option lets you apply templates to multiple products simultaneously.
Steps
- Download the sample XLSX file and open it.
- Include the product UID's and save the file.
- Upload the saved XLSX file using the 'Choose File' option.
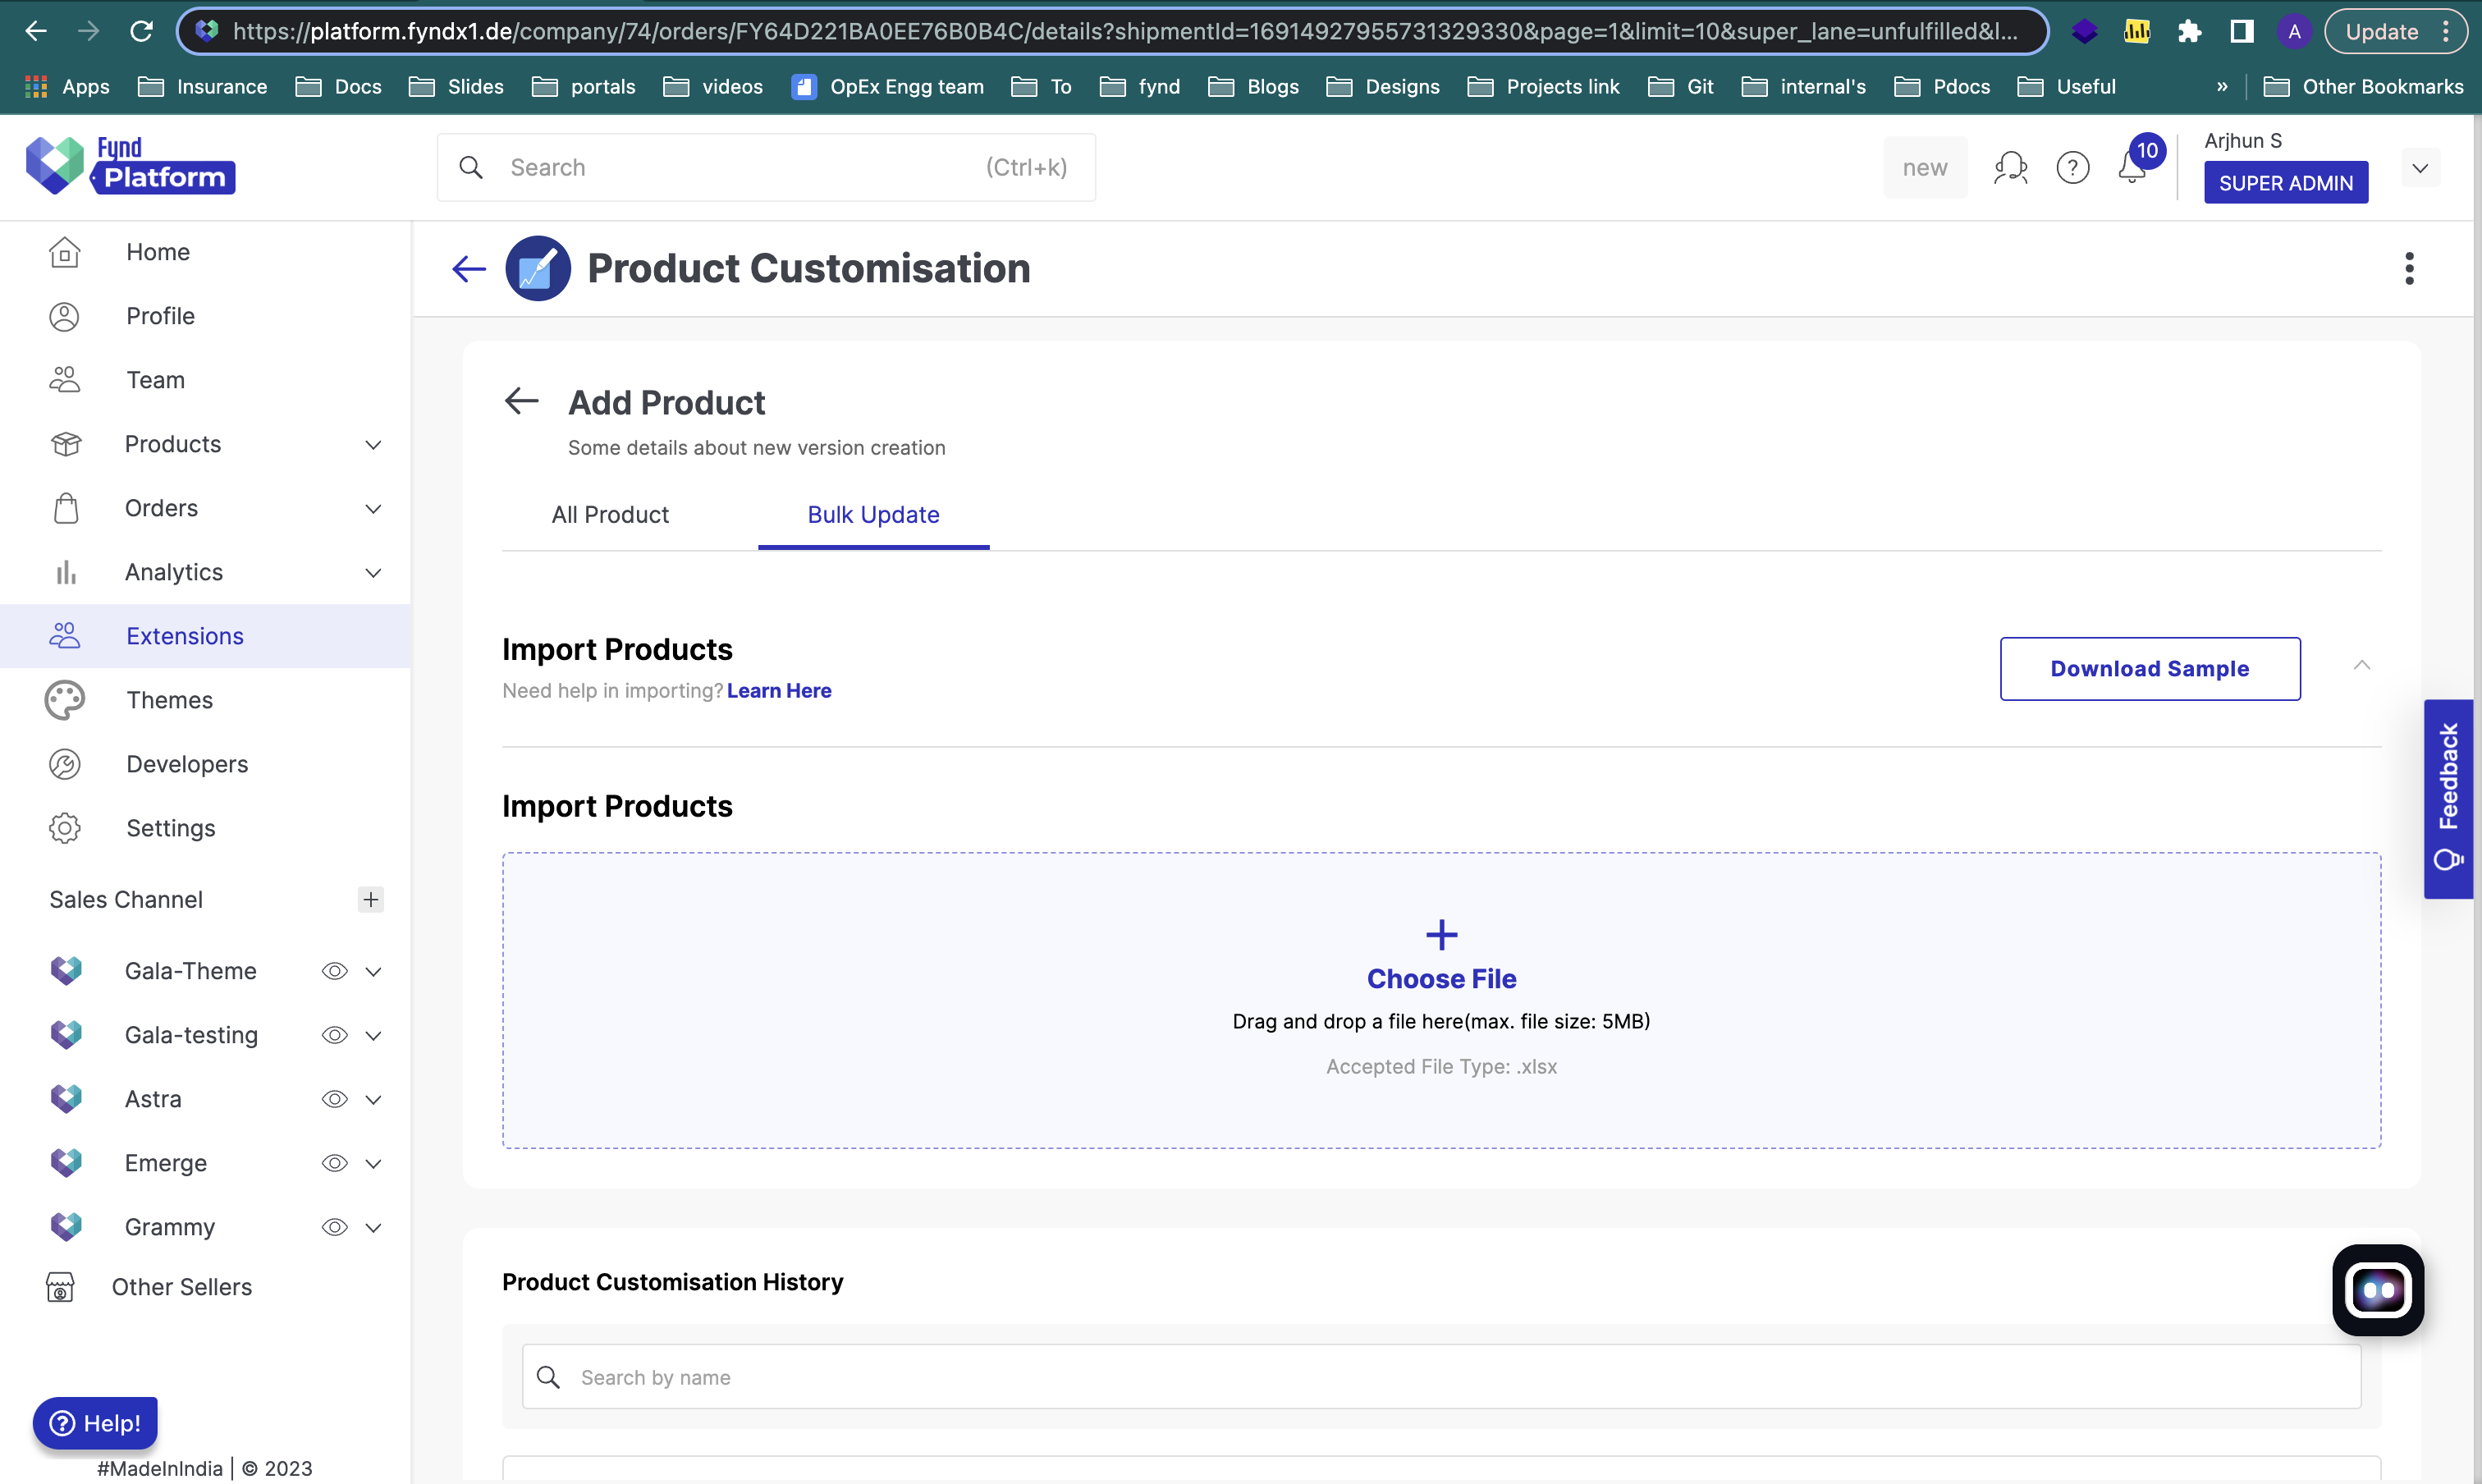
Figure 9: Steps for bulk update option - The system will validate the uploaded product UID's and provide a summary of valid records.
- Click 'Customize' to pick or create a template.
- Once chosen, the template will be applied to all product IDs in the file.
- The list of uploaded xlsx will be available under product customisation history.
Customisation Management
Steps to create and configure new template
- Click Customisation Management option
.png)
Figure 10: Clicking customisation management option - Click ‘’Create New’‘ option and fill the required details.
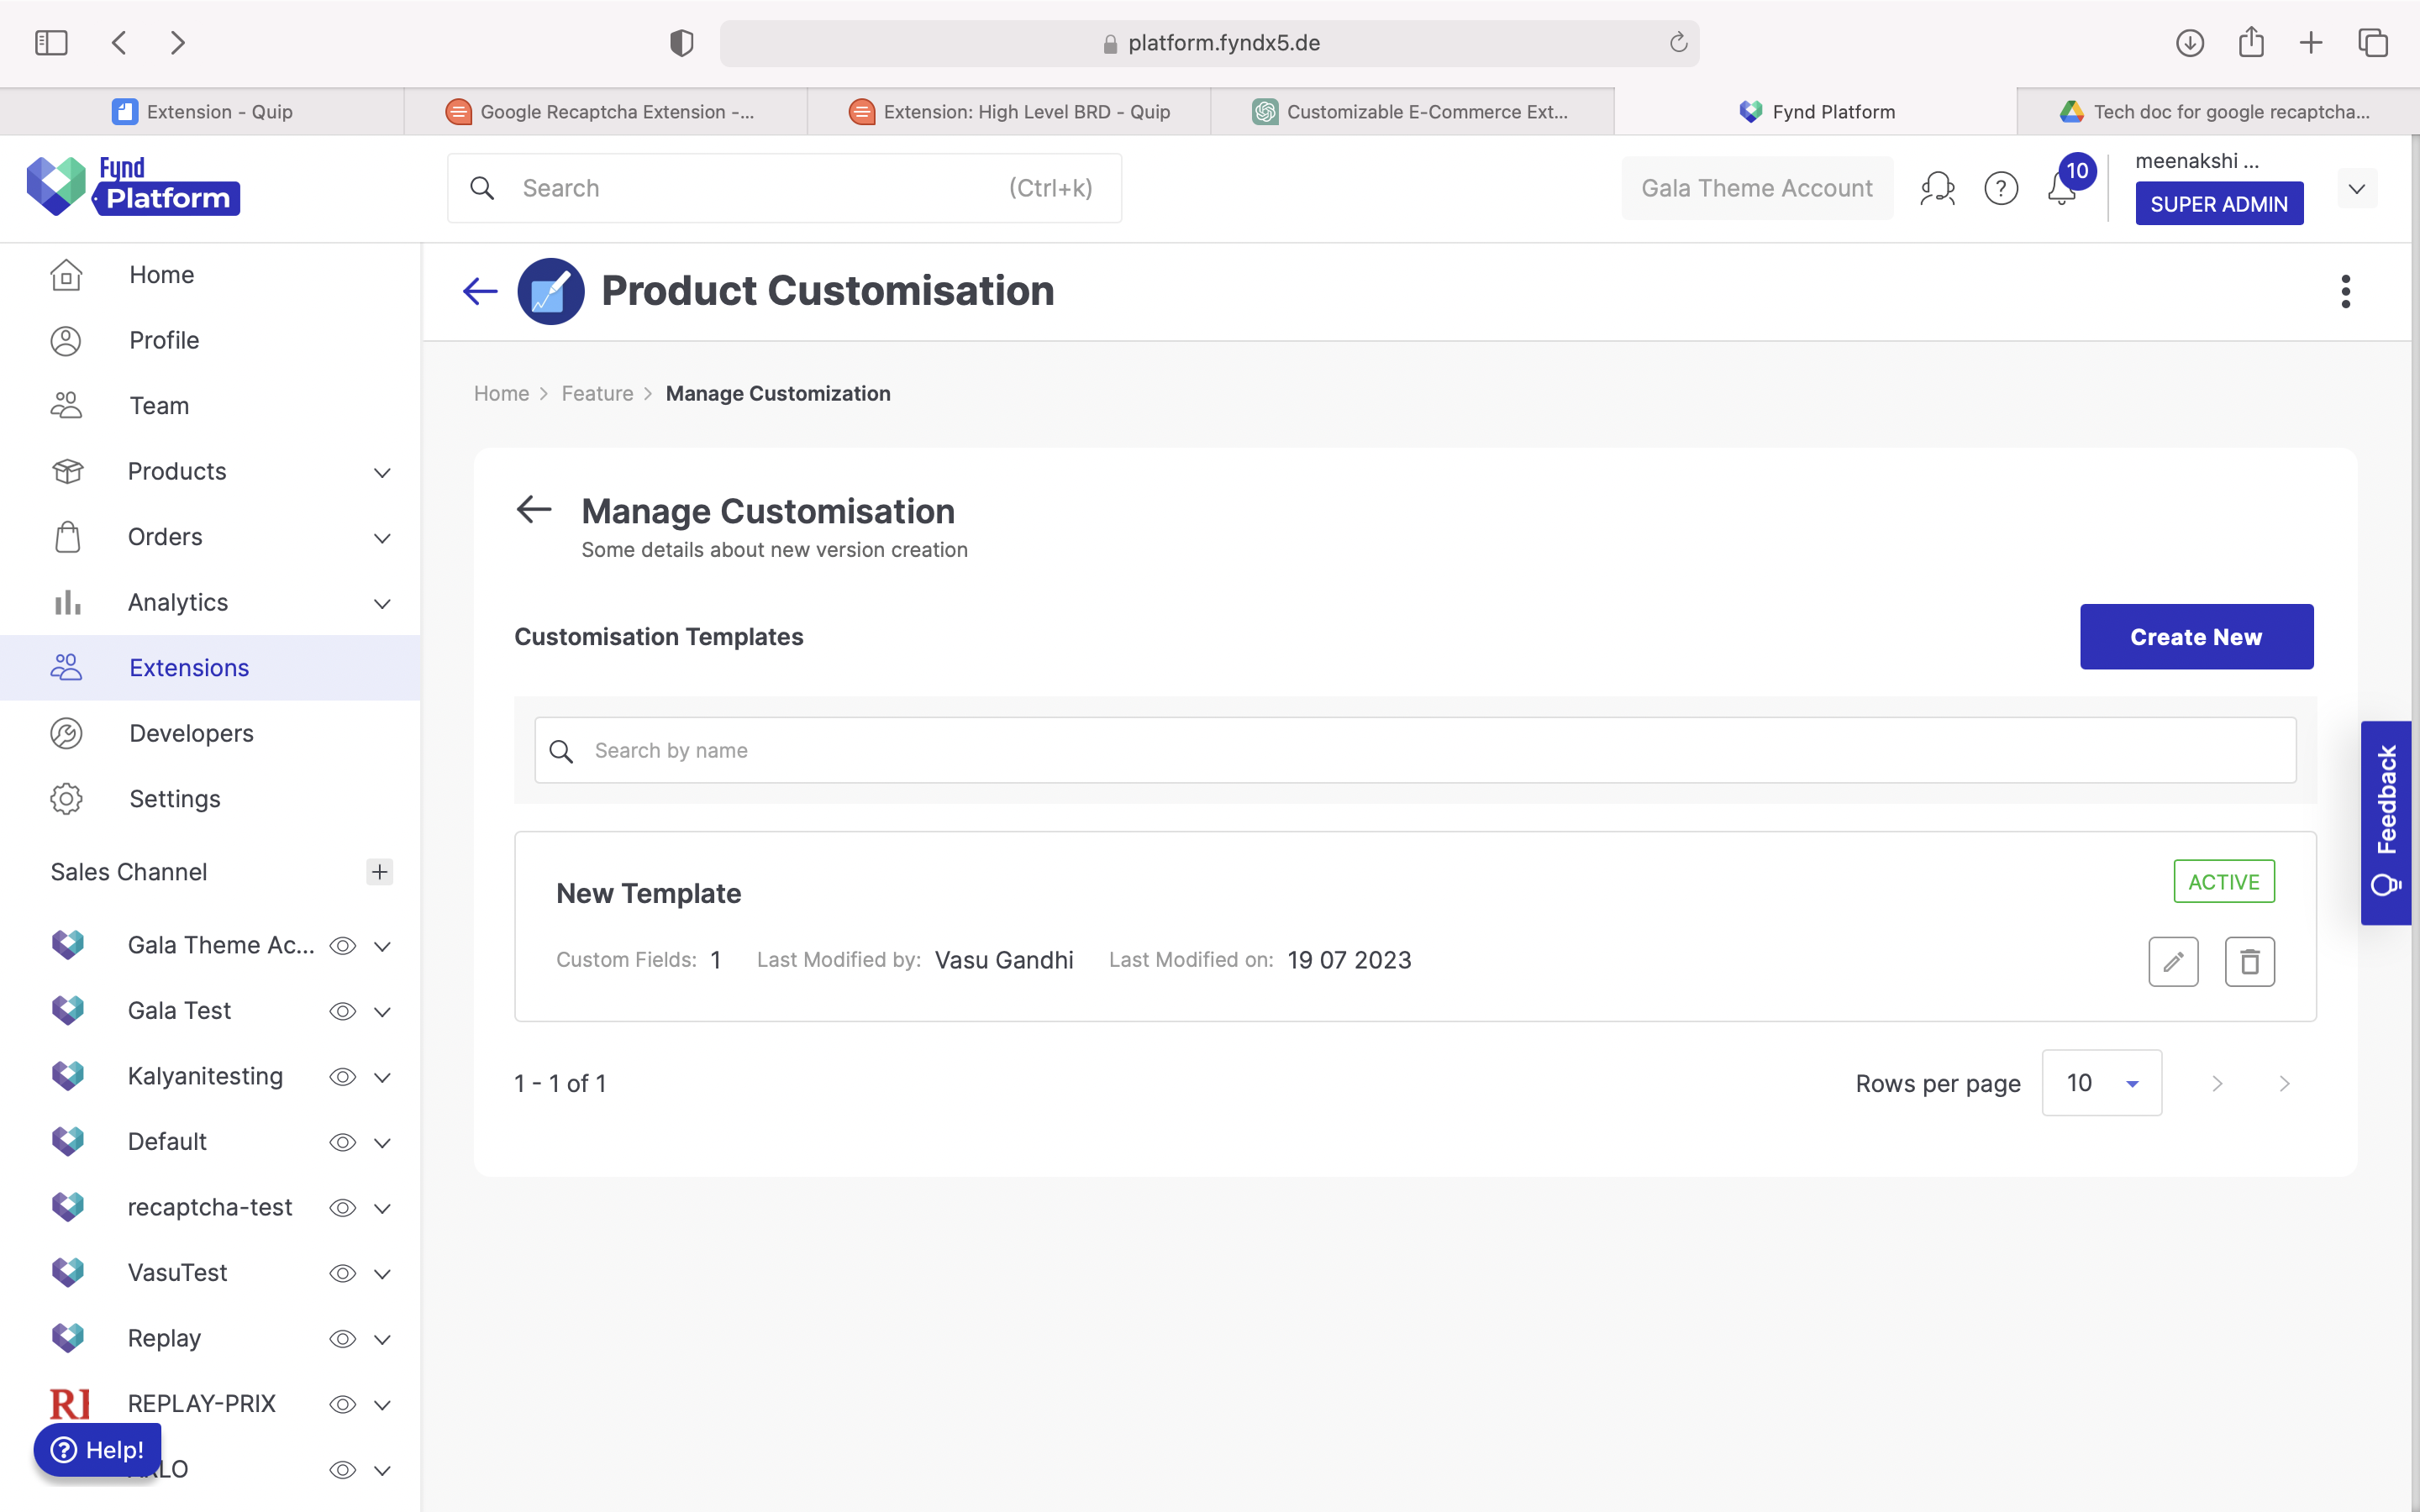
Figure 11: Clicking create new option - Enter the details of the required fields.
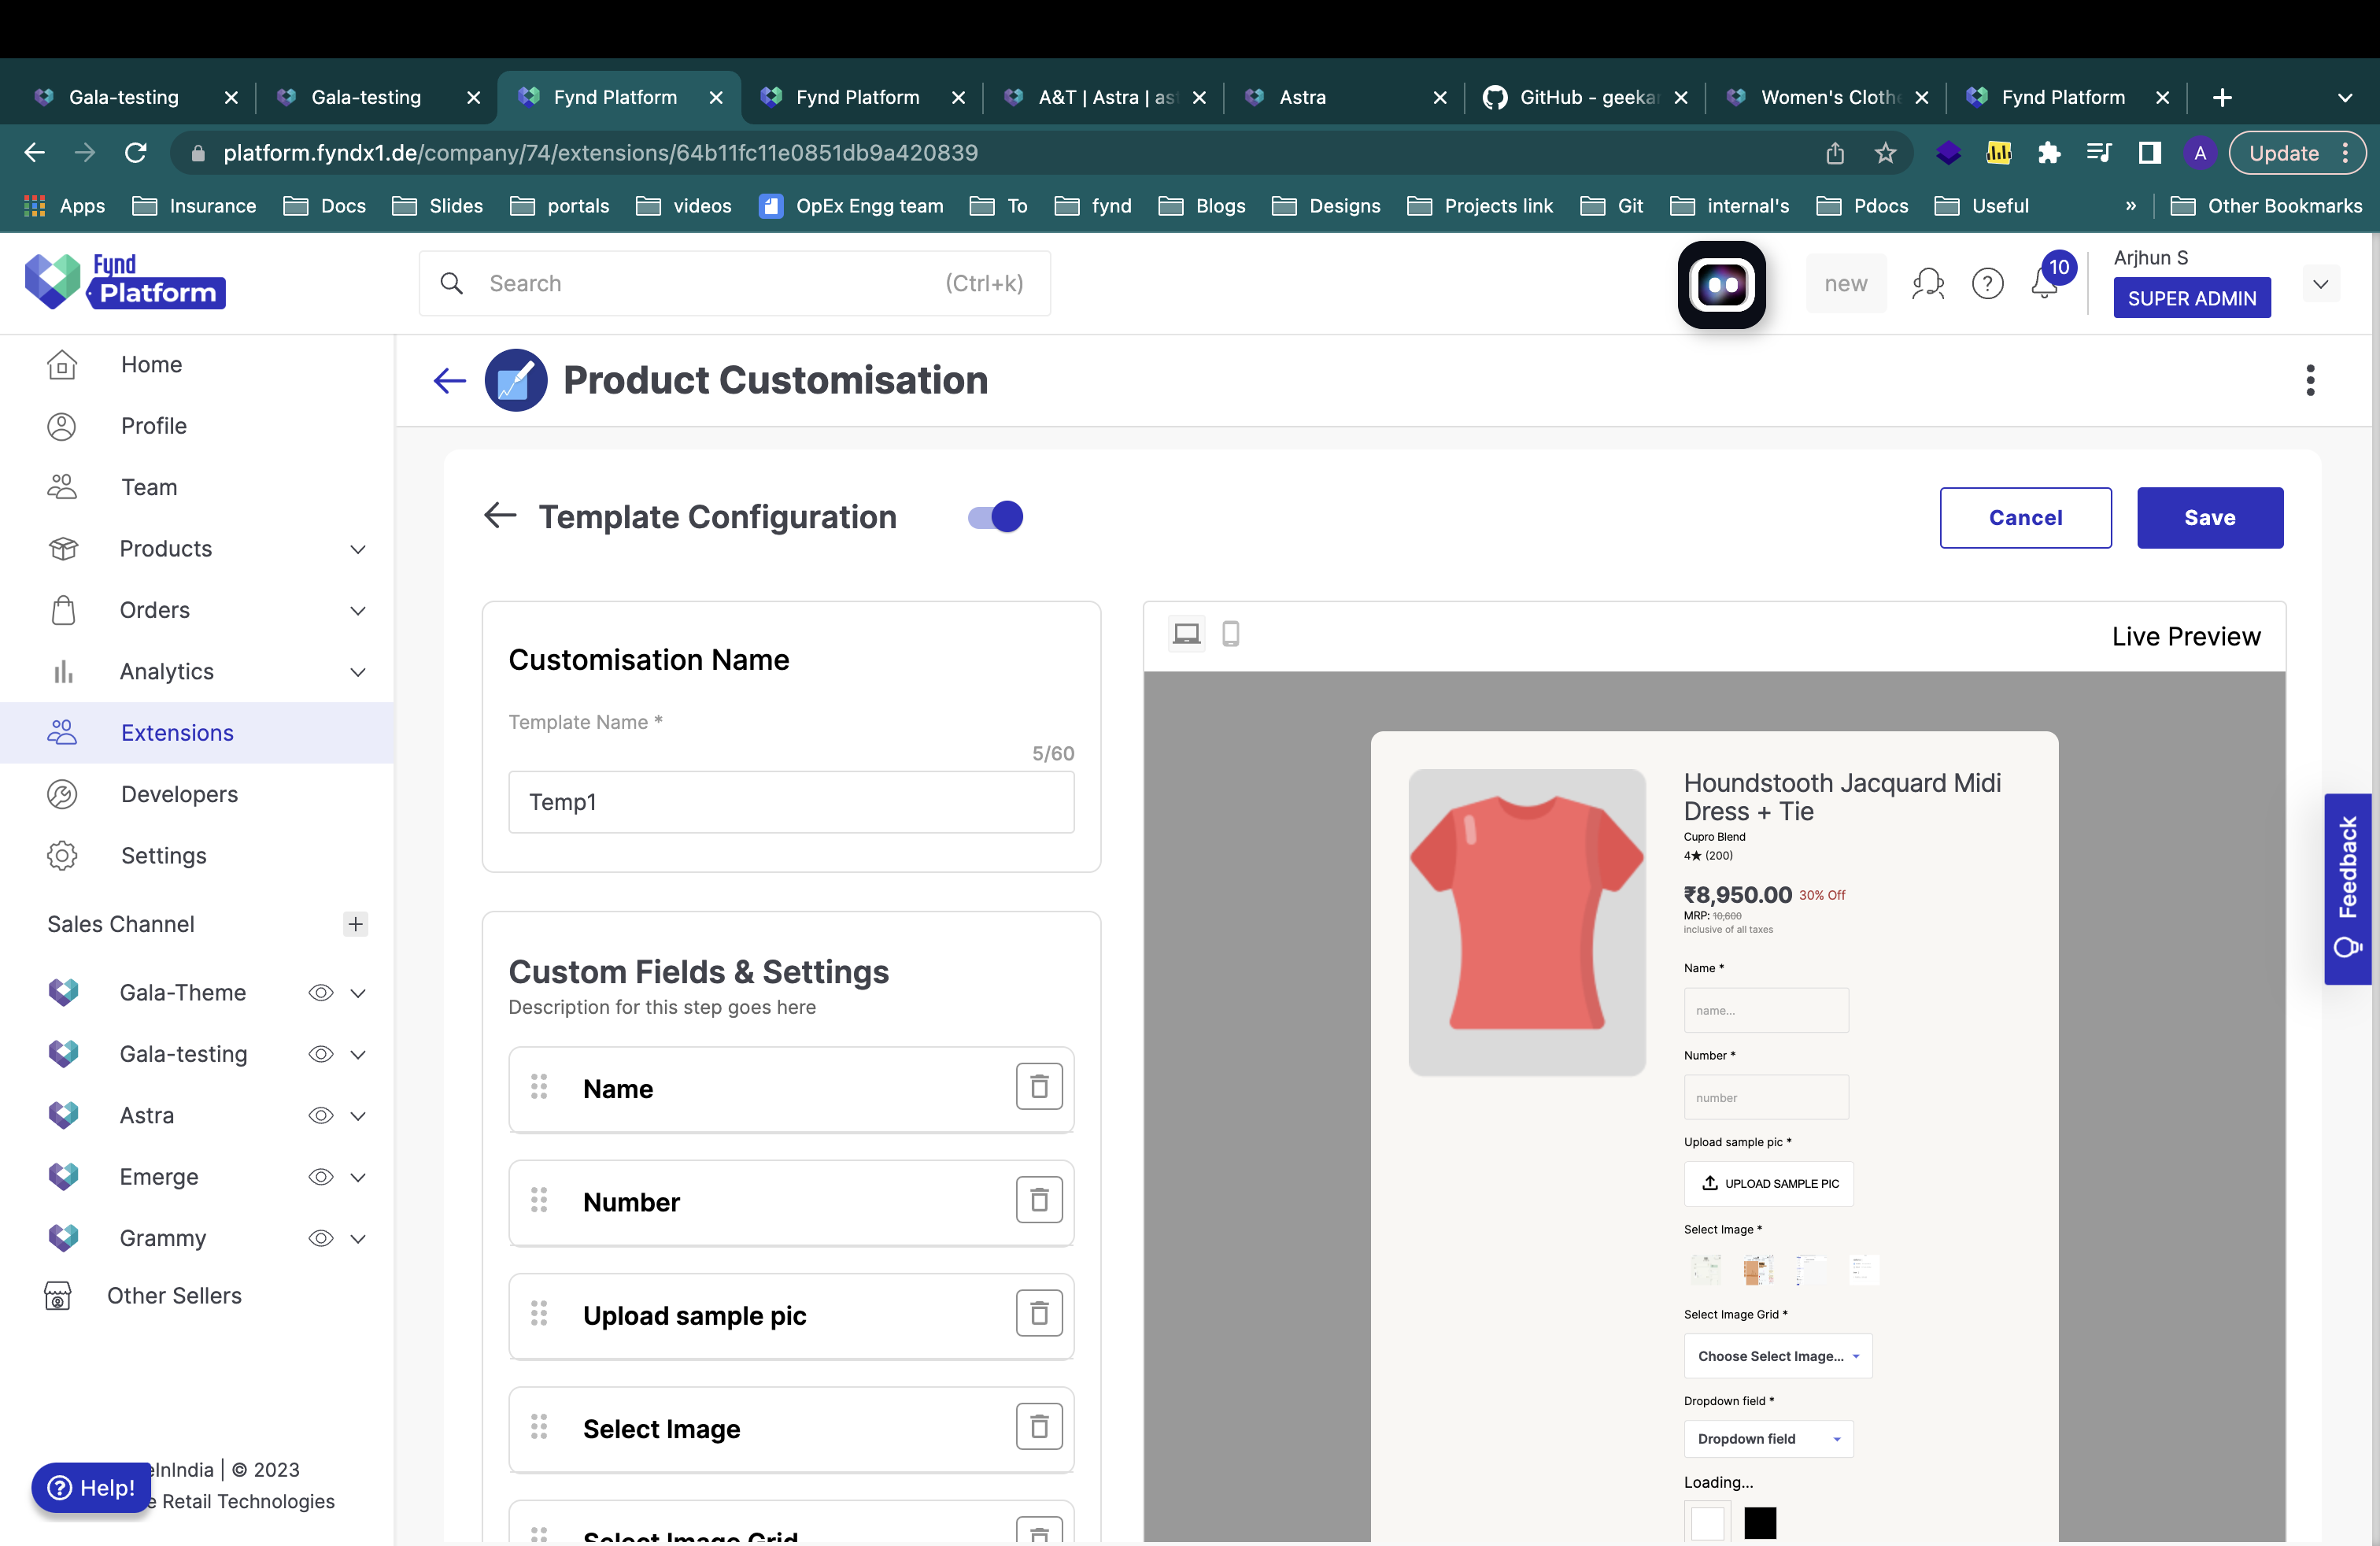
Figure 12: Entering the required details
Building upon the example provided above, the fields that have been configured consists:
- Customization Name: Provide a name for your template.
- Text: Enter a fitting product name.
- Number: Input the product number.
- Upload Sample Pic: Attach a sample picture of the product.
- Select Image: Choose an appropriate product image.
- Select Image Grid: Pick a personalization image from the available grid or gallery.
- After completing all the required details, the resulting output is displayed in the sales channel.
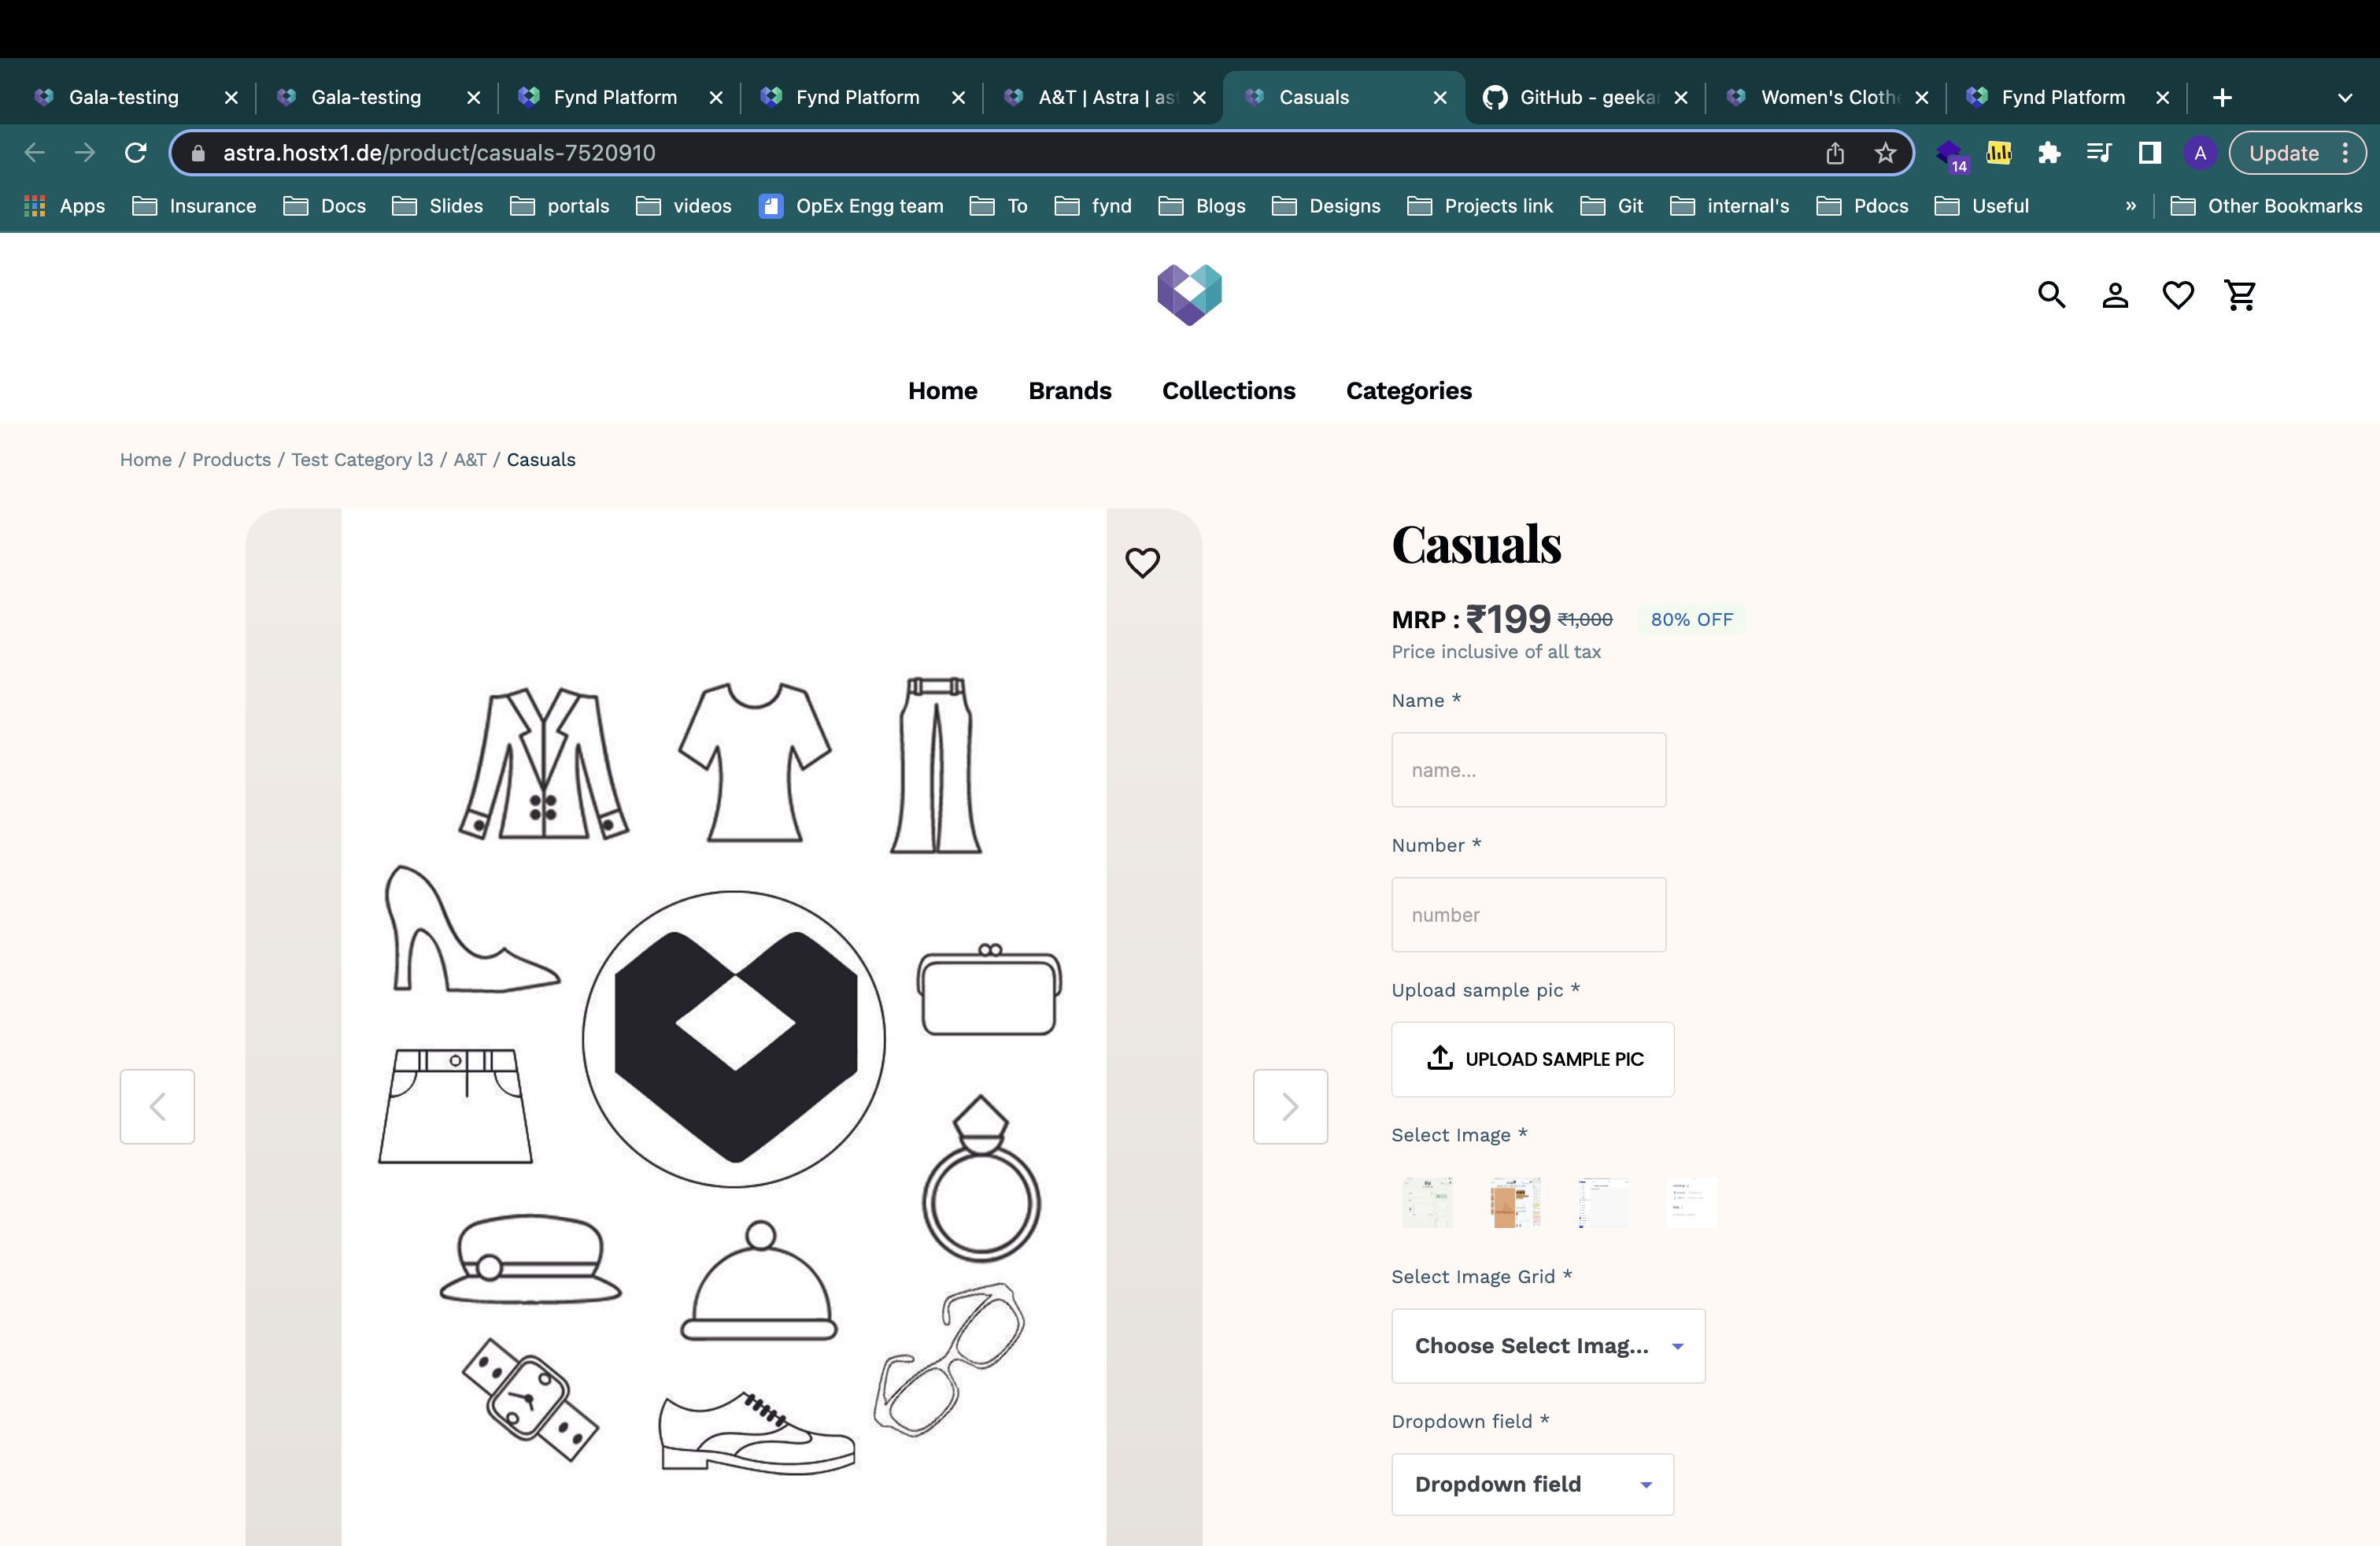
Figure 13: Final output in the sales channel
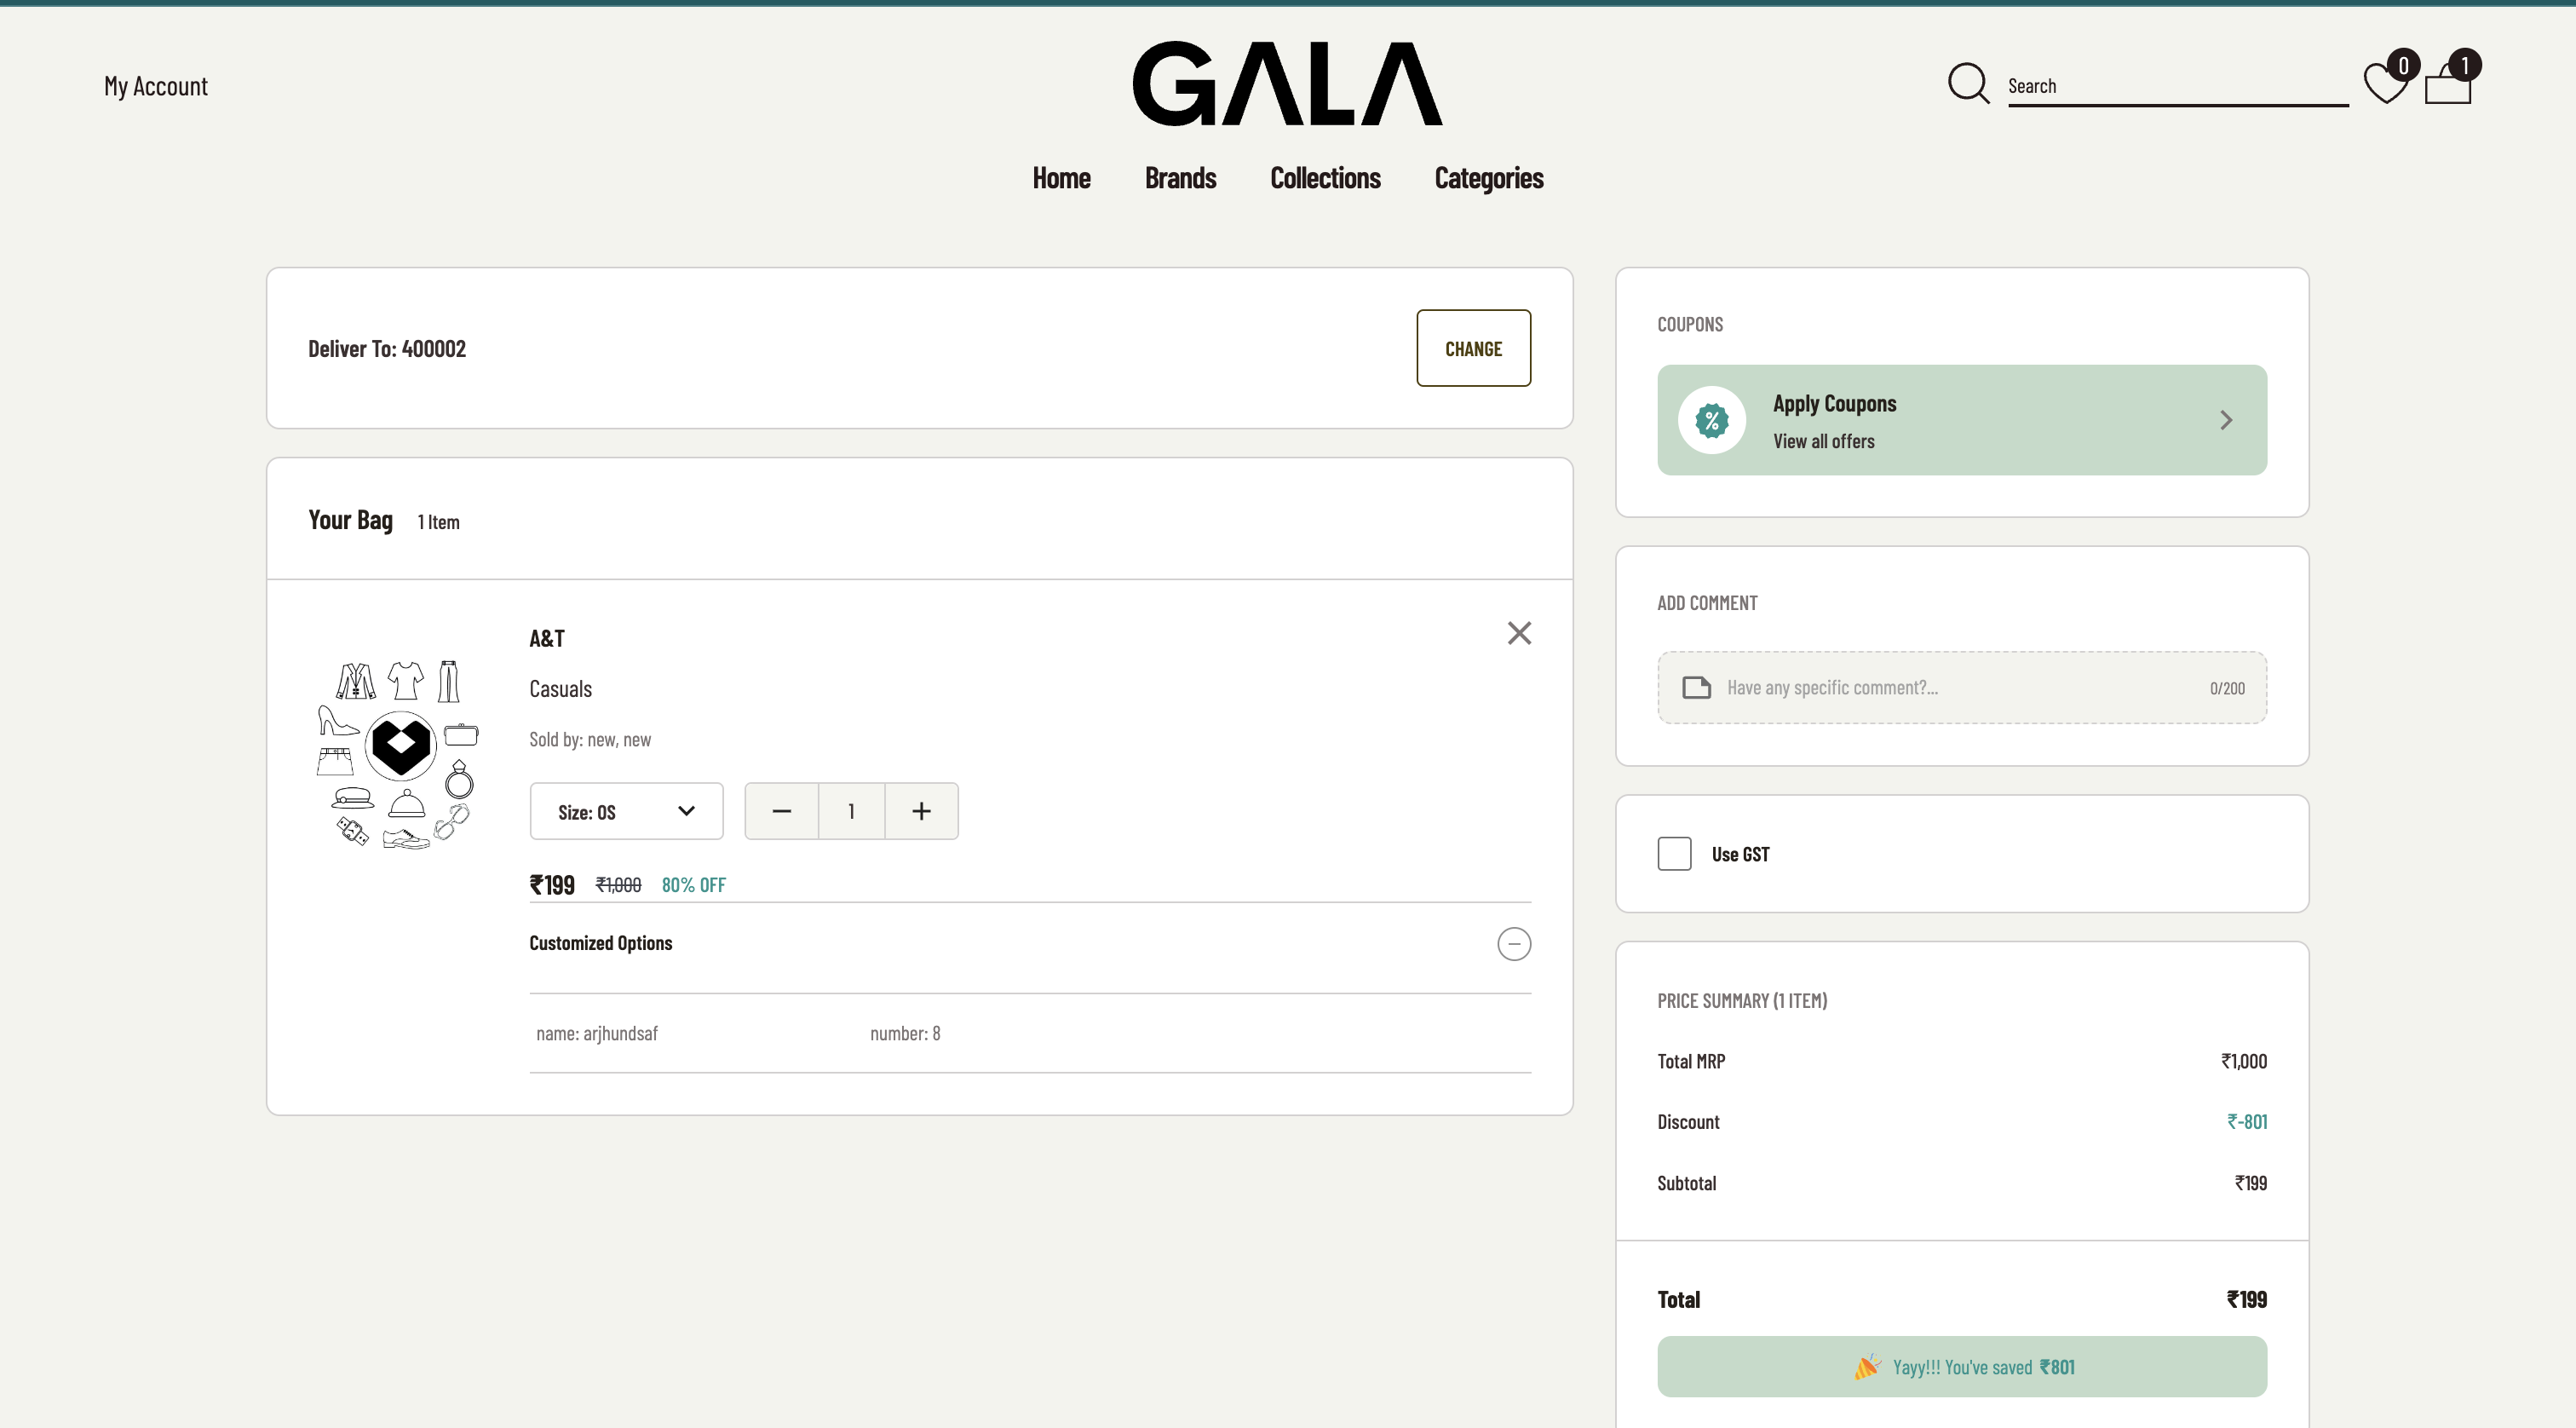
On the cart page, it will appear as follows:
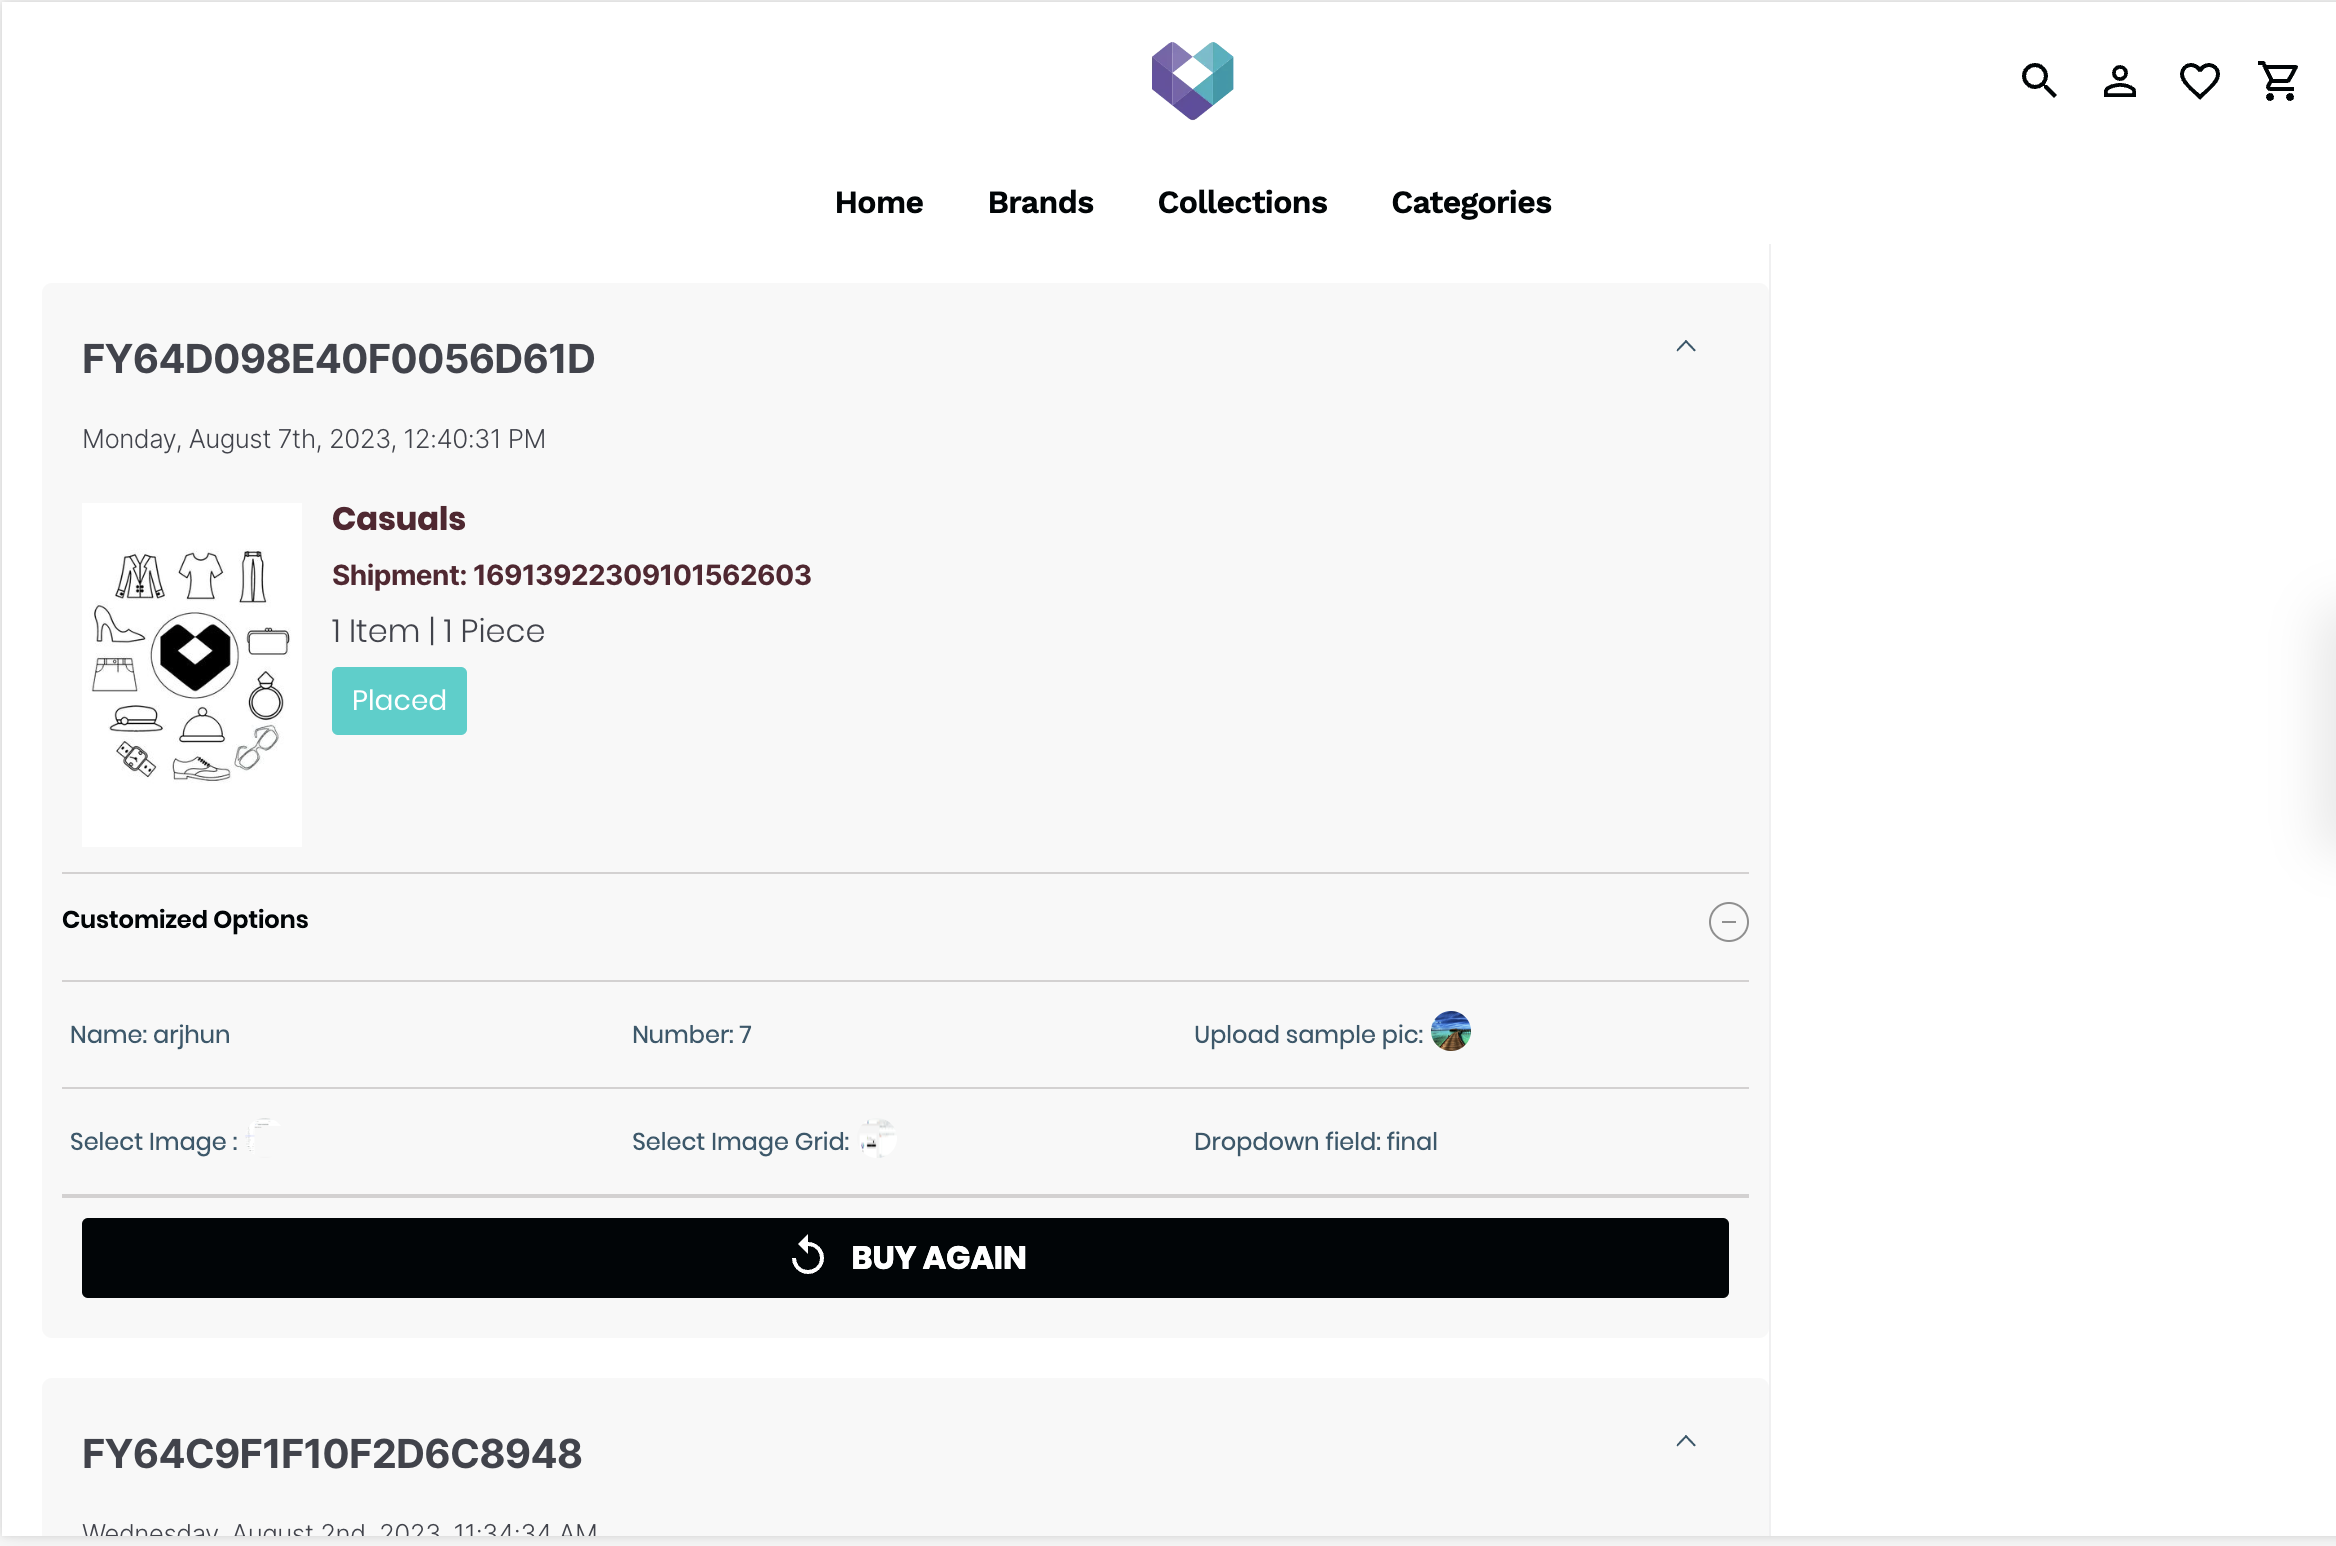
The customization option on the orders listing will appear as shown below:
Steps to add the extension in the theme
-
Add product customisation to the extension slot on the product description page.

Figure 16: Adding Product customisation to the extension slot
-
On the cart page, place the "View Customisation" option in the "Below Item Price" extension slot.

Figure 17: Placing the View Customisation on cart page
-
On the Orders listing page, position the "View Customisation" option in the "Above Buy Again" section.
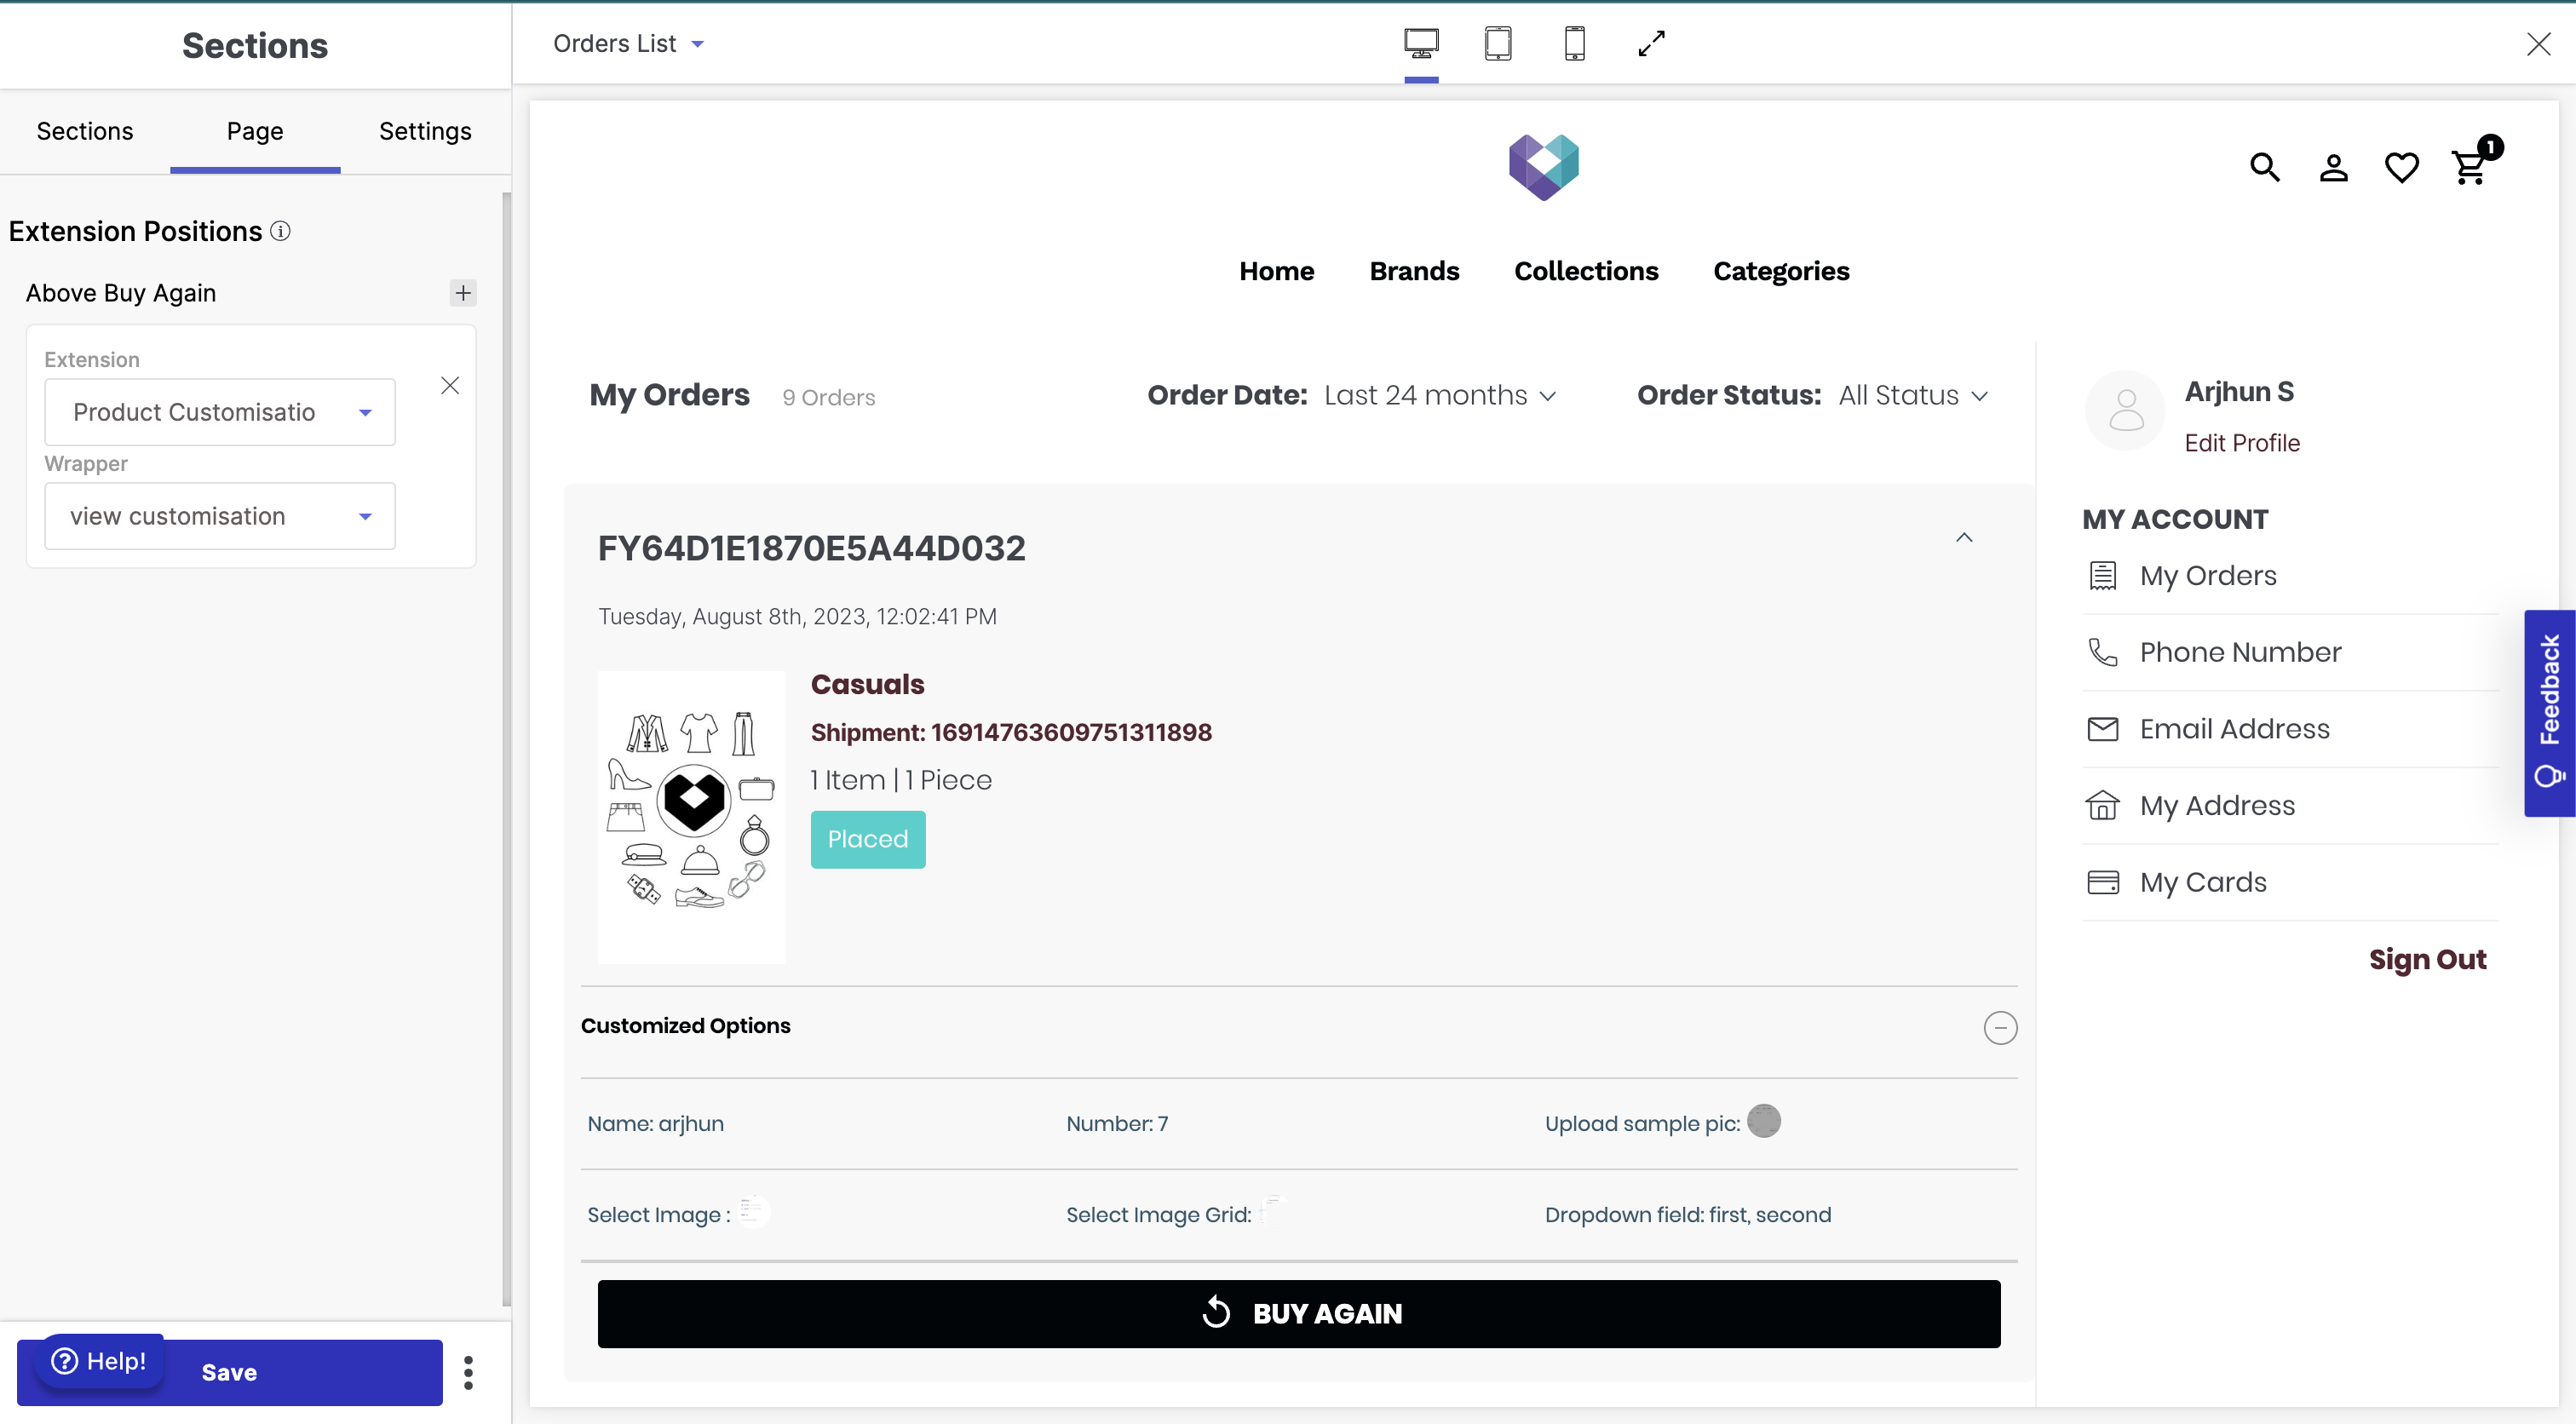
Figure 18: Placing the View Customisation on orders listing page