SMS
Introduction
Use this section for configuring an SMS response to the customer, with the help of templates. The primary purpose of sending an SMS is to make the customer aware of the order status.
Example: If a customer has placed an order, they will receive an SMS stating that the order has been placed. Similarly, if a customer cancels an order, they will receive a cancellation message.
Main Screen
![]()
In this document, you will learn more about:
Create Templates
You can either create a new custom template using Create New or use any existing system templates arranged in Signup & Login, Order Processing, Order Cancellation, Order Return, and Order Refund groups. These templates will be used for choosing a template under events.
The only difference between a custom template and a system template is that the data is readily available in a system template.
-
Click Create (refer fig. 1).
-
If you wish to create a custom template, click on Create New. Else, you can continue by selecting any other system template below it.
-
Click Select & Proceed.
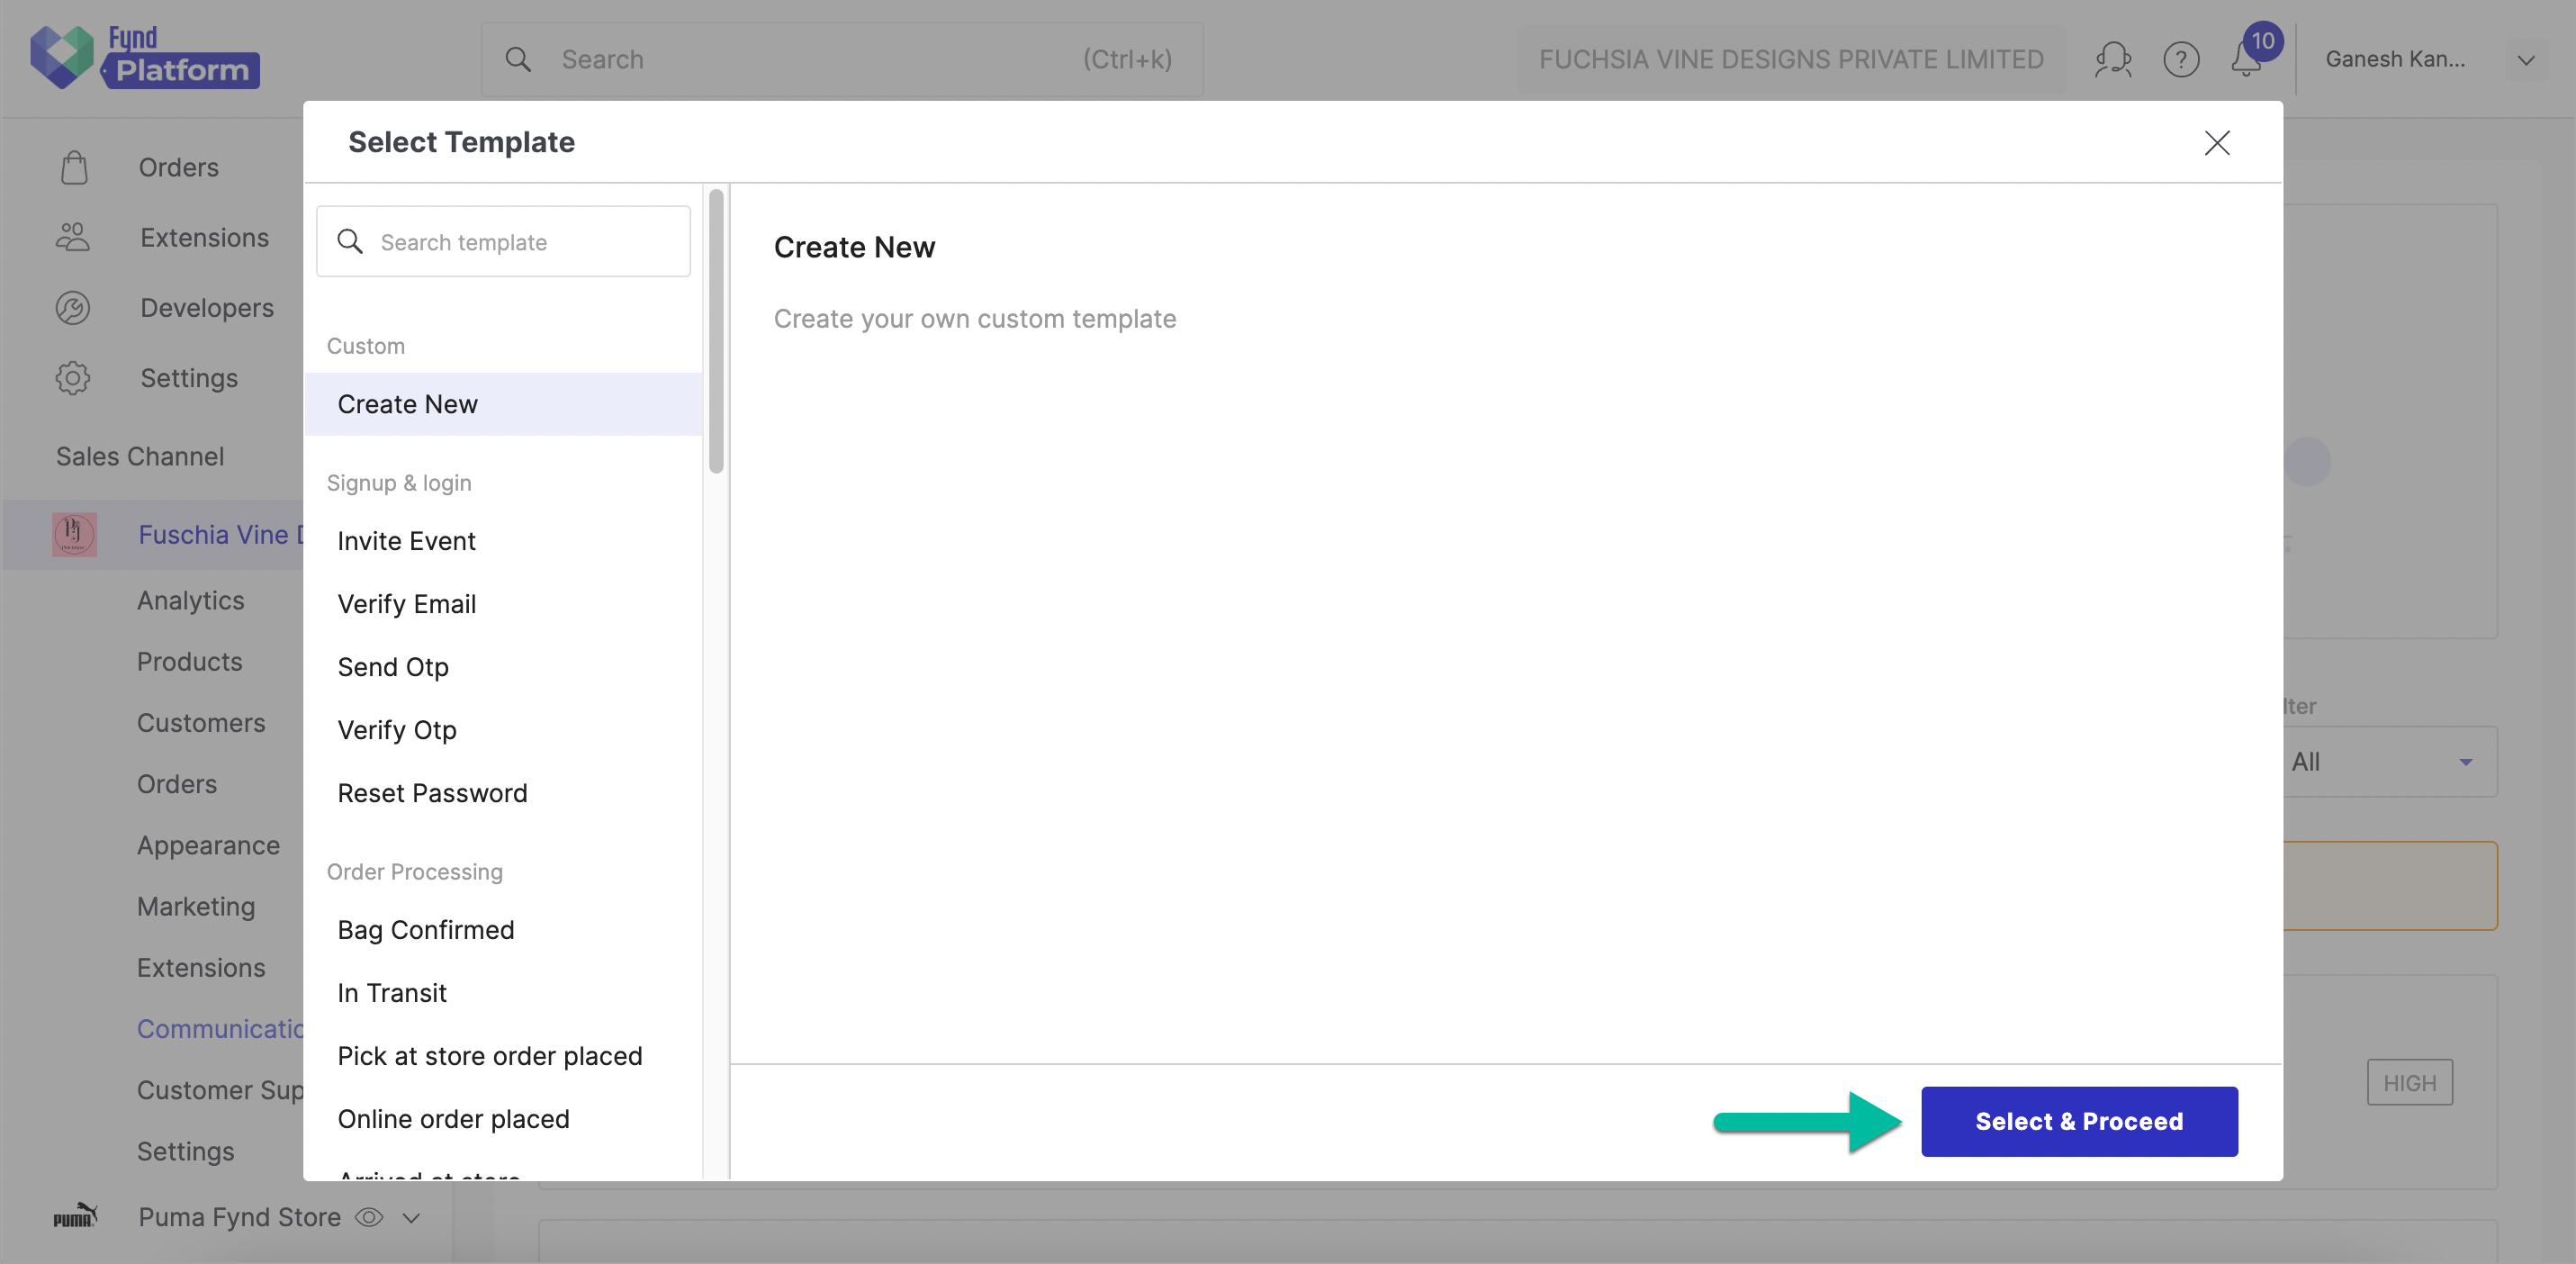
Figure 3: Select a Template
-
You will get the following page for configuring your template.
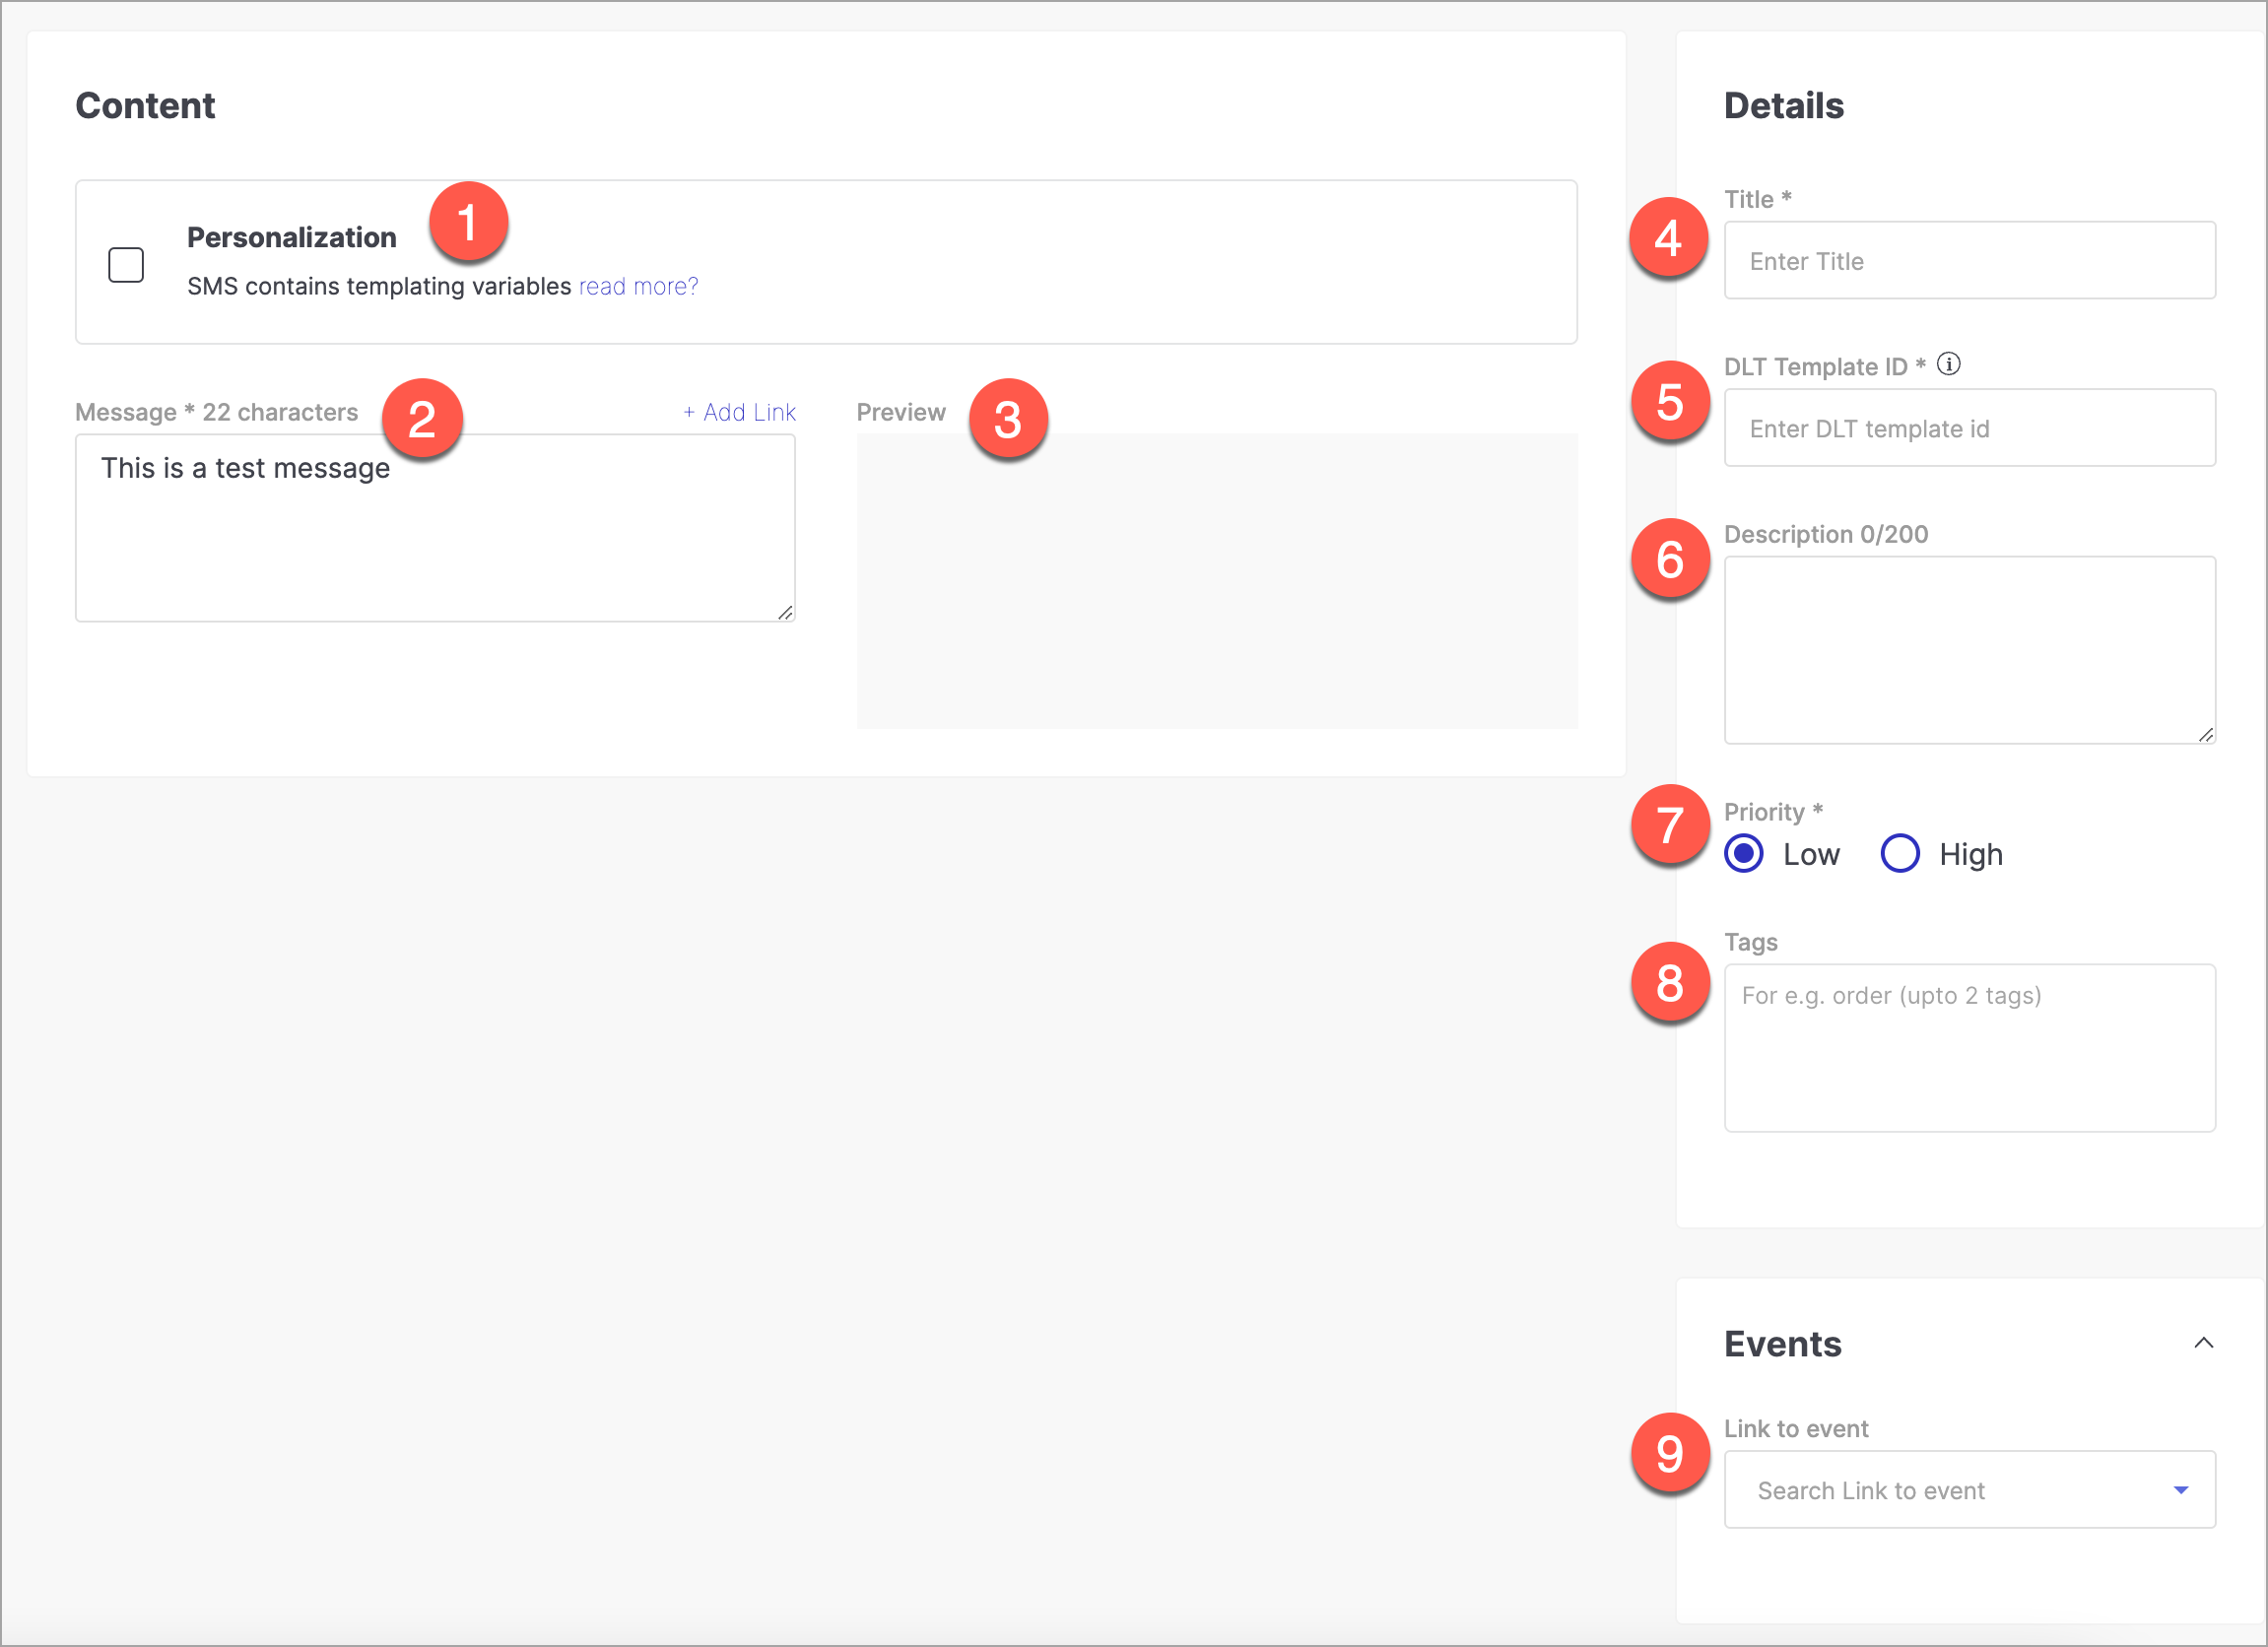
Figure 4: Configuring an SMS Template
-
Personalization - Select this only if you wish to use template variables. When the template engine Nunjucks encounters a variable, it evaluates that variable and replaces it with the value given in the JSON editor. This editor is used to add and edit variables in JSON format.
You can use existing variables. Moreover, you can create your own variables by using the following notation
"variable_name":"value"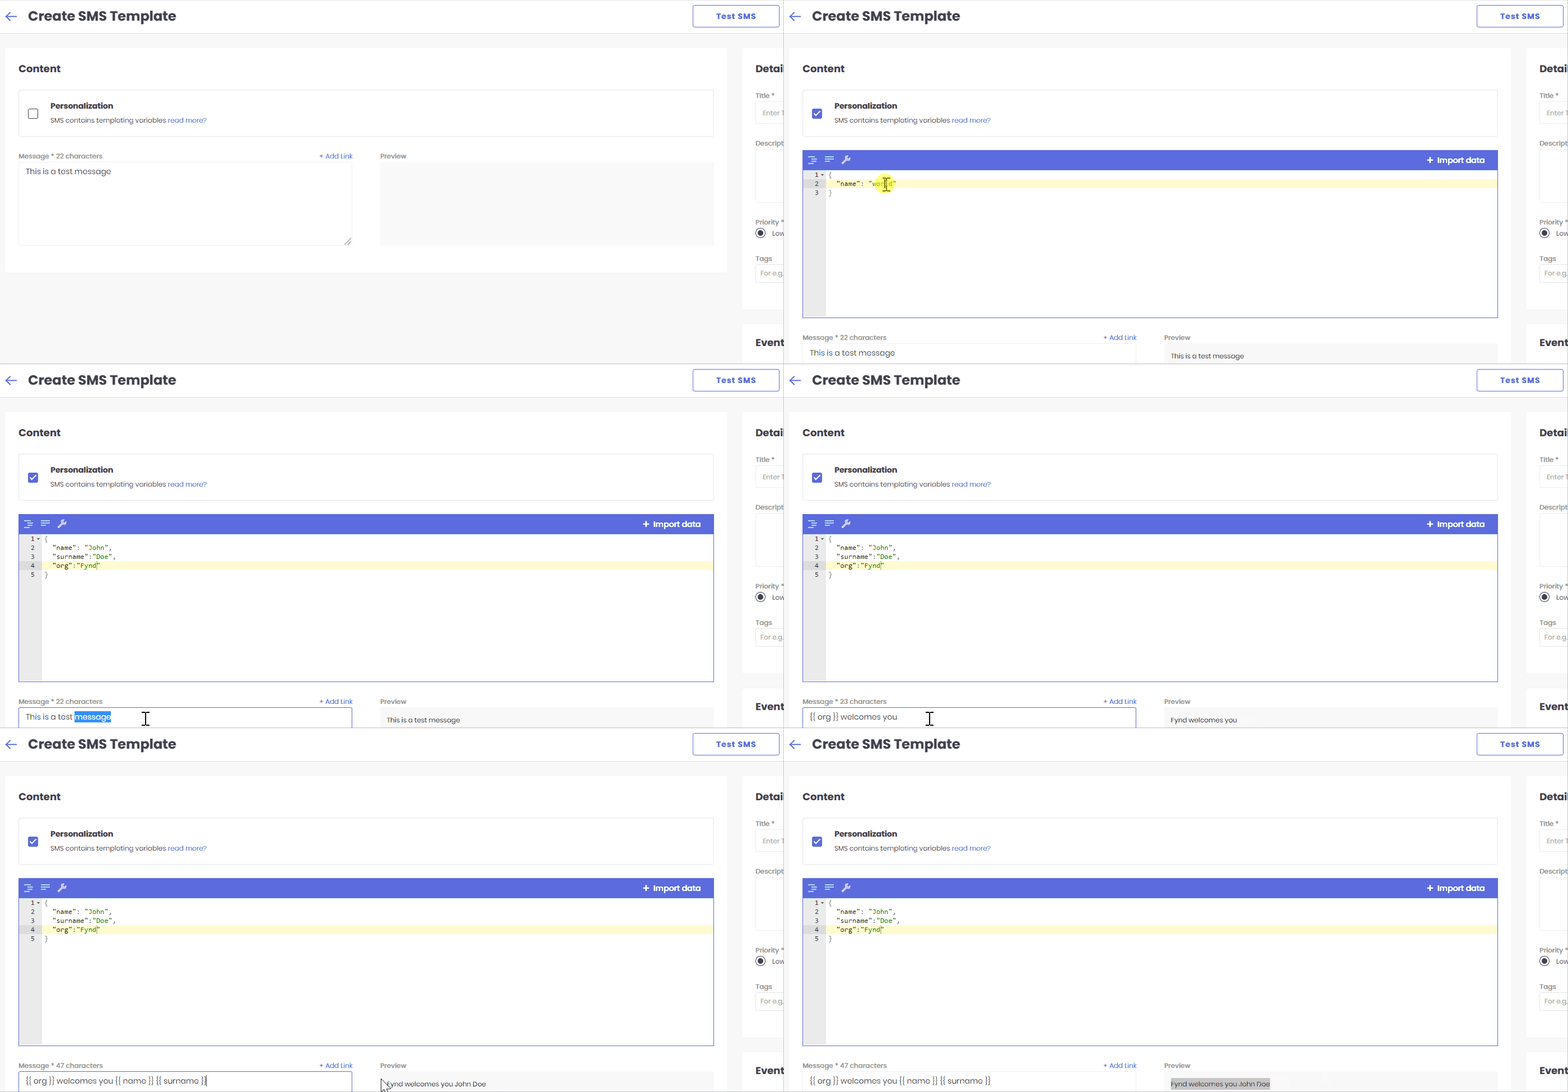
Figure 5: Personalization using templating
-
Message - This is the body of the SMS. You can directly enter the SMS content or customize it using templating variables as shown in fig.5
-
Preview - This is the preview of the SMS as shown in fig.5
-
Details
- Title - Give a suitable name to the template. Note that this name won't reflect in the SMS itself, and it is just for identifying one template from the other.
- DLT Template ID -
- For new SMS template, add DLT Template ID from your DLT Service Provider.
- For old SMS templates, get DLT Template ID generated from your DLT Service Provider. Otherwise, SMS will not be triggered.
- Description - Assign a short description to the template within a limit of 100 characters. Note that this description is not the SMS content, and it is just for a user's understanding.
- Priority - Set a High or Low priority. For example, a payment SMS is prioritized higher over an 'order delivered' SMS.
- Tags - This is optional. One can, however, use tags to identify a specific SMS by searching its tag.
-
Events
- Link to event - Assign this template to an event from the drop-down.
noteSellers can customize SMS templates by dynamically integrating global currency codes (e.g., INR, USD) instead of fixed currency symbols (e.g., ₹) for amount representation. Furthermore, the templates also include timezone codes as suffixes to date and timestamp variables, guaranteeing precise time representation for recipients worldwide.
-
-
Click on Test SMS to verify its content and functionality.
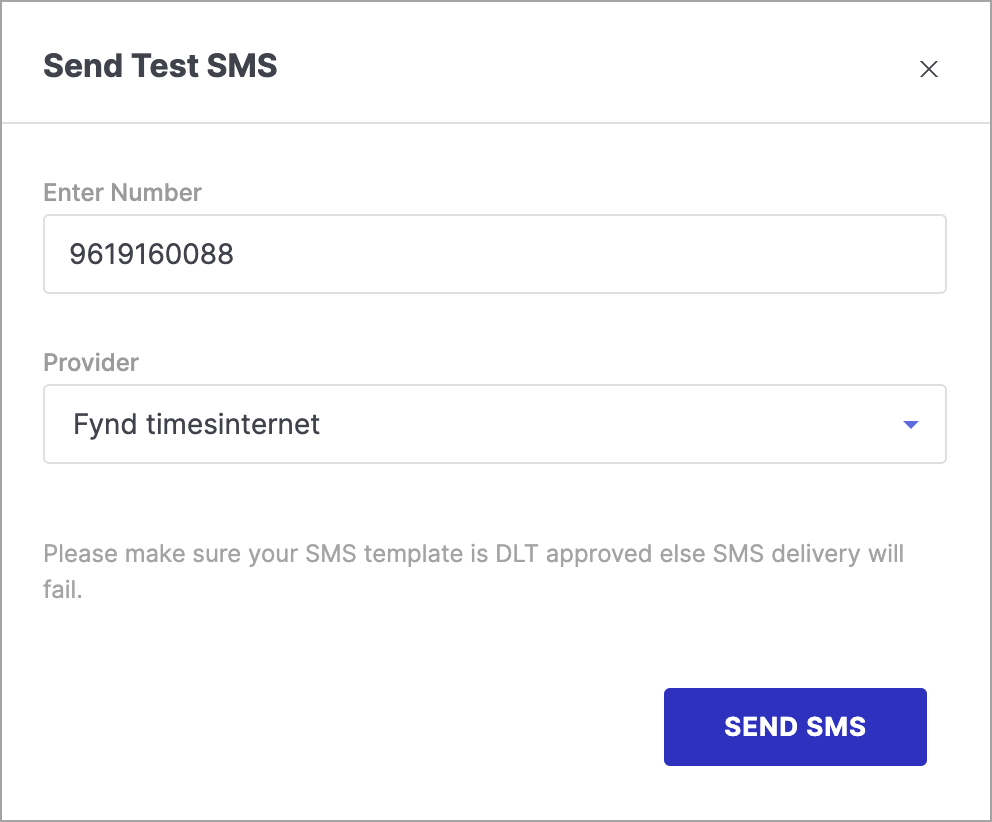
Figure 6: Test SMS
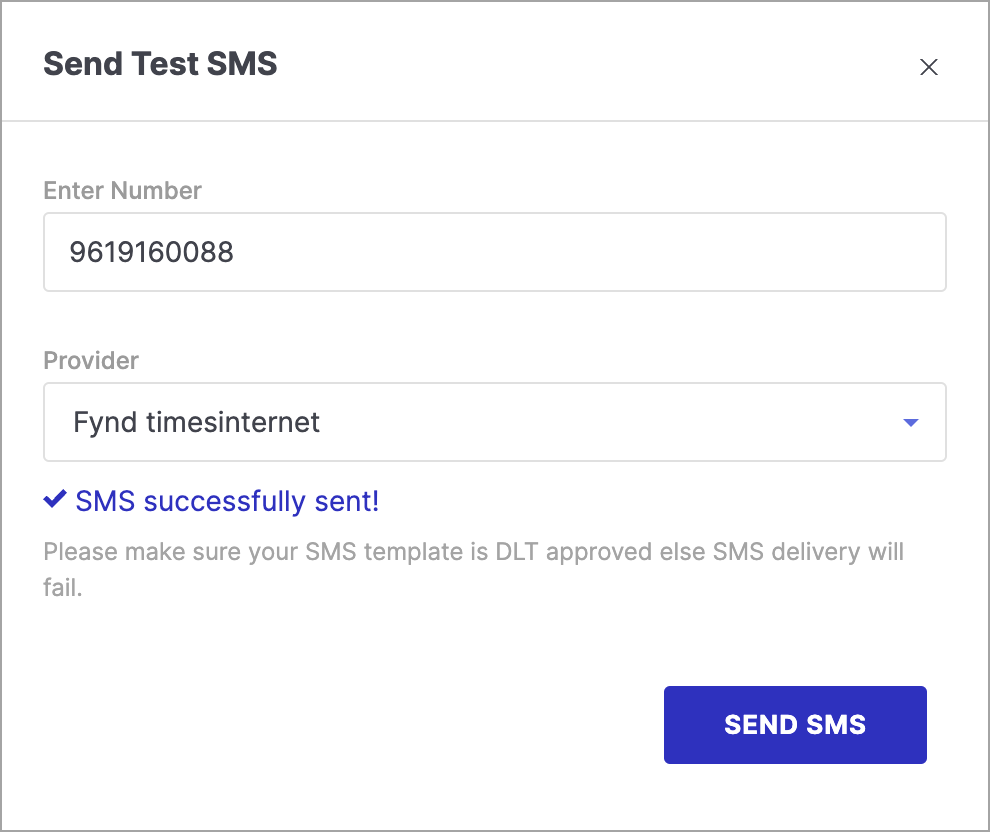
Figure 7: SMS Sent
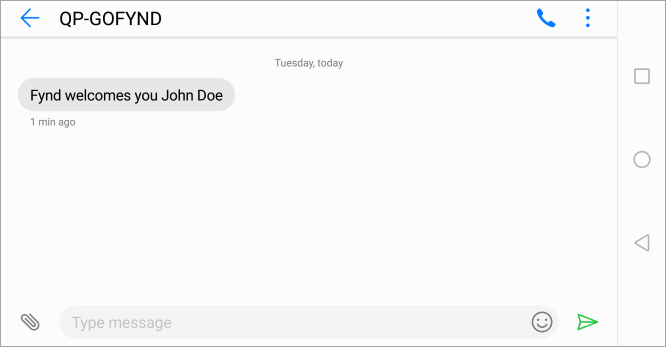
Figure 8: Successfully Received the Test SMS
-
Later, you can proceed to save and publish this by choosing a template under events.