Type of Account
- Assisted Merchant Account: Seamlessly connect your Razorpay account with Fynd Platform using your Razorpay login credentials without the hassle of manually setting up API and Webhook.
- Own Merchant Account Credentials: Connect your Razorpay Account with the Fynd Platform by manually adding API and Webhook credentials associated with your Razorpay account in the Fynd Platform.
Add Razorpay Payment Gateway in Your Sales Channel
Assisted Merchant Account
Do the following steps to connect your Razorpay account:
-
Navigate to the Sales Channel > Setting > Cart & Payments > Payments.

Figure 1: Sales Channel Setting
-
Click General Settings.

Figure 2: Payments Page
-
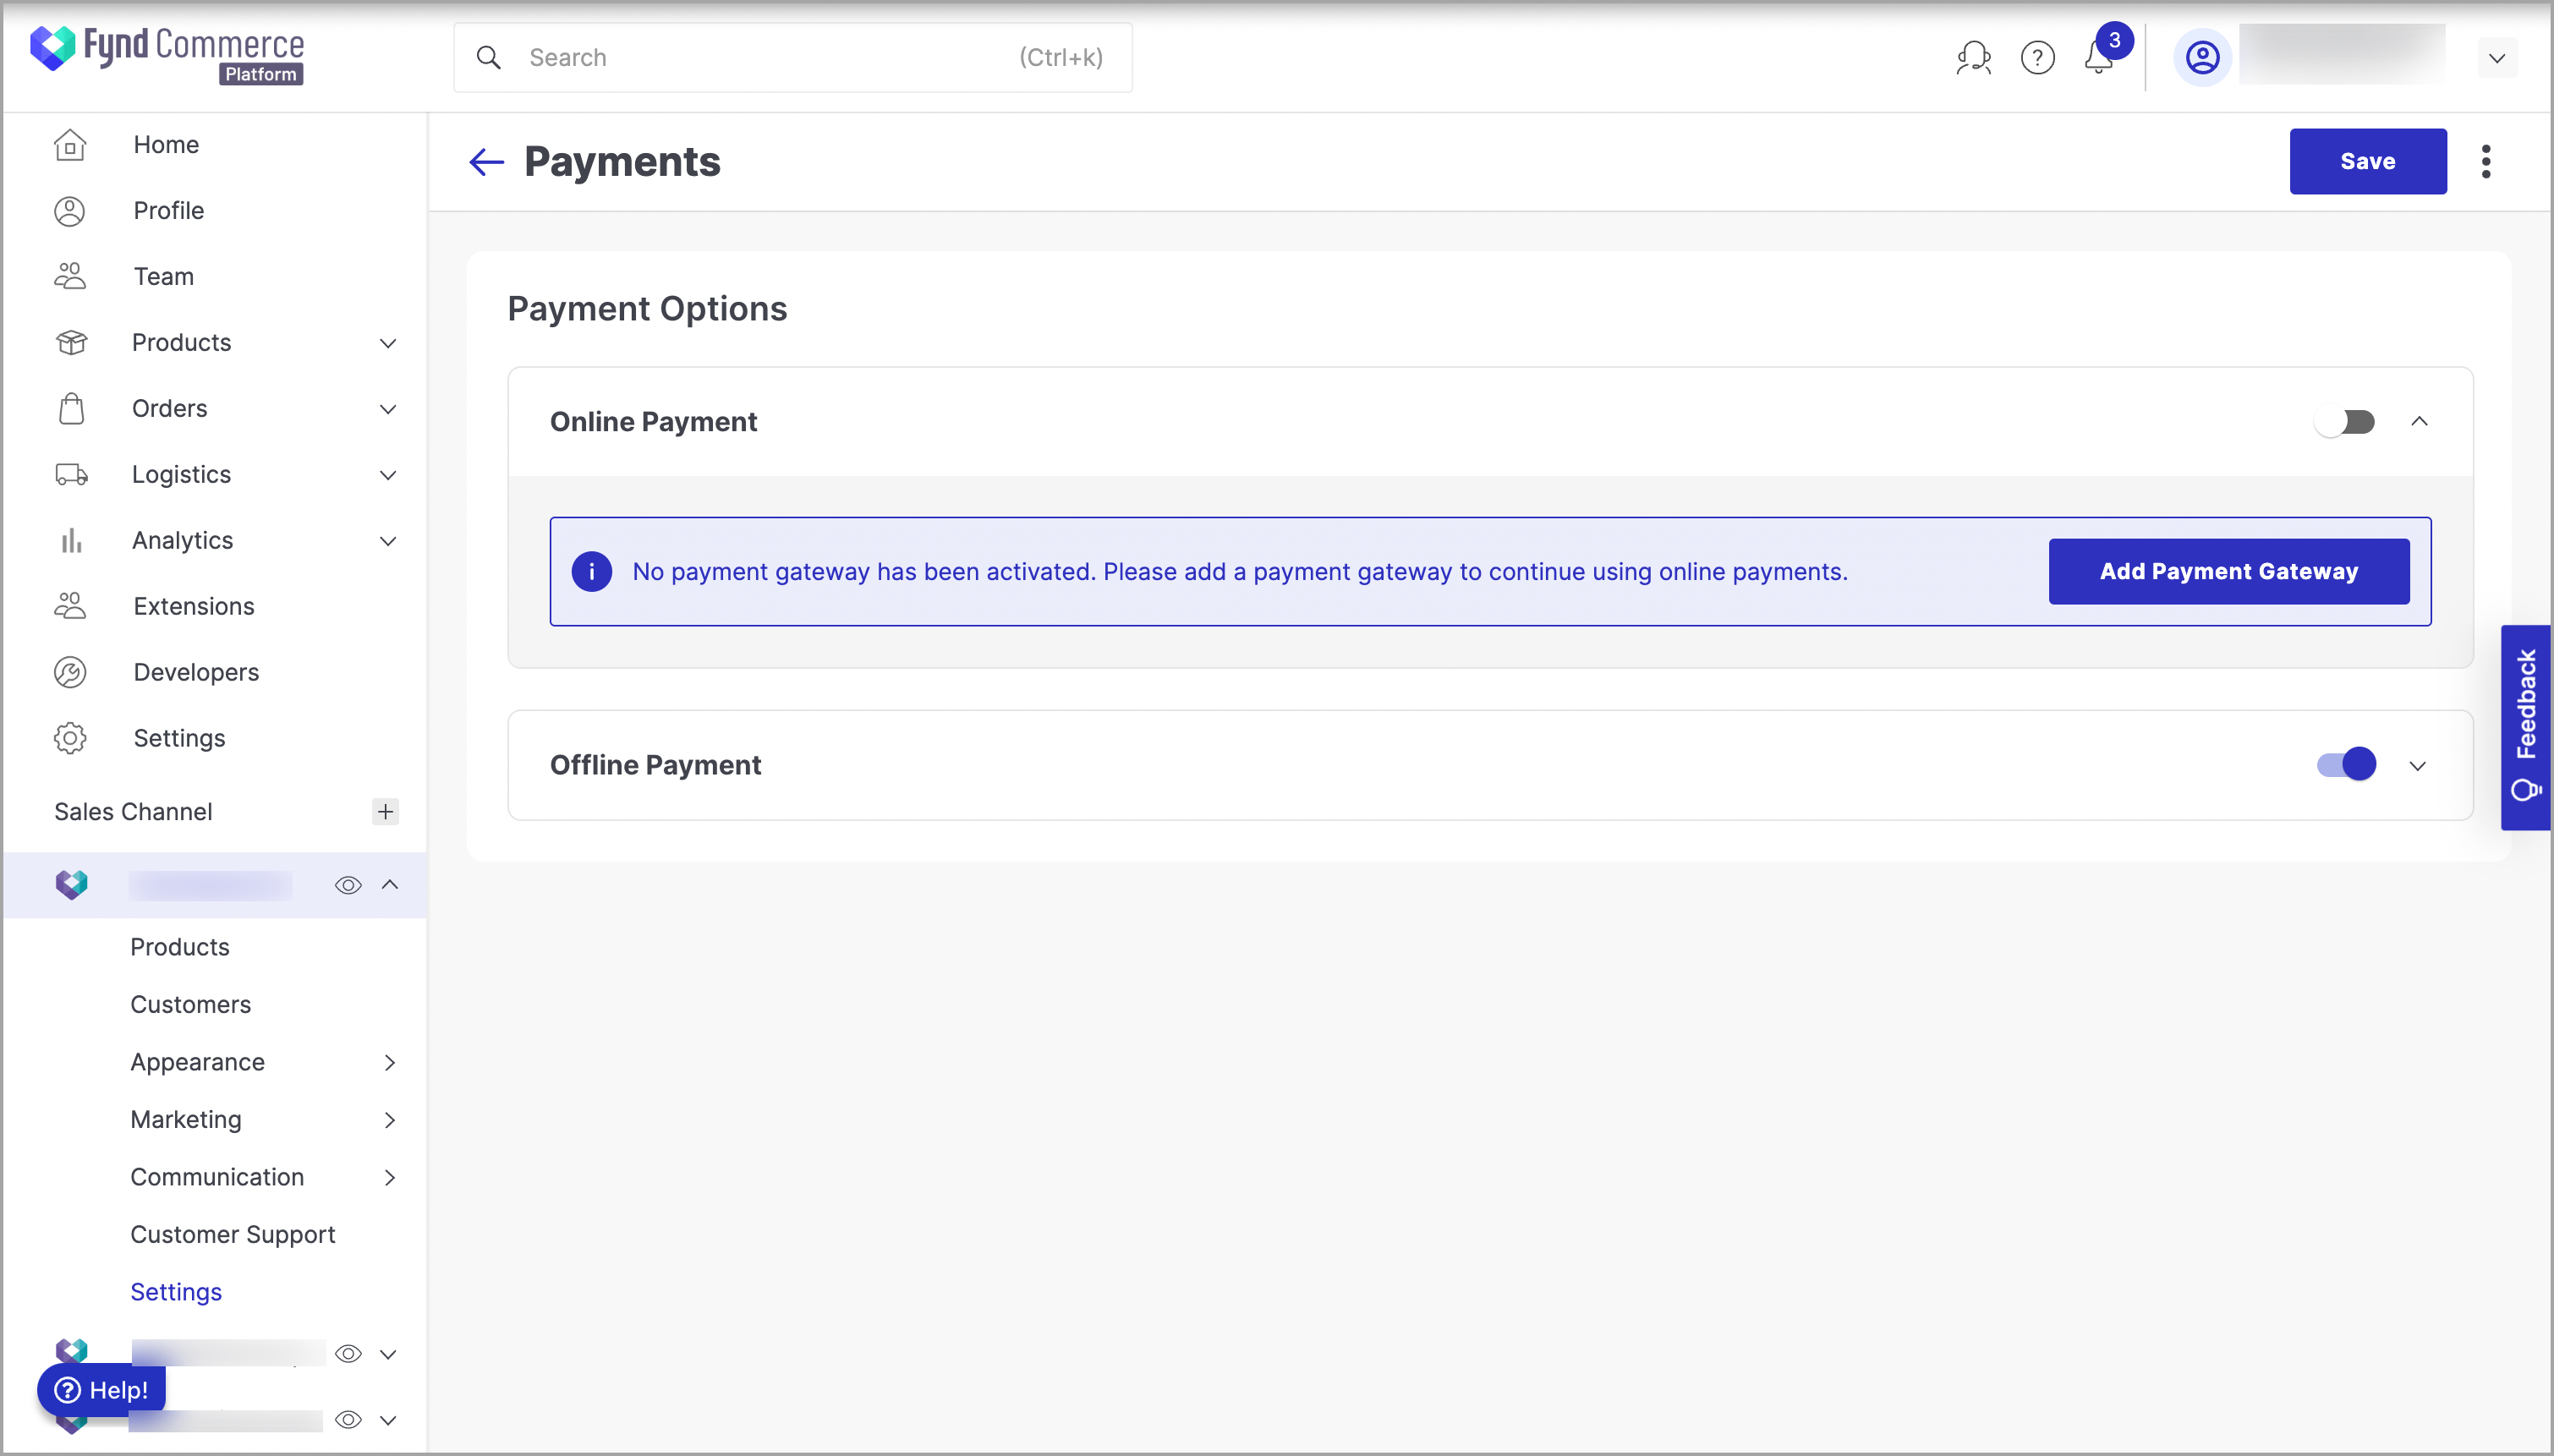
Click Add Payment Gateway.

Figure 3: Clicking Add Payment Gateway
-
Click Razorpay.

Figure 4: Clicking Razorpay
-
Choose Assisted Merchant Account.

Figure 5: Choosing Assisted Merchant Account
-
Click Proceed. You will be directed to the Razorpay login dashboard.
-
Click Login to navigate to the login page of the Razorpay account. OR If you do not have Razorpay account, click Create Account to create a new account. Refer to Create Account for more details.

Figure 6: Razorpay Login Page
-
Enter credentials to login. Here, we have selected Login.
-
Click Authorize. Your Razorpay account will get connected to the Fynd Commerce Platform and you will get redirected to the Fynd Commerce panel.

Figure 7: Authorizing to Add Razorpay PG
-
Go back to your Razorpay Payment configuration.

Figure 8: Navigating to the Razorpay Payment Configuration
-
In the upper-right of the window, slide the Active toggle to the right to activate the PG.
This will only activate the options selected in the Business Unit (Storefront or POS) and Device (Website, iOS, or Android, and Payment link) dropdown list. You need to follow this step for all the required Business Unit and Device combinations.
![]()
- Choose the desired business unit and device.
- Navigate to the required MOP that you need to activate (such as card, net banking, and UPI).
The card tokenization and card vault services should be enabled in your Razorpay MID to allow customers to tokenize their card details and save tokens for faster card payments in future transactions.
![]()
15. Click Active.
MOP like Net Banking can have multiple Sub-MOPs. You can open such MOPs to activate Sub-MOPs in it.
Make sure you only activate those payment options that are enabled in your Razorpay MID.
- Click Save to save the changes.
- Provide your confirmation to save the changes.
Own Merchant Account
Do the following steps to add Razorpay to the sales channel:
- Collect your API Key and API Secret from your Razorpay account Dashboard. Click here to understand how to get these credentials.
- Setup Webhook as following in Razorpay dashboard:
- Click here to understand how to setup webhook.
- Enter the following URL as Webhook URL in the Razorpay Webhook setup process:
https://api.fynd.com/service/webhooks/payment/v1.0/events/razorpay - Add a webhook secret of your choice and save it for later use.
- Make sure that the following events are selected:
- payment.authorized
- payment.failed
- payment.captured
- refund.processed
- refund.failed
- refund.created
-
On your Fynd Commerce Panel, navigate to the Sales Channel > Setting > Cart & Payments > Payments.

Figure 12: Sales Channel Setting
-
Click General Settings.

Figure 13: Payments Page
-
Click Add Payment Gateway.

Figure 14: Clicking Add Payment Gateway
-
Click Razorpay.

Figure 15: Clicking Razorpay
-
Choose Own Merchant Account.

Figure 16: Choosing Own Merchant Account
-
Click Proceed.
-
Enter the Key, Secret, and Webhook Secret collected from the Razorpay dashboard as described in step-1 and step-2.

Figure 17: Clicking Proceed
-
Click Save.
-
Provide your confirmation to save the changes.
-
Go back to your Razorpay payment configuration.

Figure 18: Navigating to the Razorpay Payment Configuration
-
Choose the desired business unit (Storefront or POS) and device (Website, iOS, or Android).
This will only activate the options selected in the Business Unit (Storefront or POS) and Device (Website, iOS, or Android, and Payment link) dropdown list. You need to follow this step for all the Business Unit and Device.
![]()
- In the upper-right side of the window, slide the Active toggle to the right to activate the PG.
- Navigate to the required MOP that you need to activate (such as card, net banking, and UPI).
The card tokenization and card vault services should be enabled in your Razorpay MID to allow customers to tokenize their card details and save tokens for faster card payments in future transactions.
Before activating the QR payment method, make sure it is enabled in your Razorpay account. If not, raise a request to Razorpay support to enable it in your account and then enable it in your sales channel on the Fynd Commerce.
-
Click three dots (
⋮) to the right of MOP.
Figure 20: Clicking three dots (⋮)
-
Click Active.
MOP like Net Banking can have multiple Sub-MOPs. You can open such MOPs to activate Sub-MOPs in it.
Make sure you only activate those payment options which are enabled in your Razorpay MID.
- Click Save to save the changes.
- Provide your confirmation to save the changes.