Creating Product Catalog
How to create a Catalog
- Login to the Myntra Partner Portal and navigate to Catalog Management > Cataloging > Download DIY Template.
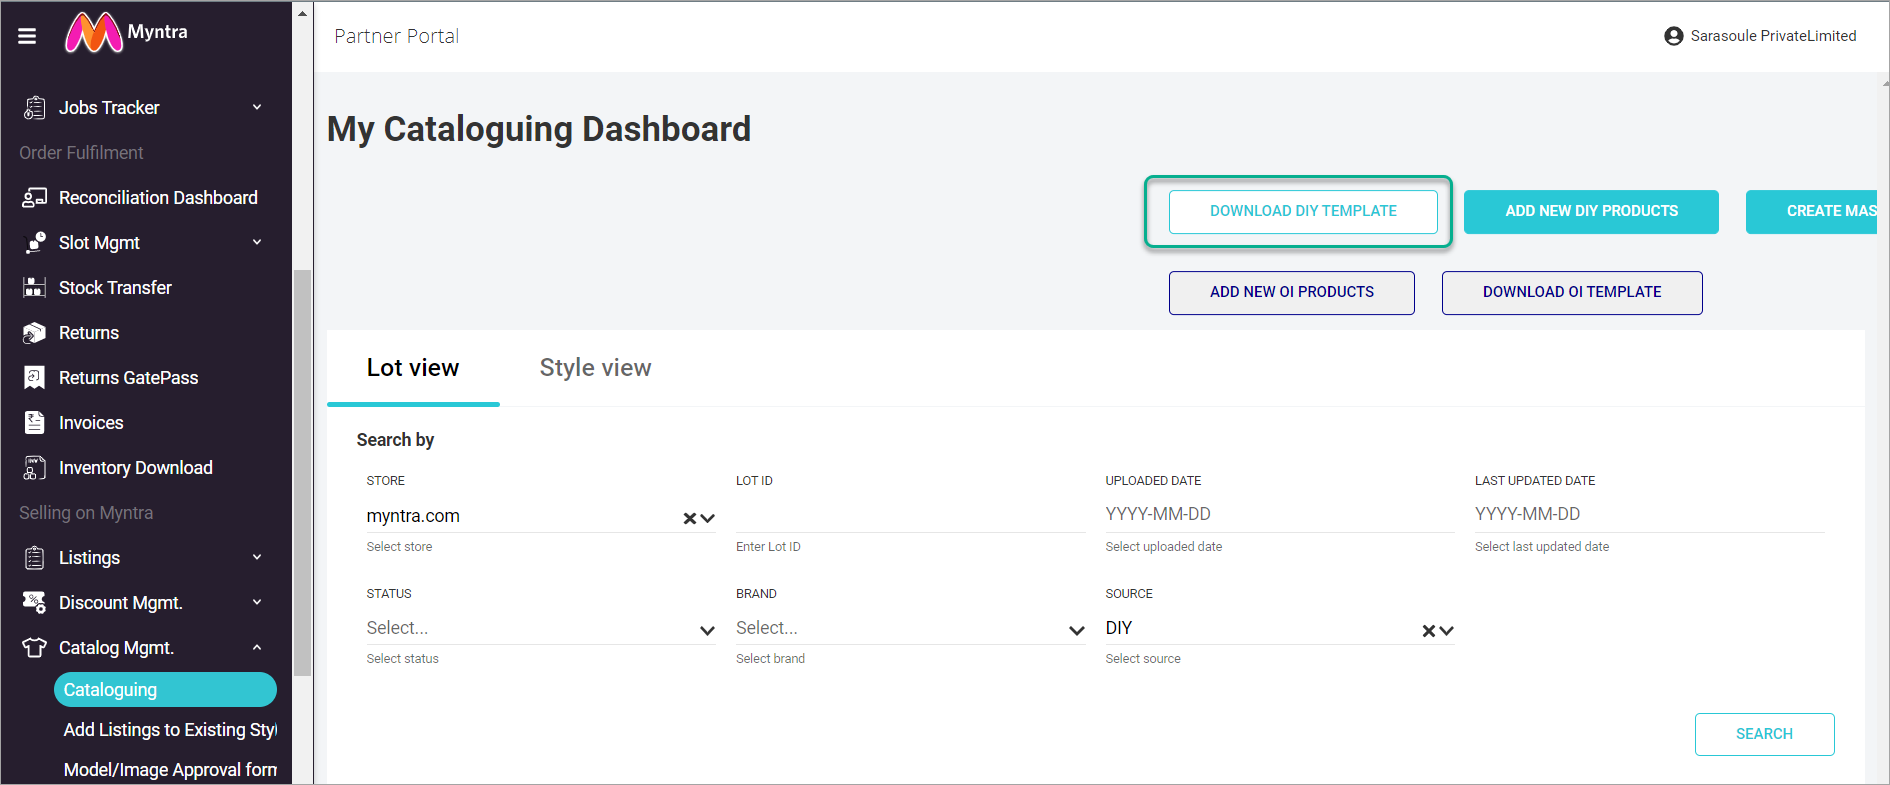
- Select the template that you want and click Download Template.
.png)

- Fill in the required fields in the template and once complete, click Add New DIY Products. A pop-up window will appear where you will have to upload the attribute sheet (template that you downloaded).
.png)
.png)
-
Once you have attached the sheet and selected the Store and Studio, click on Add Products.
-
A draft lot will be created under the Lots in Draft tab with the status as PARTNER_DRAFT.
.png)
- To complete the DIY Request, click the View Details button.
.png)
- After clicking View Details, you will need to upload the images. Click Upload to add images (min 5, max 7) for each VAN.
.png)
- Click on Submit once you have uploaded the images. In case you want to do a bulk upload instead of adding images for each VAN, you can click on Upload Image Folder.
.png)
.png)
- You will need to do the following to complete this step.
- Create a folder with the name target.
- Inside the target folder, create subfolders named after your VAN.
- Inside the VAN folders, add images corresponding to the VAN.
- Select the target folder while uploading the images.
-
Once you have added the images, click Submit.
-
After clicking Submit, the draft will move to the Lots in Progress tab. You can view the status by going to the tab.
-
The status will change to CATALOG_IN_PROGRESS . To check the details at any stage, click on View Details.
.png)
Lot Rejected
- If for any reason the lot gets rejected, you can re-submit the rejected styles. To view the rejection reason, click on View Details.
.png)
- You can click on the status to see the reason for rejection.
.png)
.png)
- Refer to the instructions for re-submission. Styles re-submitted after rectification will directly move to the Re-Manual QC stage.
Styles rejected for article type change must be submitted via a new lot and not via re-submission
-
If the lot is rejected due to an image issue, you will need to re-upload image links to the downloaded attribute sheets as per the rejection reason.
-
You will need to go to the Image Uploader section on the partner portal and upload the corrected attribute sheet.
Styles Going Live
Once the cataloging is complete, the styles will be made live. The Catalog Style Status for each active style will be shown as P under the View Details section of the lot.
.png)
Once the style is marked P, you can provide the Seller Approval on the partner portal and then Upload Inventory.
Seller Approval
-
To provide the ‘Seller Approval’, navigate to My Listings > Platform Sellers and you can see the styles in the Pending tab.
-
Click on Apply without selecting any filters in the Search By tab.
.png)
-
Select the styles that you want to approve by ticking the checkboxes.
-
Click on Change Seller Approval to approve your style.
.png)
- In the dropdown, select Approved and then click OK.
.png)