Add Flipkart
There are 2 options: Flipkart and Flipkart Assured. If you select Flipkart, the delivery is done by Flipkart. Whereas in Flipkart Assured, the entire responsibility of processing and delivery is with Fynd.
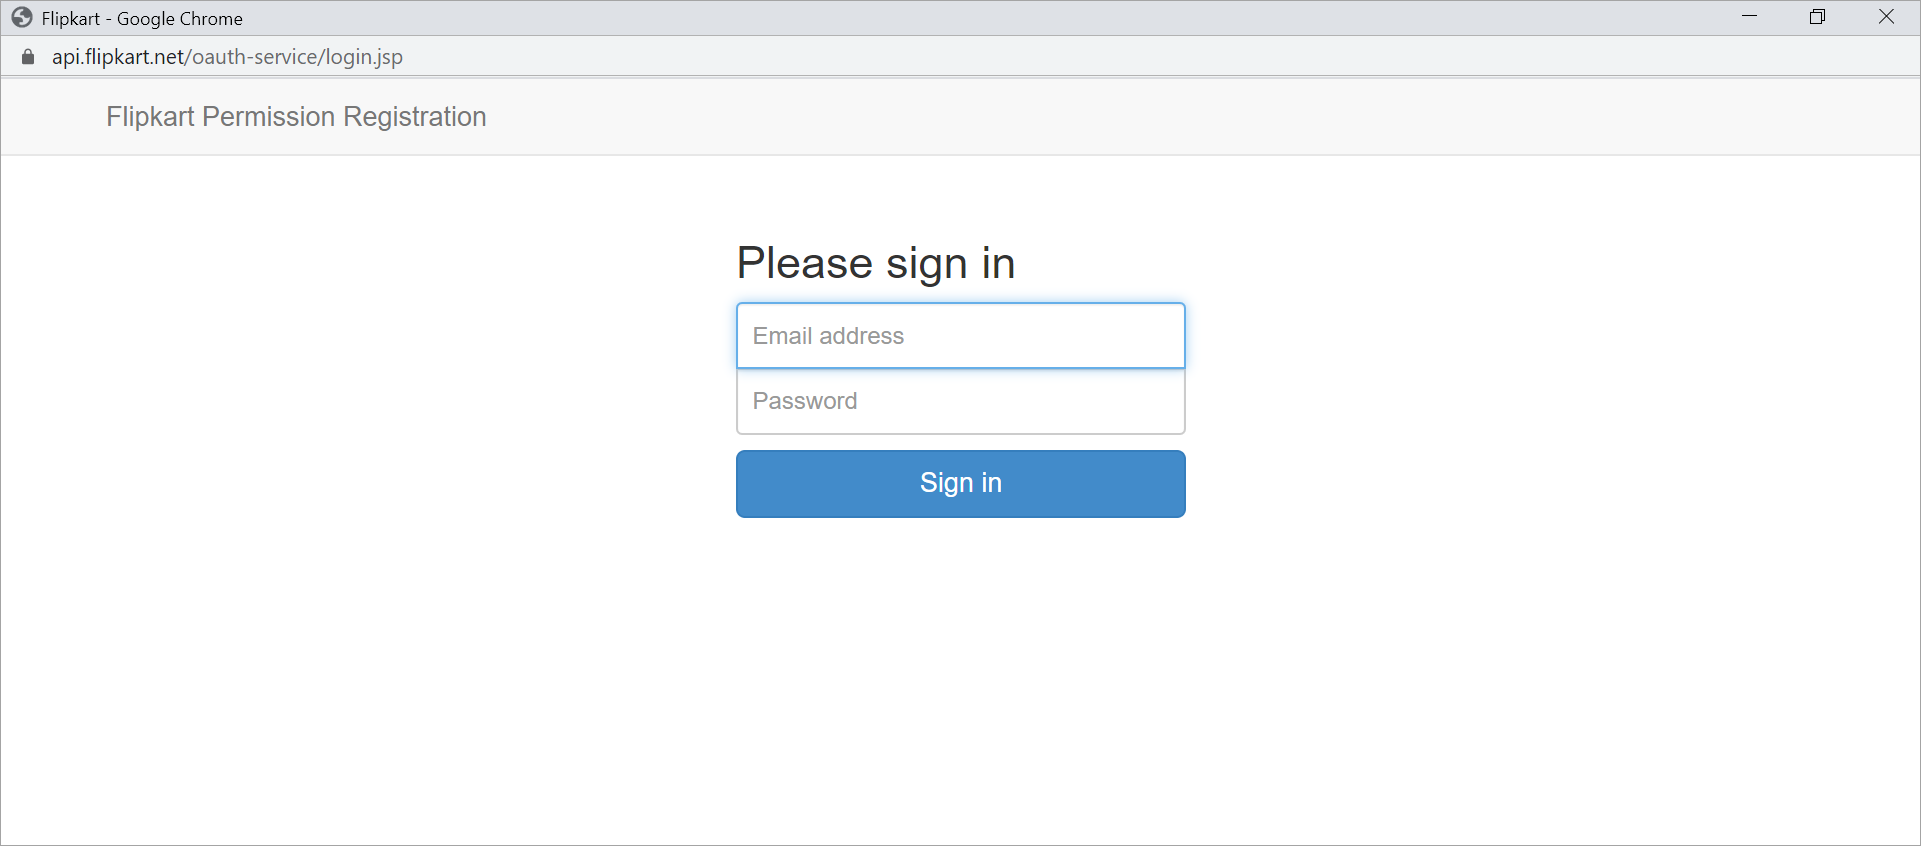
- Click the Add Flipkart button.
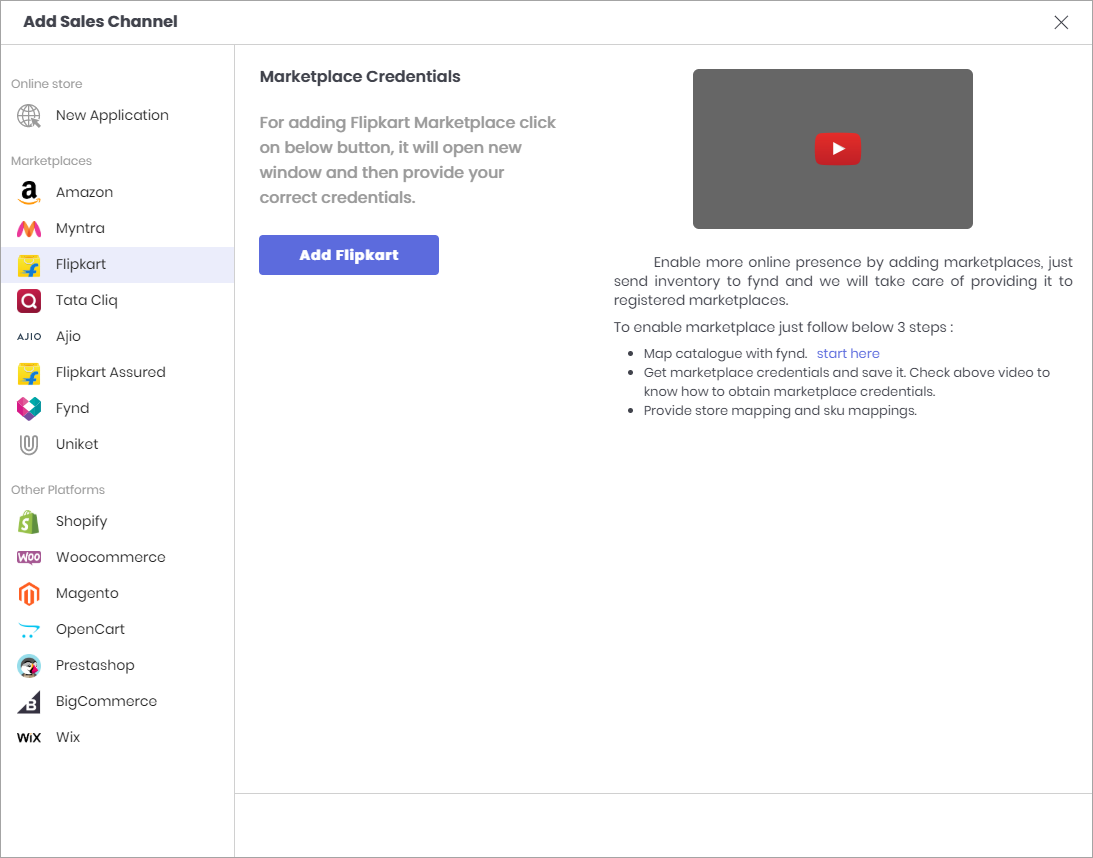
- Enter your Flipkart marketplace credentials.
- After a successful login, the Flipkart marketplace will be added in the list of sales channels. As shown below, you will have to get the following sections for Flipkart marketplace:
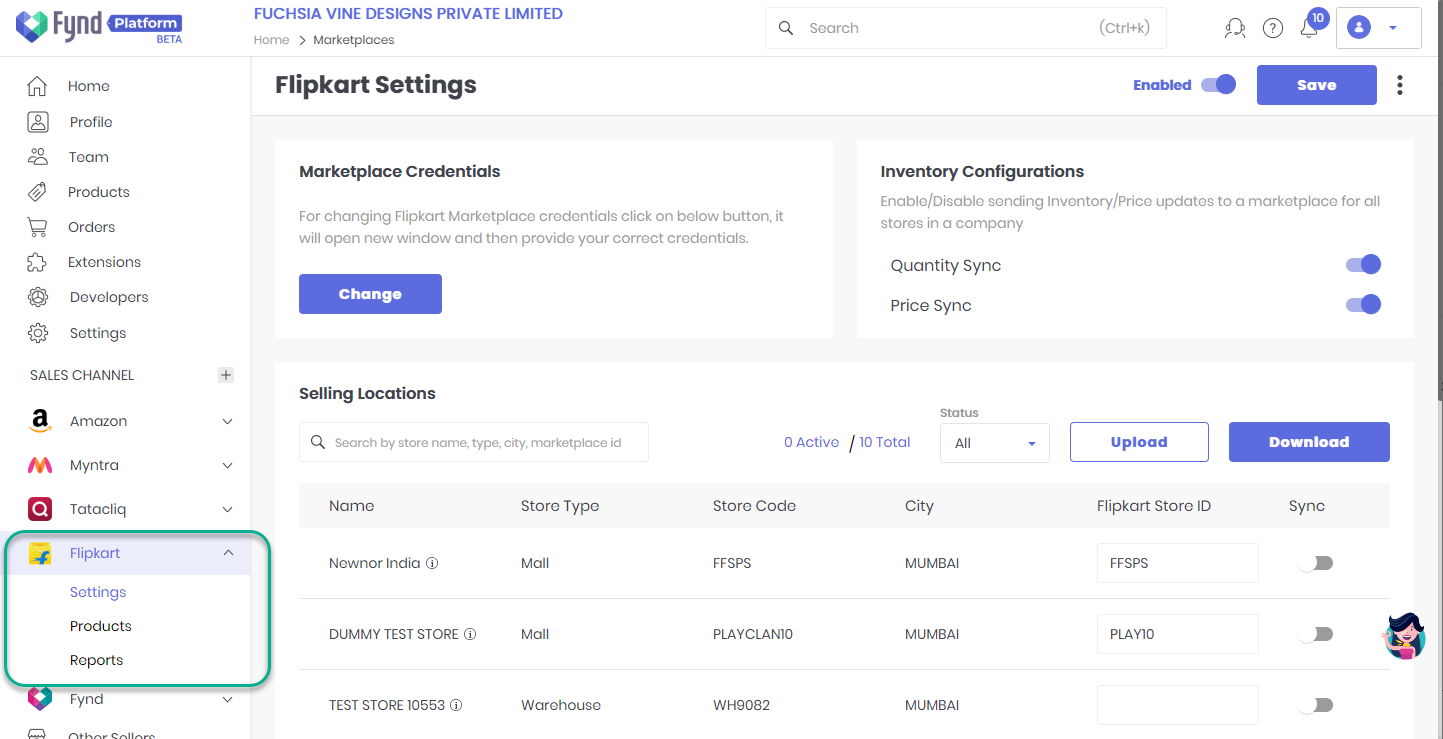
Flipkart Settings
You will get the settings page for enabling the Flipkart marketplace.
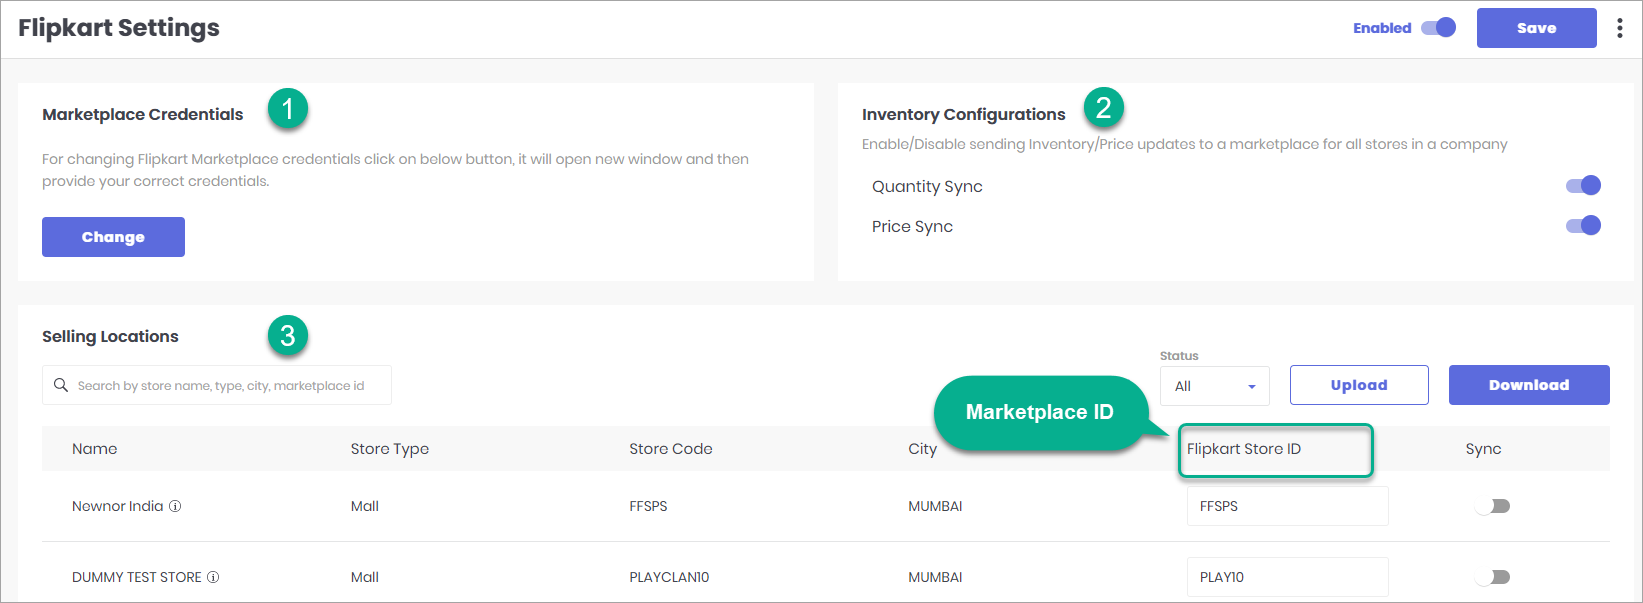
- Marketplace Credentials: Here you can change the credentials provided by Flipkart, which you used for login.
- Inventory Configurations: You can use this if you wish to automatically send your inventory and price updates to Flipkart.
- Quantity Sync: Enable this to sync the quantities of all your products with Flipkart. Let's say, the quantity of a t-shirt is 25 nos as per your inventory on Fynd Platform, the same quantity (25) will be displayed on Flipkart.
- Price Sync: Enable this to sync the price of all your products with Flipkart, e.g., price of a t-shirt is ₹299 as per your inventory on Fynd Platform, the same price (₹299) will be displayed on Flipkart.
Inventory sync is automatic. However, if you feel that your inventory updates aren't reflecting on Flipkart, you can manually trigger the sync by clicking the 'Kebab' menu as shown below.
- Selling Locations: Here, you can map your selling locations with those at Flipkart. You can view a list of all your selling locations that you have registered on Fynd Platform. The data of your selling locations, such as Name, Store Type, Store Code and City will be as-is on Fynd Platform. Flipkart provides you the Flipkart Store ID for your selling locations. Make sure you map the correct values while typing the marketplace ID for your respective selling locations.
As an alternative, you can use the Download option to download a CSV file, fill the seller mapping (done above) and upload it using the Upload option.
Once you have performed the seller mapping, click the Save button at the top-right corner (as shown in fig. 4).
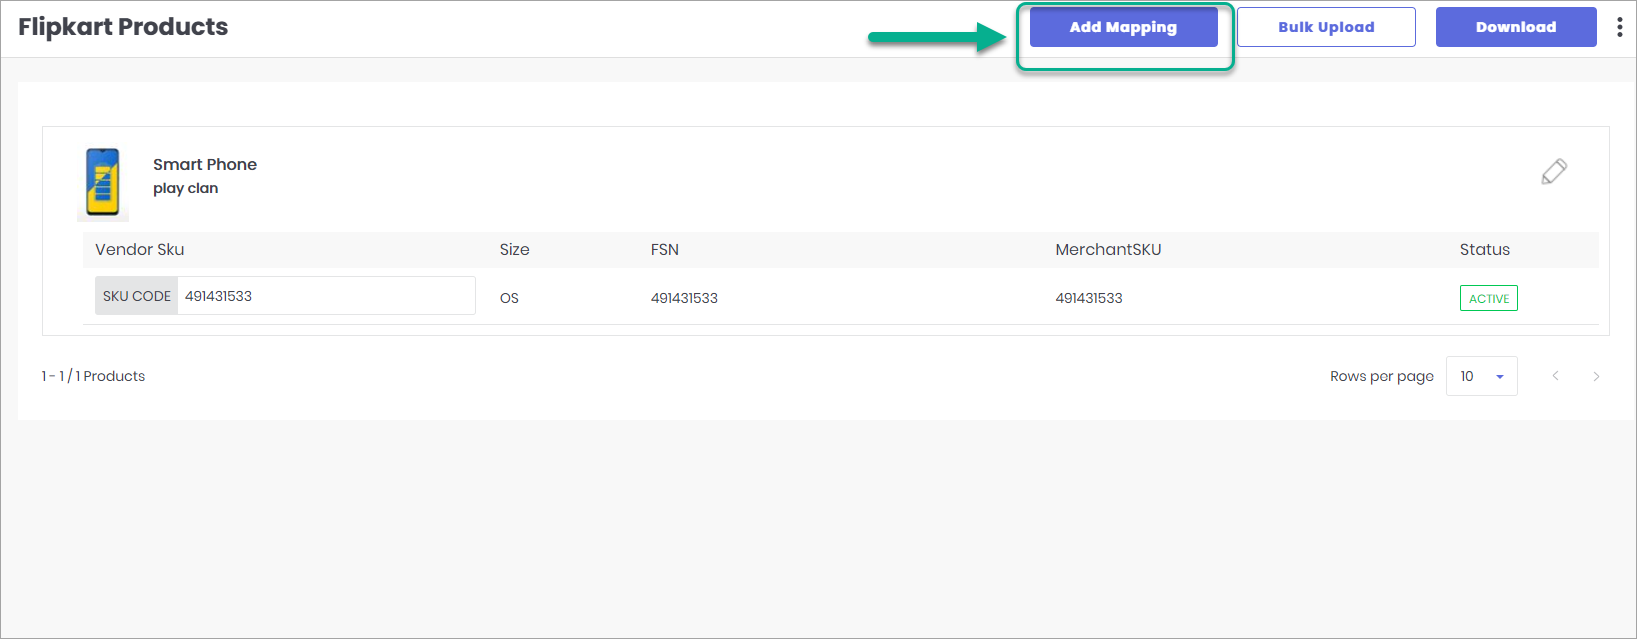
Flipkart Products
Now it's time to map your products. Click the Add Mapping button.
Search the product you want to sell on Flipkart.

Fill the Flipkart marketplace identifier: Flipkart Store ID.
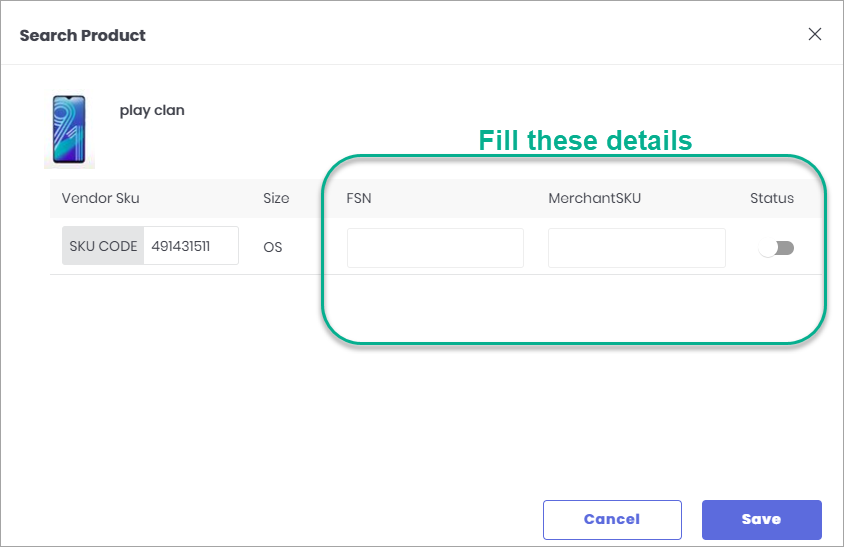
Flipkart provides you these details if you have created your catalogue on Flipkart.
- You can even activate or deactivate a product by using the toggle button.
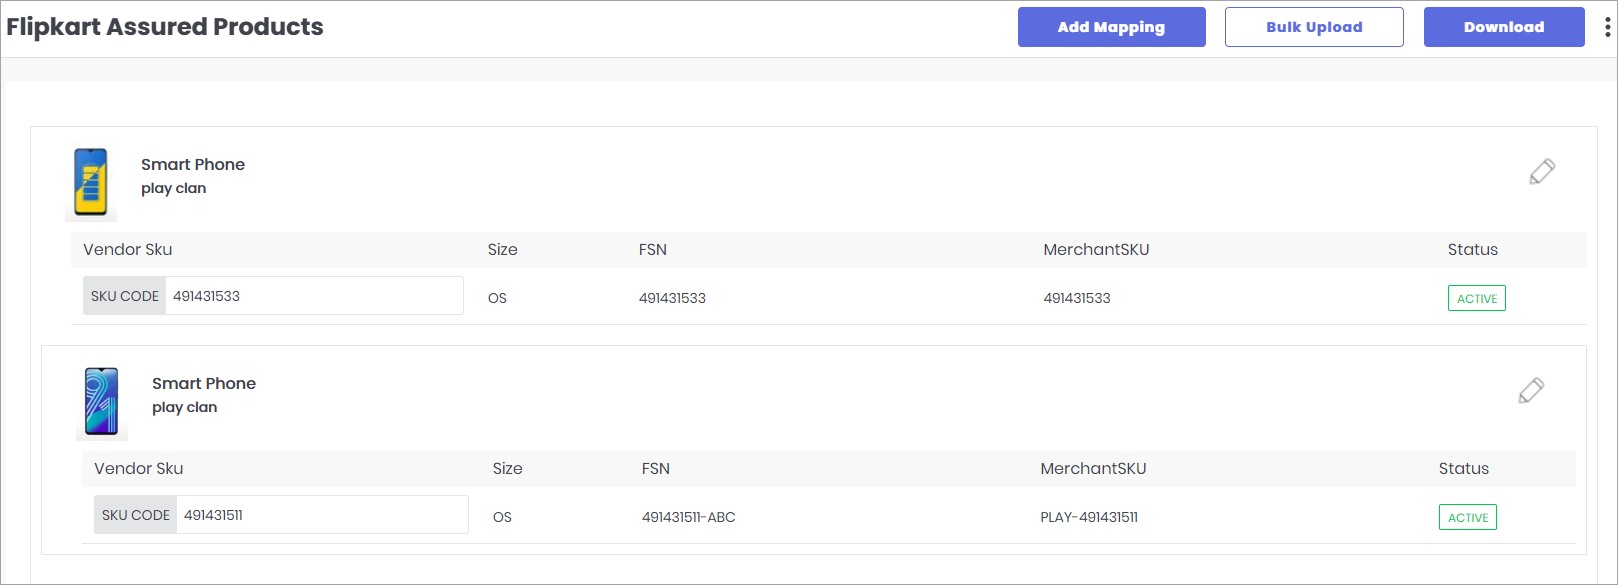
- As an alternative, you can use the **Download** option to download a CSV file, fill the product mapping (done above) and upload it using the **Bulk Upload** option.
Now, you can start selling on Flipkart!
Flipkart Reports
You can view a detailed Inventory and Order reports under the Reports section, as shown below: