A cart landing page is a webpage that appears when a user clicks on the "cart" or "checkout" button on an e-commerce website.
How to access Cart Landing page in your website?
Below are the steps to access Cart Landing page:
- Select Cart Landing from dropdown menu.
- Pop-up window appears with cart landing section.
- Customise subsections in Cart Landing page.
Below are the configurable options of the Cart Landing page:
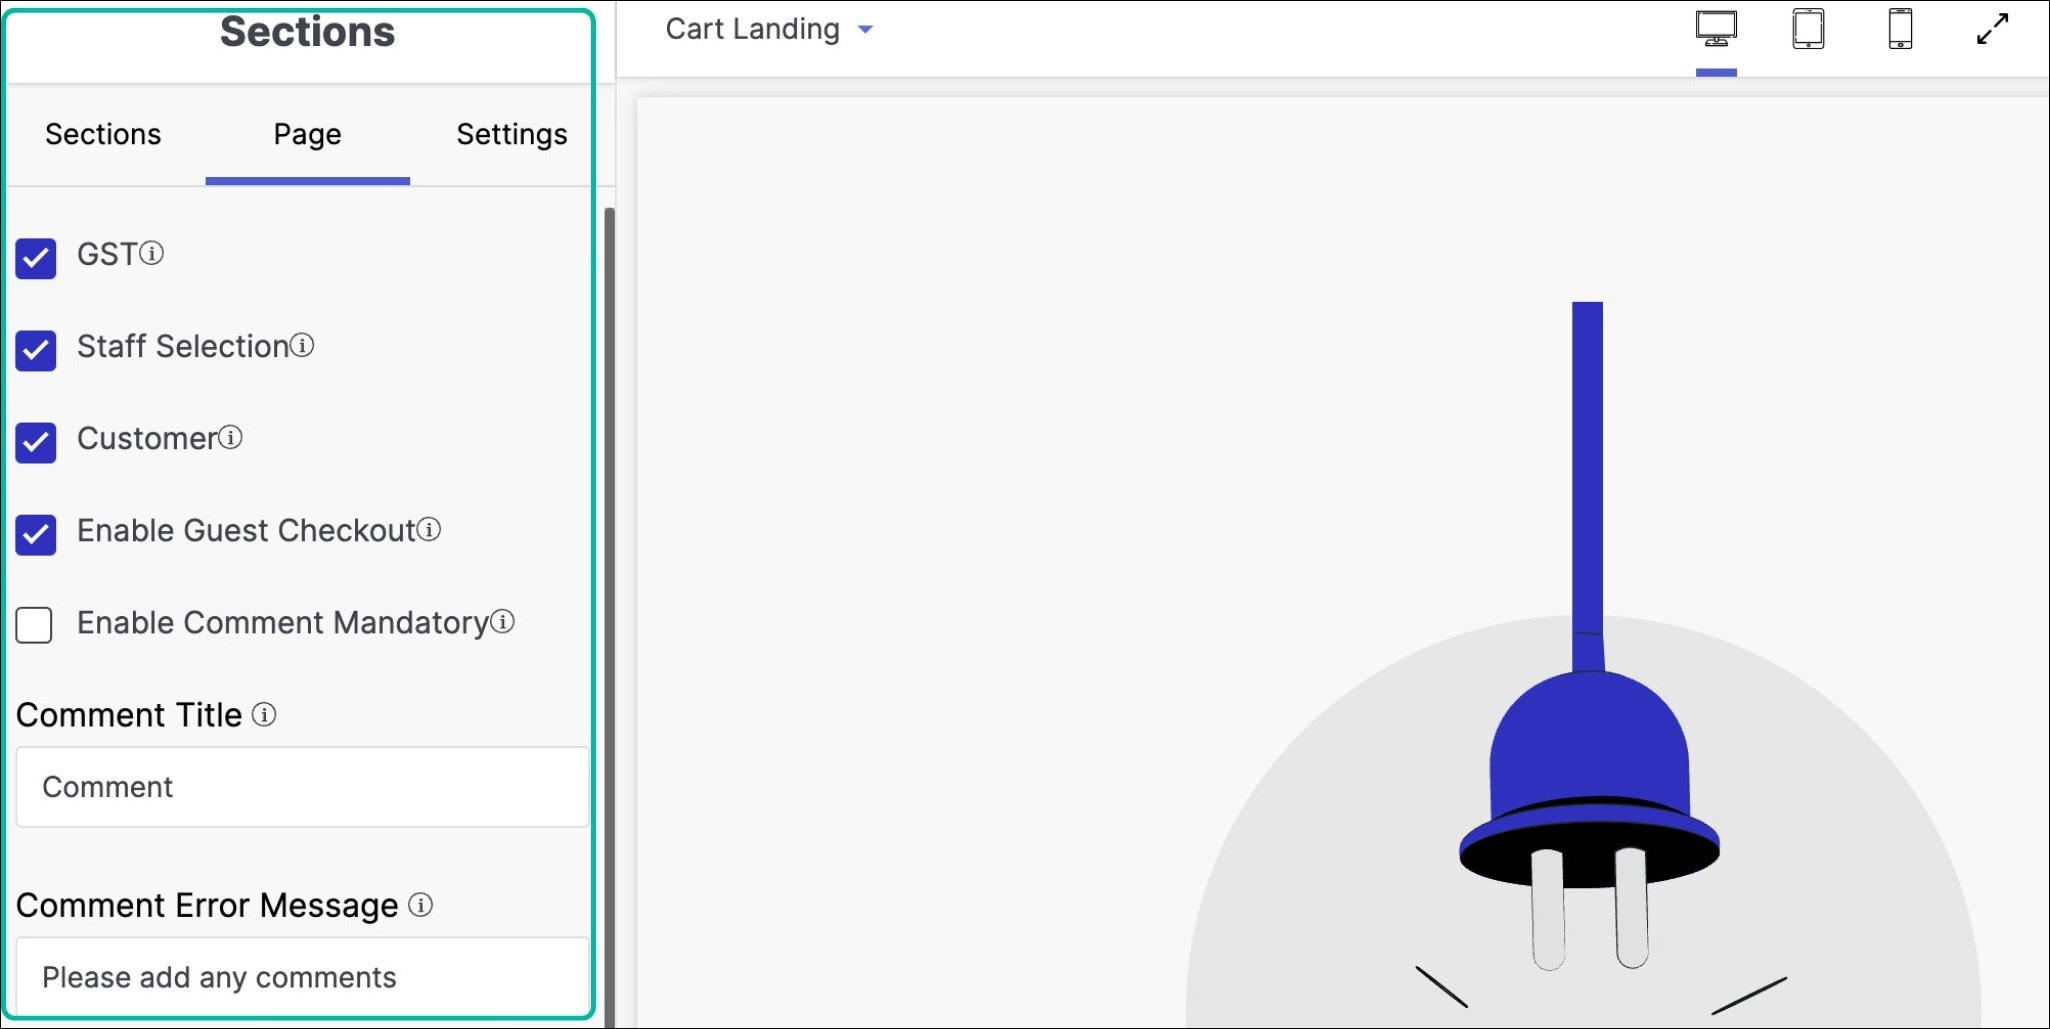
1. GST
Select GST checkbox on a cart landing page is a feature that allows users to choose whether or not to apply the Goods and Services Tax (GST) to their purchase.
Select the GST checkbox if you want to display enable the GST option on your cart page for the users.
To display the GST option on the website, you need to enable it both in the platform and the theme.
2. Staff Selection
Staff selection on a Cart Landing page is a feature that allows users to save their shopping cart for future reference or share it with other staff members. It is commonly used in e-commerce websites or B2B businesses where multiple employees may be involved in the purchasing decision-making process.
Select the Staff Selection checkbox if you want to display staff selection to the users on your cart page.
3. Customer
Placing on behalf of a customer in a Cart landing page refers to the ability of an authorised person or a customer service representative to add items to a customer's shopping cart on their behalf. It is often used in B2B or wholesale scenarios where an agent may assist a customer in placing orders.
Select the Customer checkbox if you want to enable the option of placing an order on behalf of the customer.
4. Enable Guest Checkout
Enable Guest Checkout on a cart landing page allows customers to complete their purchase without having to create an account or log in. It is a convenient option that can improve the customer experience by simplifying the checkout process and reducing barriers to purchase.
Select the Enable Guest Checkout checkbox if you want to enable the option of guest checkout for the users.
5. Enable Comment Mandatory
Enable Comment Mandatory in a cart landing page is a feature that requires customers to leave a comment or provide feedback before they can complete their purchase on the website. It is often used by online retailers to encourage customers to share their opinions, suggestions, or concerns about the product or service they are purchasing.
Select the Enable Comment Mandatory checkbox if you want to enable the option of mandatory comment for the users.
6. Comment Title
Comment Title on a cart landing page is a field where a customer can provide a short, descriptive title for any comments or feedback they want to provide about the products or the purchasing experience.
Select the Comment Title checkbox if you want to enable the option of customising comment title on Cart.
7. Comment Error Message
Comment Error Message on a cart landing page is a notification that appears when a user tries to submit a comment or message, but an error occurs.
Select the Comment Error Message checkbox if you want to enable the option of customising comment error message on Cart.
8. Share Cart
Share Cart is a feature on a Cart landing page that allows users to share their cart contents with others via a unique link. It is often used in e-commerce websites where users may want to share their shopping list with friends or family for feedback or as a gift suggestion.
Select the Share Cart checkbox if you want to allow the sharing of carts to the users.
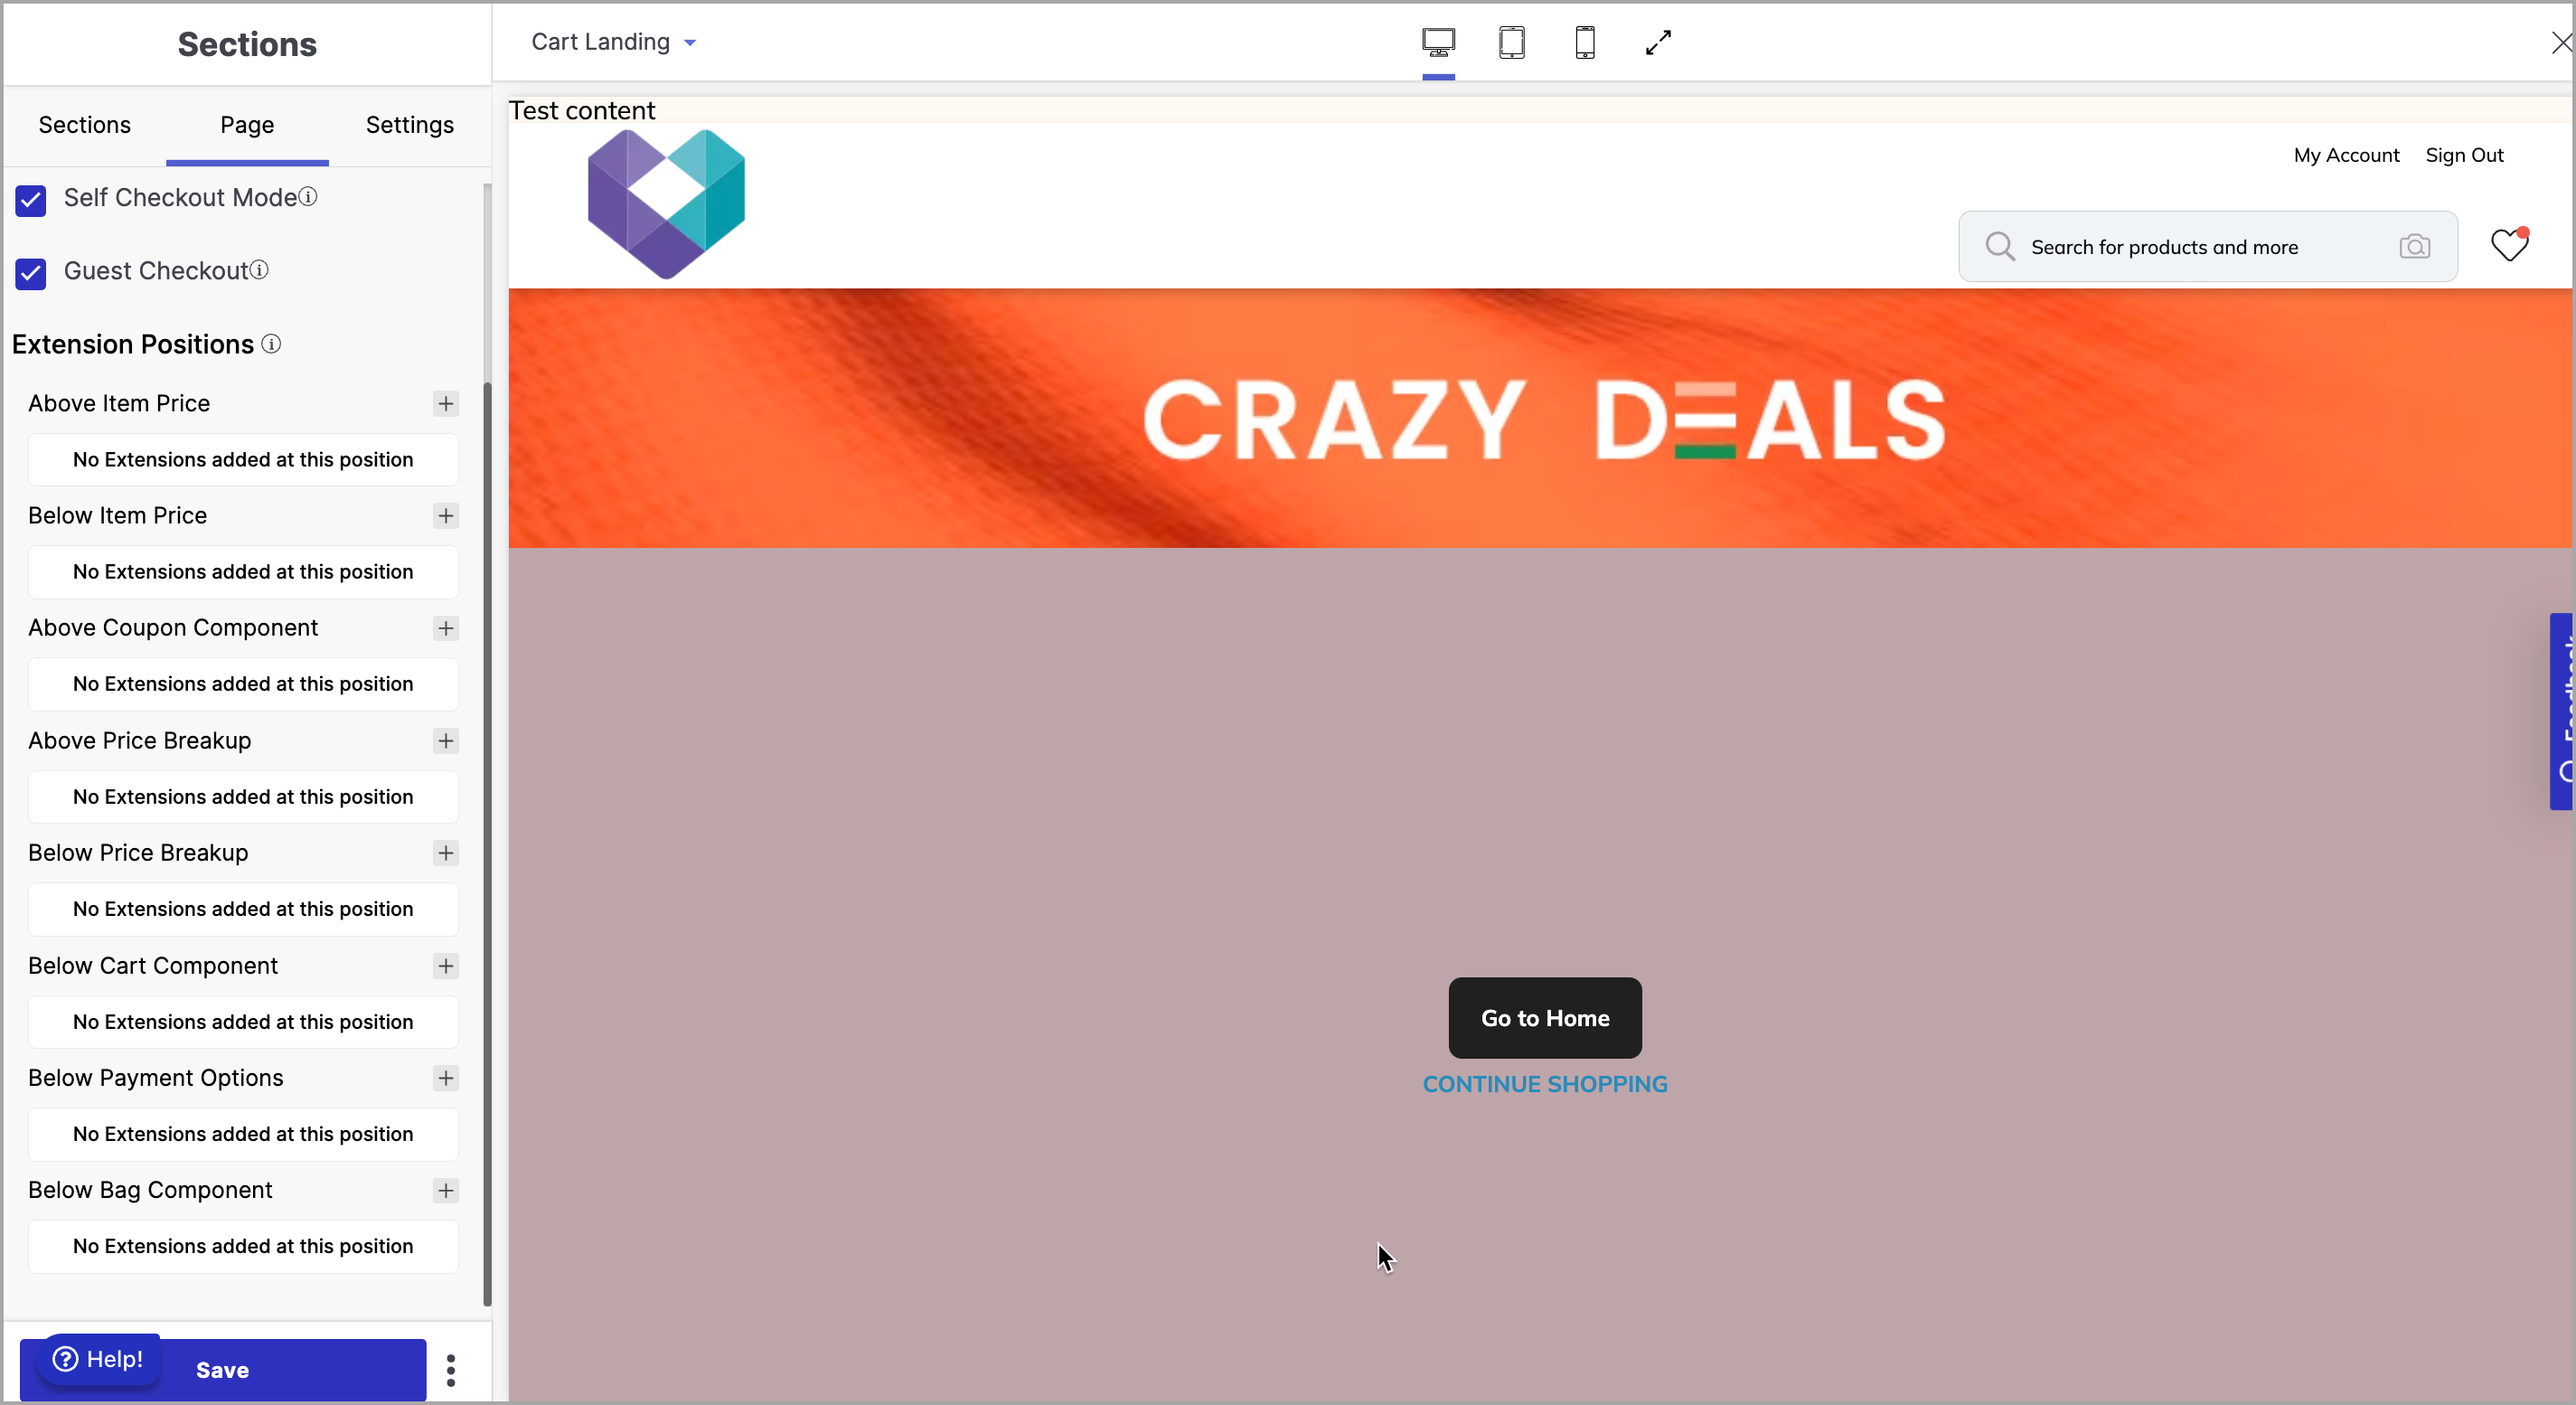
9. Self Checkout Mode
Self Checkout Mode in a Cart Landing Page is a feature that allows customers to complete their purchase without leaving the cart page. It enables customers to make necessary changes to their order, such as updating quantities, removing items, and applying promo codes, while staying on the same page.
Select the Self Checkout Mode checkbox if you want to enable self checkout mode to the users.
10. Extension Positions
The extension positions in the extension section of a website refer to the specific locations or areas on a web page where browser extensions or add-ons can be displayed or integrated.
Below the extension positions section, click on the ‘+’ button to add an extension:
- Add extension (e.g. Above Item Price, Below Item Price , Above Coupon Component, Below Price Breakup, Above Price Breakup, Below Cart Component, Below Payment Options, Below Bag Component).
- Save the added extension.
- Users can repeat the process to add other extensions.
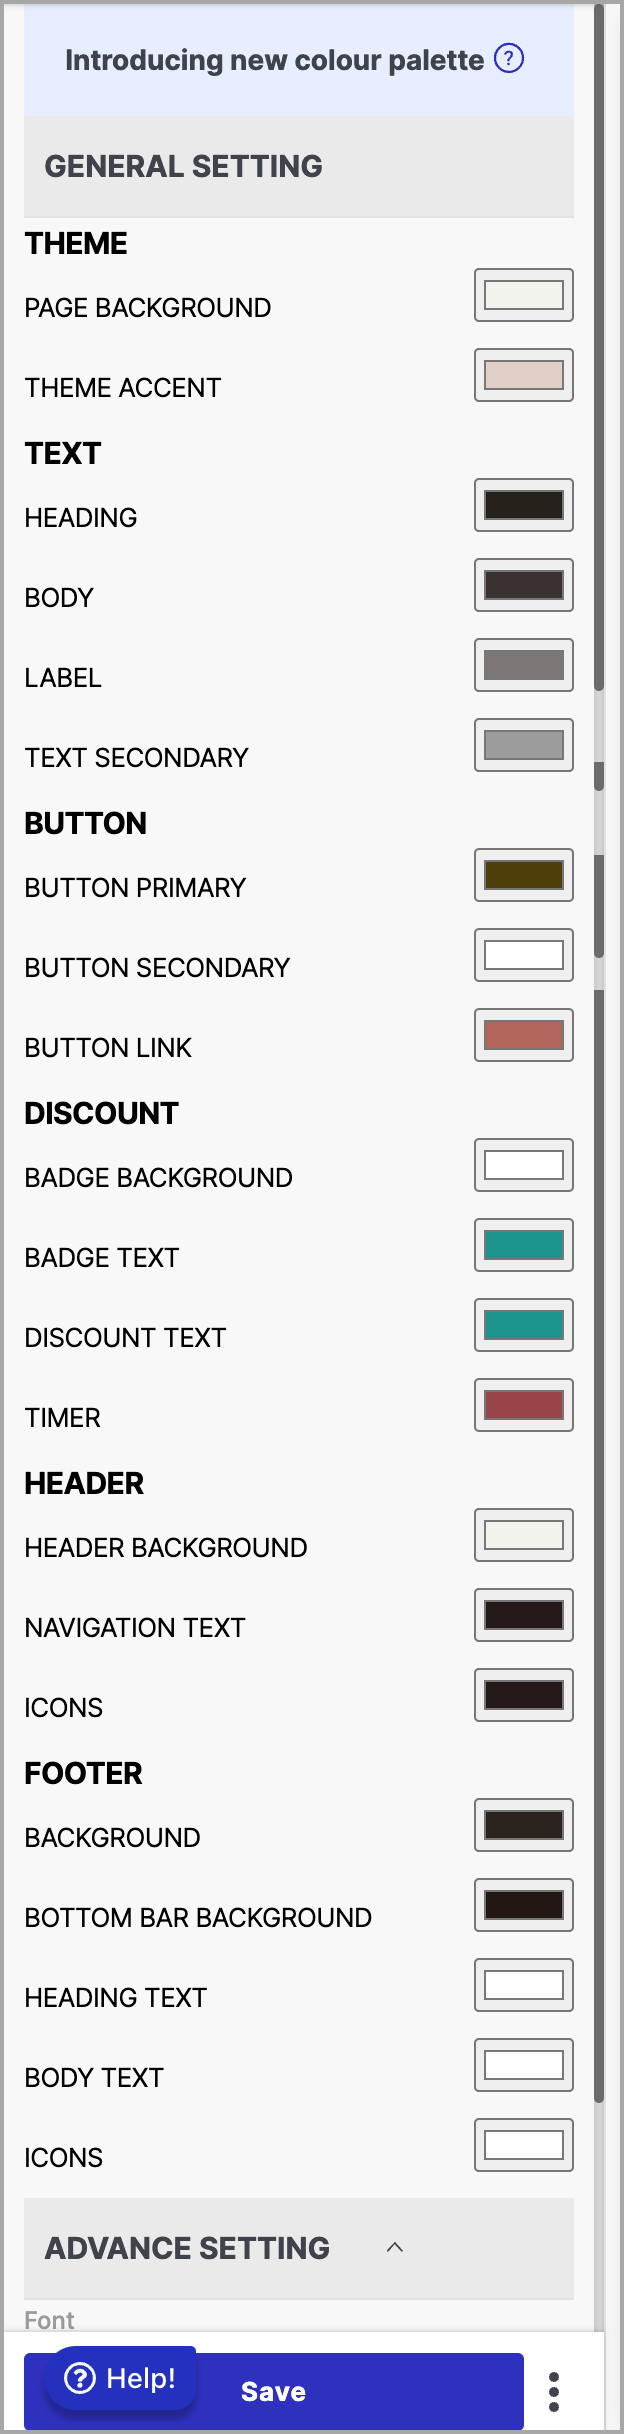
11. Colour Palatte
The seller can customize the colour palette of the Cart Landing page via the general settings of the sales channel, and this chosen colour scheme will be applied to the themes of the Cart Landing page.
- Go to Sales Channel > Appearance > Theme > Edit Theme.
- From the system page dropdown list, choose Cart Landing page.
- Navigate to Sections > Settings > General.
- Adjust the colours for various elements in the Theme/Text/Button/Discount/Header/Advance Setting sections.
- Save your changes. The selected colours will be applied to both the customer store and the theme editor as per your selection.