WhatsApp Order Notification
Introduction
The WhatsApp Order Notification extension helps in sending various order notifications to customers using the WhatsApp messaging platform. It has a trouble-free setup. It uses numerous ready-to-use WhatsApp message templates for various stages of order management system. WhatsApp order notifications work automatically once they are set up. It is simply a matter of updating the order status in the Fynd Platform, and the notifications will be sent automatically. As a result, this extension will facilitate good customer service.
- Images used in this document are only for reference and do not intend to promote any brand or company.
- Feature of WhatsApp Order Notification consent is supported in public themes such as Emerge, Grammy, Kartmax, and Whitesplash.
- Only Interakt (Haptik) and Twilio WhatsApp Business Solution Provider (BSP) integrations are supported in this extension.
Steps to use WhatsApp Order Notification Extension
-
Go to Extensions in Fynd Platform.

Figure 1: Extensions Section - Fynd Platform
-
Click WhatsApp Order Notification extension.

Figure 2: WhatsApp Order Notification Extension
noteOnce you have installed this extension, it will be available in the list here.
-
Select desired sales channel. Here, we have selected 'Swadesh'.

Figure 3: WhatsApp Order Notification Extension
-
Turn ON the toggle button to activate WhatsApp order notifications for sales channel.

Figure 4: Selecting Desired Sales Channel
In the upcoming sections, you'll learn more about various features available in WhatsApp Order Notification extension.
Analytics
Use this feature to track and analyse valuable data of WhatsApp order notifications. You can select the date range. The available parameters are explained below.
![]()
- Sent - It represents the number of messages sent to your customers.
- Delivered - It represents the number of messages delivered to your customers.
- Read - It represents the number of messages read by your customers.
- Failed - It represents the number of messages that failed to deliver to your customers.
Message Templates
Use this feature to choose message notification templates for different stages of the order journey. It contains group of events which are listed below.
![]()
- Order Cancellation - It supports the following events.
- Order cancelled by customer
- Order cancelled by admin
- Order Processing - It supports the following events.
- Out for pickup
- Out for delivery
- Online order placed
- Order delivered
- Order rejected by customer
- Order Arrived at Store
- Order Packed
- Order Picked
- Pick at store order Placed
- Order Handed Over to Customer
- Order Refund - It supports the following events.
- Refund completed
- Refund initiated
- Order Return - It supports the following events.
- Return request cancelled
- Order return initiated
- Return not accepted
- Order return accepted
- Return Dp Out for pickup
- Order delivery attempt failed
Configure a Custom Service Provider
-
Sign in to your interakt account.

Figure 7: Interakt Sign In
-
Go to Settings.

Figure 8: Clicking Settings Option
-
Copy Secret Key present in the Developer Setting section.

Figure 9: Copying Secret Key
-
Go to kebab menu
⋮present on the homepage of the extension.
Figure 10: Opening Kebab Menu
-
Go to Settings.

Figure 11: Clicking Settings Option
-
Click Service Provider.

Figure 12: Clicking Service Provider Option
-
Click Add Custom Provider.

Figure 13: Clicking Add Custom Provider Button
-
Choose a provider from the Select Provider dropdown (Refer Figure 14). Here, we have selected a 'Haptik'.
-
Paste the secret key (copied from step 3) in the API Key field (Refer Figure 14).
-
Enter a 10-digit mobile number which you had used while registering on interakt.

Figure 14: Adding Service Provider Details
-
Click Verify Account.

Figure 15: Clicking Verify Account Button
-
Click Set As Active option.

Figure 16: Clicking Set As Active Option
-
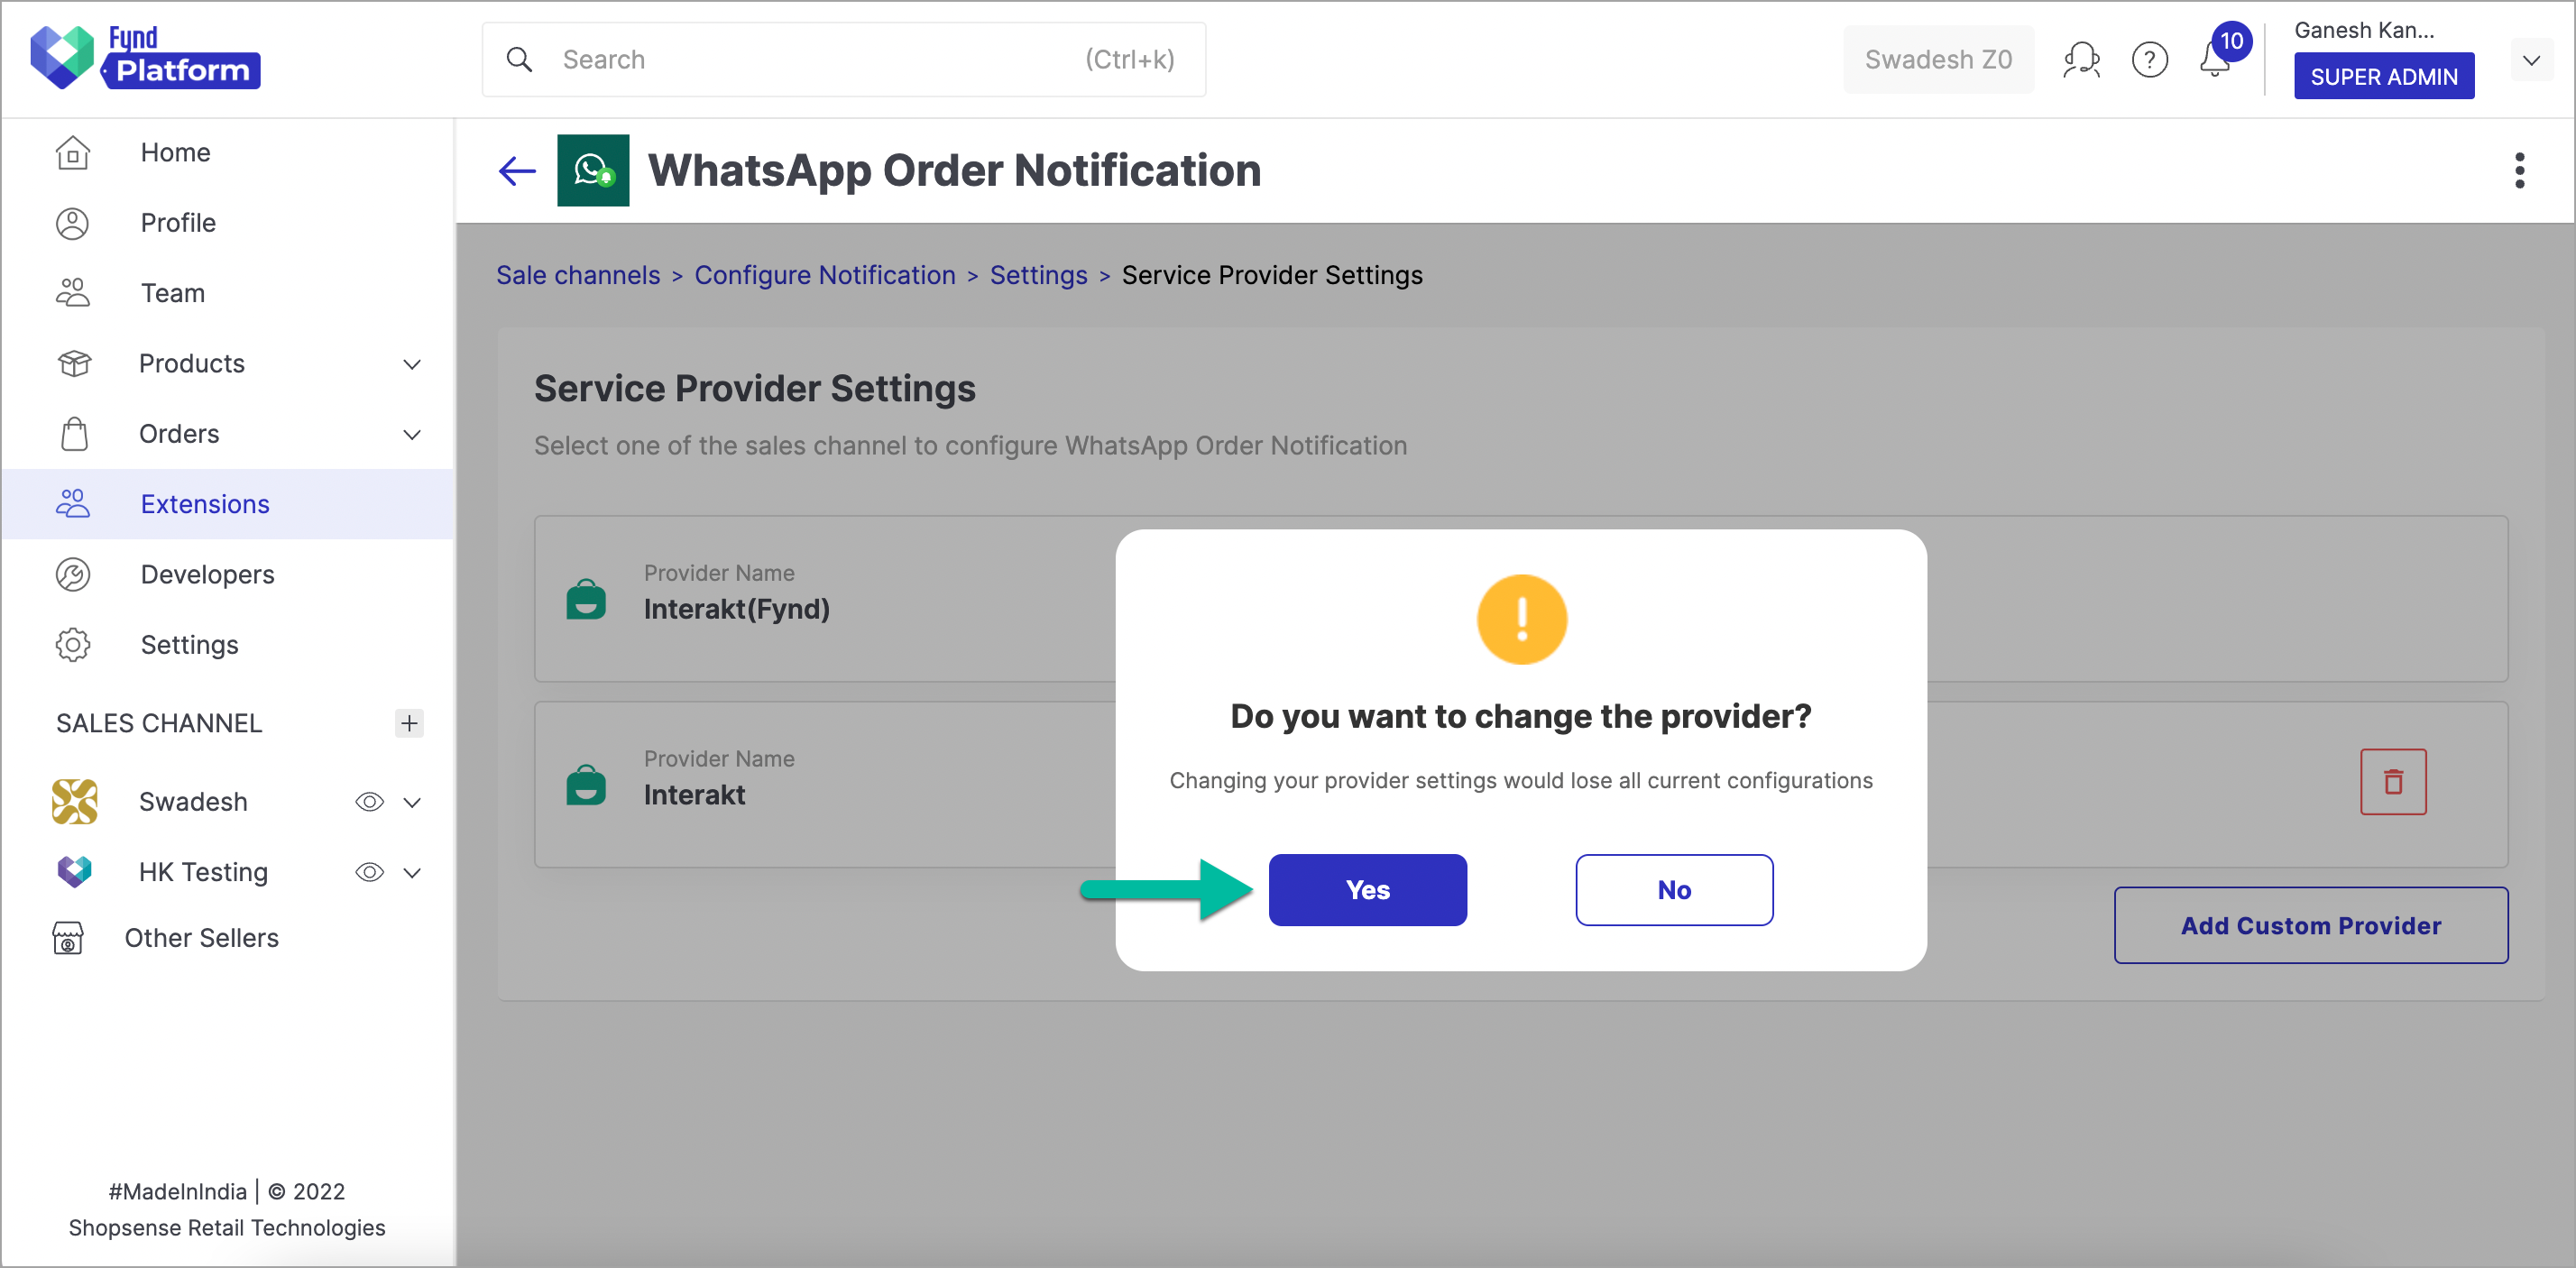
Click Yes.

Figure 17: Clicking Yes Button
In this way, your custom service provider has been activated successfully.
![]()
Add a Custom Message Template
Click here to read WhatsApp message notification template guide.
-
Sign in to your interakt account.

Figure 19: Interakt Sign In
-
Go to Templates.

Figure 20: Templates Section
-
Click Create New.

Figure 21: Clicking Create New Button
-
Enter Display Name (Refer Figure 22).
-
Select Category (Refer Figure 22). Here, we have selected 'Shipping Update'.
noteYou should select a category based on the type of message template you want to create.
-
Select Languages (Refer Figure 22).

Figure 22: Adding WhatsApp Message Template Details
-
Click Continue.

Figure 23: Clicking Continue Button
-
Enter the content for a message template in Body field.

Figure 24: Entering Message Body
-
Click Submit.

Figure 25a: Clicking Submit Button

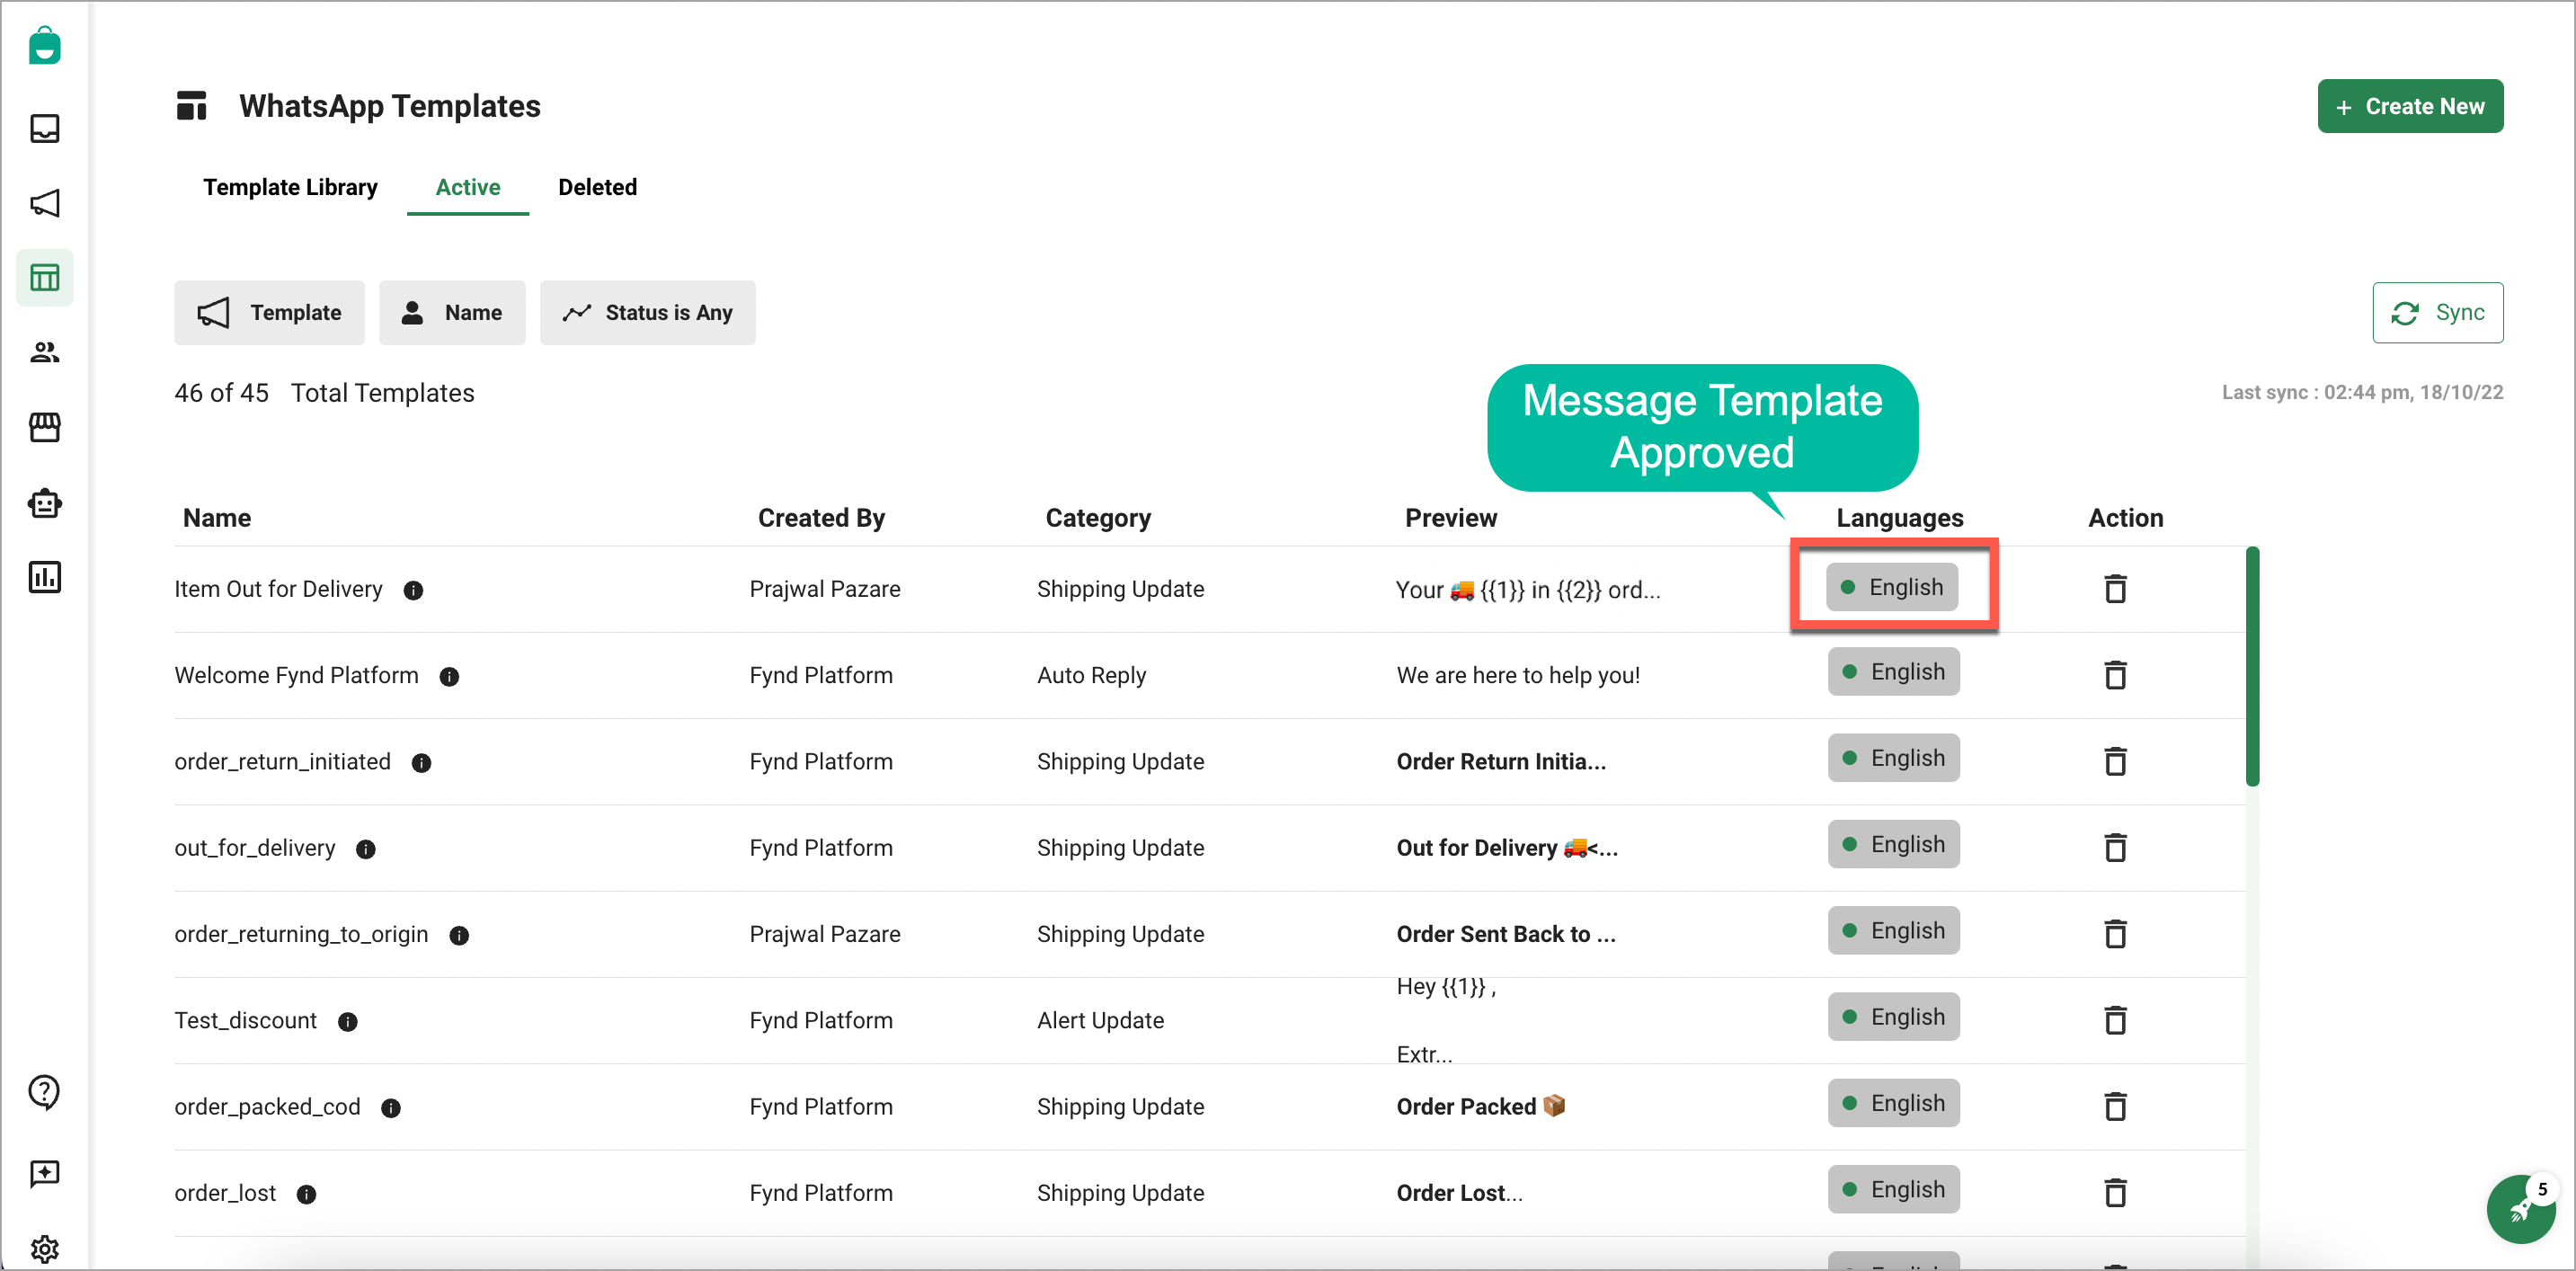
Figure 25b: Message Template Approved
Note 1It can take up to 24 hours to get your message template approved or rejected on the interakt portal. The Green indicator :large_green_circle: represents the successful approval of your message template (Refer Figure 25b above). Upon successful approval, you can add this message template to your extension.
Note 2Read Message Template Guidelines to avoid mistakes while creating message templates.
-
Go to kebab menu
⋮present on the homepage of the extension.
Figure 26: Opening Kebab Menu
-
Go to Settings.

Figure 27: Clicking Settings Option
-
Click Manage Templates.

Figure 28: Clicking Manage Templates Option
-
Click Create New.

Figure 29: Clicking Create New Button
-
Choose a template from the list available on Select Template window. Here, we have selected 'Out for delivery'.

Figure 30: Choosing Template
-
Click Select & Proceed.

Figure 31: Clicking Select & Proceed Button
-
Enter Template Name (Refer Figure 32a).
-
Paste the content of your message template (which was added in step 8 above) in Message Body field. Here, you have to replace existing variables with predefined variables of your choice (Refer Figure 32a). For e.g.,
{{1}}is replaced with{{articles}},{{2}}is replaced with{{brand}}, and so on.noteThe predefined variables are available in the block of code present on the same page.
-
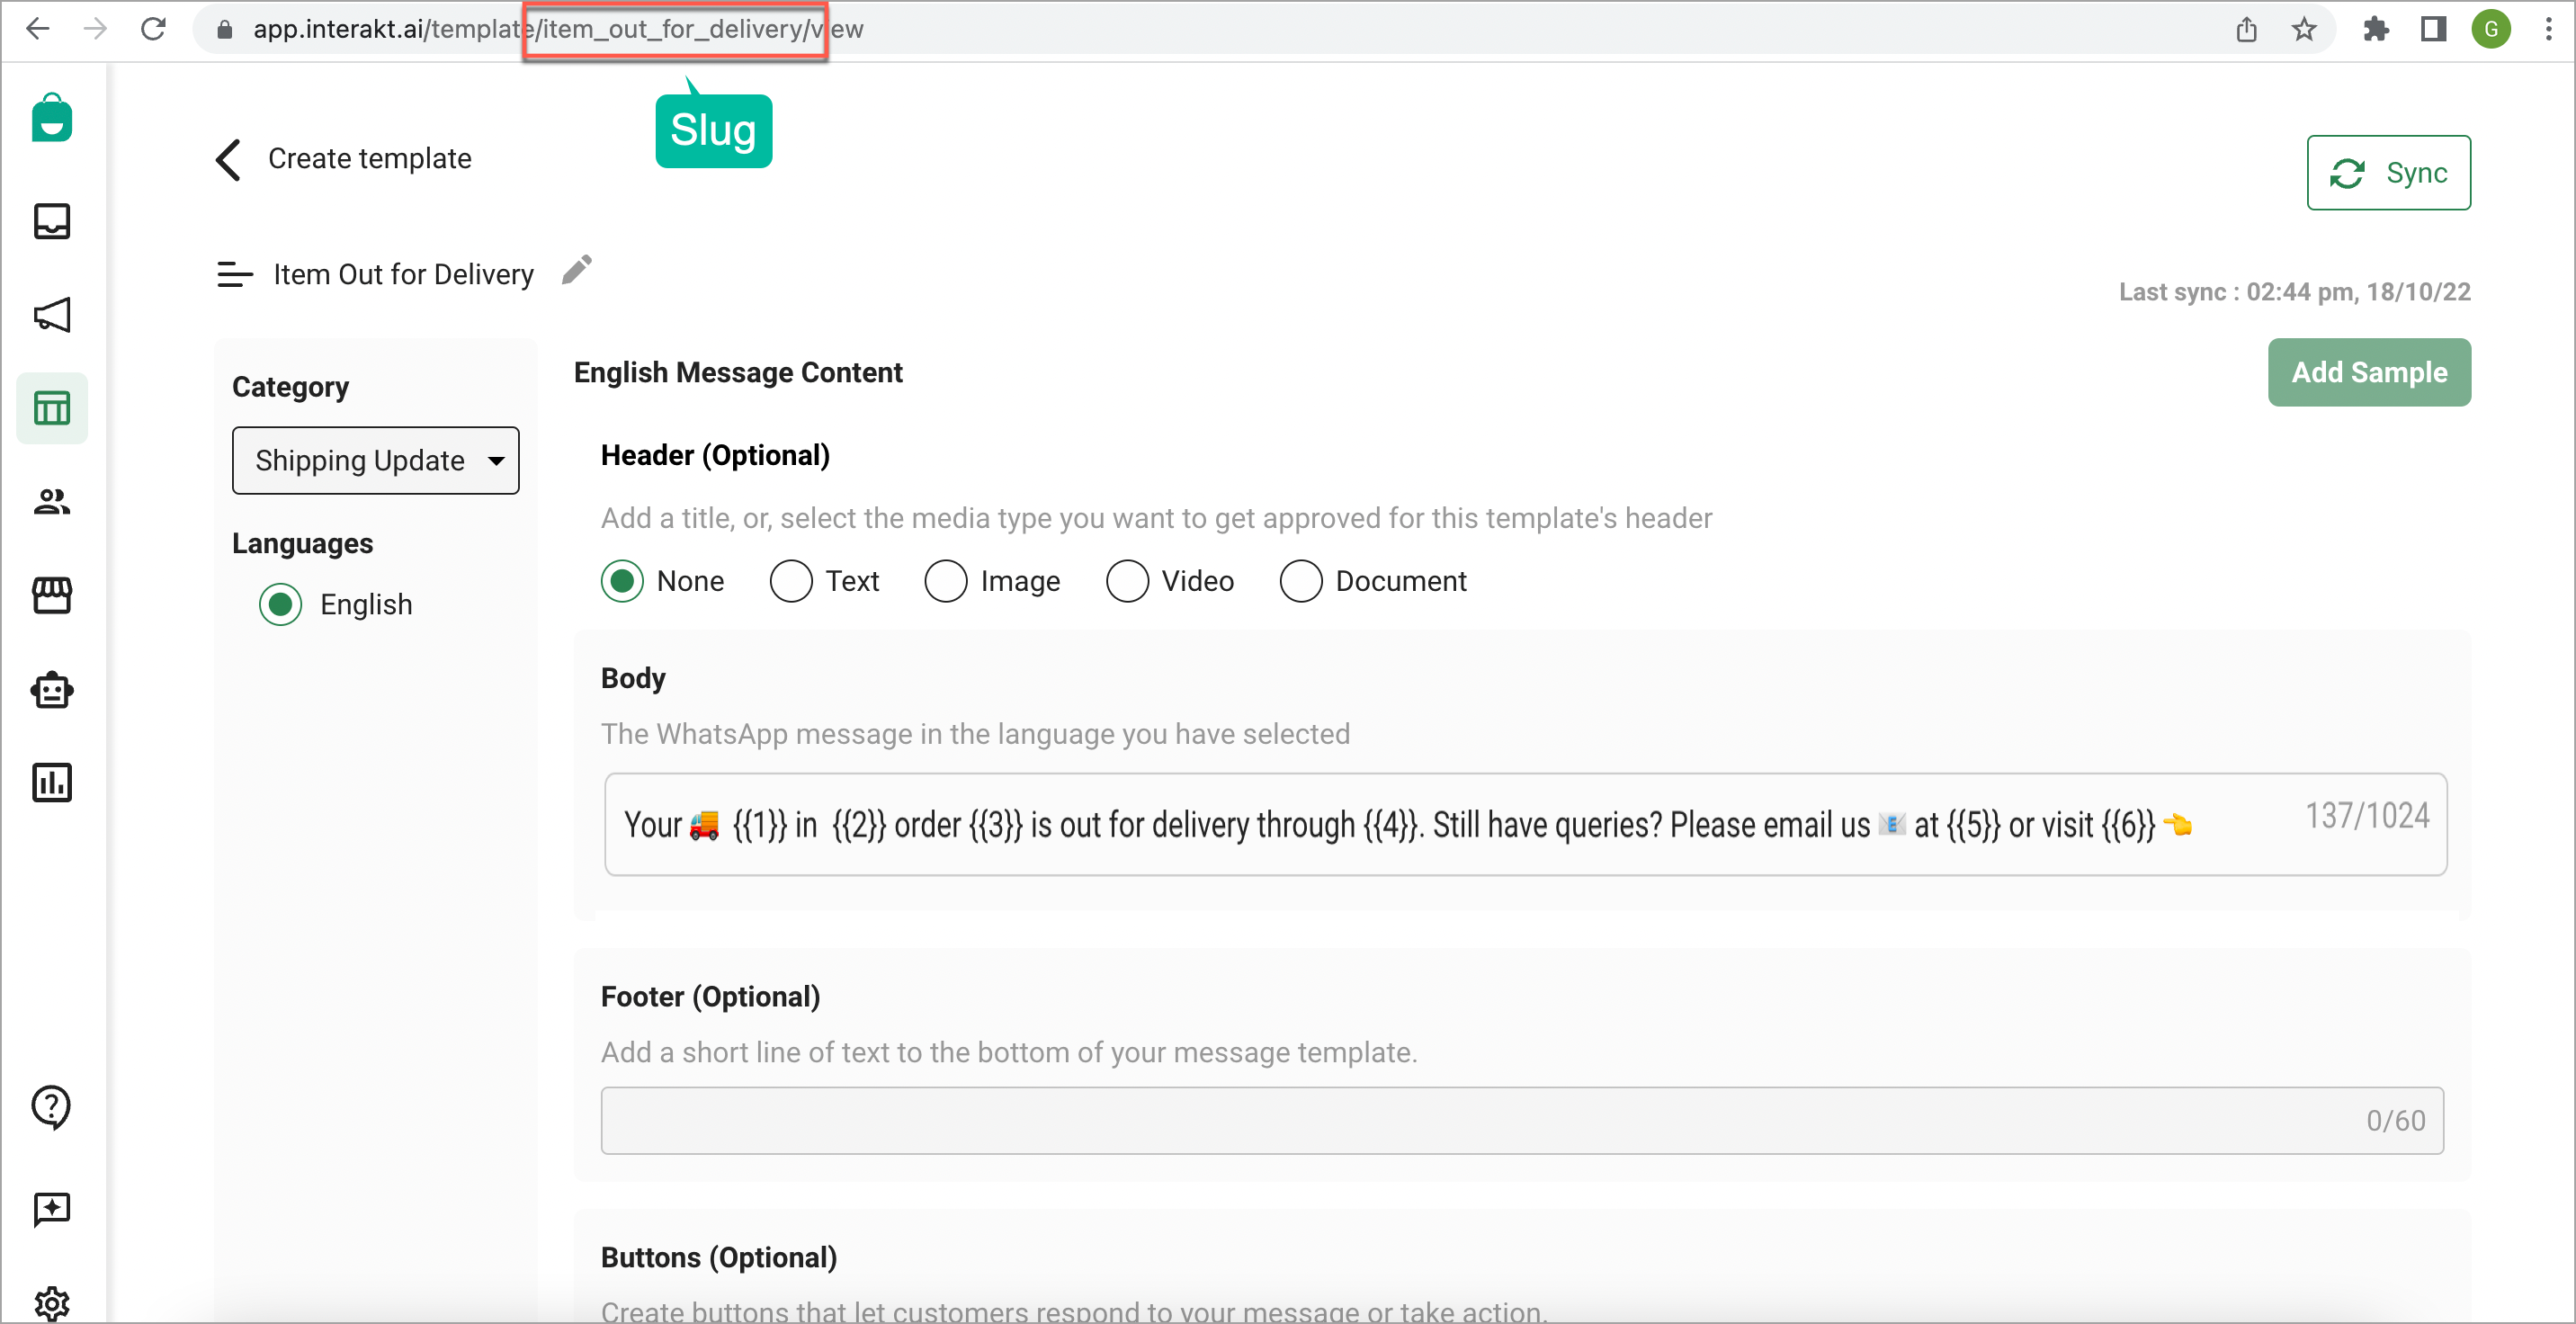
Add a slug in Haptik Slug field. It is present in the URL of your message template on the interakt portal (Refer Figure 32b).

Figure 32a: Adding Message Template Details

Figure 32b: Slug Present in URL
-
Click Save.

Figure 33: Clicking Save Button
In this way, your custom message template has been created successfully. You can choose this message template from the dropdown of specific event of order journey if you wish to send custom WhatsApp order notifications to your customers.
![]()
Activating/Deactivating WhatsApp Order Notification
Turn ON the toggle button to activate WhatsApp order notifications for sales channel.
![]()
Adding WhatsApp Order Notification Extension in Theme
-
Click Themes in Appearance section of sales channel on Fynd Platform.

Figure 36: Themes - Sales Channel
-
Click Edit.

Figure 37: Clicking Edit Button
-
Select 'Cart Landing' option from SYSTEM PAGES dropdown.

Figure 38: Selecting Cart Landing Option
-
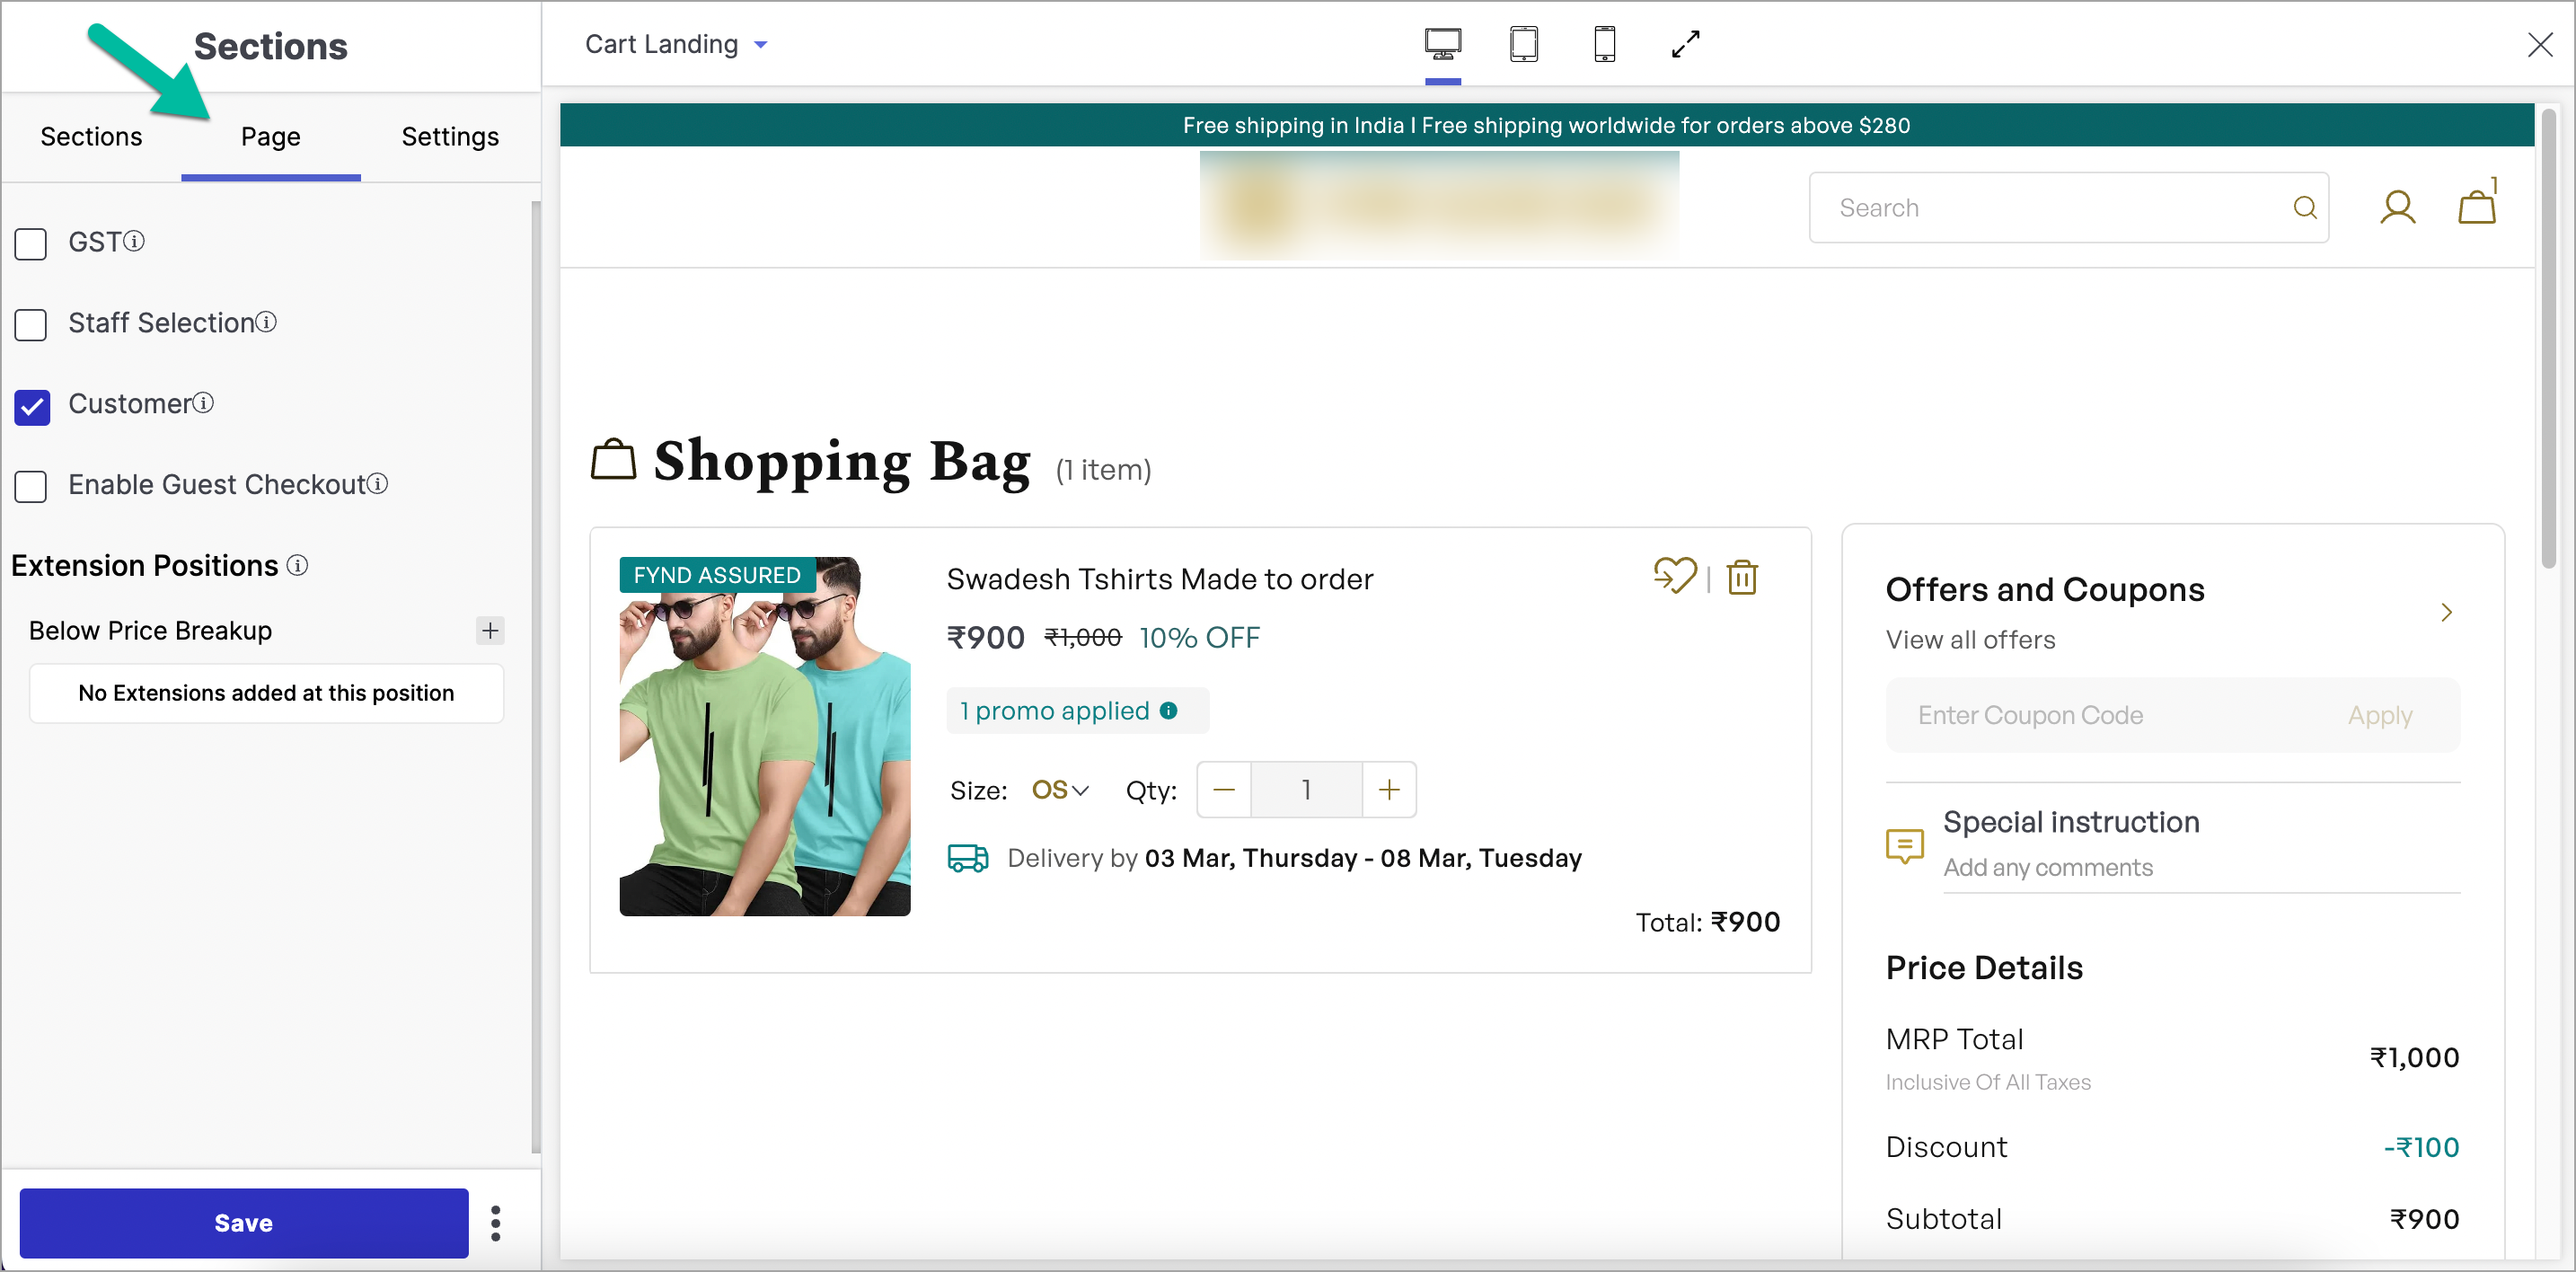
Go to Page tab.

Figure 39: Page Tab
-
Click + sign.

Figure 40: Clicking '+' Option
-
Select WhatsApp Order Notification extension from dropdown list.

Figure 41: Choosing WhatsApp Order Notification Extension
-
Click Save.

Figure 42: Clicking Save Button
-
Close the theme window.

Figure 43a: Closing Theme Window
In this way, WhatsApp Order Notification extension is added in your website's theme.

Figure 43b: WhatsApp Order Notification Consent
It might take up to 10 minutes to view WhatsApp Order Notification consent on cart landing page of your website. Since these configurations aren't used regularly, the caching duration is active and new changes might take some time to reflect on your website.
Final Output
![]()