QR Code Generator
Introduction
The QR Code Generator Extension allows you to generate QR codes for their products, services, or websites. With this extension, you can create QR codes with different shapes, sizes, and colours, making them stand out and easily scannable. It is a useful tool for businesses and individuals who want to provide customers with a quick and easy way to access their business information.
Steps to set up QR Code Generator Extension
-
Go to Extensions in Fynd Platform.
.png)
Figure 1: Clicking Extensions
-
Click QR Code Generator.
.png)
Figure 2: Clicking QR Code Generator
noteOnce you have installed this extension, it will be available in the list here.
-
Select desired sales channel. Here, we have selected Azorte.
.png)
Figure 3: Selecting Sales Channel
-
Click Generate New.
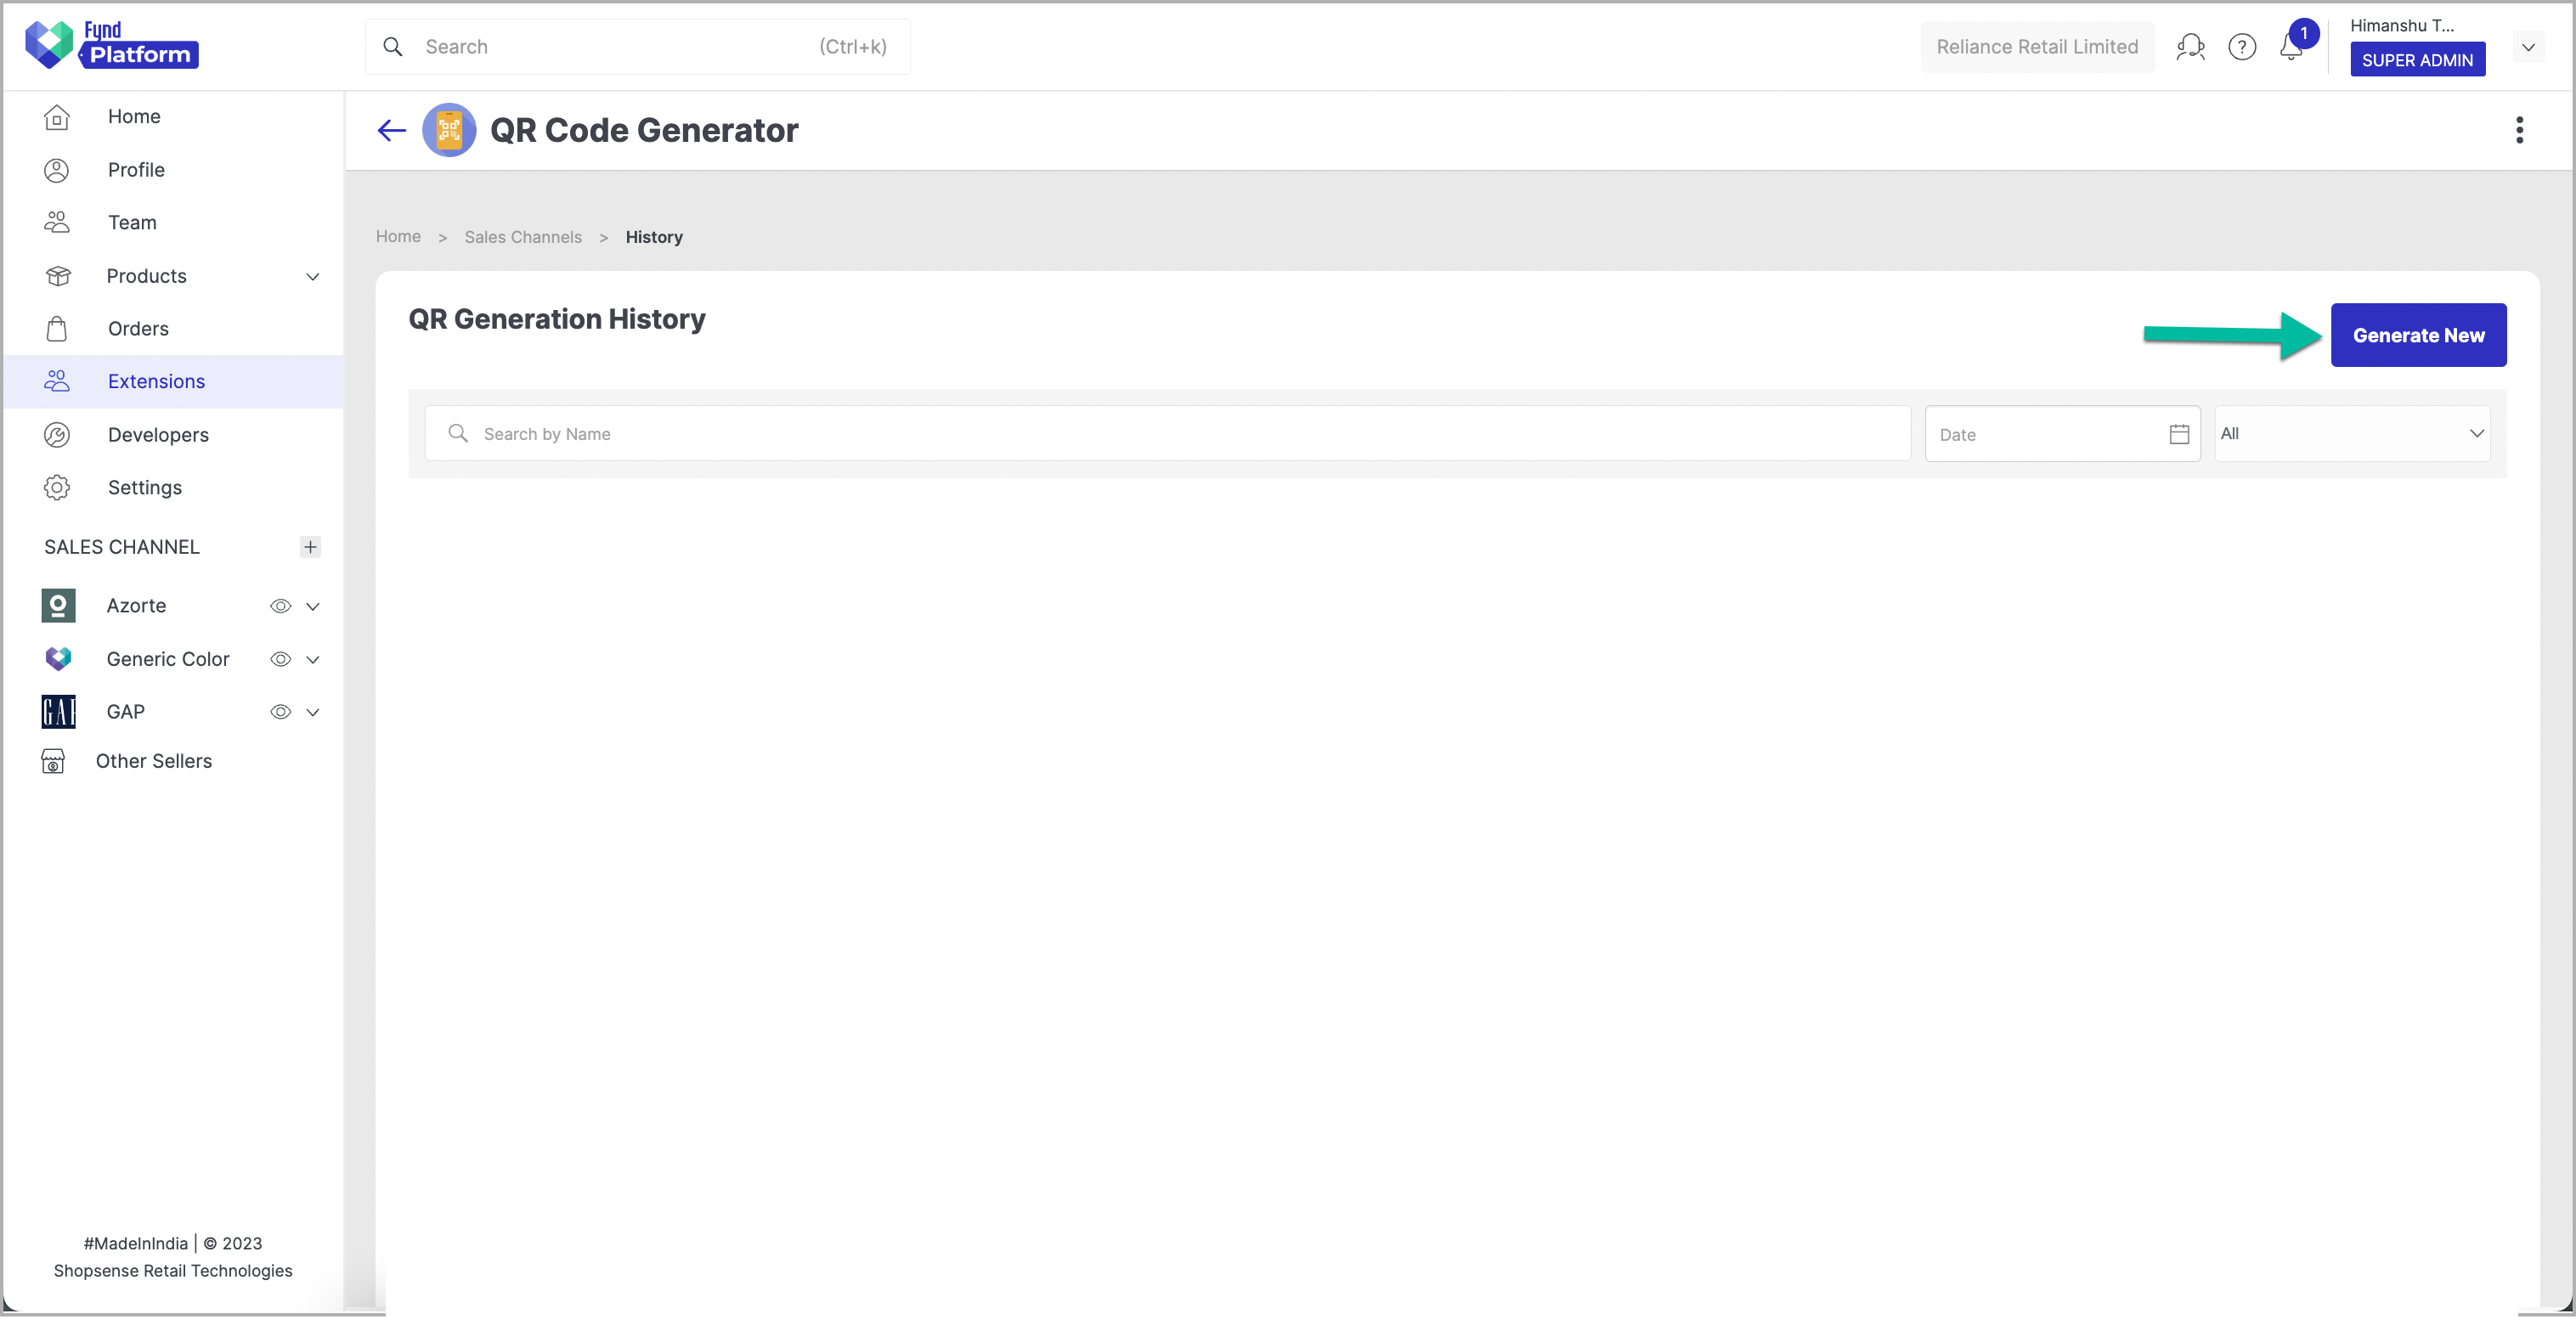
Figure 4: Clicking Generate New
In the next sections, you'll learn to configure the QR Code Generator Extension.
General Details
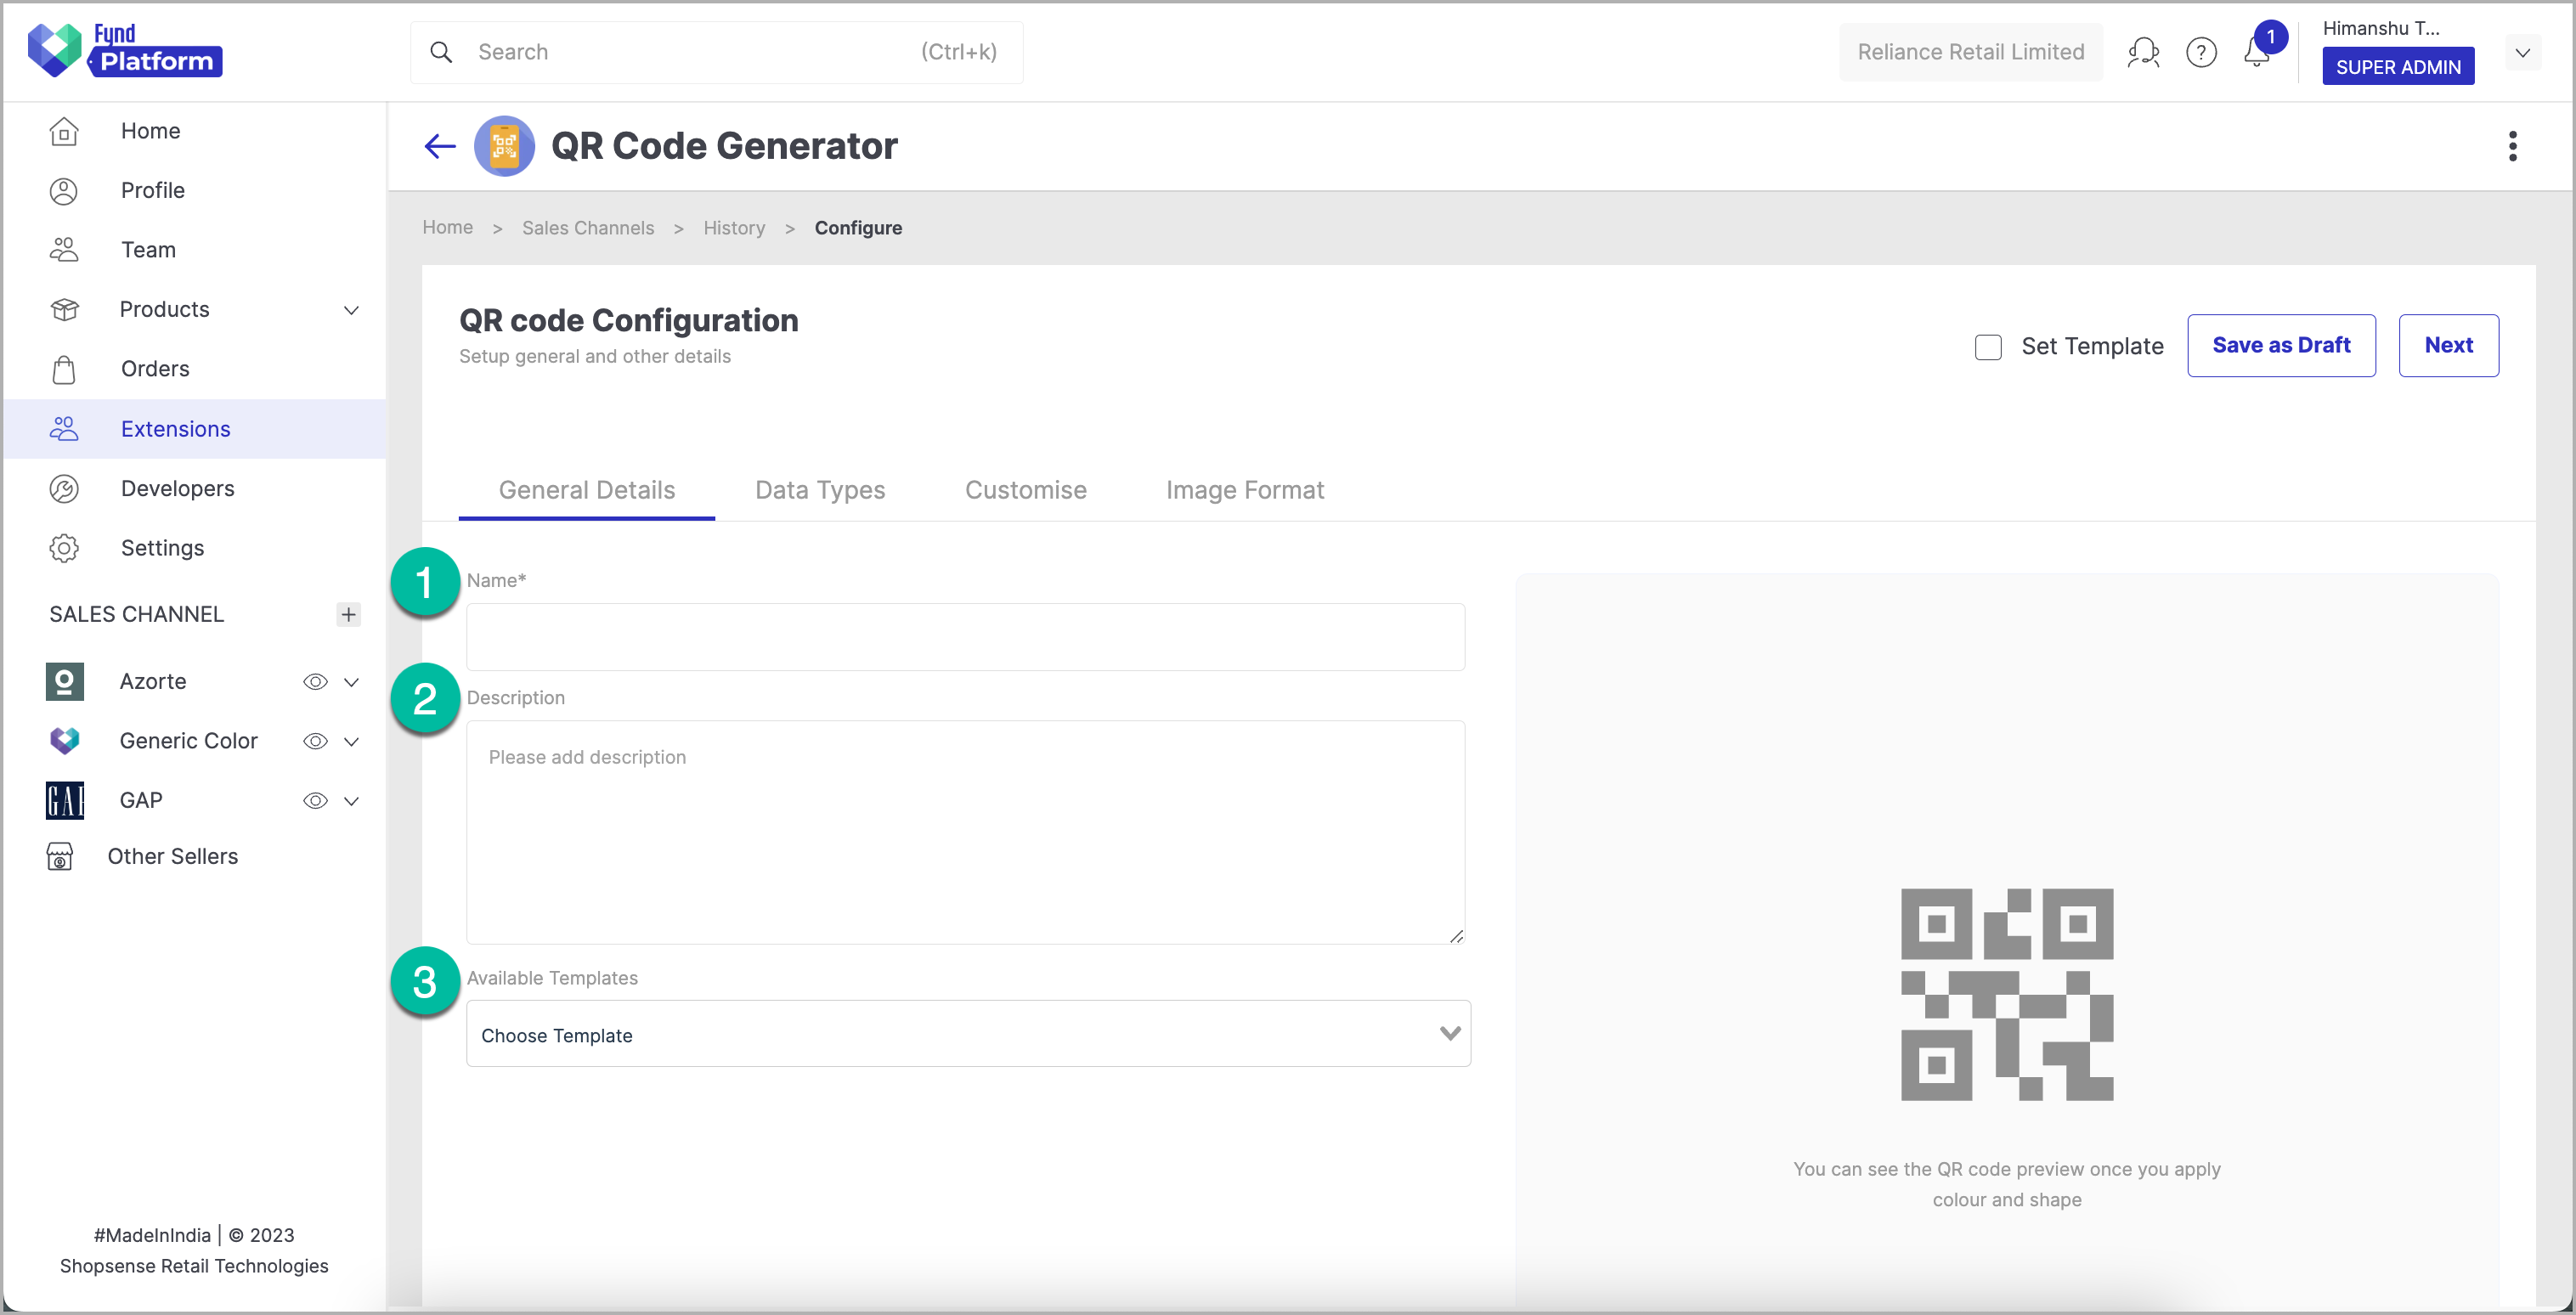
- Name: Enter the suitable and unique name for your QR code. For e.g., 'ScanIt.'
- Description: Enter the suitable description for your QR code. For e.g., 'Scan and see the preview.'
- Available Templates: The QR code you have selected as Set as Template will be saved as a template and can be accessed from the dropdown menu.
First-time users will not initially see the list of Available Templates.
Data Type
Choose the appropriate data type to show users the desired information when they scan the QR code.
-
Store: Use this data type to display a URL that redirects the user to the store website when scanned. Follow these steps to set it up:
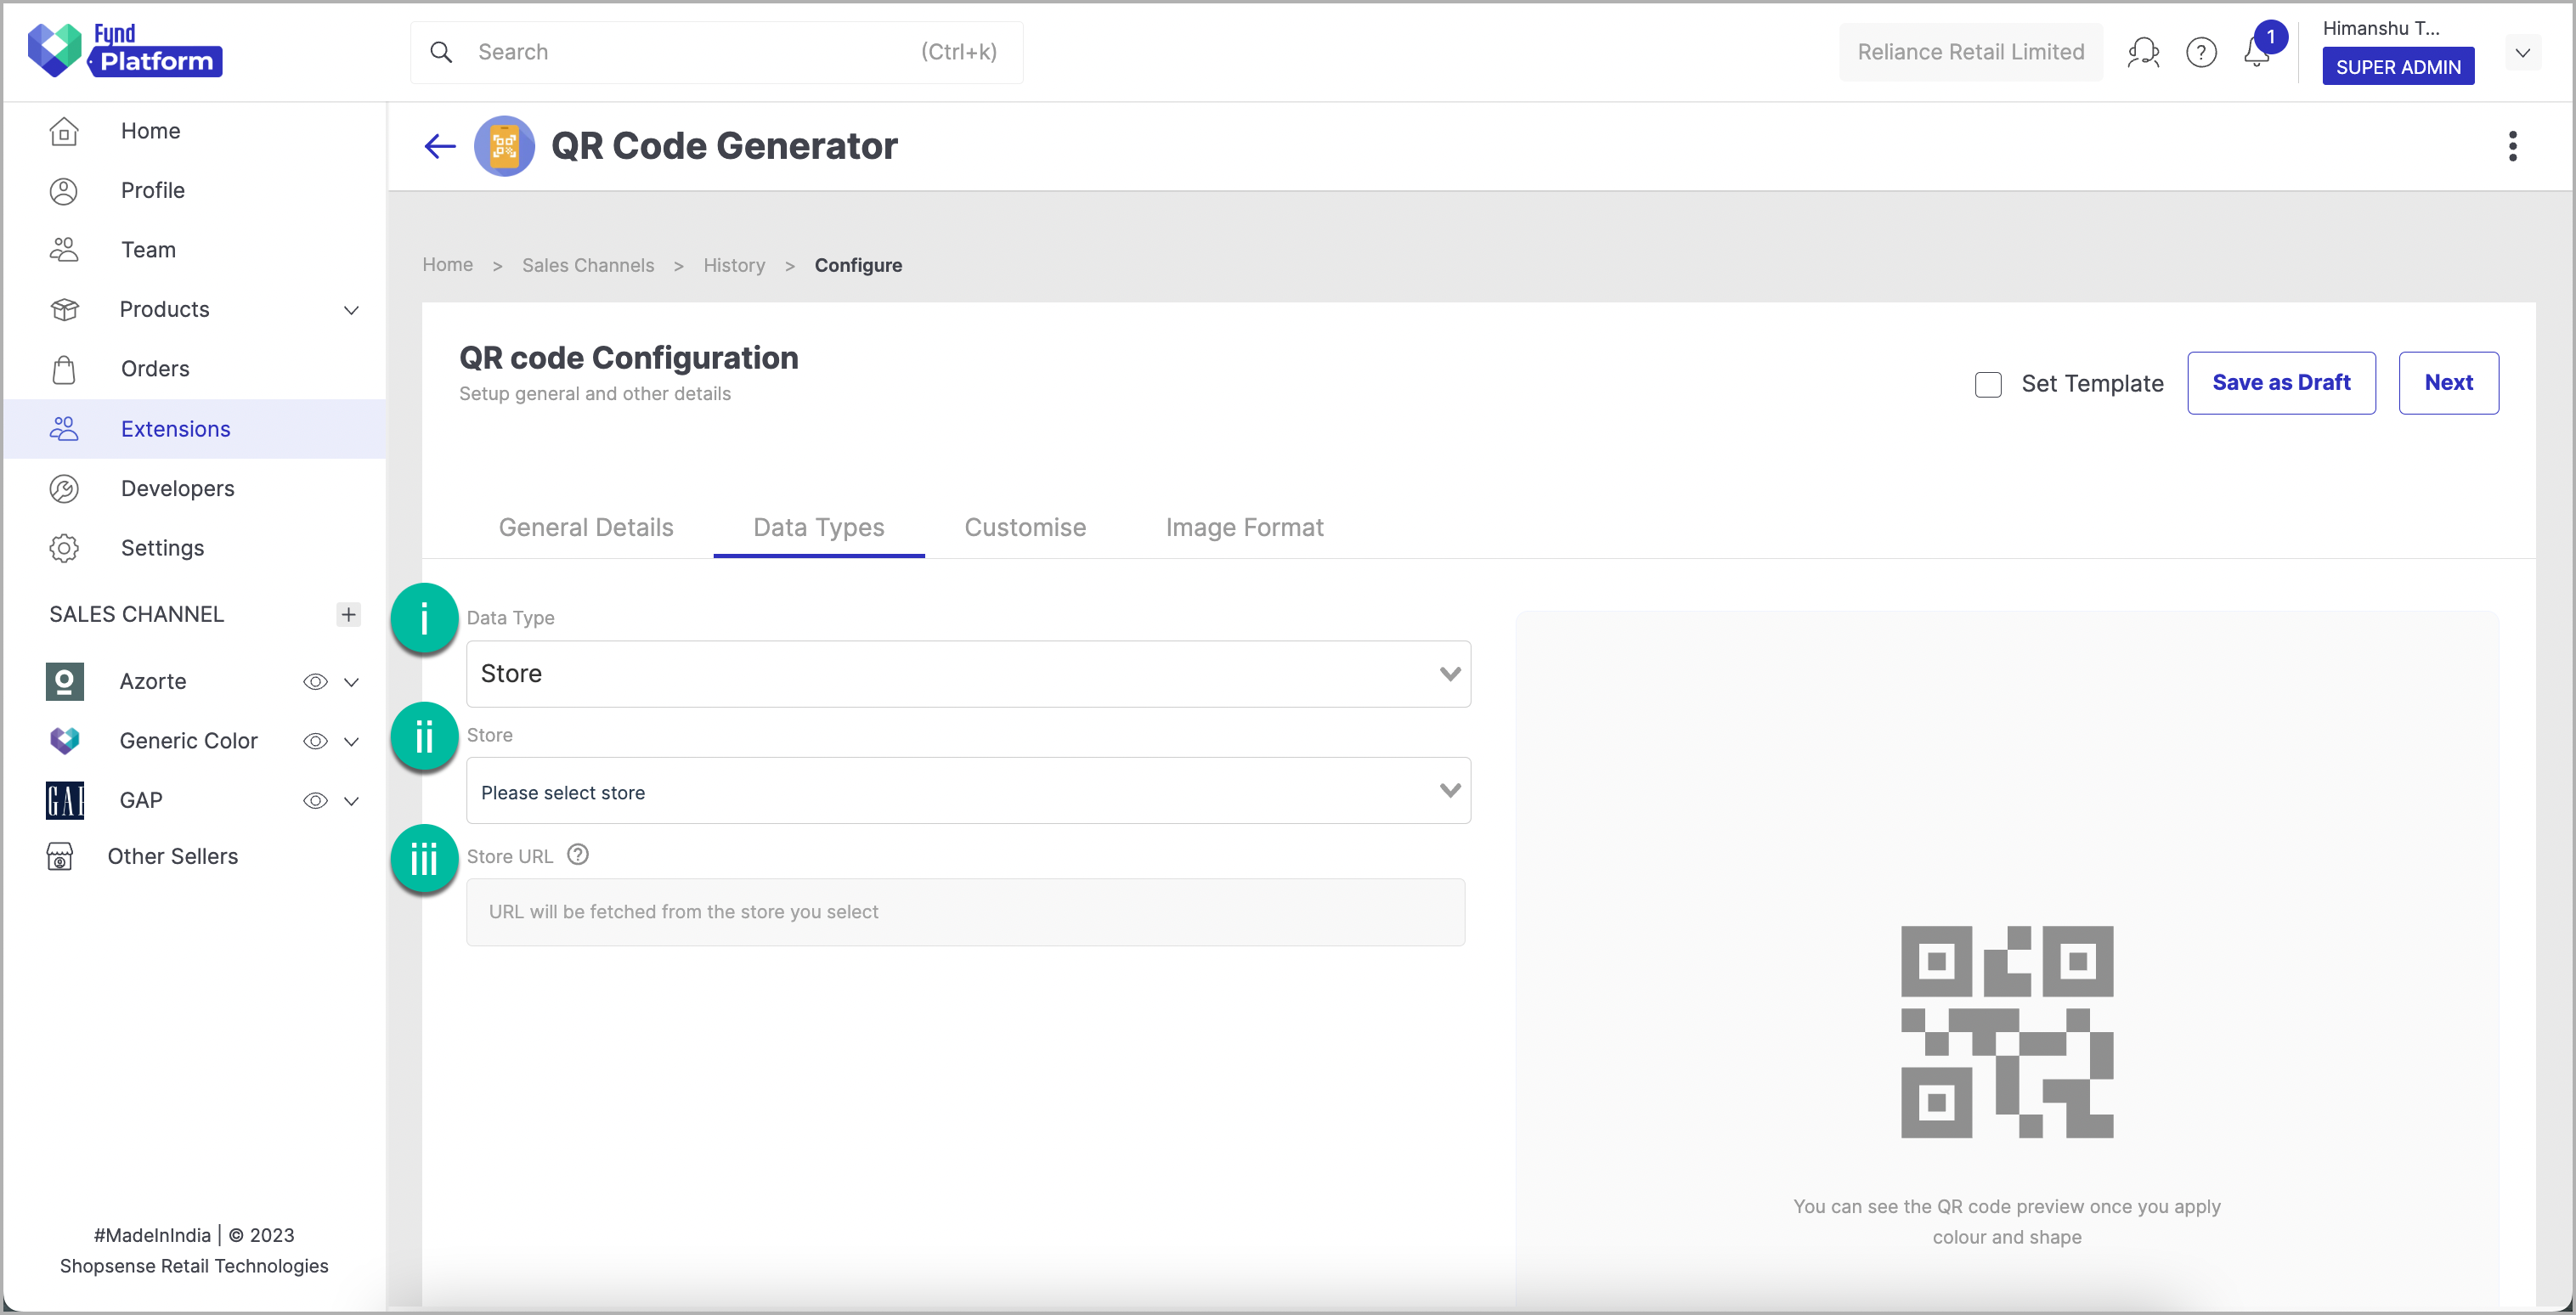
Figure 6: Store Data Type
- Select Store in the data type dropdown.
- Choose your preferred store from the dropdown.
- The store URL will be auto-feched from your selection.
-
URL: Use this data type to redirect users to a specific webpage. Follow these steps to set up:
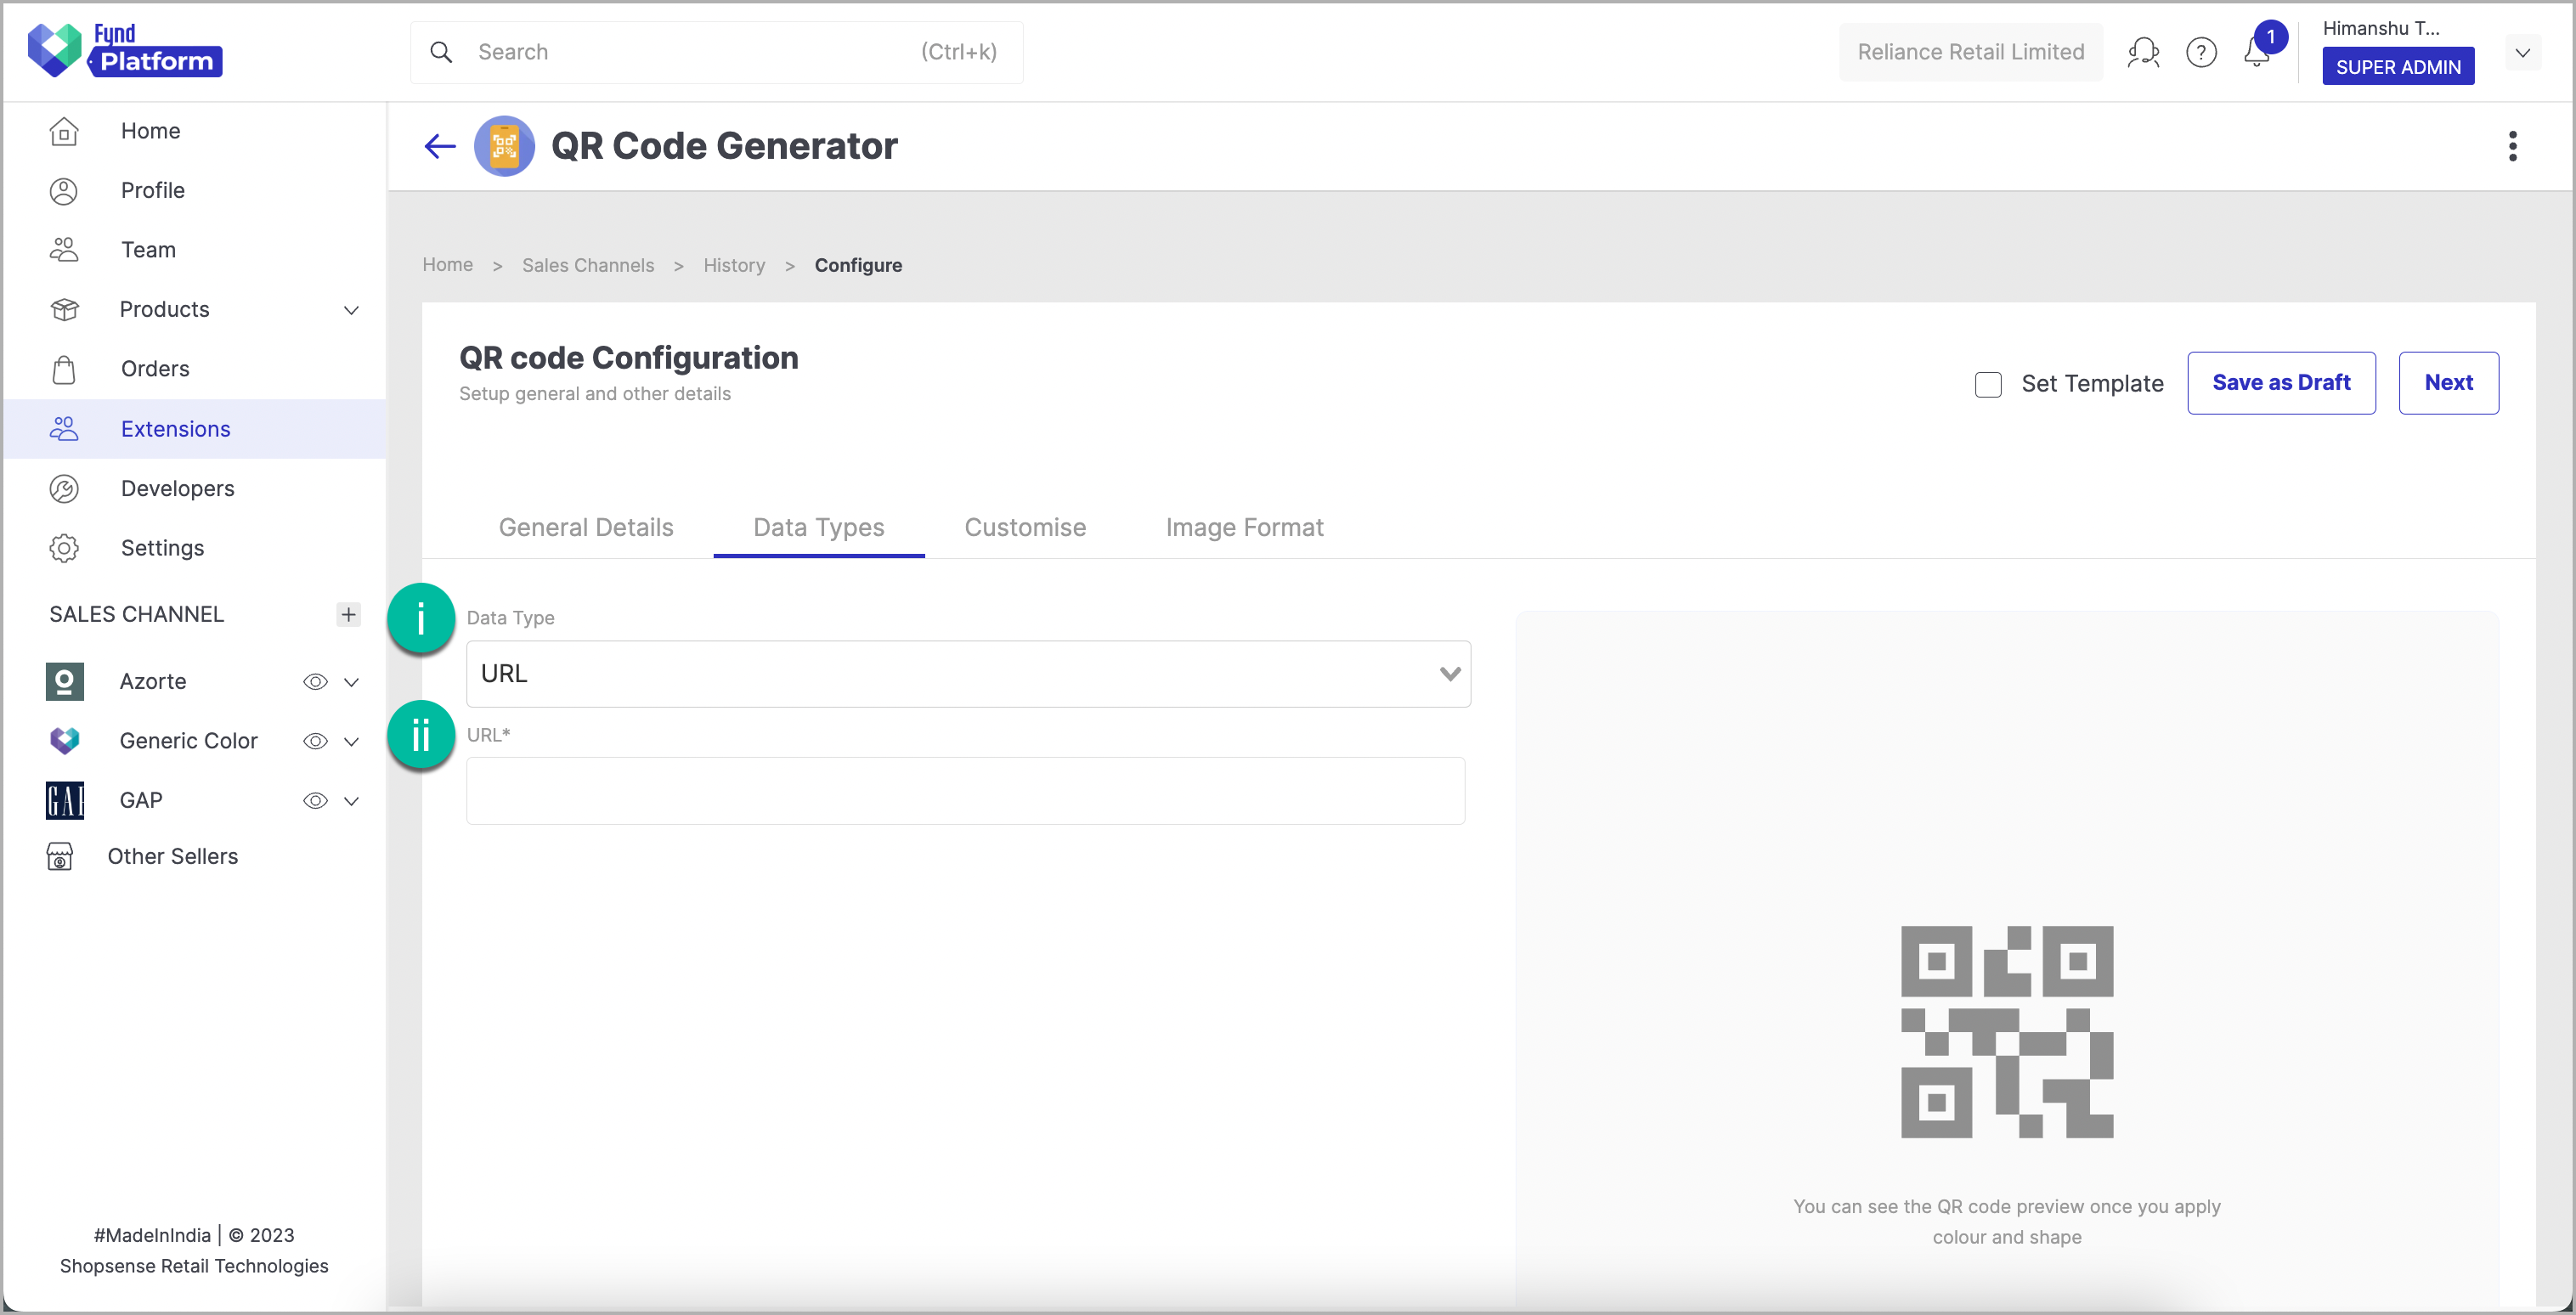
Figure 7: URL Data Type
- Select URL in the data type dropdown.
- Enter the desired URL.
-
Free Text: Use this data type to display textual information when scanned. Follow these steps to set up:
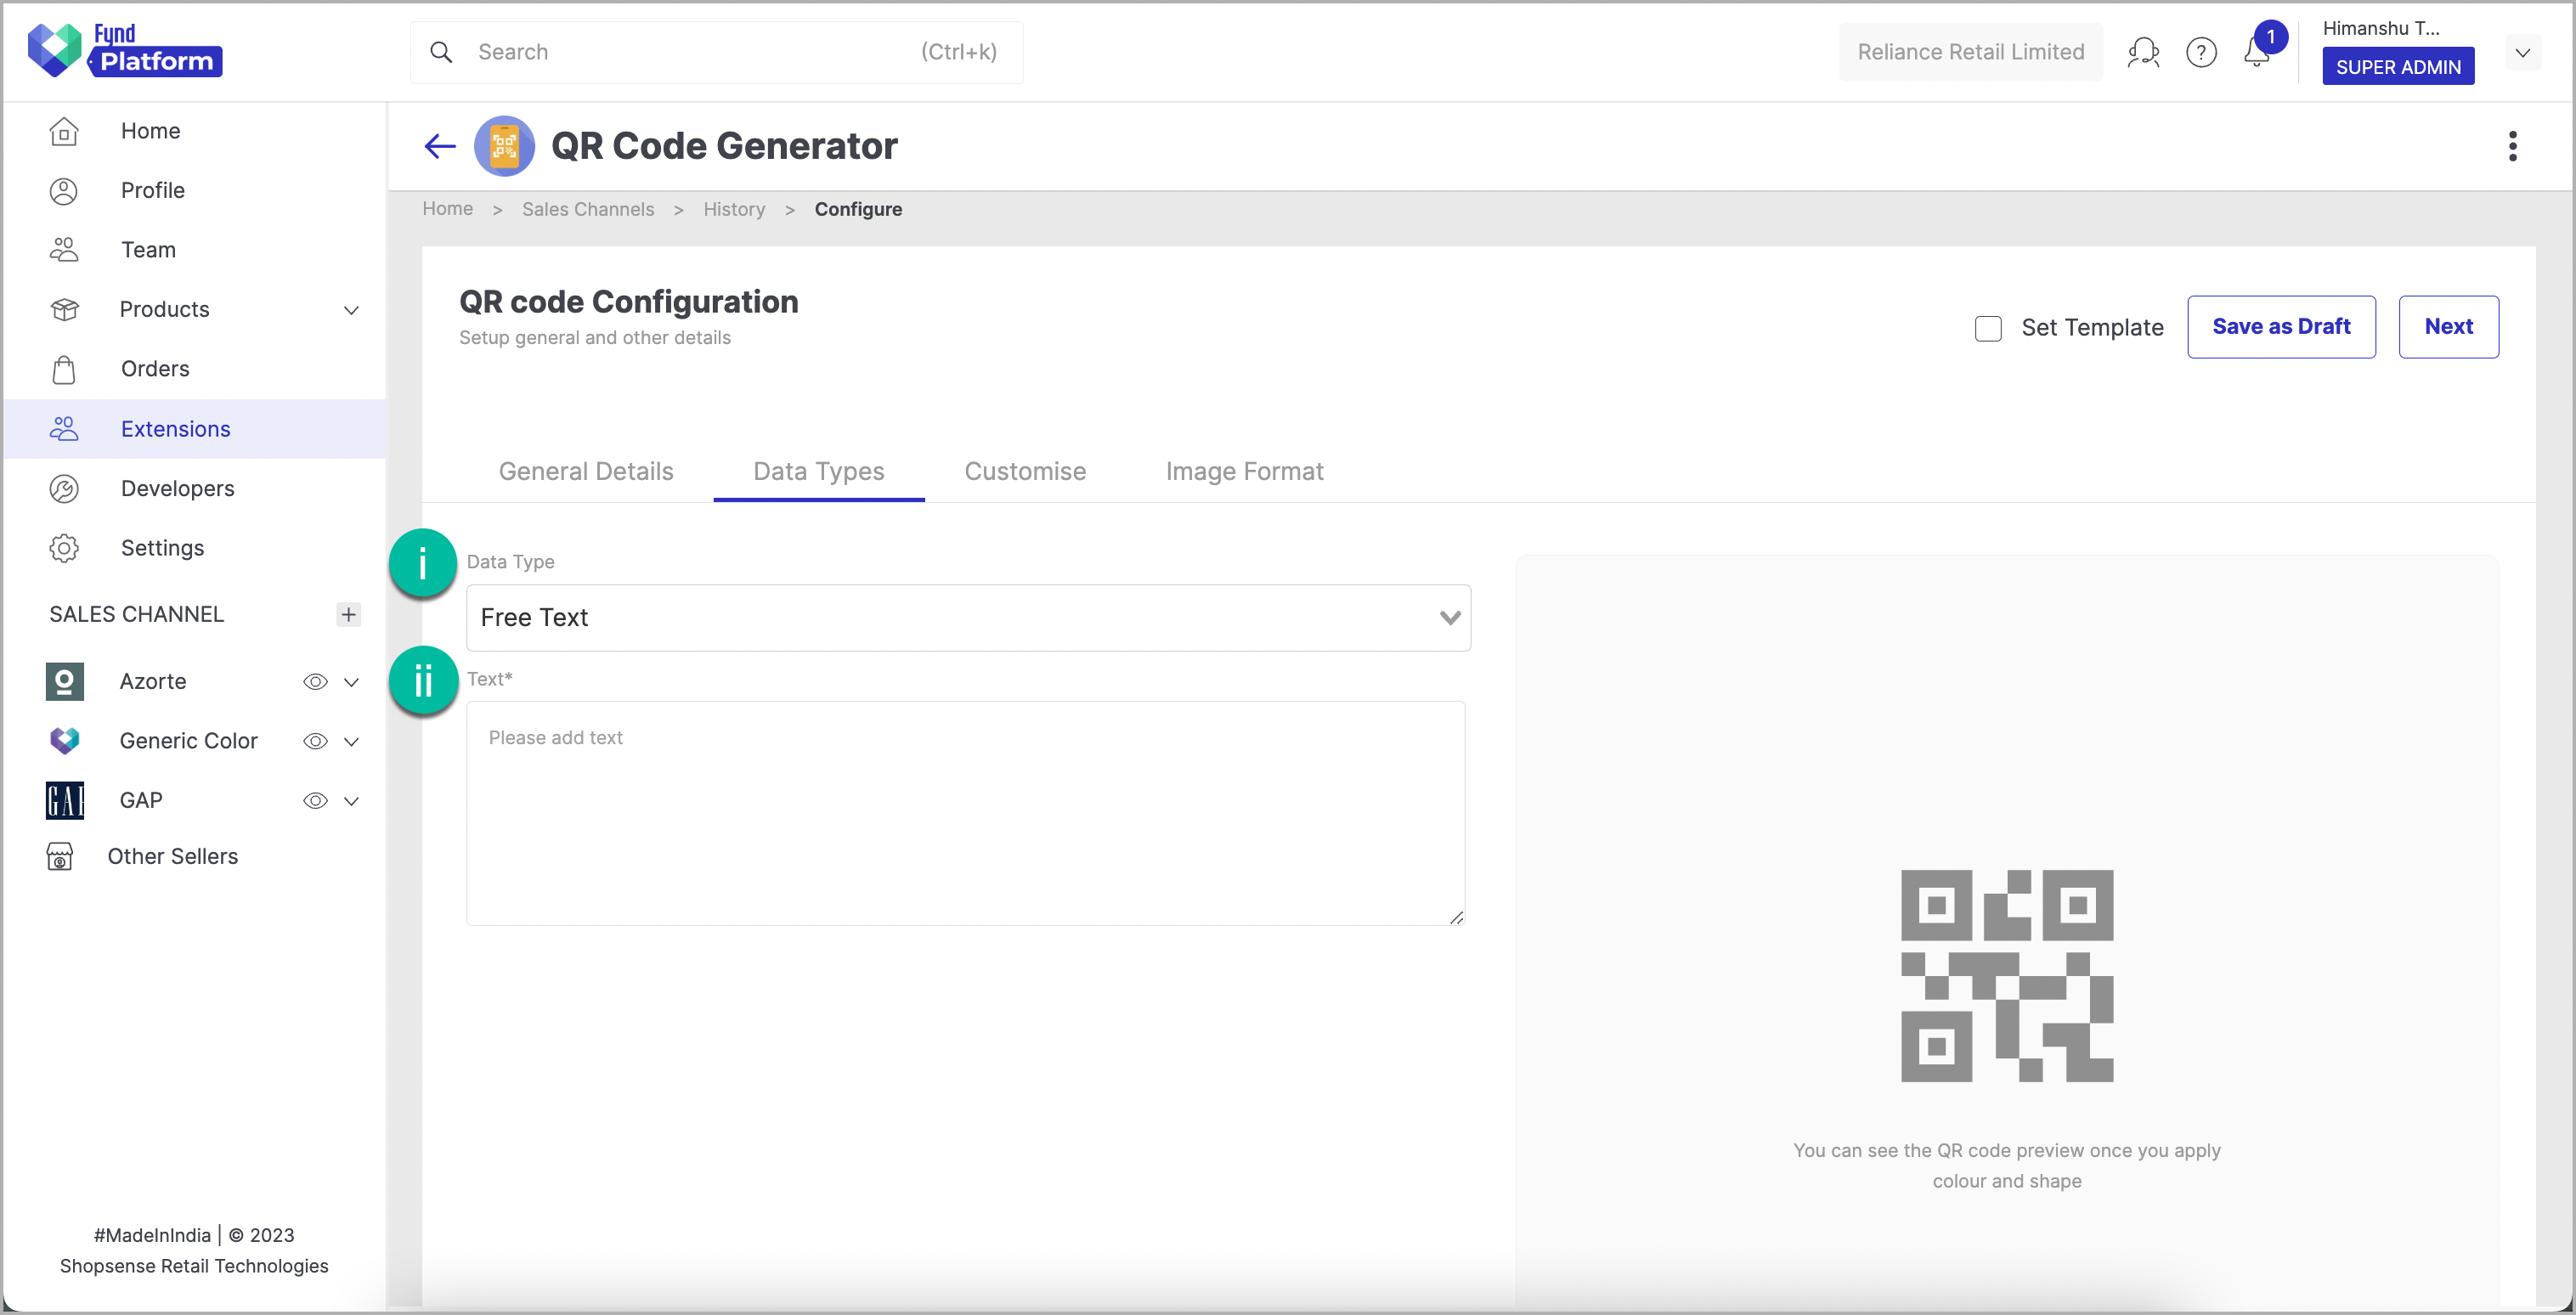
Figure 8: Free Text Data Type
- Select Free Text in the data type dropdown.
- Enter the desired information in the description field. For e.g., 'Welcome to XYZ Company! We offer top-quality products and services in technology, healthcare, and education. Please browse our website and contact us for inquiries. Thank you for your interest.'
Customise
Customise your QR code with these options:
-
Module Shape: Choose from Classic, Smooth, Circles, or Rounded.
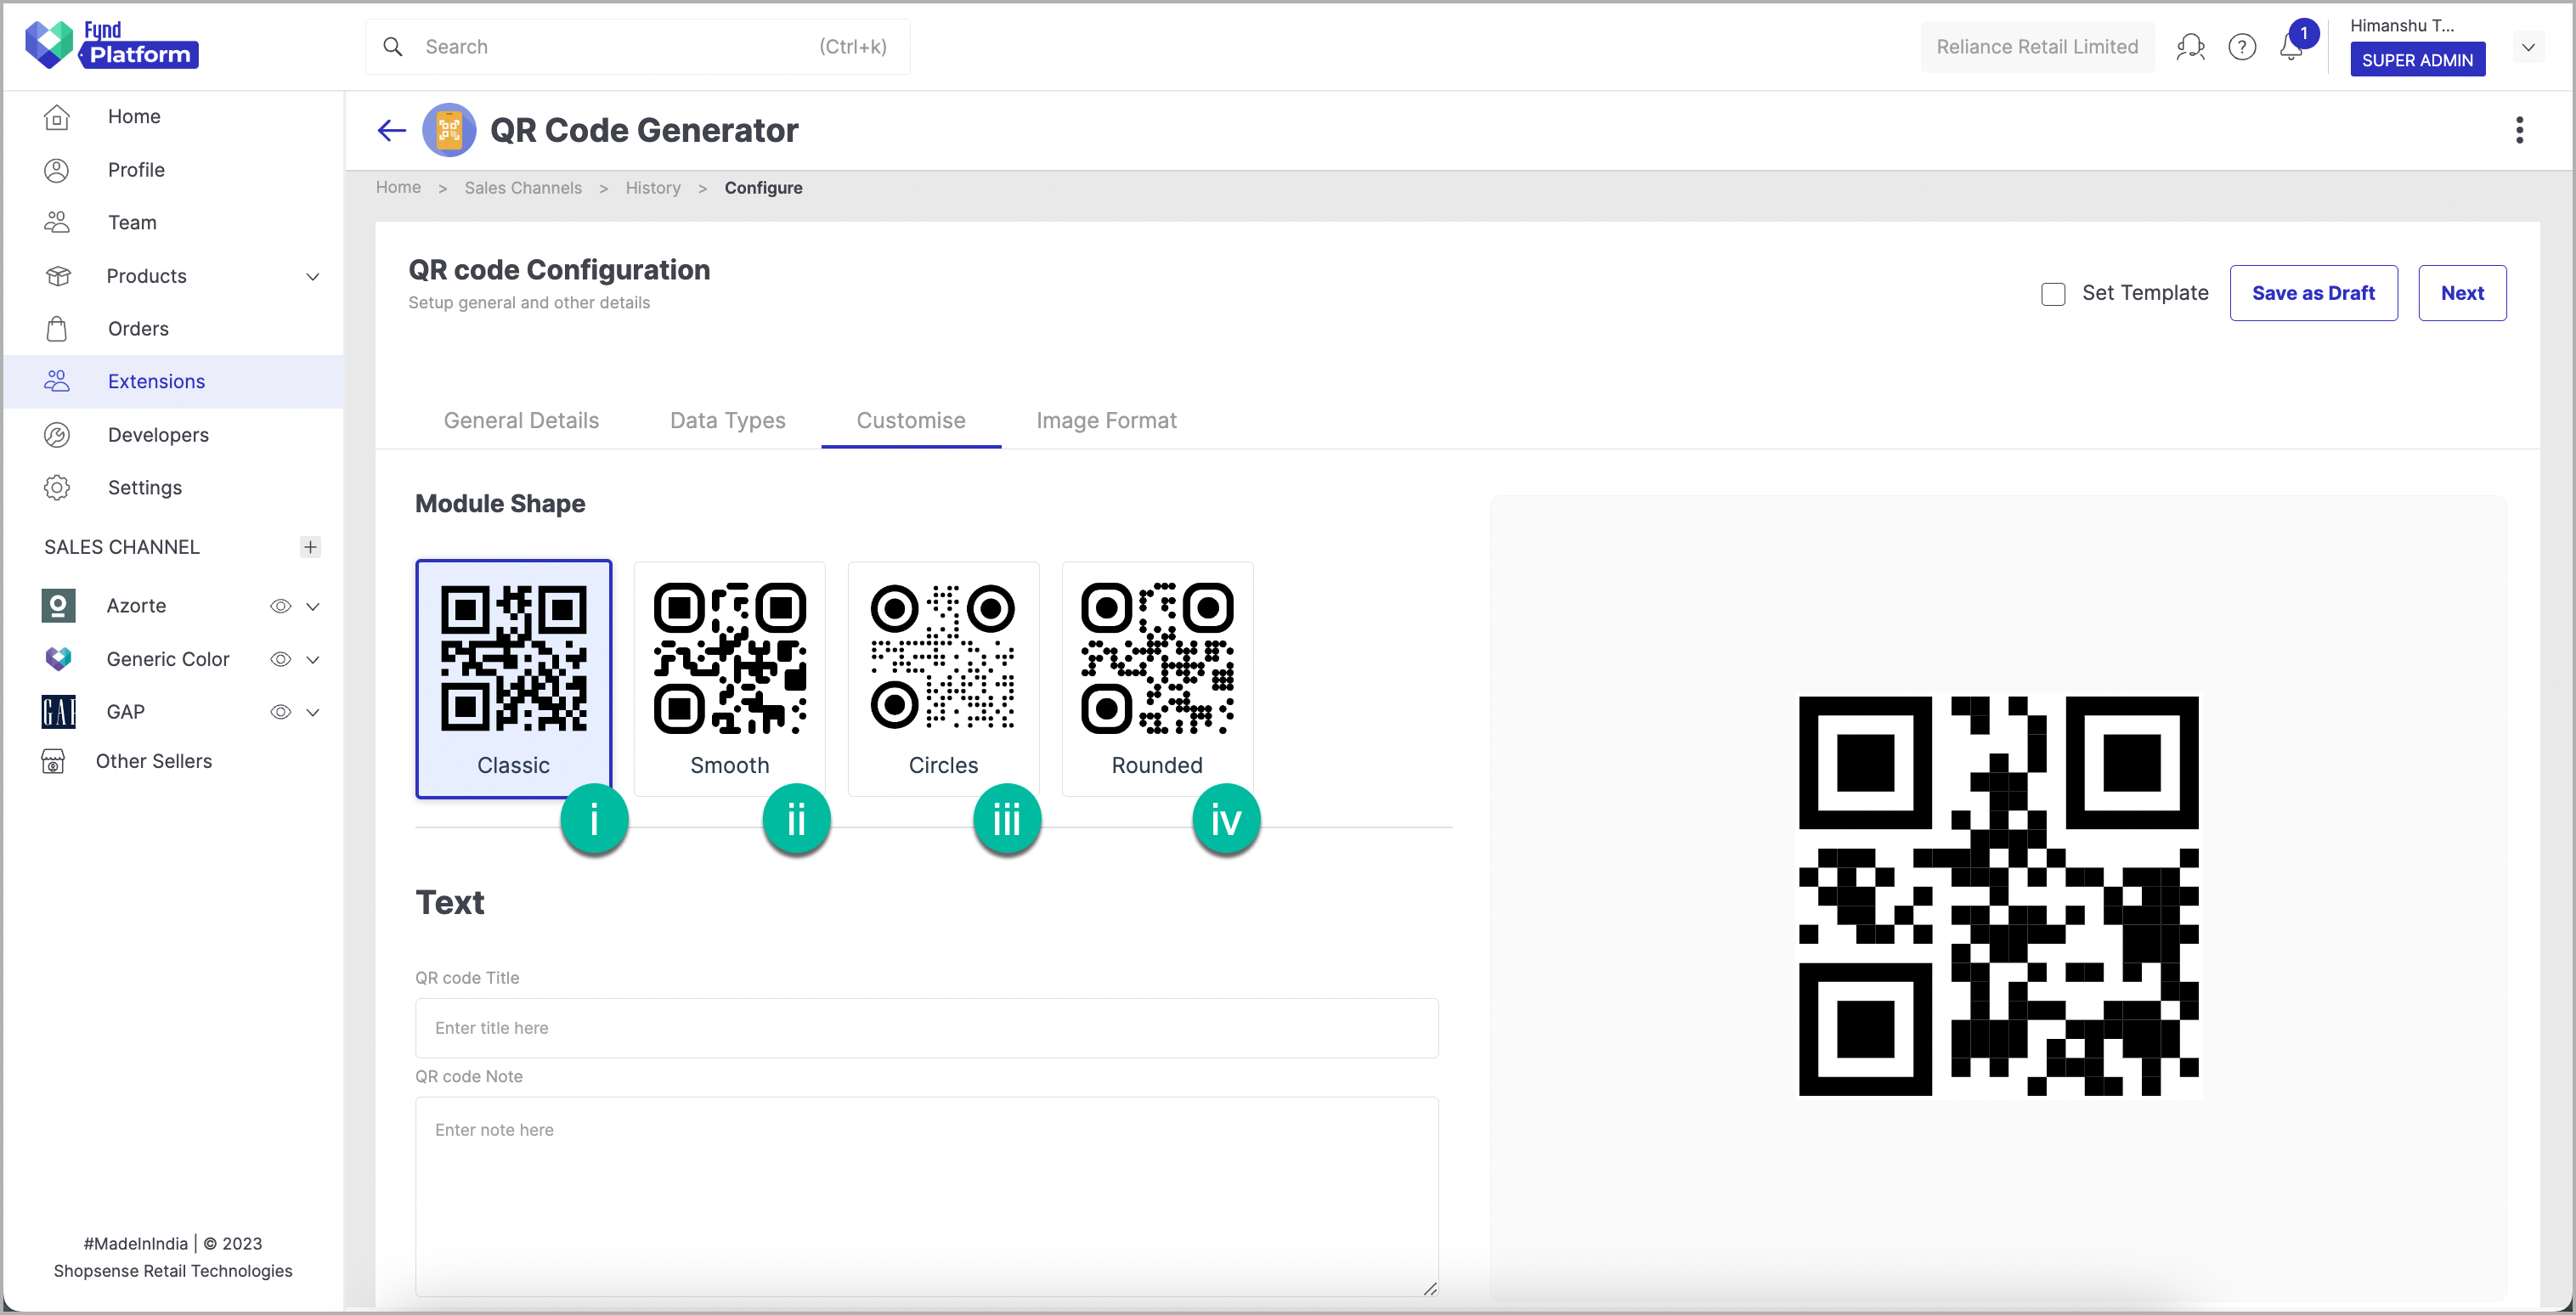
Figure 9: Module Shapes for QR Code
- Classic: The most common QR code with a square shape and sharp edges filled with small squares or dots.
- Smooth: A QR code similar to the classic module, but with slightly curved edges on the blocks.
- Circles: A QR code with round blocks and a circular centre filled with dotted patterns.
- Rounded: A QR code with curved edges on the blocks and a circular centre filled with larger dots for a softer appearance.
-
Text:
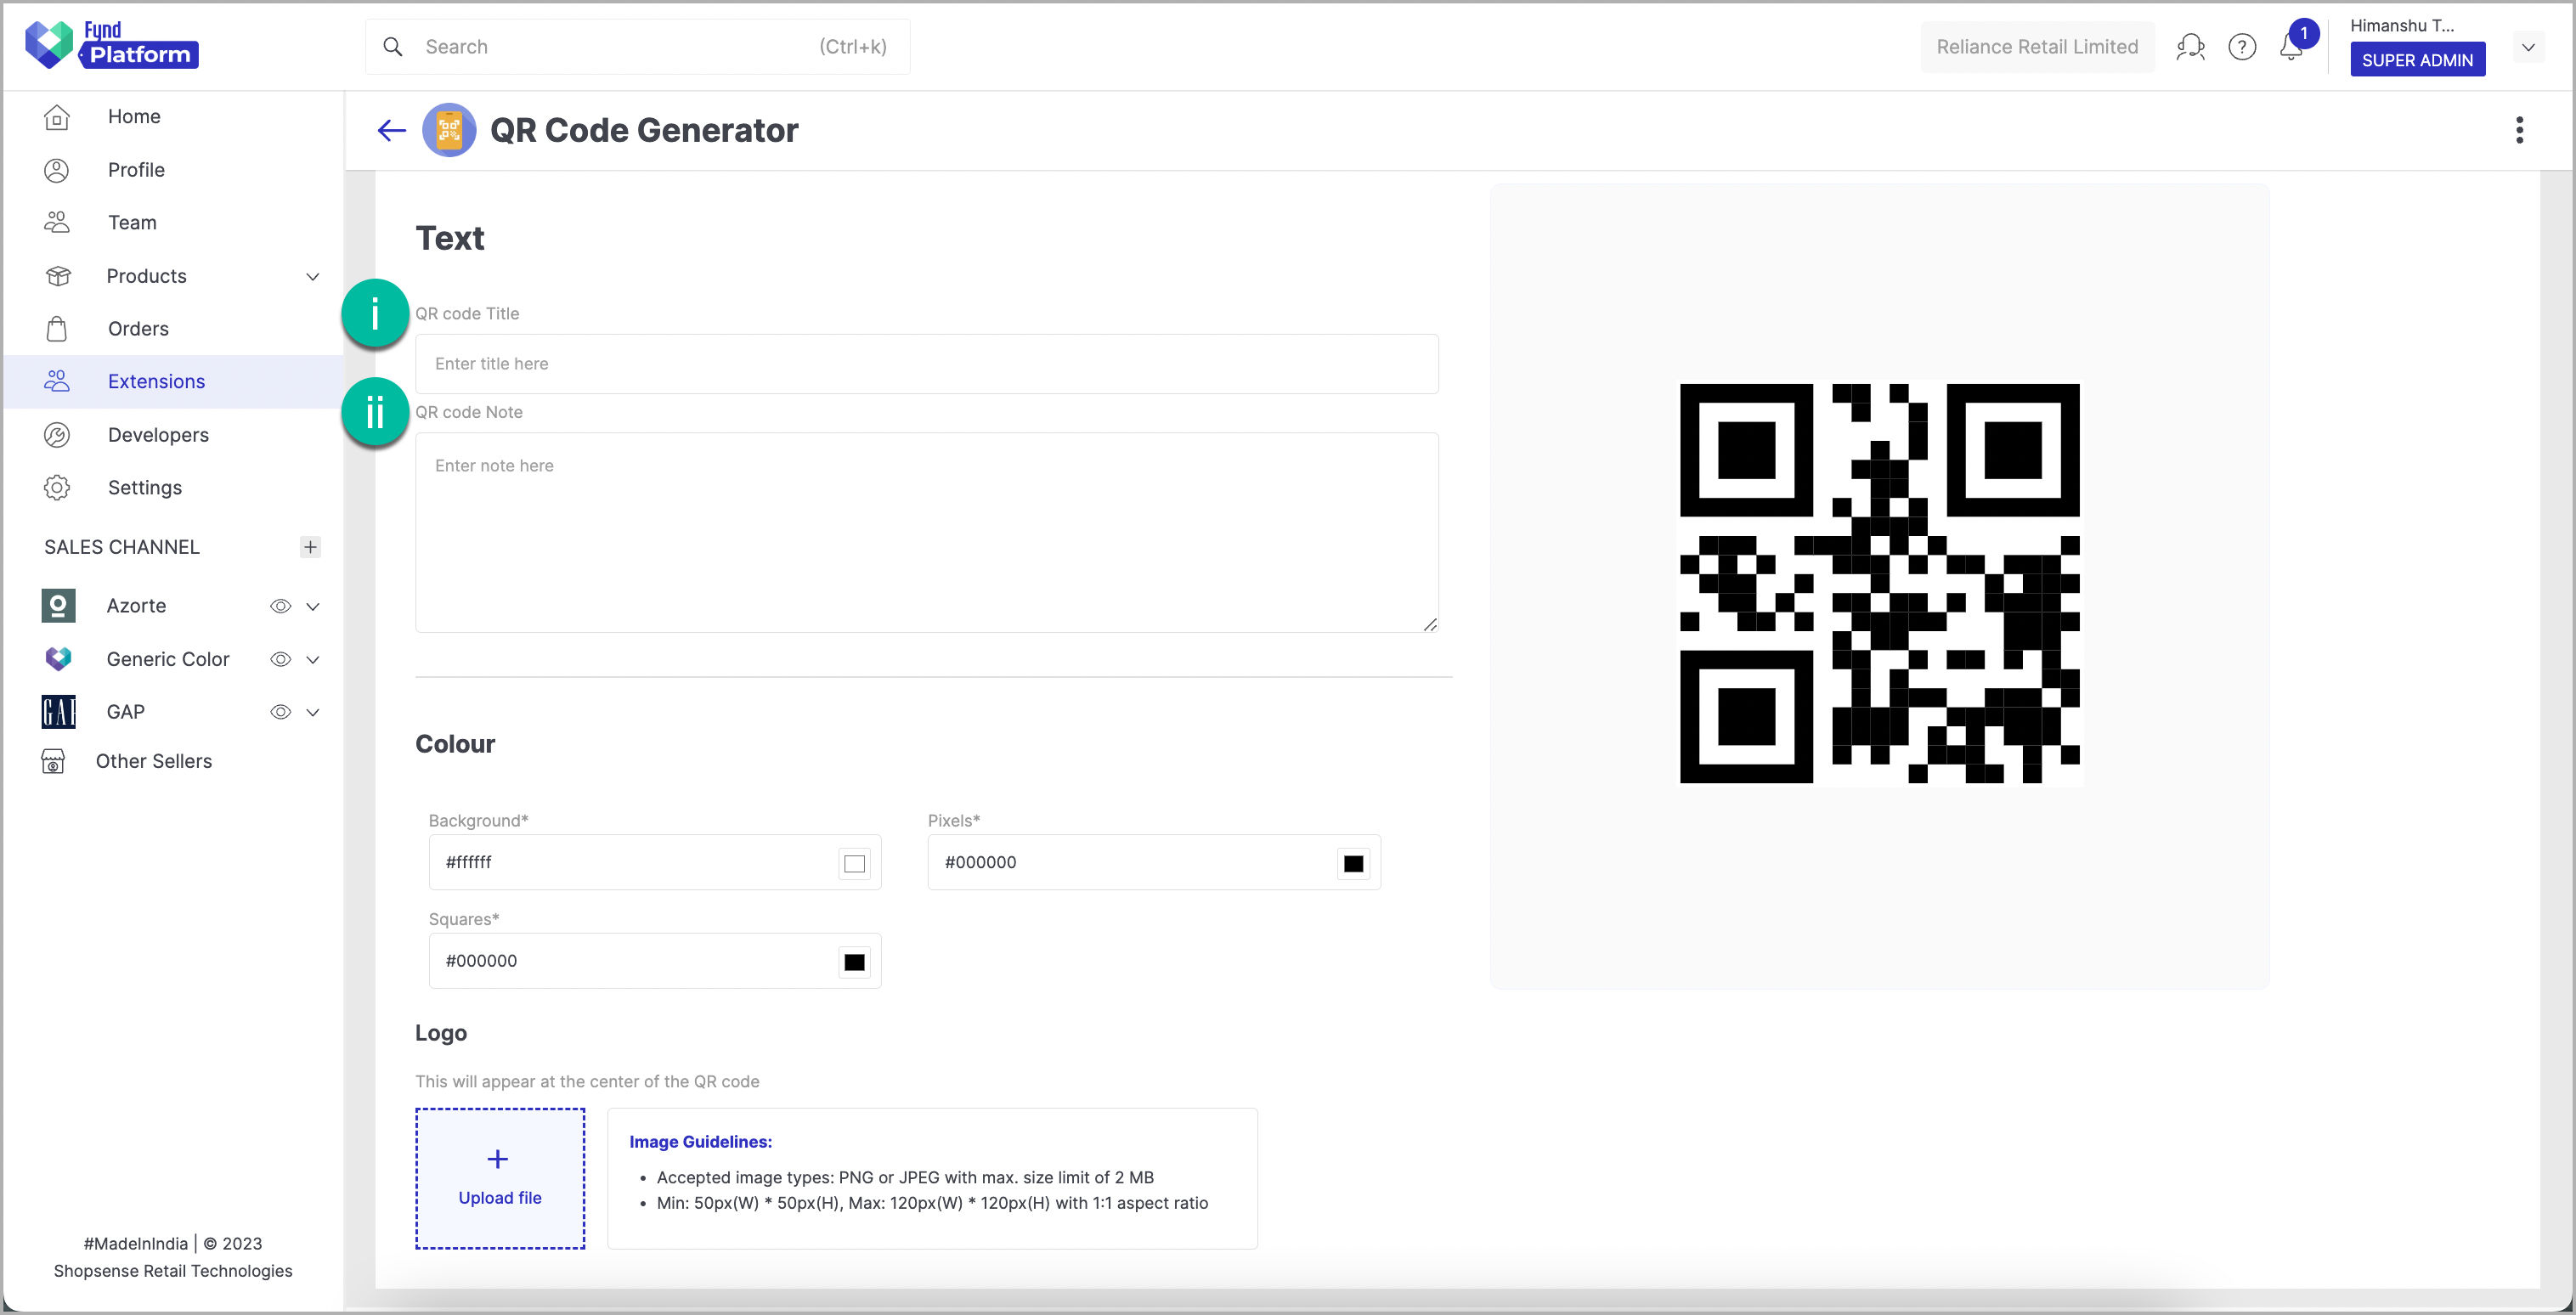
Figure 10: Text Fields for QR Code
- QR code Title: Add a title to display at the top of your QR code. For e.g., “Scan Me.”
- QR code Note: Add a note to display at the bottom of your QR code. For e.g., “Company Name, Instantly access our contact information by scanning this code.”
-
Colour:
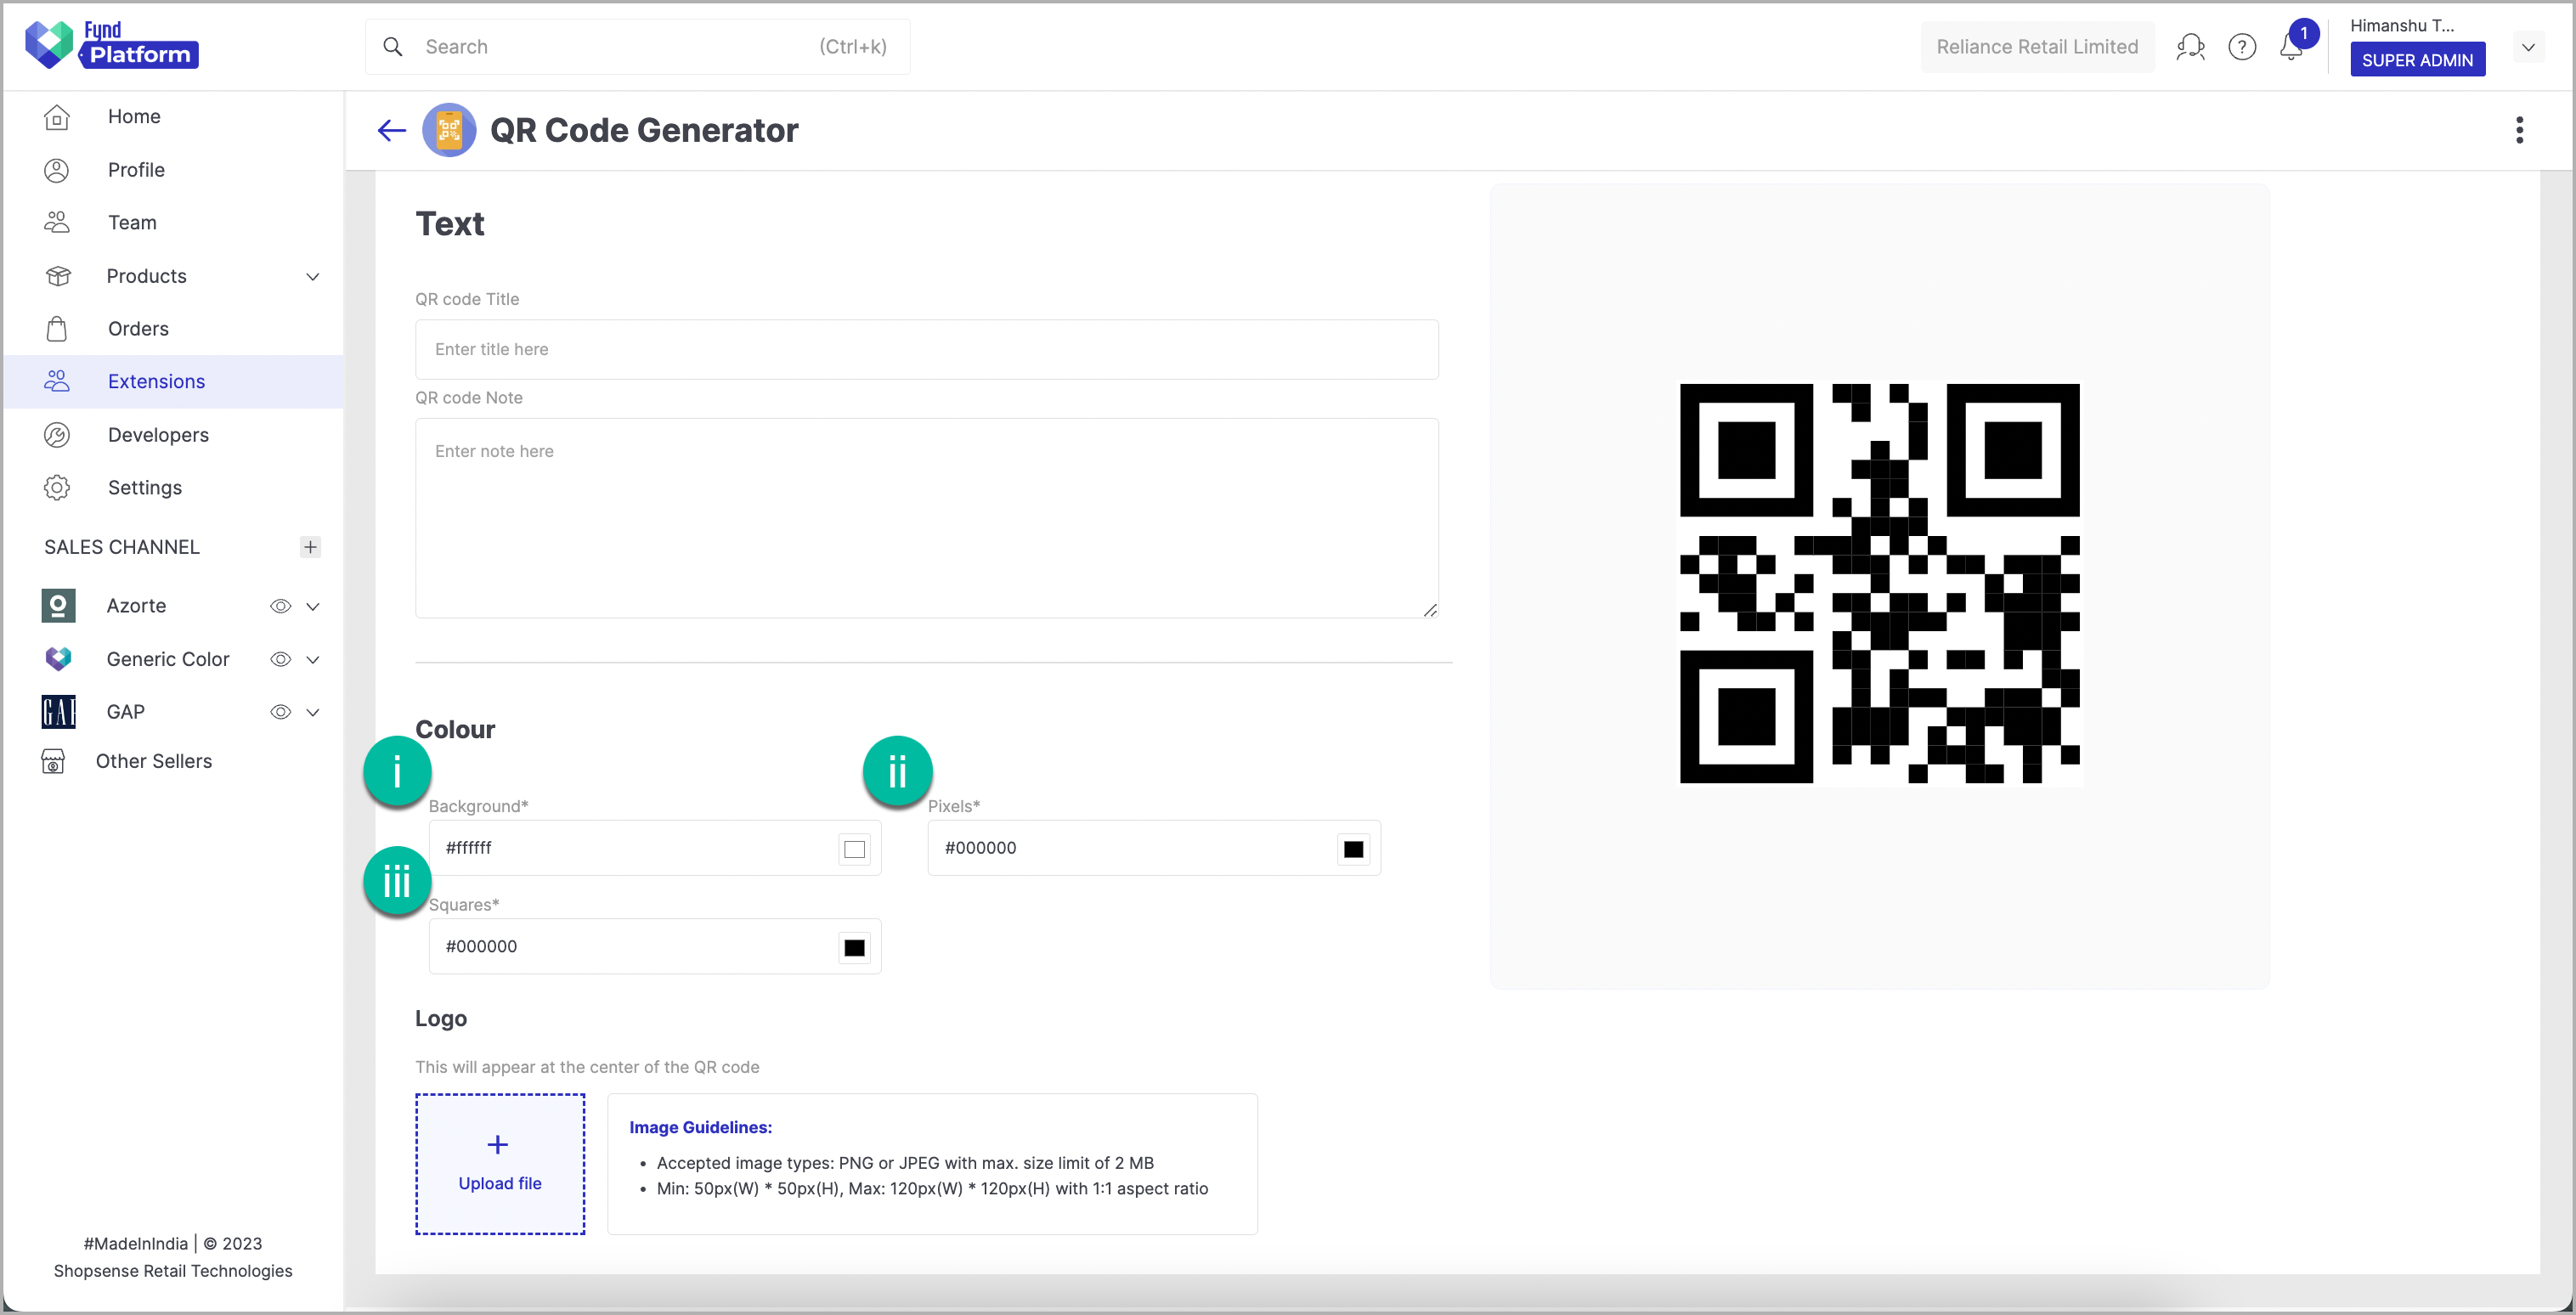
Figure 11: Colour for QR Code
- Background: Choose a suitable background colour.
- Pixels: Choose a suitable pixel colour.
- Squares: Choose a suitable square colour.
-
Logo: Upload your logo here (refer to Figure 12 for image guidelines). It will appear at the centre of the QR code.
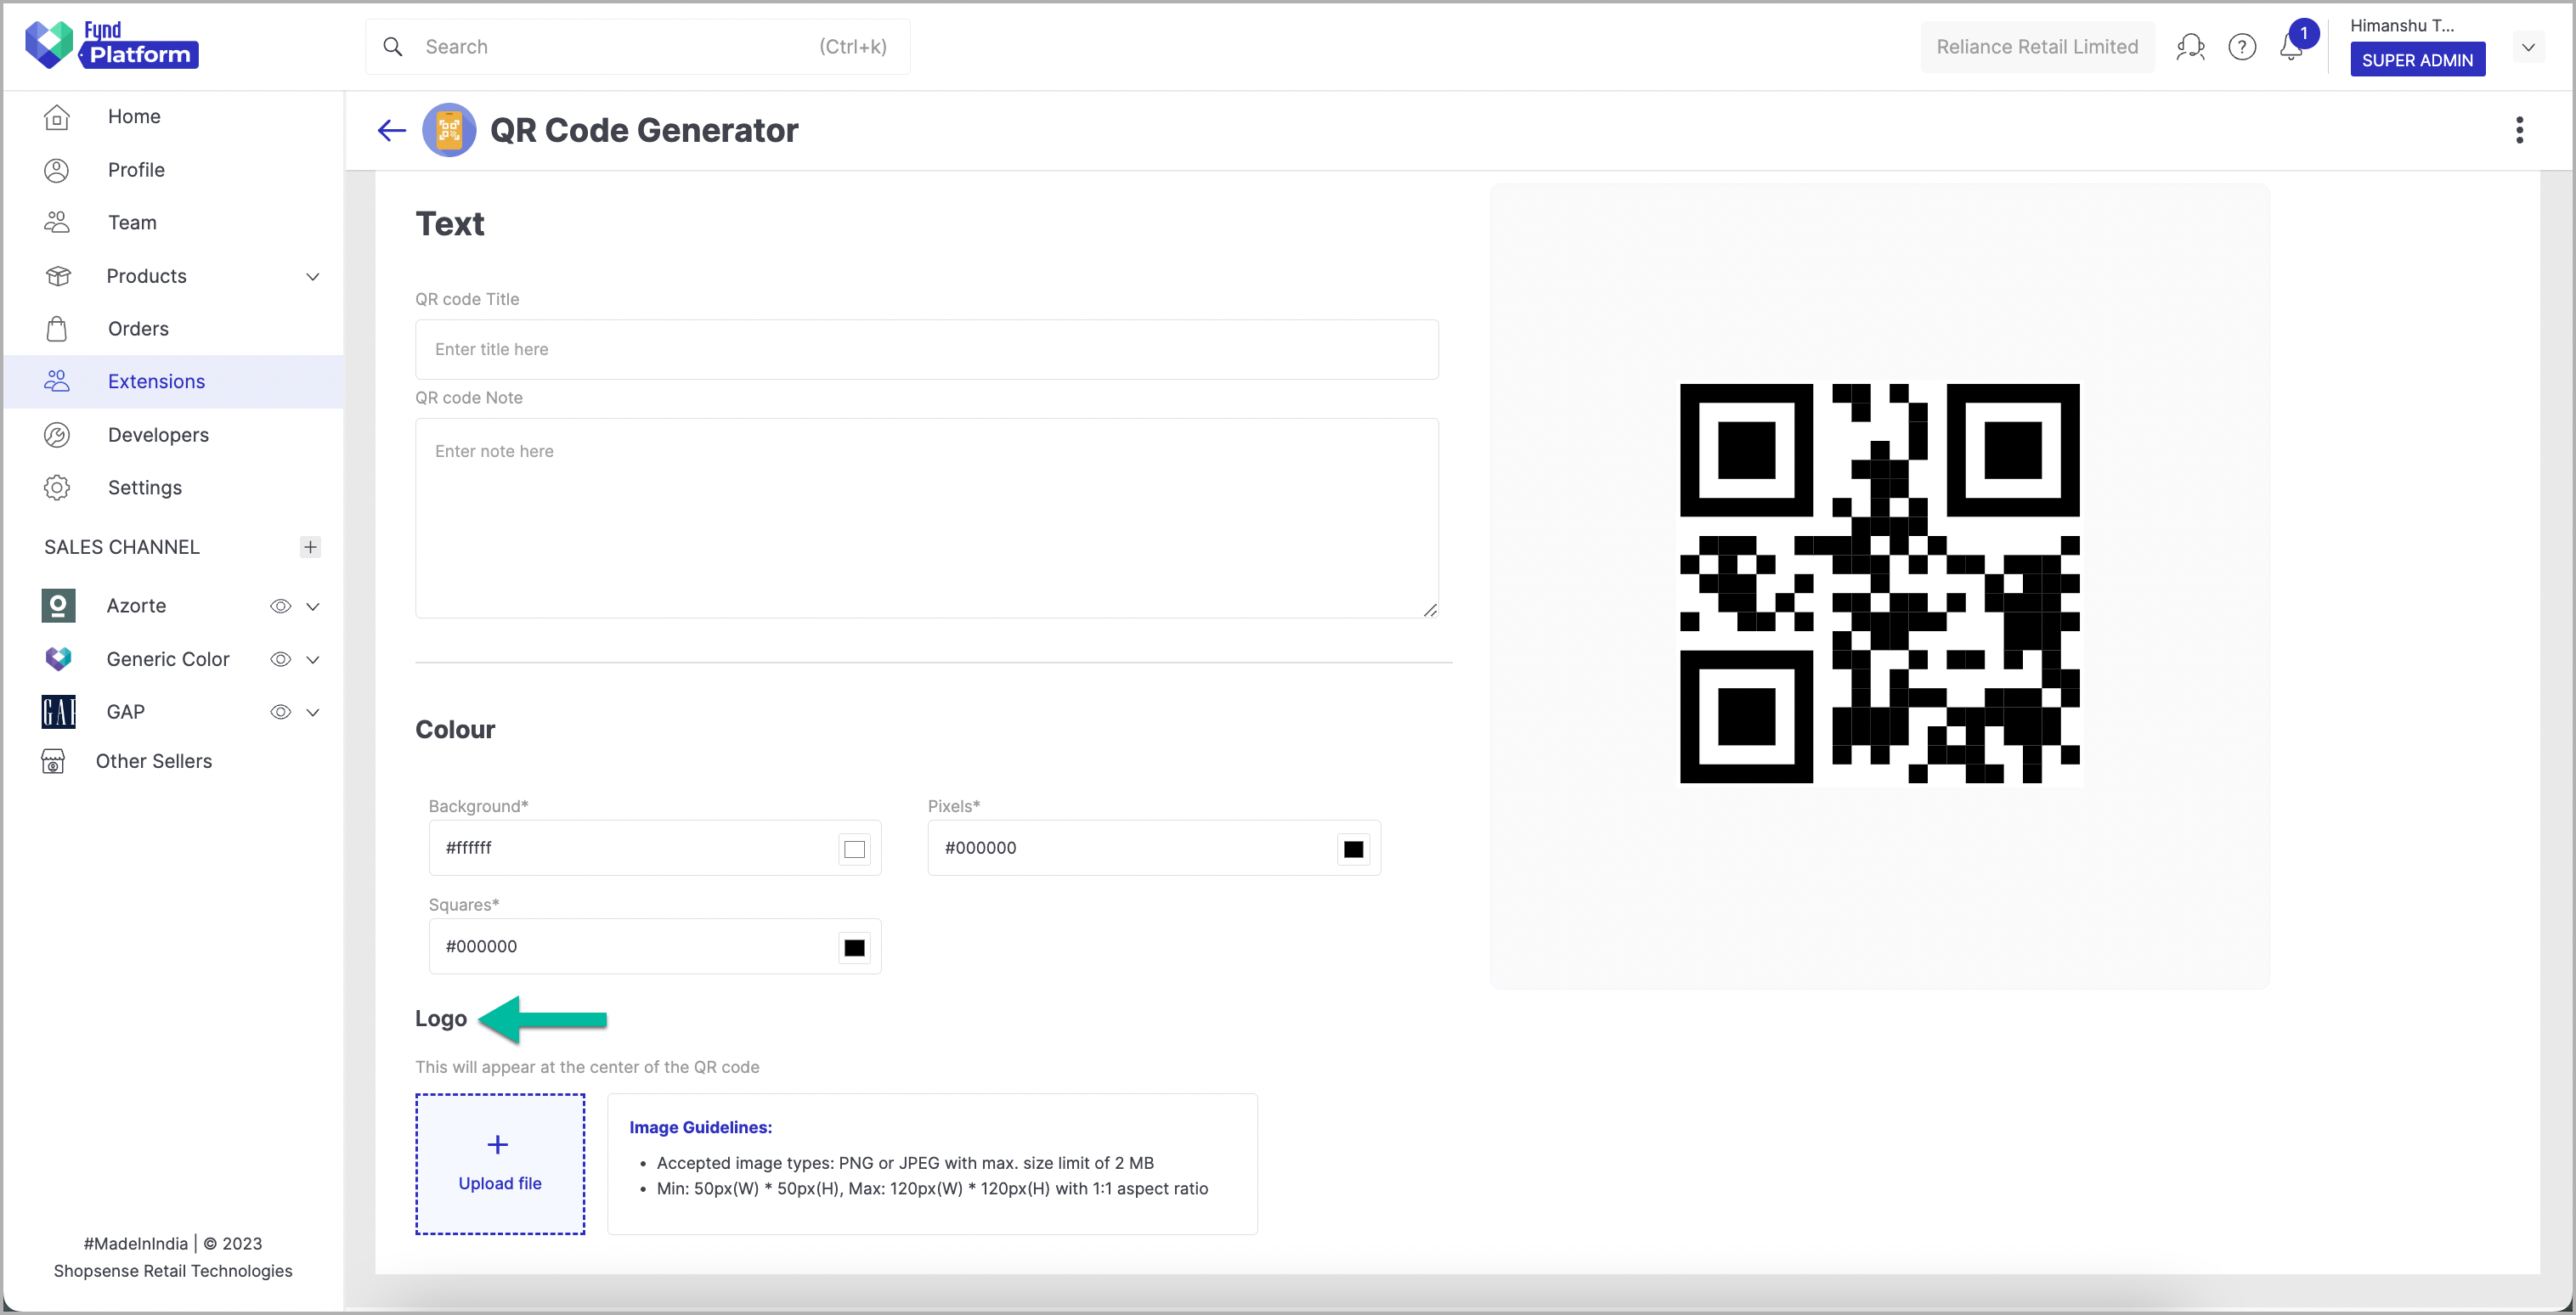
Figure 12: Logo for QR Code
Select high-contrast colours to enhance the scannability of the QR code.
Image Format
Choose the right Size & Resolution for your QR code to ensure easy scanning.
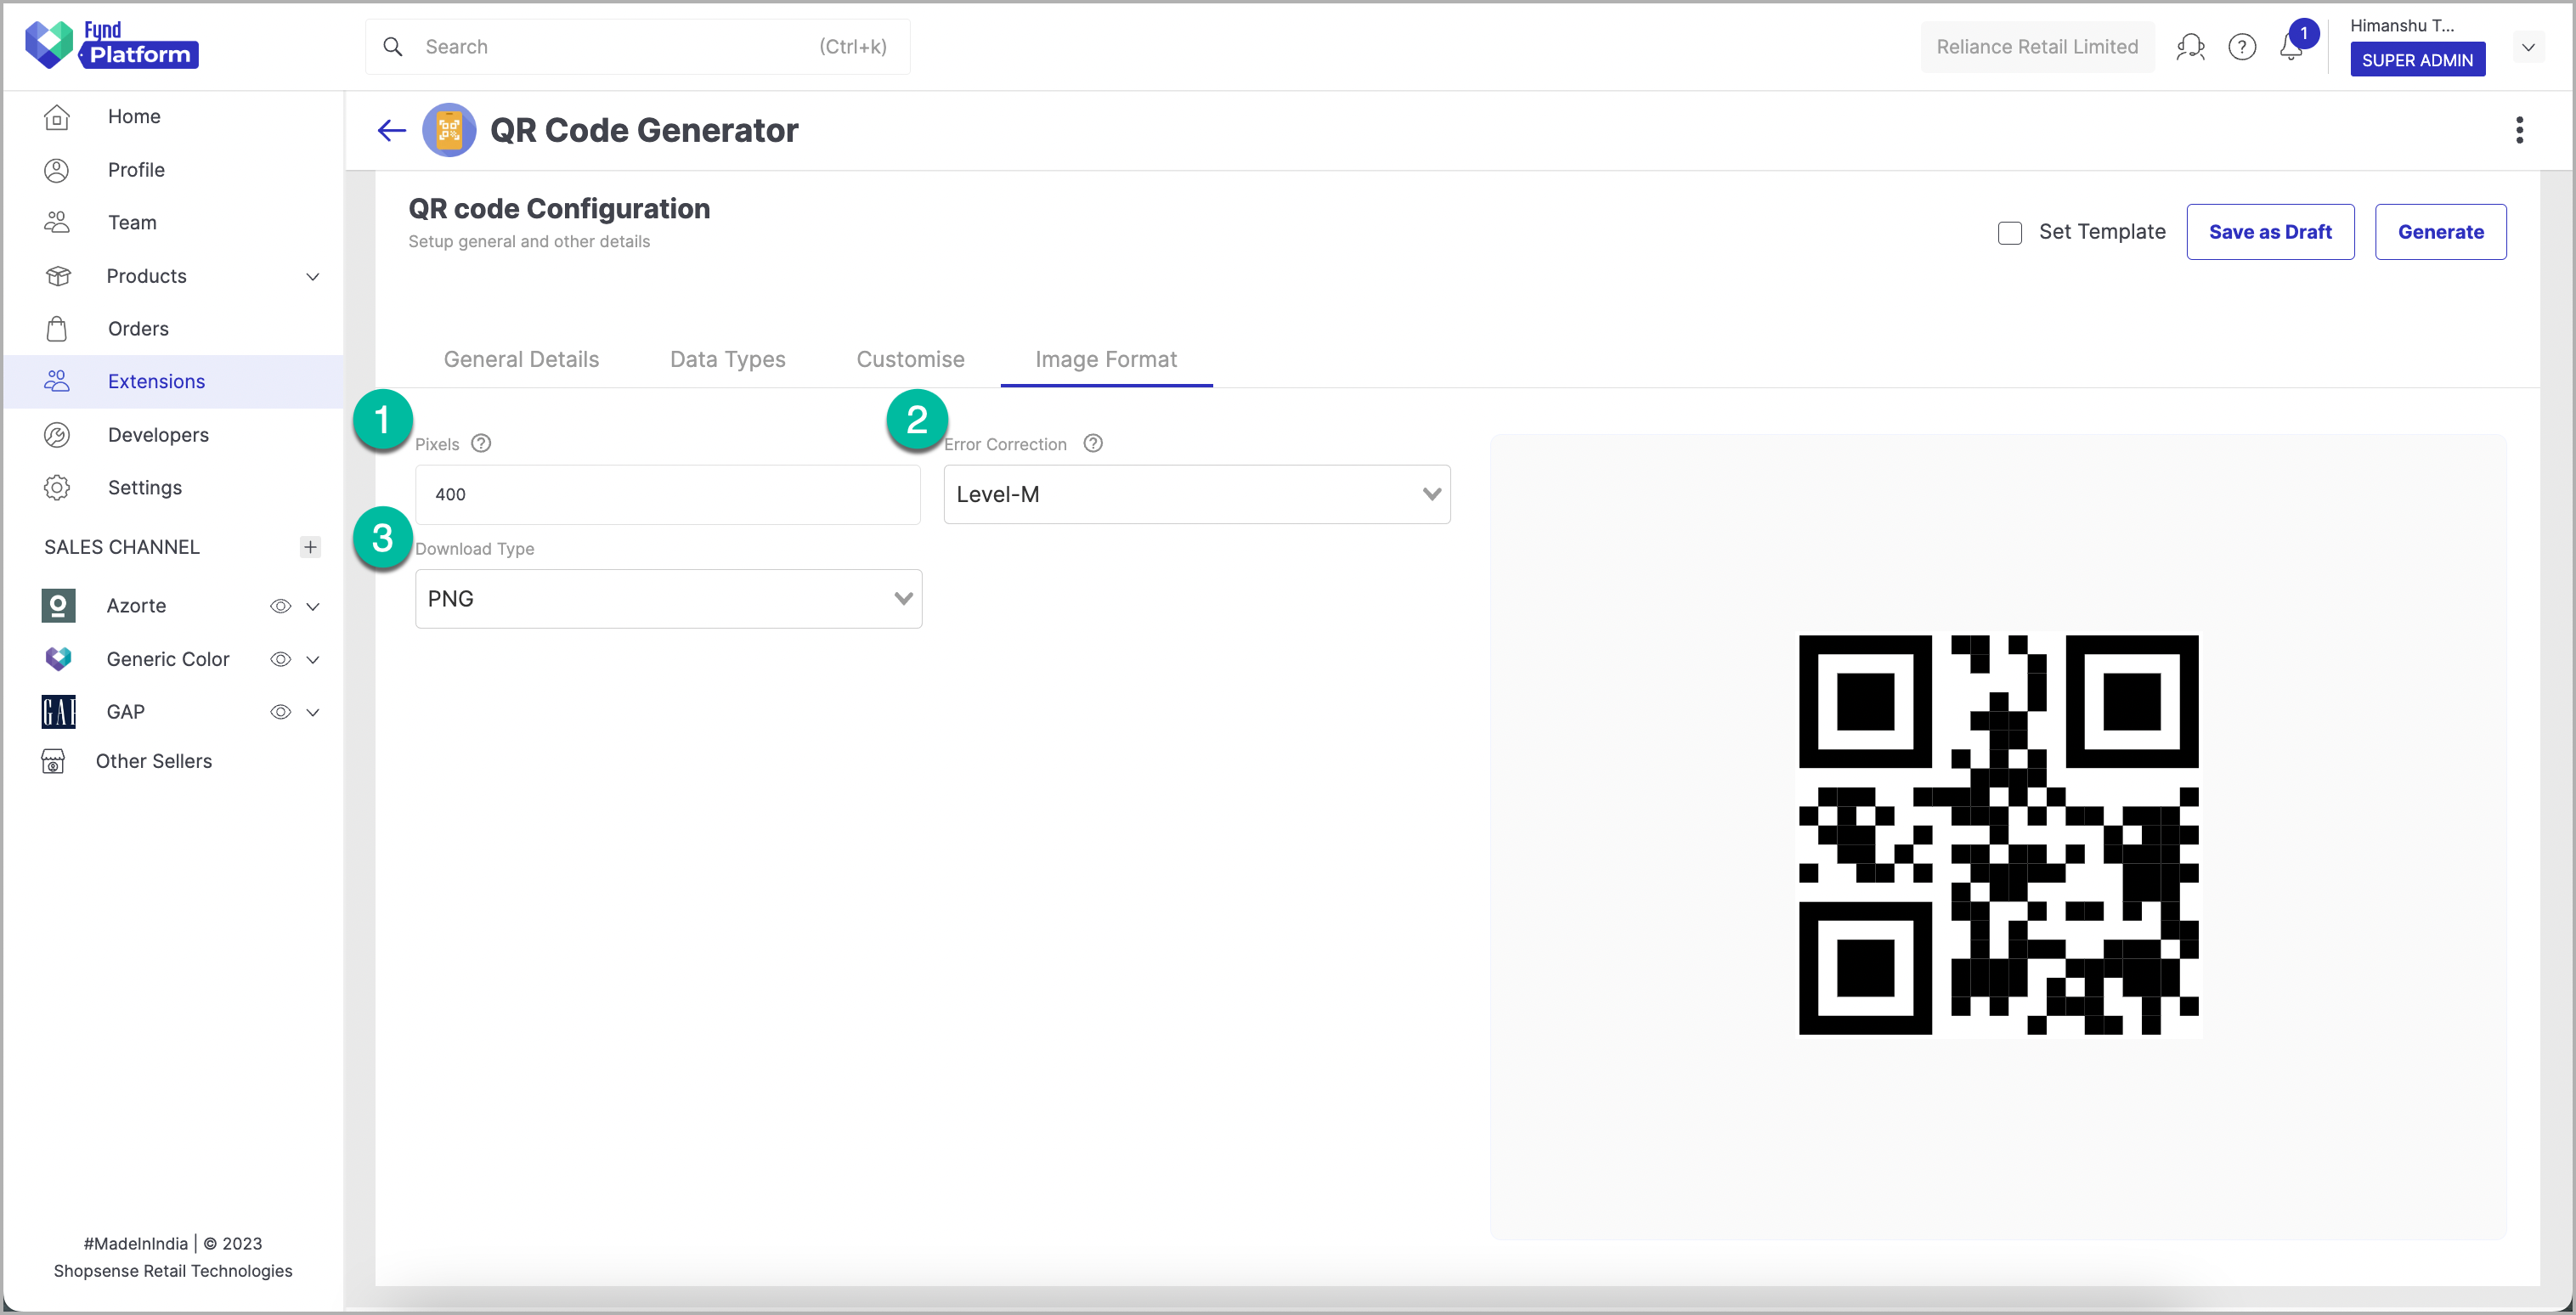
- Pixels: Choose the appropriate pixel size for your QR code image. Higher pixel size means a larger image.
- Error Correction: Choose the appropriate Error Correction level to help restore data in case the code is dirty or damaged. Higher levels of error correction improve the code's ability to recover data even if up to 30% of the code is unreadable.
- Download Type: Select the suitable download format for your QR code image.
Finalise: Click Generate to create the QR code, Save as Draft to save it for later, and Set Template to save it as a customizable template.
Existing User: After selecting a QR code template, you have the option to either create a new QR code from scratch or use the existing template. To do this, click on the Generate New button and select a template from the dropdown of Available Templates. From there, you can costomise the template and create a new one by configuring settings such as Name, Description, URL/Text, Title, Note, and Download Type.
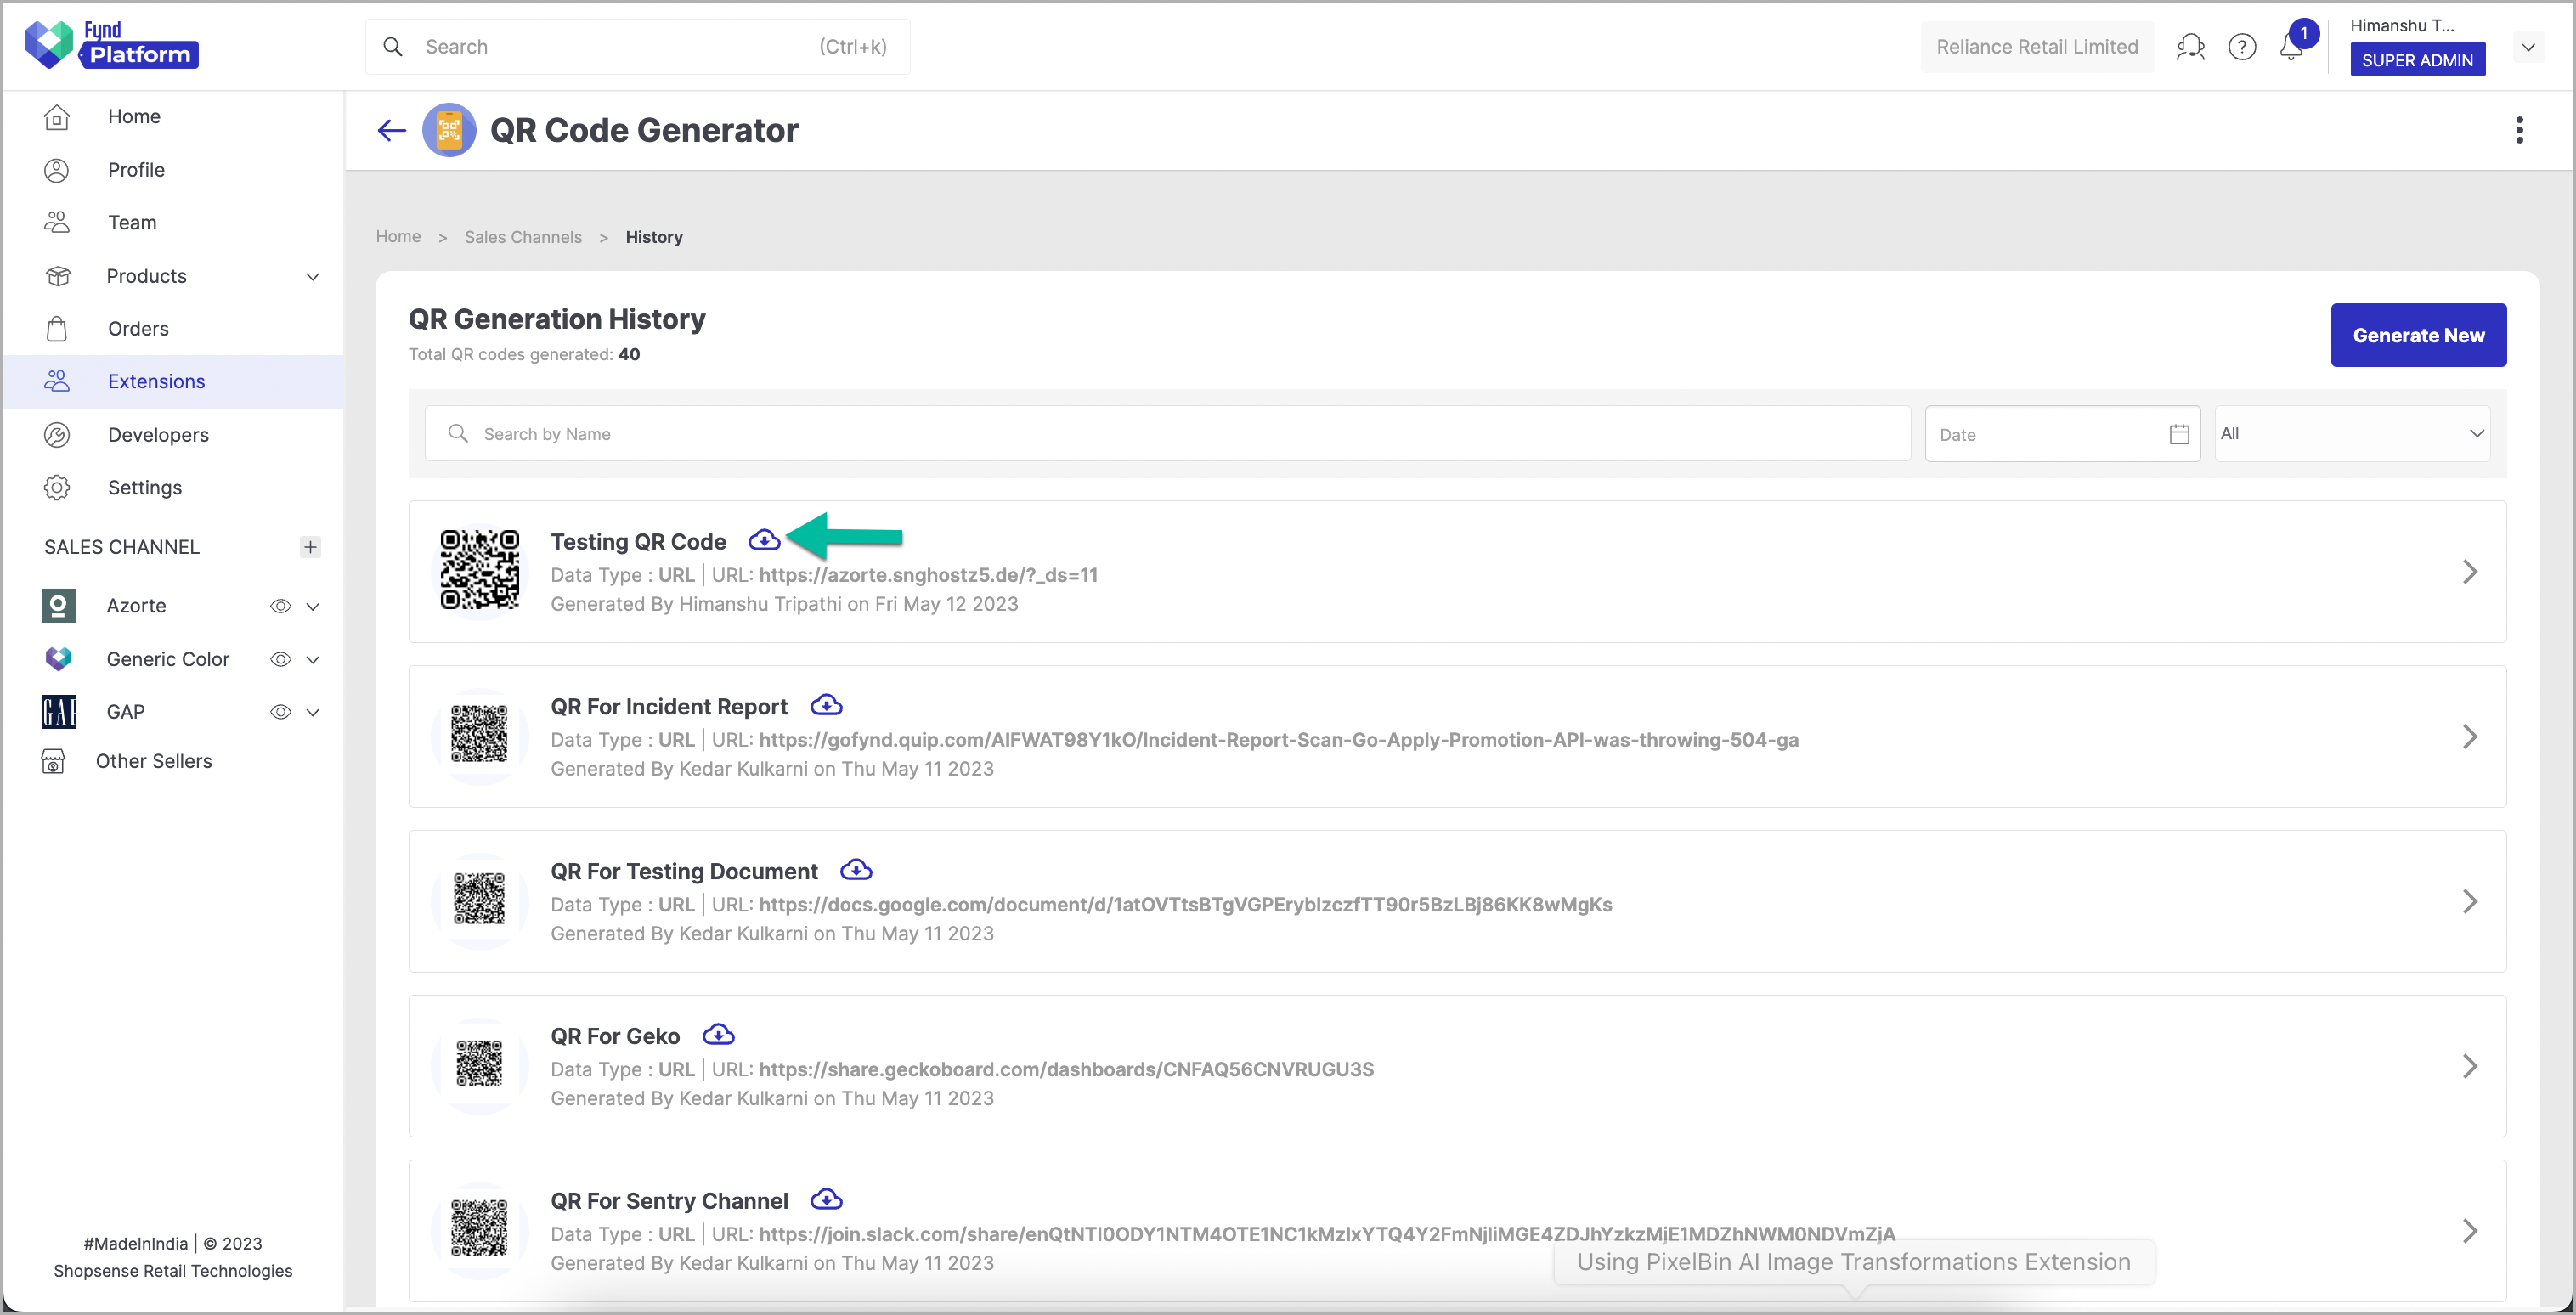
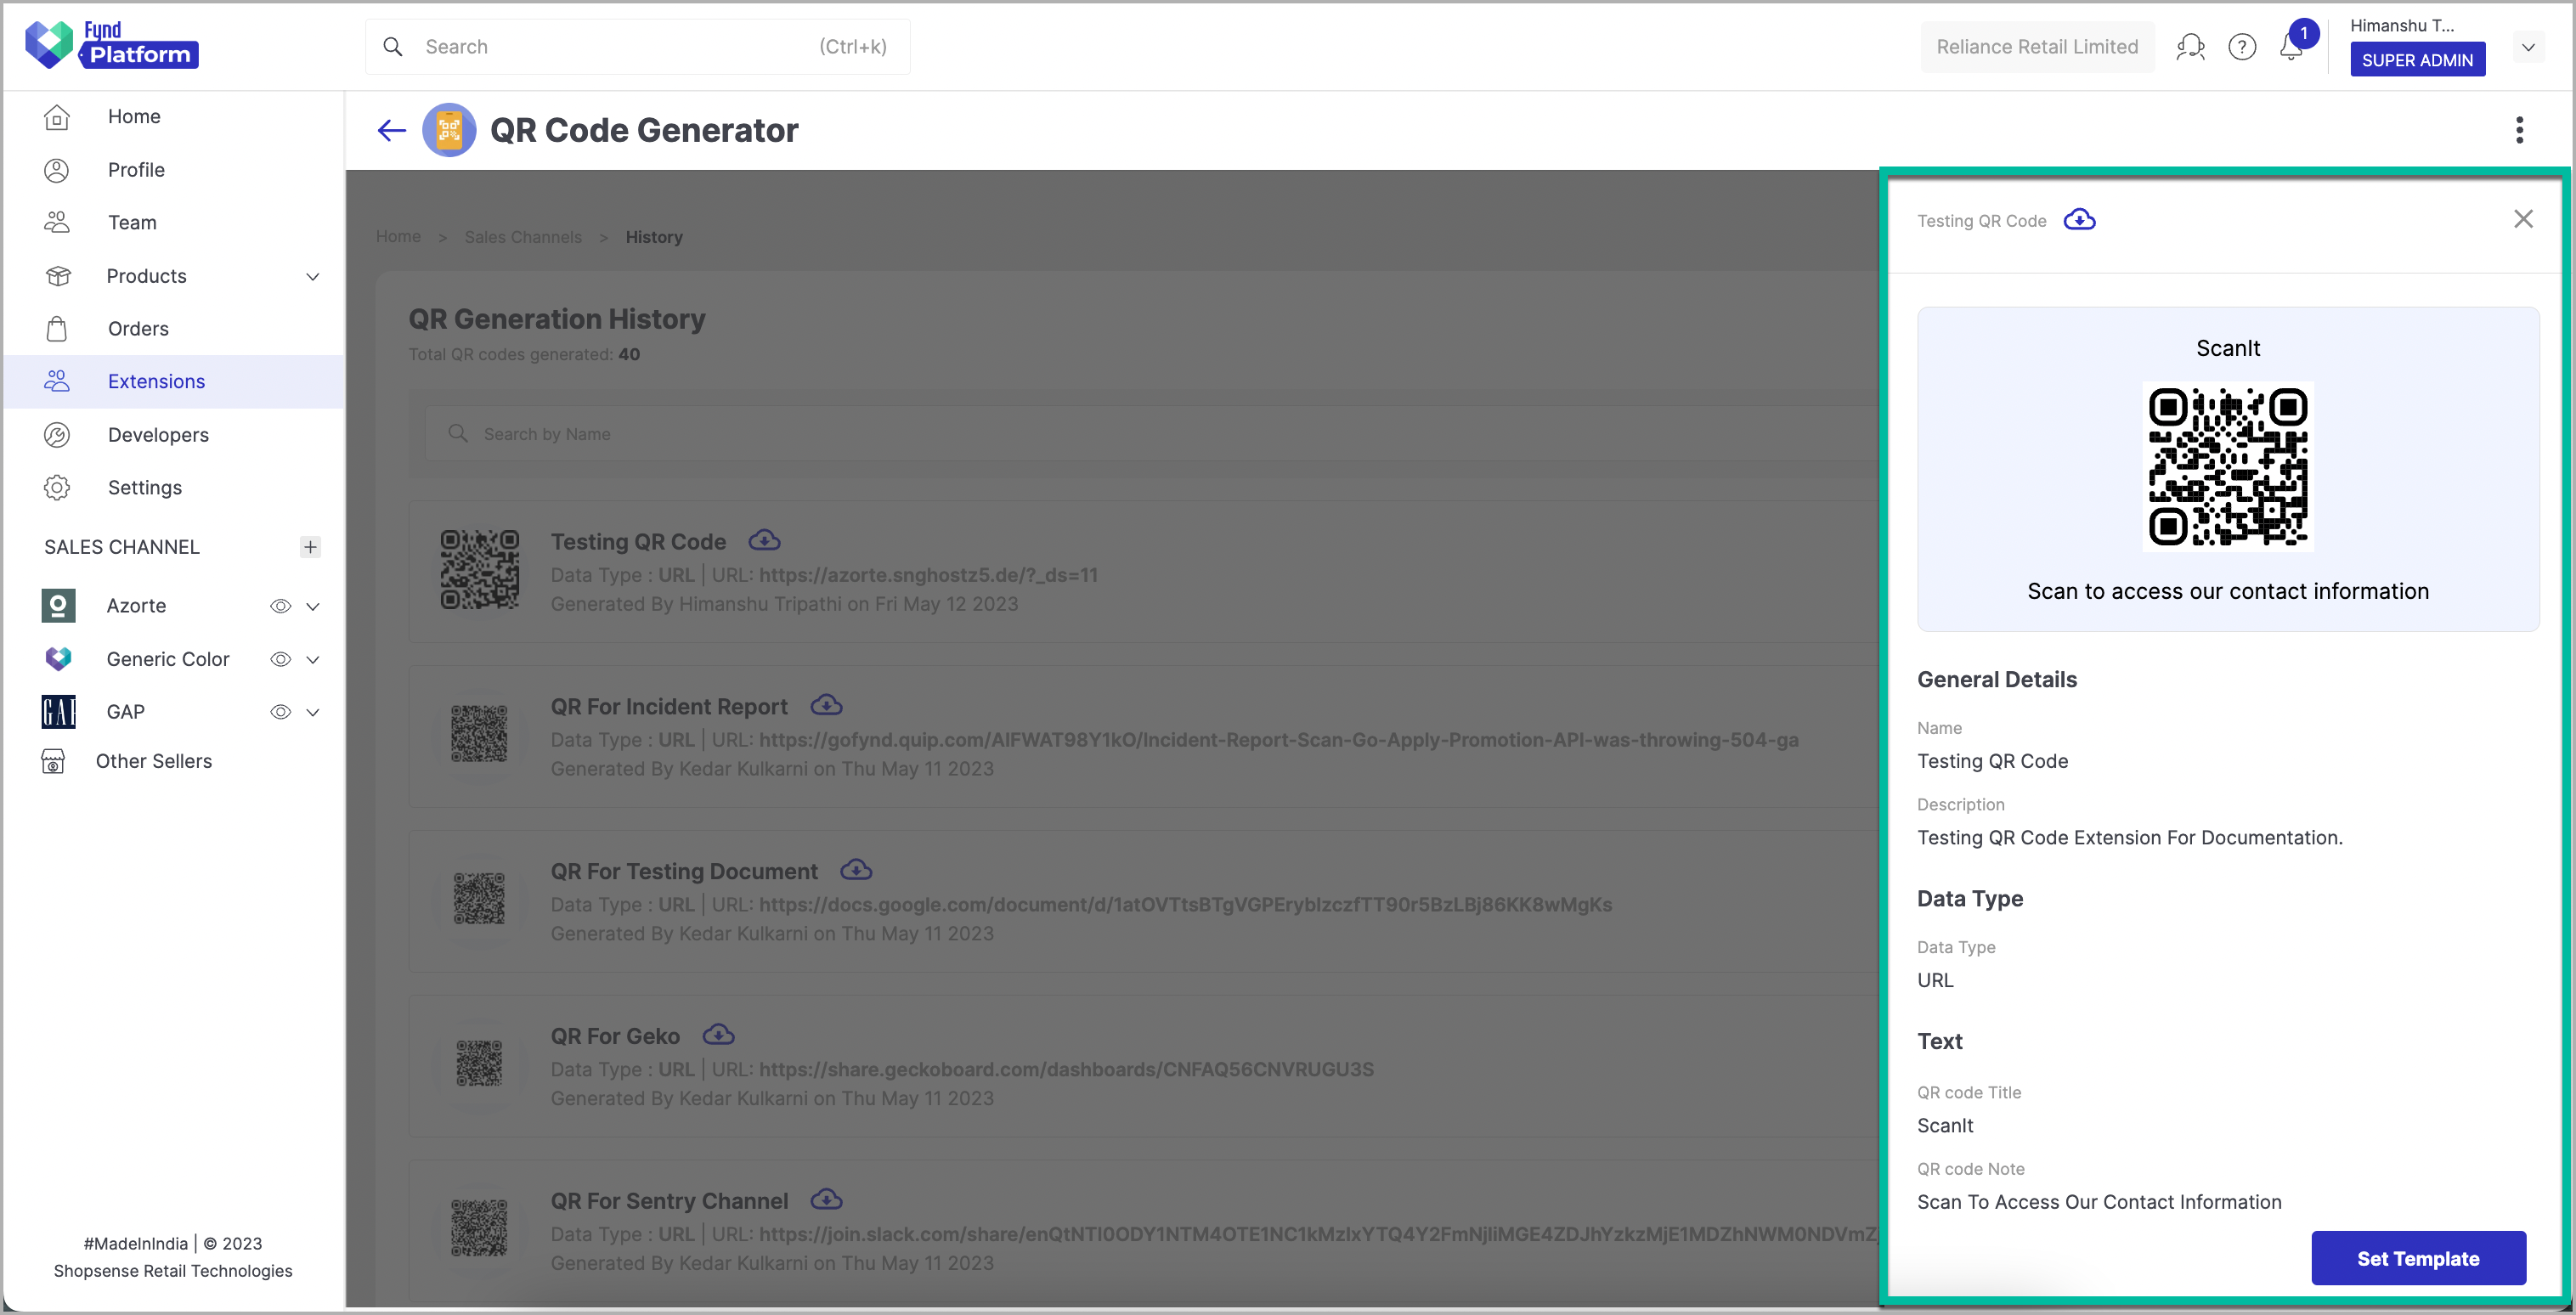
To view the QR code configurations, go to the QR Generation History page and click on the forward arrow icon (as shown in the image) next to the QR code you want to inspect.

Final Result
To download the desired QR code click on the download button (refer the image given below).