Freshdesk Integration
Introduction
Freshdesk is a cloud-based CRM software that assists businesses in managing customer support. By integrating the Freshdesk Extension into the Fynd Platform, businesses can smoothly manage customer service for a specific sales channel. The setup process for the Freshdesk extension is easy and efficient, allowing businesses to manage customer support tickets effectively. The extension streamlines customer support for sellers and users, making it a valuable tool for businesses.
Steps to use Freshdesk Integration Extension
-
Go to Extensions in Fynd Platform.
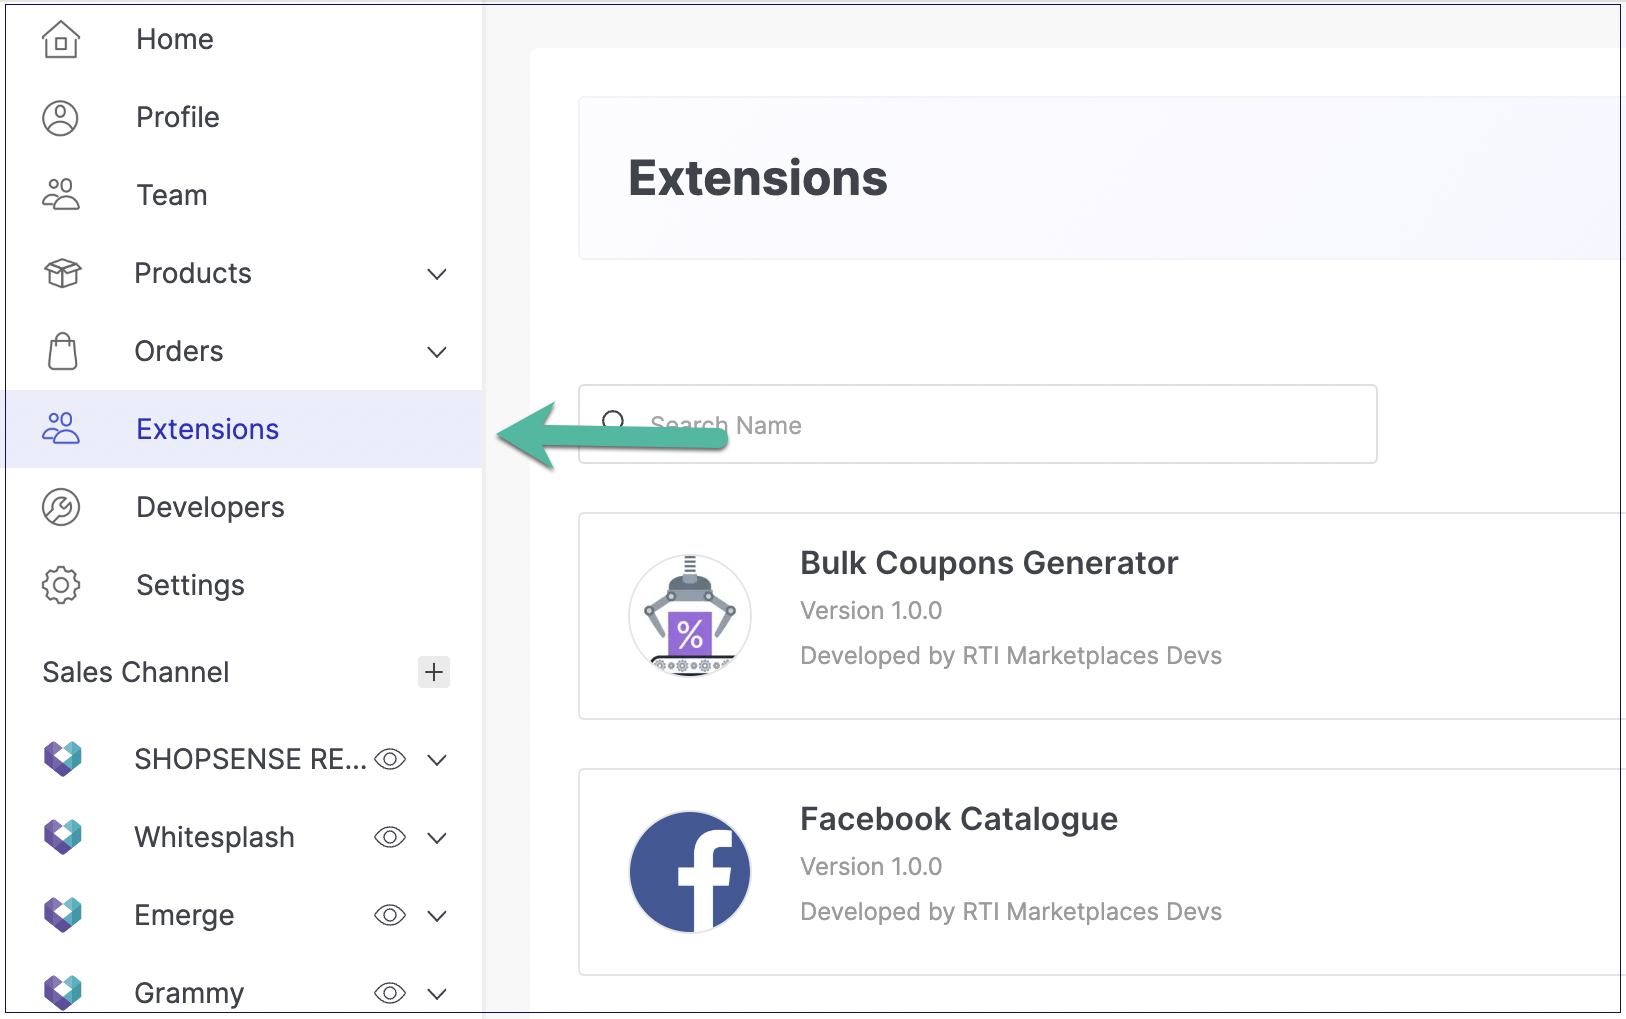
Figure 1: Extension Section - Fynd Platform
-
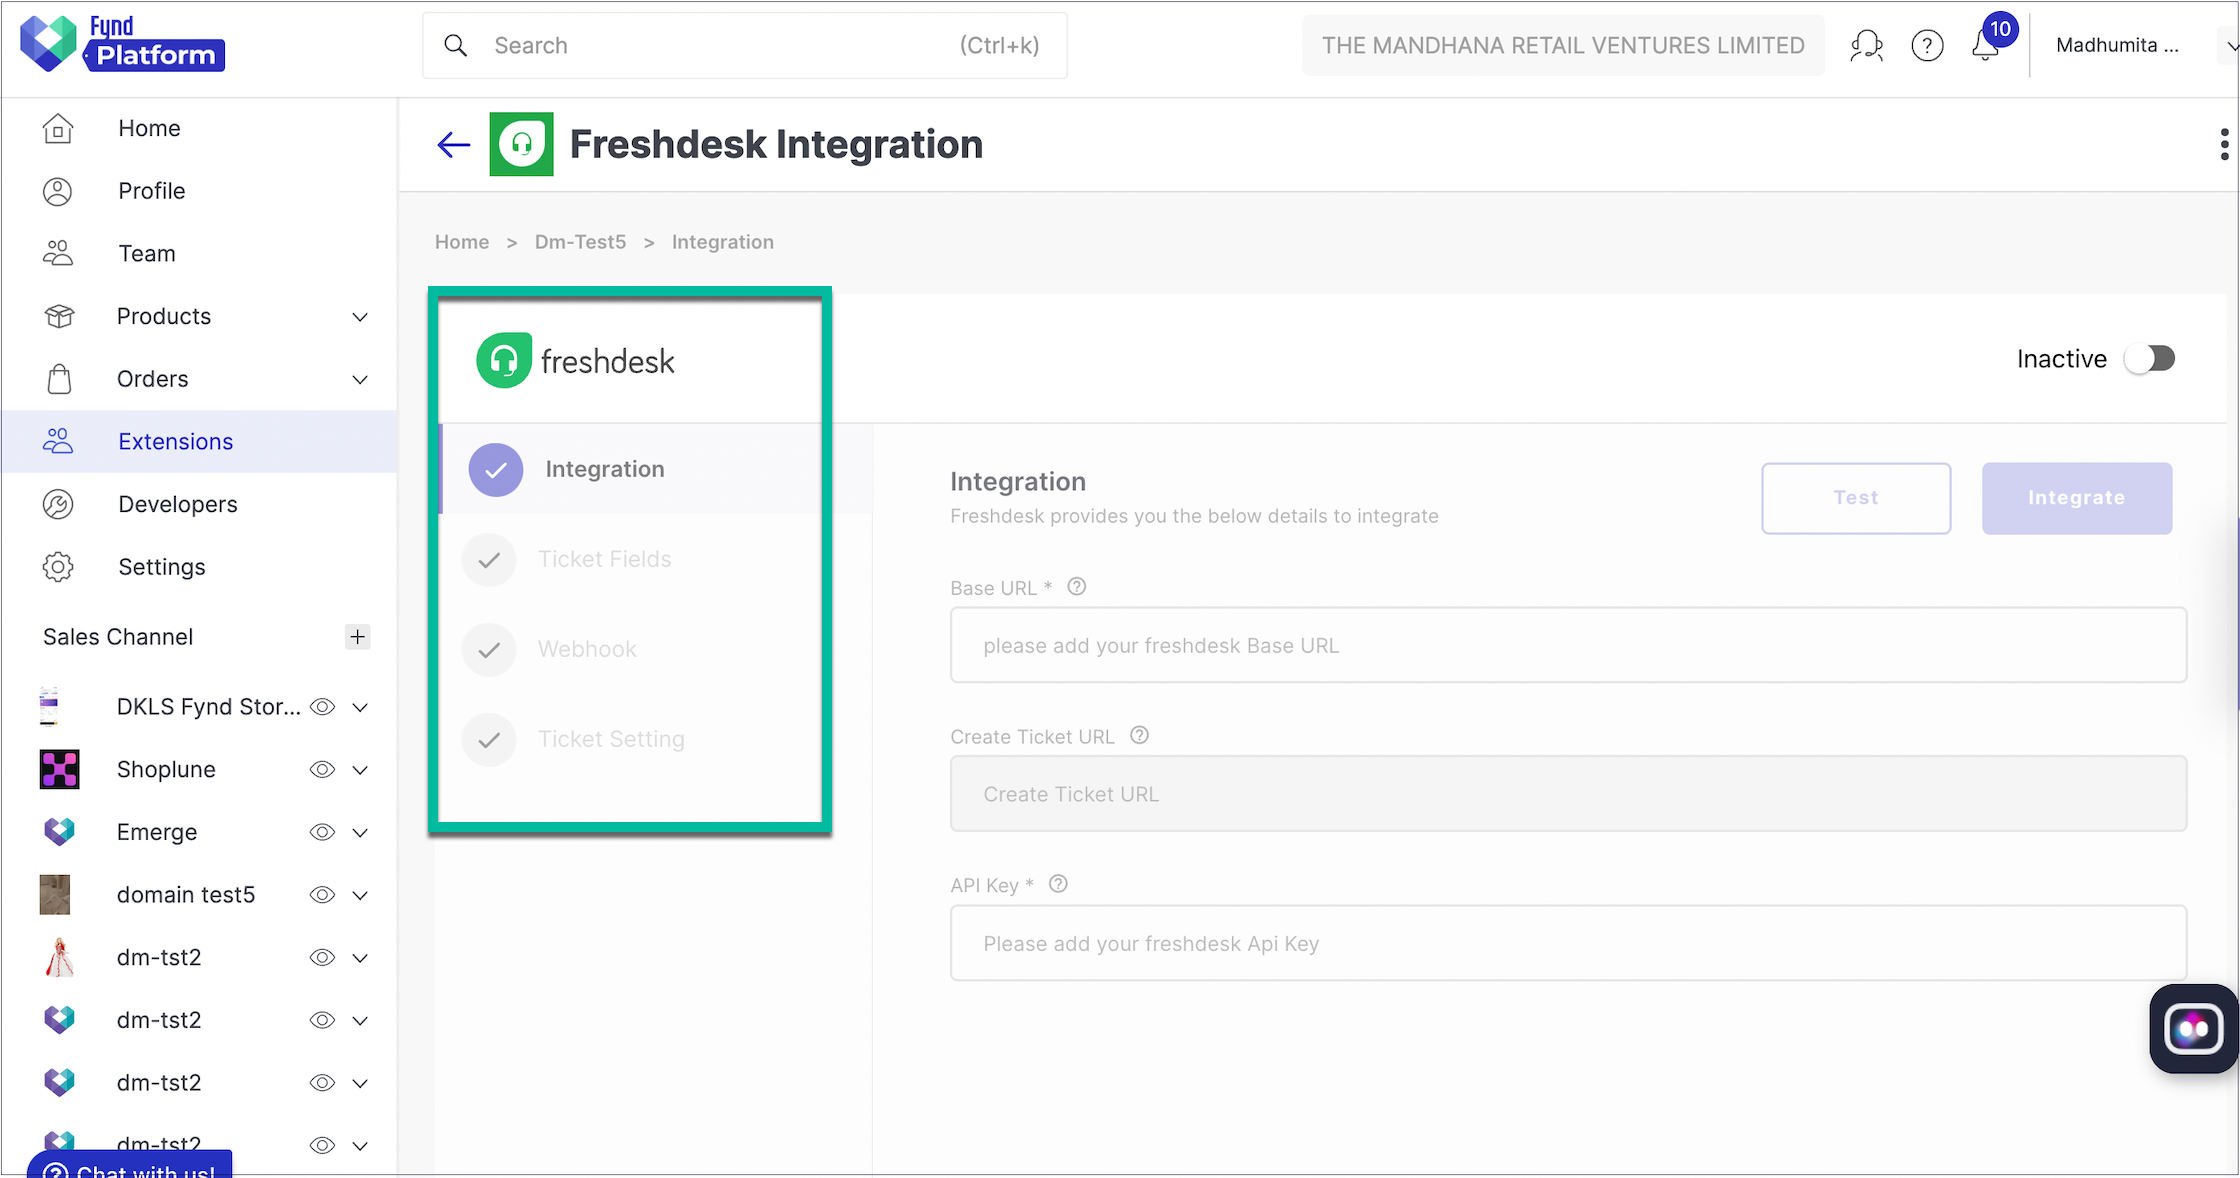
Search for the Freshdesk Integration extension in the search box, and open it.
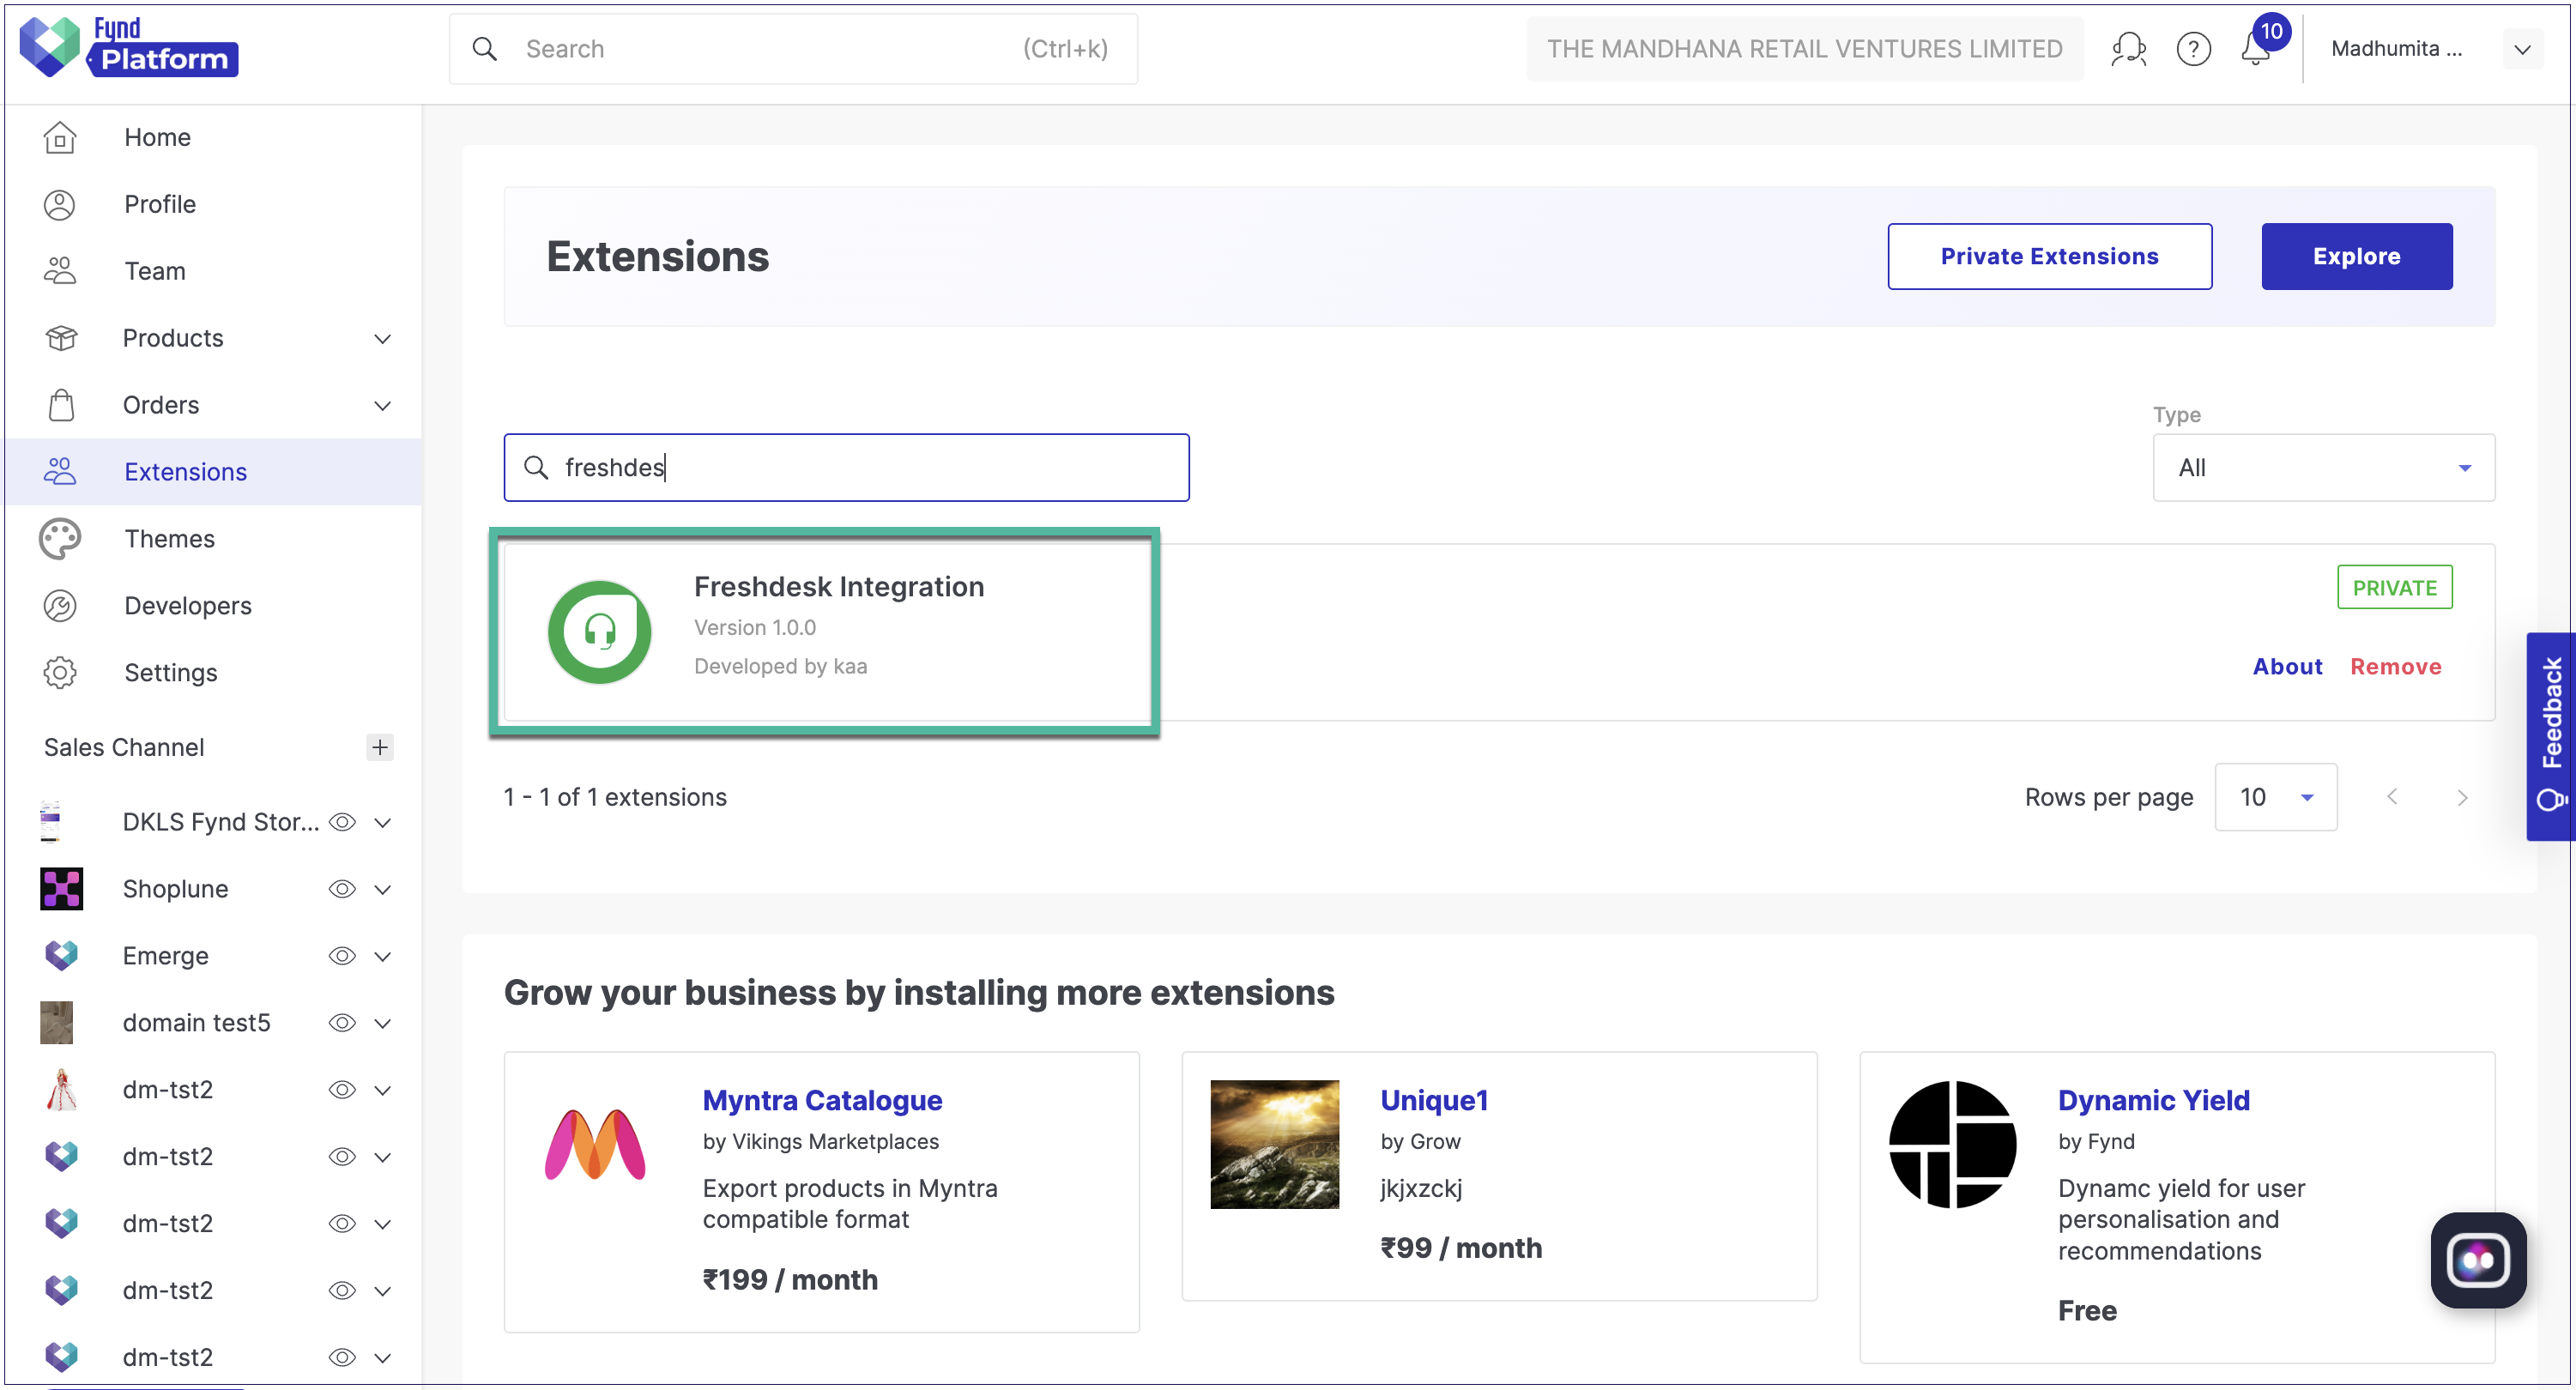
Figure 2: Freshdesk Extension
-
Select the sales channel you want to configure the extension with.
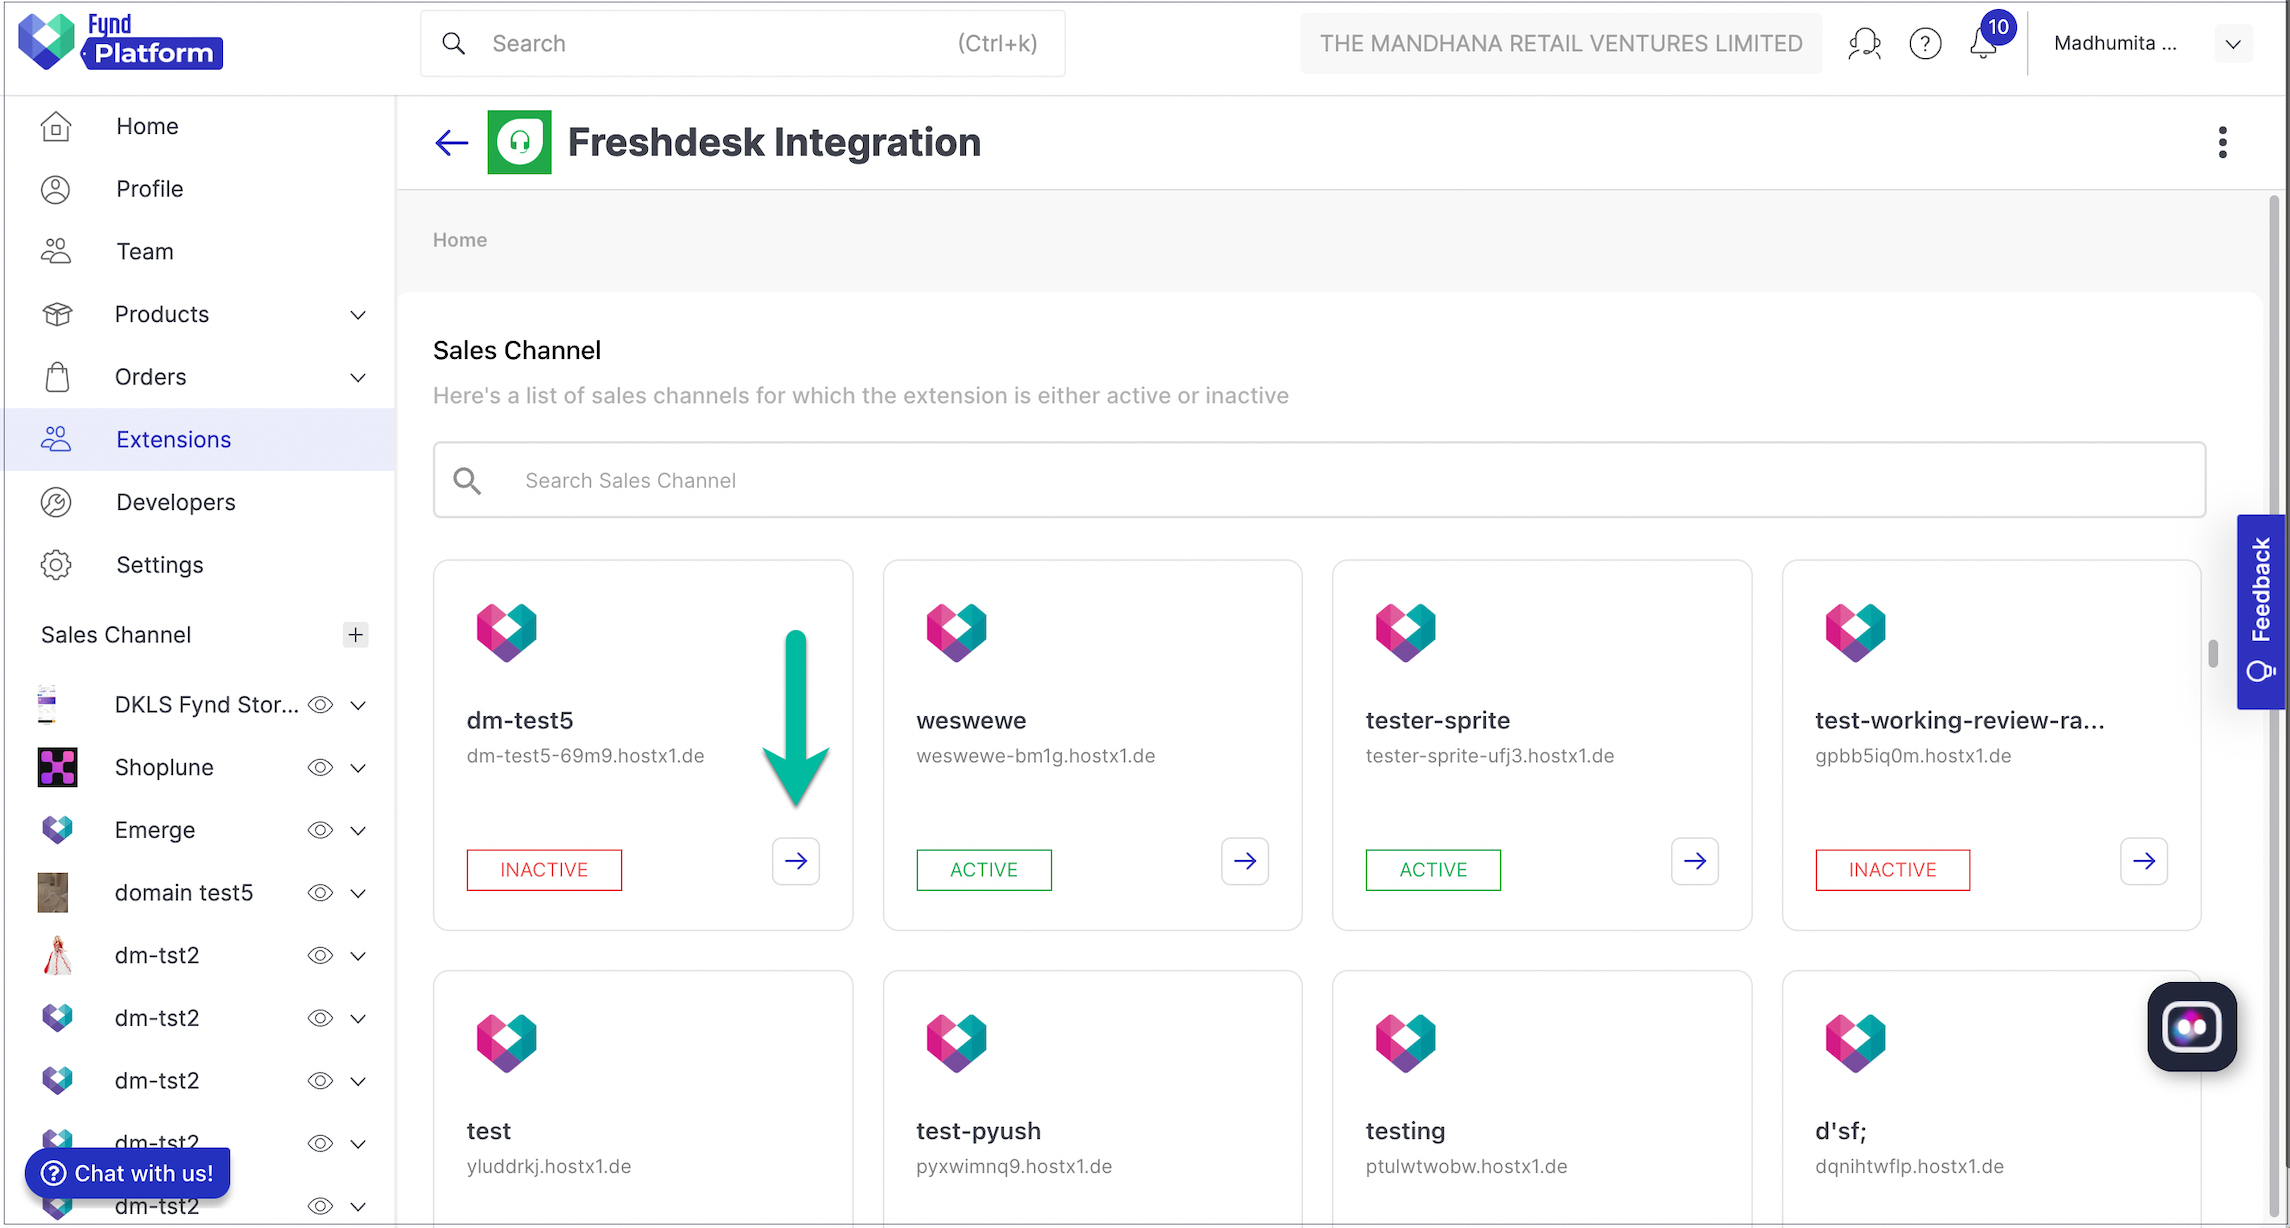
Figure 3: Selecting Sales Channel
Configure
You can configure the Freshdesk Integration extension by fulfilling the following paths:
Integration
-
Create an account on Freshdesk.
-
Copy Freshdesk domain URL from Freshdesk. Check the image below.

Figure 5: Freshdesk Homepage
-
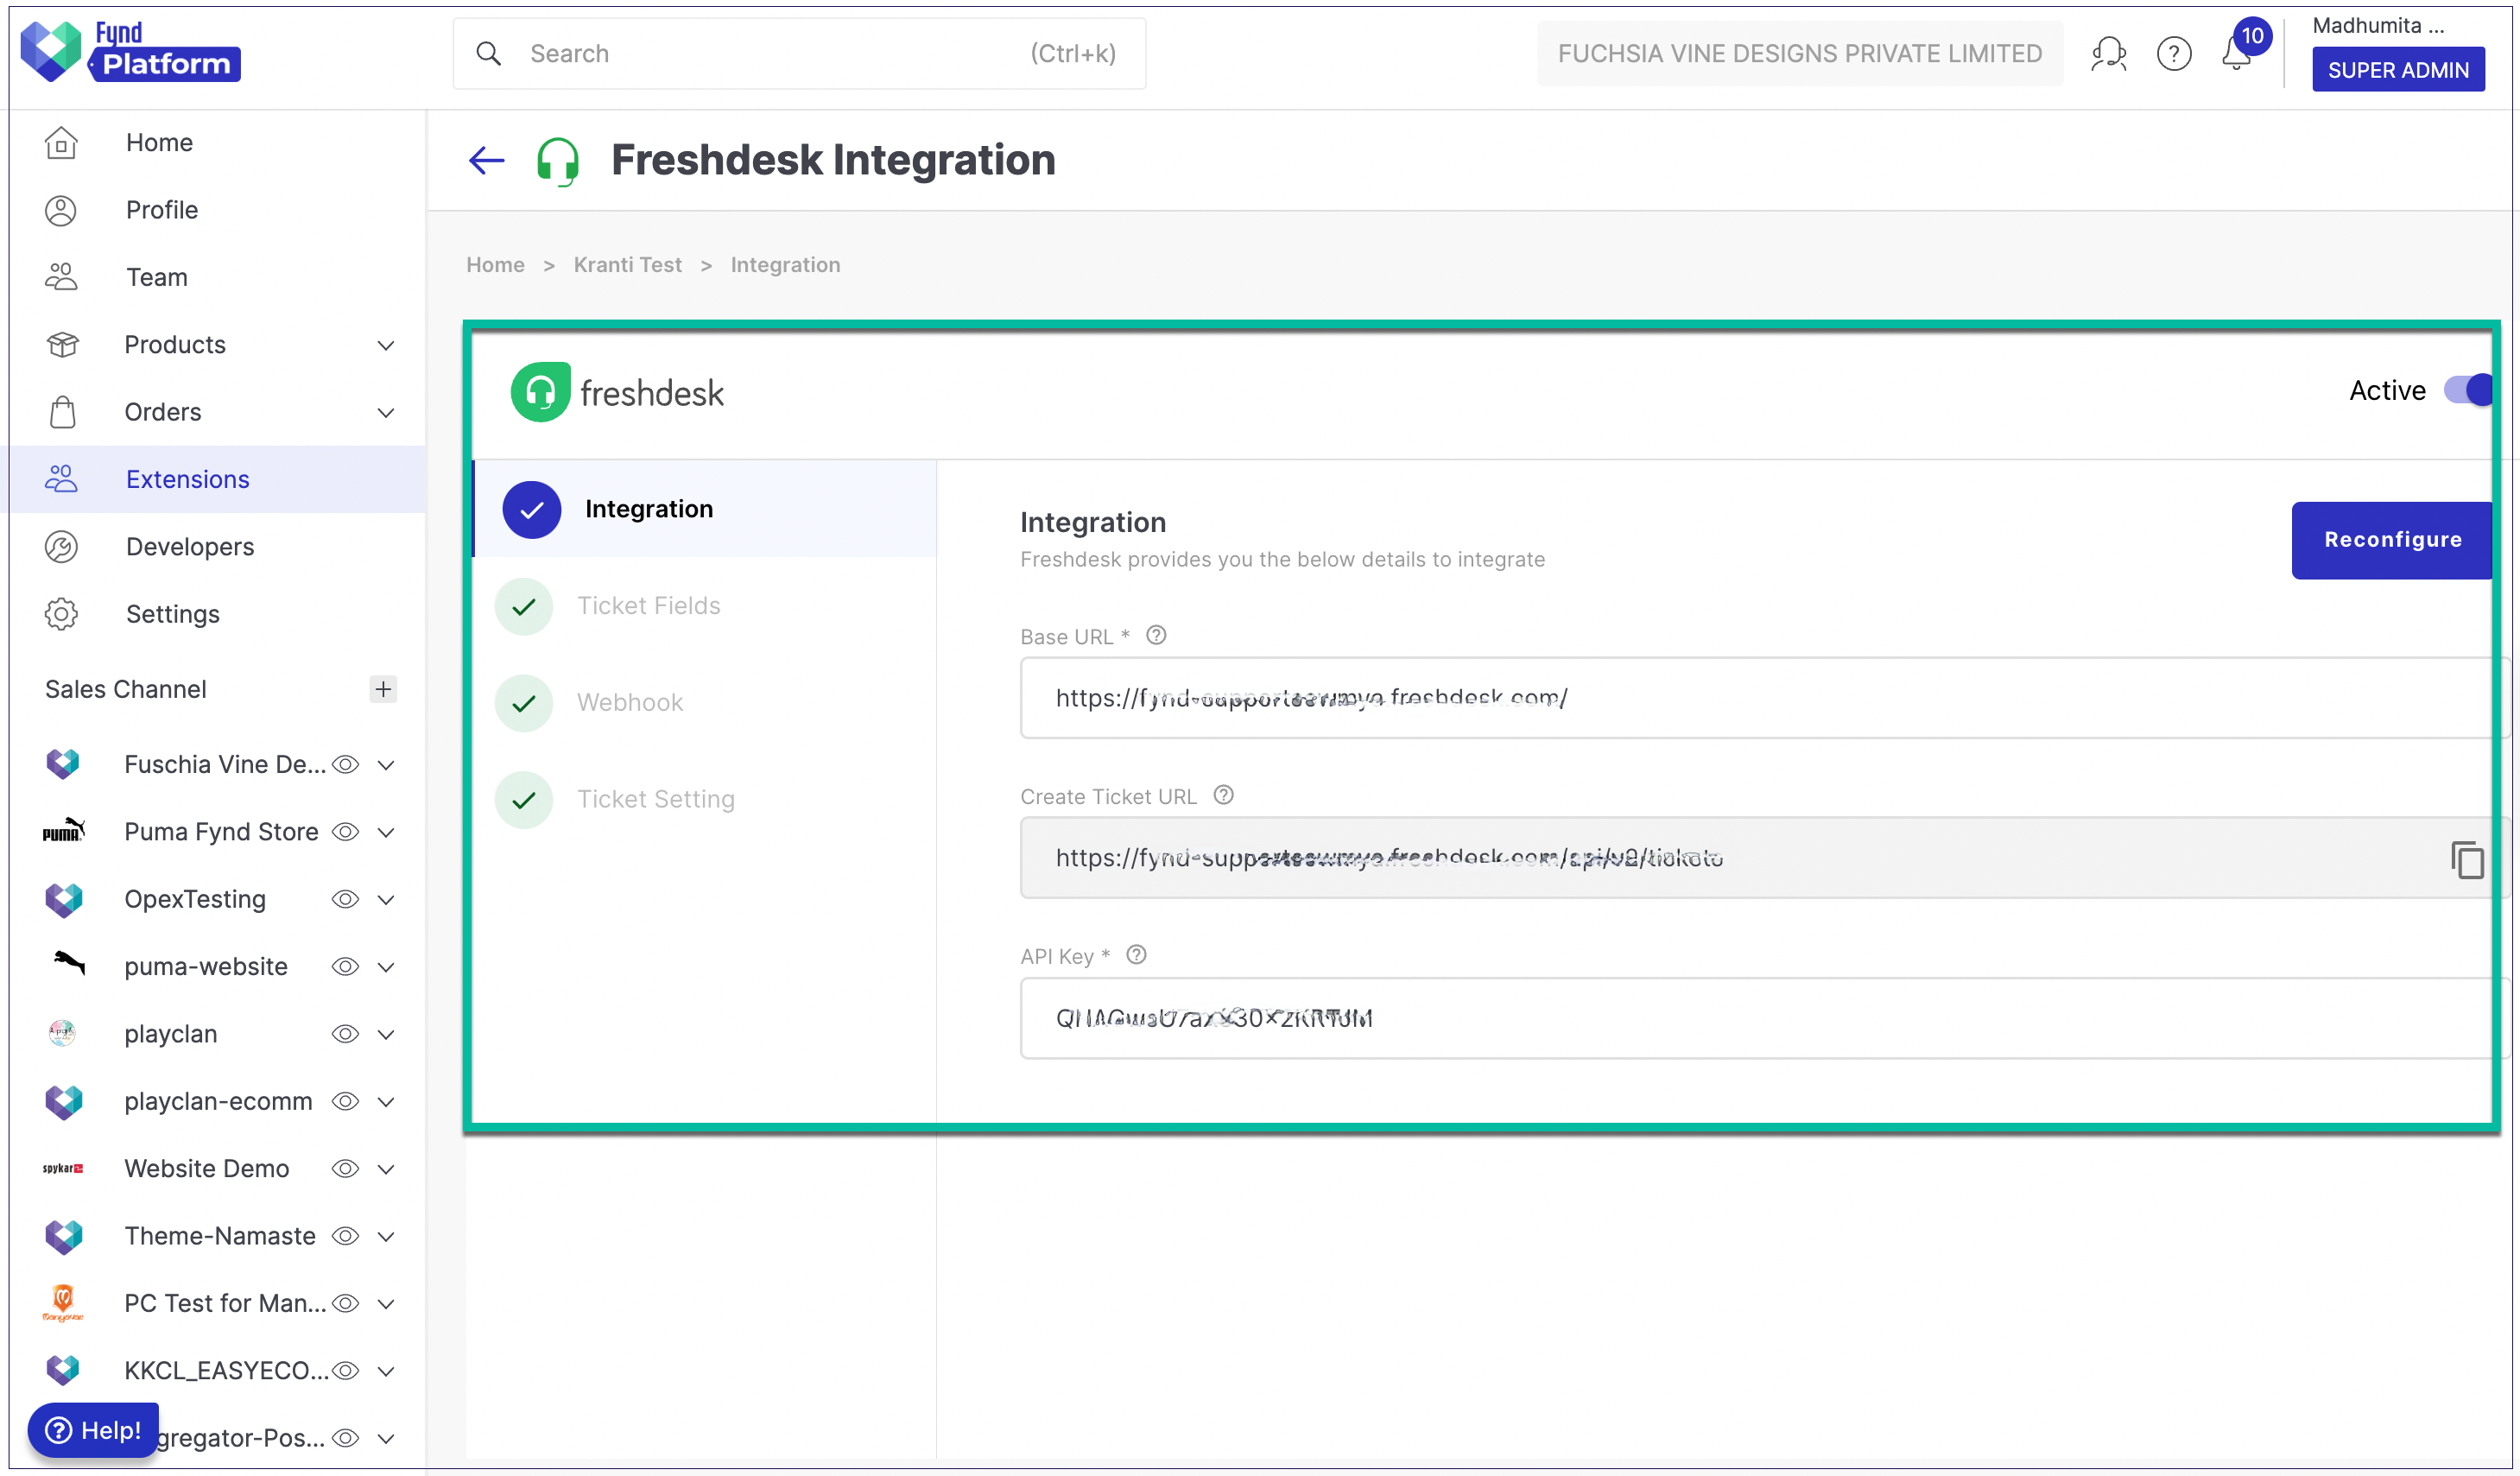
Come to the extension page and paste the link under the Base URL section. before that, you need to enable the toggle button to activate the extension on your sales channel.
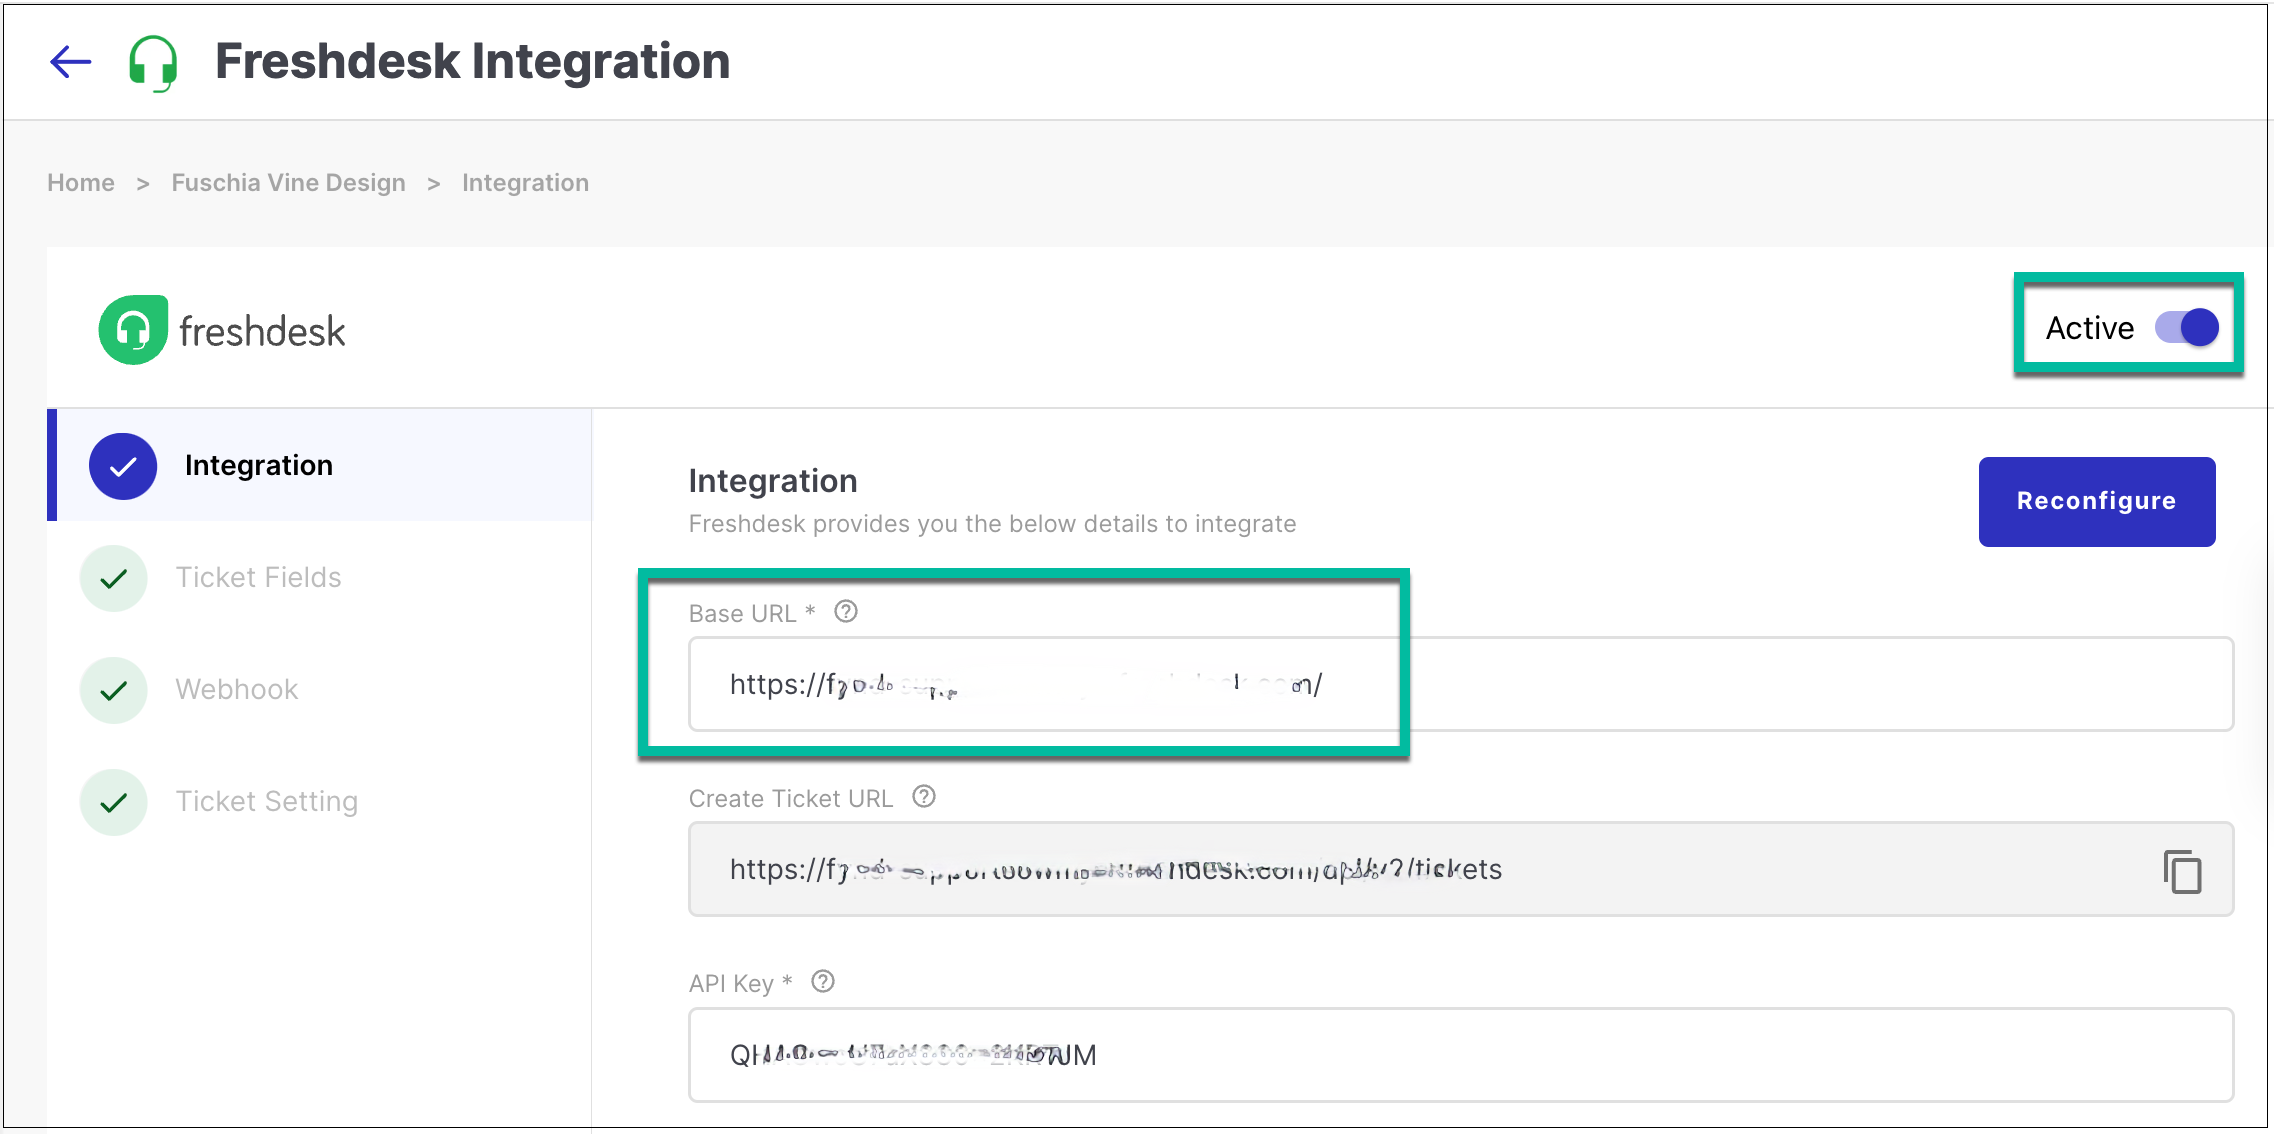
Figure 6: Pasting Base URL
-
Go to the Freshdesk Profile section.
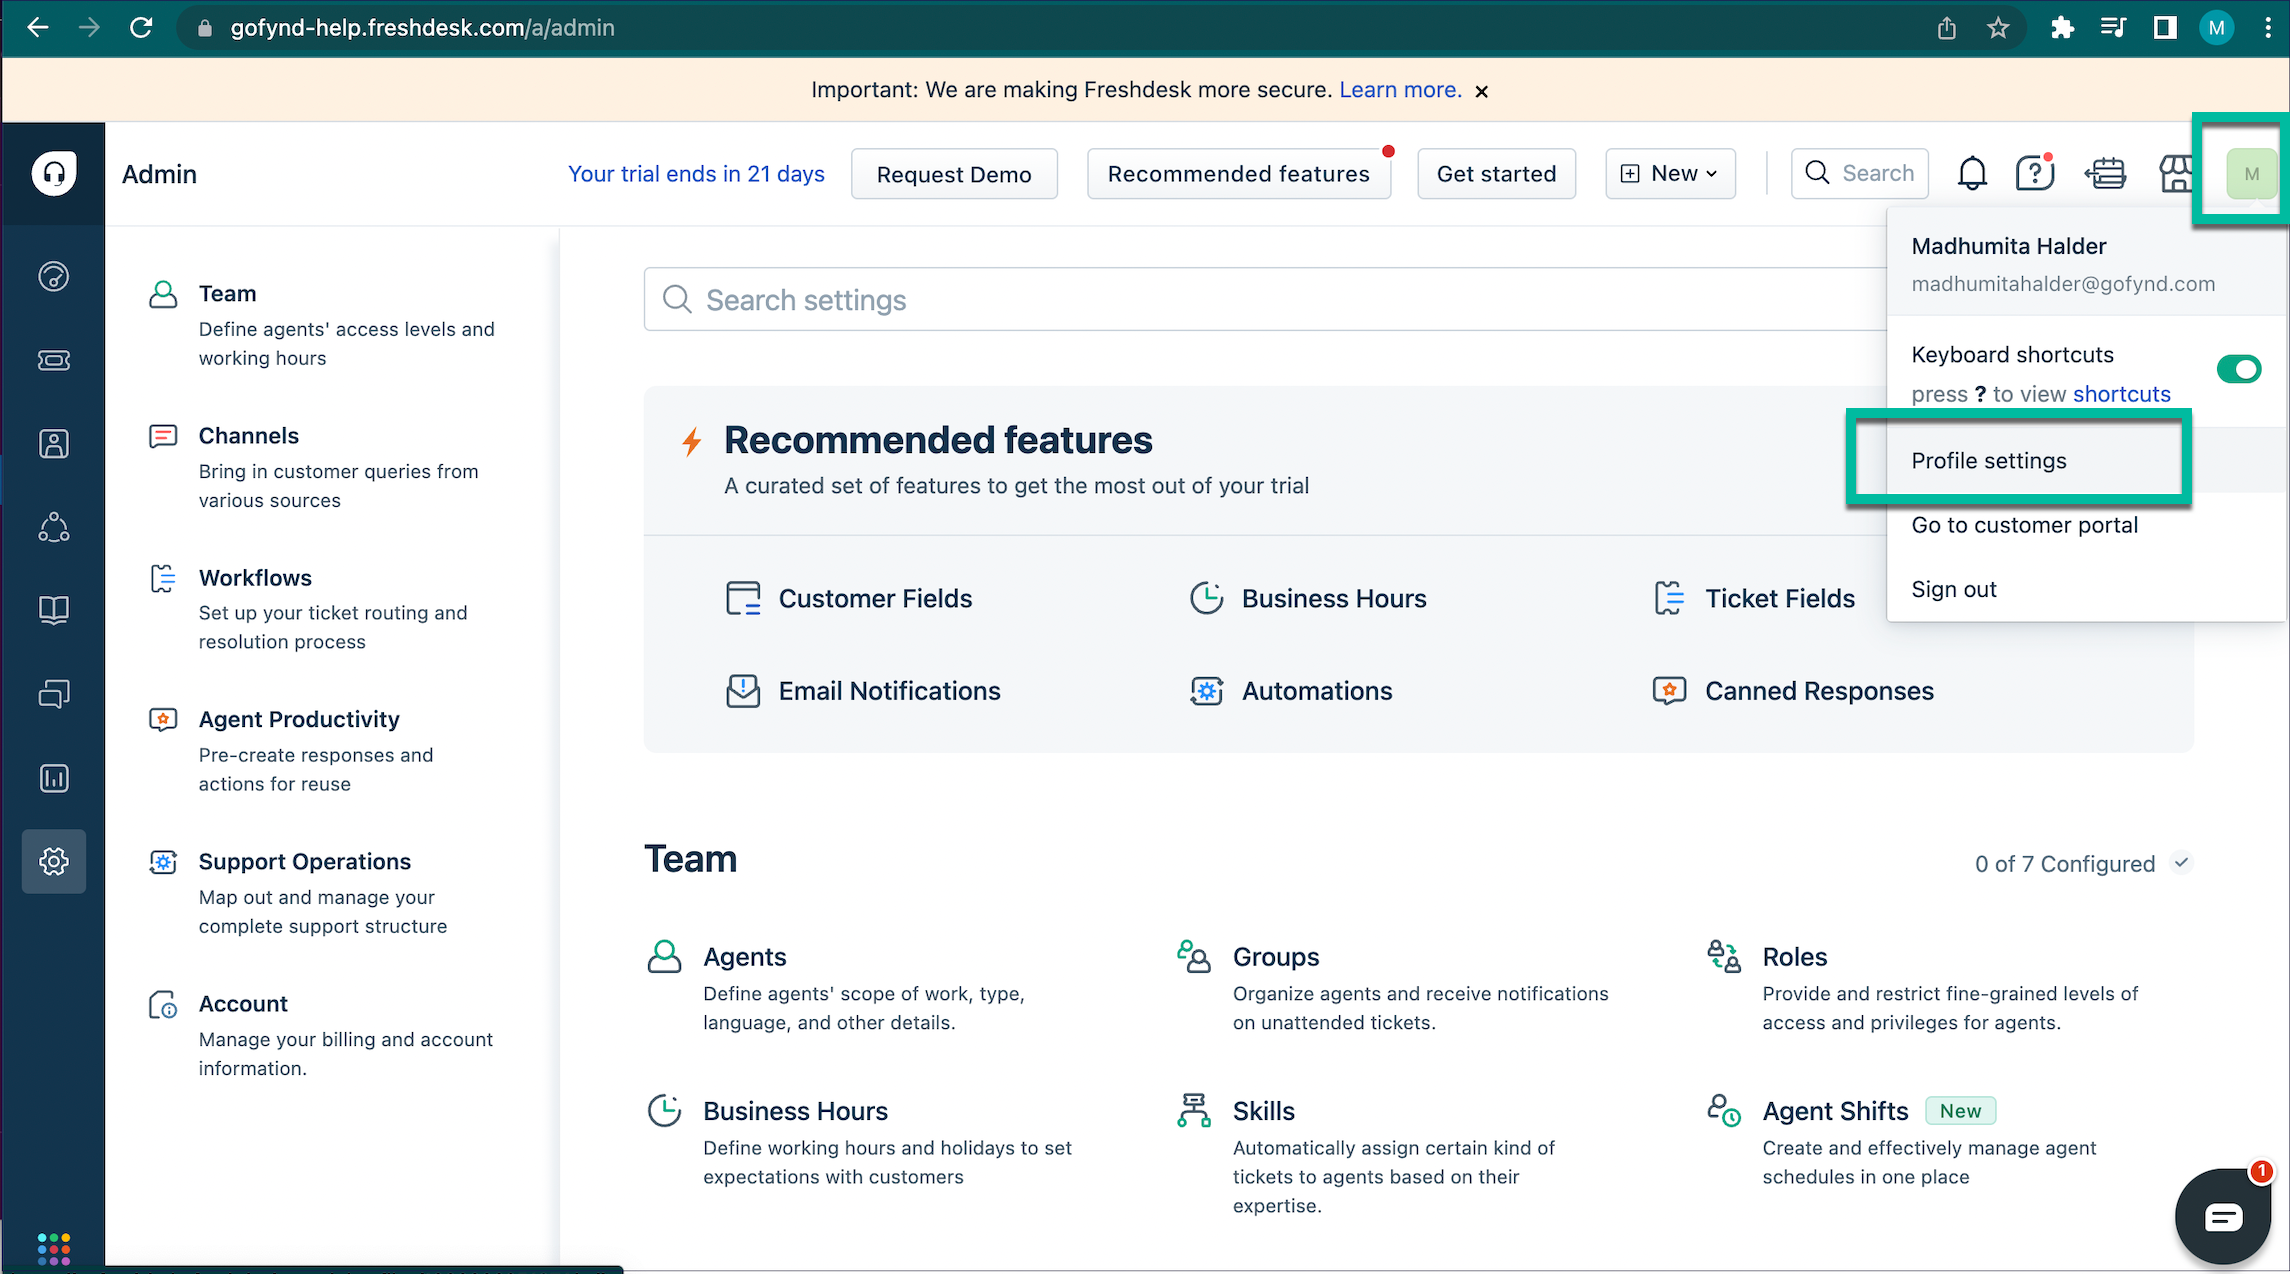
Figure 7: Freshdesk Profile Section
-
Click View API Key and copy the API Key from there.
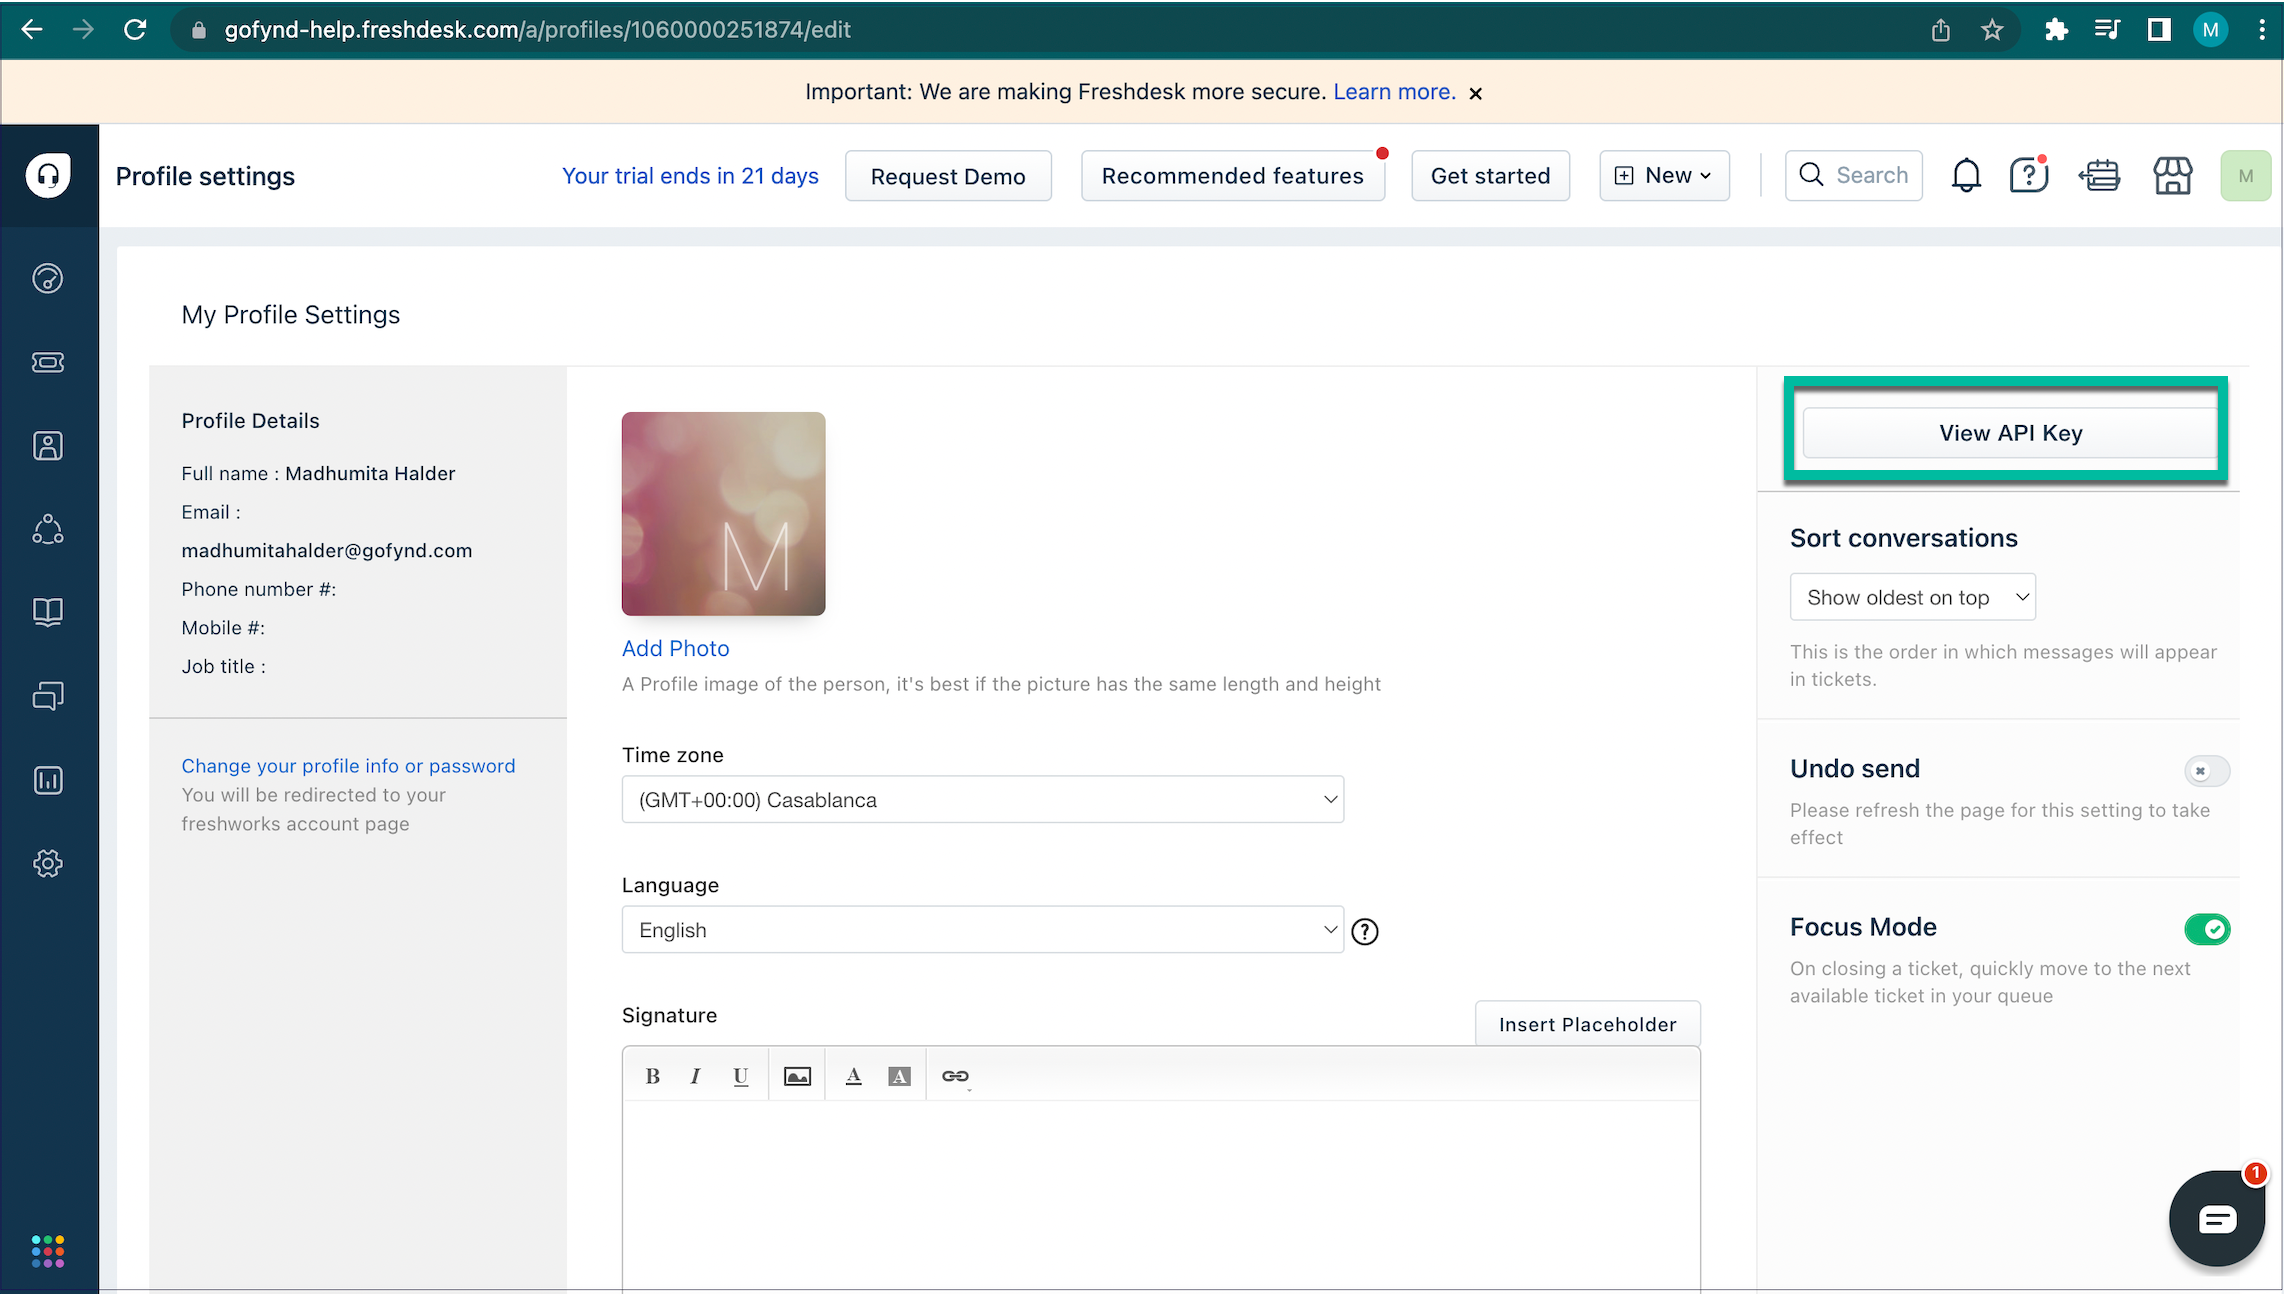
Figure 8: Copying API Key
-
Now paste the API Key on the extension page under the API Key section, and click Test. This will verify your API key.
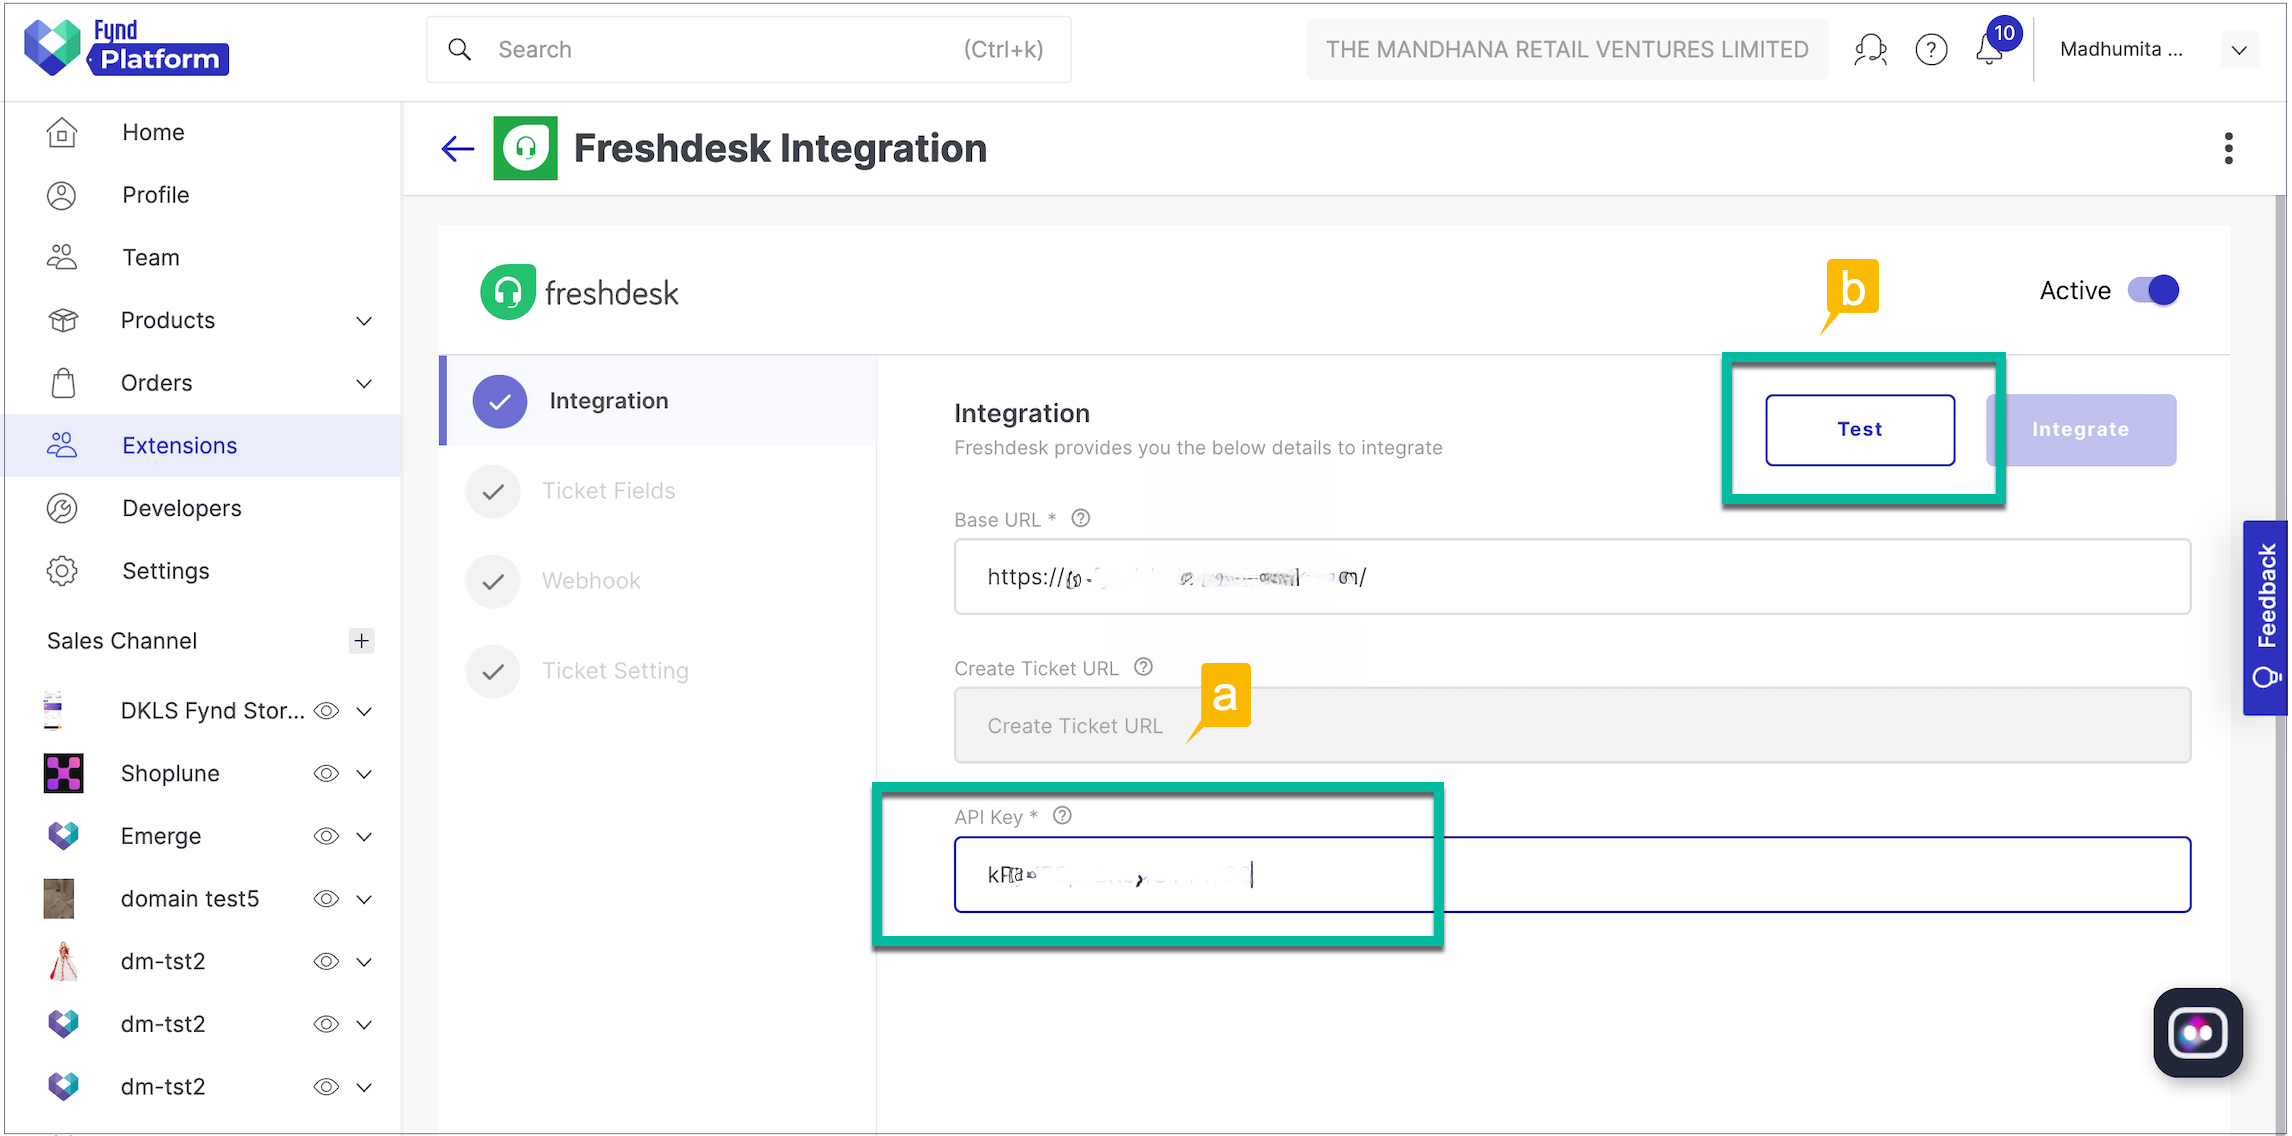
Figure 9: Pasting API Key
-
Once the API verification is successful, click Integrate. The data is now stored in the internal database.
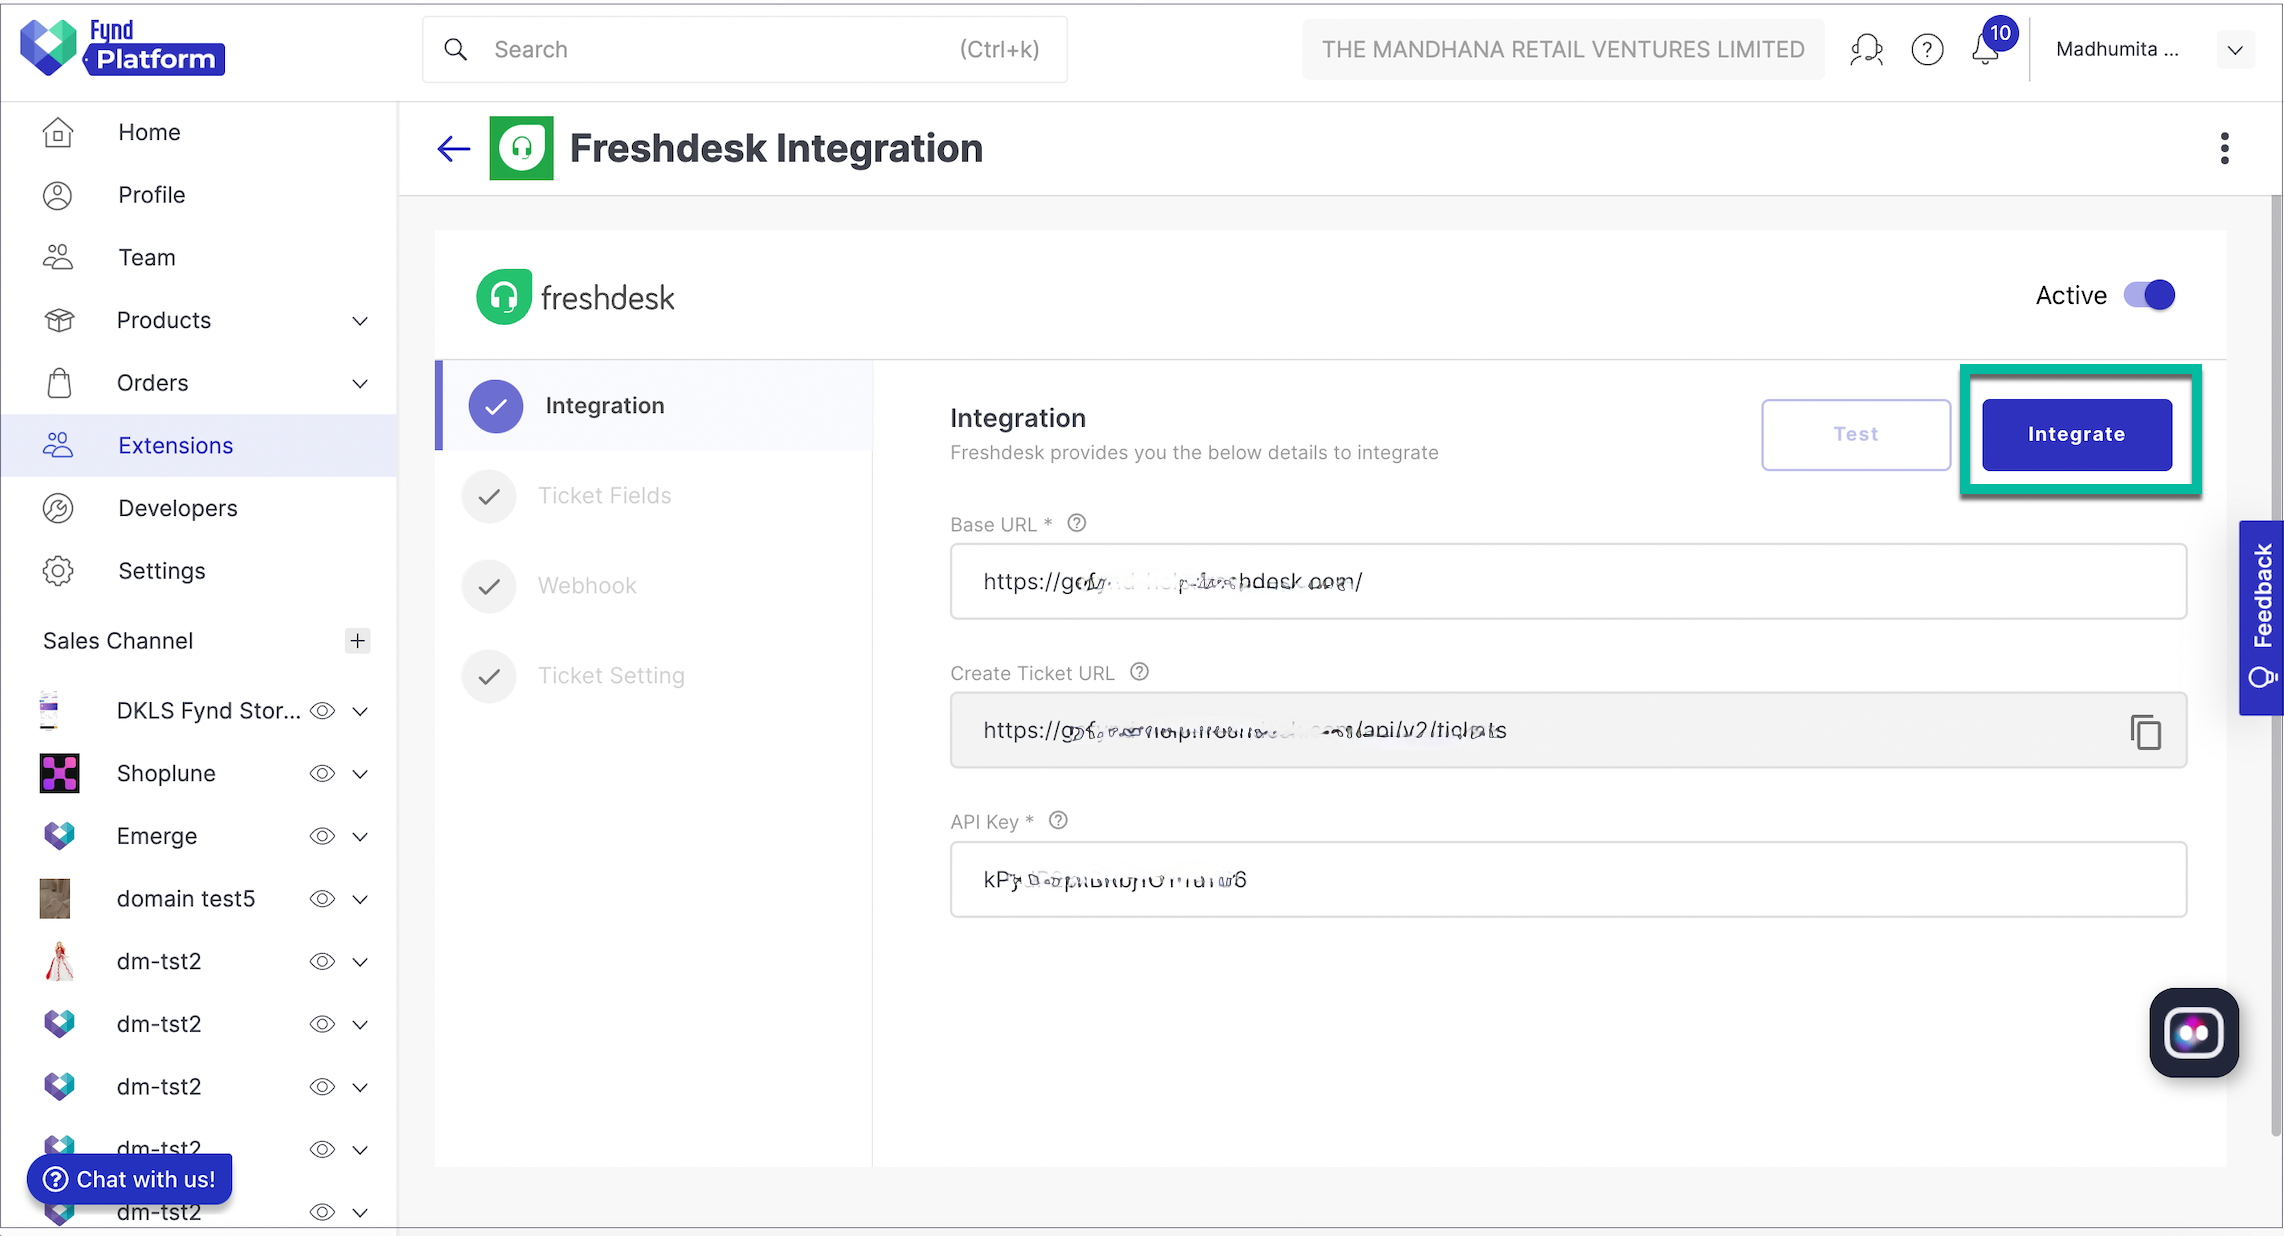
Figure 10: Integrating Extension
Ticket Fields
A new ticket gets created once you click Test to verify your API key. It justifies the validity of your credentials.
The ticket fields are fetched from your Freshdesk account. When you open Tickets Fields, you can find the mandatory sections are highlighted with an asterisk mark.
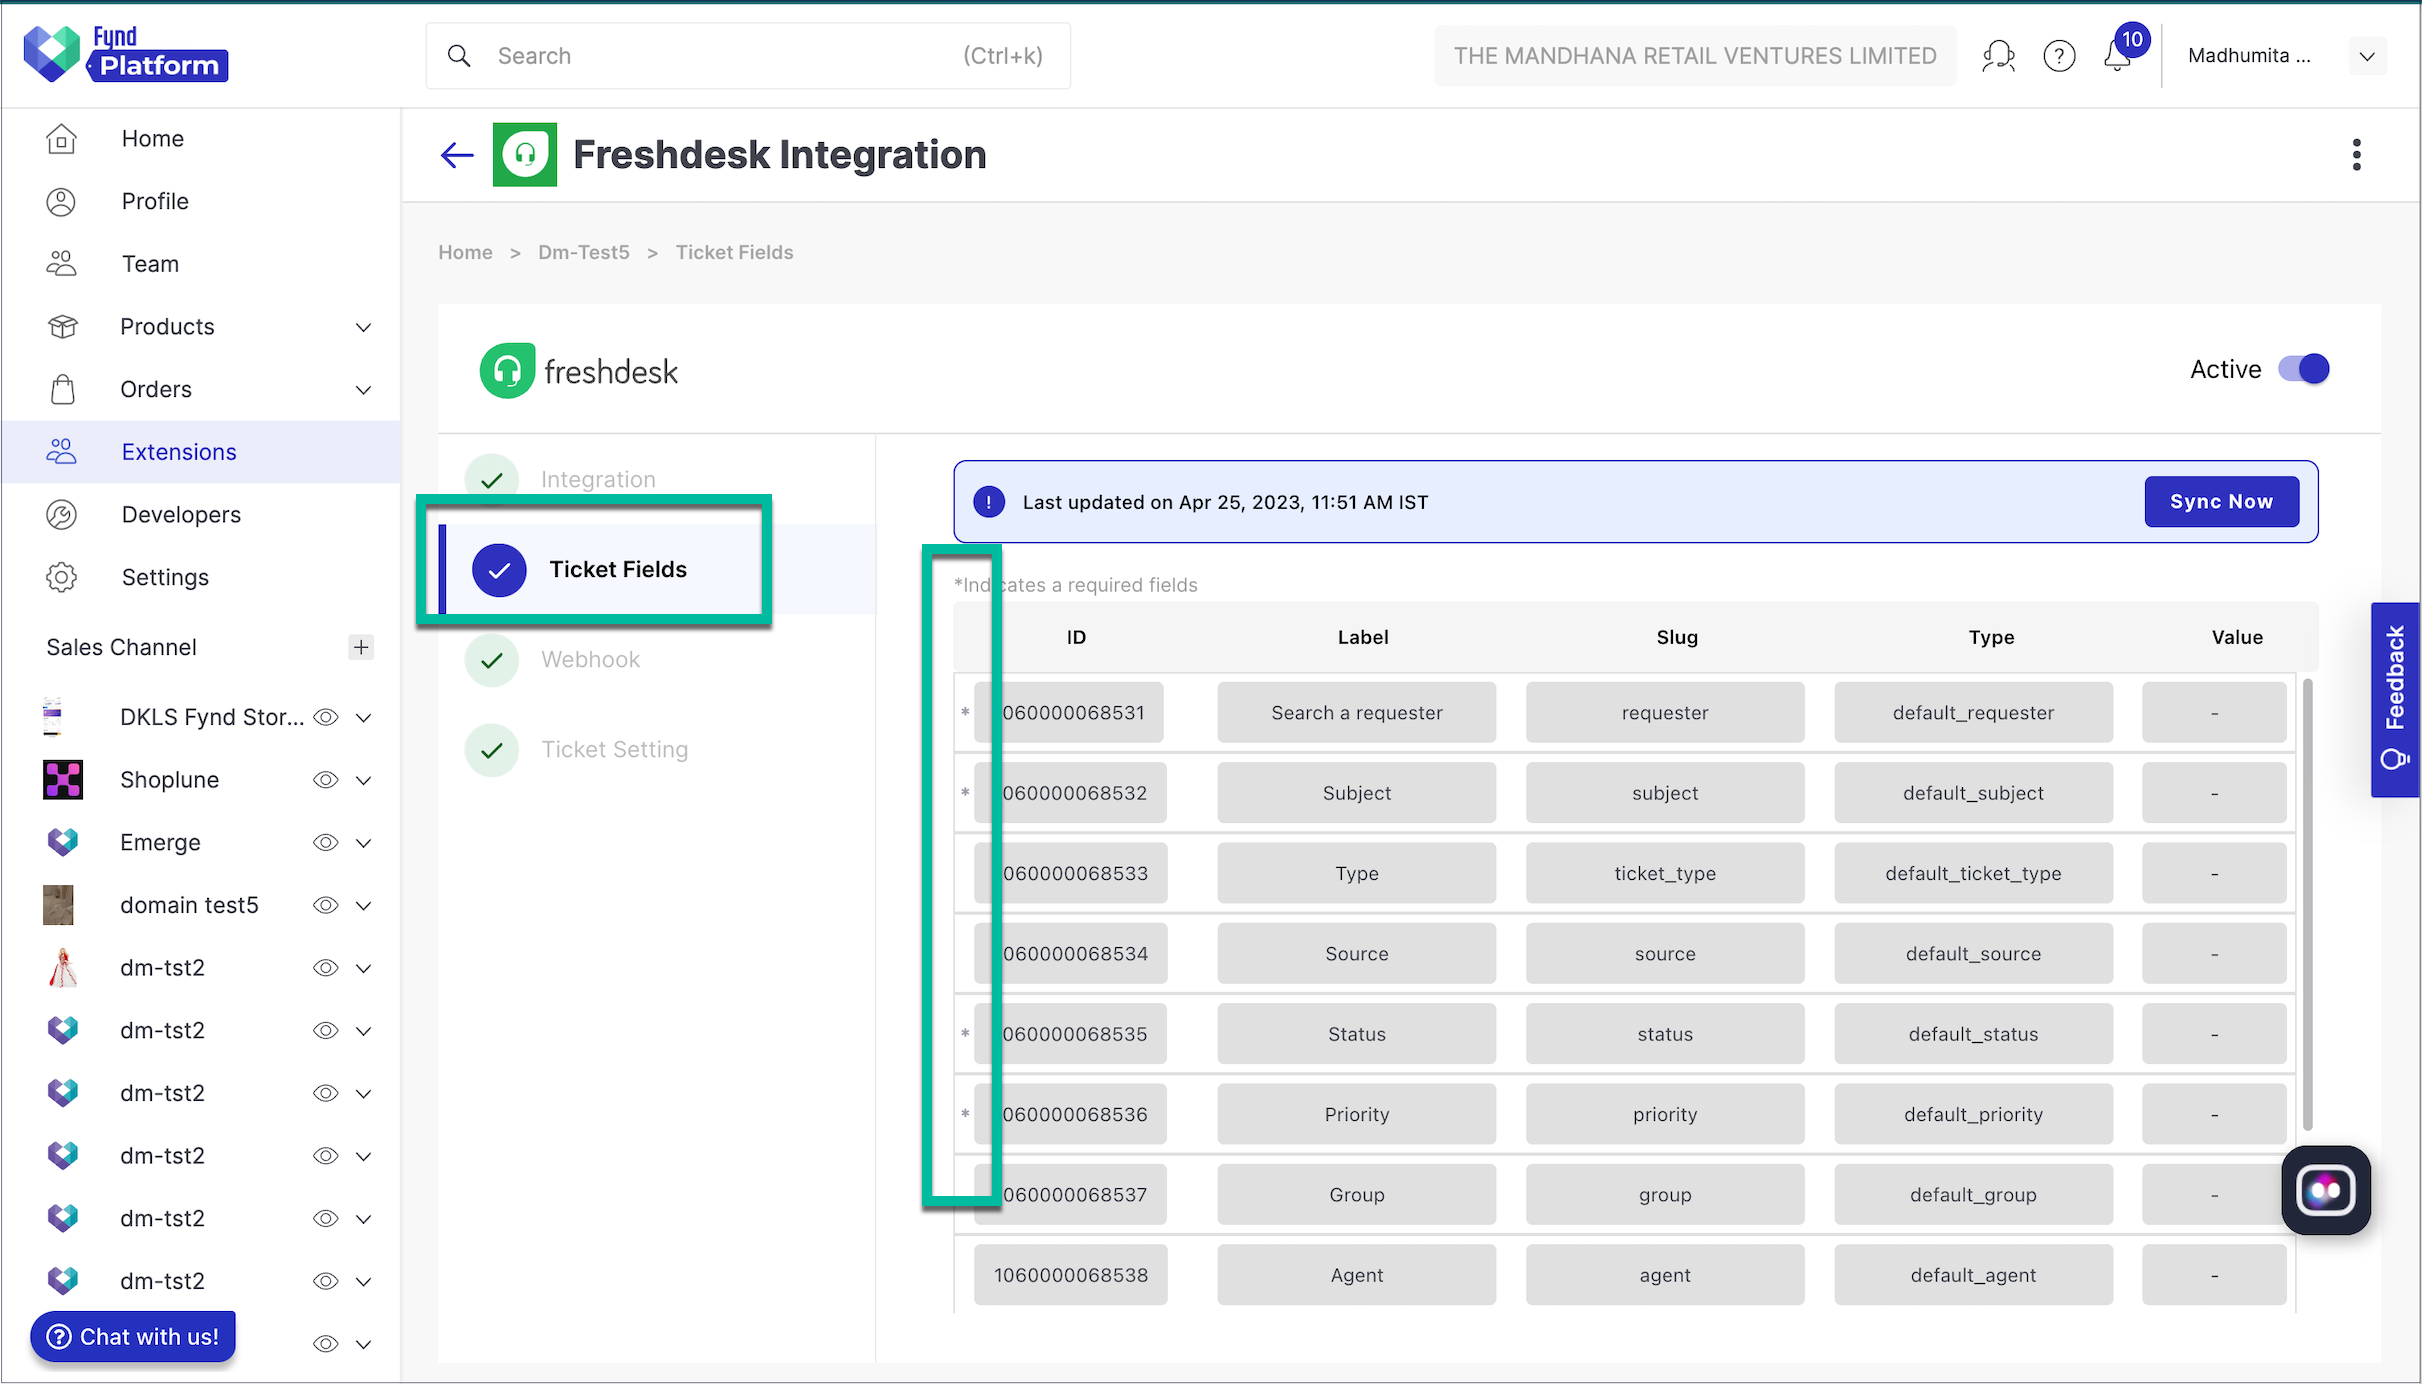
You can view/manage specific tickets fields by going to Freshdesk > Admin > Ticket Fields. Here, you can add/delete an old ticket field or can customise any other tickets.
-
Go to Freshdesk Tickets Fields.
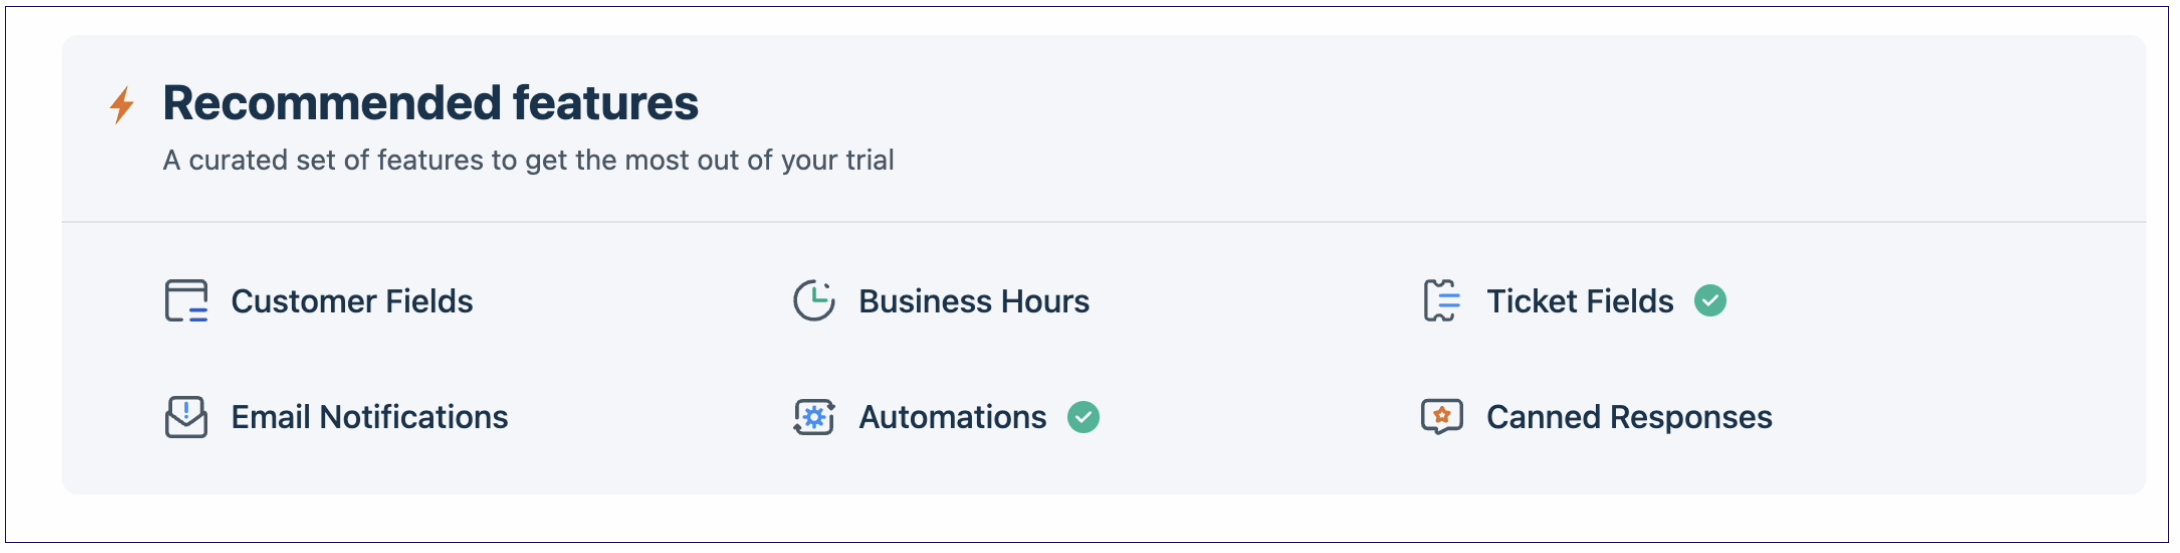
Figure 12a: Ticket Creation - Freshdesk Ticket Fields
-
Choose any of the ticket field types (refer fig. 12b) to create a ticket field in the ticket creation.
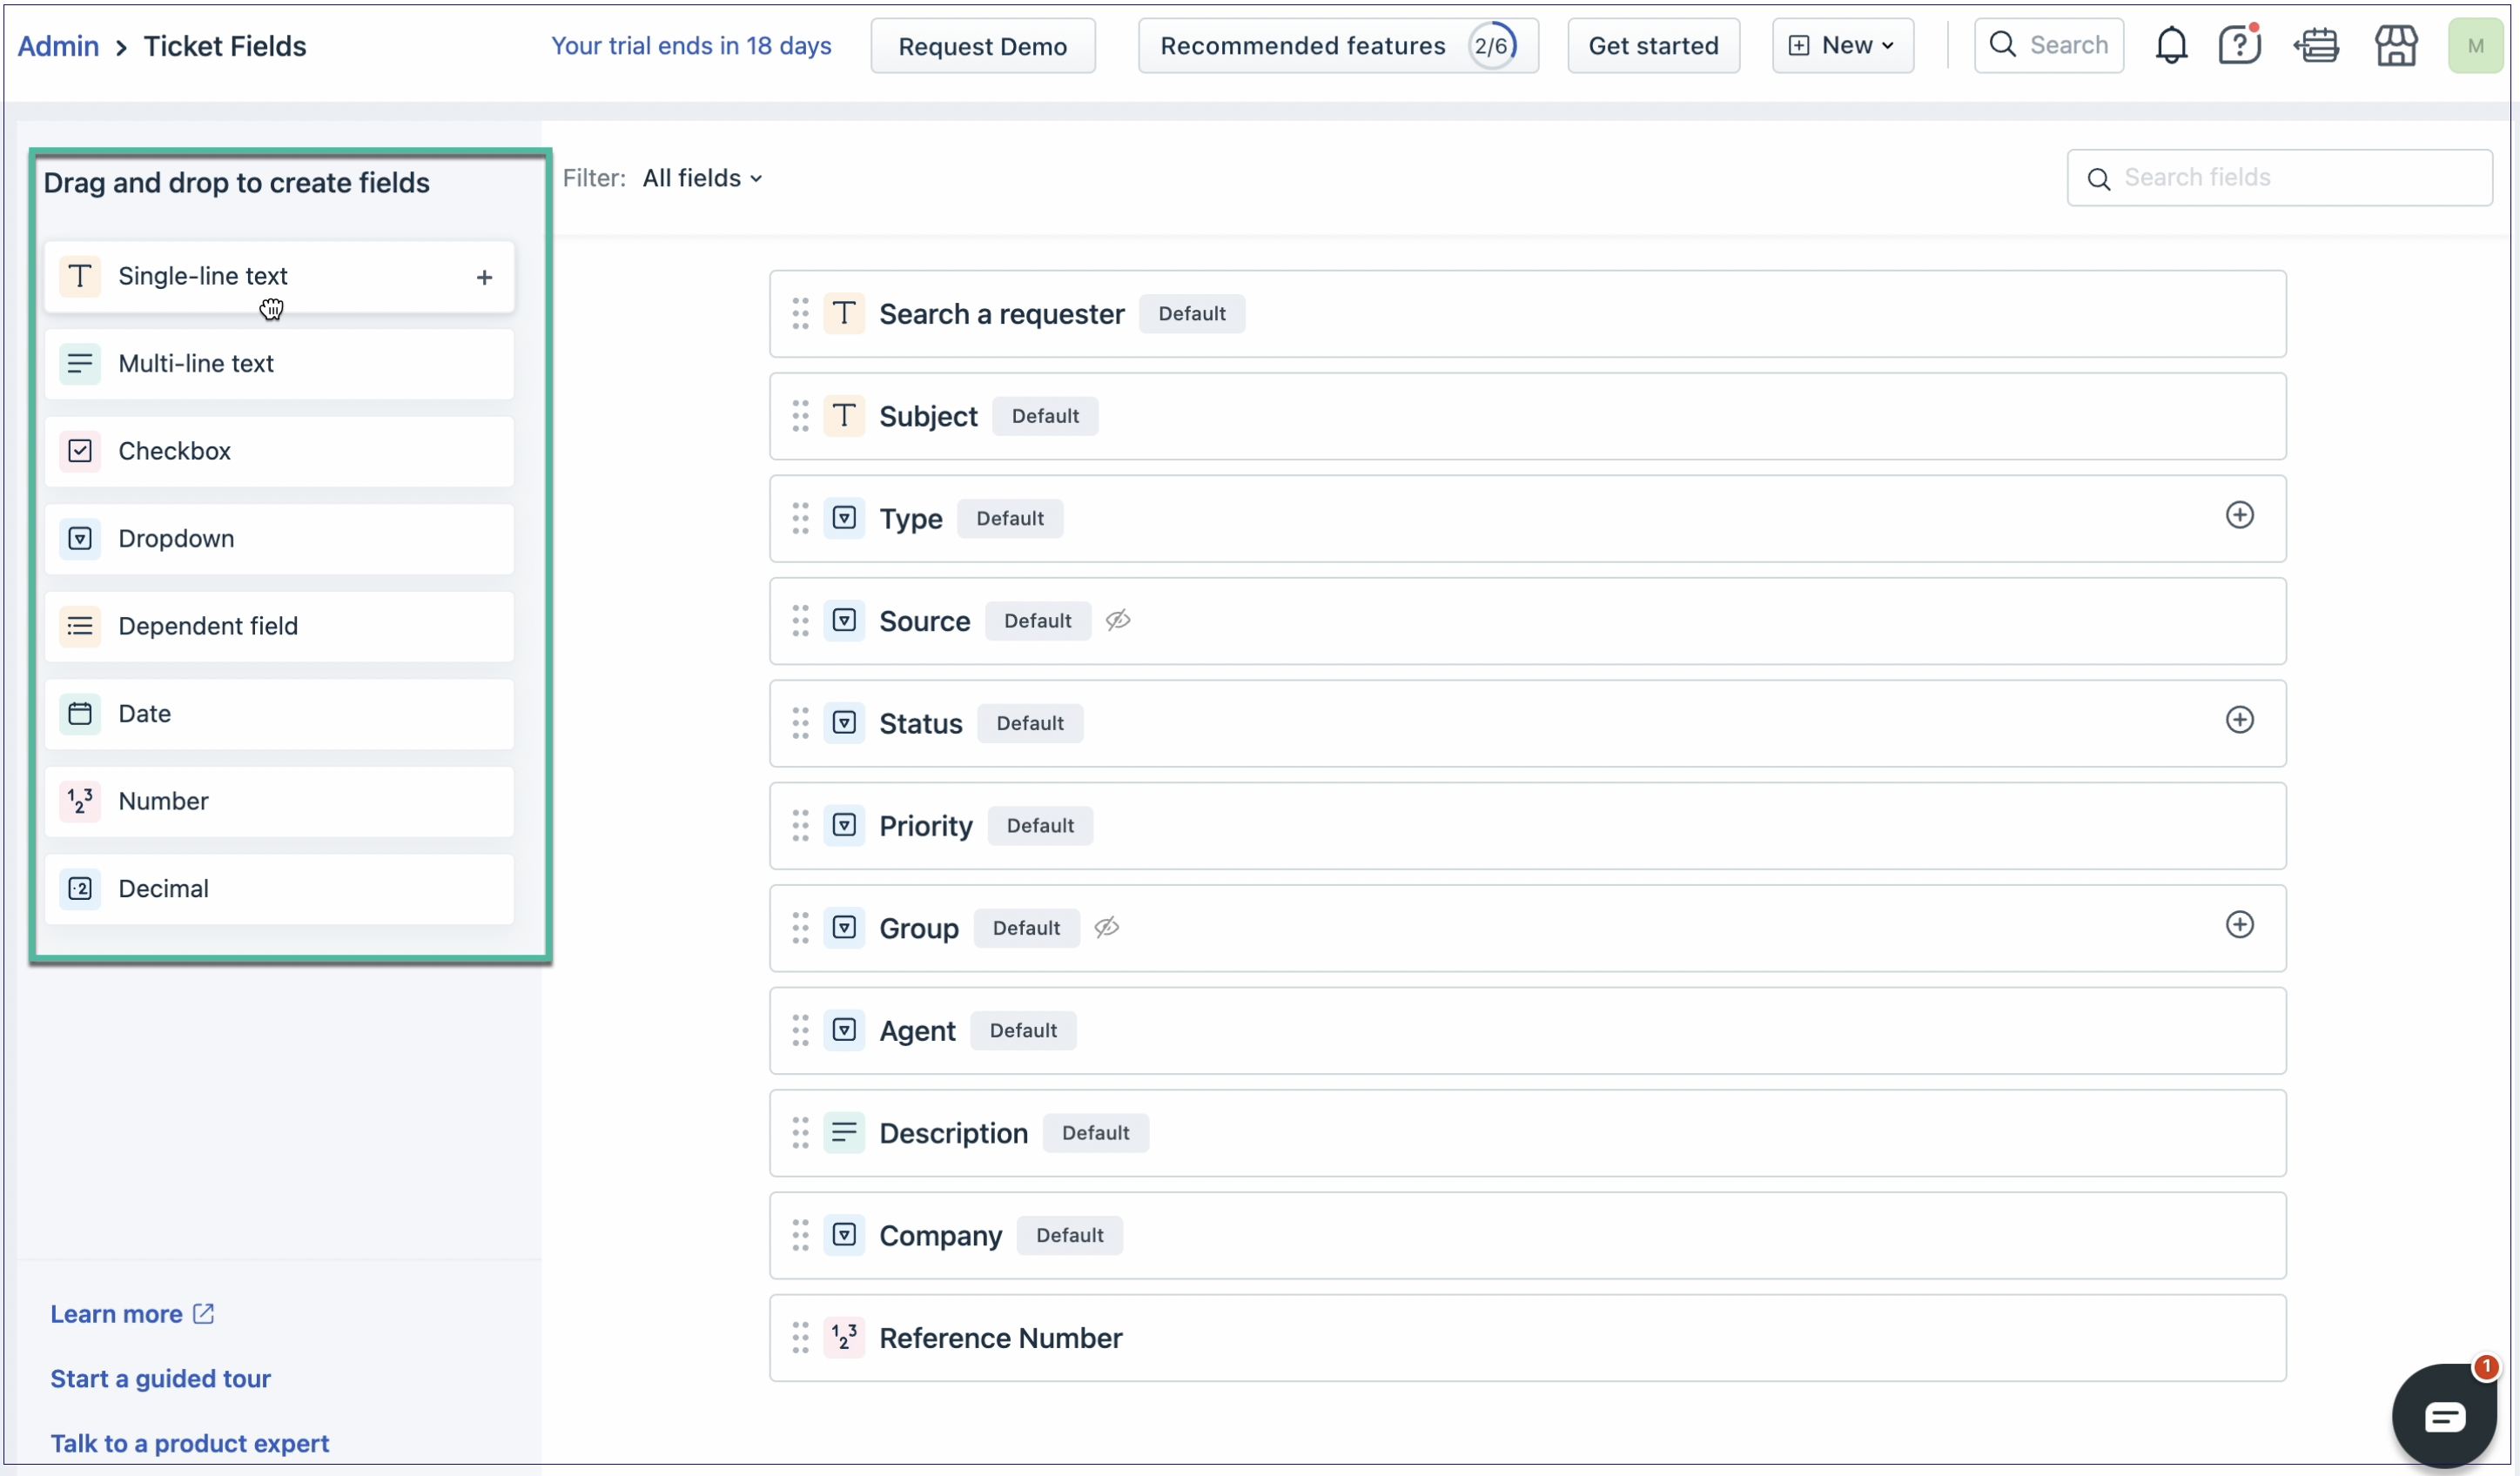
Figure 12b: Ticket Creation - Choose a Ticket Field
-
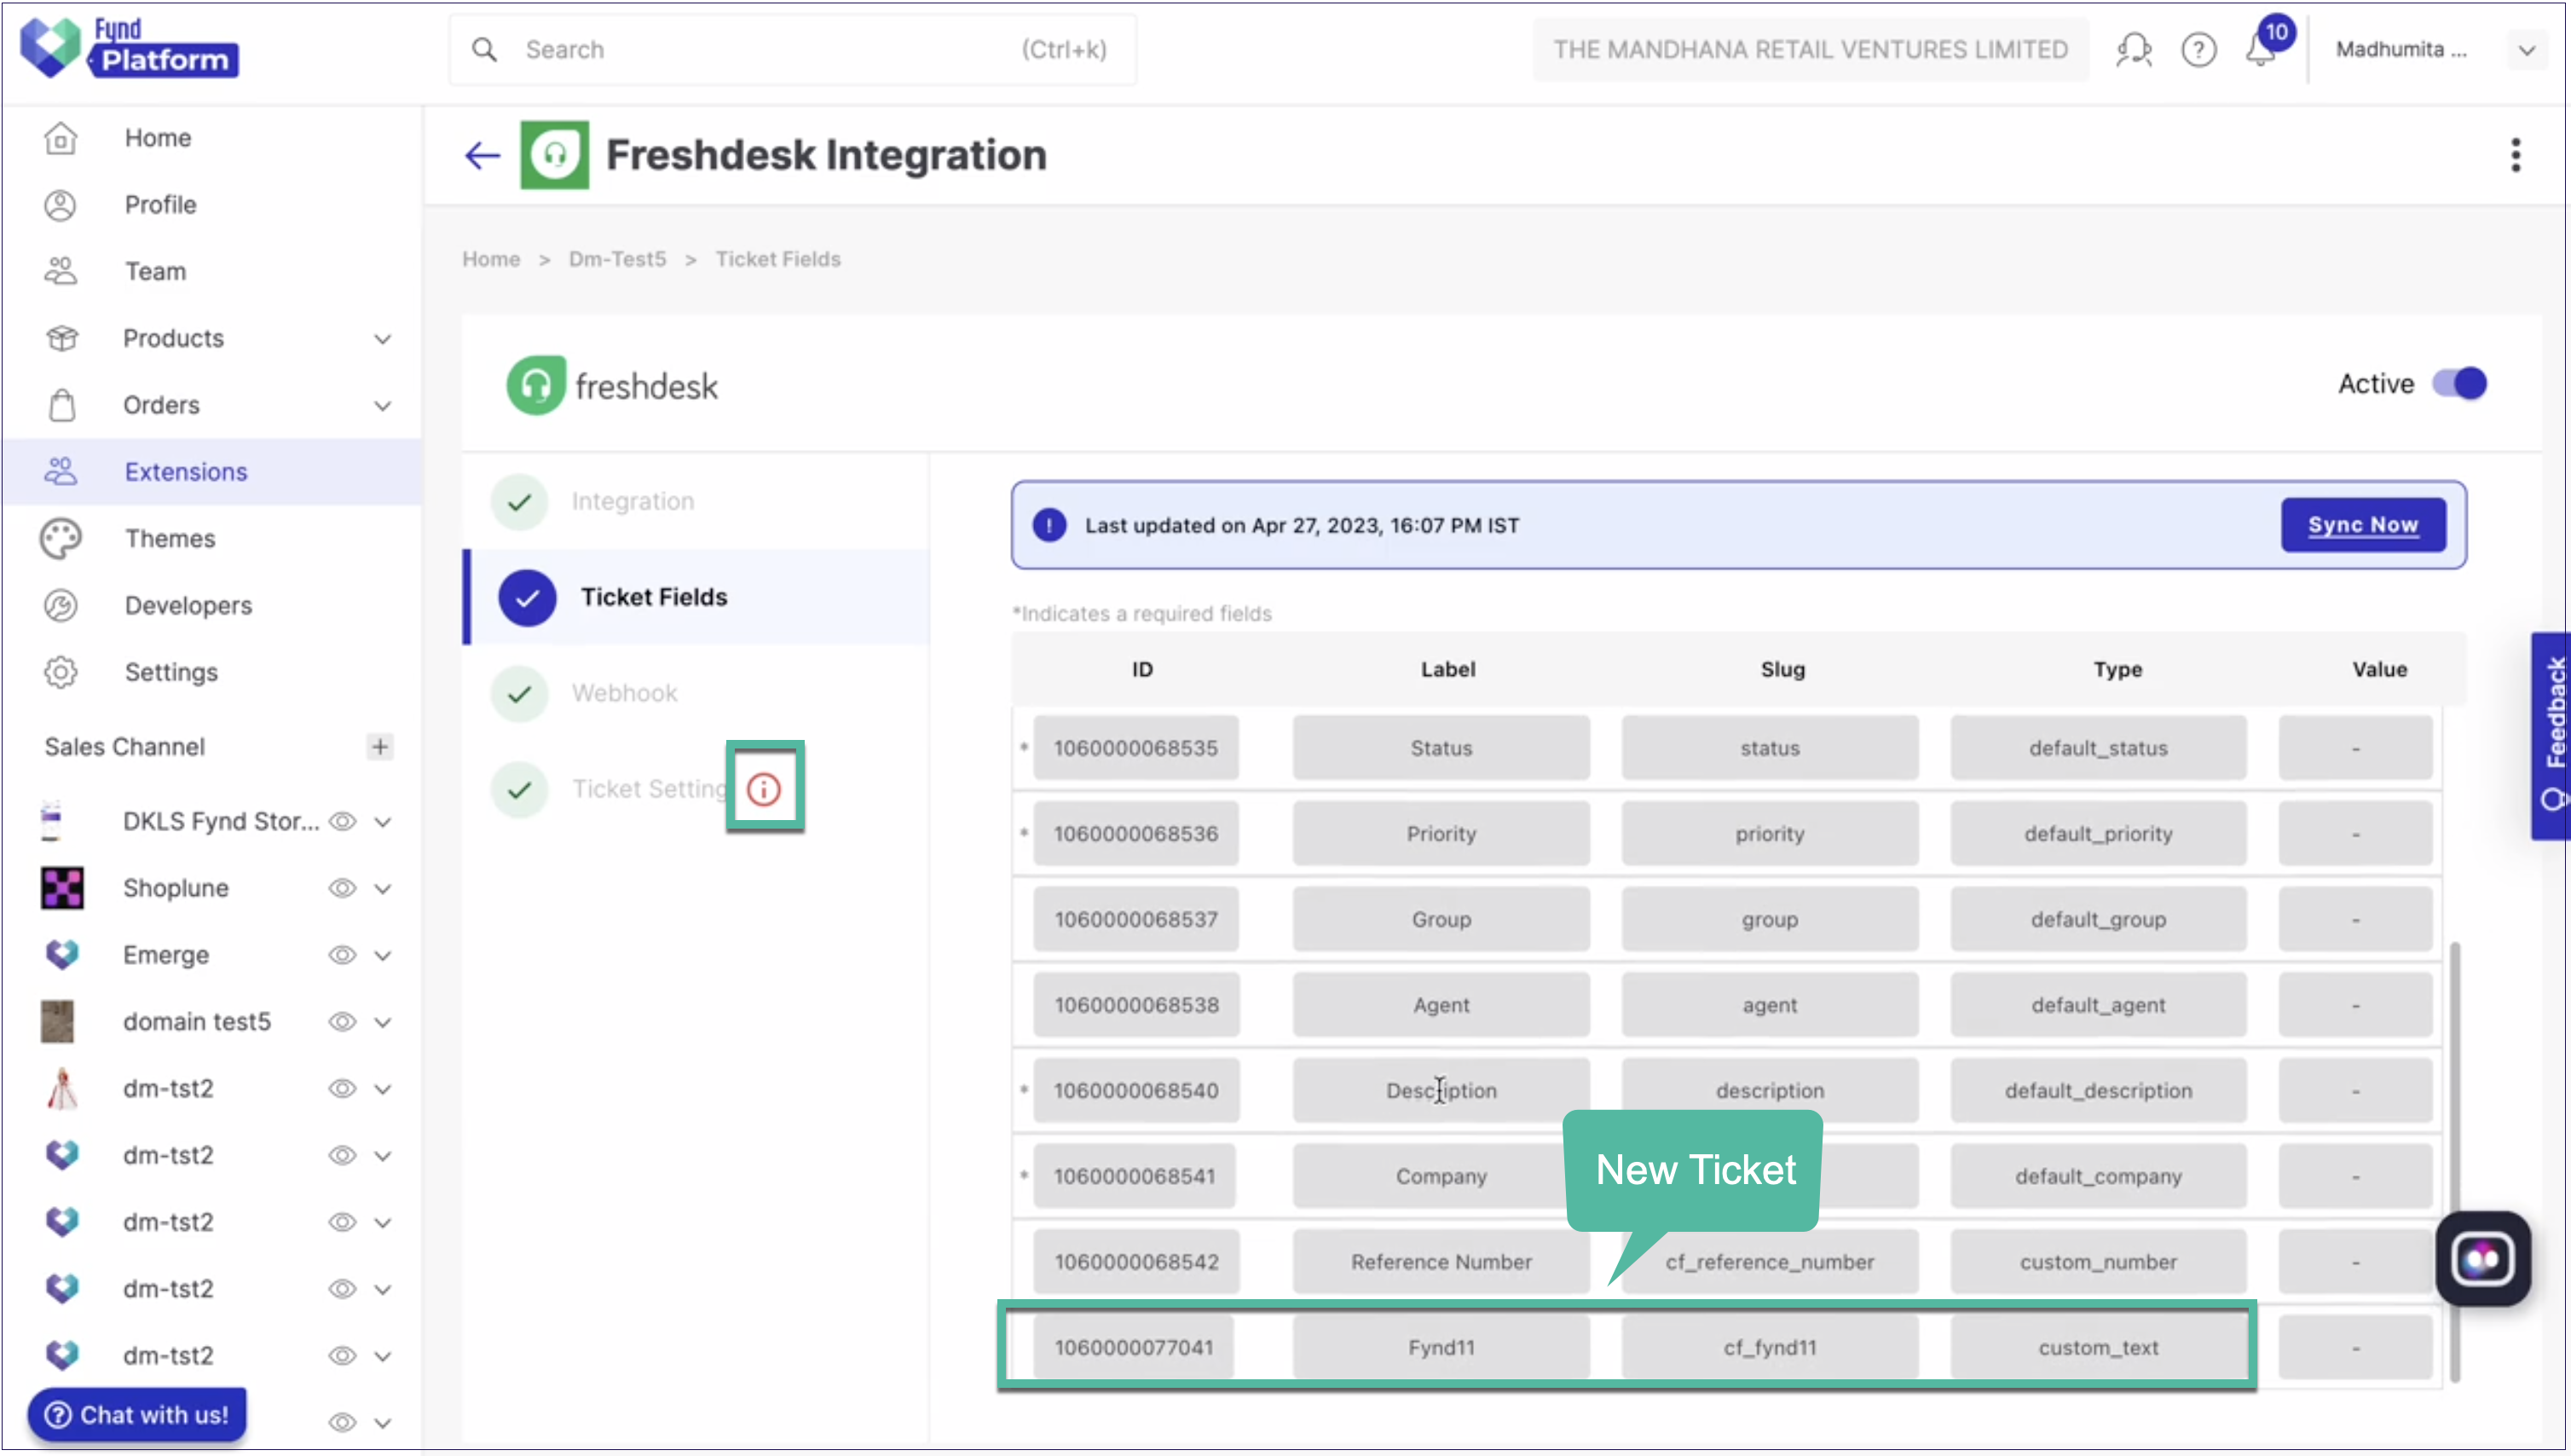
Once a new ticket gets added/deleted, come to the Ticket Fields in the extension. Click Sync Now.

Figure 12c: Ticket Creation - Syncing a New Ticket
-
If there are any changes in the ticket fields you will be getting a tooltip at the ticket settings with the message 'Please download your API collection’. The latest ticket fields get updated and you need to download api collection with changed ticket fields.
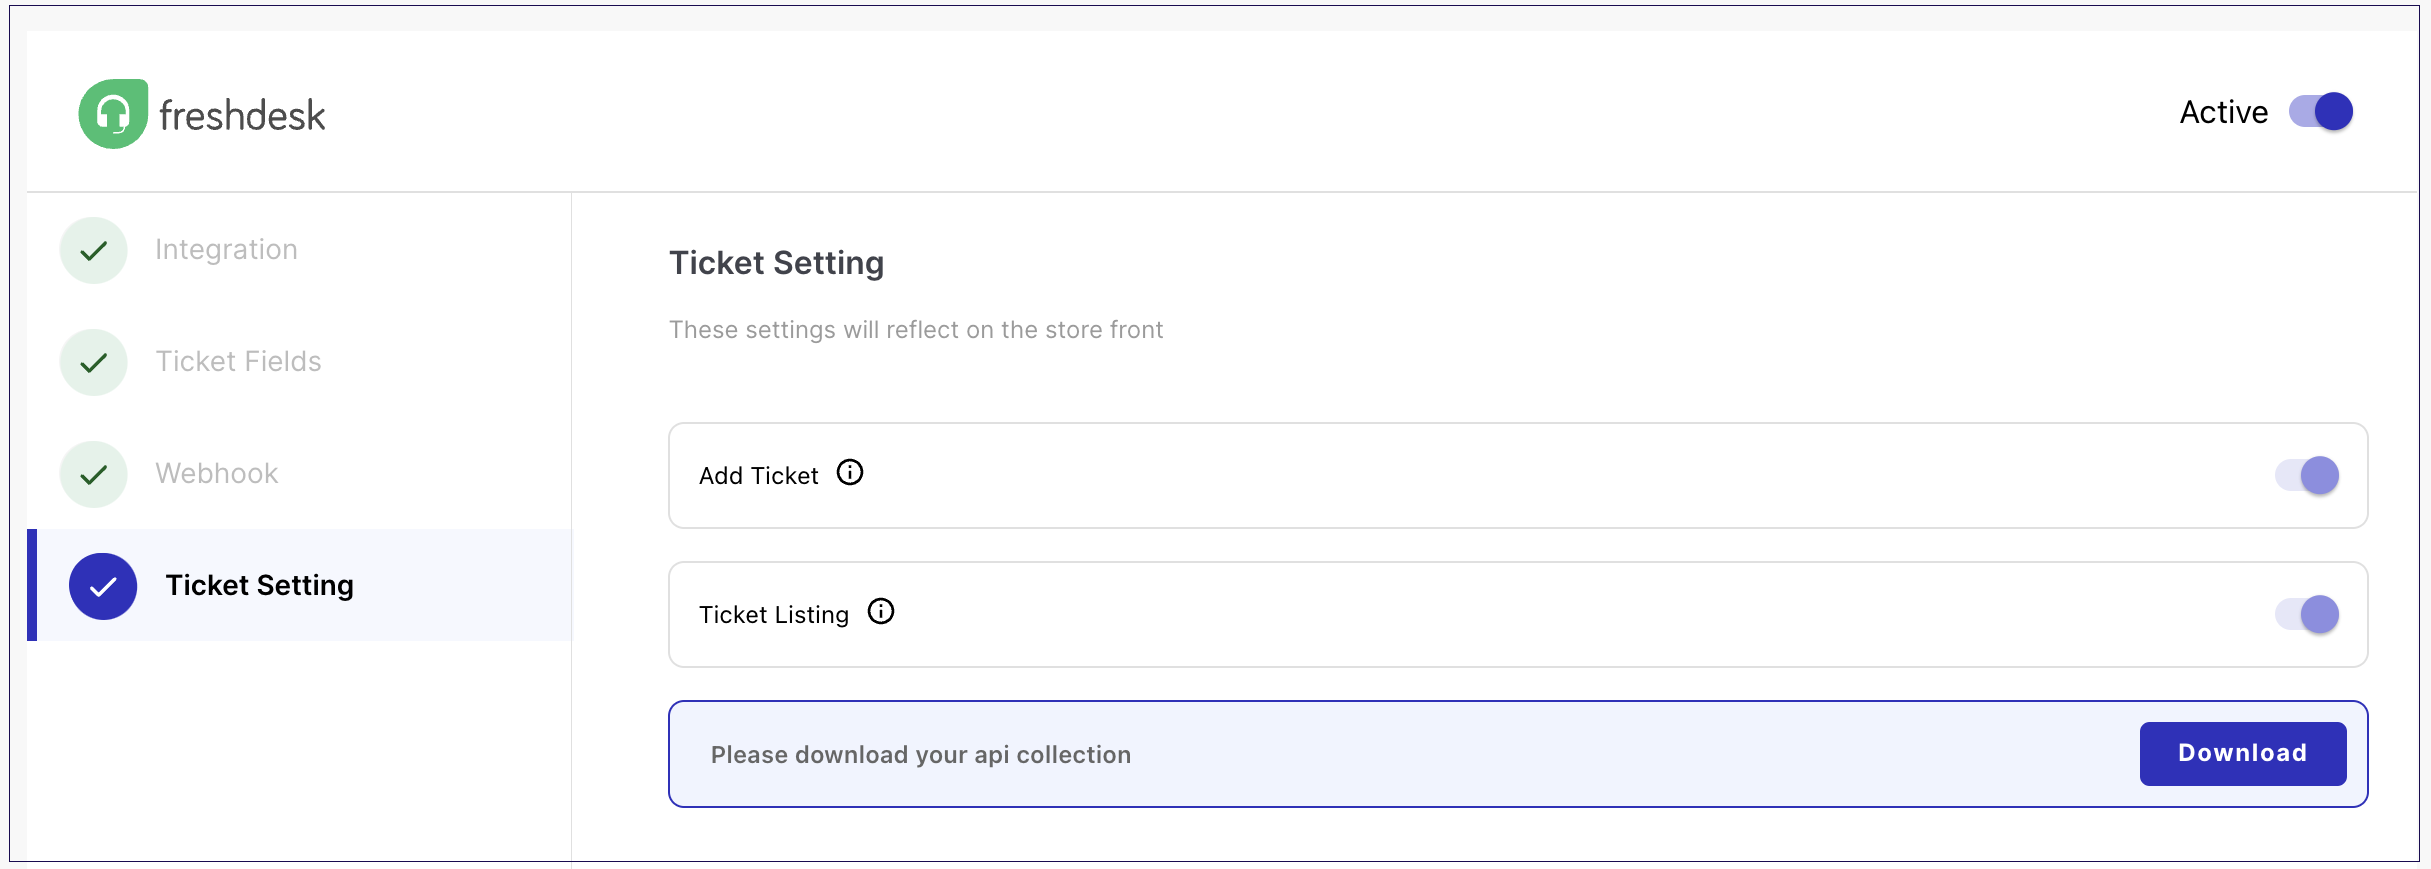
Figure 12d: Ticket Creation - Updating Ticket Information
-
You can see your new ticket at the end of the page.
You can delete any ticket there itself. Here, you can easily create, manage or delete any particular ticket of your own.
Webhook
We have integrated Webhook to automate the workflows. To receive notifications about ticket updates or changes, you'll need to set up the webhook in the Freshdesk portal. If you're a seller and wish to receive the same notifications, you'll need to have your own server to receive the events alert. Once you set up your server, integrate it with an API key to receive the same updates that are sent to our server.
- Go to the Admin section of Freshdesk site.
- Click Automation from the Recommended Fetures section.
- Click New Rule under Ticket Update.
-
Rule Name: In this section create a webhook name (e.g., webhook_fynd).
-
Involves any of these events: Choose events (e.g., Priority is changed).
-
Perform these actions: Choose Trigger webhook from the dropdown list.
- Request type: Choose PUT from the dropdown.
- URL: Go to the Extension page, copy the Webhook URL from there and paste it here in this section.
- Enable Requires authentication button.
- API Key: Copy the API key from the Extension page and paste it here.
- Encoding: Select JSON.
- Content: Select Simple. There in the box, select any ticket properties of your choice, e.g., Ticket ID, Subject, etc.
- Click Preview and Save. It is updated now; you can find it under the Ticket Update section.
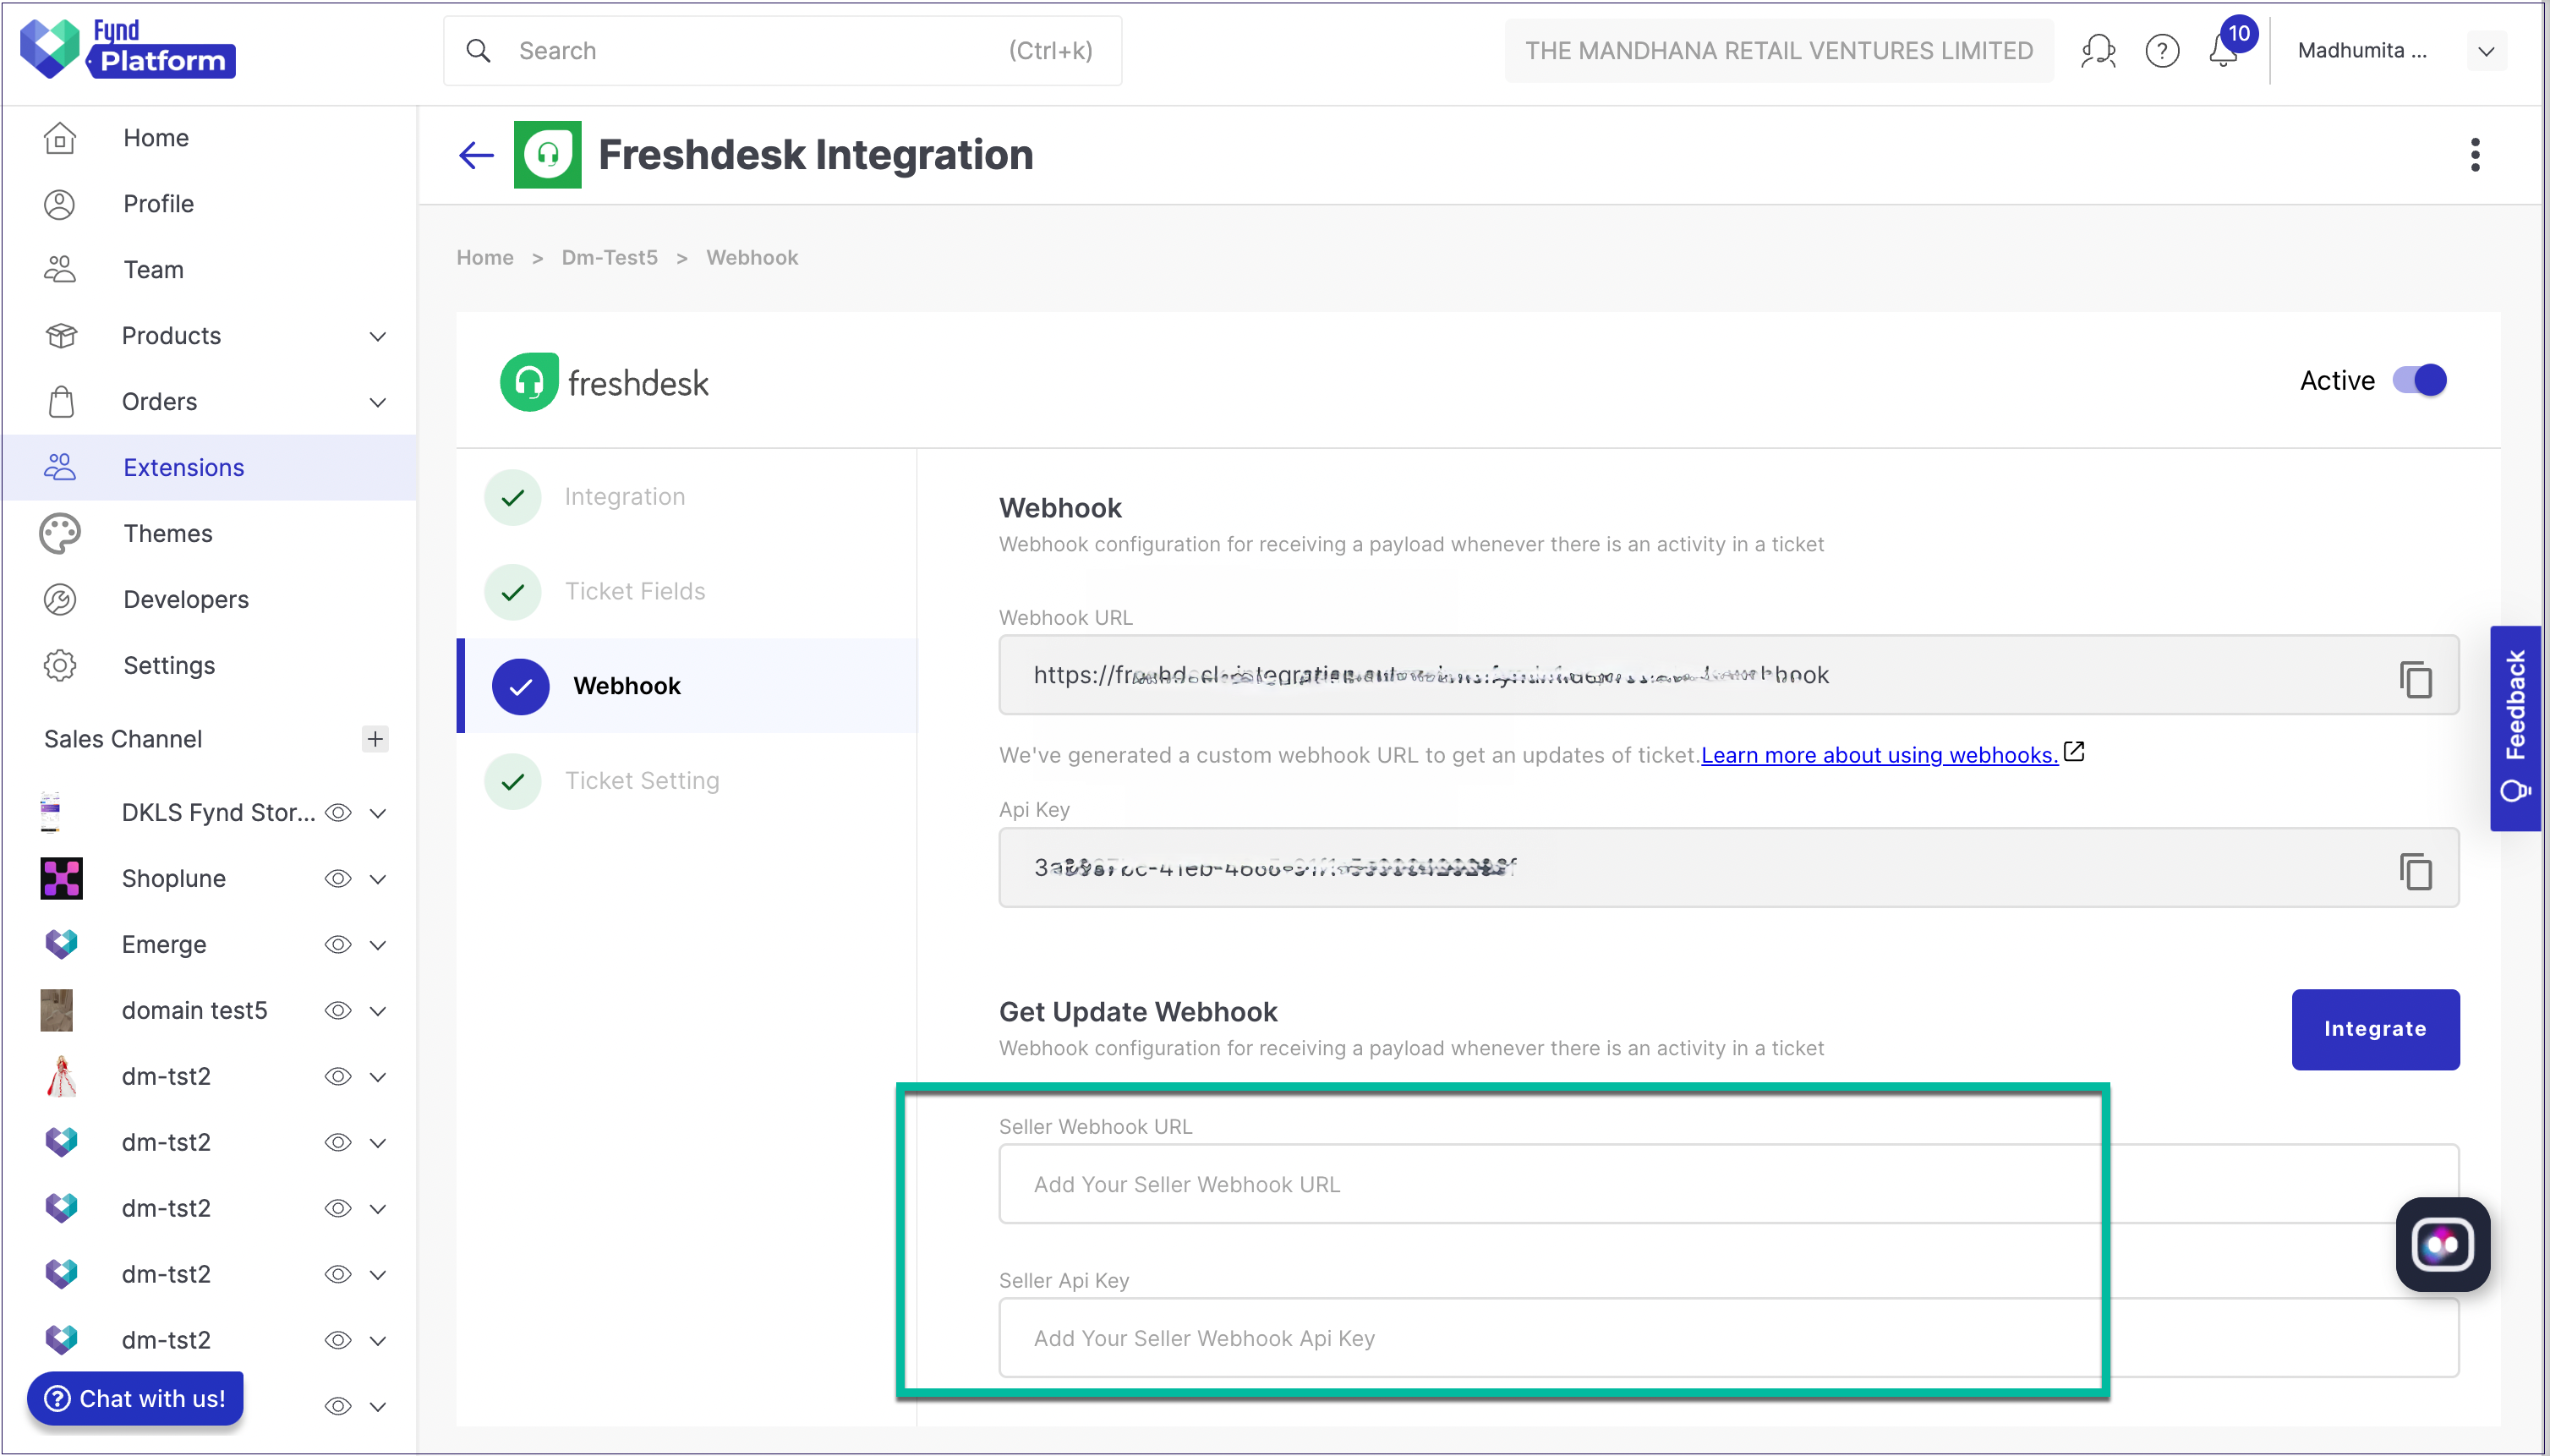
Get Update Webhook
If a seller has a custom webhook, he can add that here to integrate the seller webhook with the extension. This webhook will get the updates when there are any changes in ticket updates.
Ticket Setting
Download the API collection from the download section. You can upload the particular curl to Postman or any other API platform to create, get, filter, and update any tickets.

When a new ticket gets created, an (i) icon appears up beside the ticket setting (fig. 14b). You need to go to Ticket Setting > download the API collection, and reupload the particular curl on the API platform like Postman. You have to follow the same in case you delete any particular ticket from the Freshdesk site.
Reset API key
You can rest your API Key at any time:
-
Go to Freshdesk Integration extension and click Reconfigure.
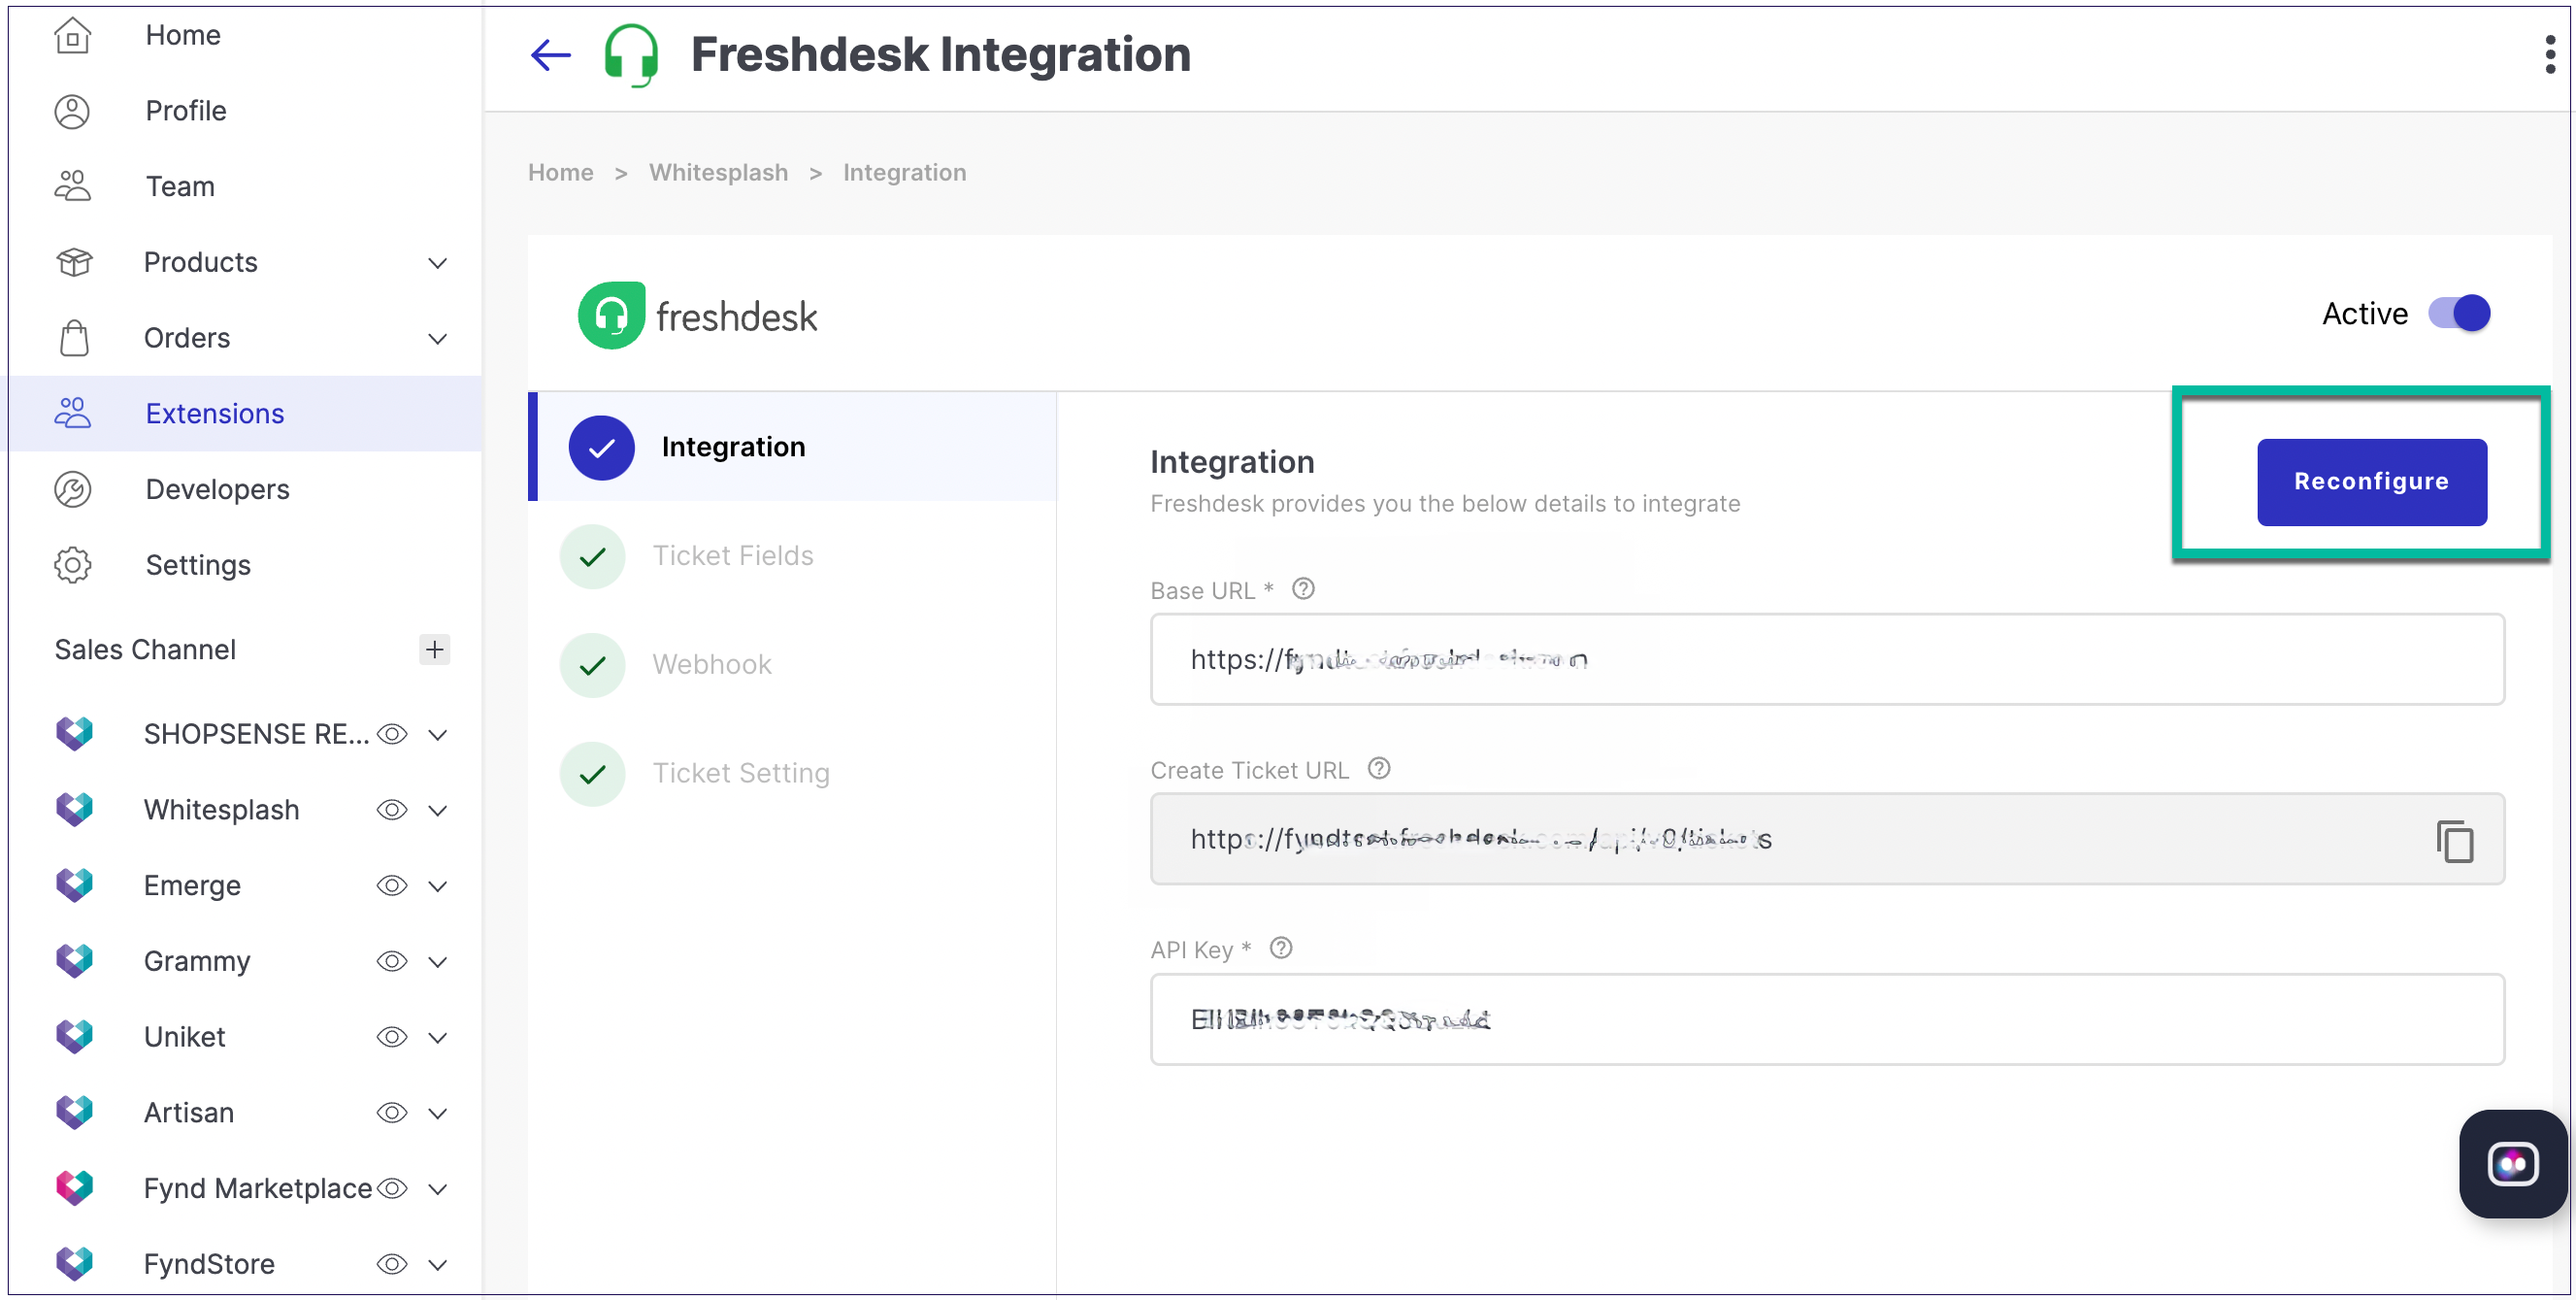
Figure 15: Reconfigure API Key
-
Click Profile settings of Freshdesk site.
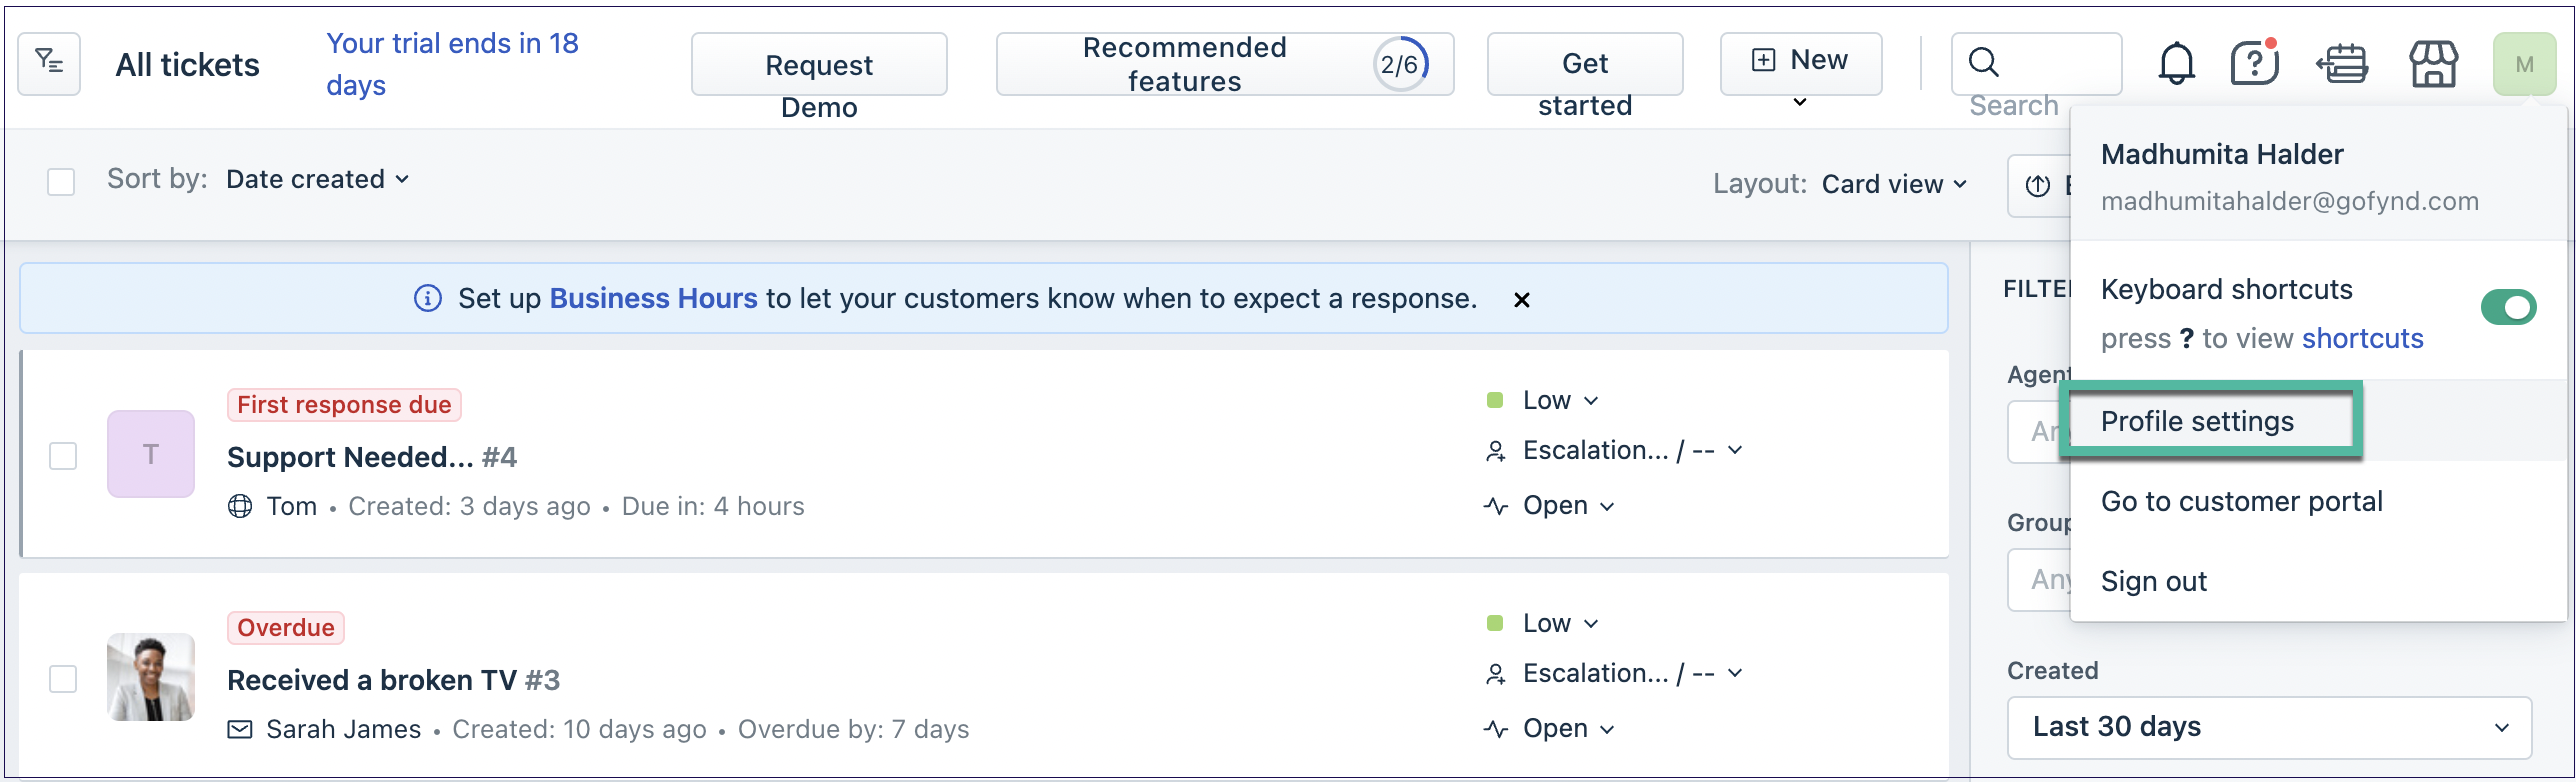
Figure 16: Freshdesk Profile
-
Go to View API key > Reset API Key > Copy the API key from there.
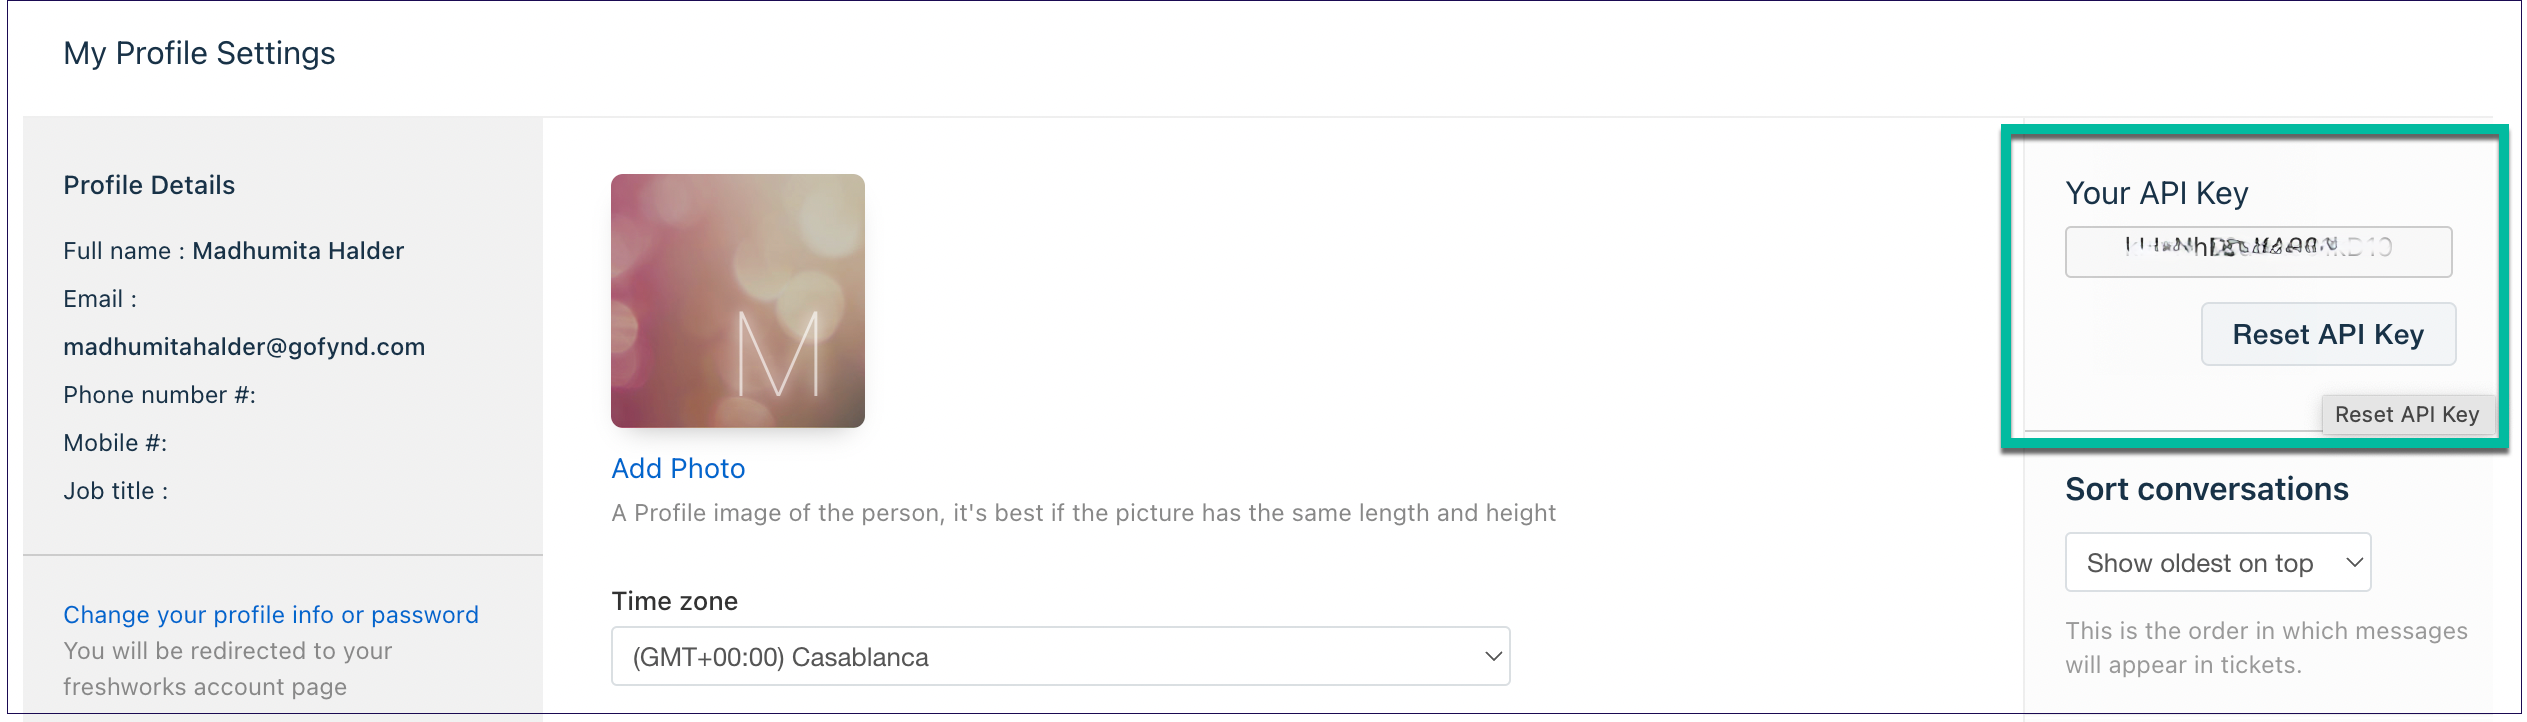
Figure 17: Reset API Key
-
Paste the API Key on the extension page under the API Key section, and click Test. This will verify your API key. Once verified, click Reconfigure.
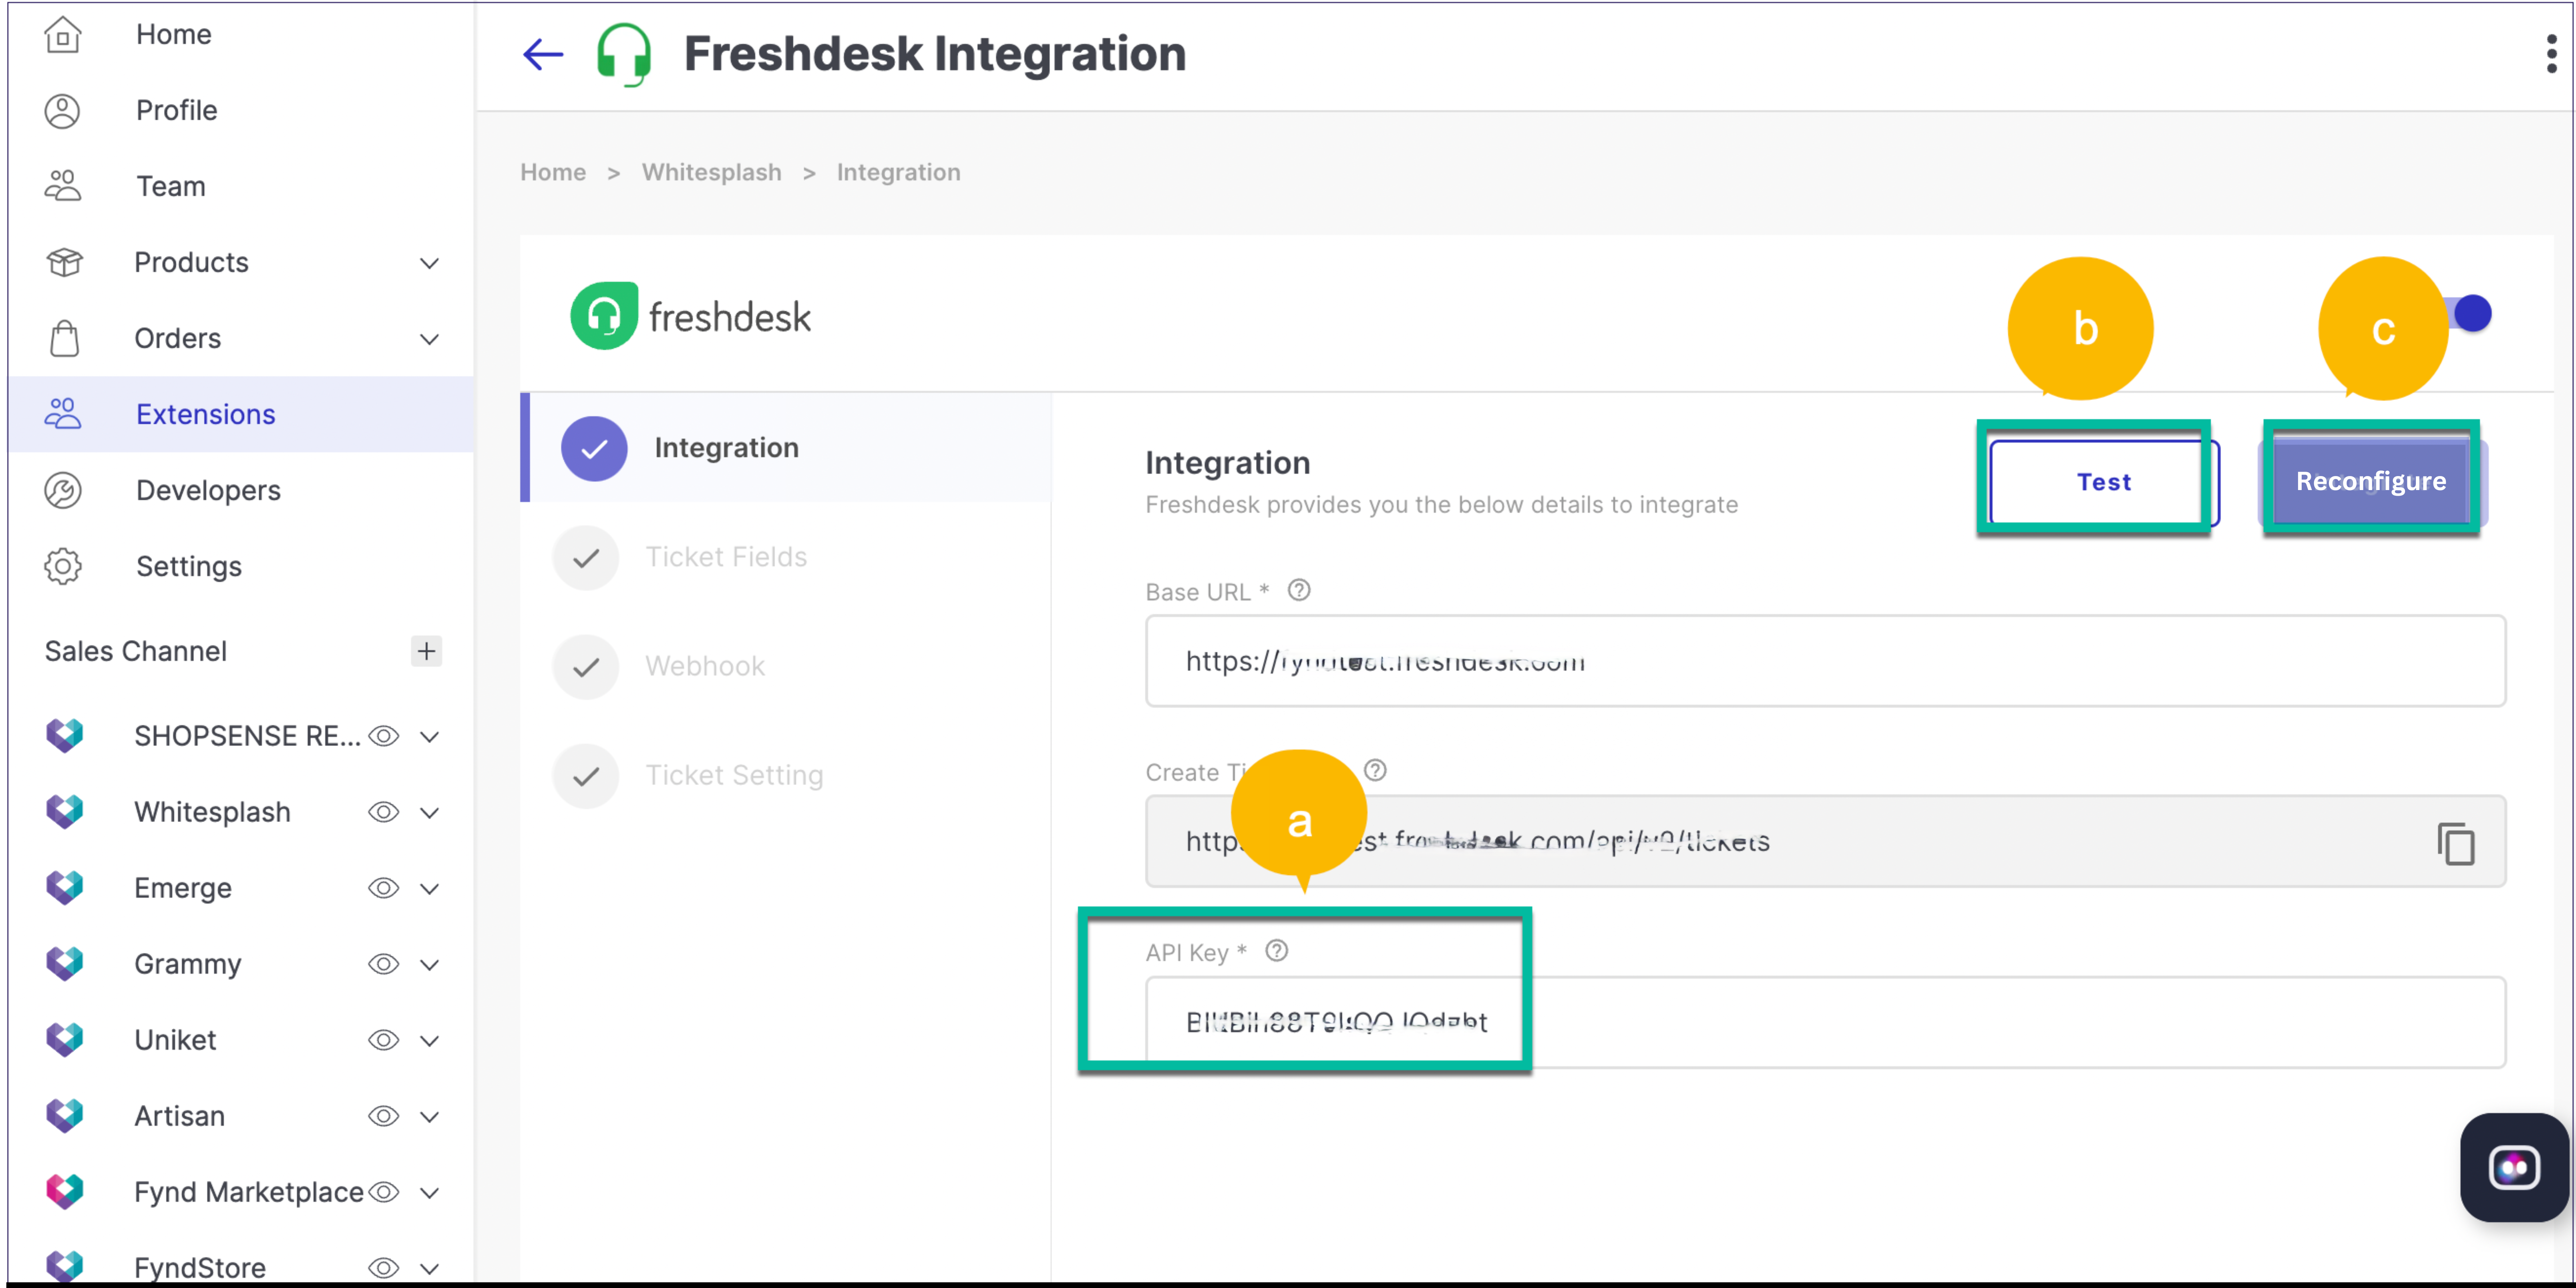
Figure 18: Reconfiguring API Key
Final Output
Your sales channel is now connected with the Freshdesk Integration extension which will act as a proxy service of the tool Freshdesk. Once all the steps are integrated, the screen will ask you to reconfigure. You can reconfigure only if you need to. The page will look like the below format.