Installing Extensions
Introduction
Using this page, you will learn the basics of how to install an extension in the Fynd Platform. The Fynd Platform offers a wide range of extensions, both public and private, to enhance the functionality of your shopping website. Installing an extension is a simple process that can be done in a few steps. This page will guide you through the installation process and help you get started with using the new functionality provided by the extension. Whether you are a new seller or an experienced professional, this page will provide you with the information you need to install public or private extension in the Fynd Platform. So, let's get started!
Installing Public Extension
In your Fynd Platform business account, go to Extensions, and click the Explore button.
OR Log in to Extension Marketplace.Click the top-right profile icon as shown below.
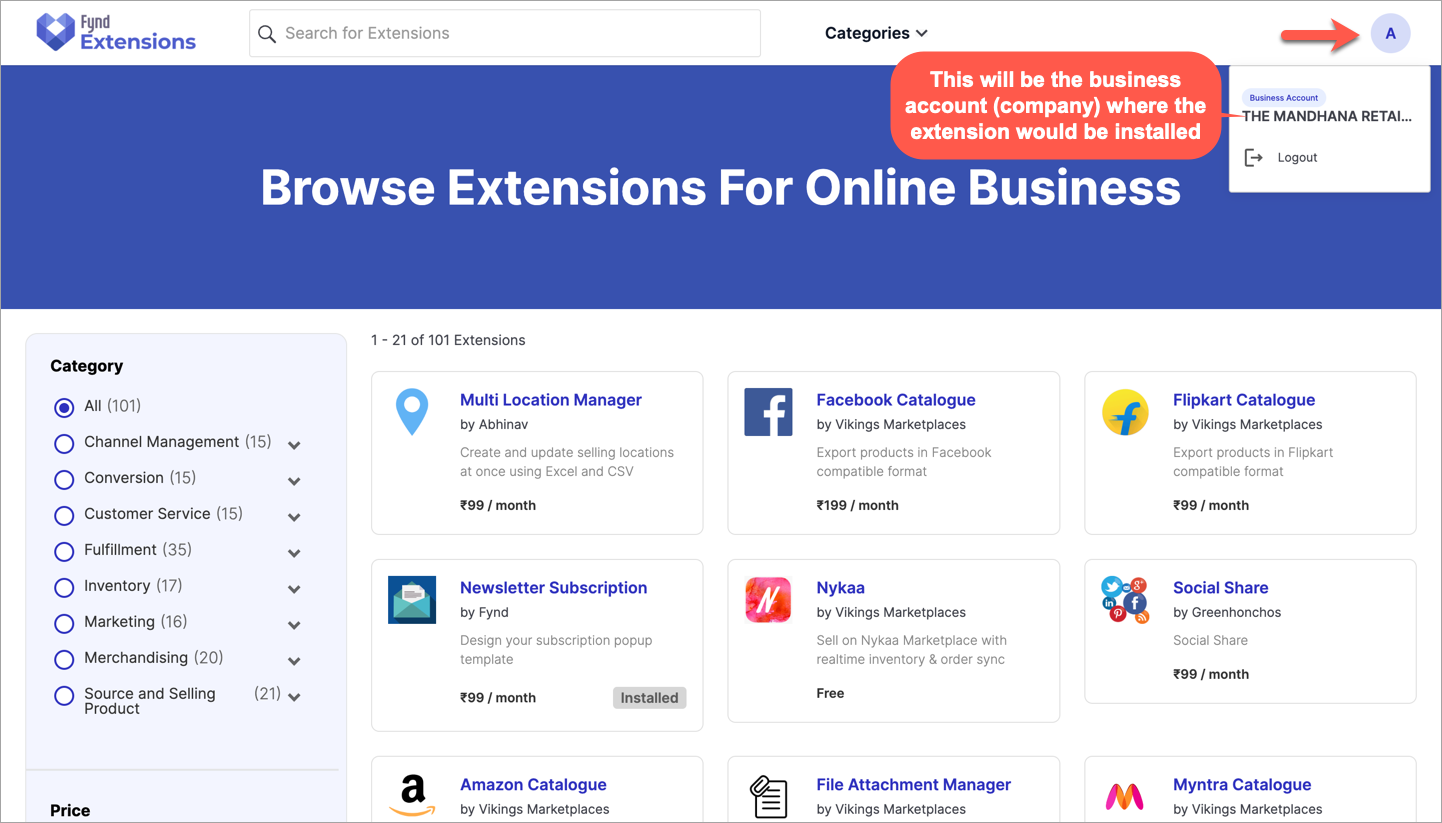
Figure 1: Profile Icon noteThe business account shown to you will be the one where the extension would be installed.
Click View All Extensions.
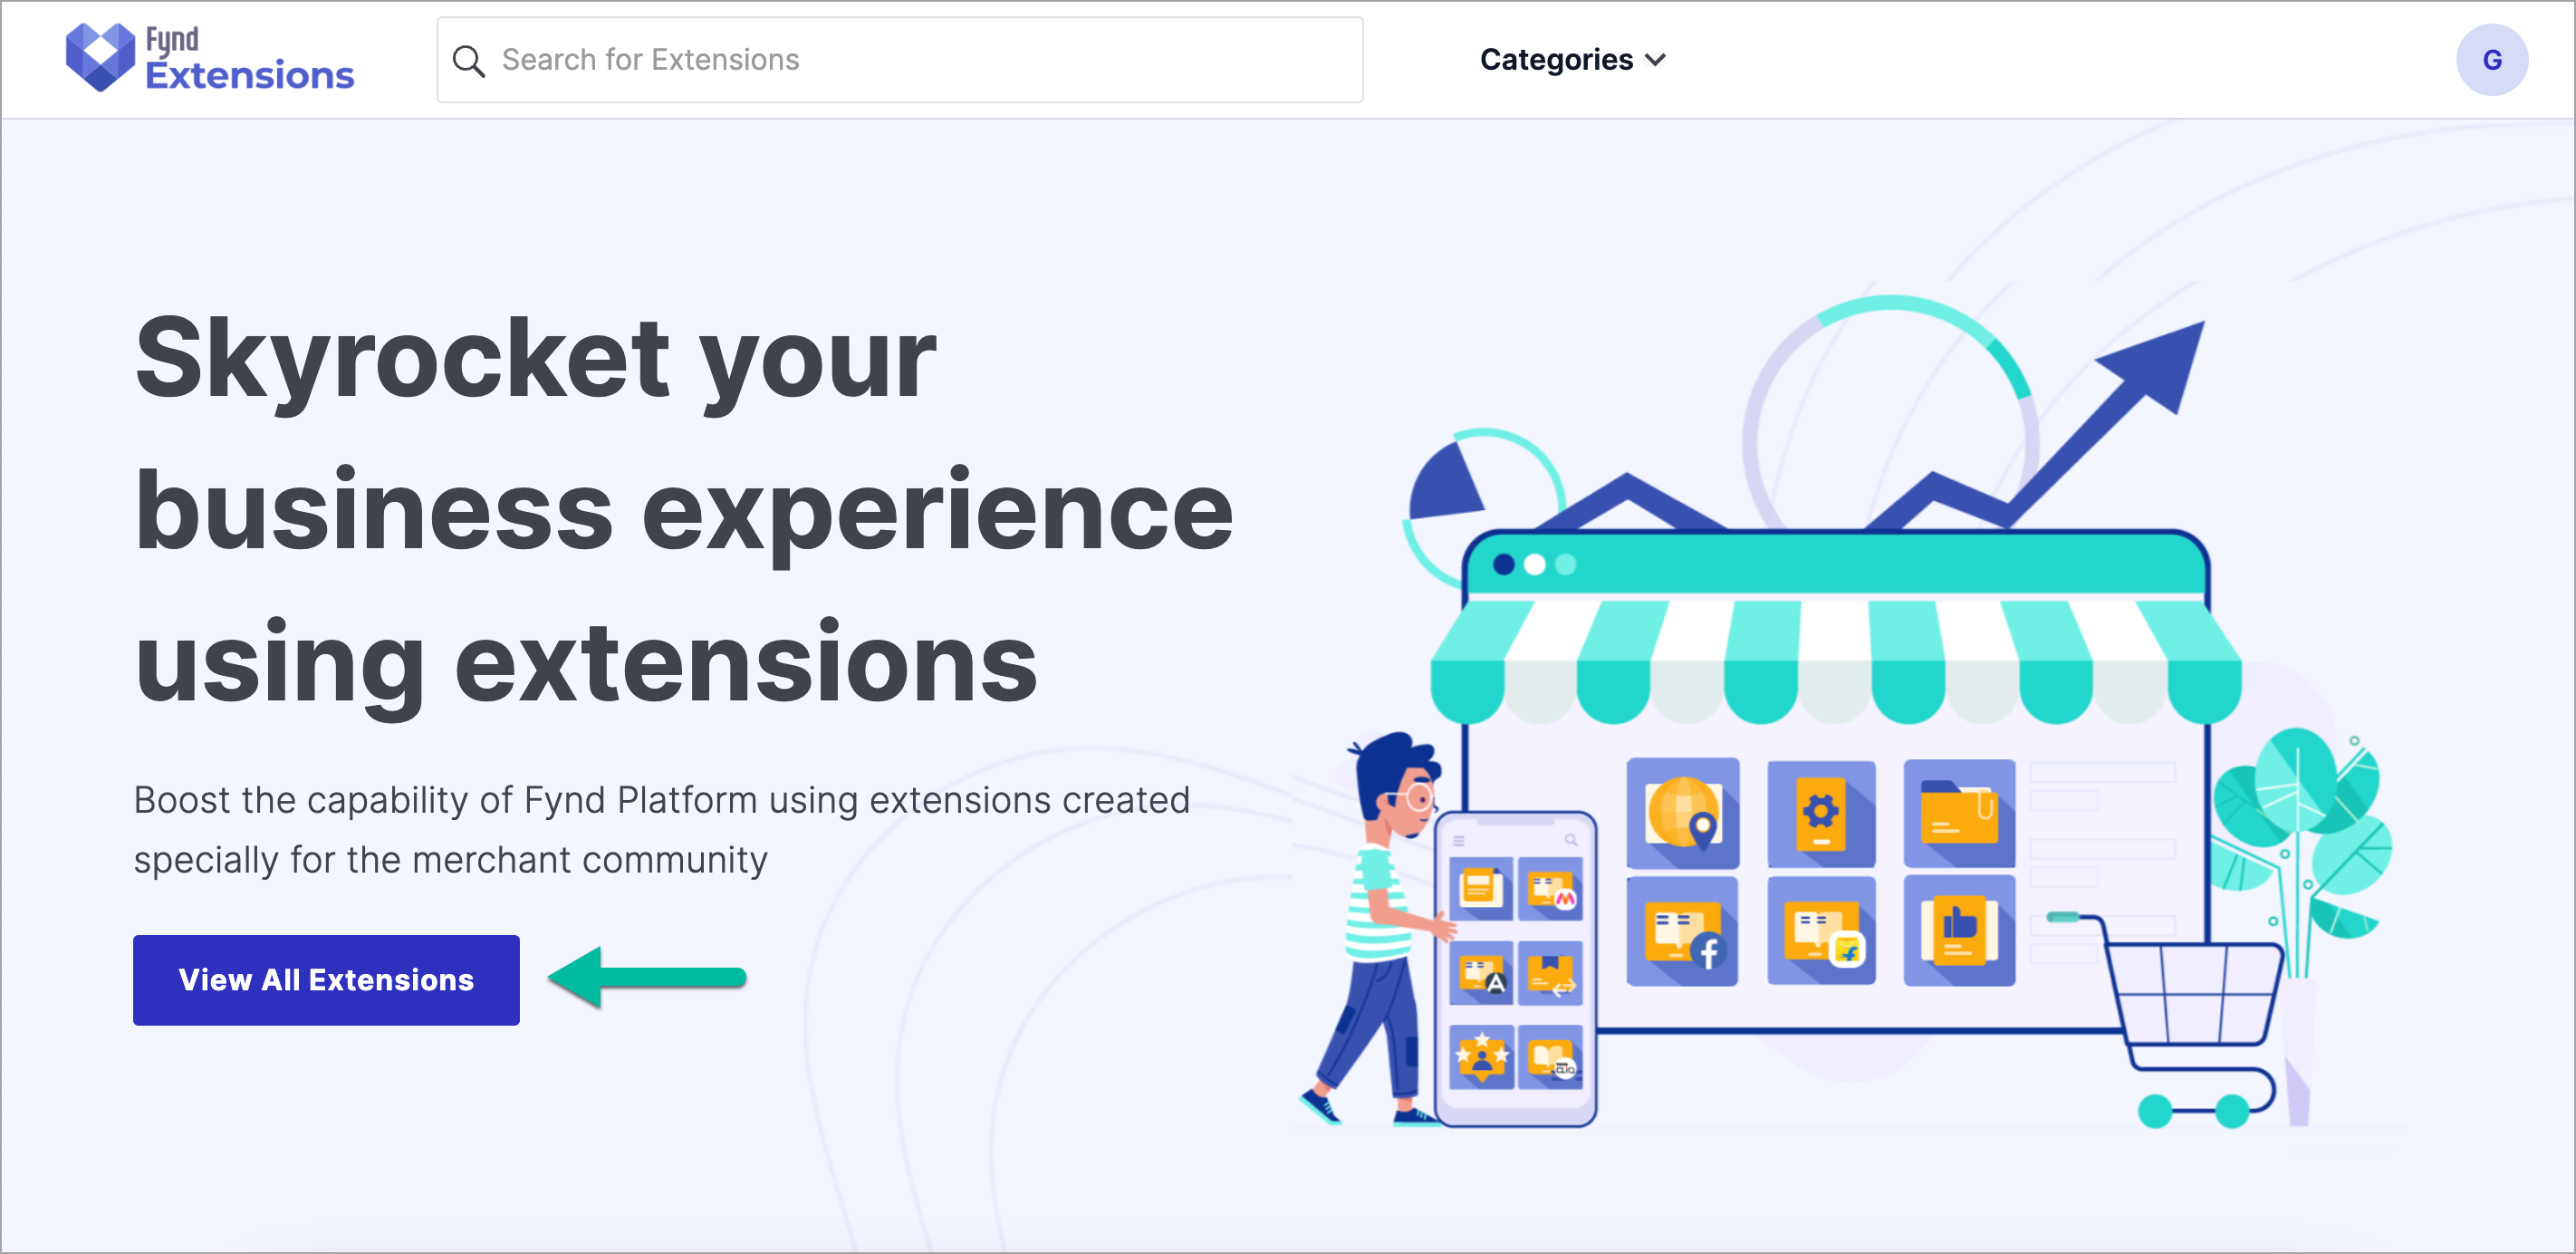
Figure 2: Clicking View All Extensions Button Click the extension that you wish to install.
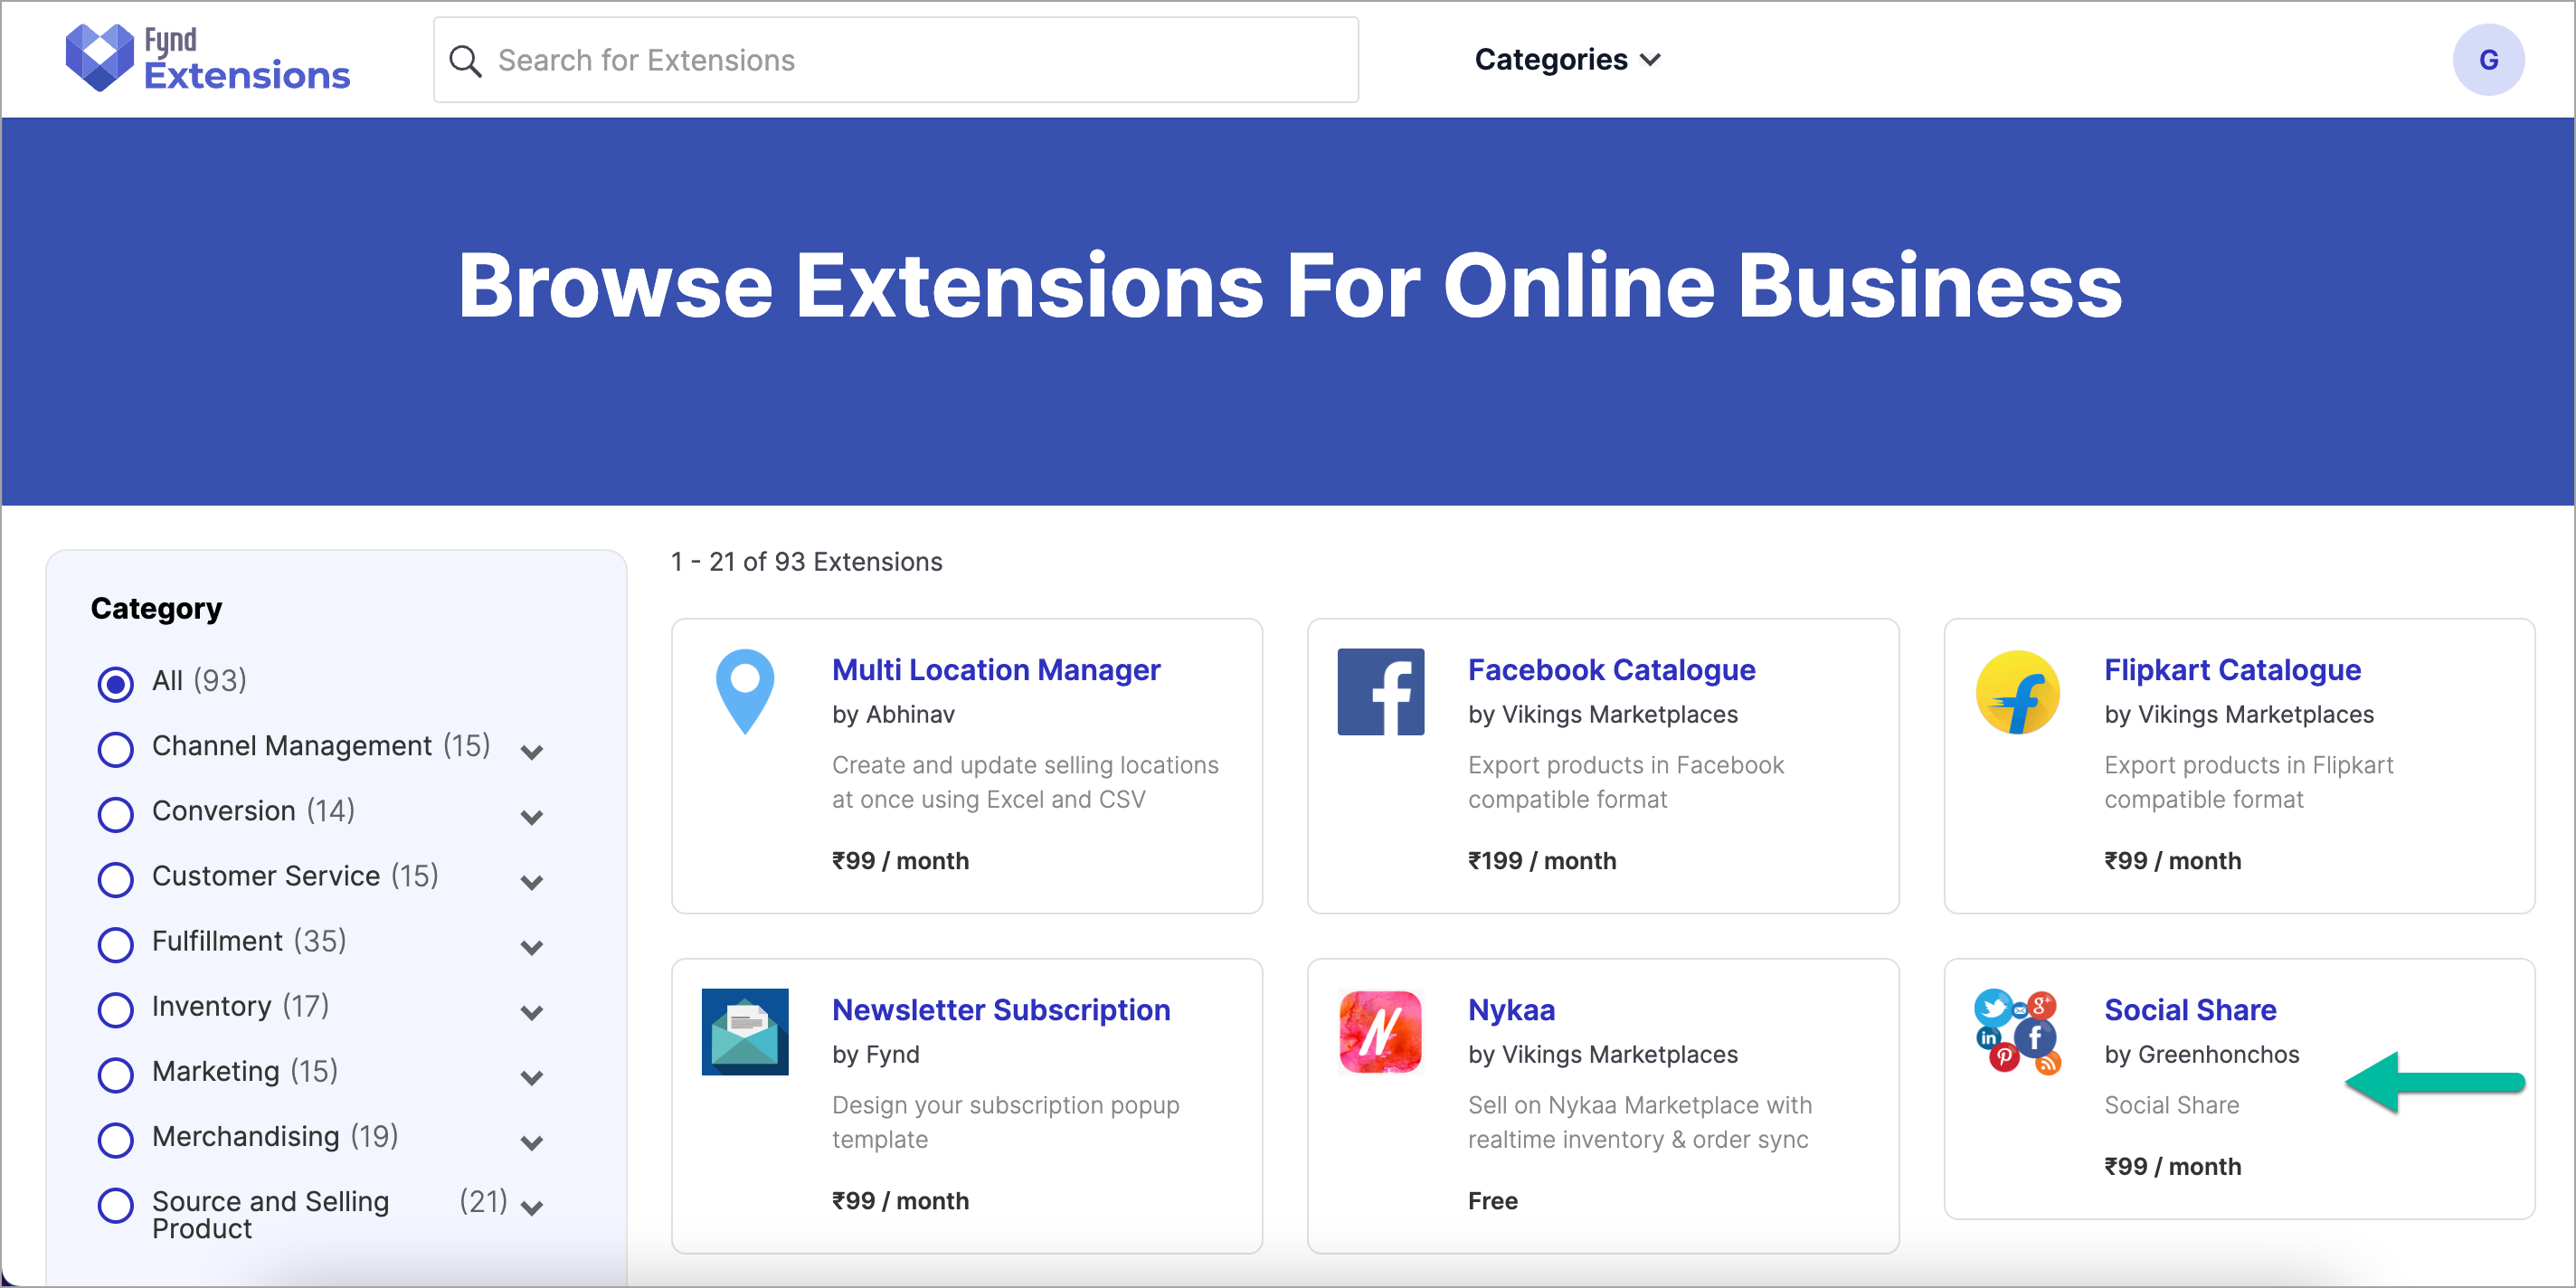
Figure 3: Opening Desired Extension on Marketplace Page Please NoteIf the extension is already installed, a tag named
Installedwould appear as shown below (assuming you have logged in)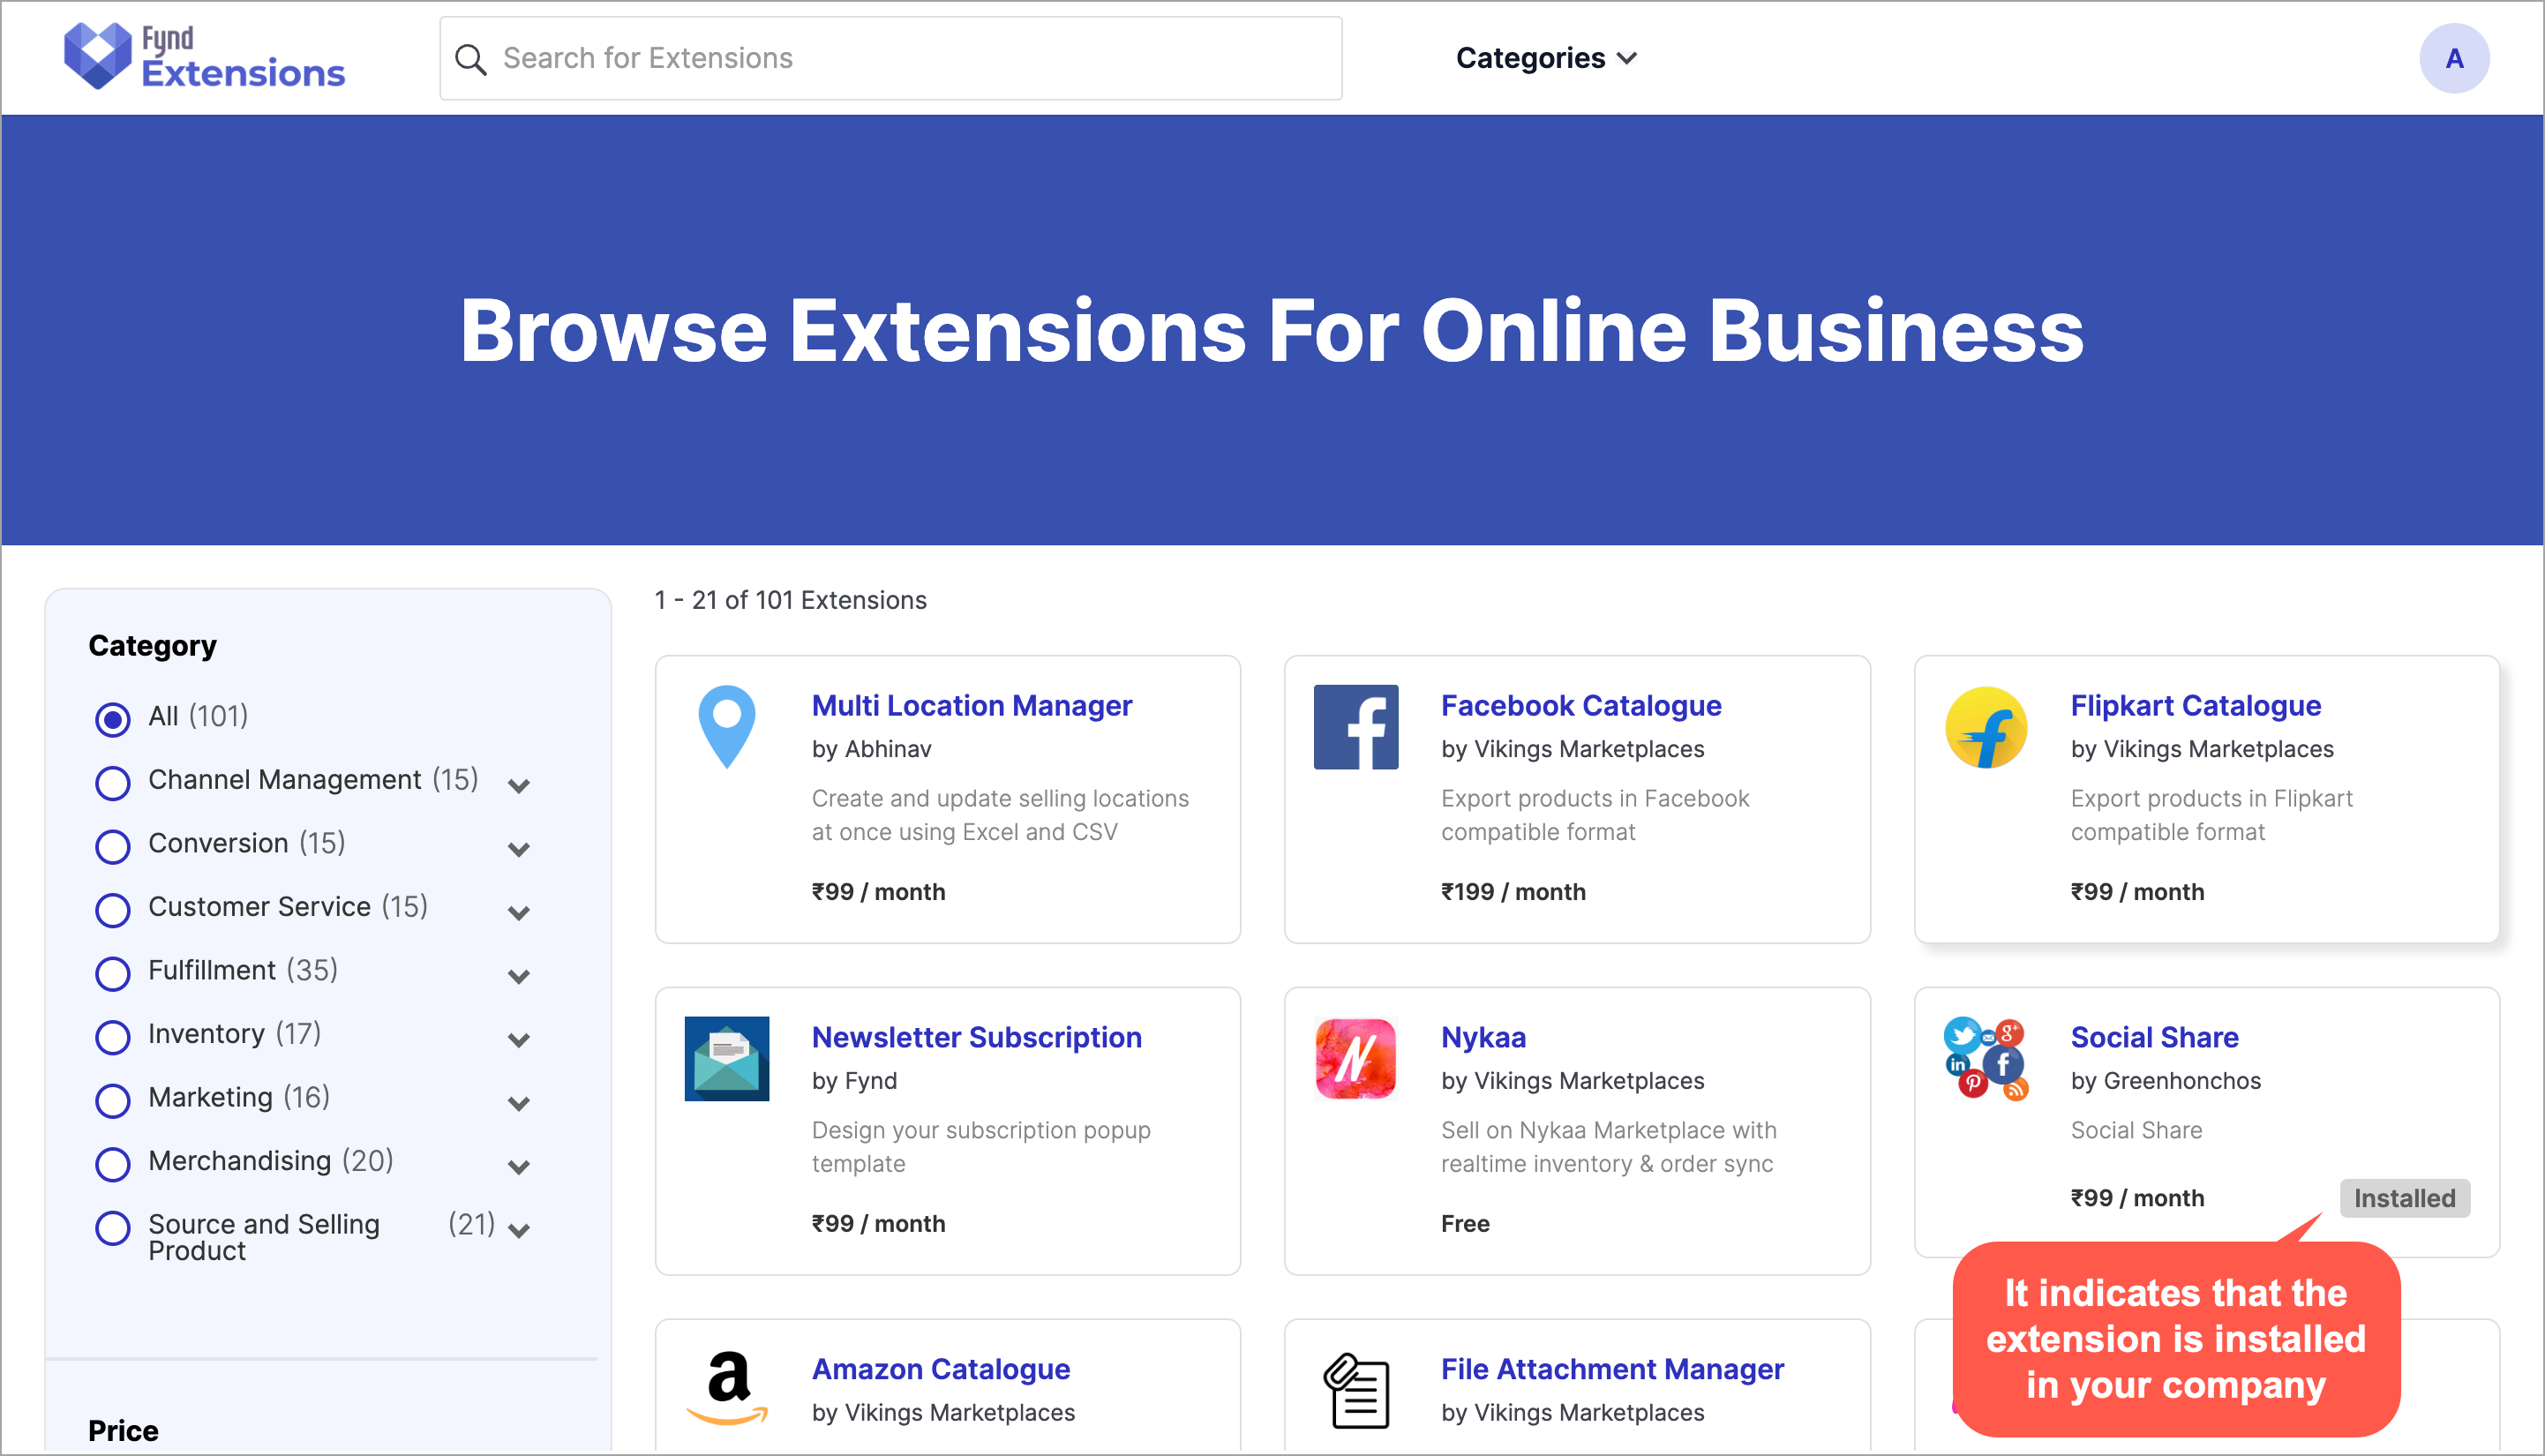
Click Install. It is recommended to read all the details about extension before installing it.
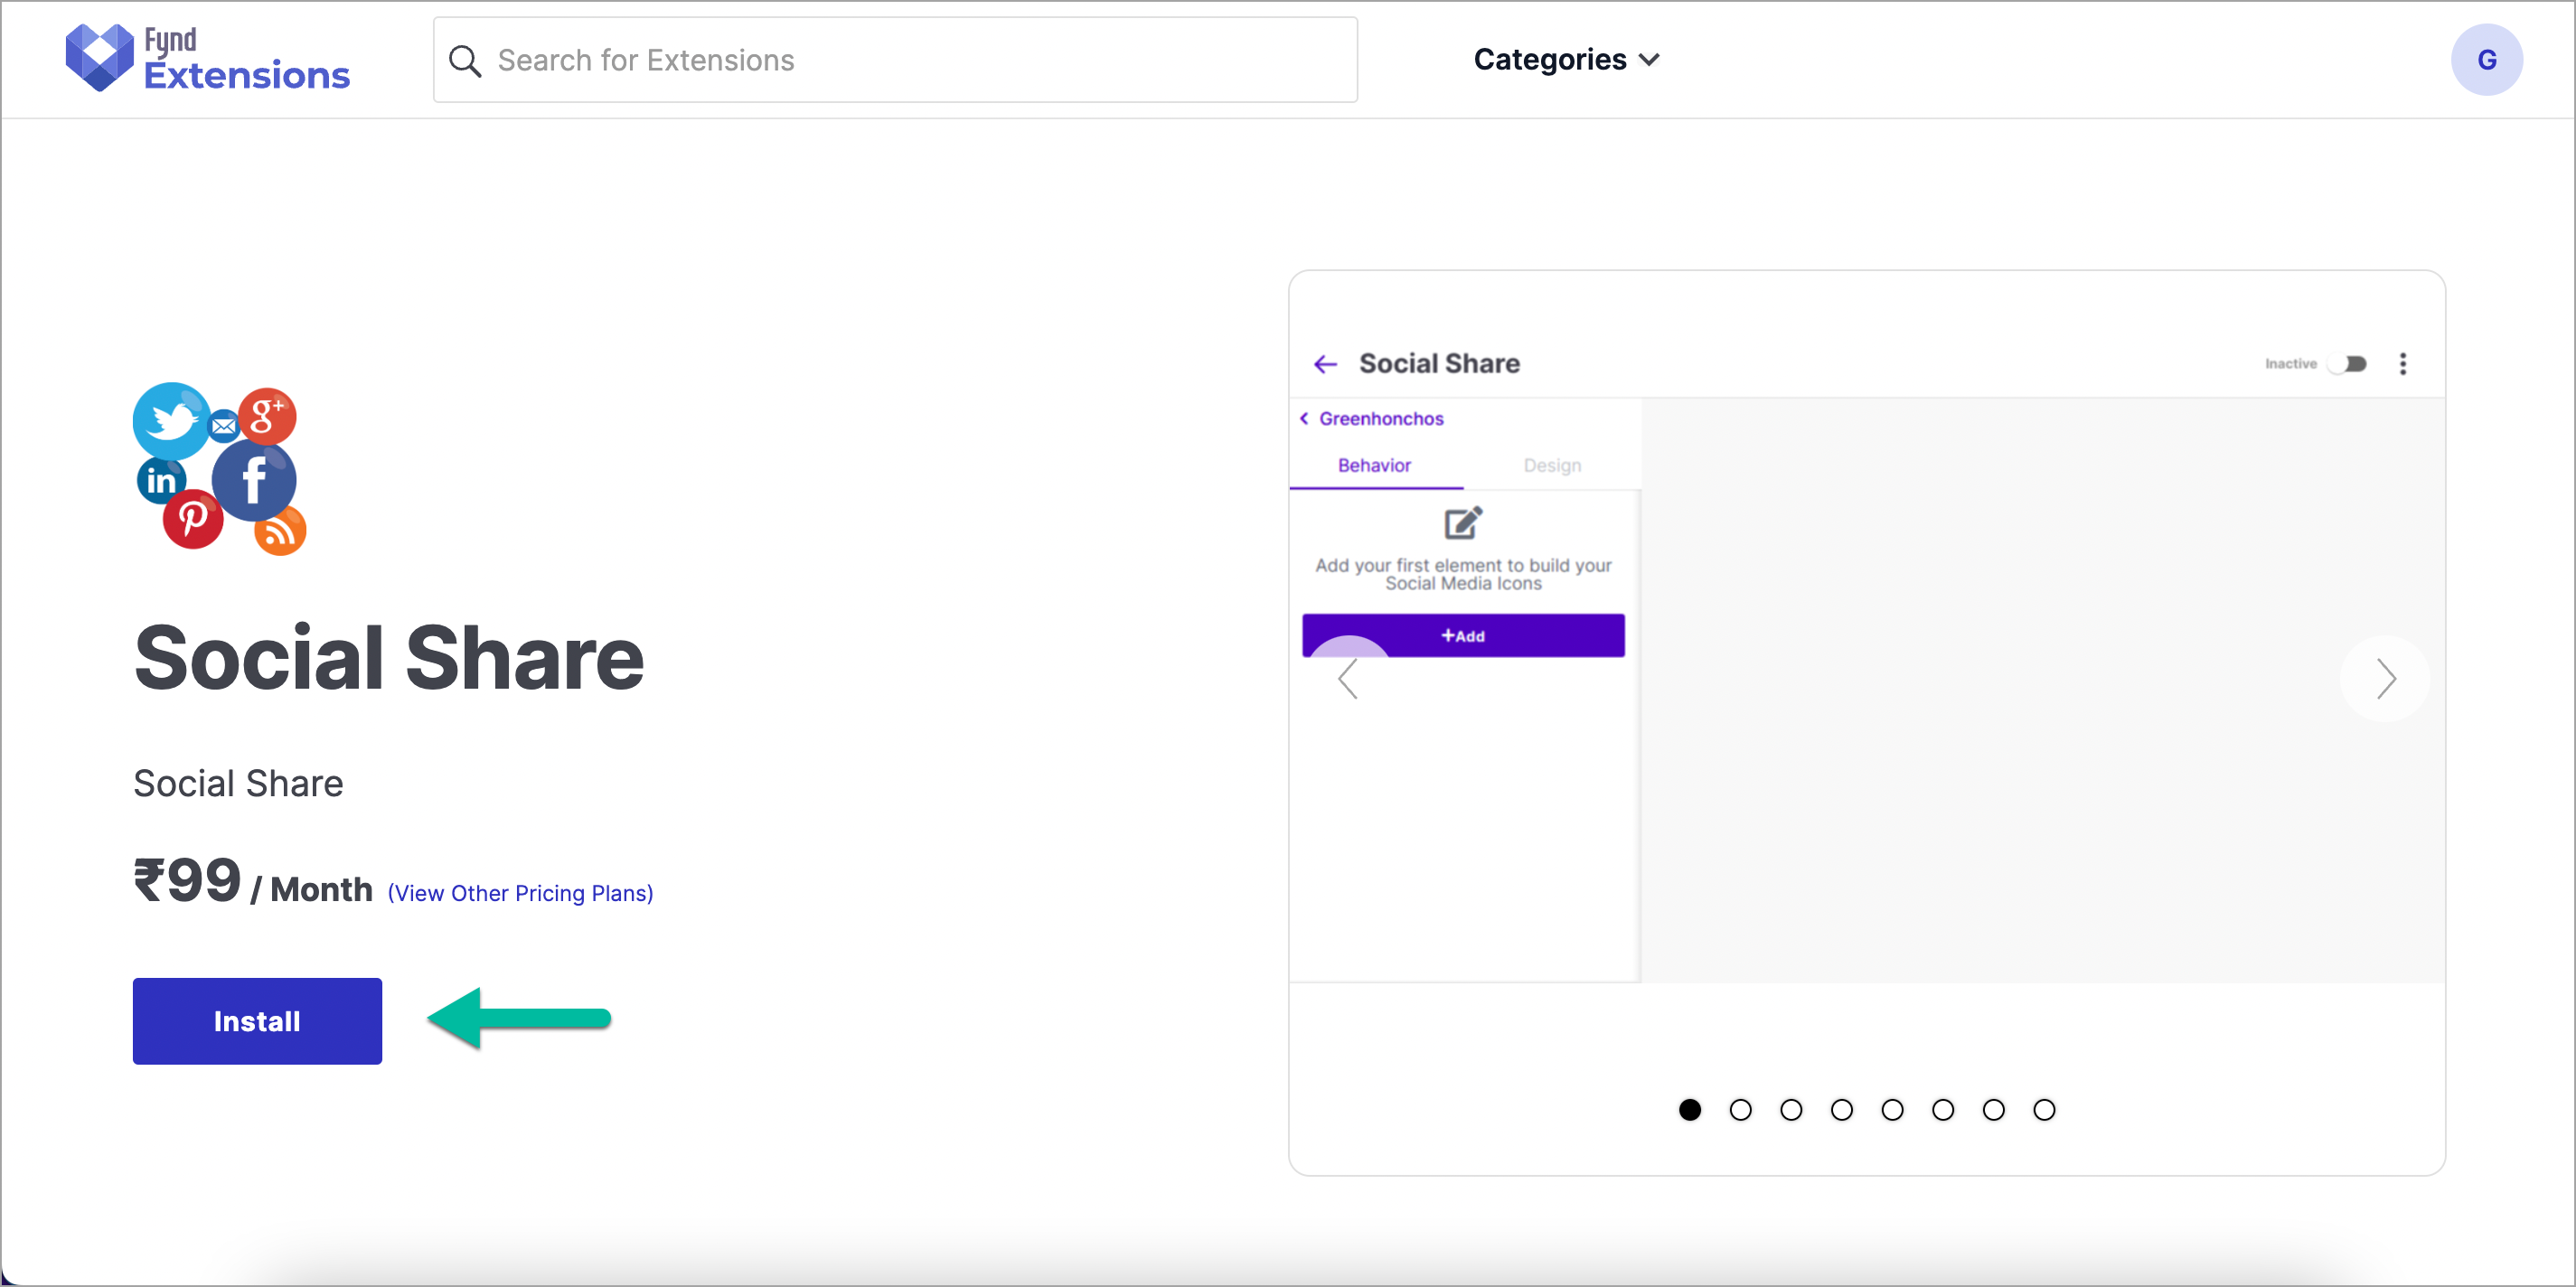
Figure 4: Clicking Install Button Please NoteIf you click on an extension that is already installed, you will see a button titled
Installedon the description page. The button remains disabled to indicate that the extension is installed in your business account.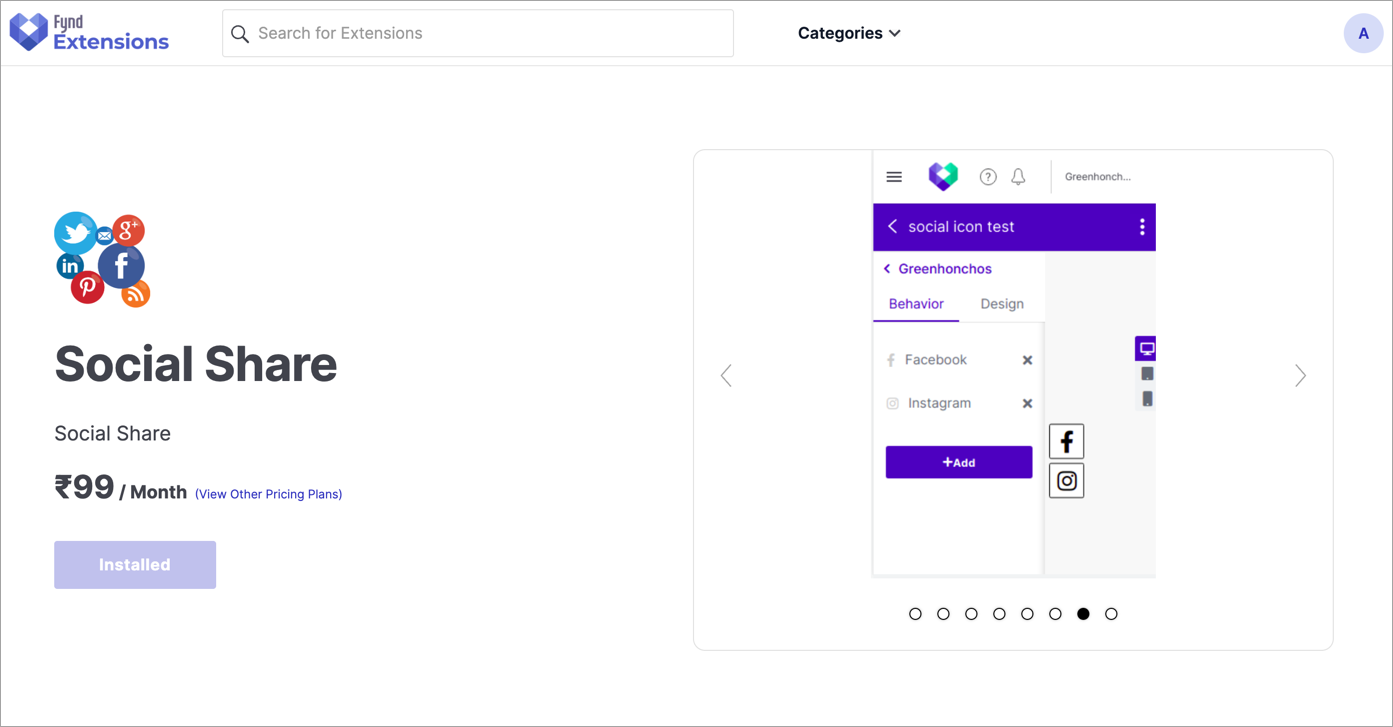
Click Accept and Continue.
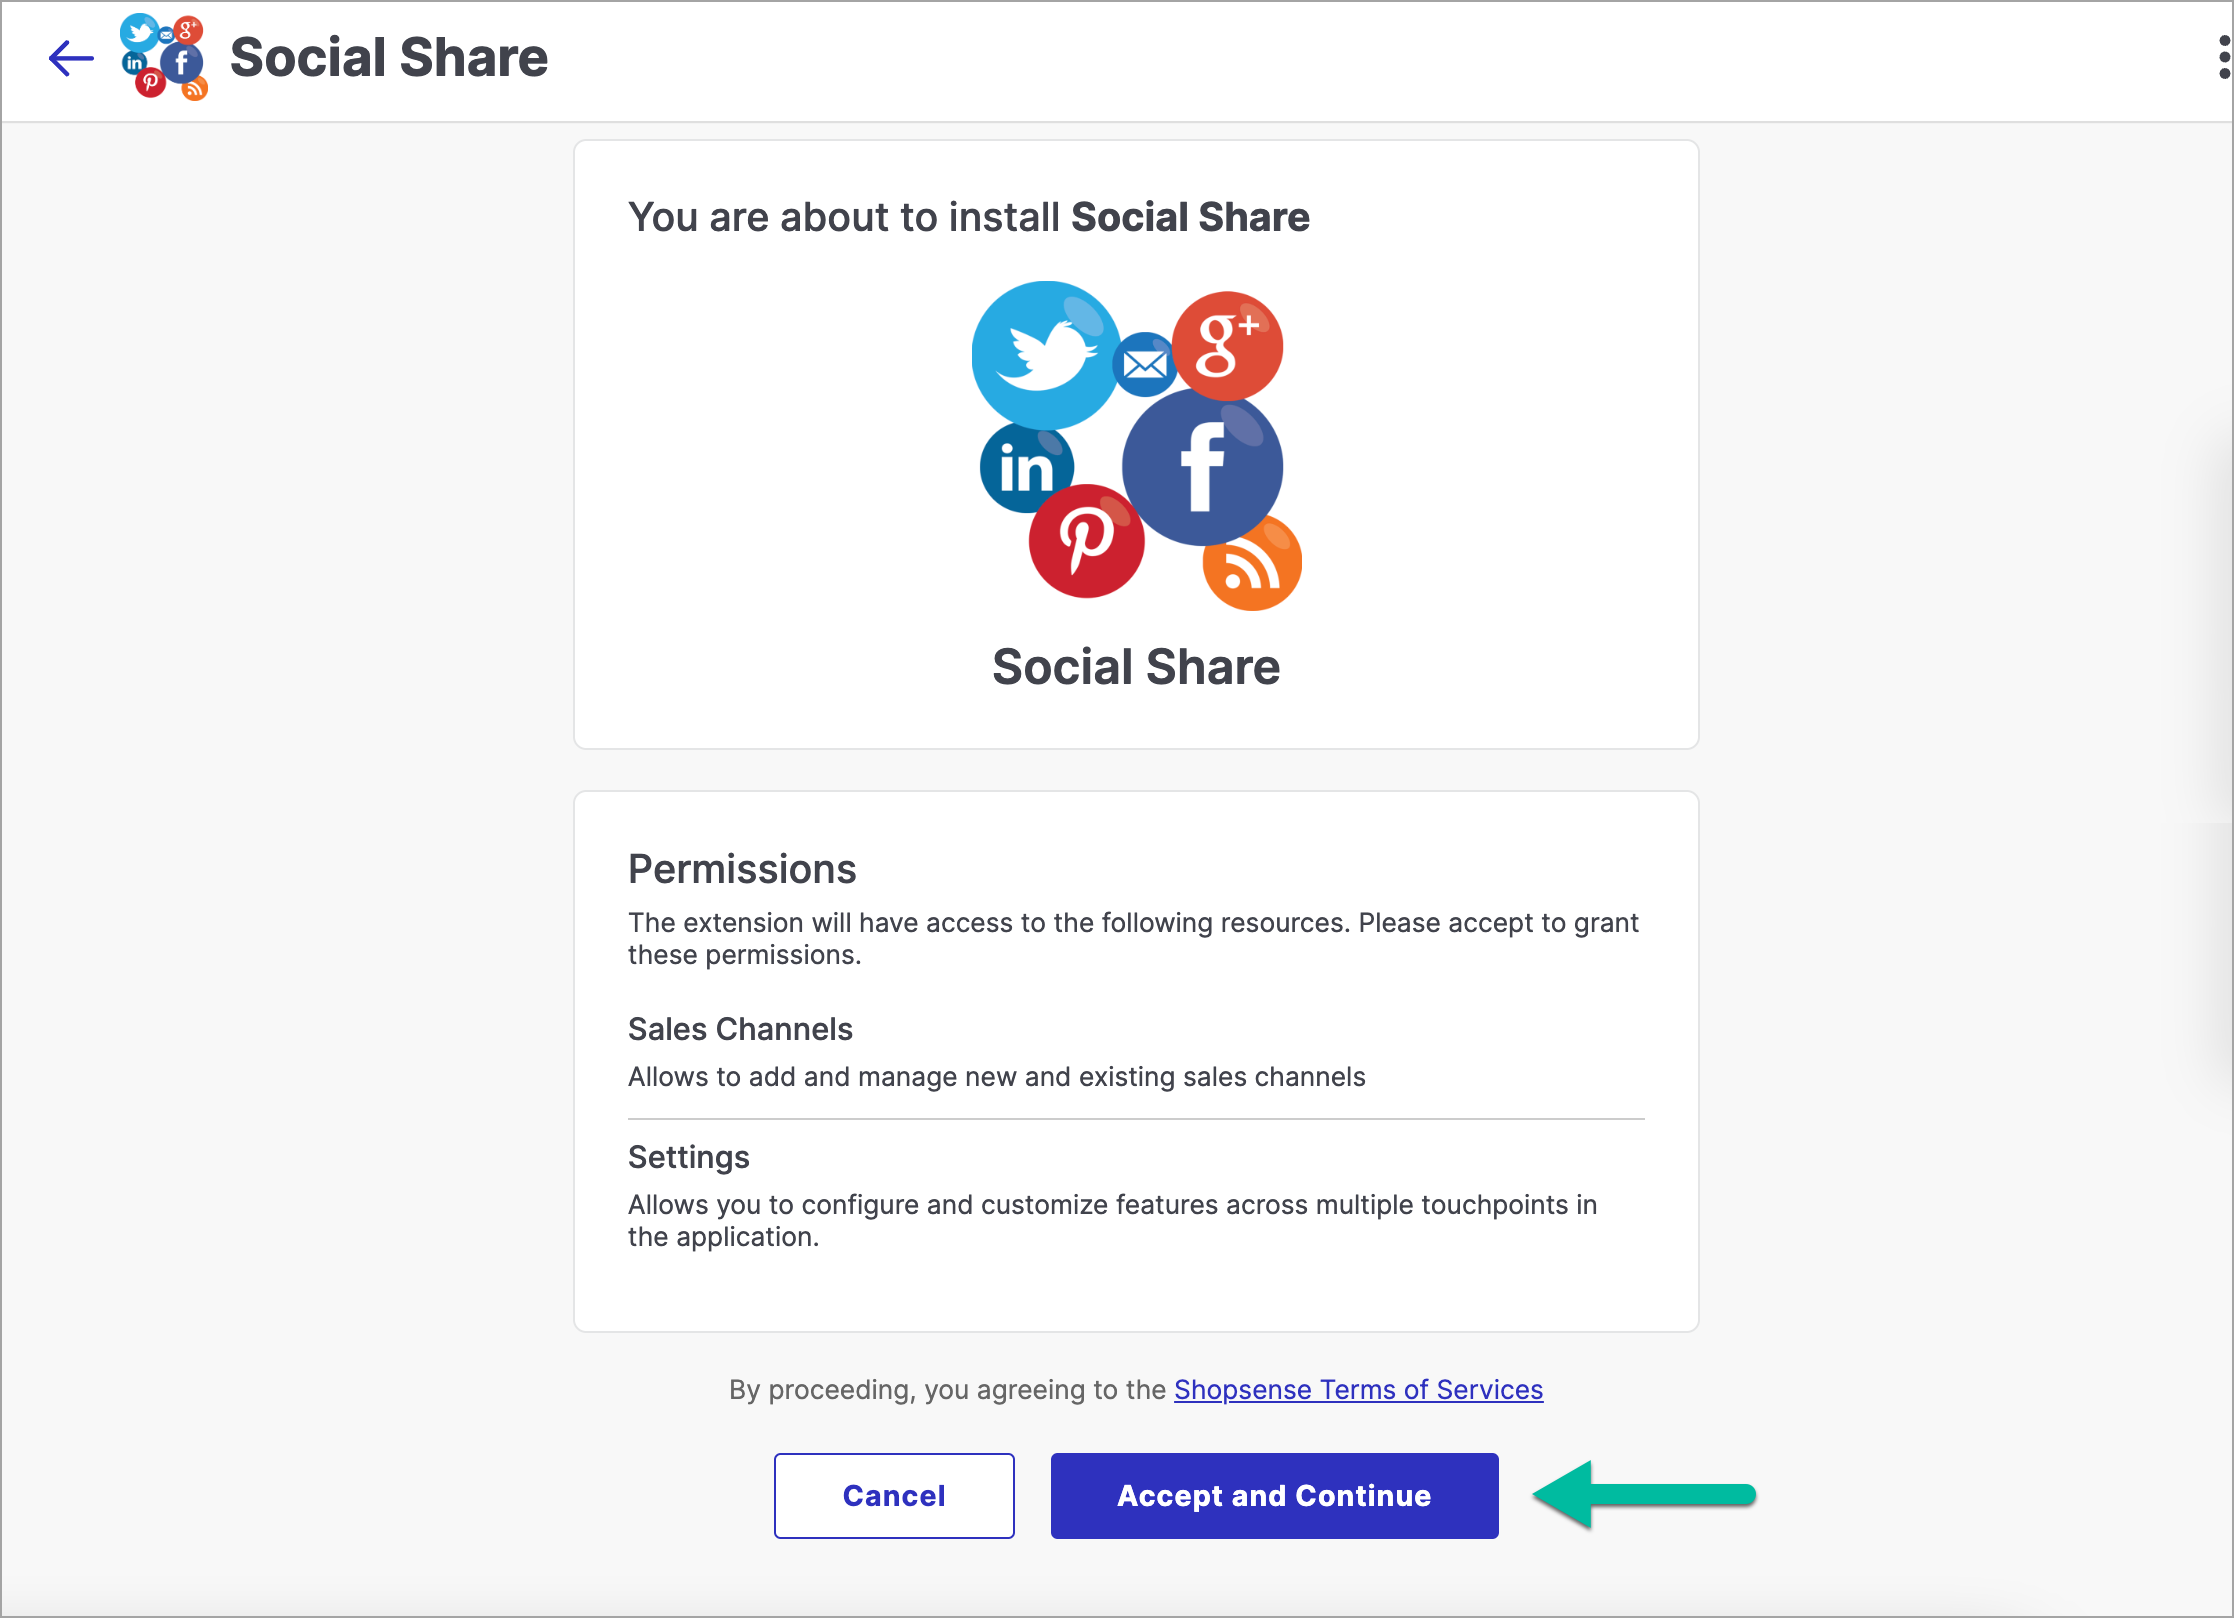
Figure 5: Clicking Accept and Continue Button noteIt is recommended to read Shopsense Terms of Services.
Select the desired plan.
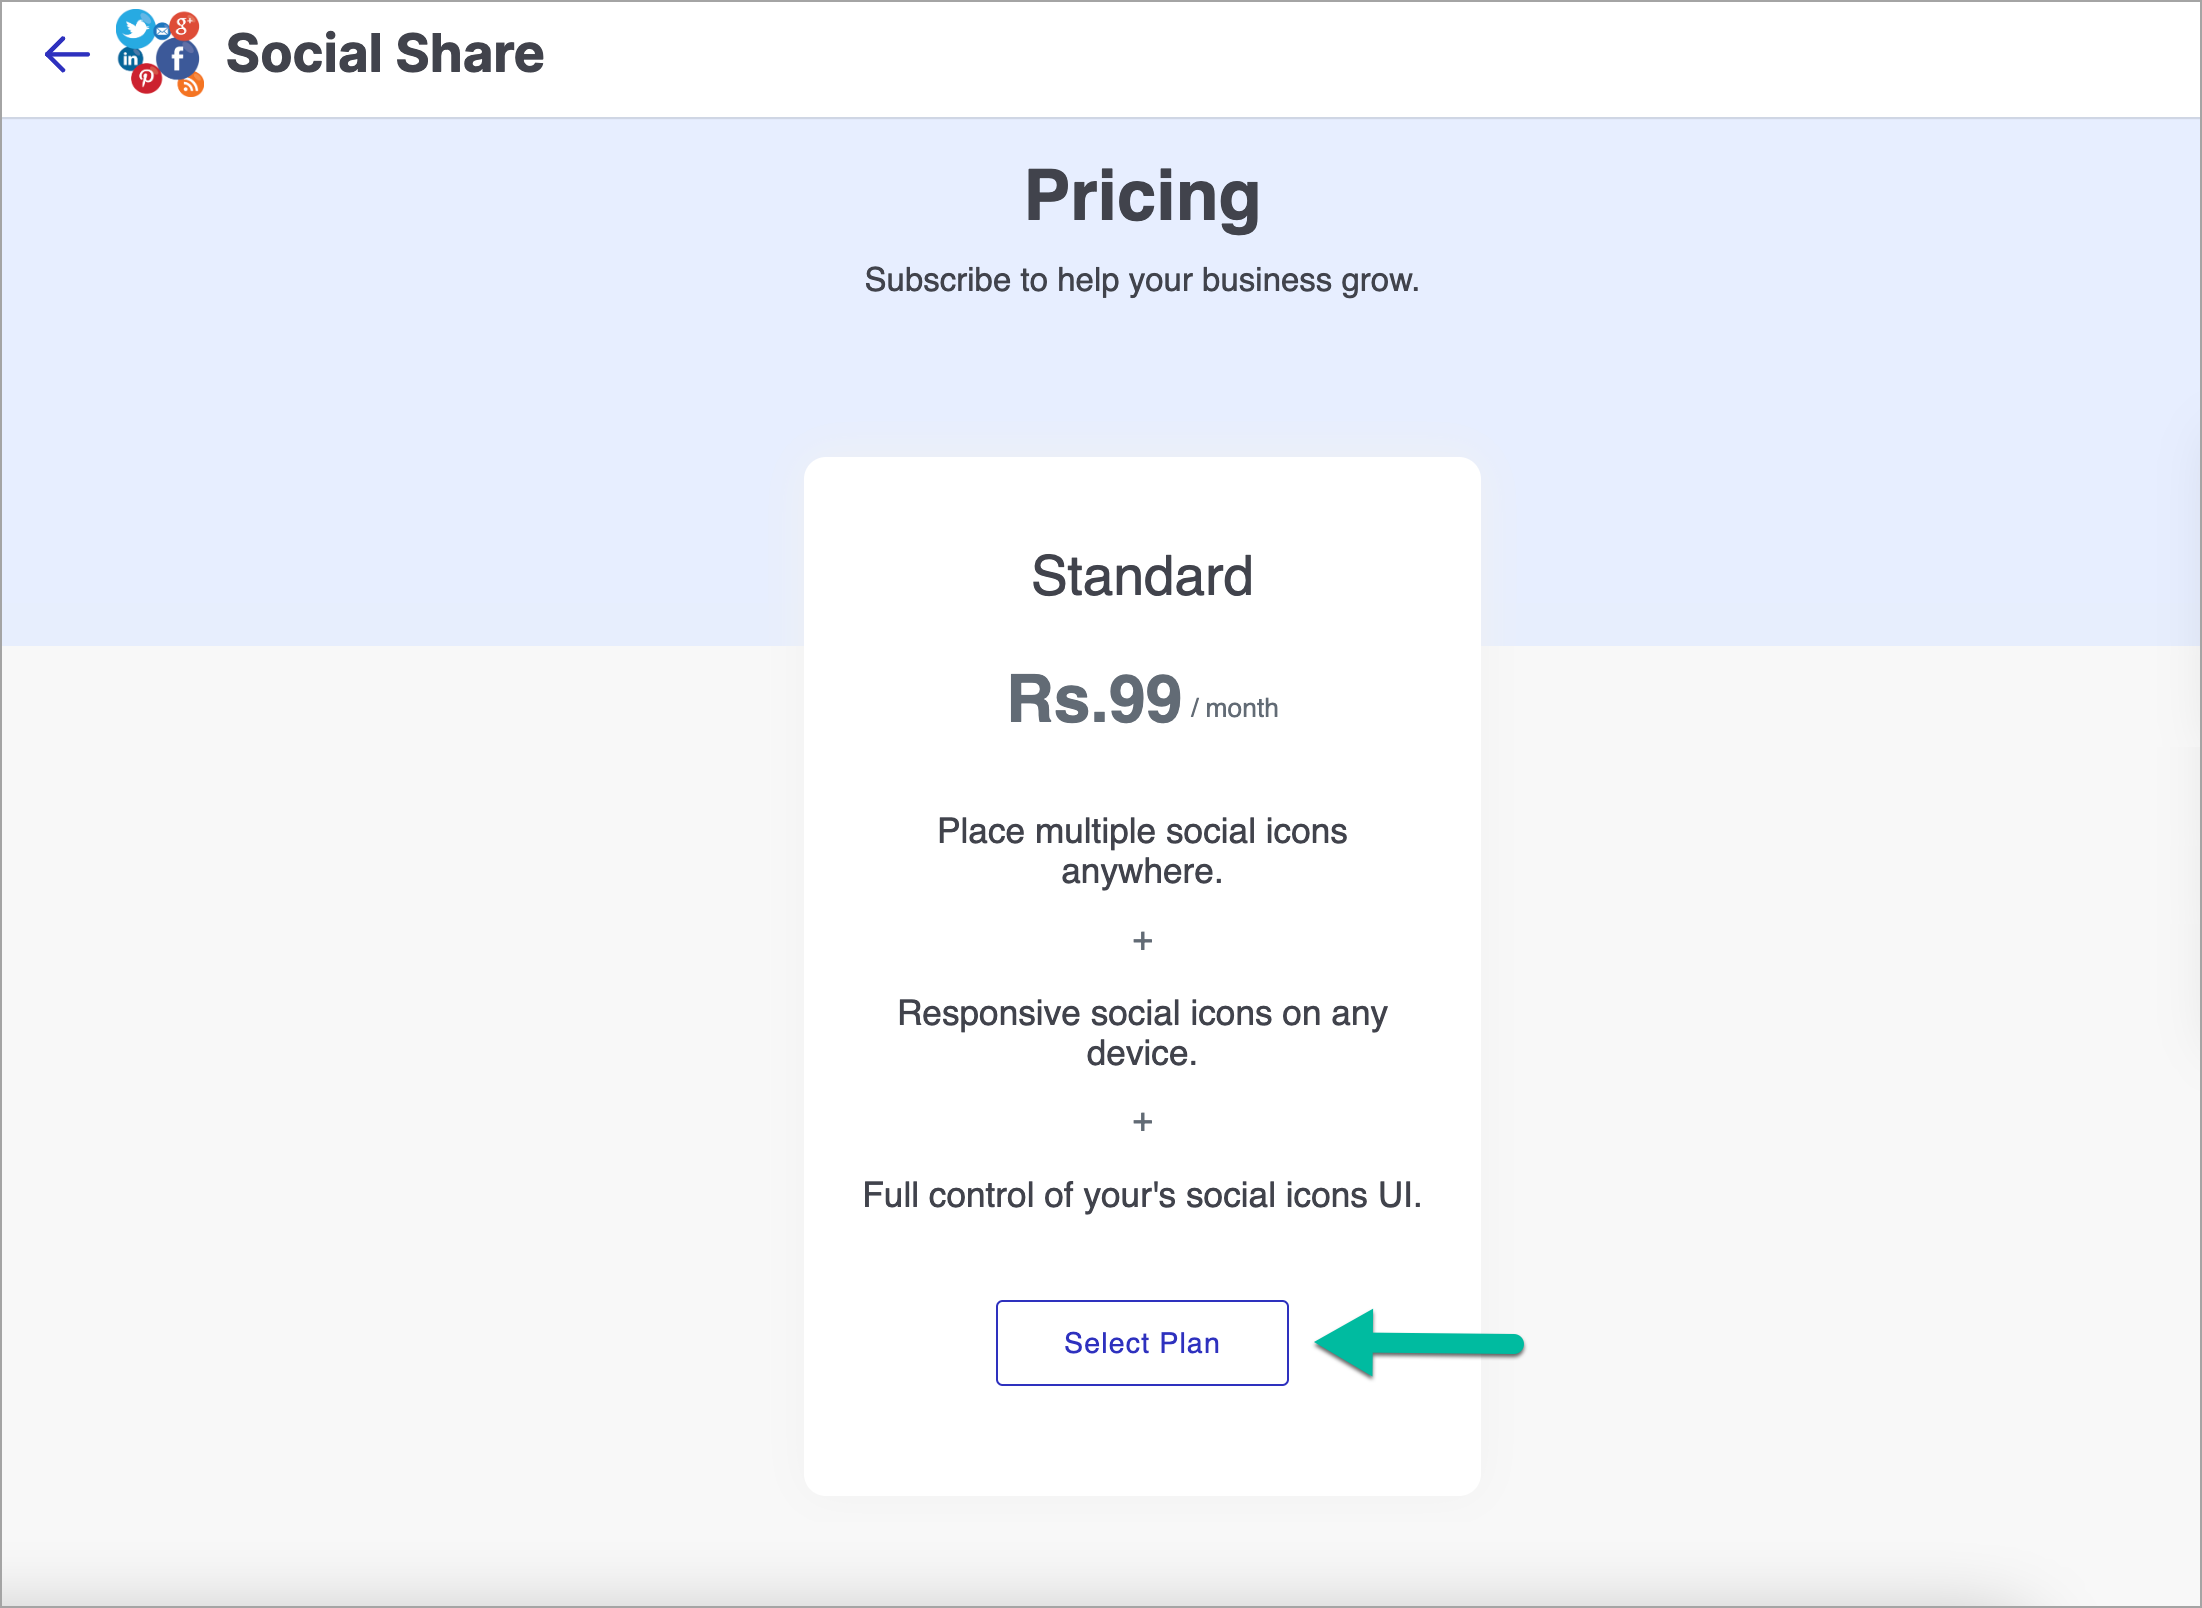
Figure 6: Selecting Desired Plan Click Approve Charges.
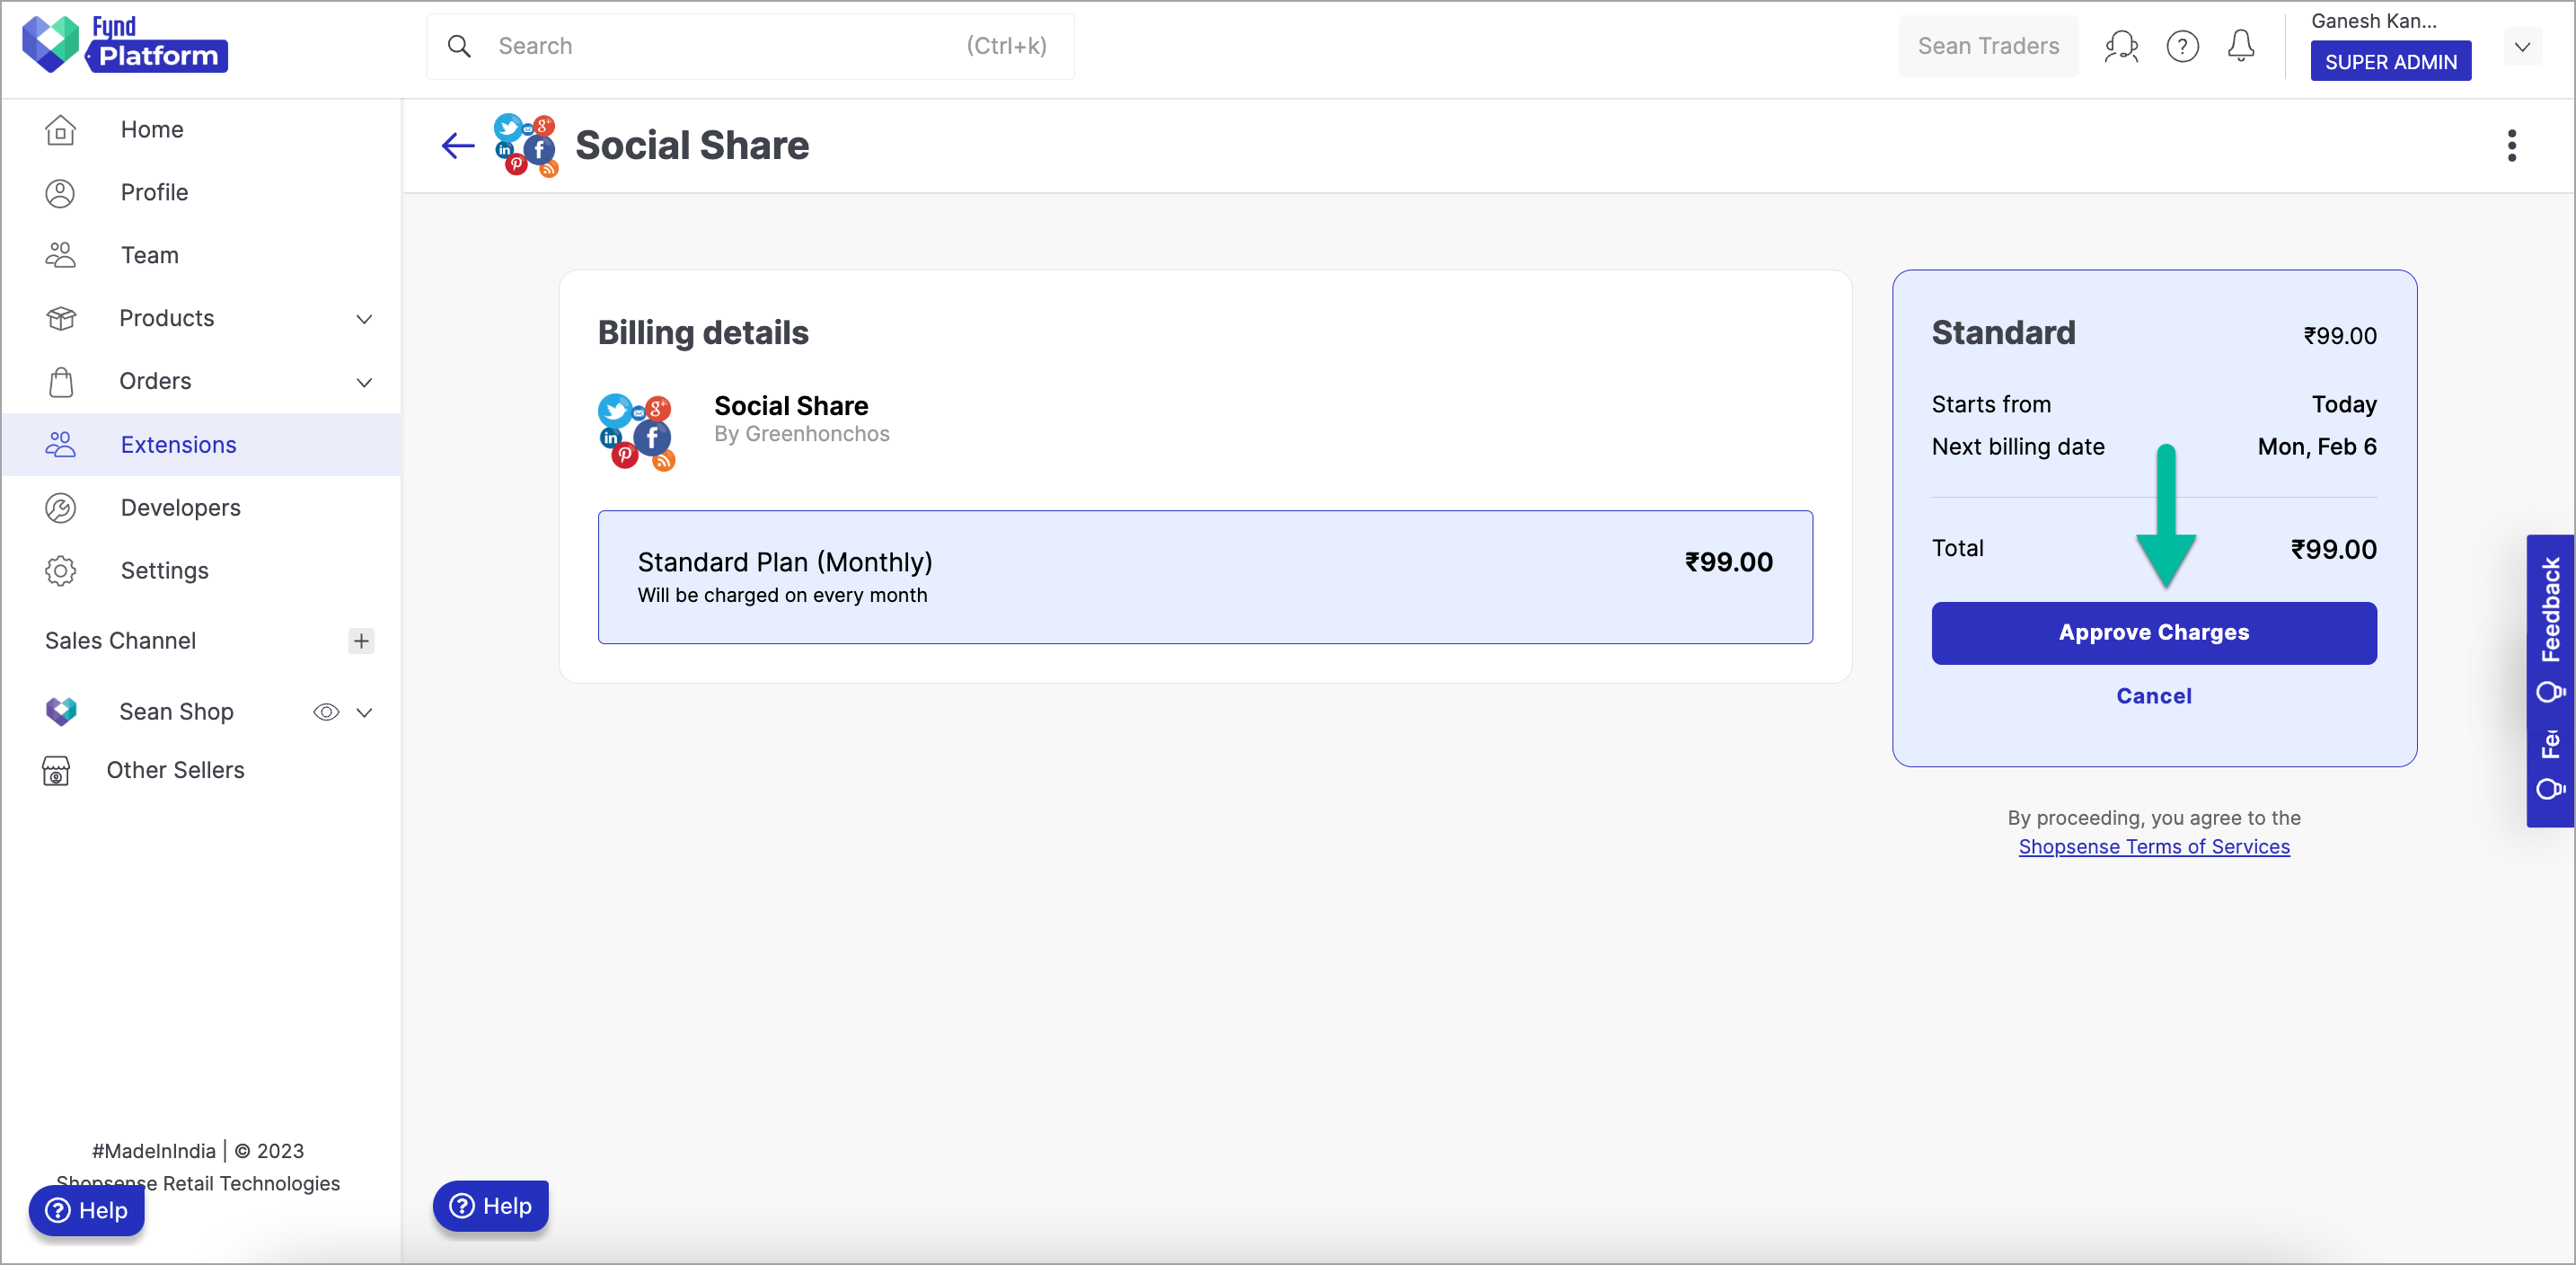
Figure 7: Clicking Approve Charges Button
In this way, your public extension has been installed successfully and it is ready for use.
Installing Private Extension
Go to Settings in Fynd Platform.
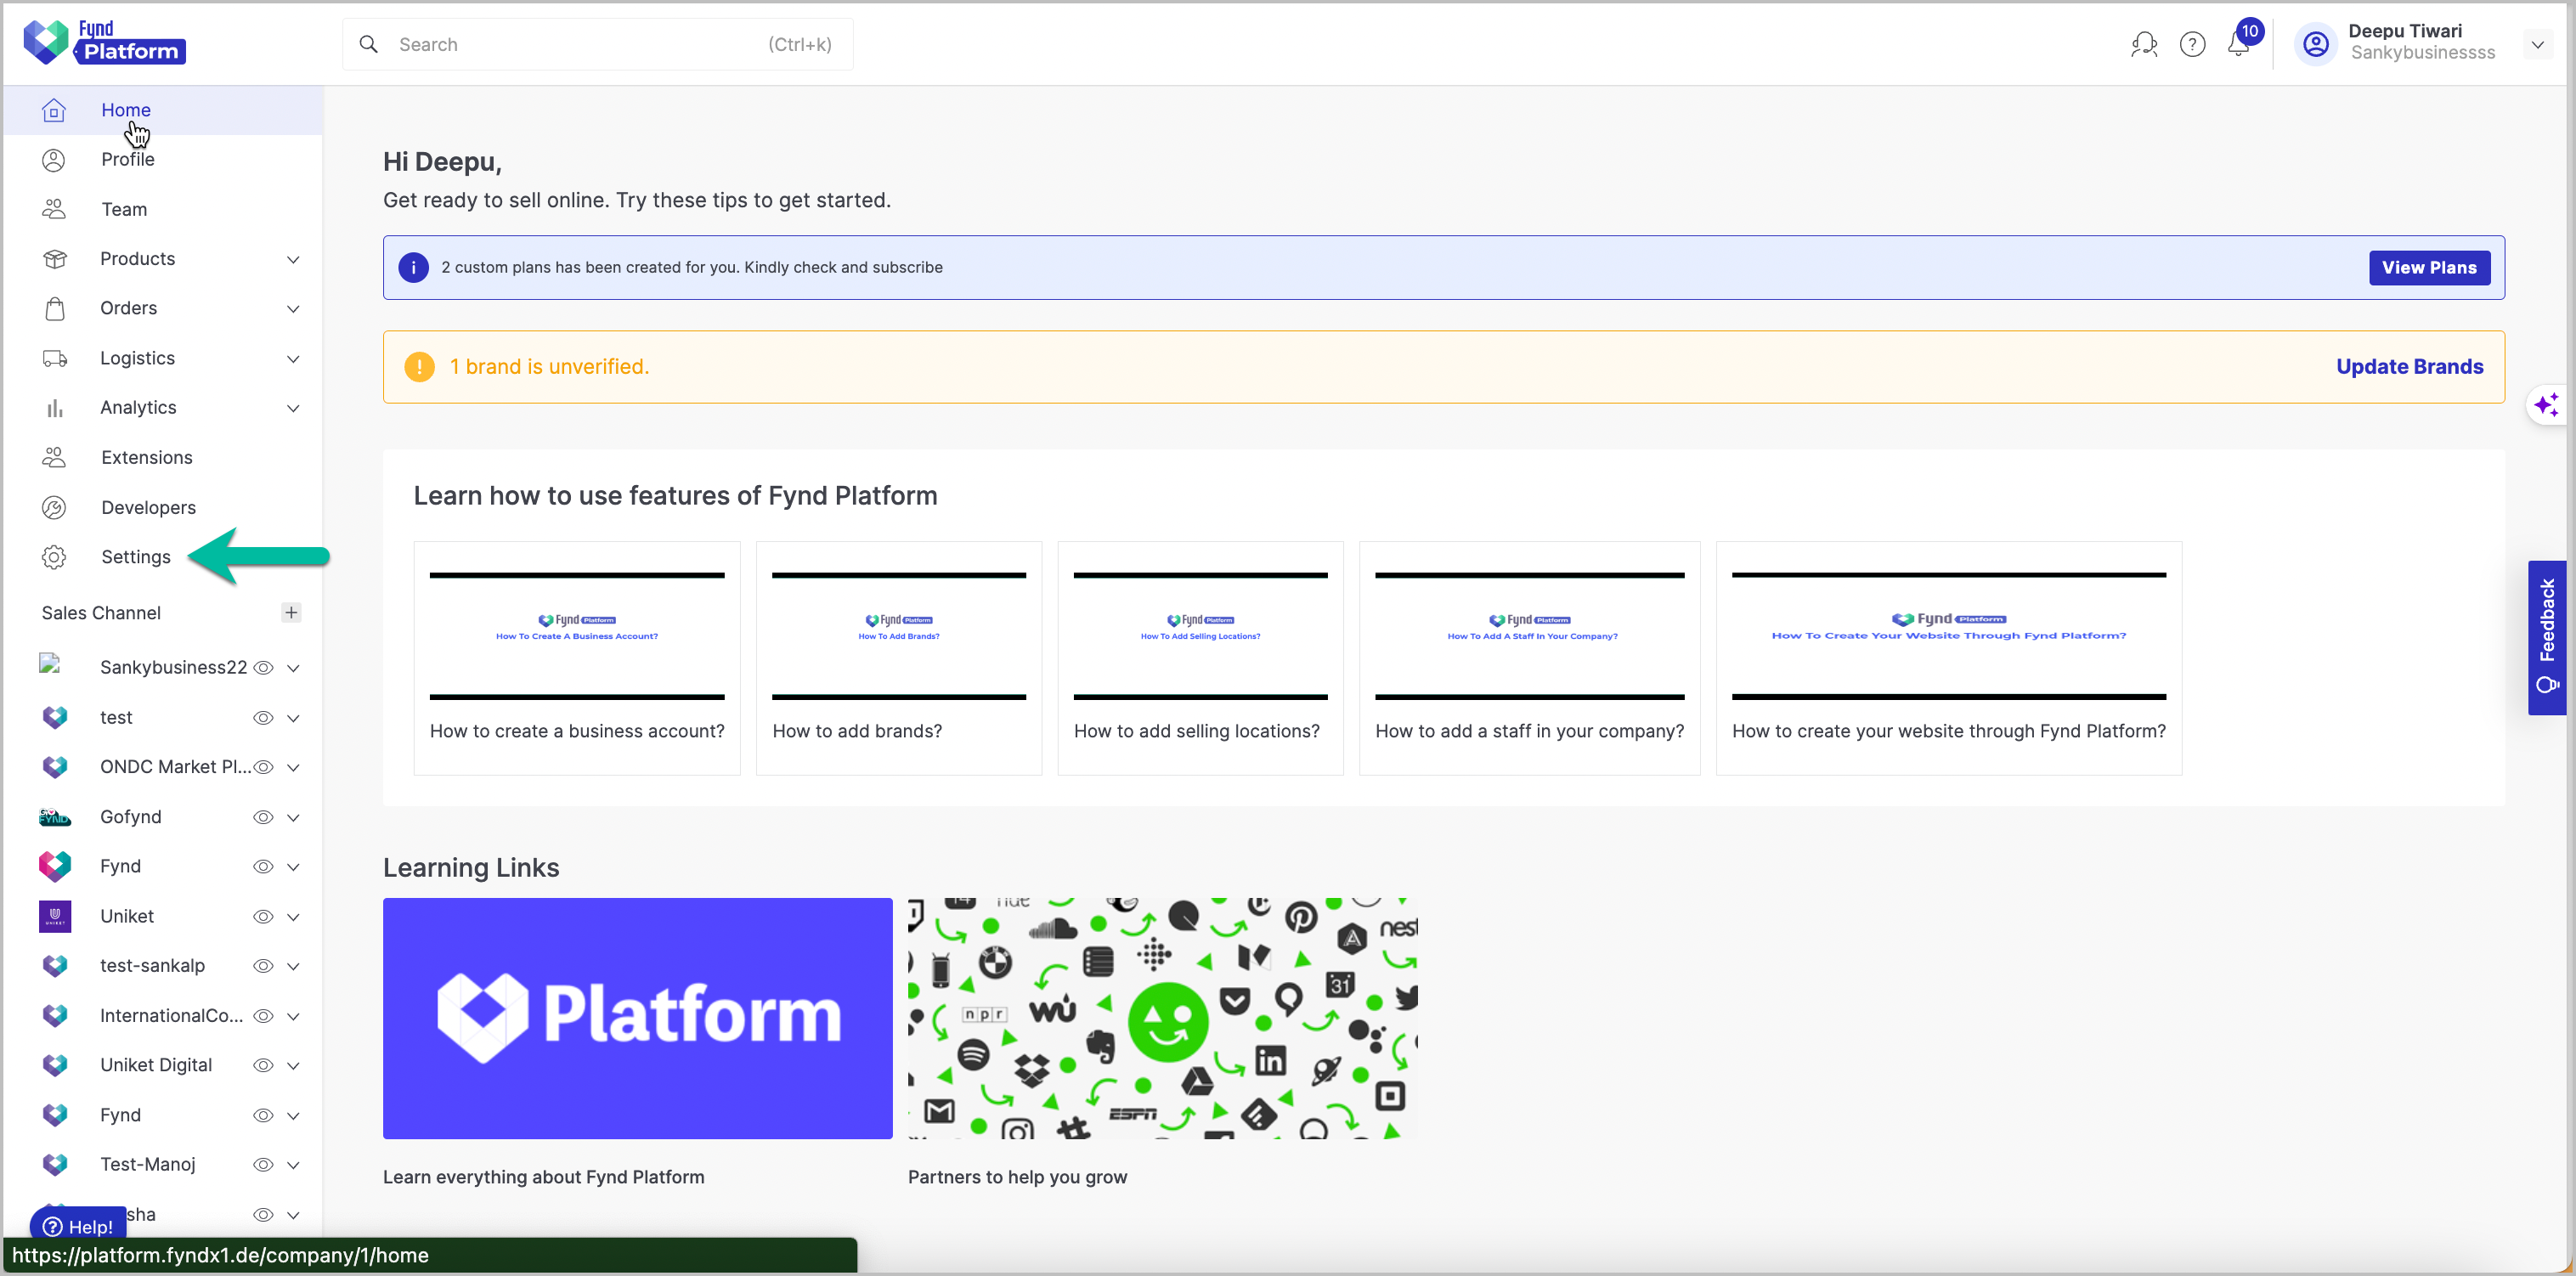
Figure 8: Clicking Settings Click Extensions.
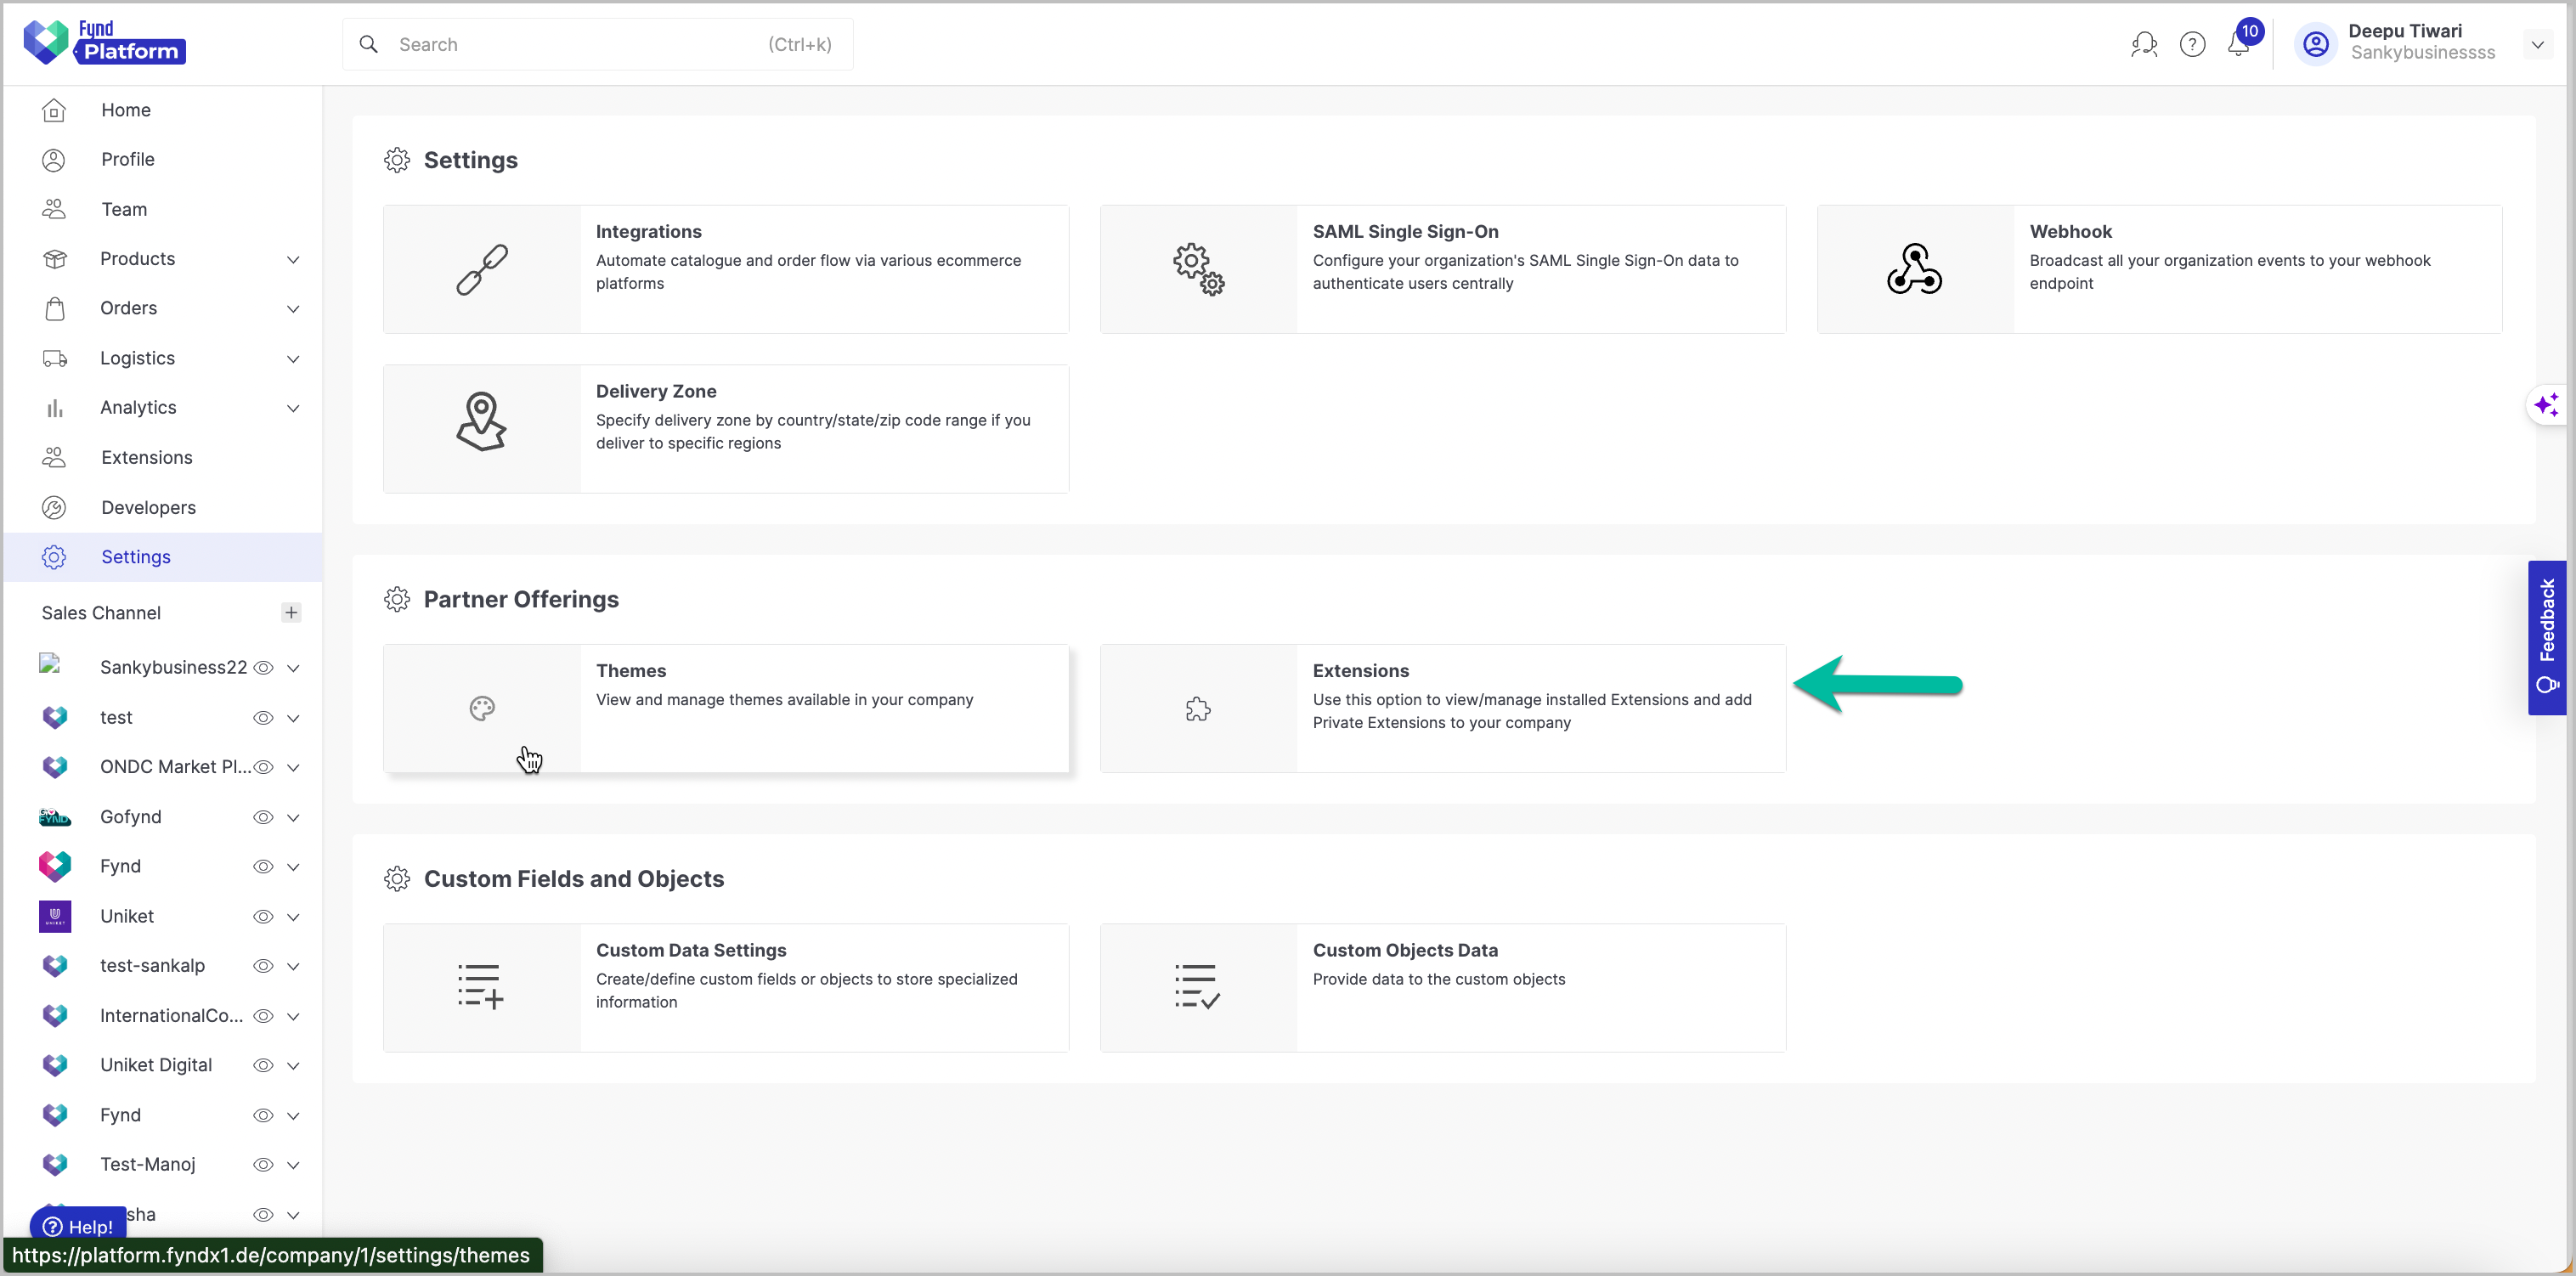
Figure 9: Clicking Extensions Click Private Installable.
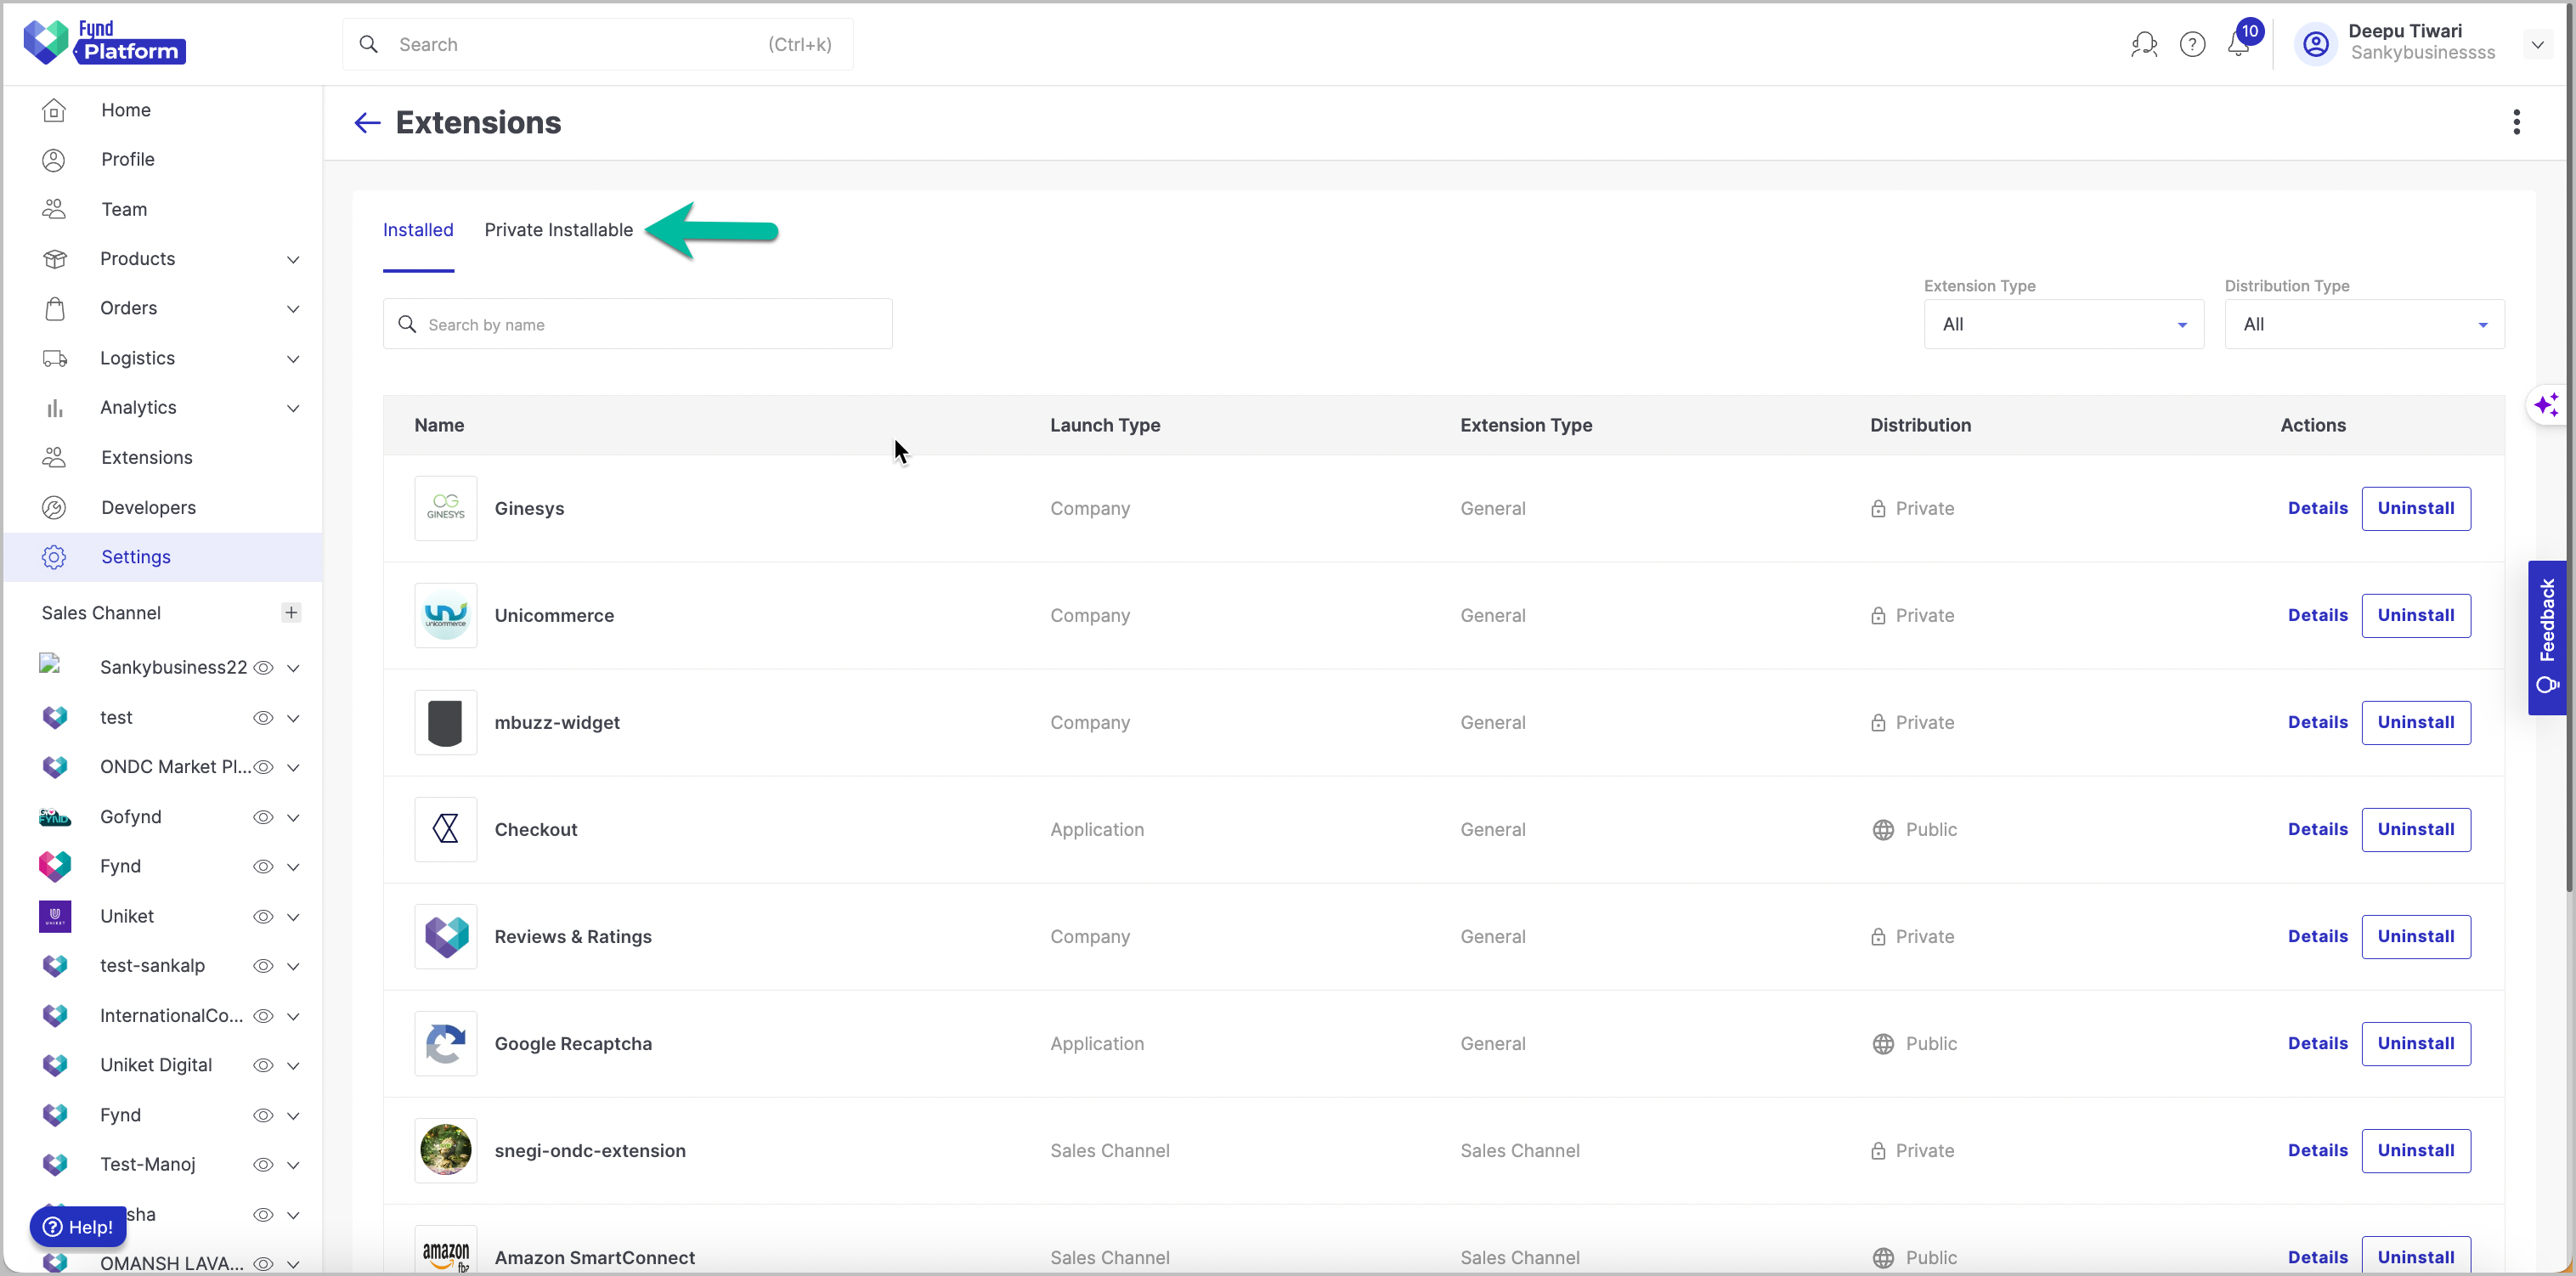
Figure 10: Clicking Private Installable A list of all the private extensions that are available for your company will appear.
Click Install on the extension that you wish to install.
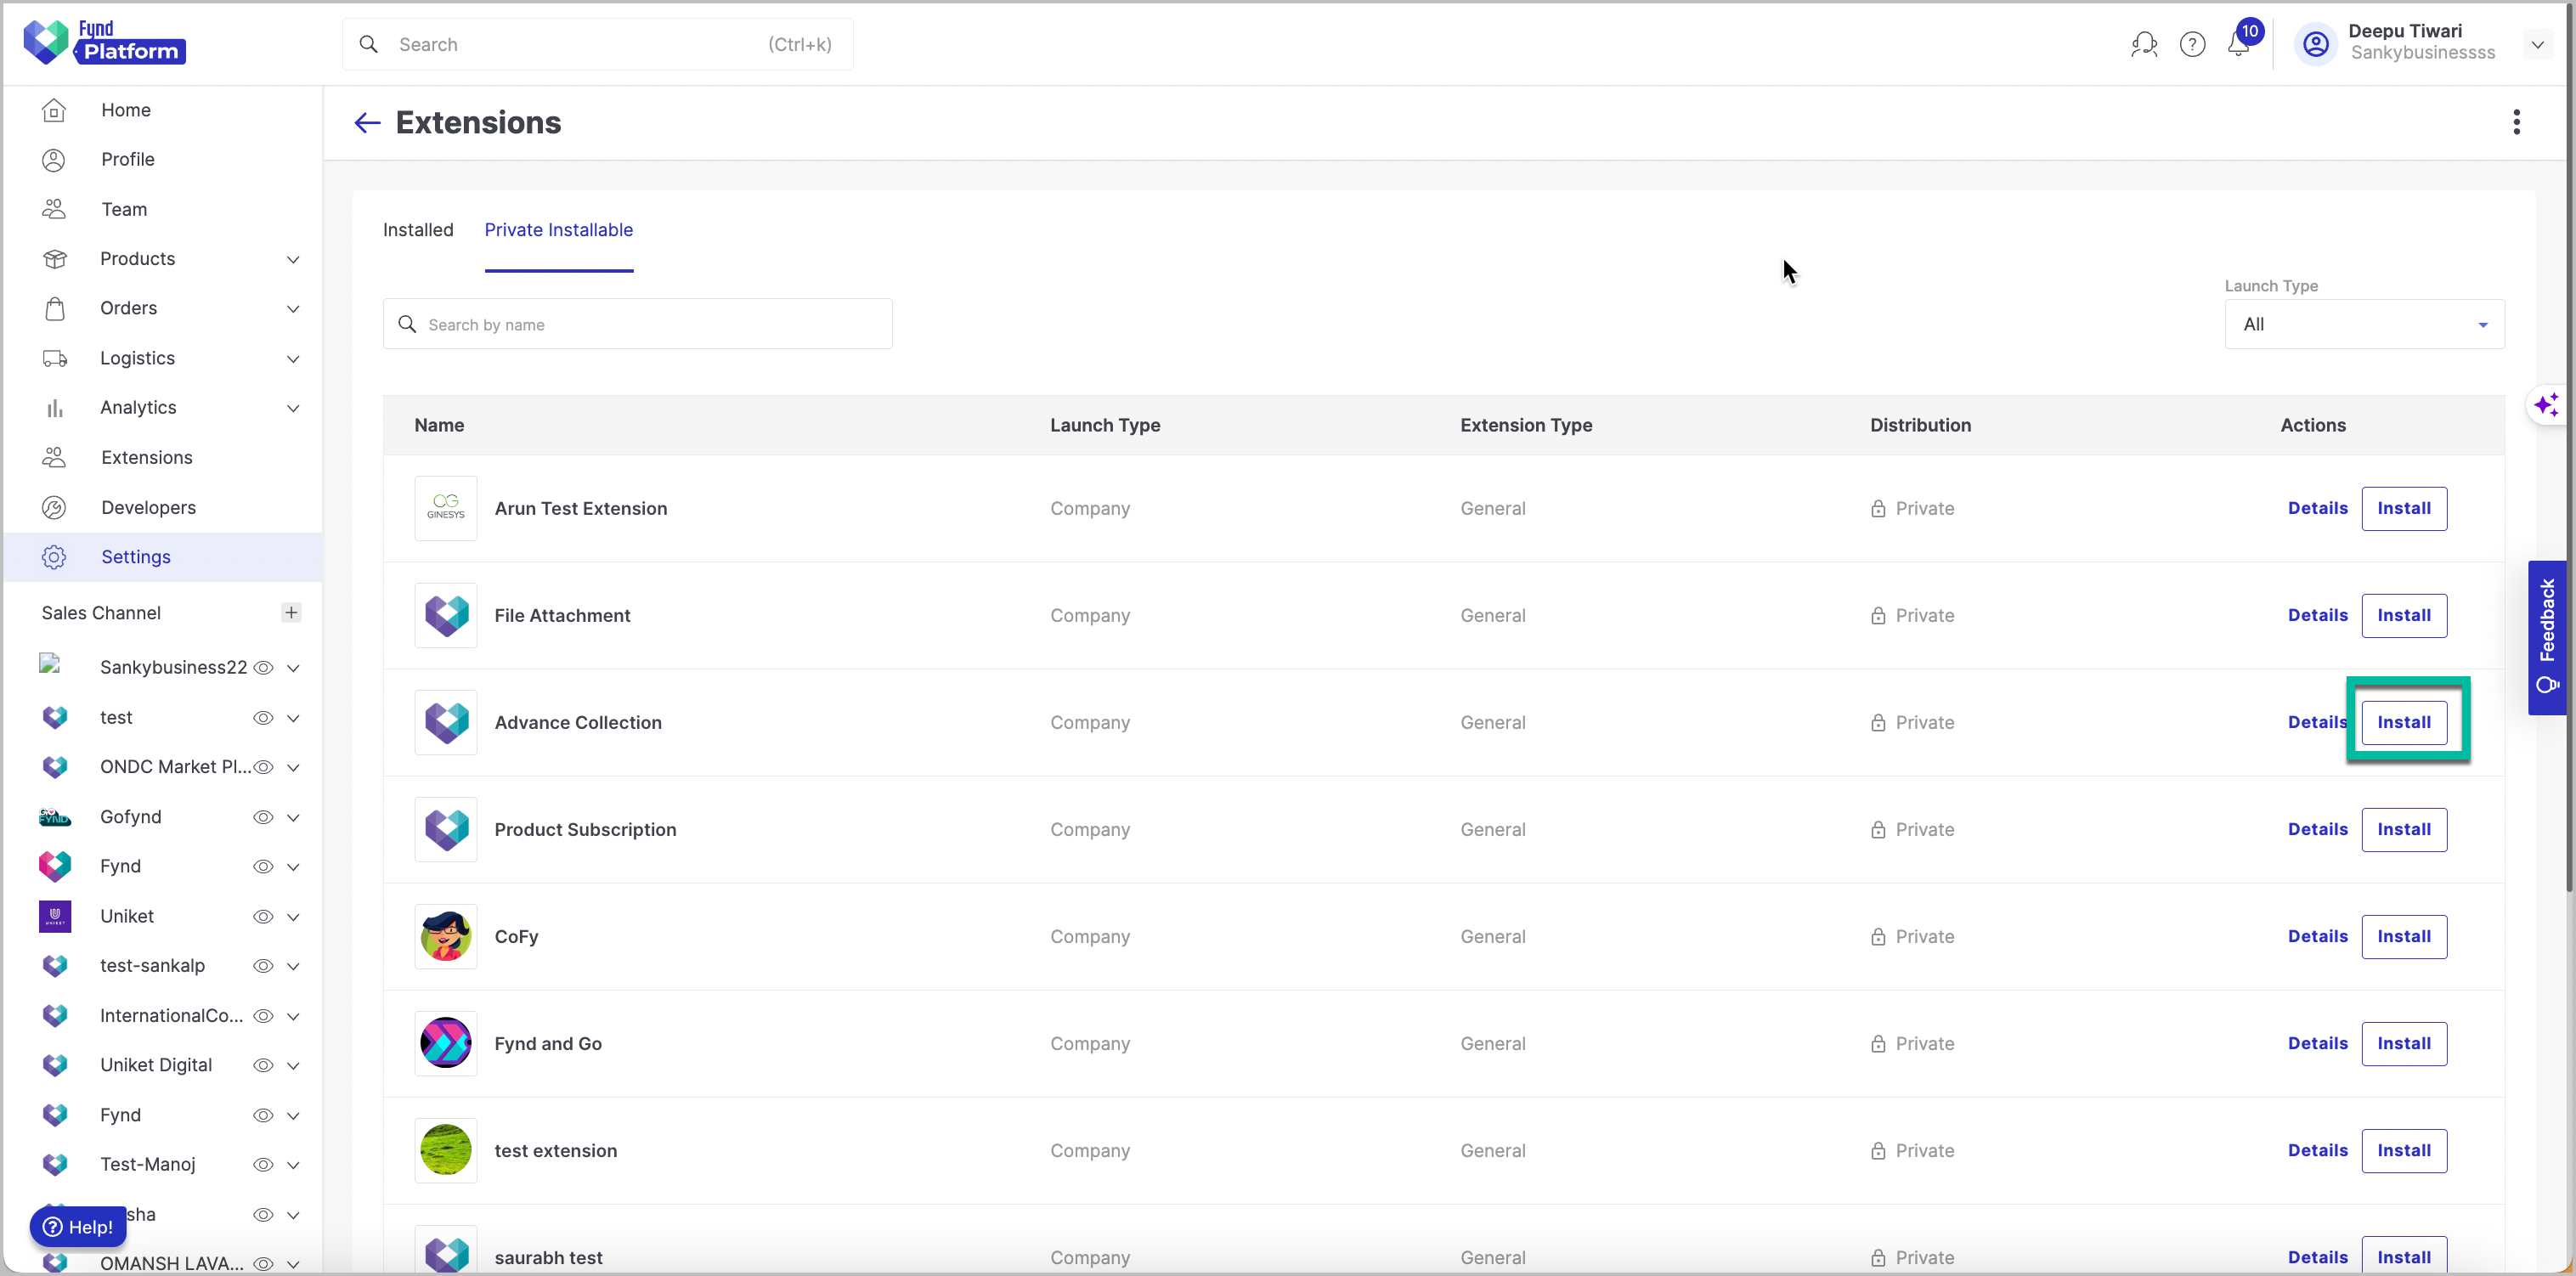
Figure 11: Clicking Install Click Accept and Continue.
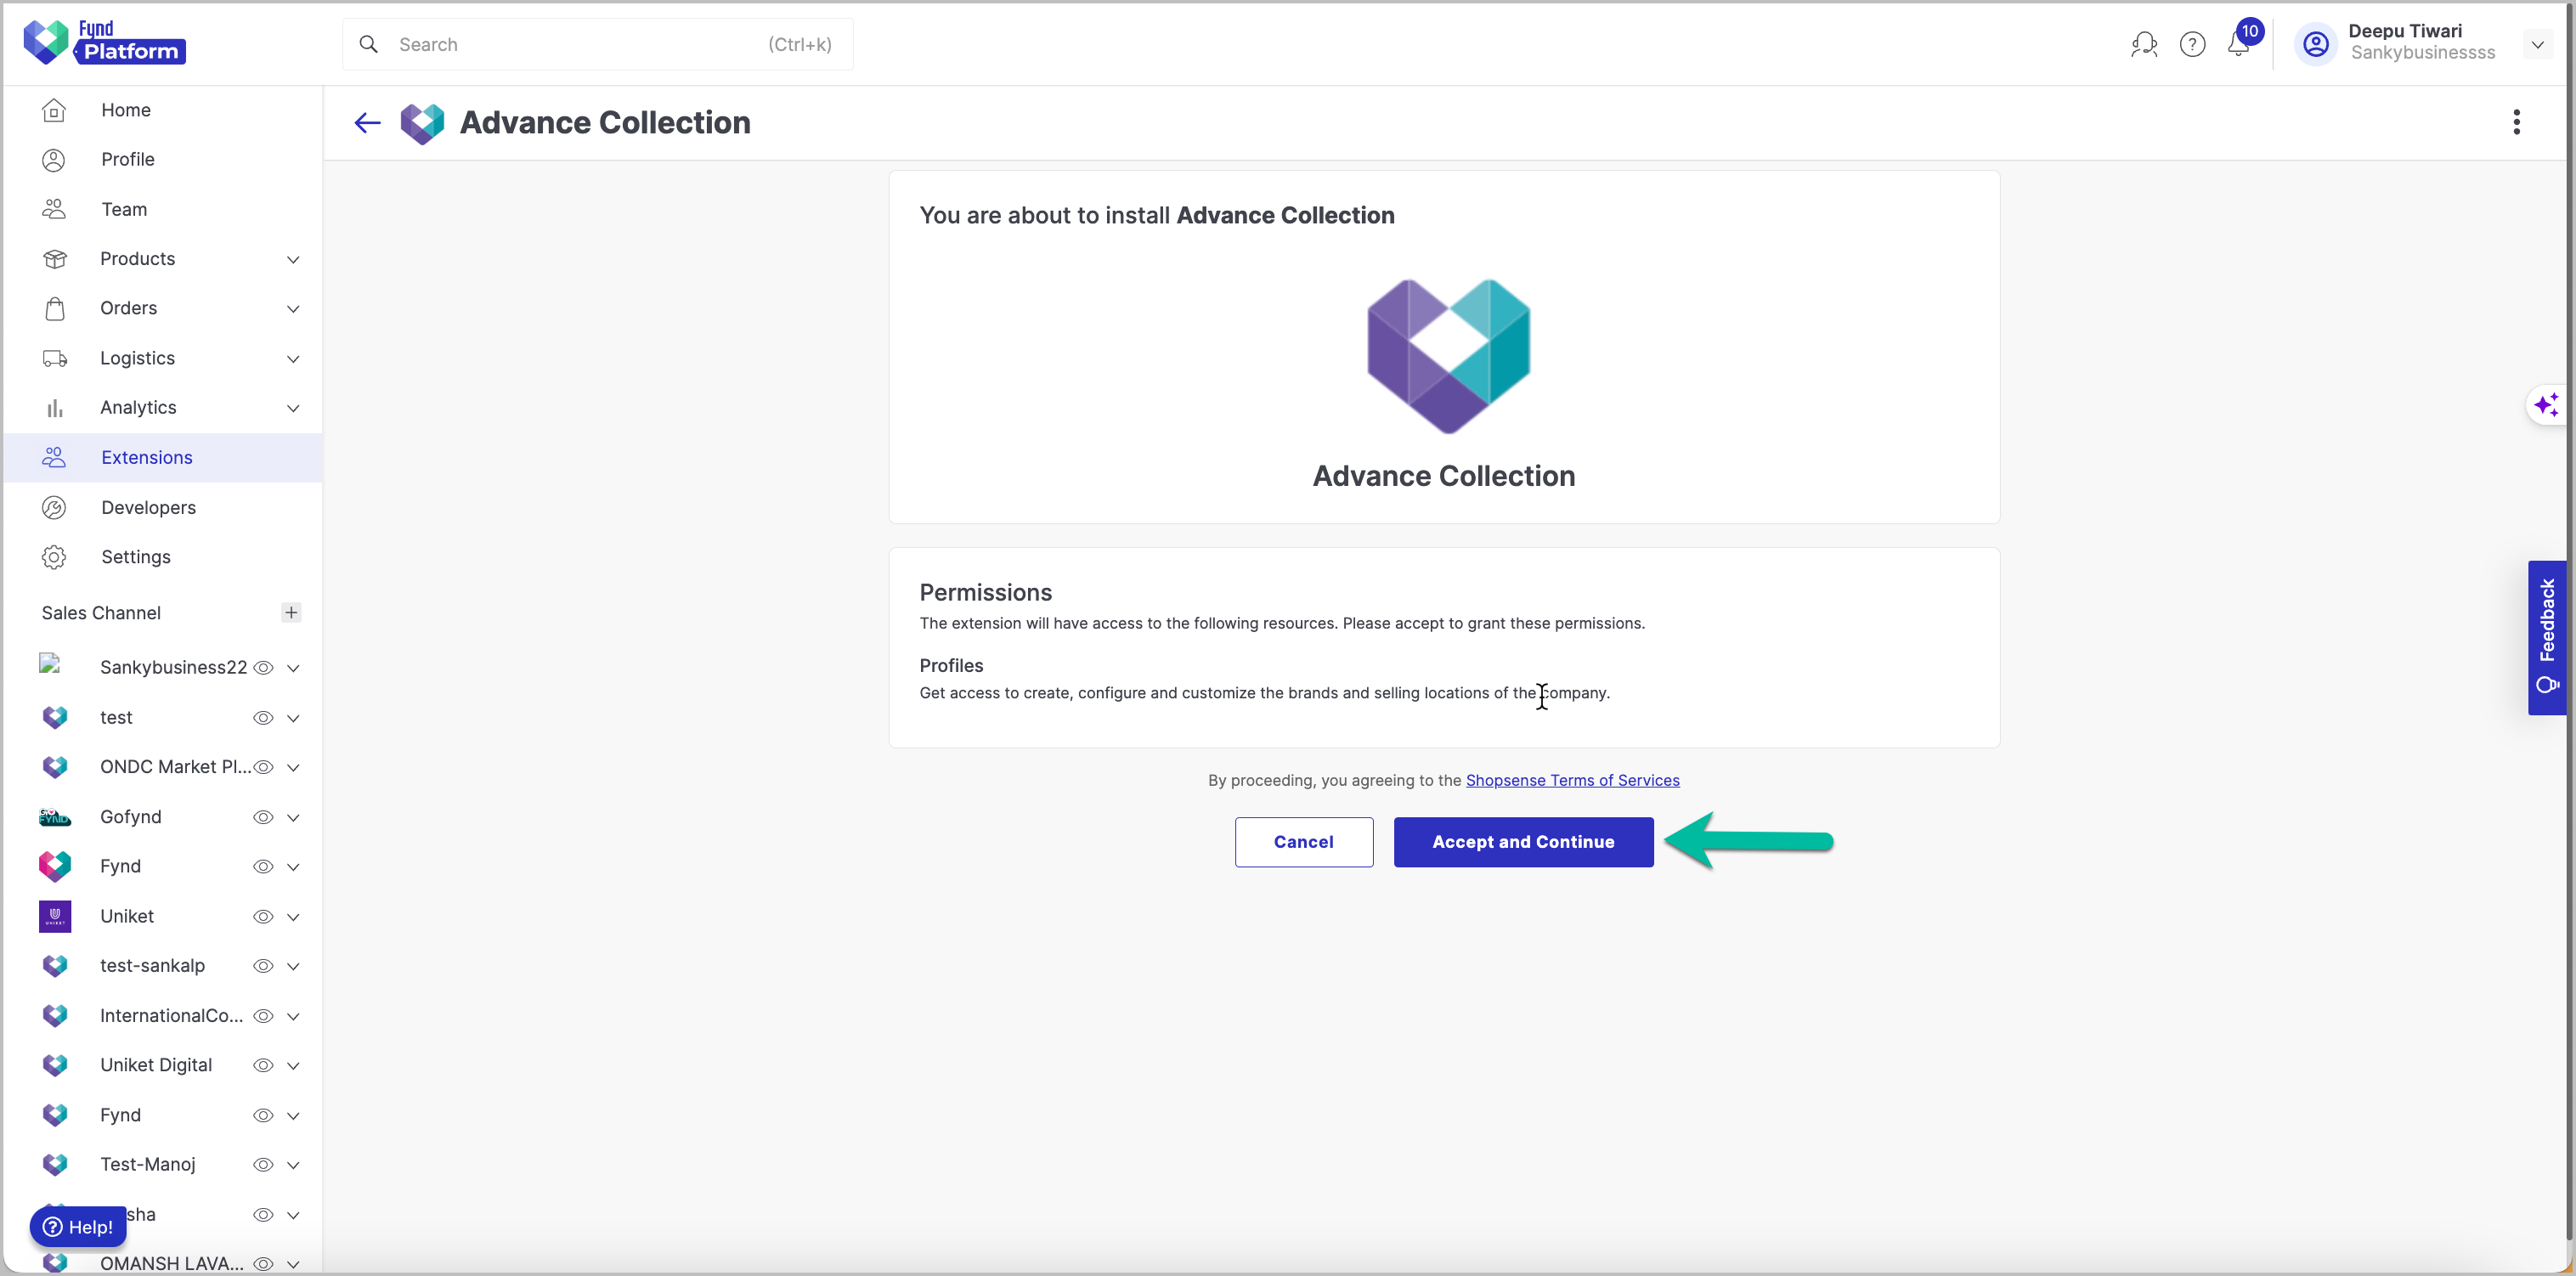
Figure 12: Clicking Accept and Continue Button
In this way, your private extension has been installed successfully and it is ready for use.