Using Smart Sales Nudge Extension
Introduction
The Smart Nudge extension on the Fynd platform is a dynamic sales notification tool that presents real-time purchase details to site visitors. This feature enhances credibility and social validation, contributing to higher conversion rates. Elevate trust and sales through immediate social proof and FOMO (Fear of Missing Out) notifications.
Steps to use Smart Sales Nudge Extension
Go to the Extensions section in the Fynd Platform.
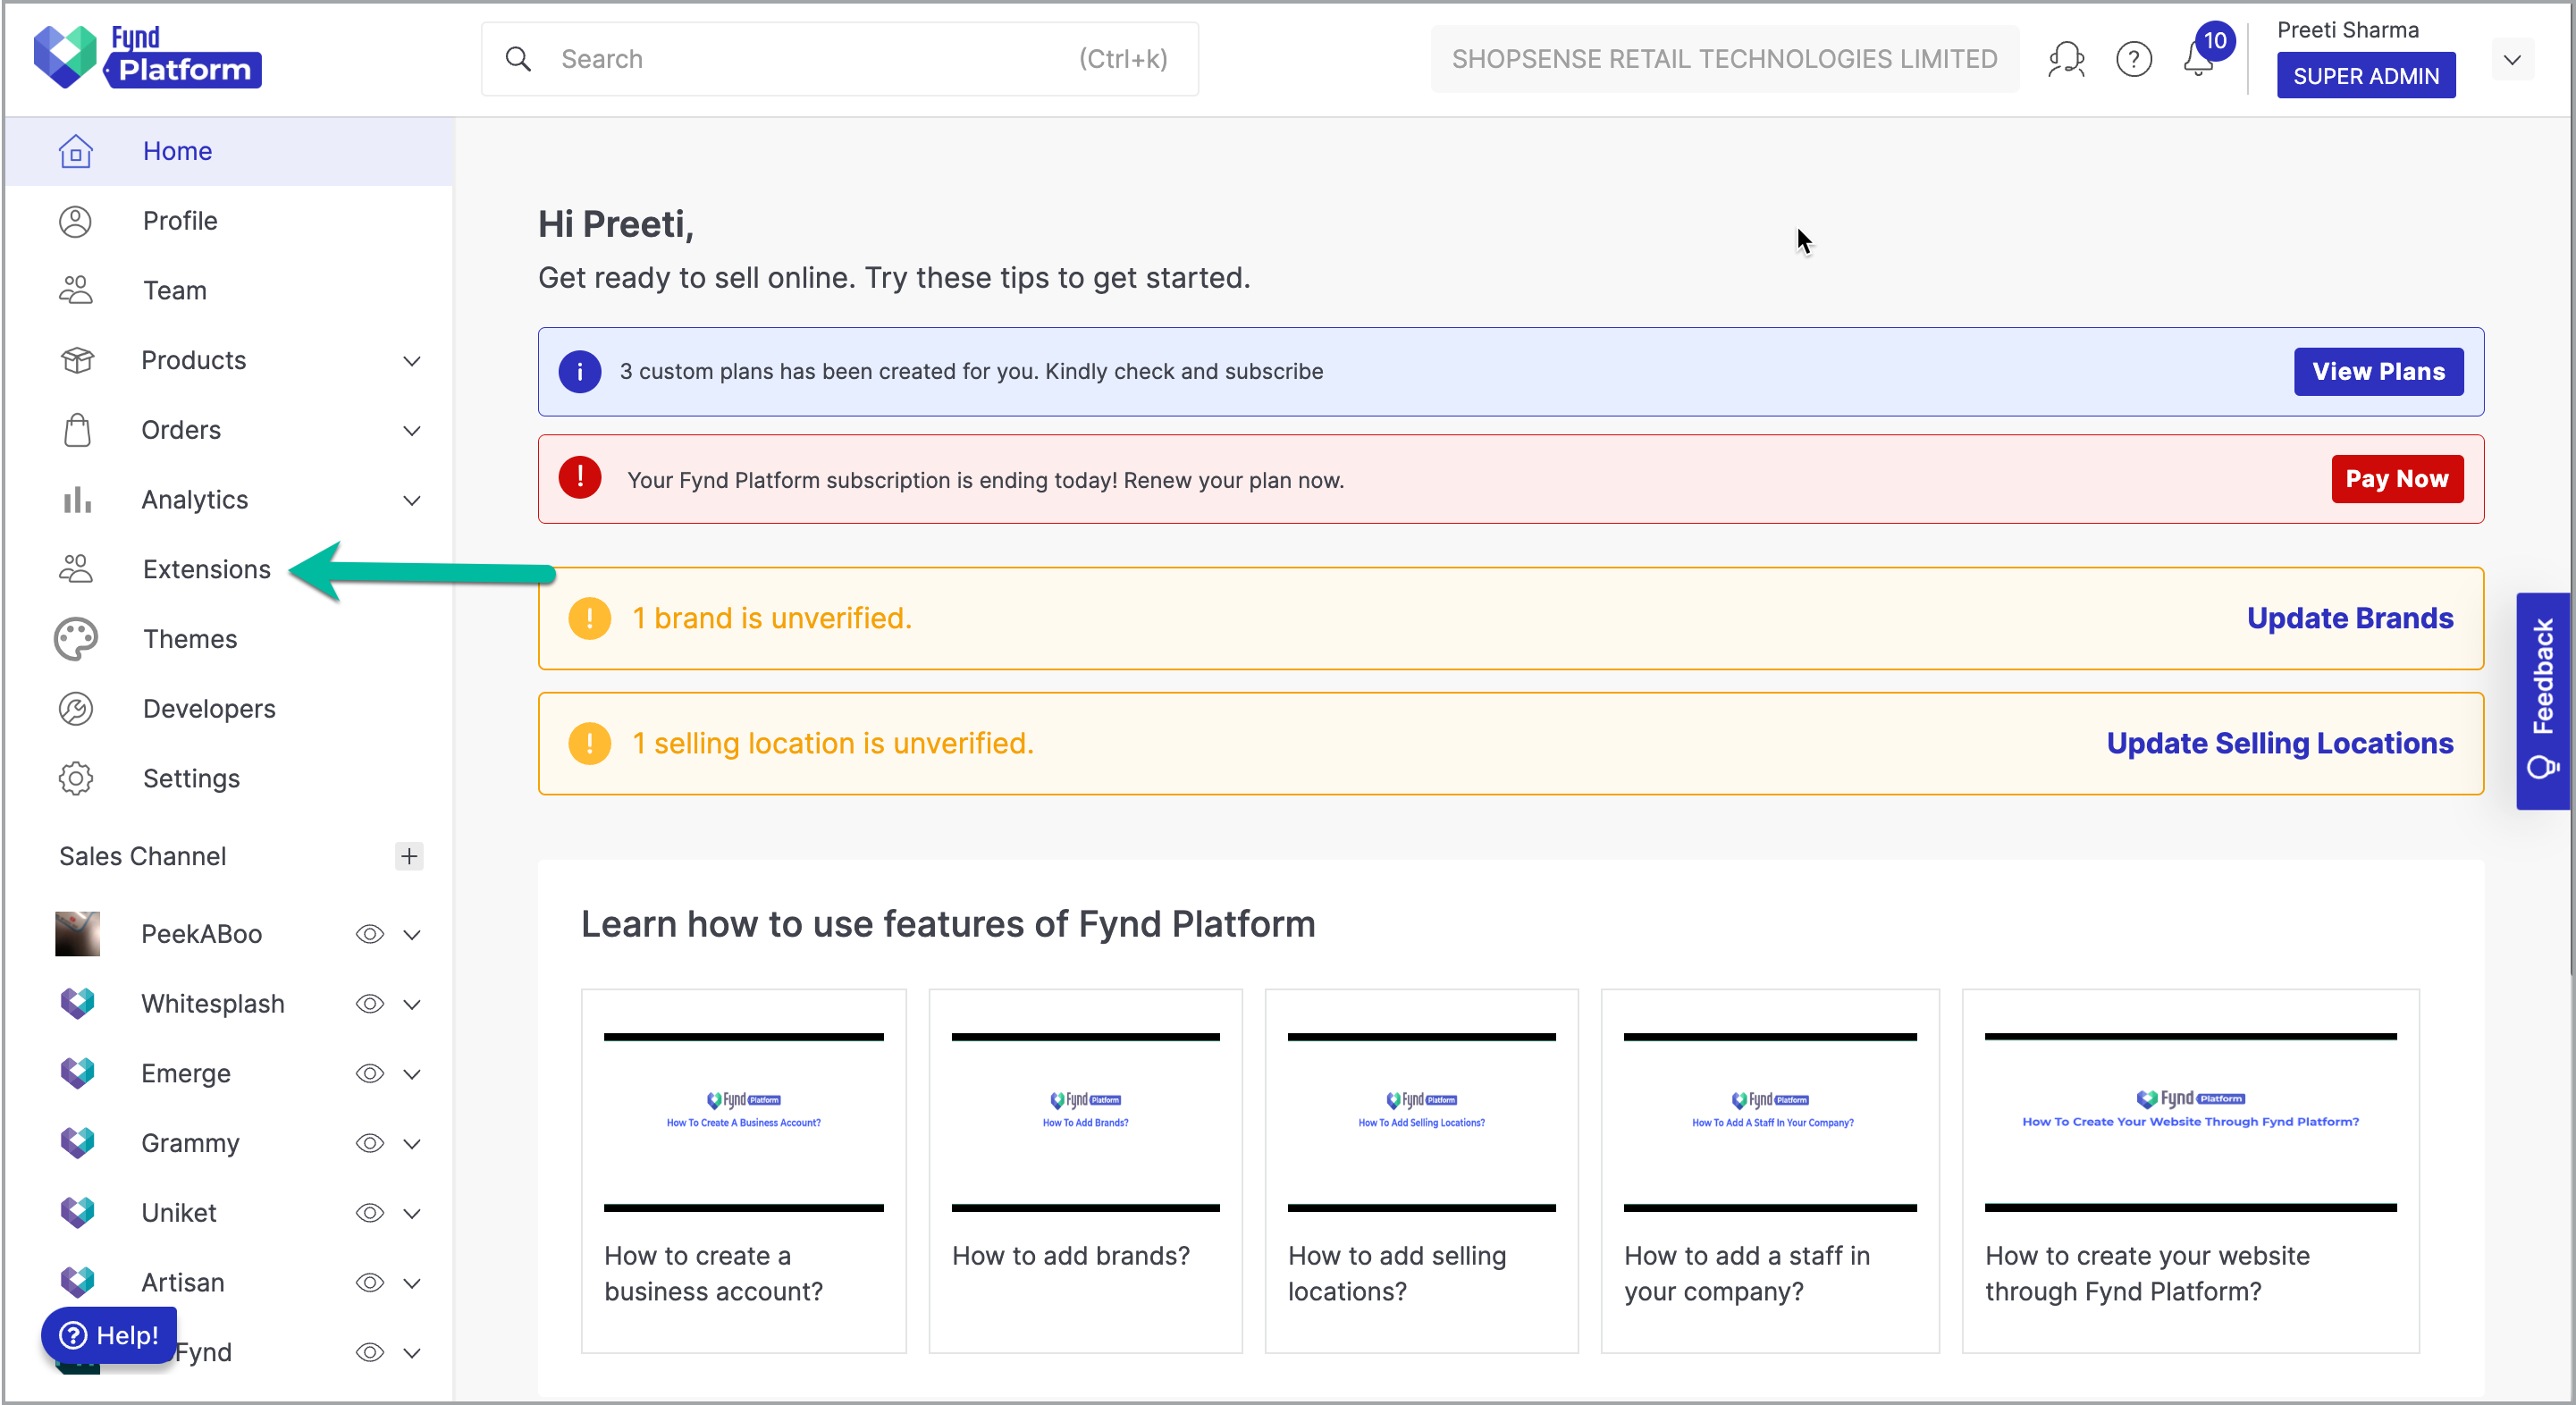
Figure 1: Extensions Section - Fynd Platform Select Smart Sales Nudge extension.
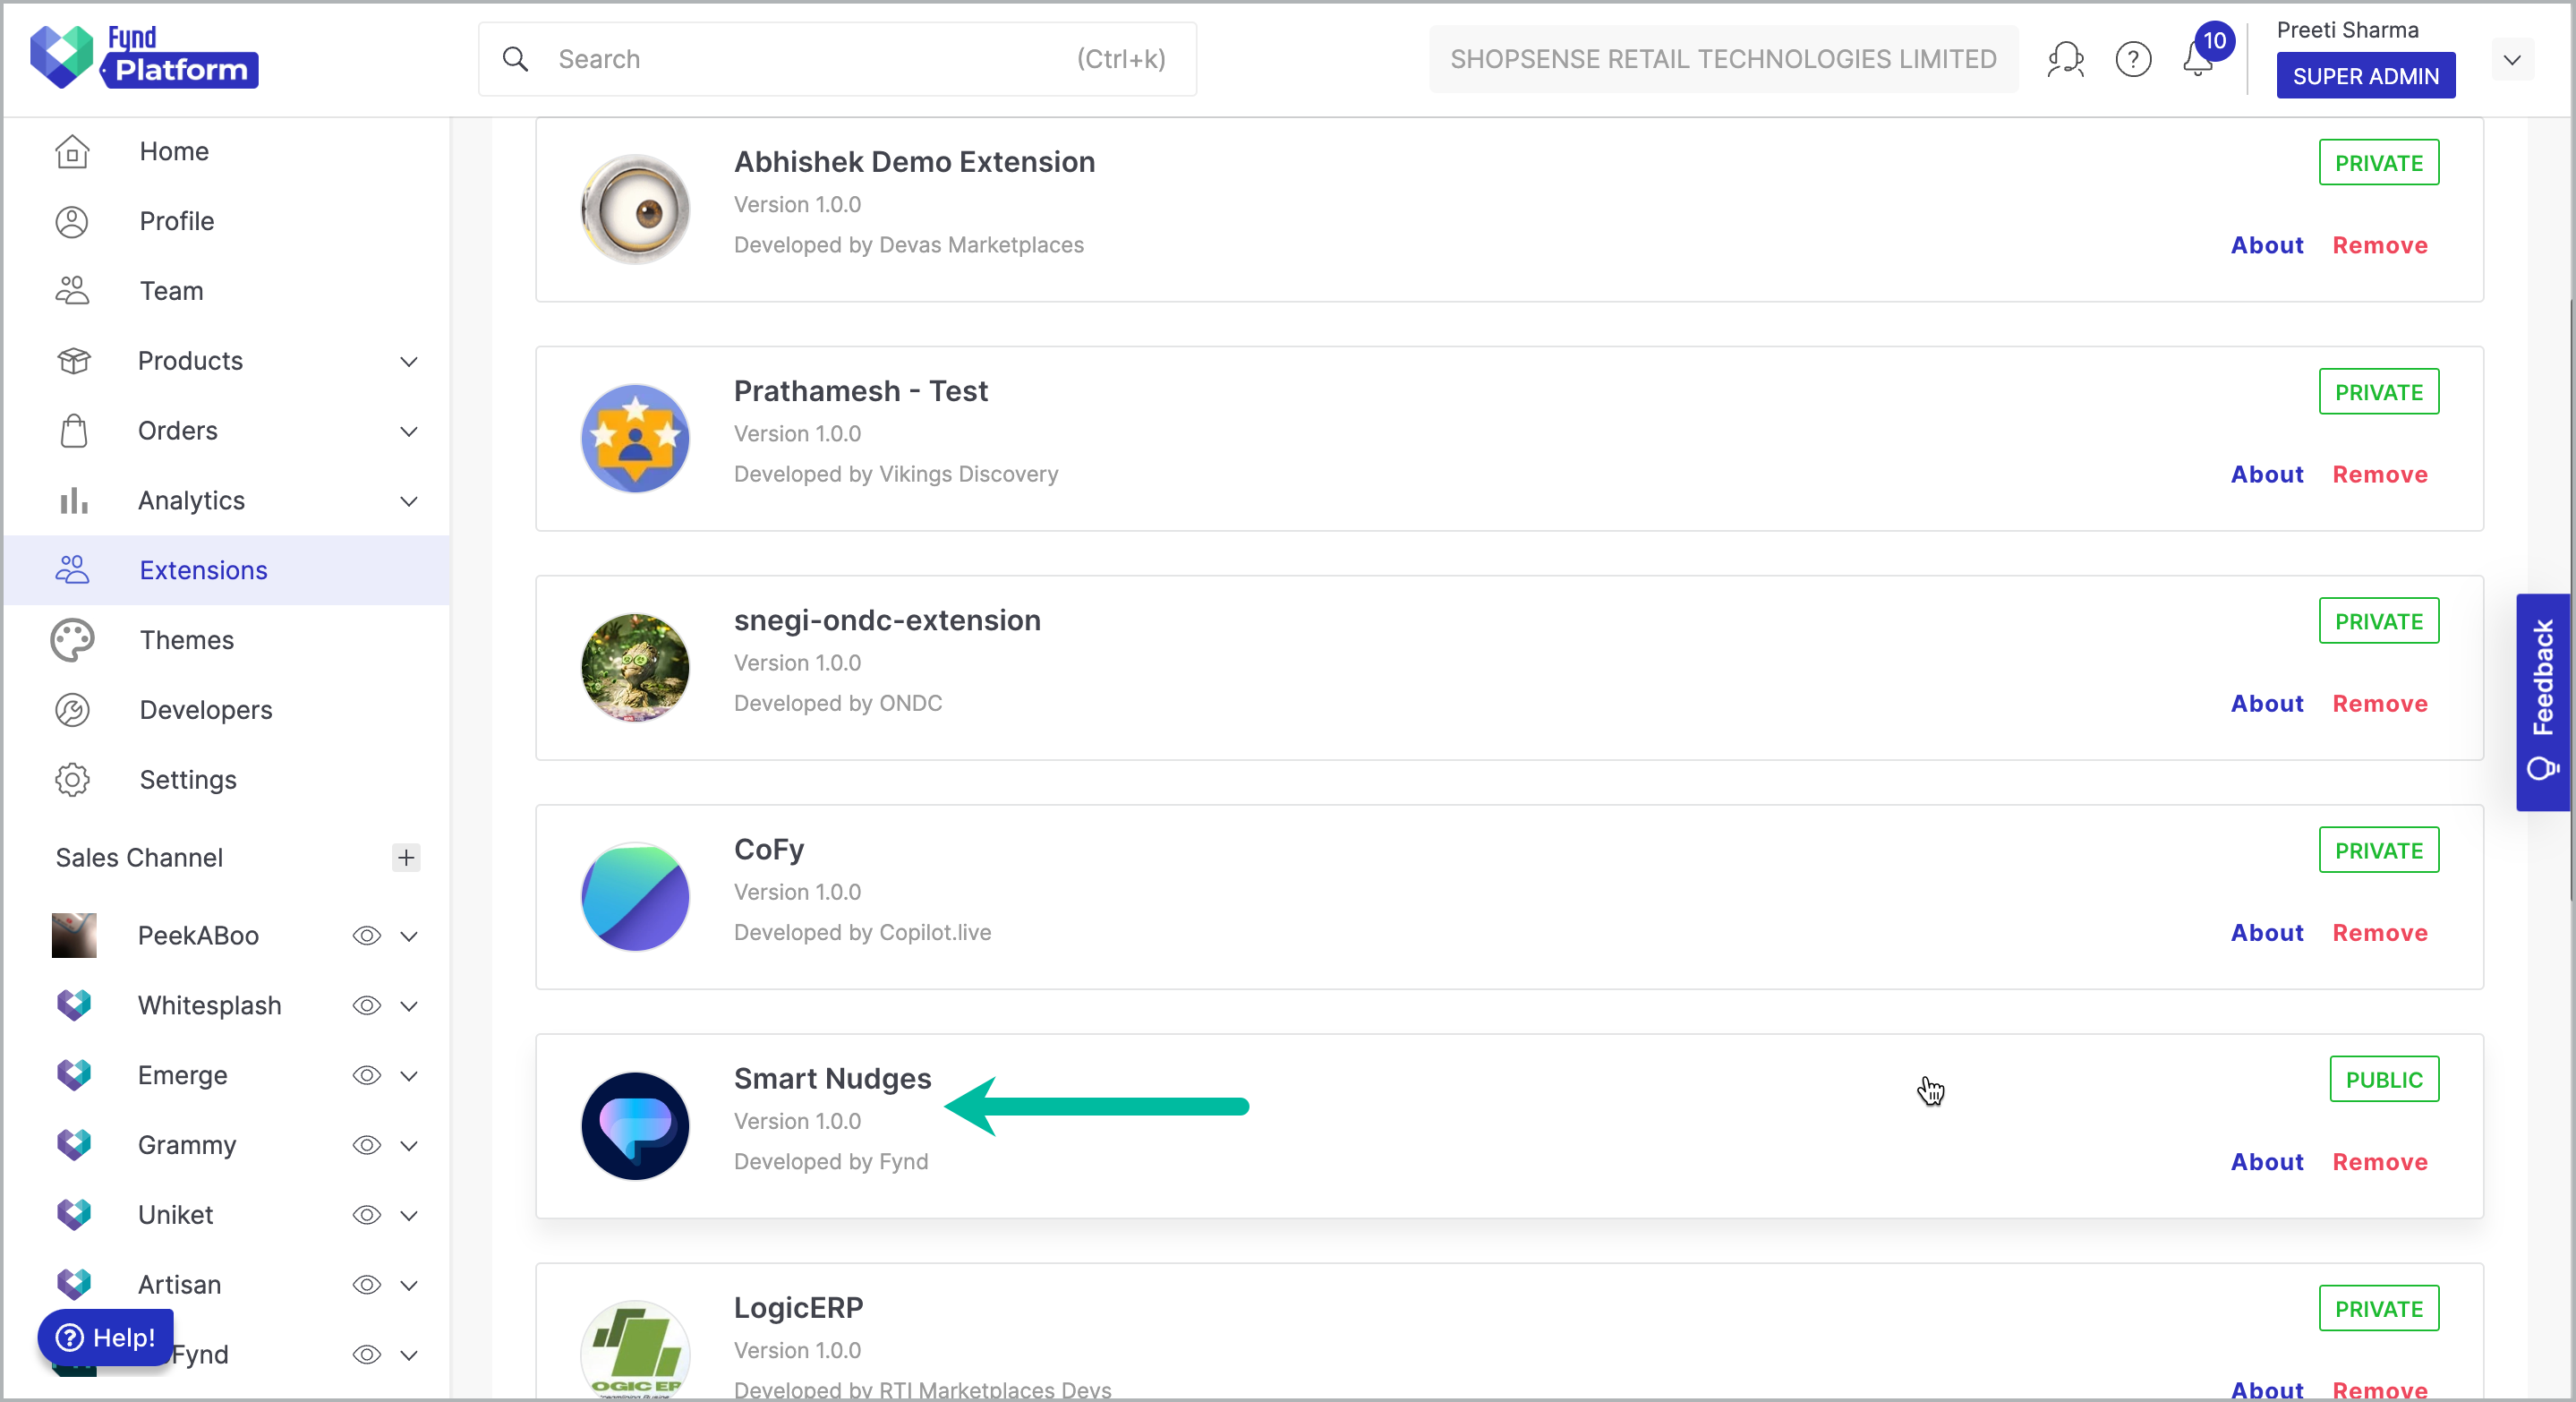
Figure 2: Smart Nudge Extension noteOnce you have installed this extension, it will be available in the Extensions section on the Fynd Platform.
Go to the desired sales channel for which you wish to enable the extension by clicking the arrow.
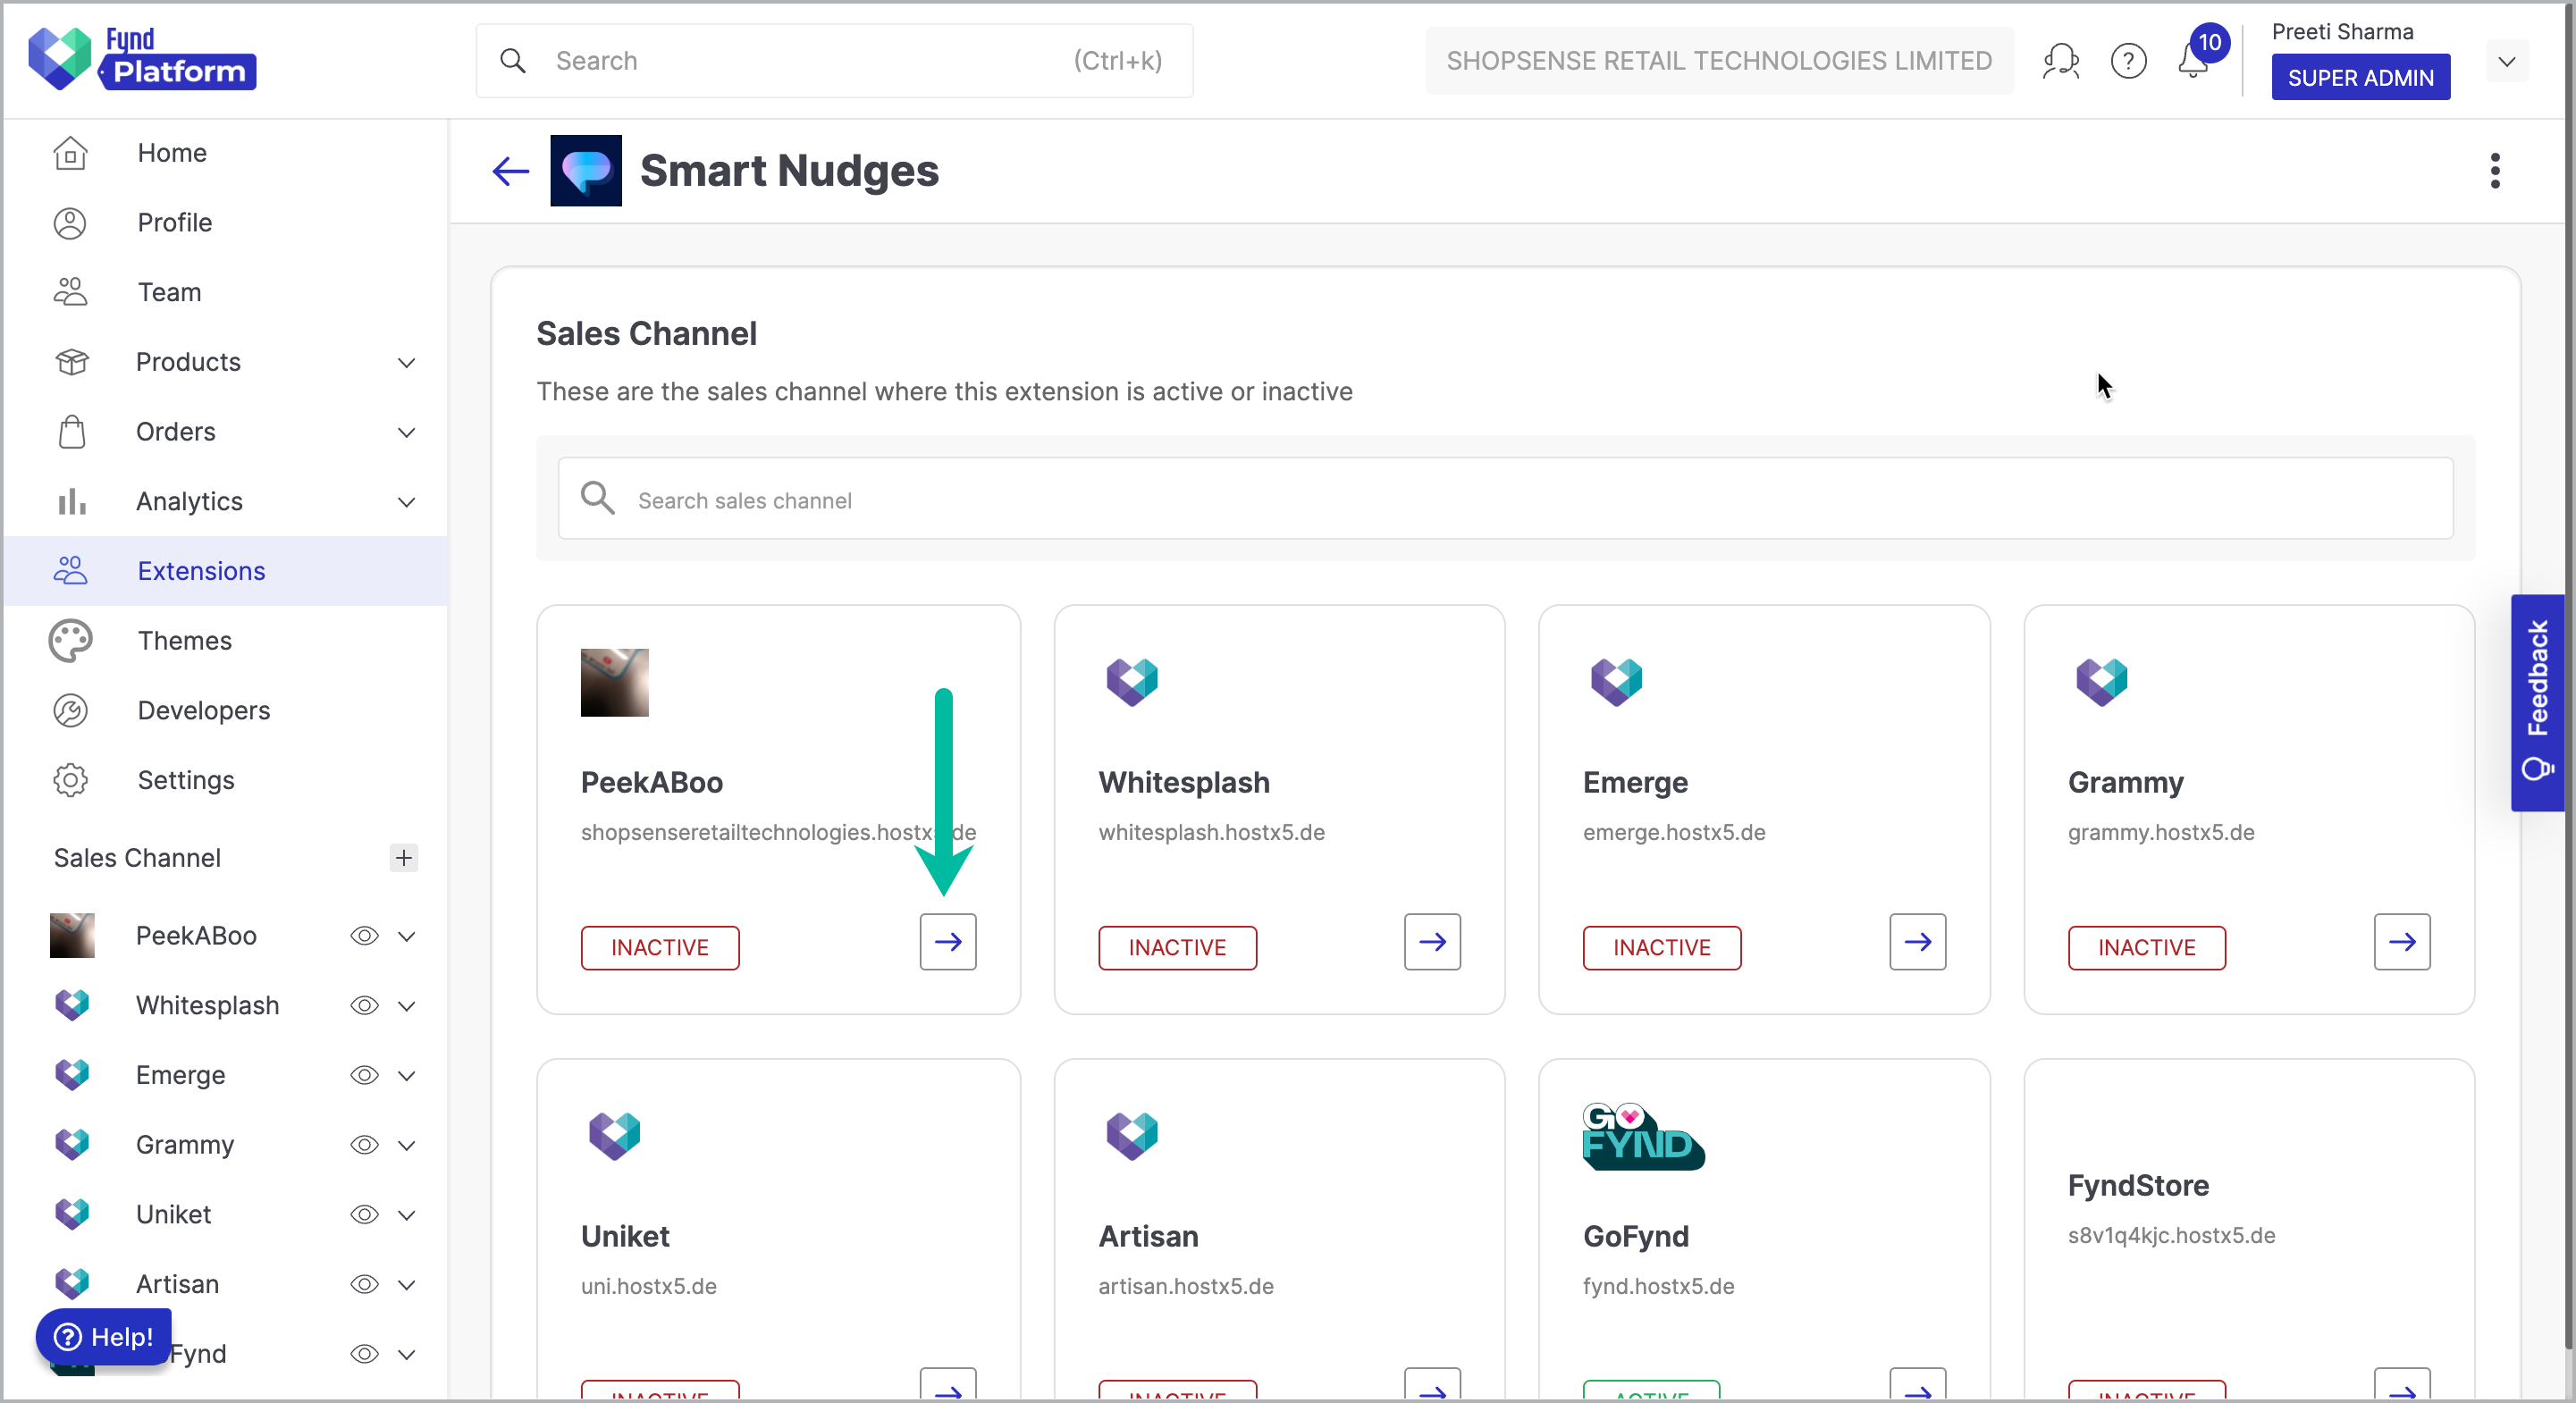
Figure 3: Selecting Desired Sales Channel Activate the extension by toggling the master button located at the top-right corner.

Figure 4: Activate the Extension noteEnabling the extension on a sales channel will result in a corresponding status update of "active" or "inactive".
The Smart Sales Nudge extension has been successfully enabled. In the following sections, you will be guided through the configuration process for the complete Smart Nudge pop-up setup. The extension offers three distinct features, each designed to address various functionalities.
Dashboard: Access comprehensive analysis of different activities related to Smart Sales Pops.
Customise Nudges: Create pops using a variety of available options.
Settings: Customize general settings and the appearance of Smart Pops.
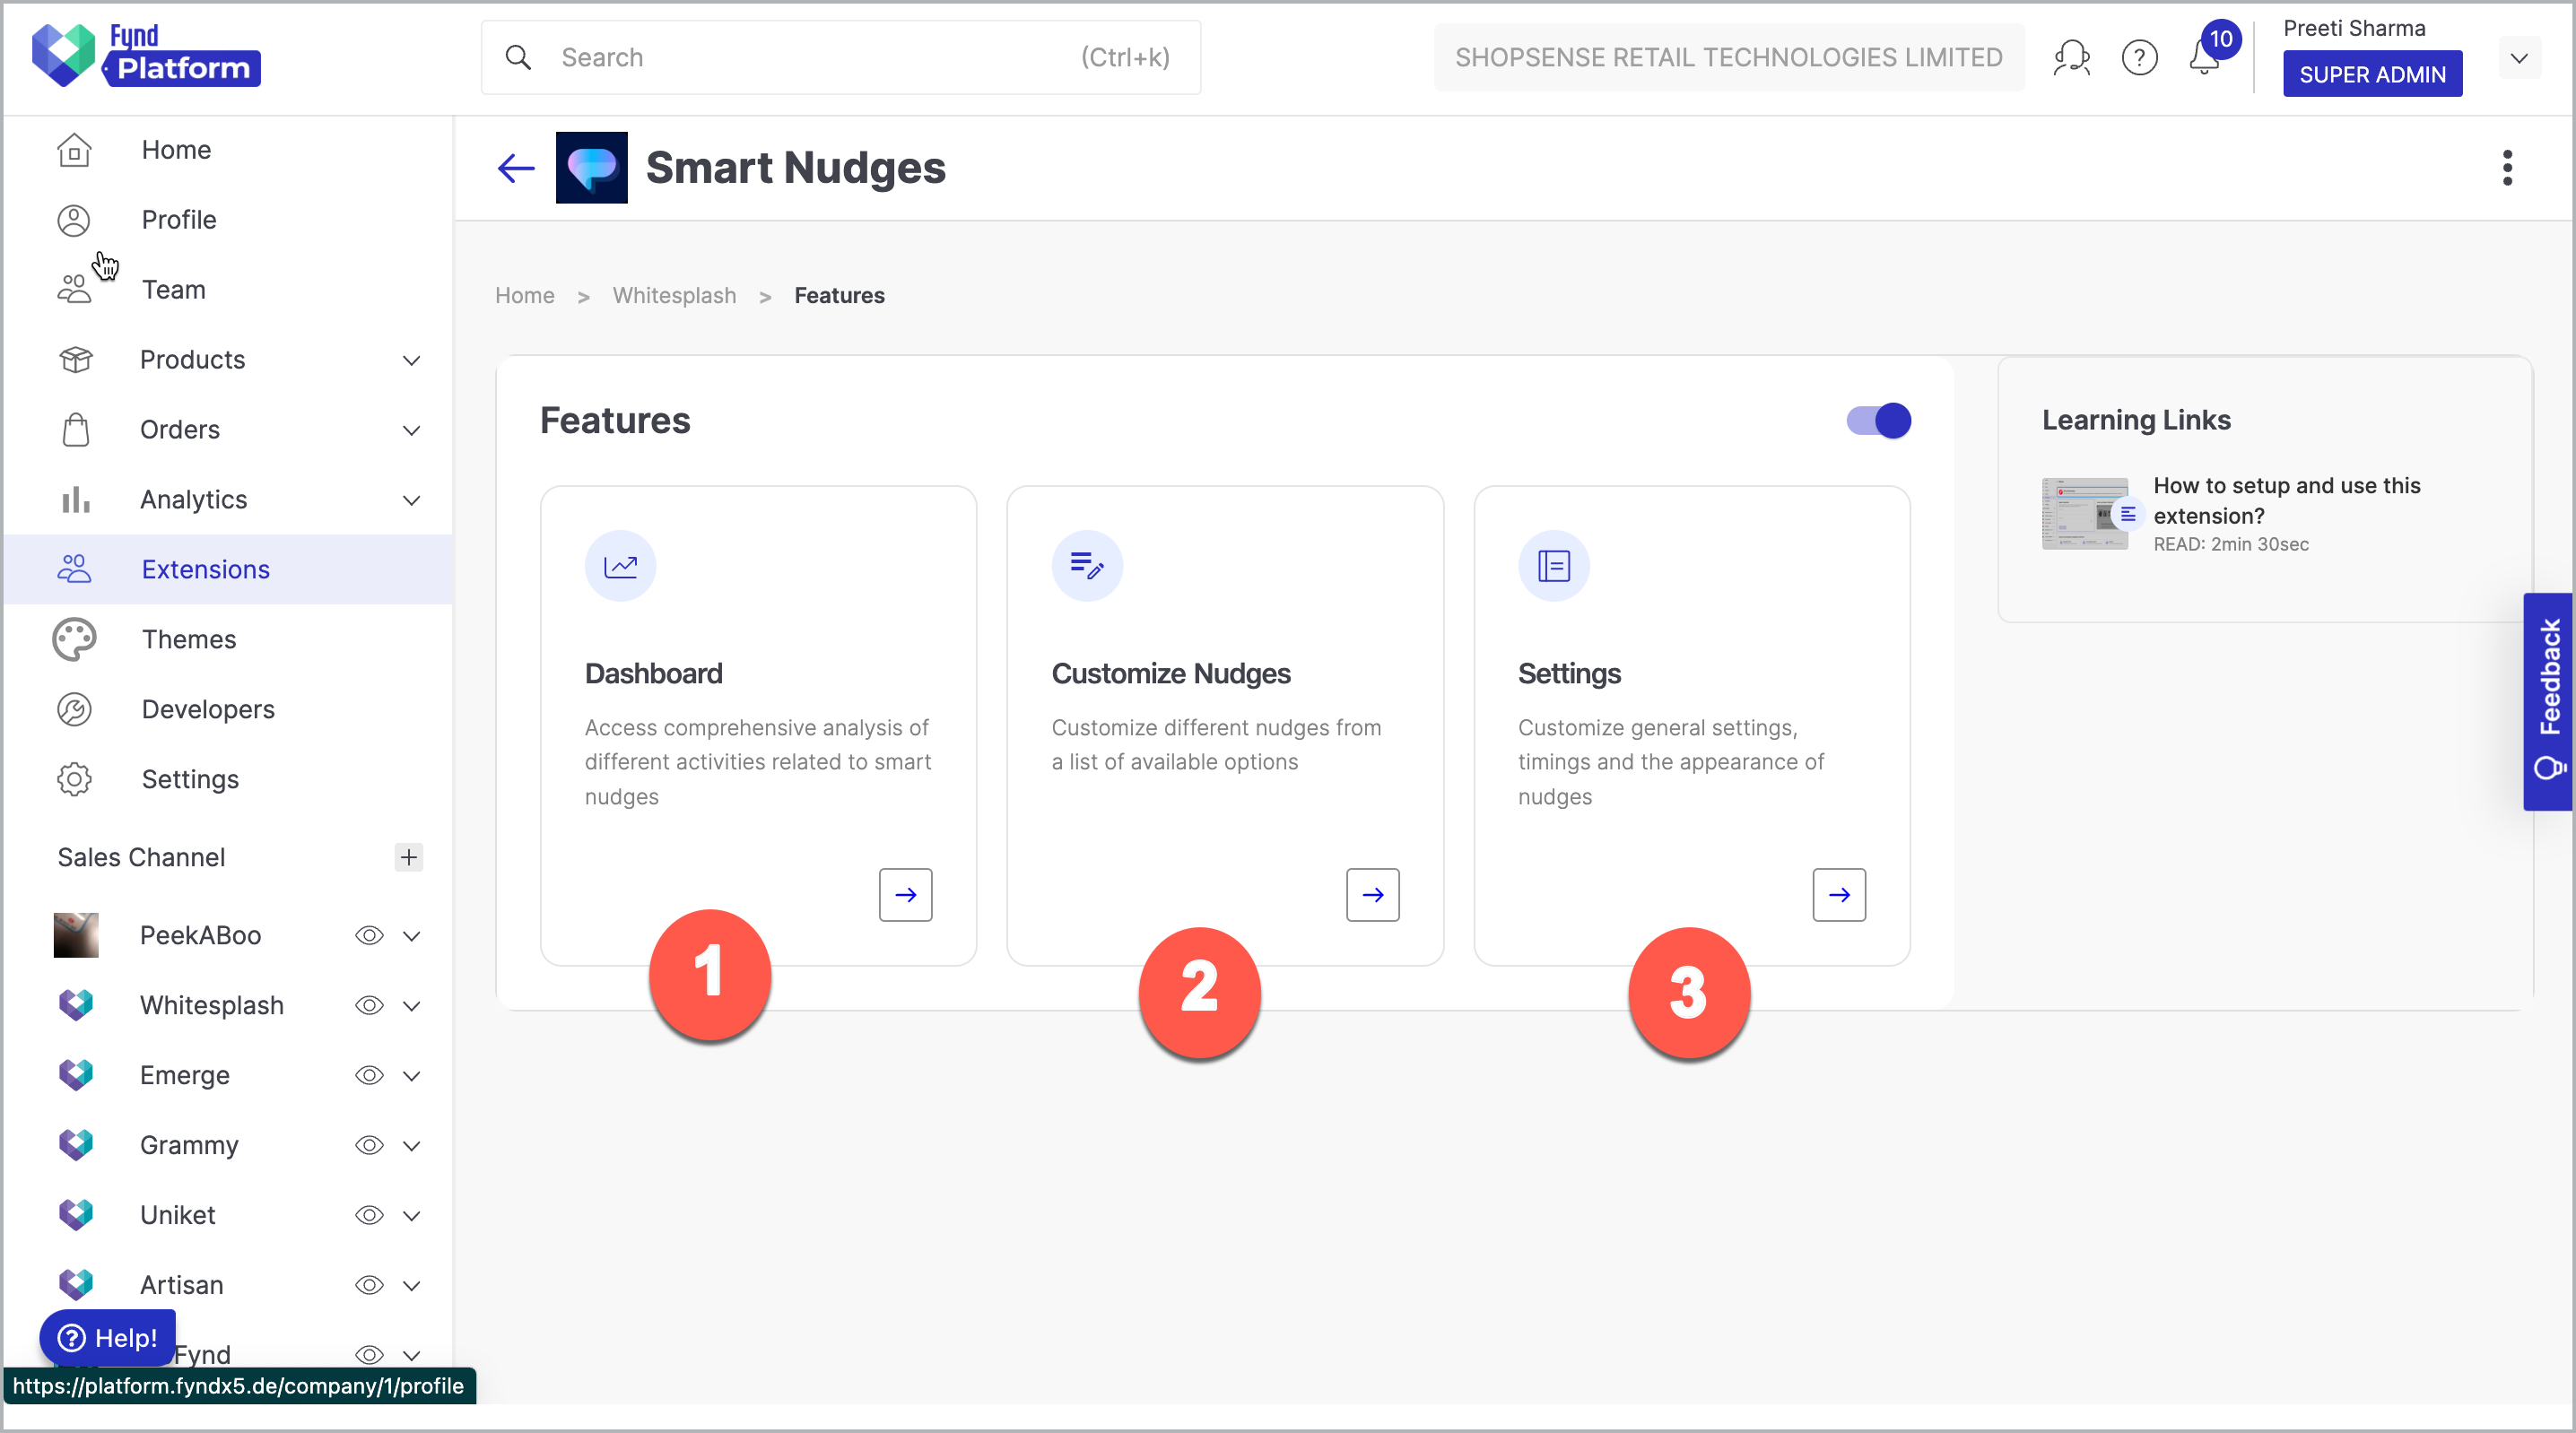
Figure 5: Features of Smart Nudge Extension
1. Dashboard
You can view the key metrics pertaining to your Nudges.
Total View: The total count of notifications viewed by customers.
Total Users: The total count of the users on your website.
Total Clicks: The total count of notifications opened by the customers.
Total Closes: The total number of notifications closed directly by customers.
Pop Event Library: Notifications generated from the nudges specified in the "Recent Purchase" category are showcased in this library along with the date and time of creation. You can utilize this library to remove any unnecessary notifications.
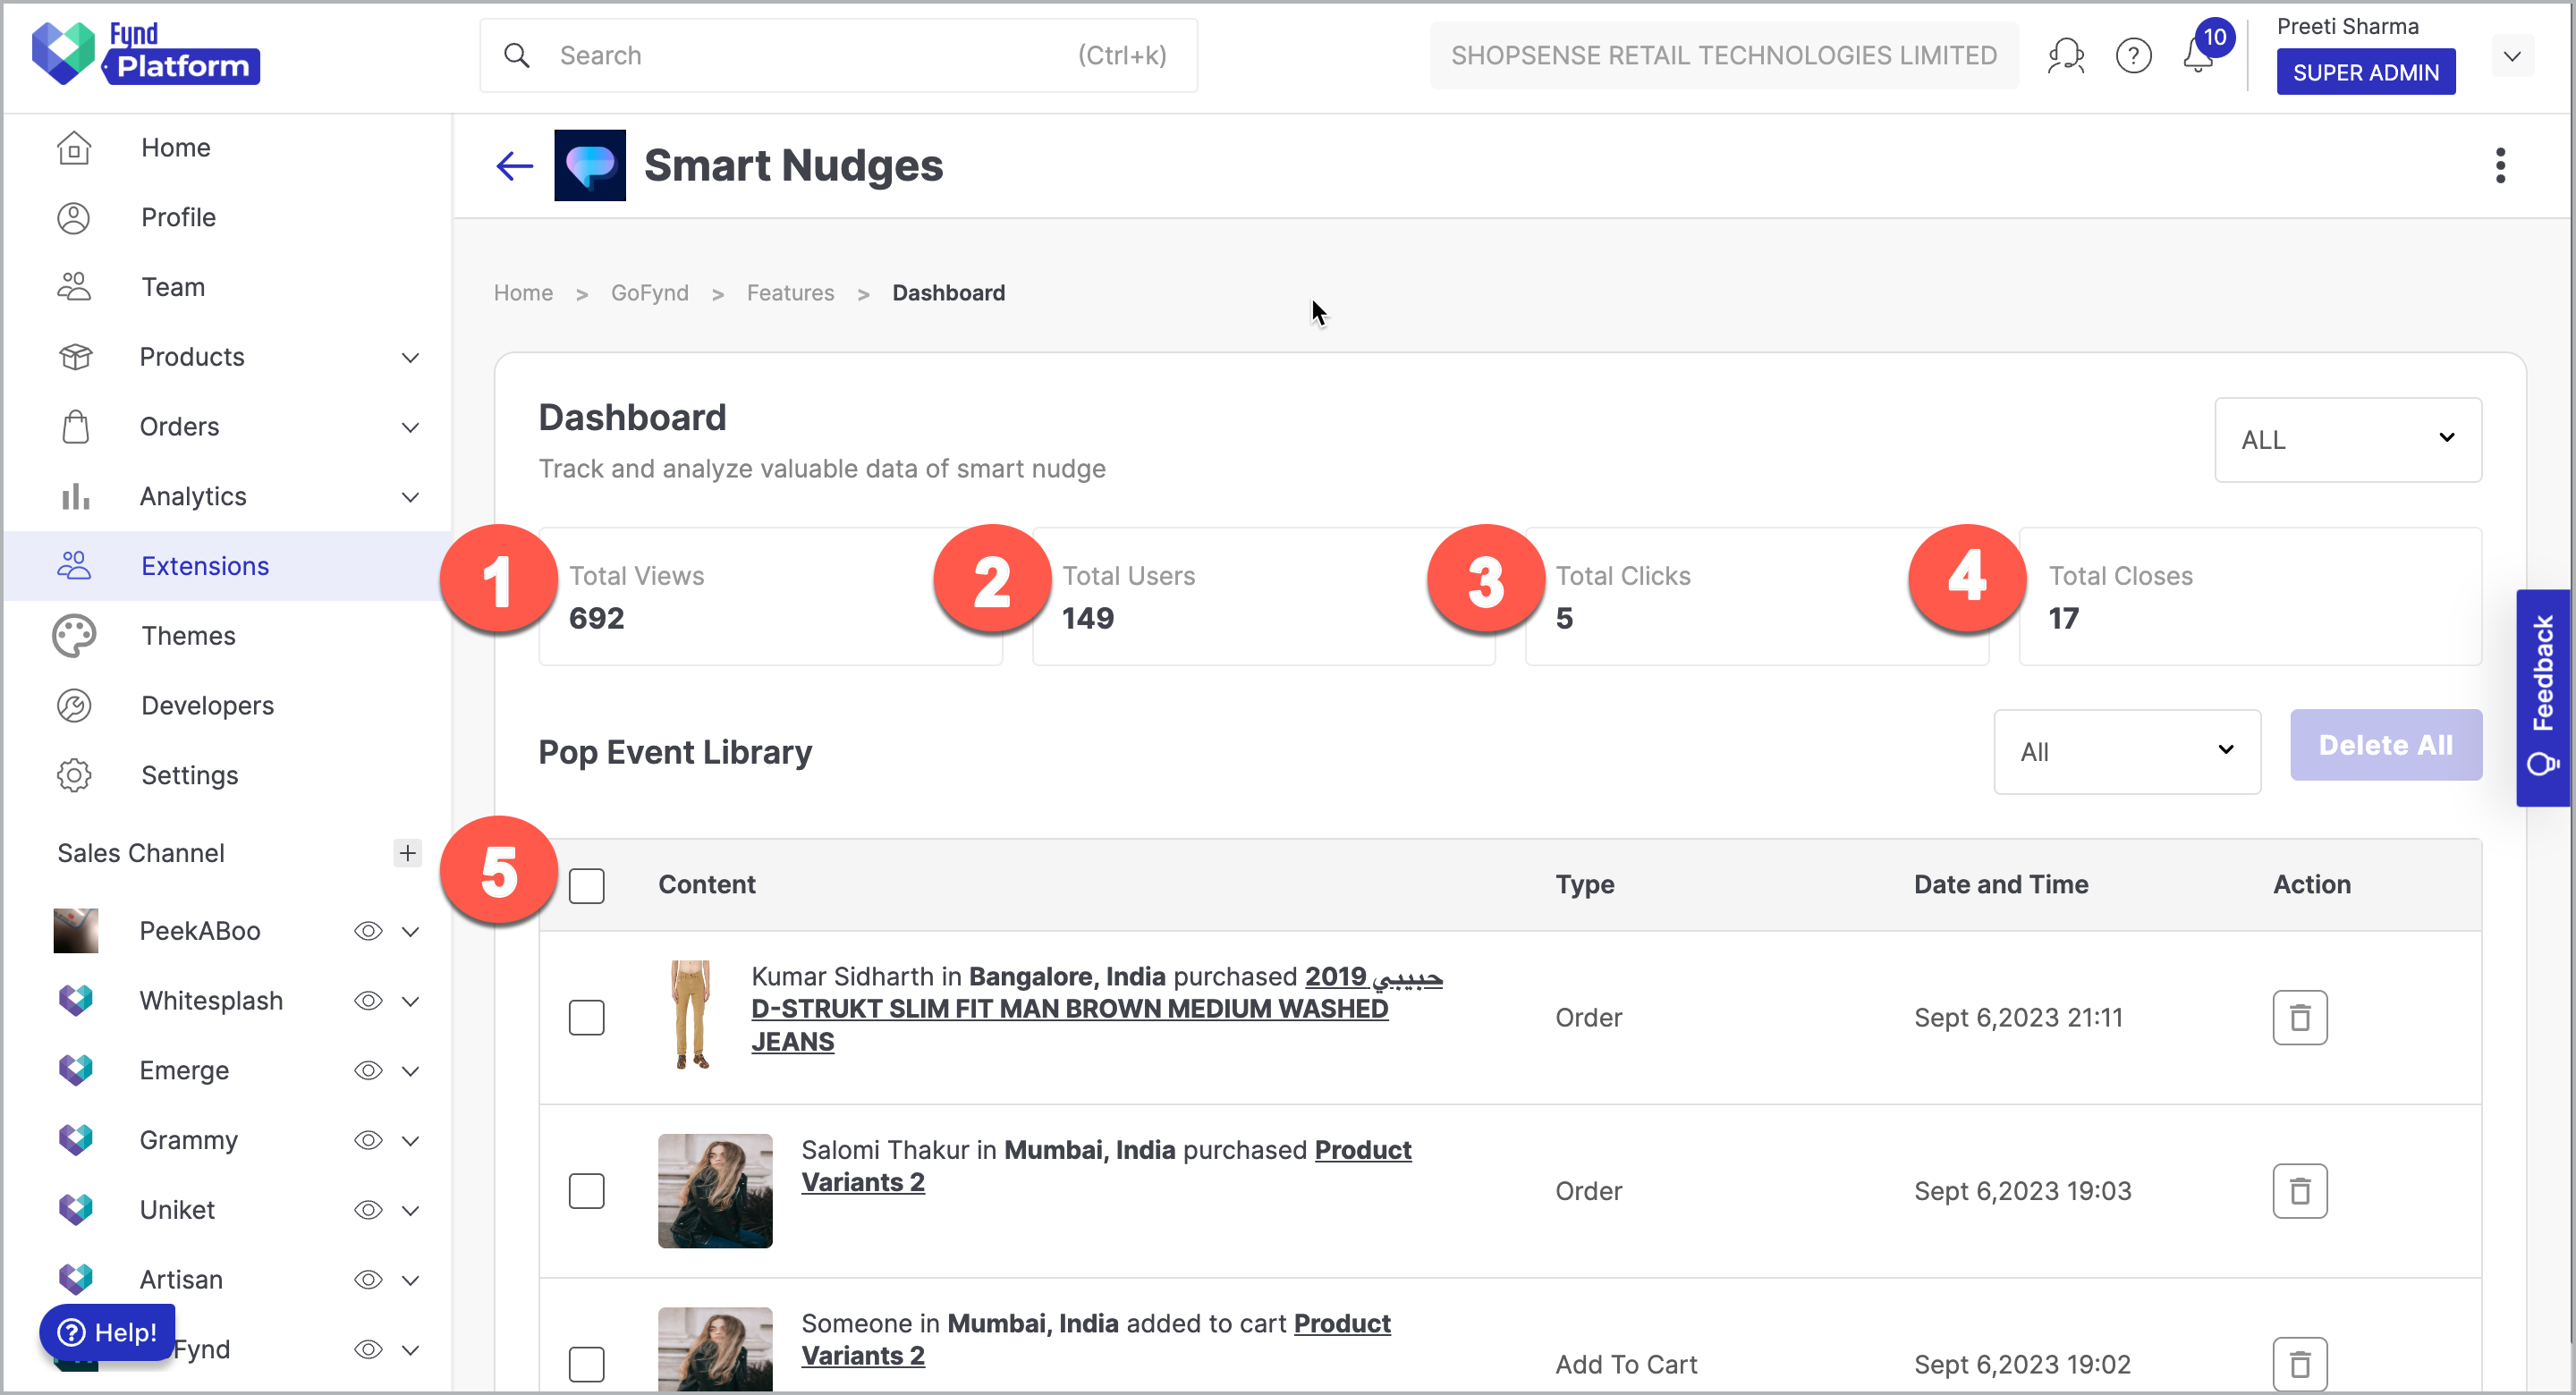
Figure 6: Dashboard
2. Customize Nudges
This feature includes nudges that correspond to activities occurring on the sales channel. To activate a nudge, navigate to the relevant nudge and toggle the master button. This action will lead to a corresponding status update, displaying either "active" or "inactive."
Recent Purchase
It includes the following nudges that display real-time notifications of recent customers’ actions on a store's website.
Add to cart: When a user adds an item to their cart, the dynamic notification informs other active users about the respective cart activity which enhances website engagement.
Product Reviews: When a user adds a review to a product, other active users receive an instant notification while shopping. This boosts engagement and community involvement.
Orders: When a user places an order on the website, other active users receive a notification about the respective order which enhances the conversion rate.
noteThese notifications generated from the above nudges are visible to a specific customer only once in a random order.

Figure 7: Recent Purchase
Popularity
It includes the following nudges that showcase real-time website visitors and product viewers on your site.
Product Specific: When one user is on the product's PDP page and another user is viewing the same product, the second user receives a notification.
Live Visitors: This nudge sends notifications that indicate the number of website visits in the last 30 minutes.
Recent Visitors: This nudge sends notifications displaying the count of website visits in the last 24 hours, with hourly updates.
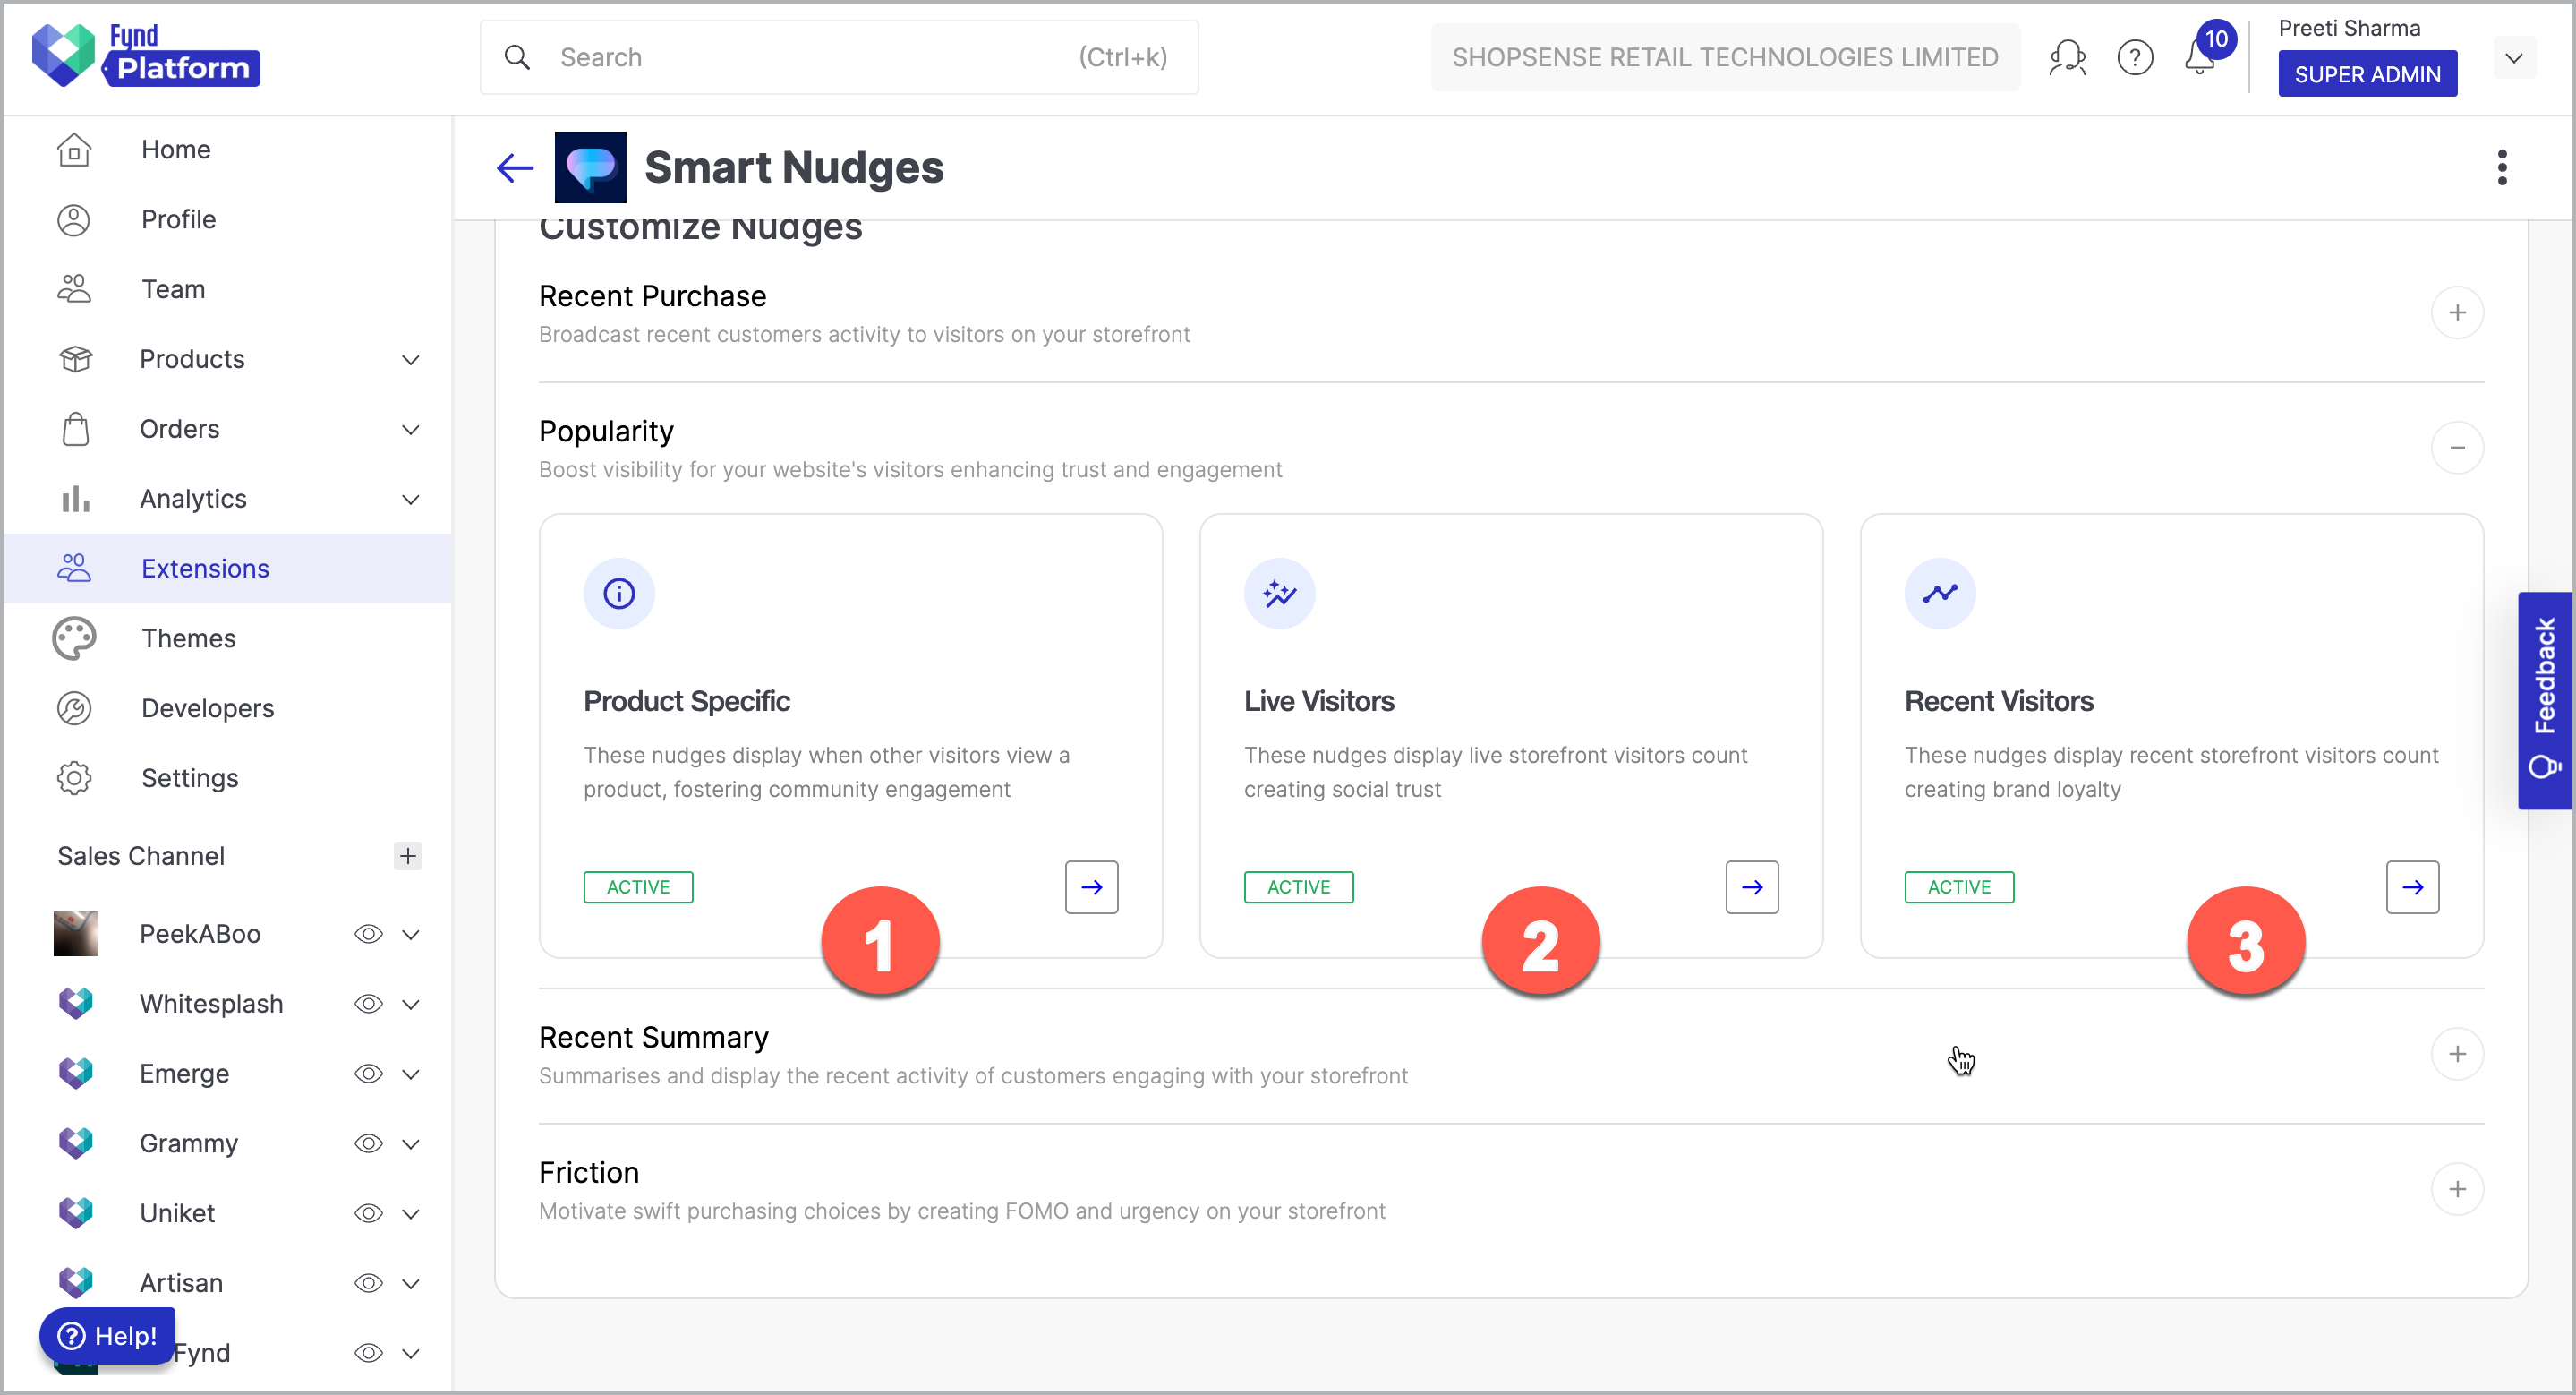
Figure 8: Popularity
Recent Summary
It includes the following nudges that highlight recent cart and order activities.
Cart Summary: It sends notifications about how many users added a specific product to their carts within a specified time frame. This feature offers insights into product popularity.
Order Summary: It sends notifications about how many users place orders for a specific product within a specified time frame. This feature offers insights into the product’s recent demand.
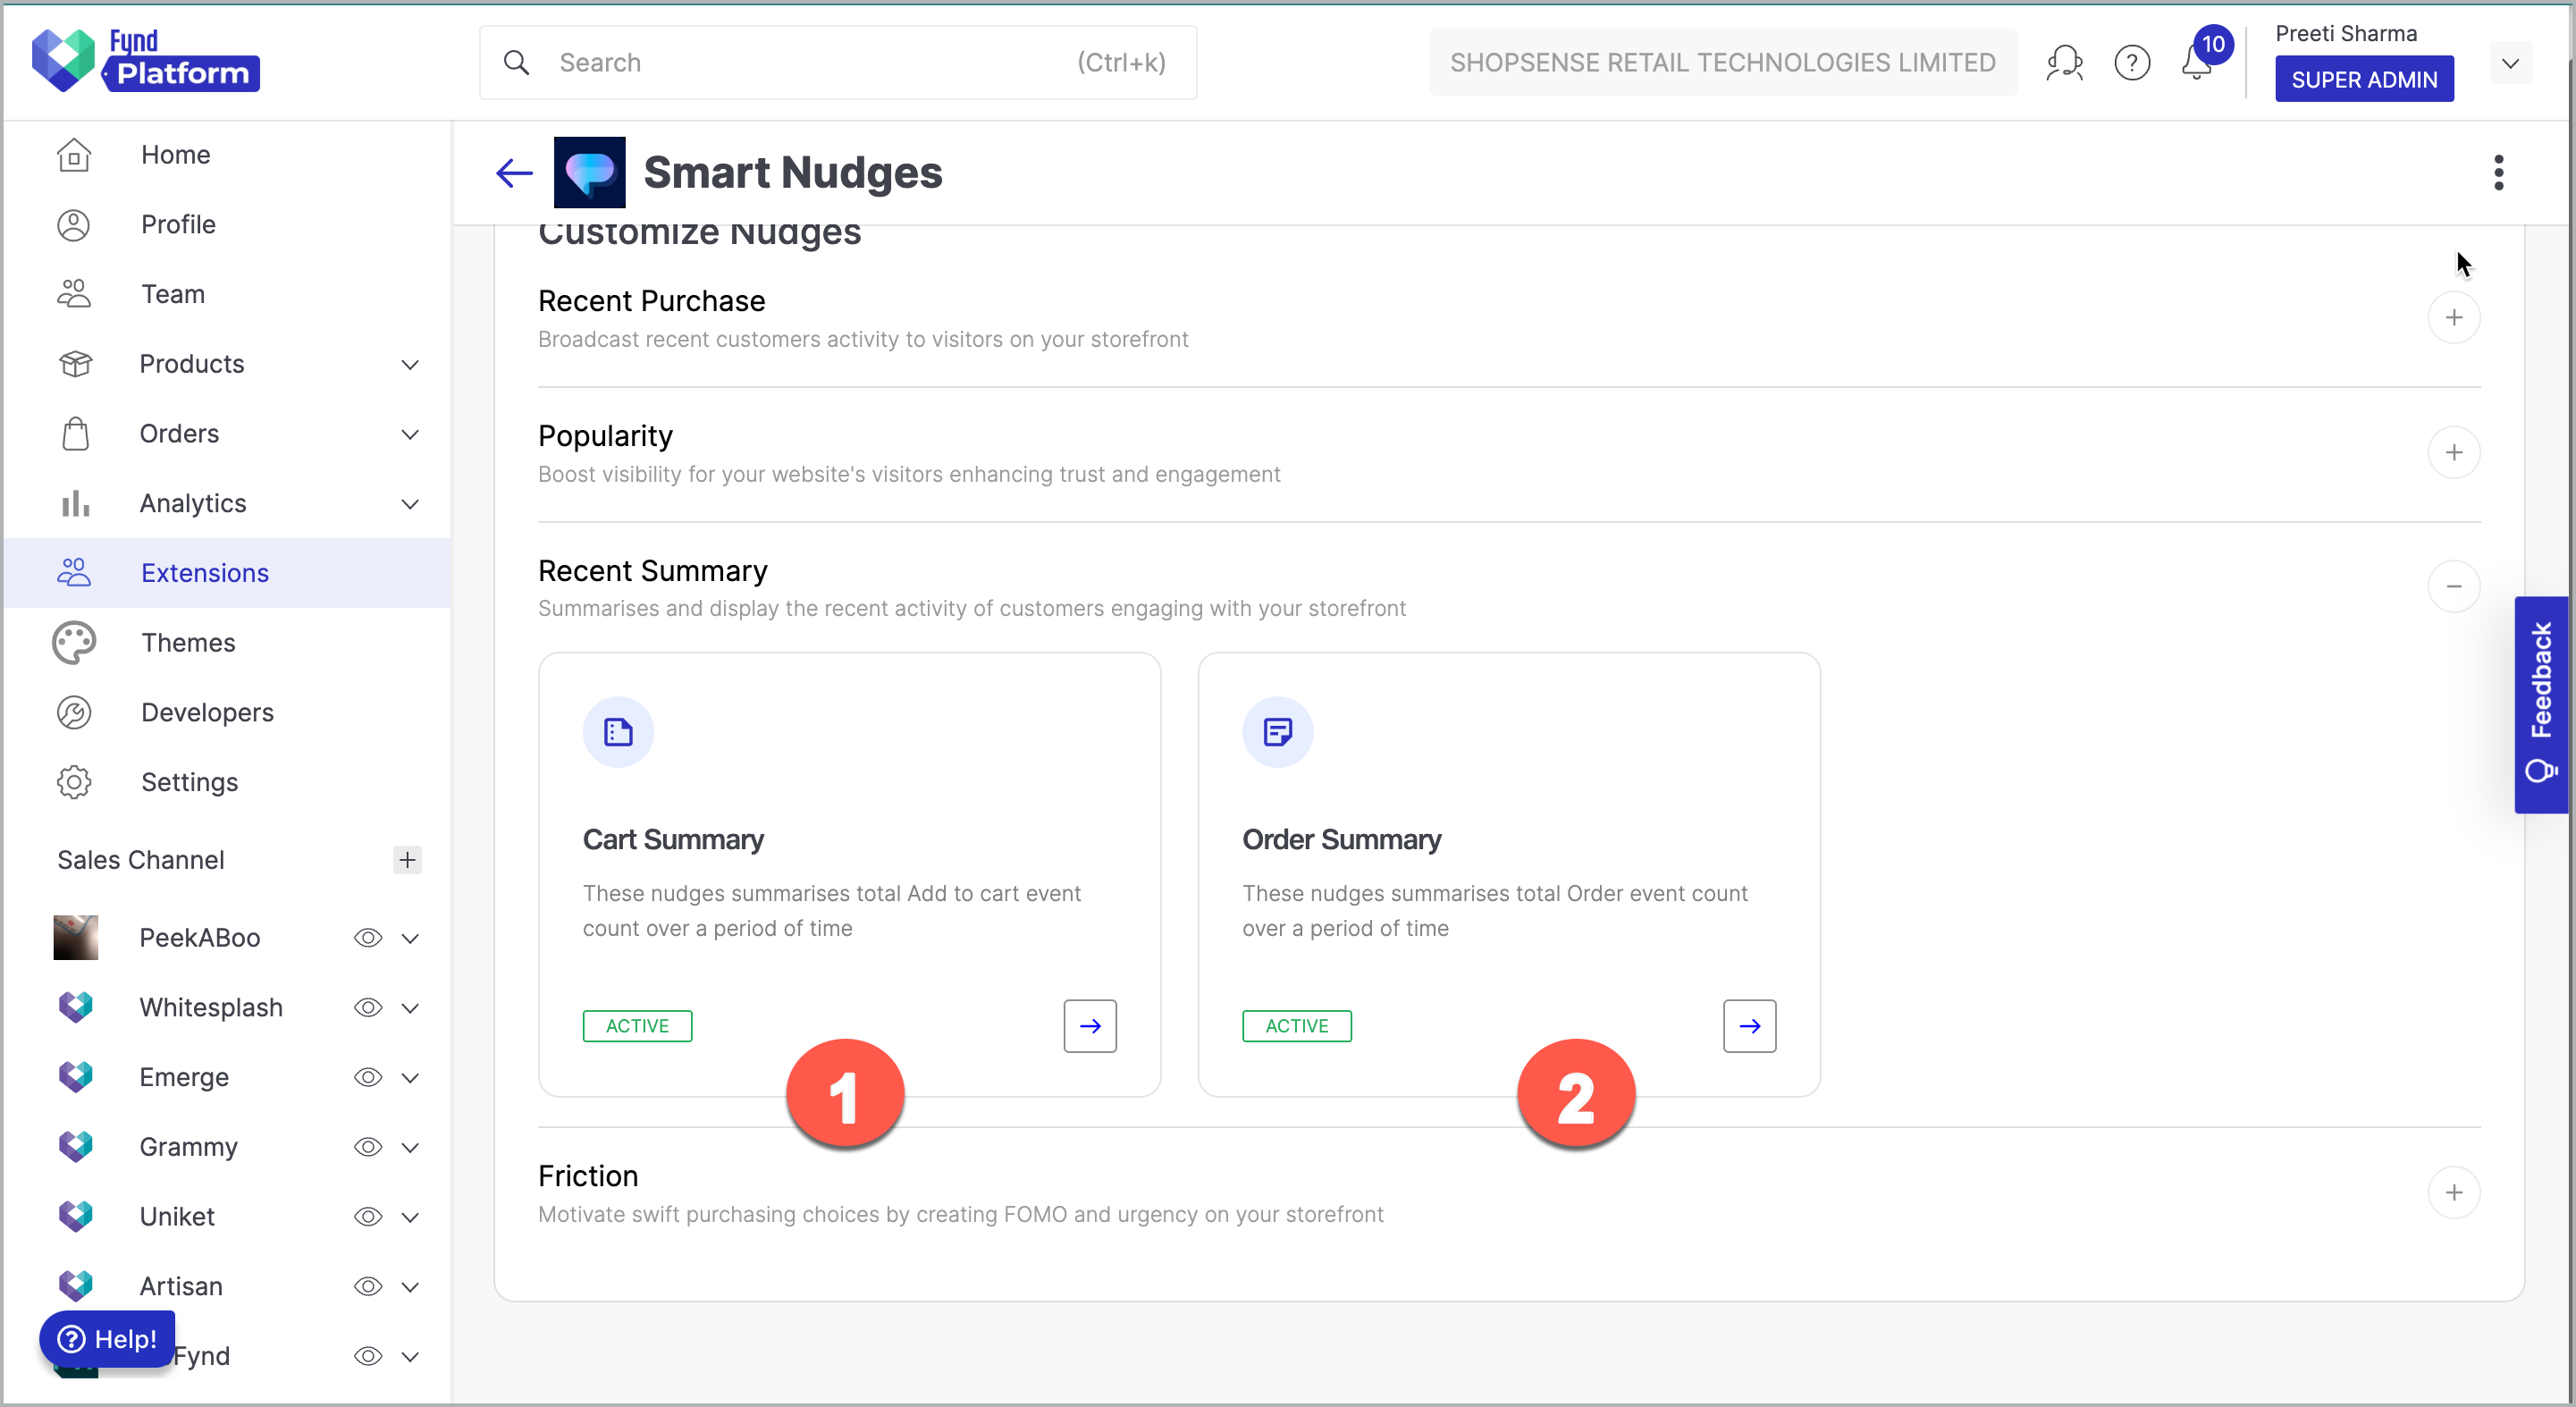
Figure 9: Recent Summary
Friction
It includes the following nudge that displays the available stock when it's running low.
Low Stock: When a user is viewing a product and its inventory is running low, a notification will be triggered to inform the customer about the limited stock availability. This feature encourages prompt purchase decisions.
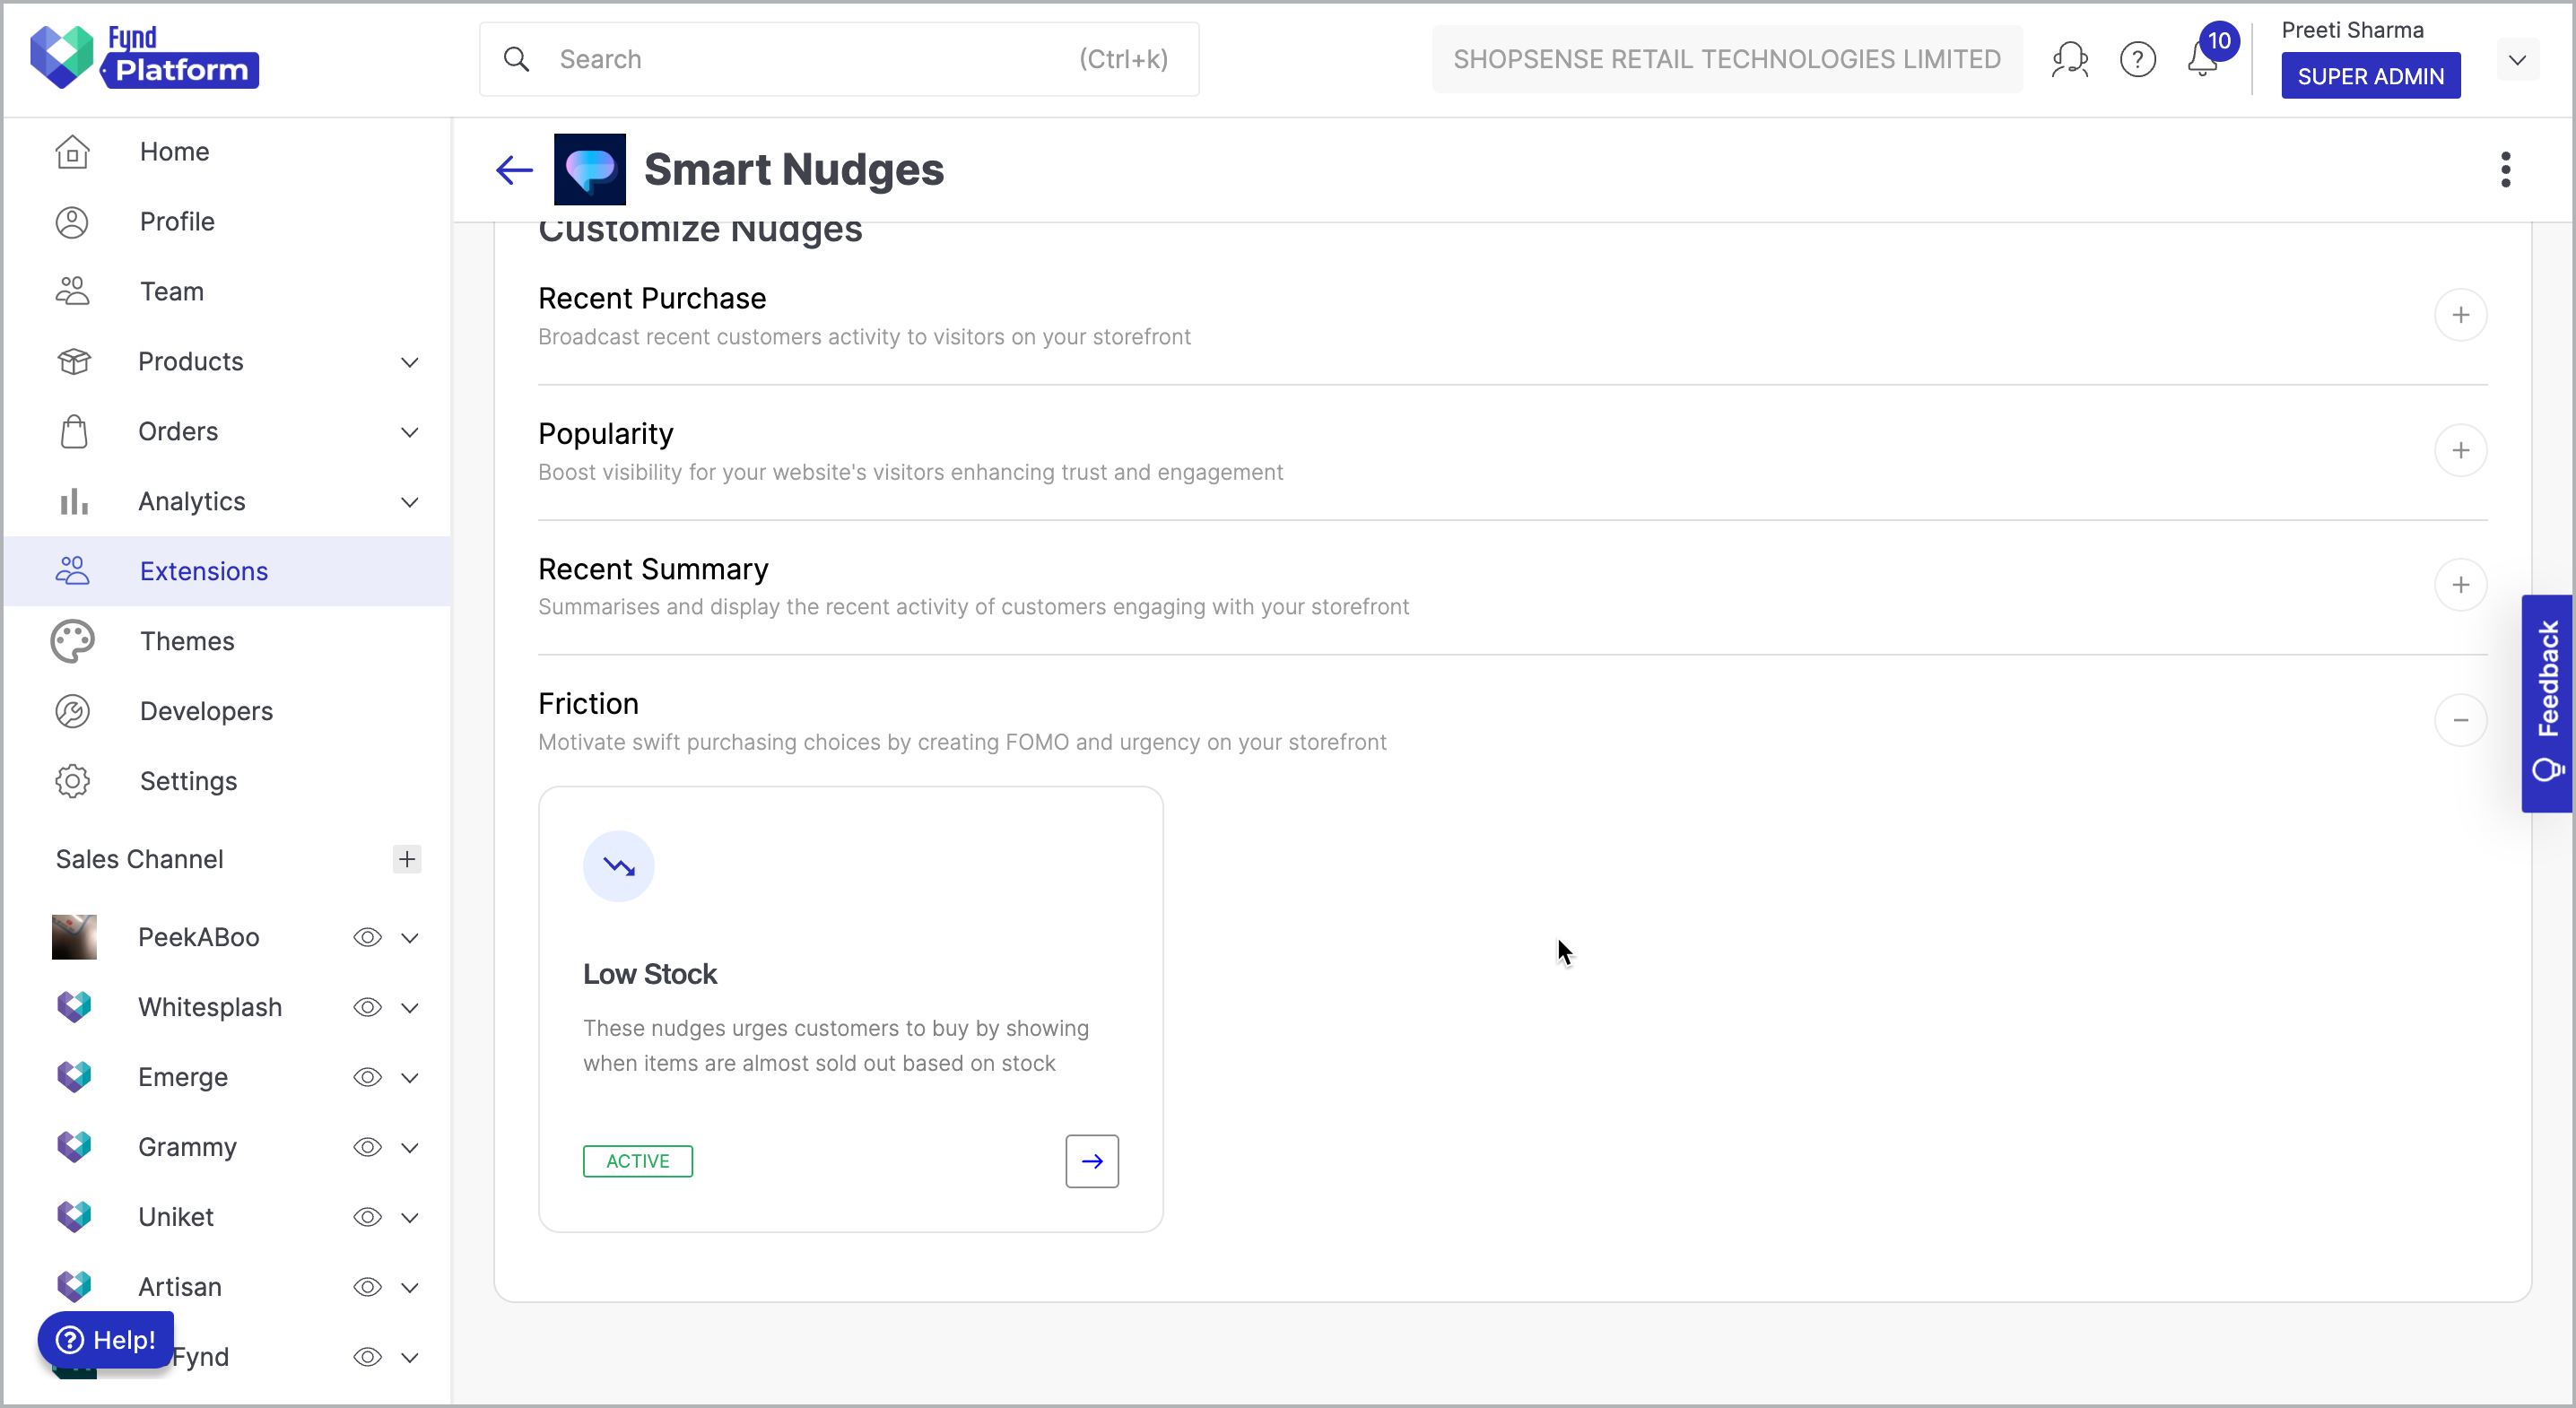
Figure 10: Friction
Fundamental Settings of Nudges
All the above nudges share the following fundamental settings:
Header Tag: Activate the header tag by toggling the button to the ON position.
Notification Time: Enable notification time by toggling the button to the ON position.
Anonymous: Conceal the name of the customer by toggling the button to the ON position. Upon activation, the customer's name is substituted with a keyword specified in the Keyword section.
Select Pages: Select the page(s) where this nudge will be visible. You can make your choices from the dropdown menu.
Highlight Color: Pick the highlighting color for the text you want to emphasize.
Live Preview: Within the live preview, you can observe how the content appears in both web and mobile views.
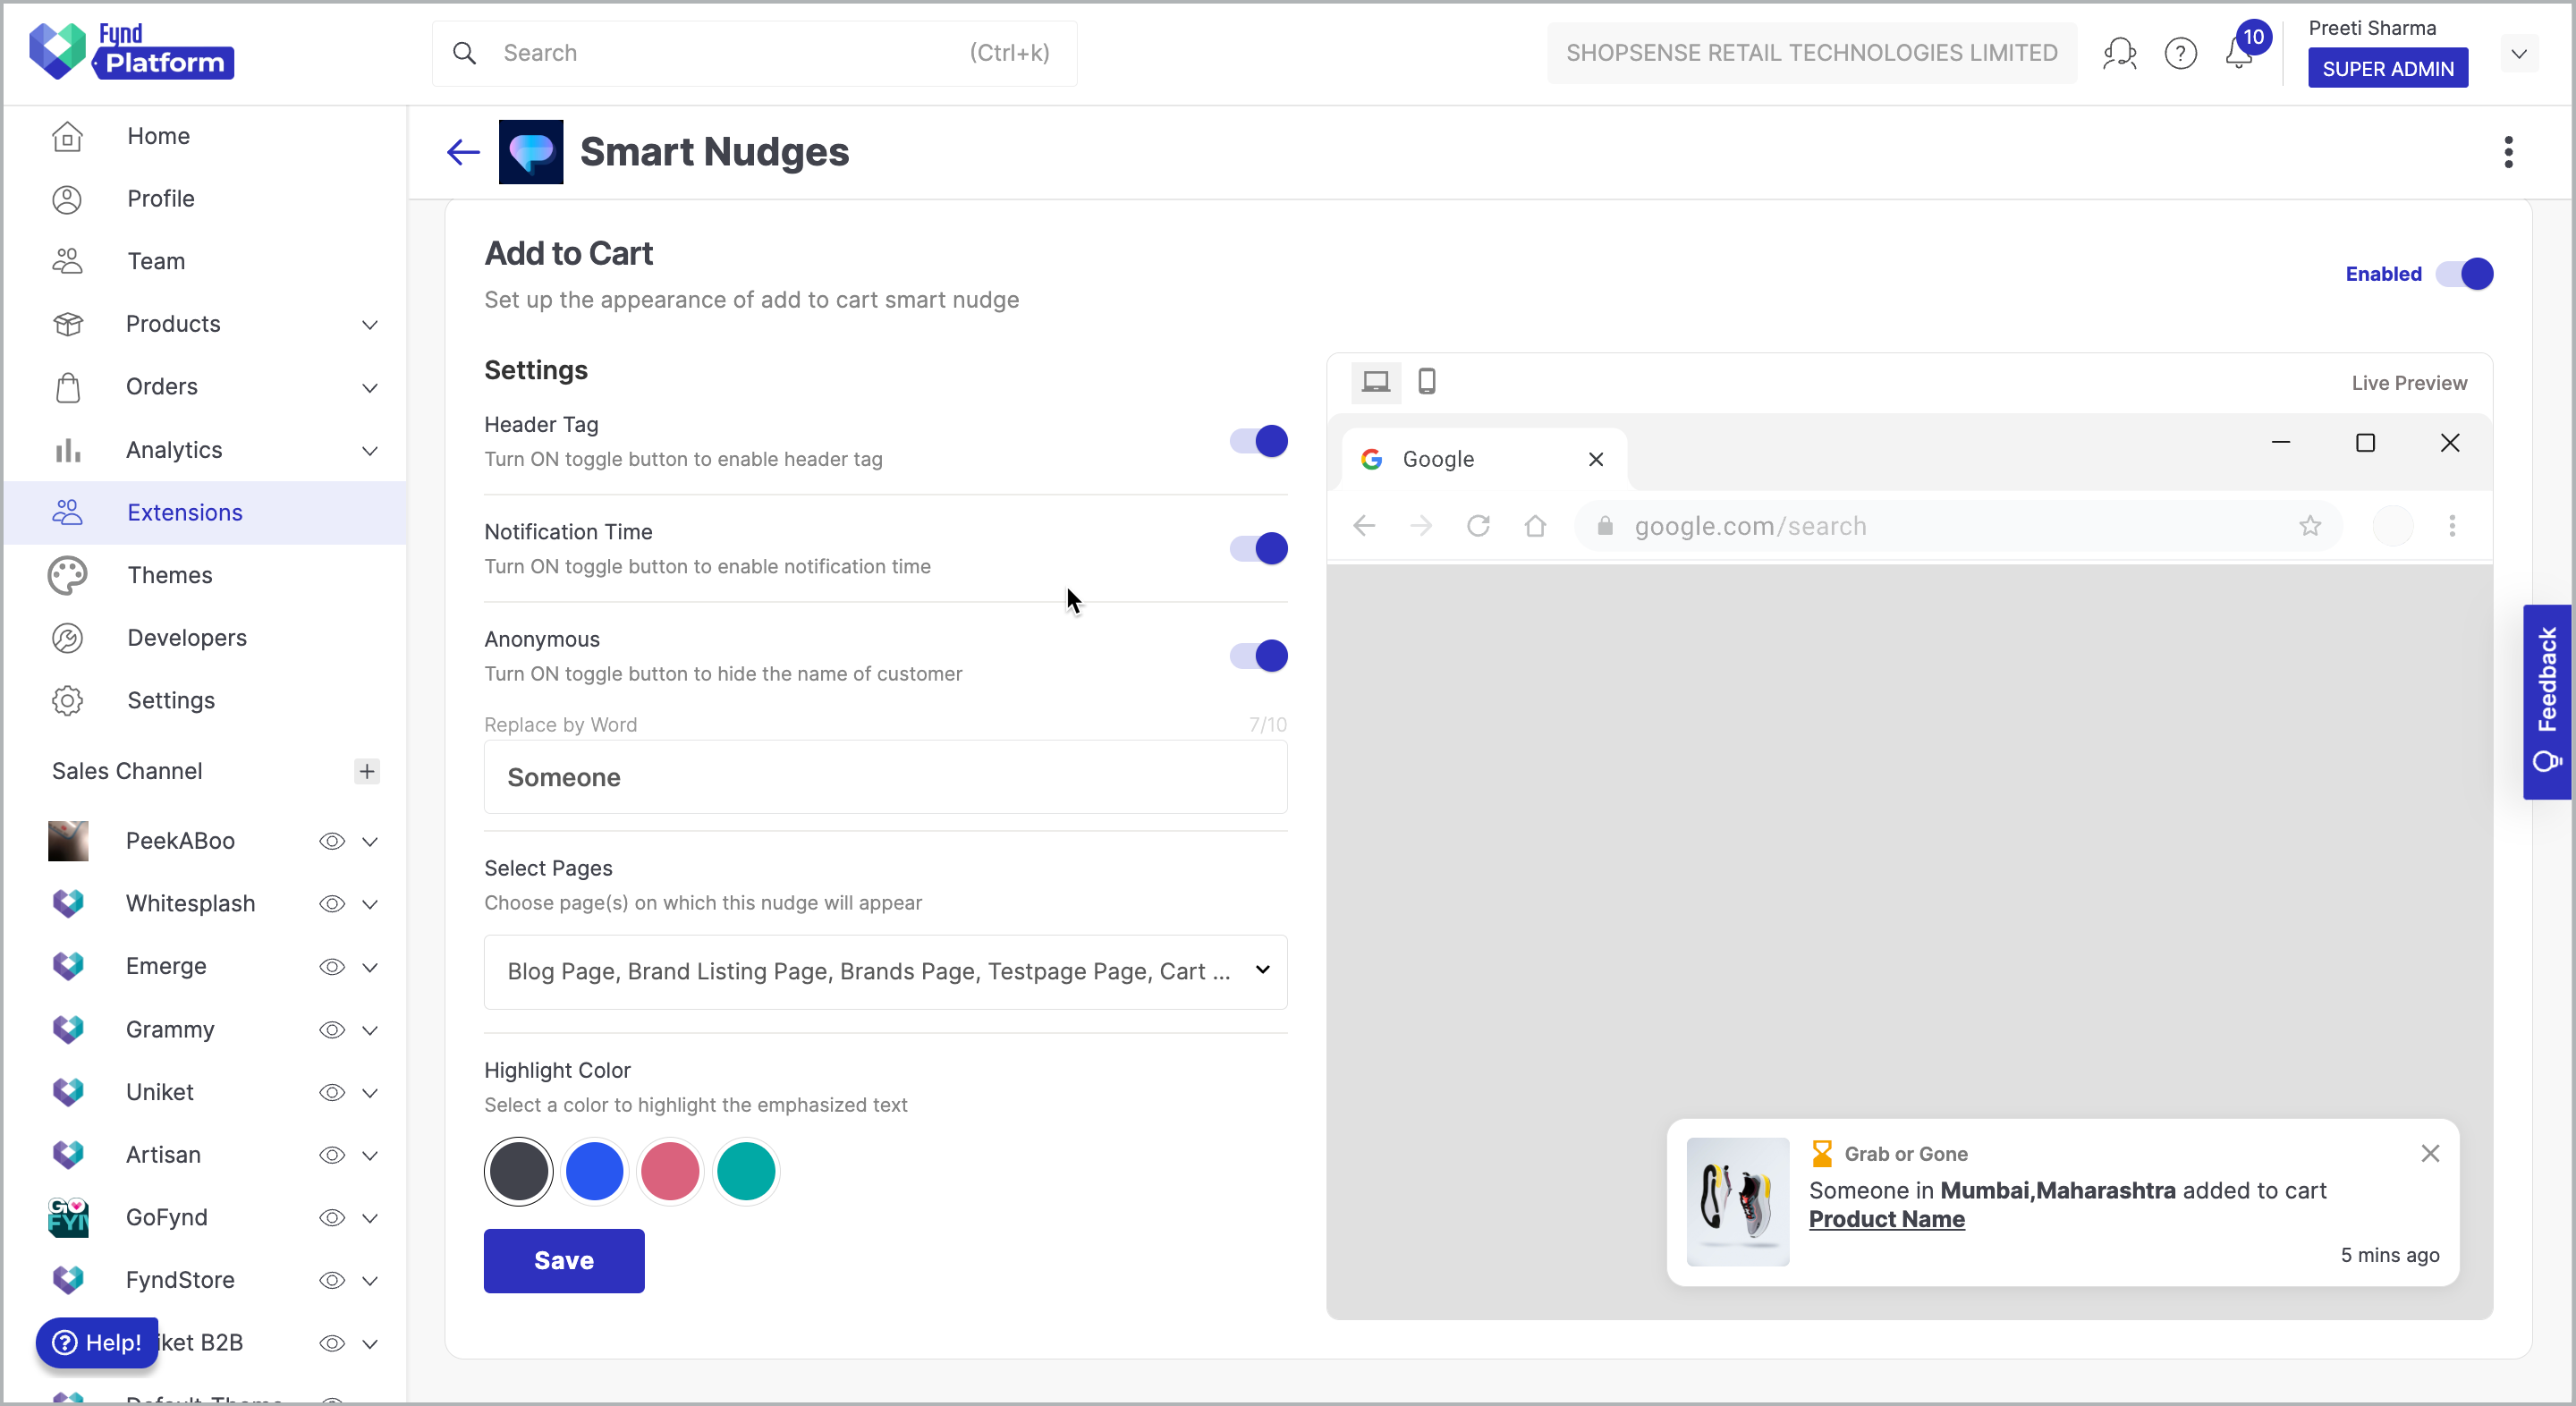
Figure 11: Fundamental Settings of Nudges
Specific Settings for Specific Nudges
The following settings are distinct for each of the corresponding nudges:
- Min Stars (for Product Reviews only): Specify the minimum star rating. Notifications will be triggered for products with reviews that match the specified star rating.
- Min Visitors & Time Period (for Live Visitors and Recent Visitors): Specify the minimum number of visitors and the time period. Notifications will be triggered for products with views that match the specified visitor count for the specified time period.
- Min Visitors & Min Item (for Cart Summary only): Define the minimum visitor count and minimum item count for which the transactions were made. Notifications will trigger, including the specified visitor count who completed transactions for the specified item count.
- Min Visitors & Min Order (for Order Summary only): Define the minimum visitor count and minimum order count for which the transactions were made. Notifications will trigger, including the specified visitor count who completed transactions for the specified item order.
- Time Period (for Cart Summary and Order Summary): Specify the time frame during which the relevant customer activity took place.
- Min Inventory (for Low Stock only): When the stock of a product reaches the specified minimum count, the nudge will send a notification.
- Exclude Products (for Low Stock only): Specify the products for which you prefer not to send low-stock notifications.
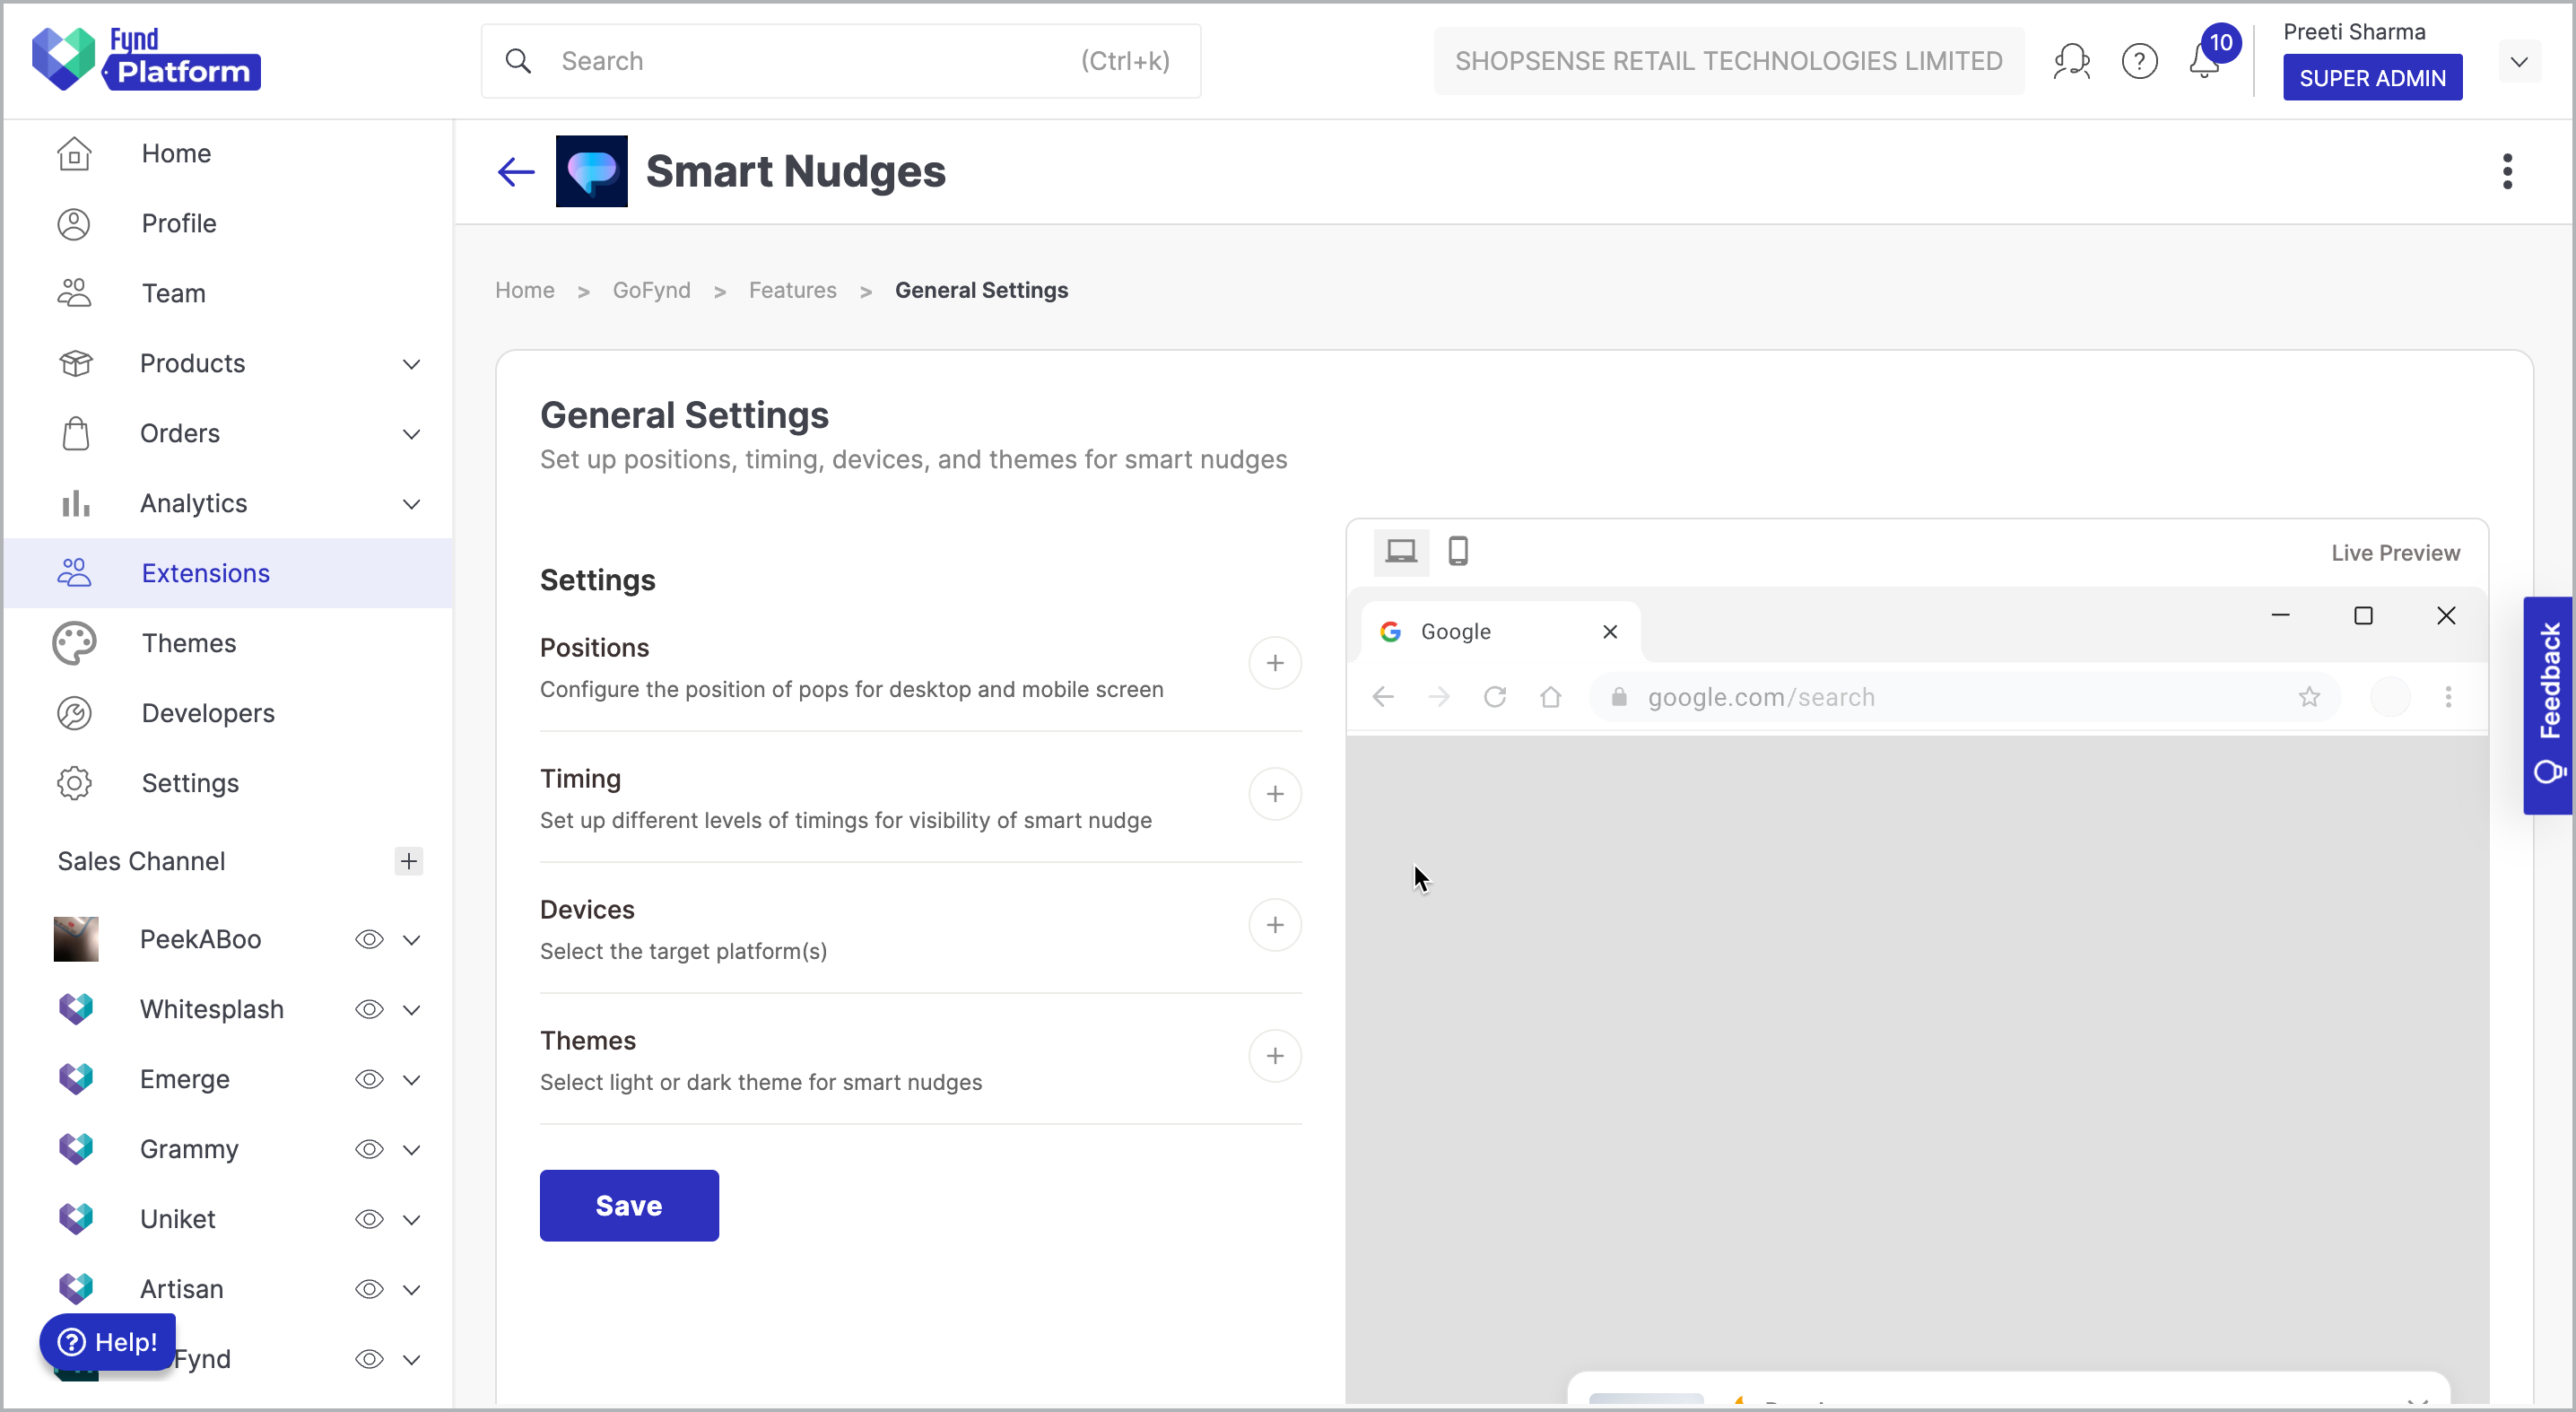
3. Settings
Customize the overall settings and visual appearance of Smart Pops using the following settings:
- Positions: Adjust the placement of the pop-up for both desktop and mobile screens.
- Timing: Establish varying time intervals for the visibility of Smart Nudges. For example, you can configure the time interval for the initial pop-up to display when a customer visits the website. You can also set the time gap between successive pop-ups. Furthermore, you can define the maximum count of pop-ups visible on the entire website and the maximum count that can appear on a specific page.
- Devices: Choose the specific platform(s) where you intend the pop-ups to be displayed.
- Theme: Choose either the light or dark theme for Smart Nudges. The corresponding highlight color palette will be updated according to the selected theme.
Adding Smart Nudges Extension in Theme
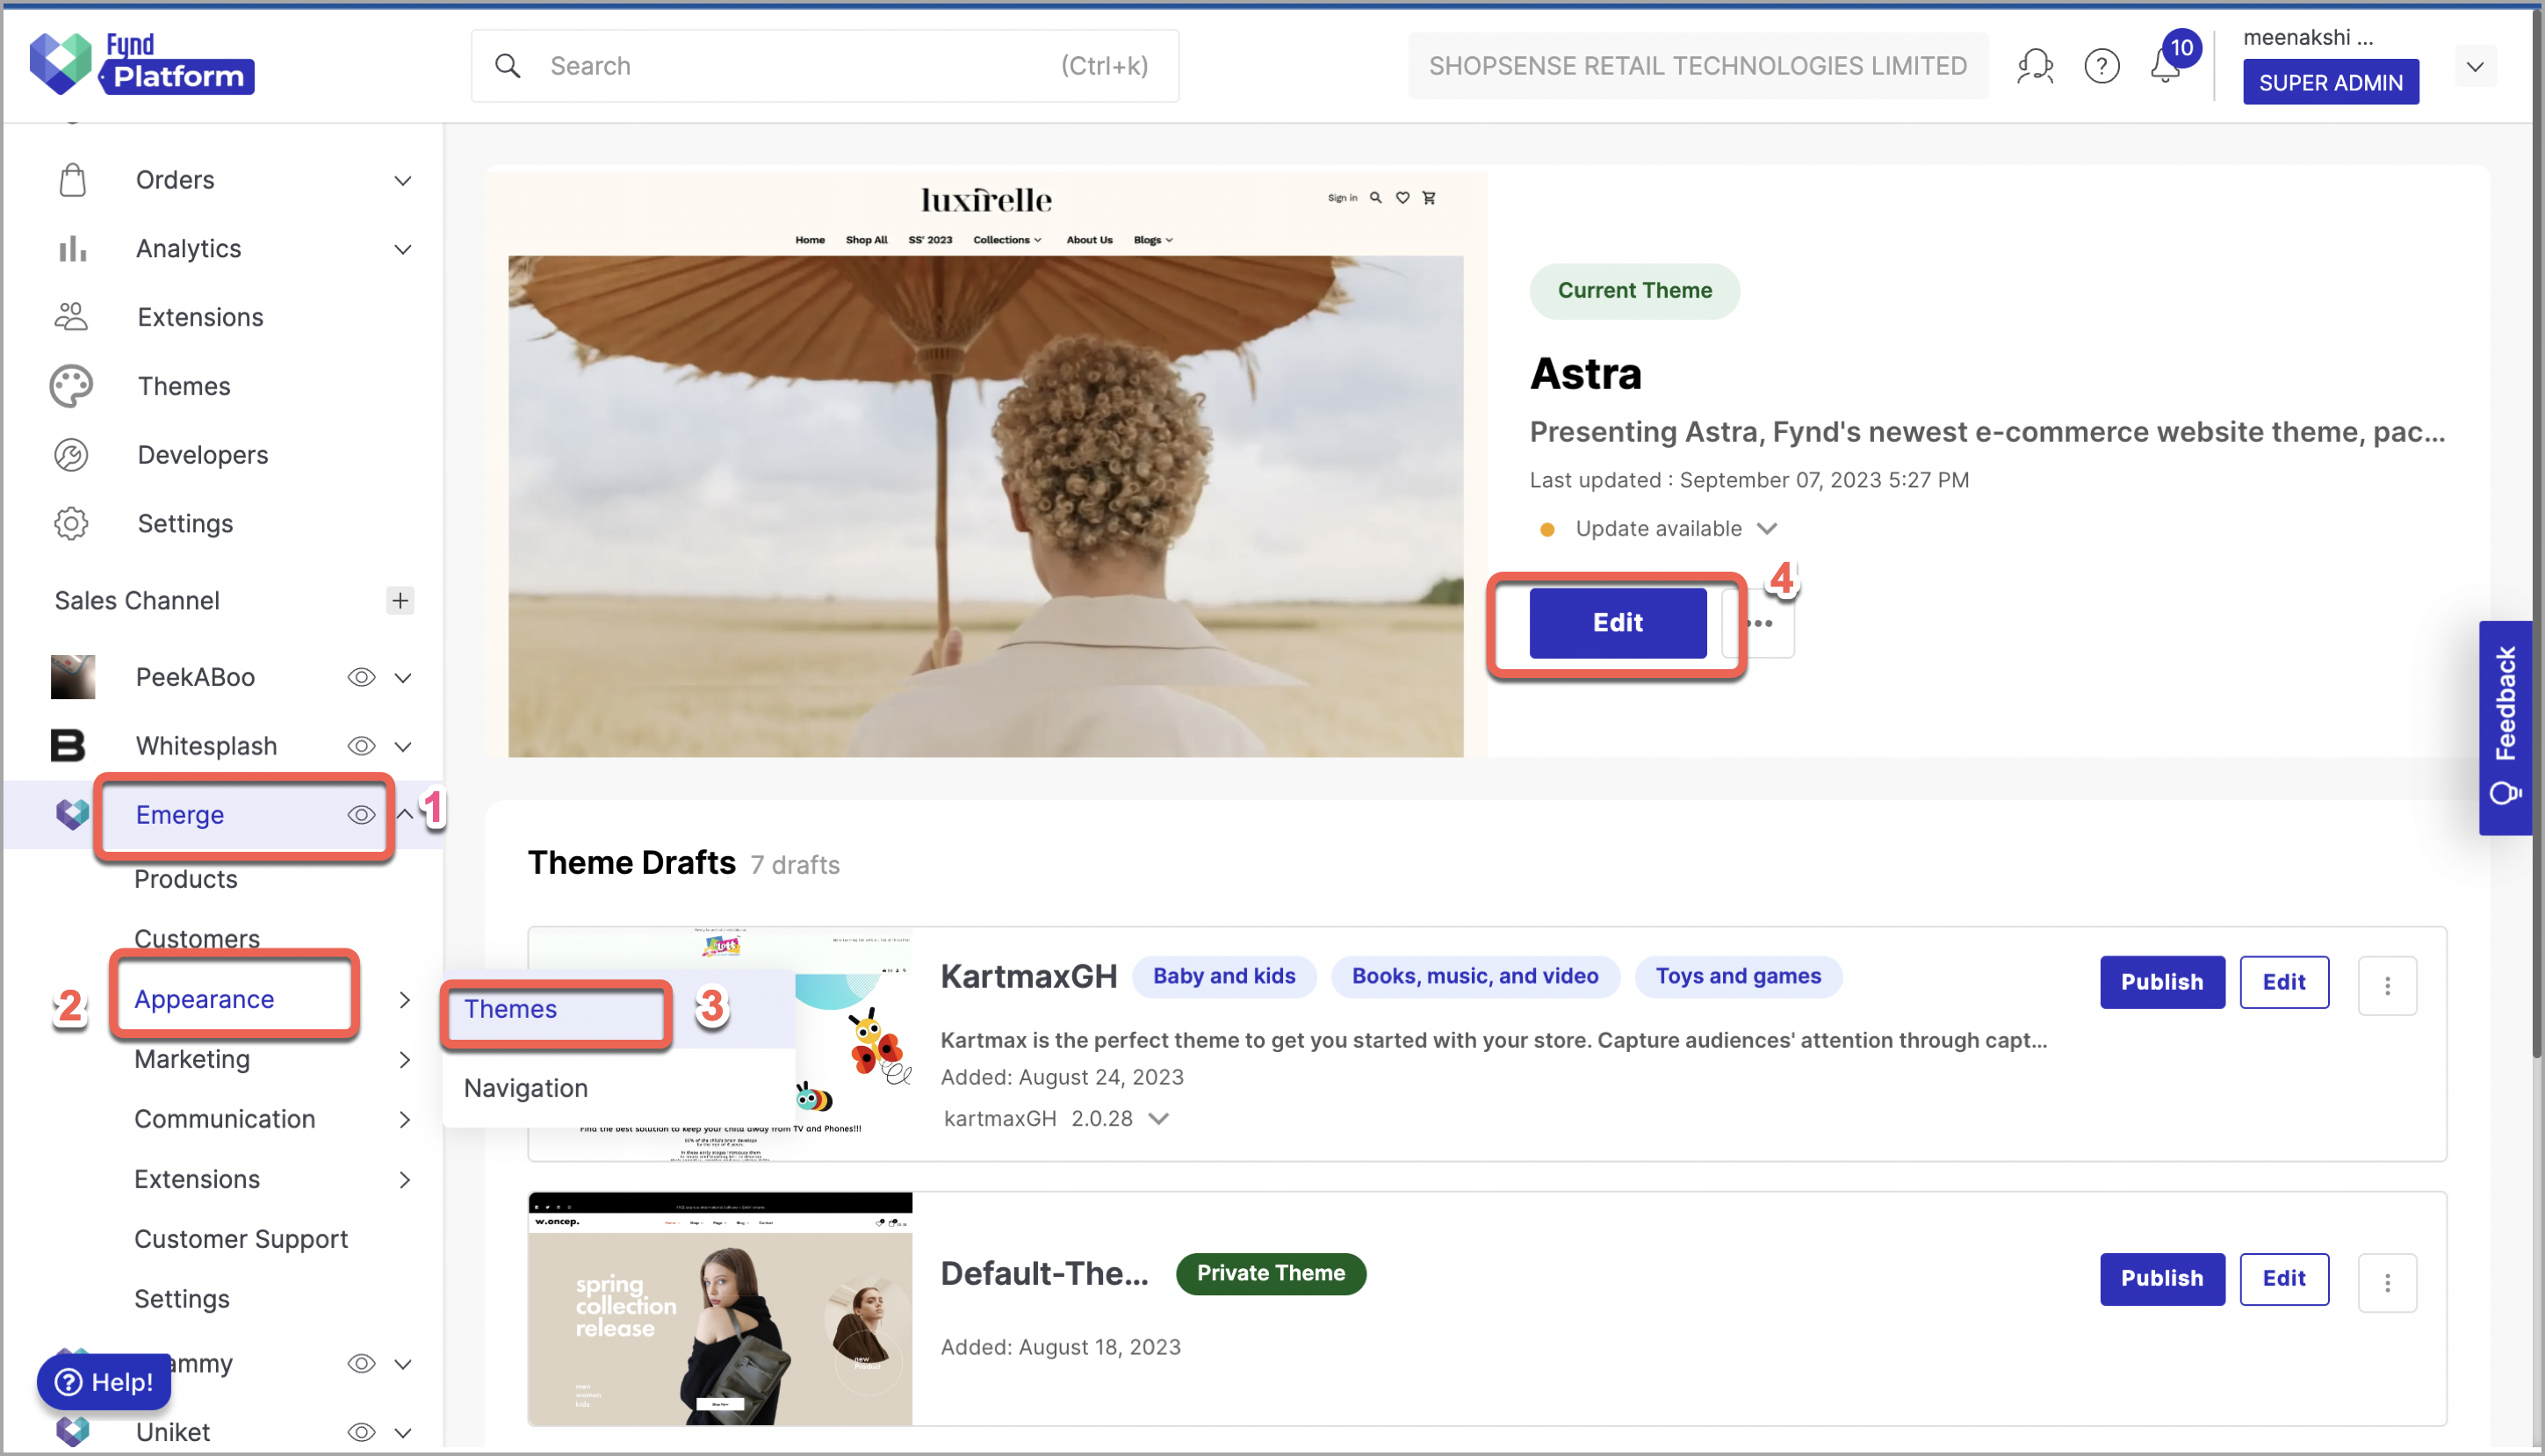
- Go to Sales Channel. Here we have selected Emerge.
- Click Appearance.
- Click Theme.
- Click Edit. Theme editor will appear.
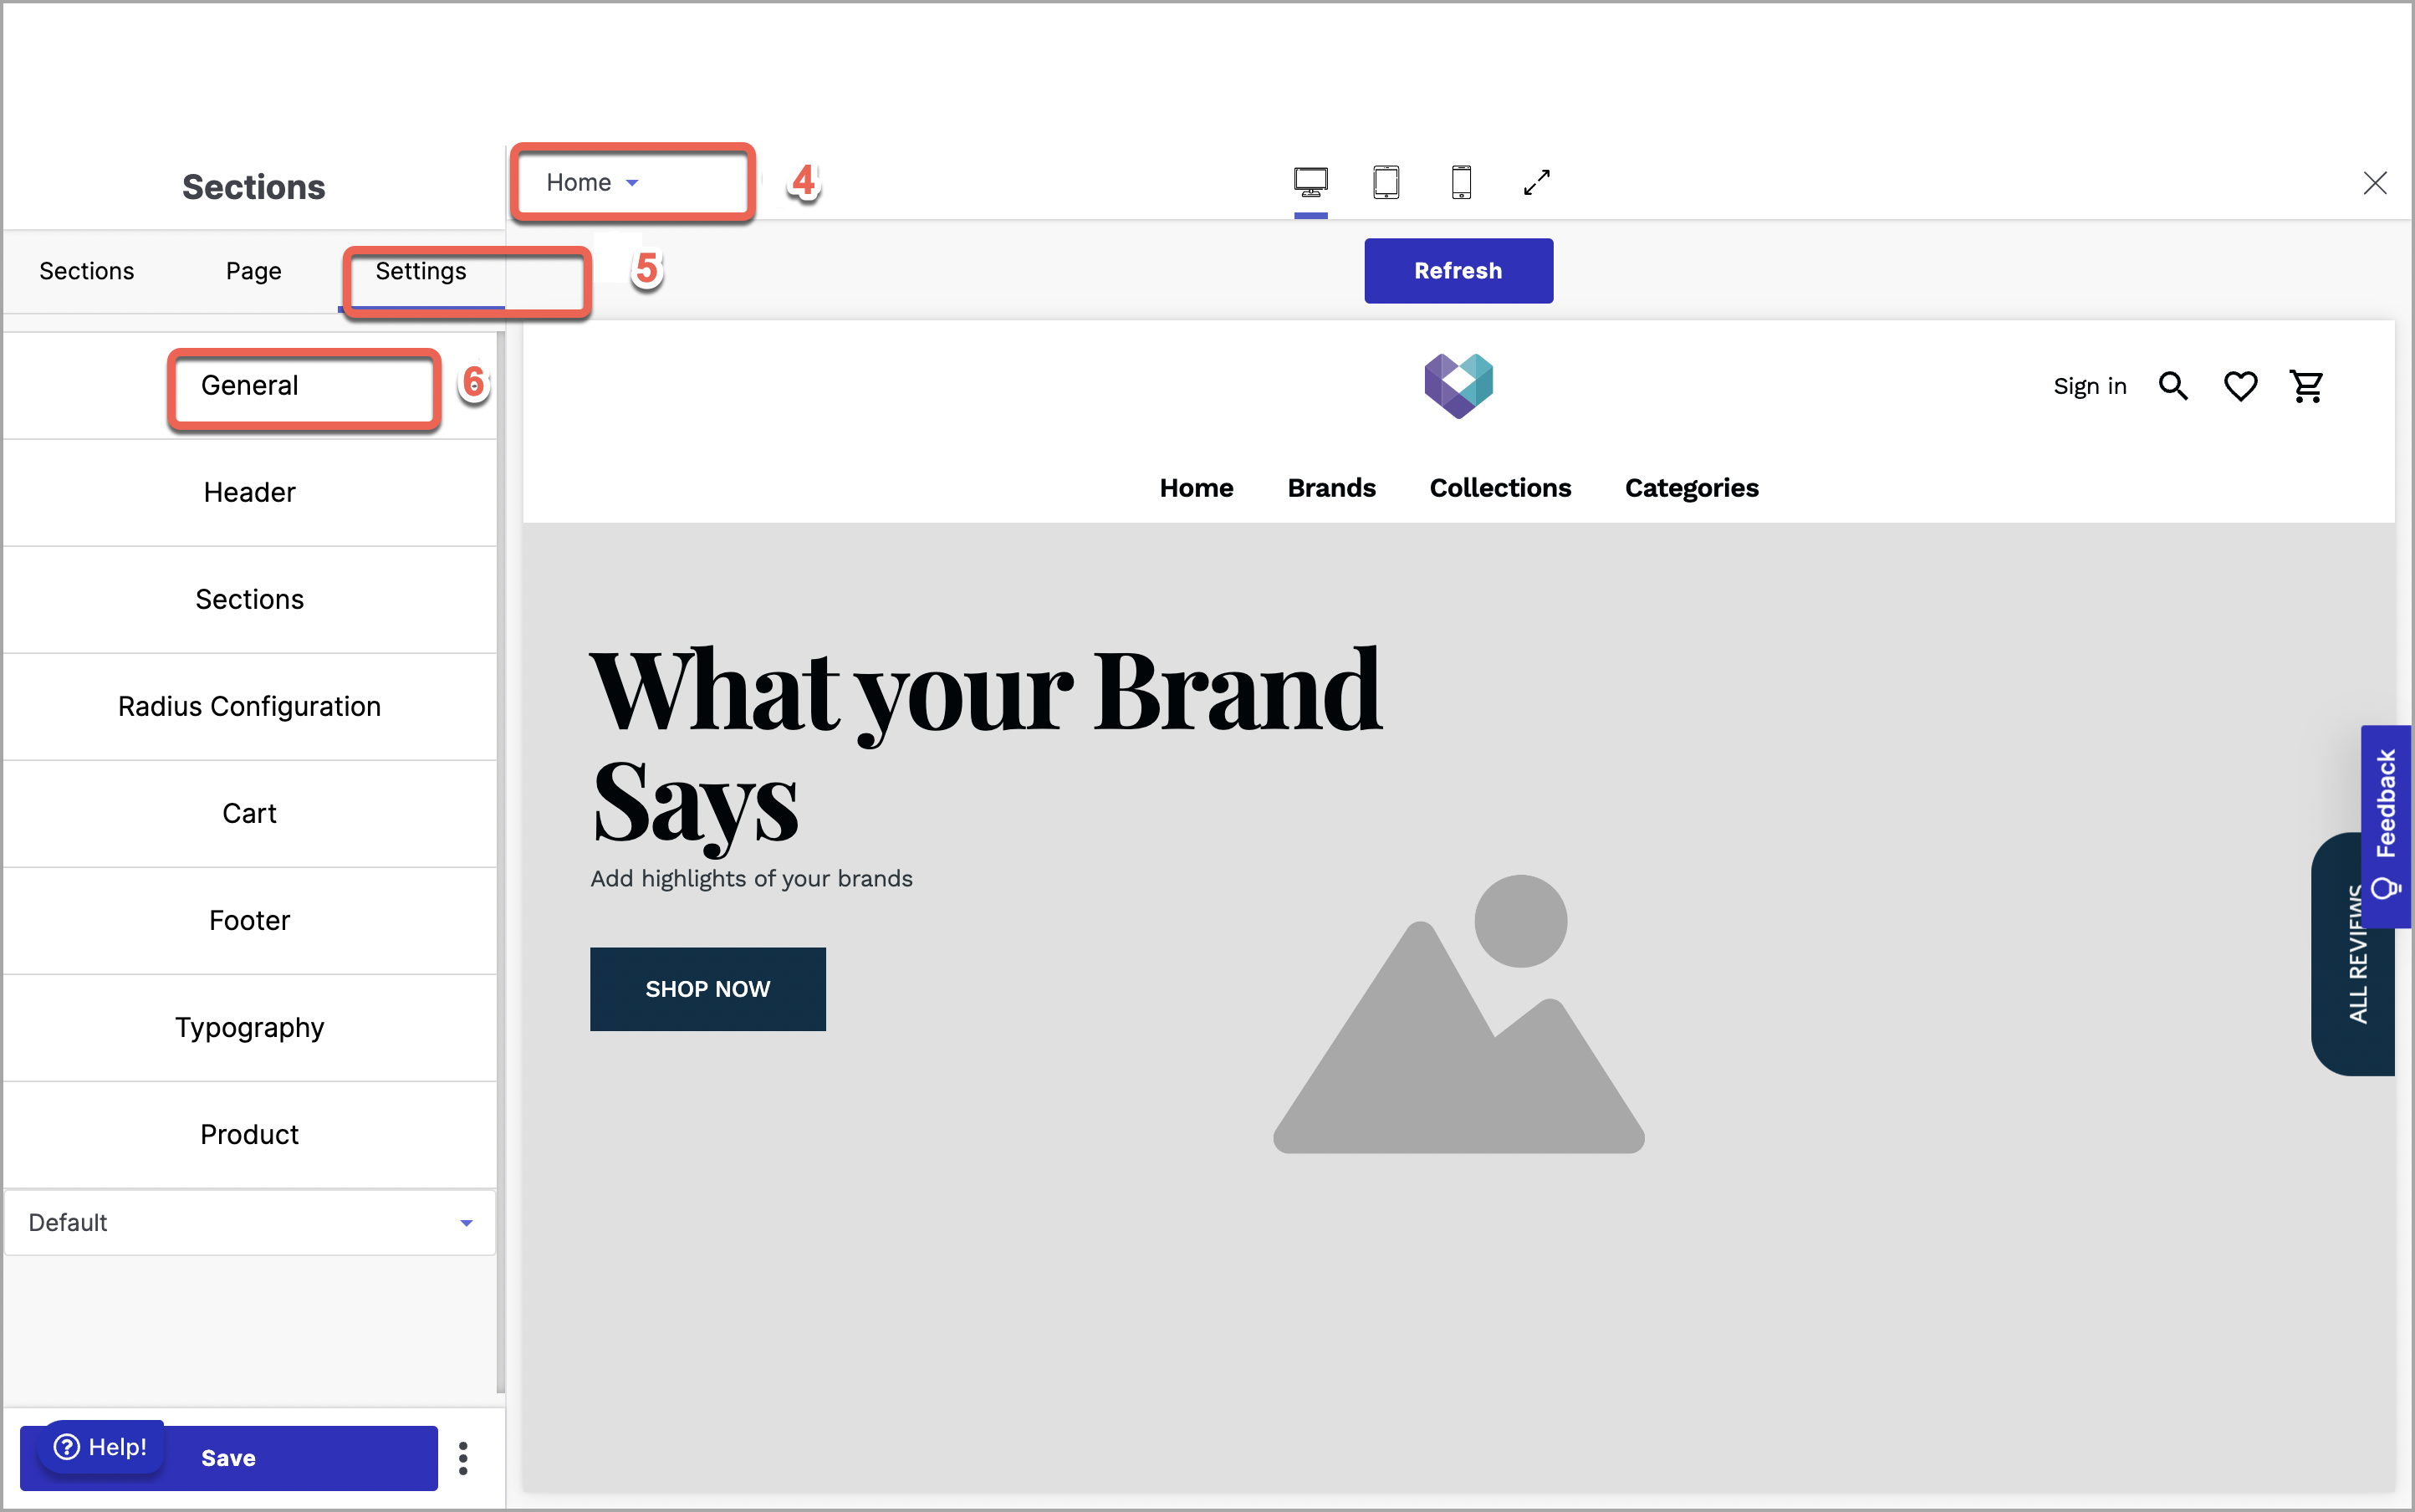
- Select Home option from the drop down.
- Click Settings tab.
- Click General section.
- Select Extension as Smart Nudges in Header Top.
- Select wrapper as Smart Sales Nudges.
- Click Save.
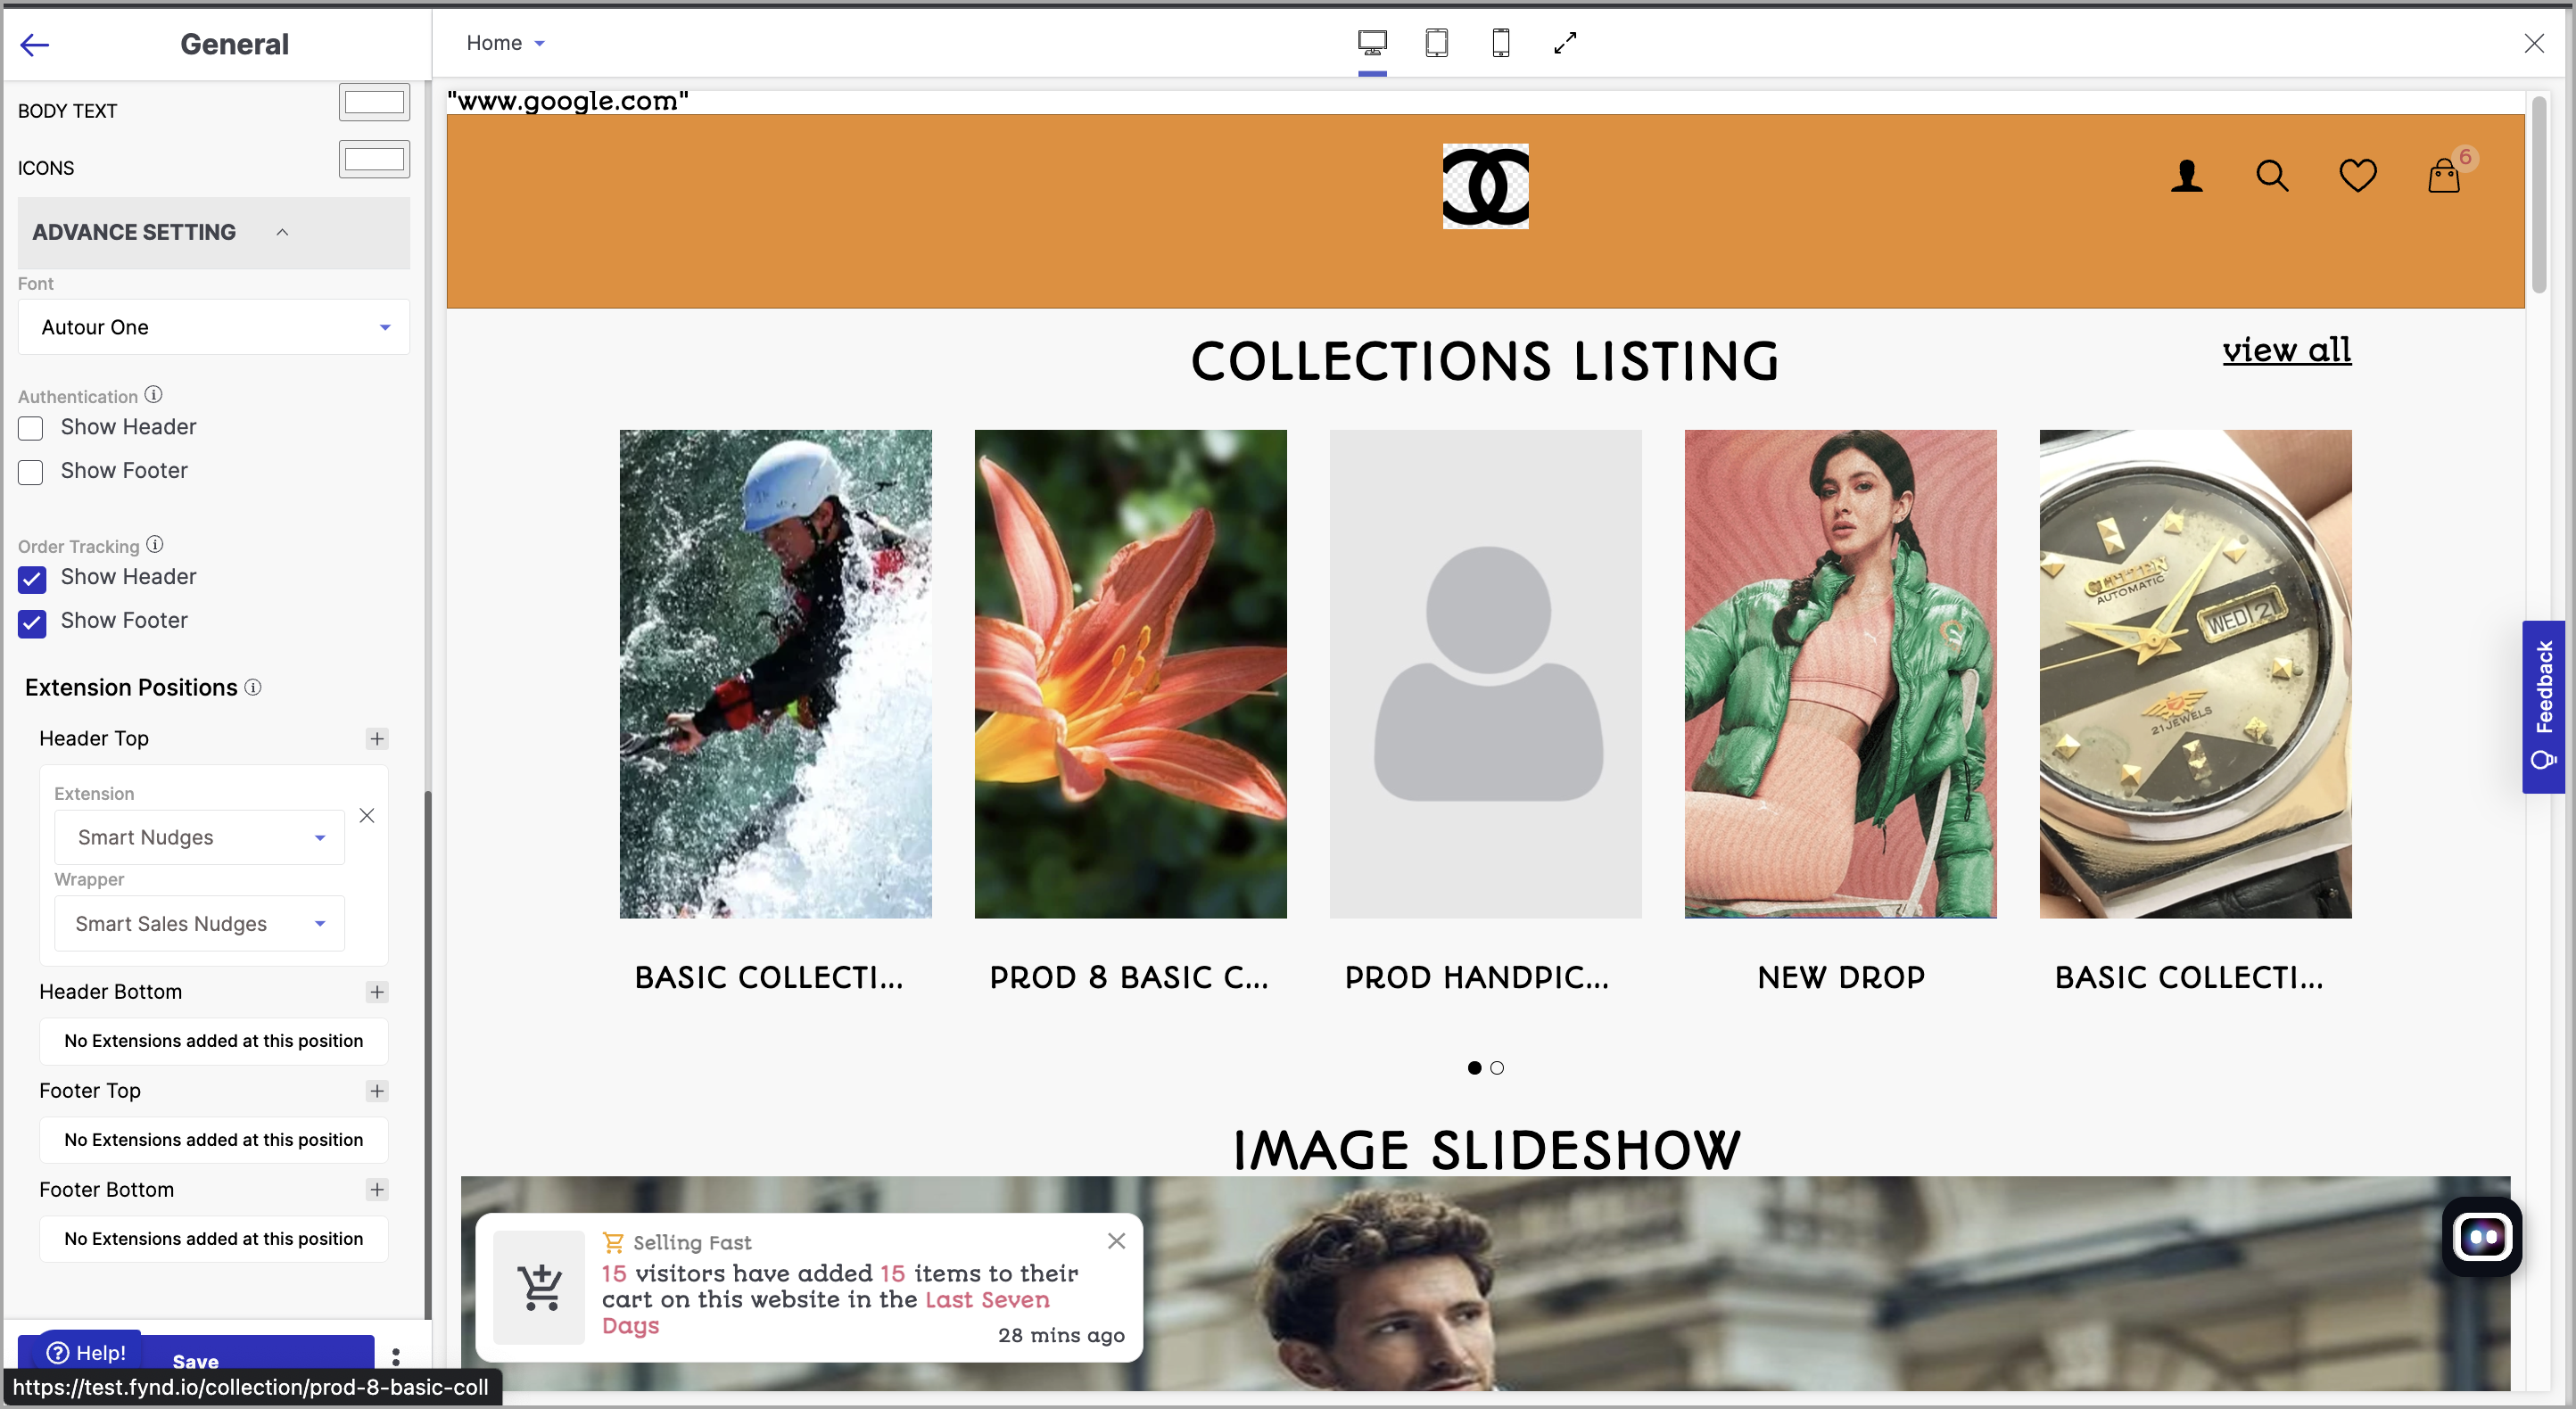
Final Output