Using the Frolic Extension
Introduction
The Frolic extension provides additional discounts to customers during the checkout process on the e-commerce platform, enhancing their shopping experience. The extension will be available on e-commerce channels hosted on the Fynd platform, this extension allows customers to play interactive games and win discount coupon codes. By integrating this extension, businesses can increase user engagement and drive sales.
Steps to use Frolic Extension
Go to Extensions on the Fynd Platform.

Figure 1: Clicking Extensions Click Frolic extension.

Figure 2: Frolic extension noteOnce you install the extension, it will be available in the list here.
Select desired sales channel. Here we have selected Fynd Store.

Figure 3: Selecting the desired Sales Channel noteIf the extension is currently inactive for the selected sales channel, a message will be displayed saying To activate this extension, please configure it in the settings.
Select the widget you want to enable on your sales channel.

Figure 4: Selecting desired widget Select Communication Configuration.
.png)
Figure 5: Selecting Communication Configuration Select an email provider from the dropdown list for sending the customers an email about the discount coupons. Click Save.
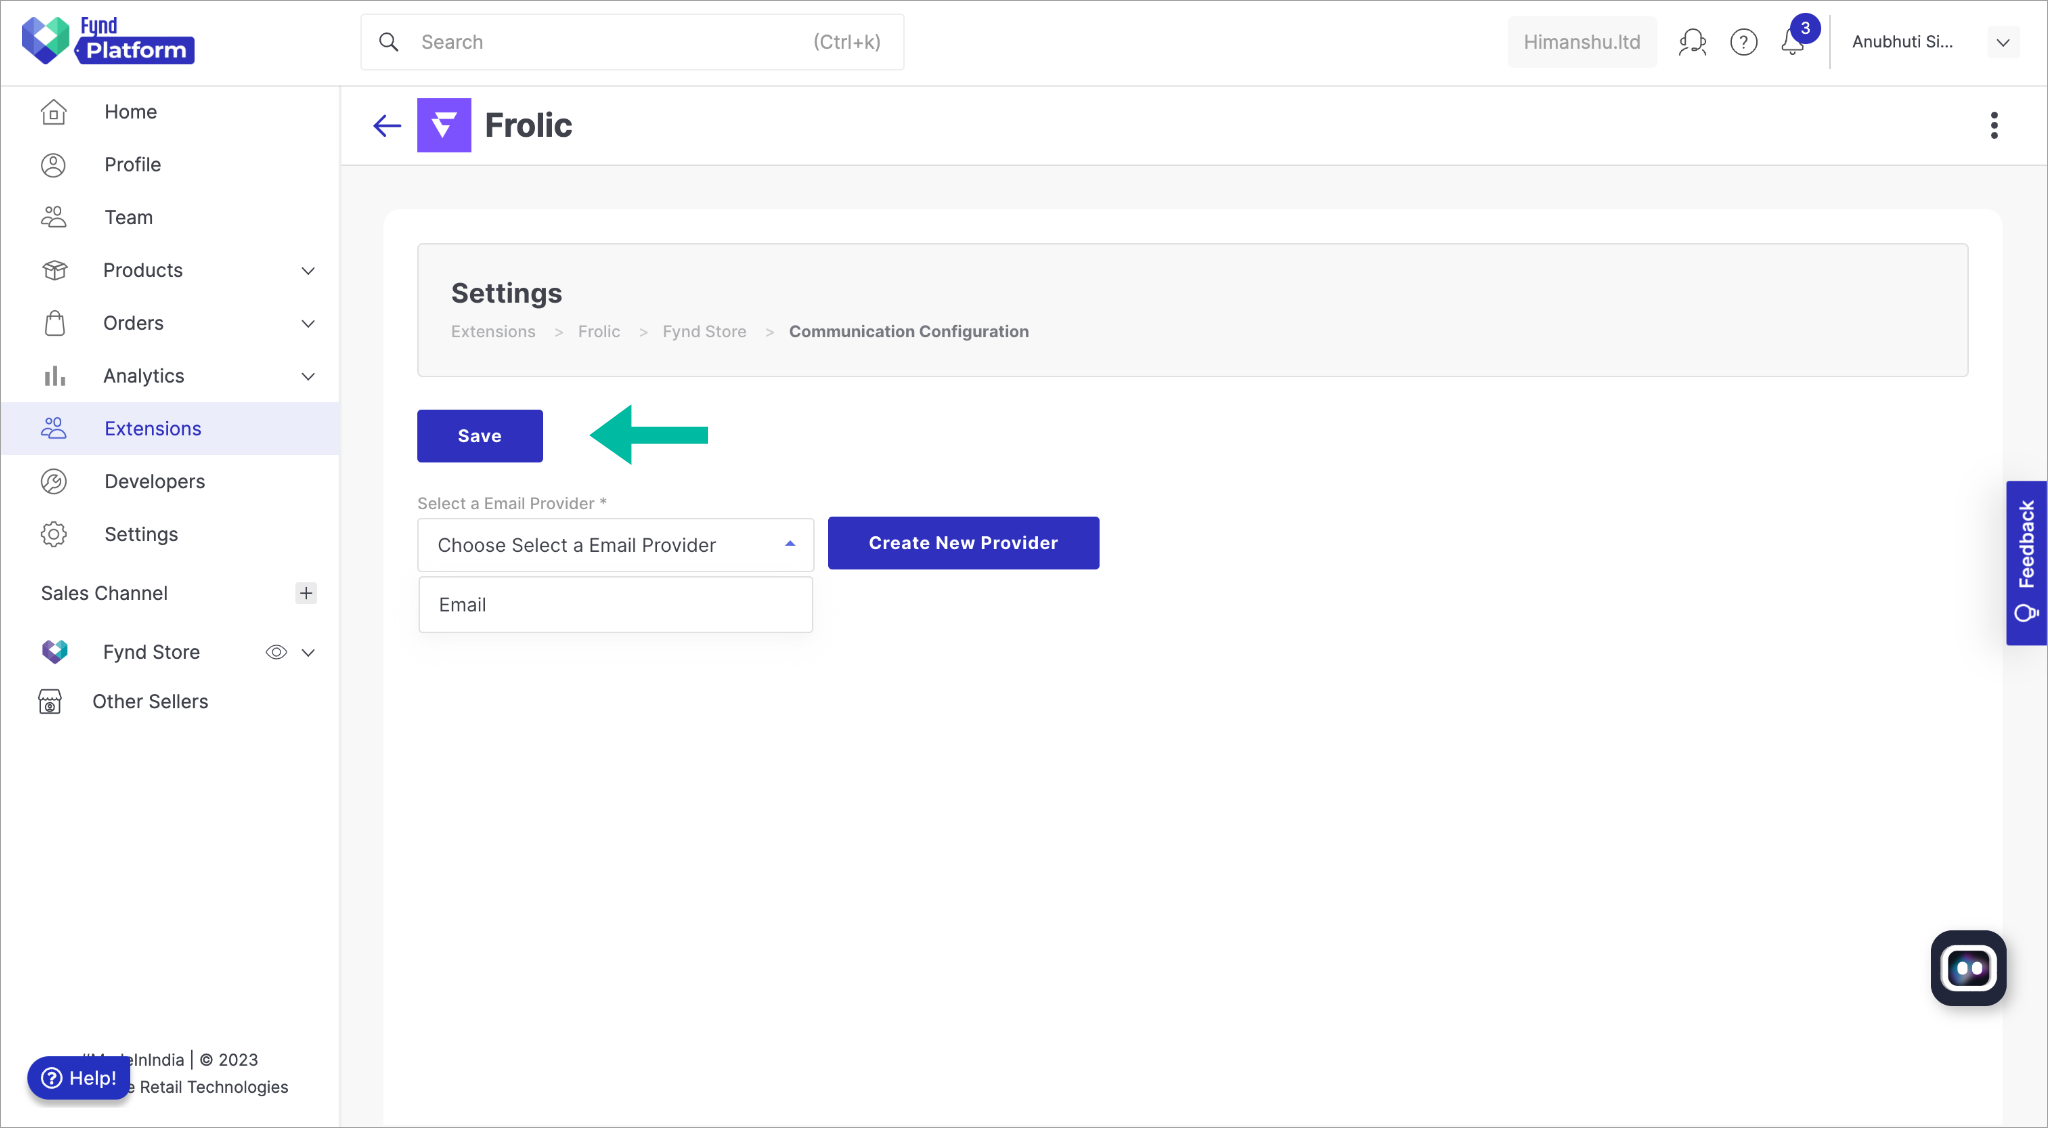
Figure 6: Setting up the Email Provider Toggle the button to activate the Frolic extension for the selected sales channel.
.png)
Figure 7: Making the extension Active Visit your sales channel on the Fynd platform. Once logged in as a registered customer, you will find the Frolic Extension logo prominently displayed. Click on the logo to access the interface. Here we will see the interface of the Slot Machine.
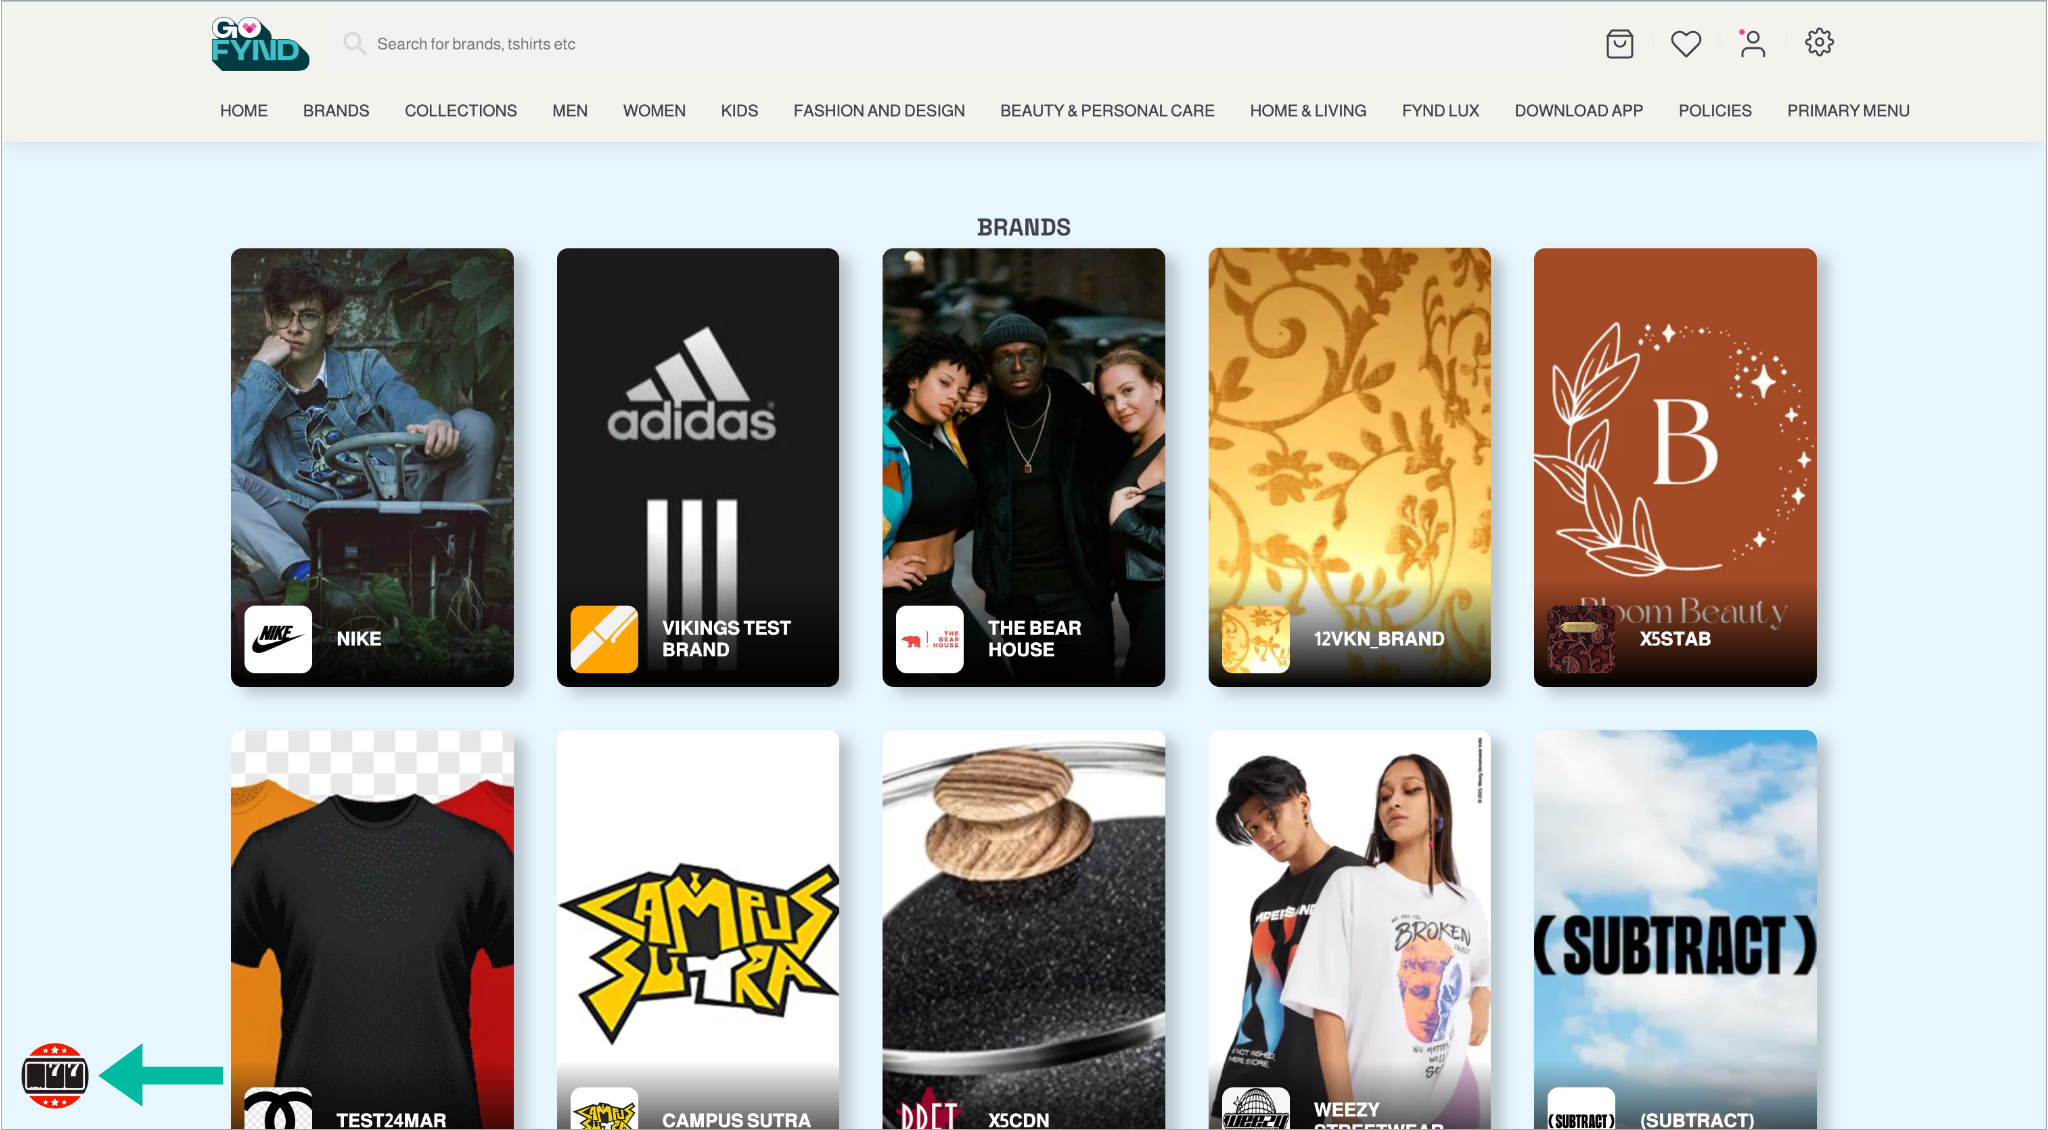
Figure 8: Extension on Home Page Click Press to Start to set the reels in motion. If you align three matching icons on the Slot Machine, you will instantly receive a discount coupon code as a prize.
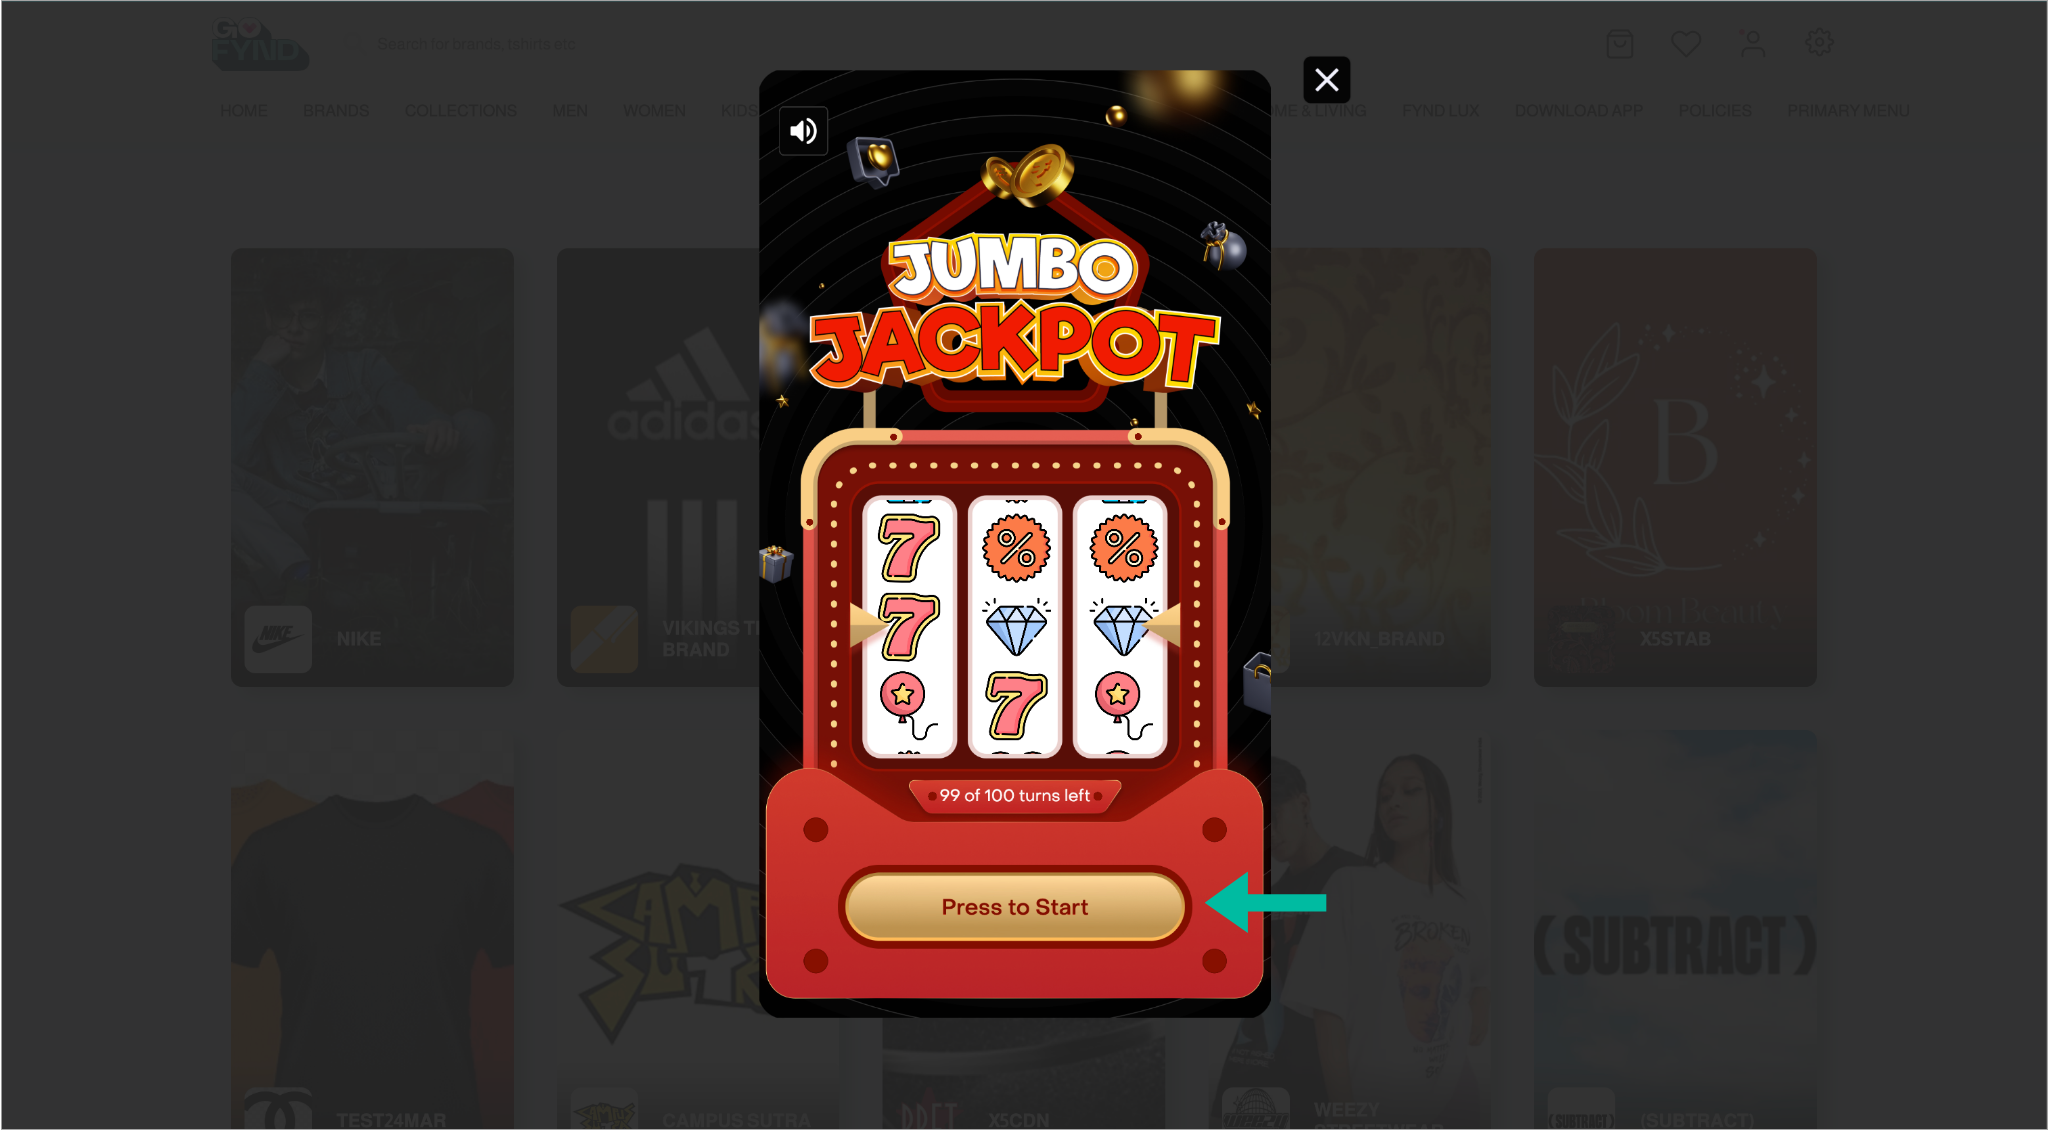
Figure 9: User Interface of the Slot Machine Locate the coupon code along with the other coupons on your account dashboard.
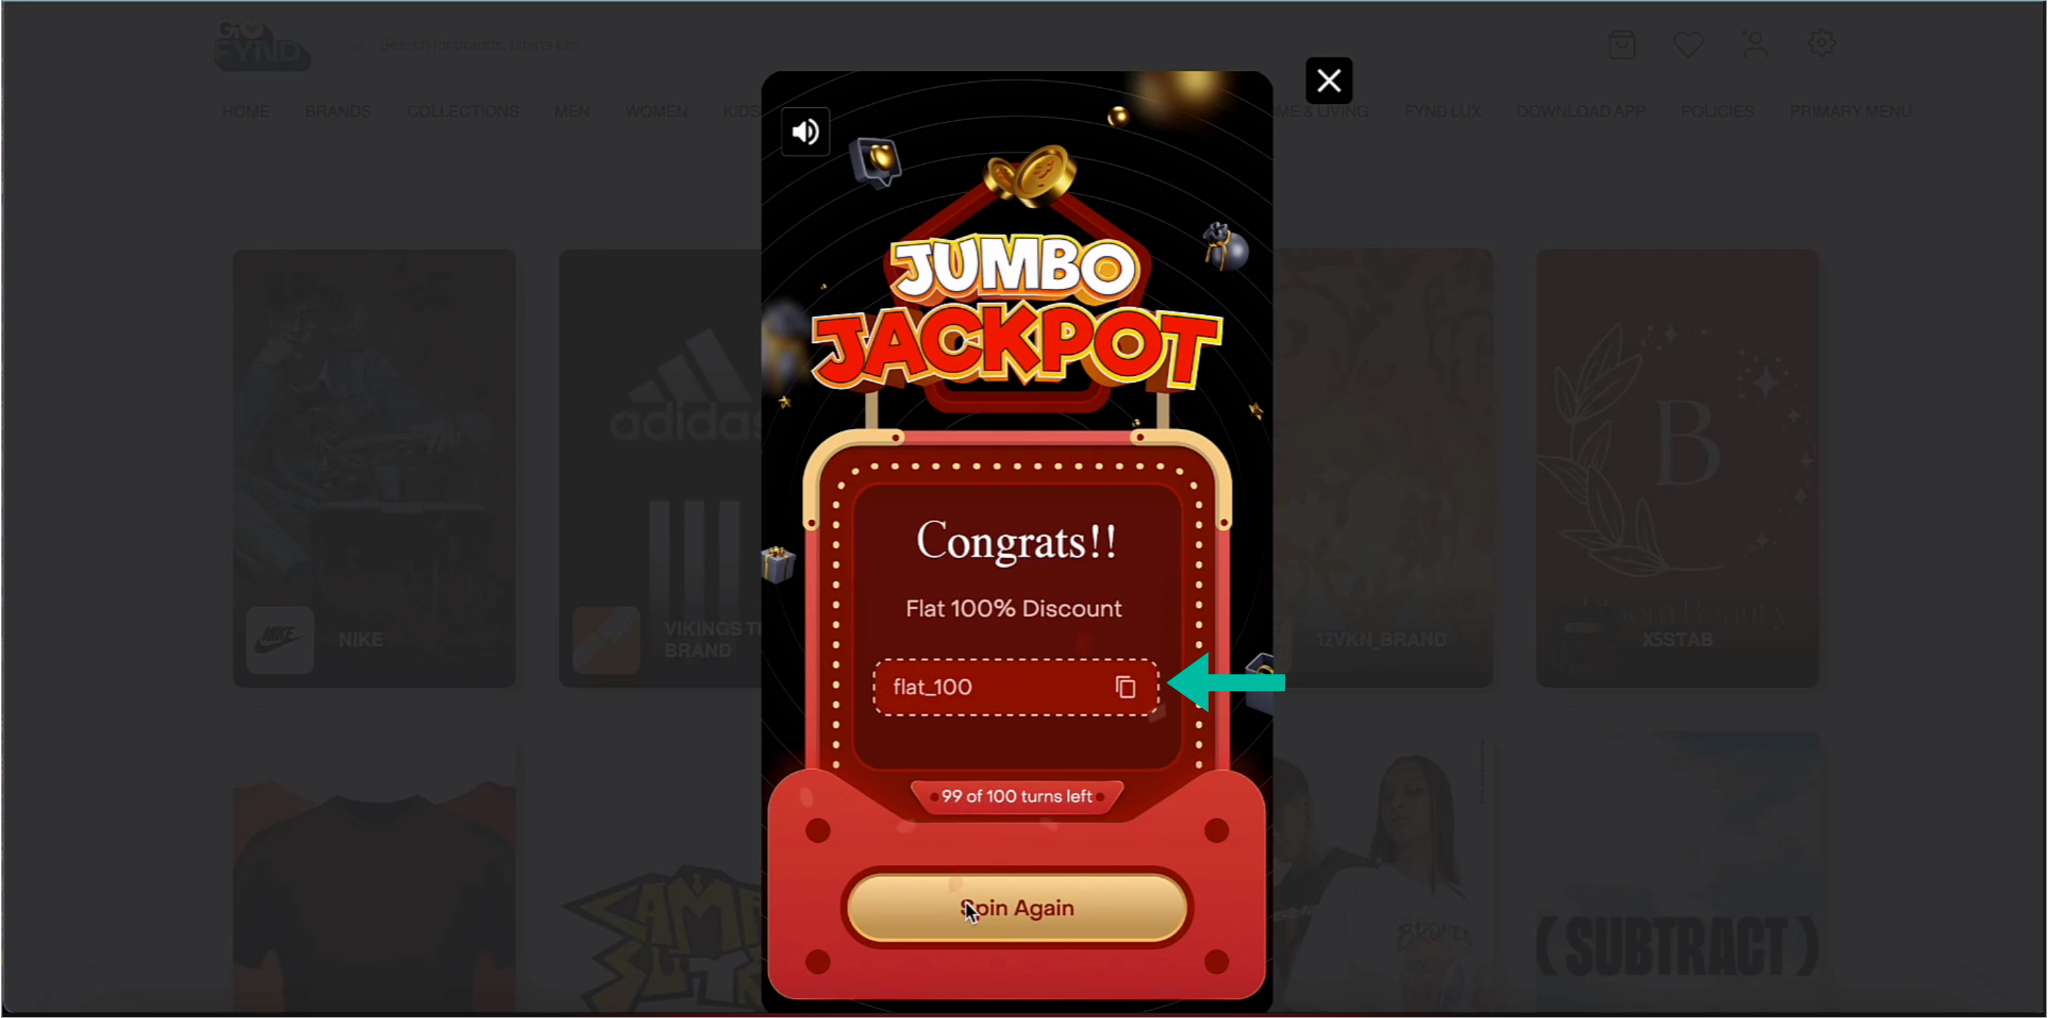
Figure 10: Received Coupon
An email notification will also be sent to you, informing you about the coupon you have received through the Slot Machine or Spin The Wheel.
Slot Machine Widget
Select Slot Machine from the features
.png)
Figure 11: Clicking on Slot Machine Click Pool Settings
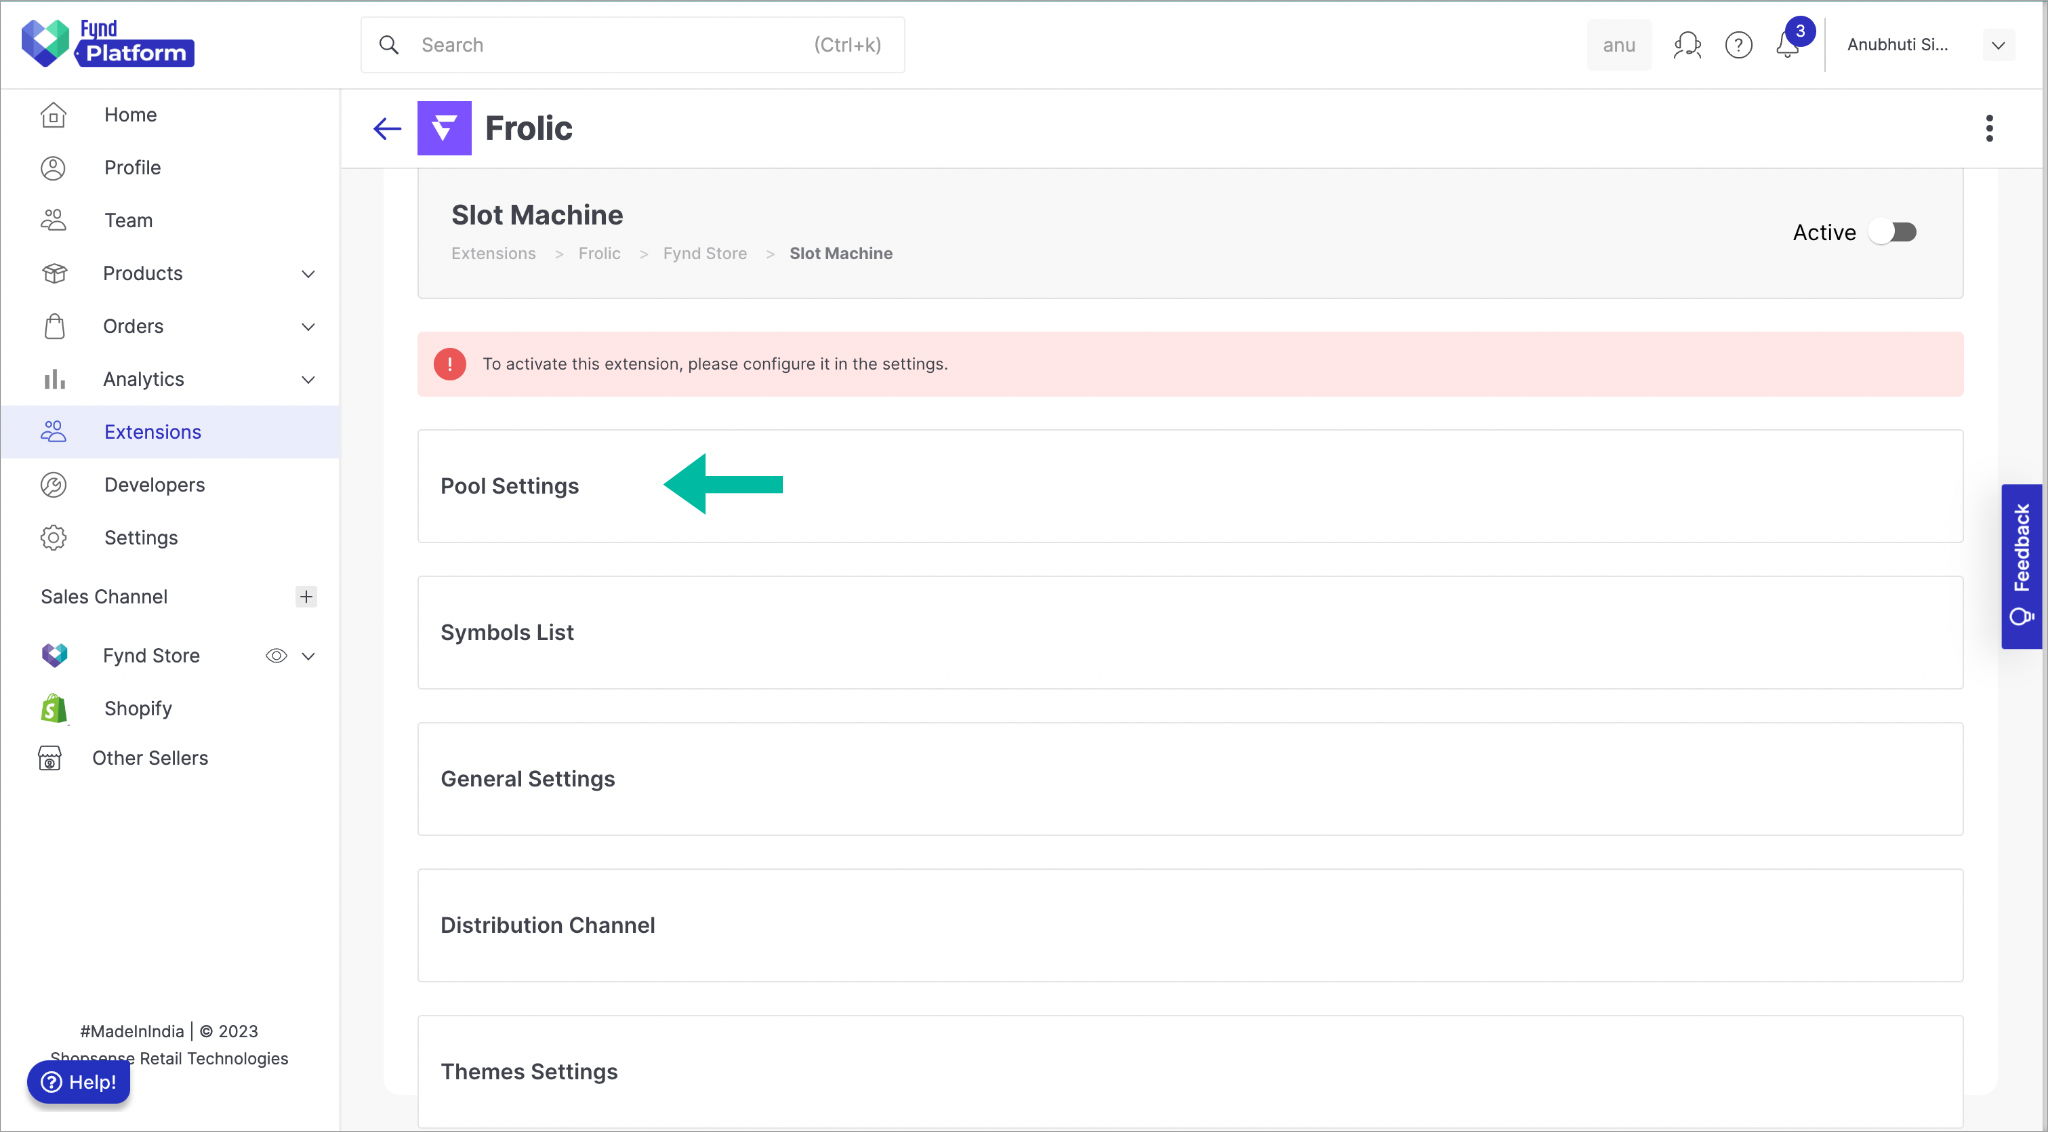
Figure 12: Clicking on Pool Settings Configure the Pool Settings according to your requirements. This includes setting the parameters for the pool, such as the symbol for the slot, the coupon and the probability to get that coupon. you can add more than 1 pool if required.
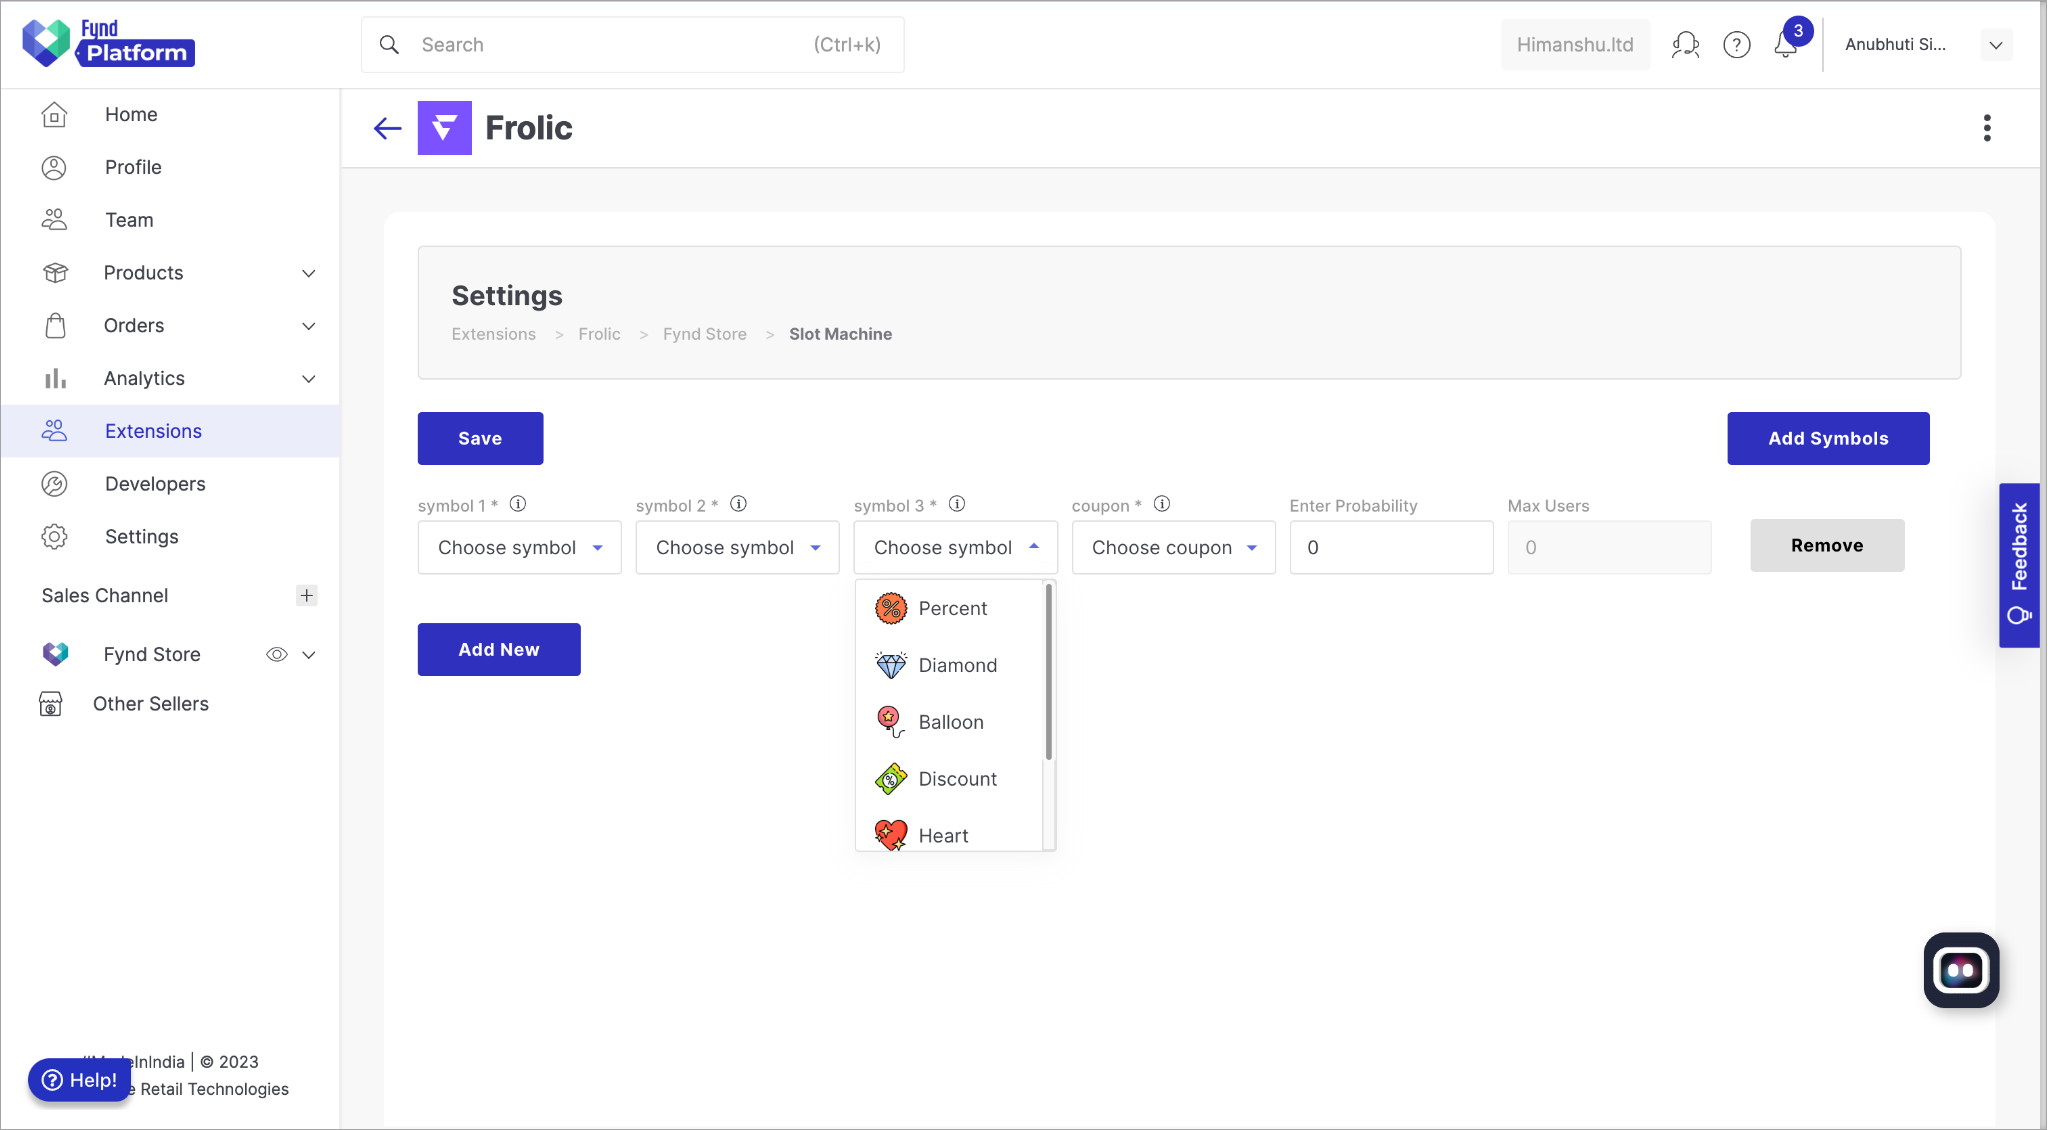
Figure 13: Configuring the Pool Settings Click Save to save the Pool Settings.
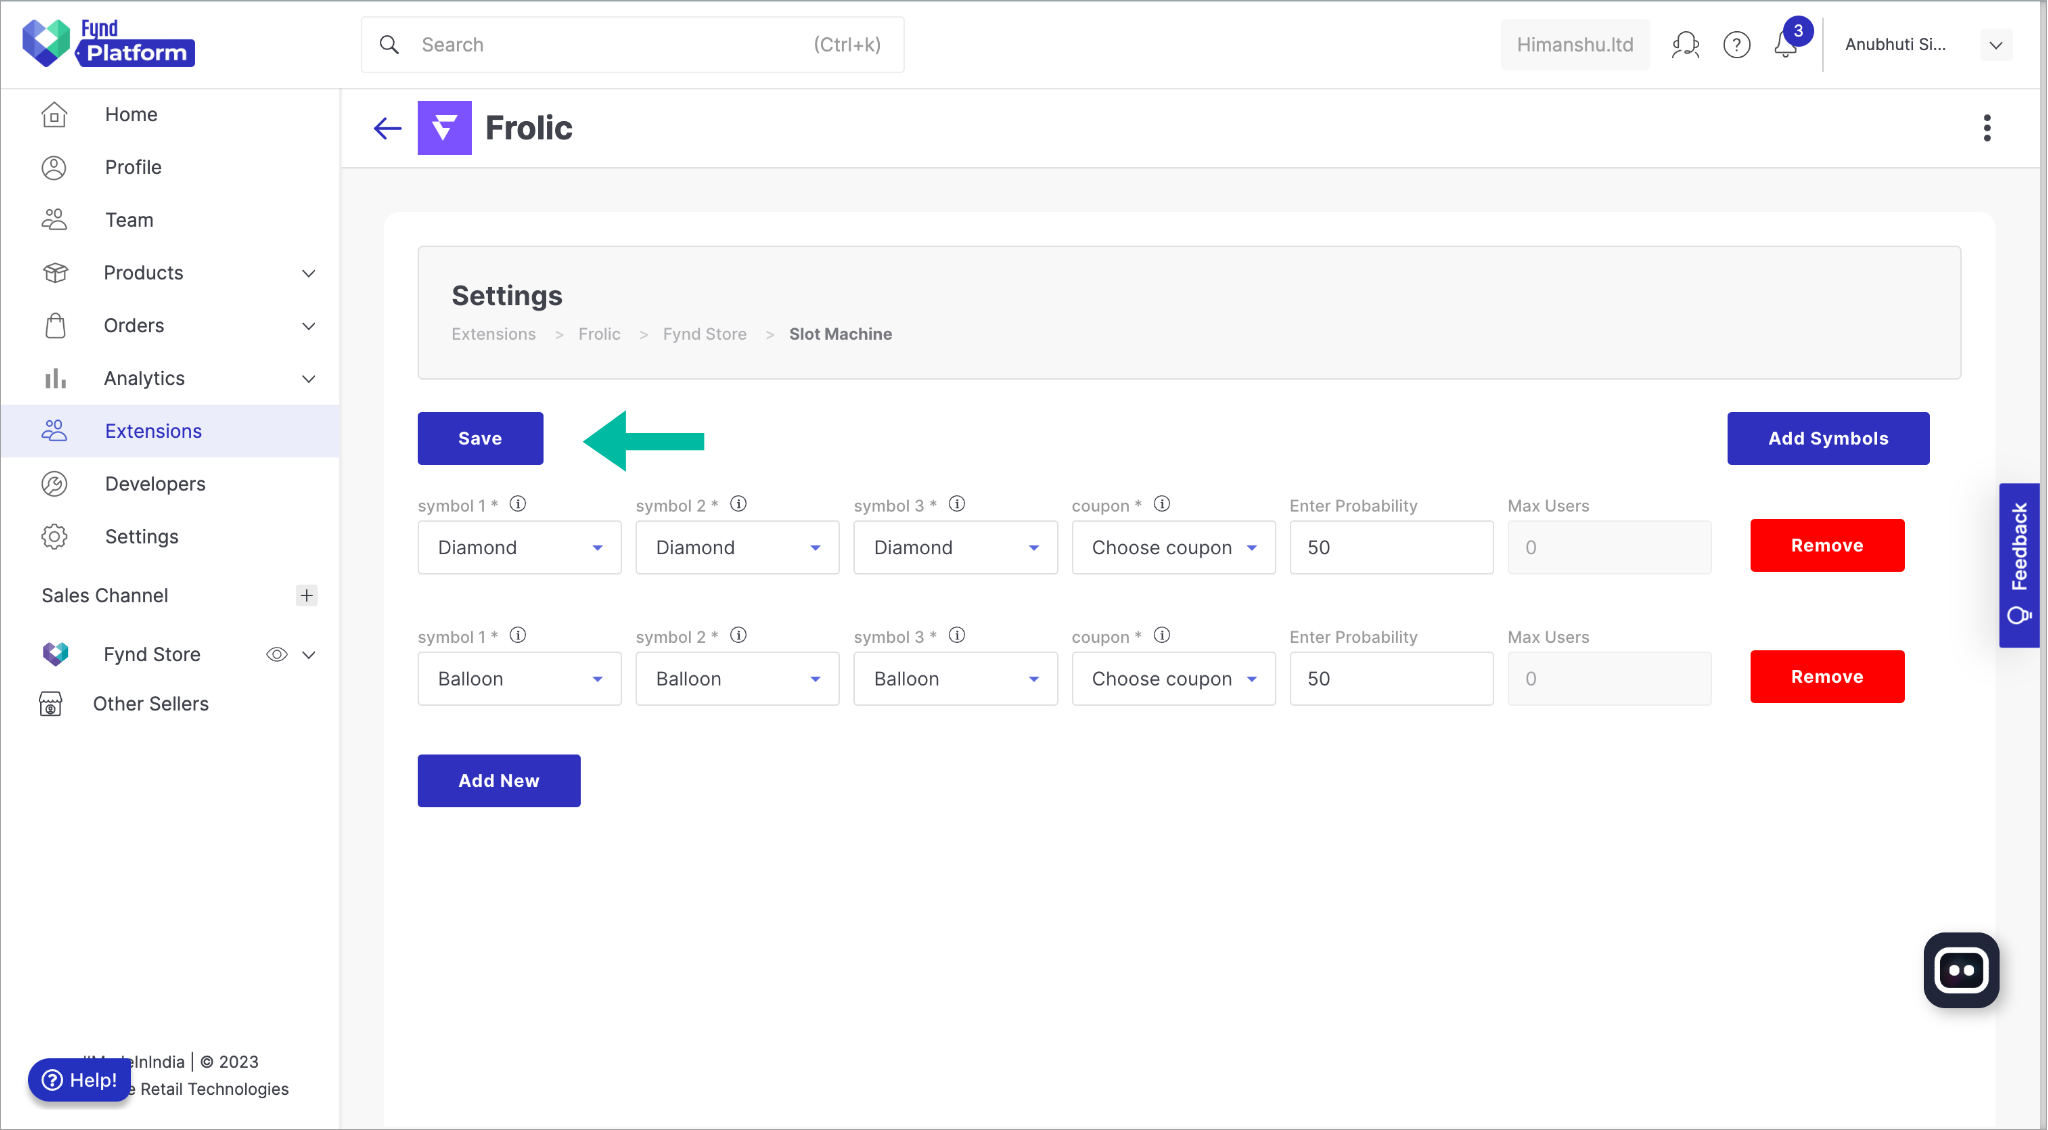
Figure 14: Saving the Pool Settings noteIf the pool is not set, customers will see the message Better luck next time when using the Slot Machine.
Select Symbols List to view the symbols used in the Slot Machine. By default, some symbols will already be present.
.png)
Figure 15: Symbols List Click Create Symbols If you wish to create a new symbol for your slot machine.
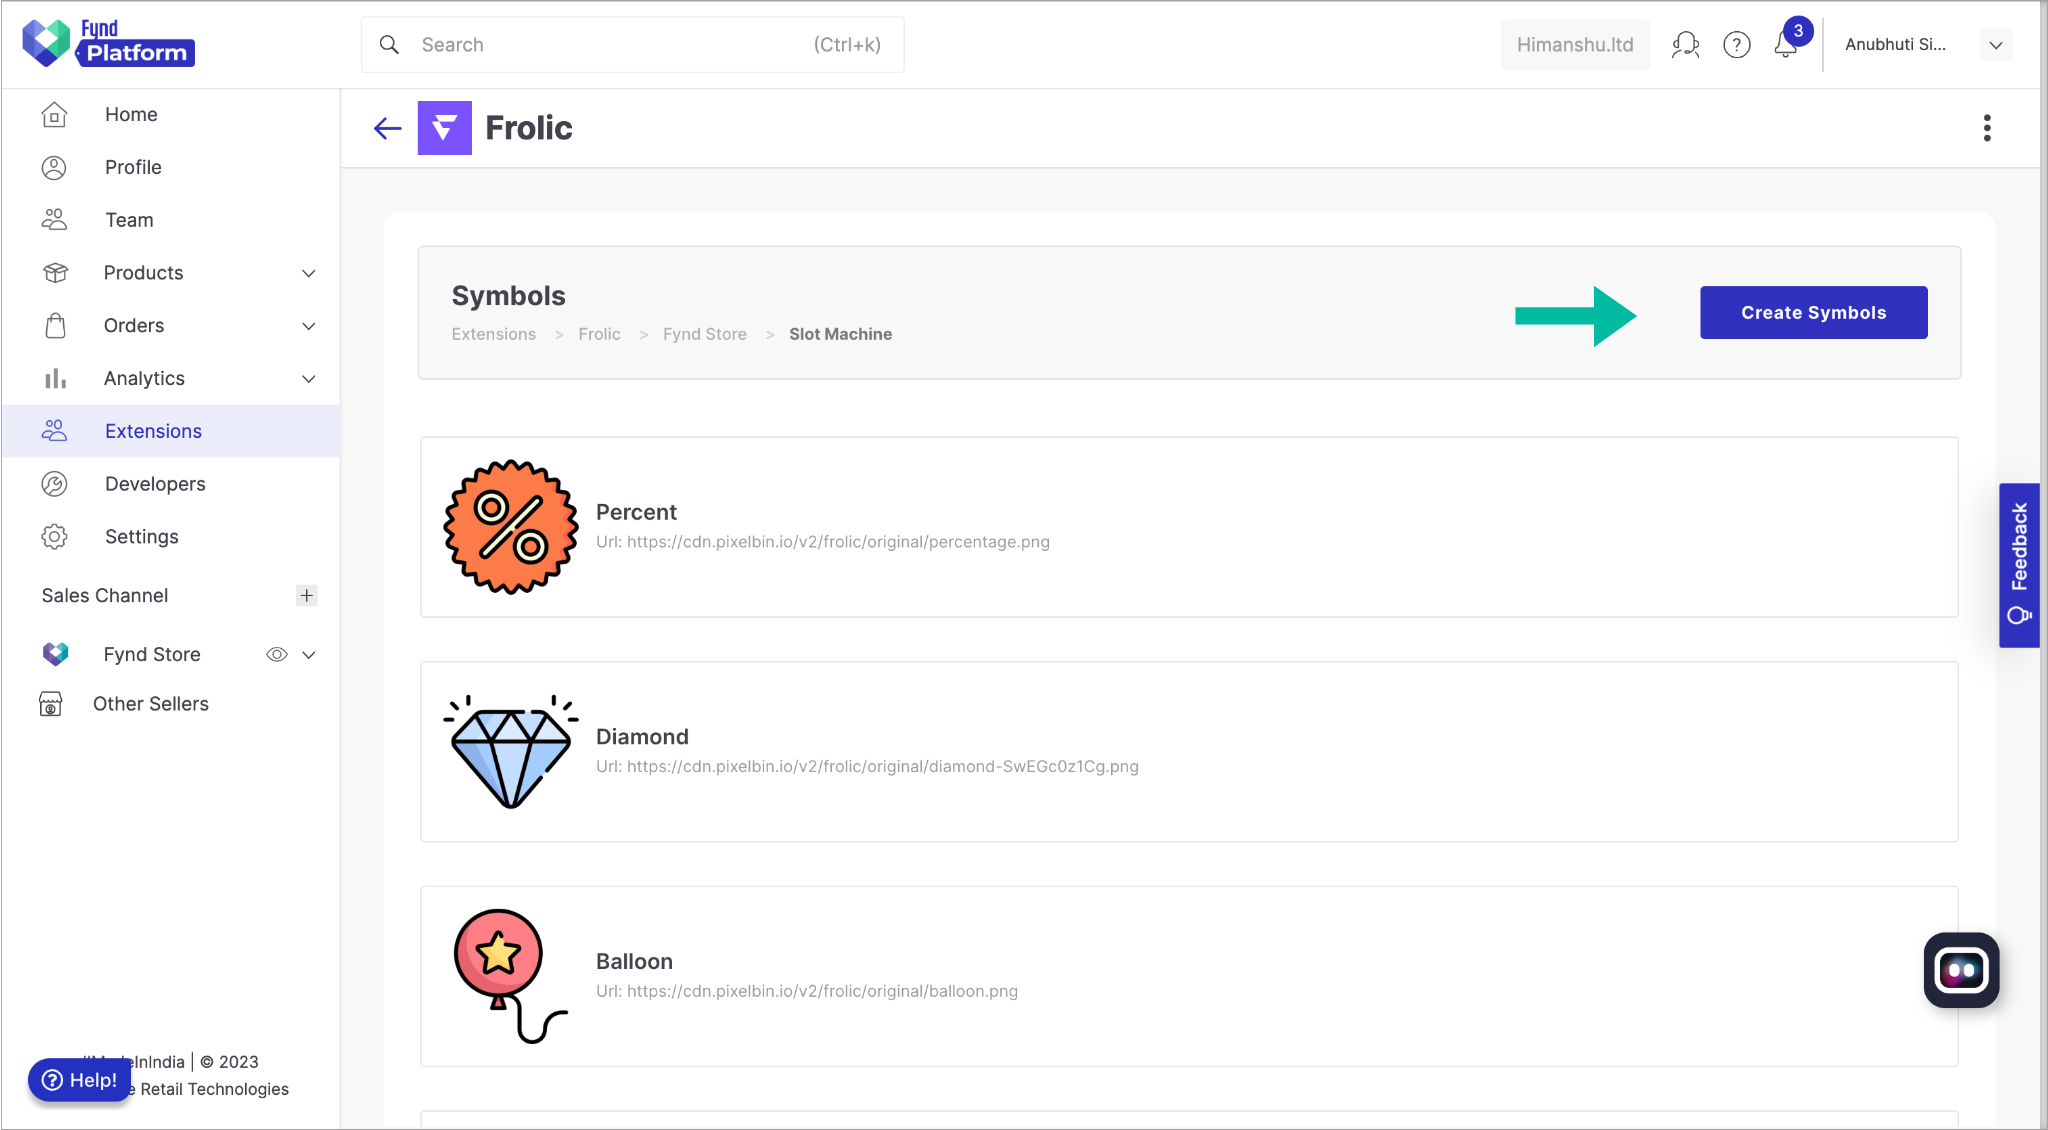
Figure 16: Creating a new Symbol Click General Settings.
.png)
Figure 17: Clicking General Settings Set Max Spin Per Day*. For example, if you set this value to 10, users will have a maximum of 10 spins on the slot machine per day. Click Save.
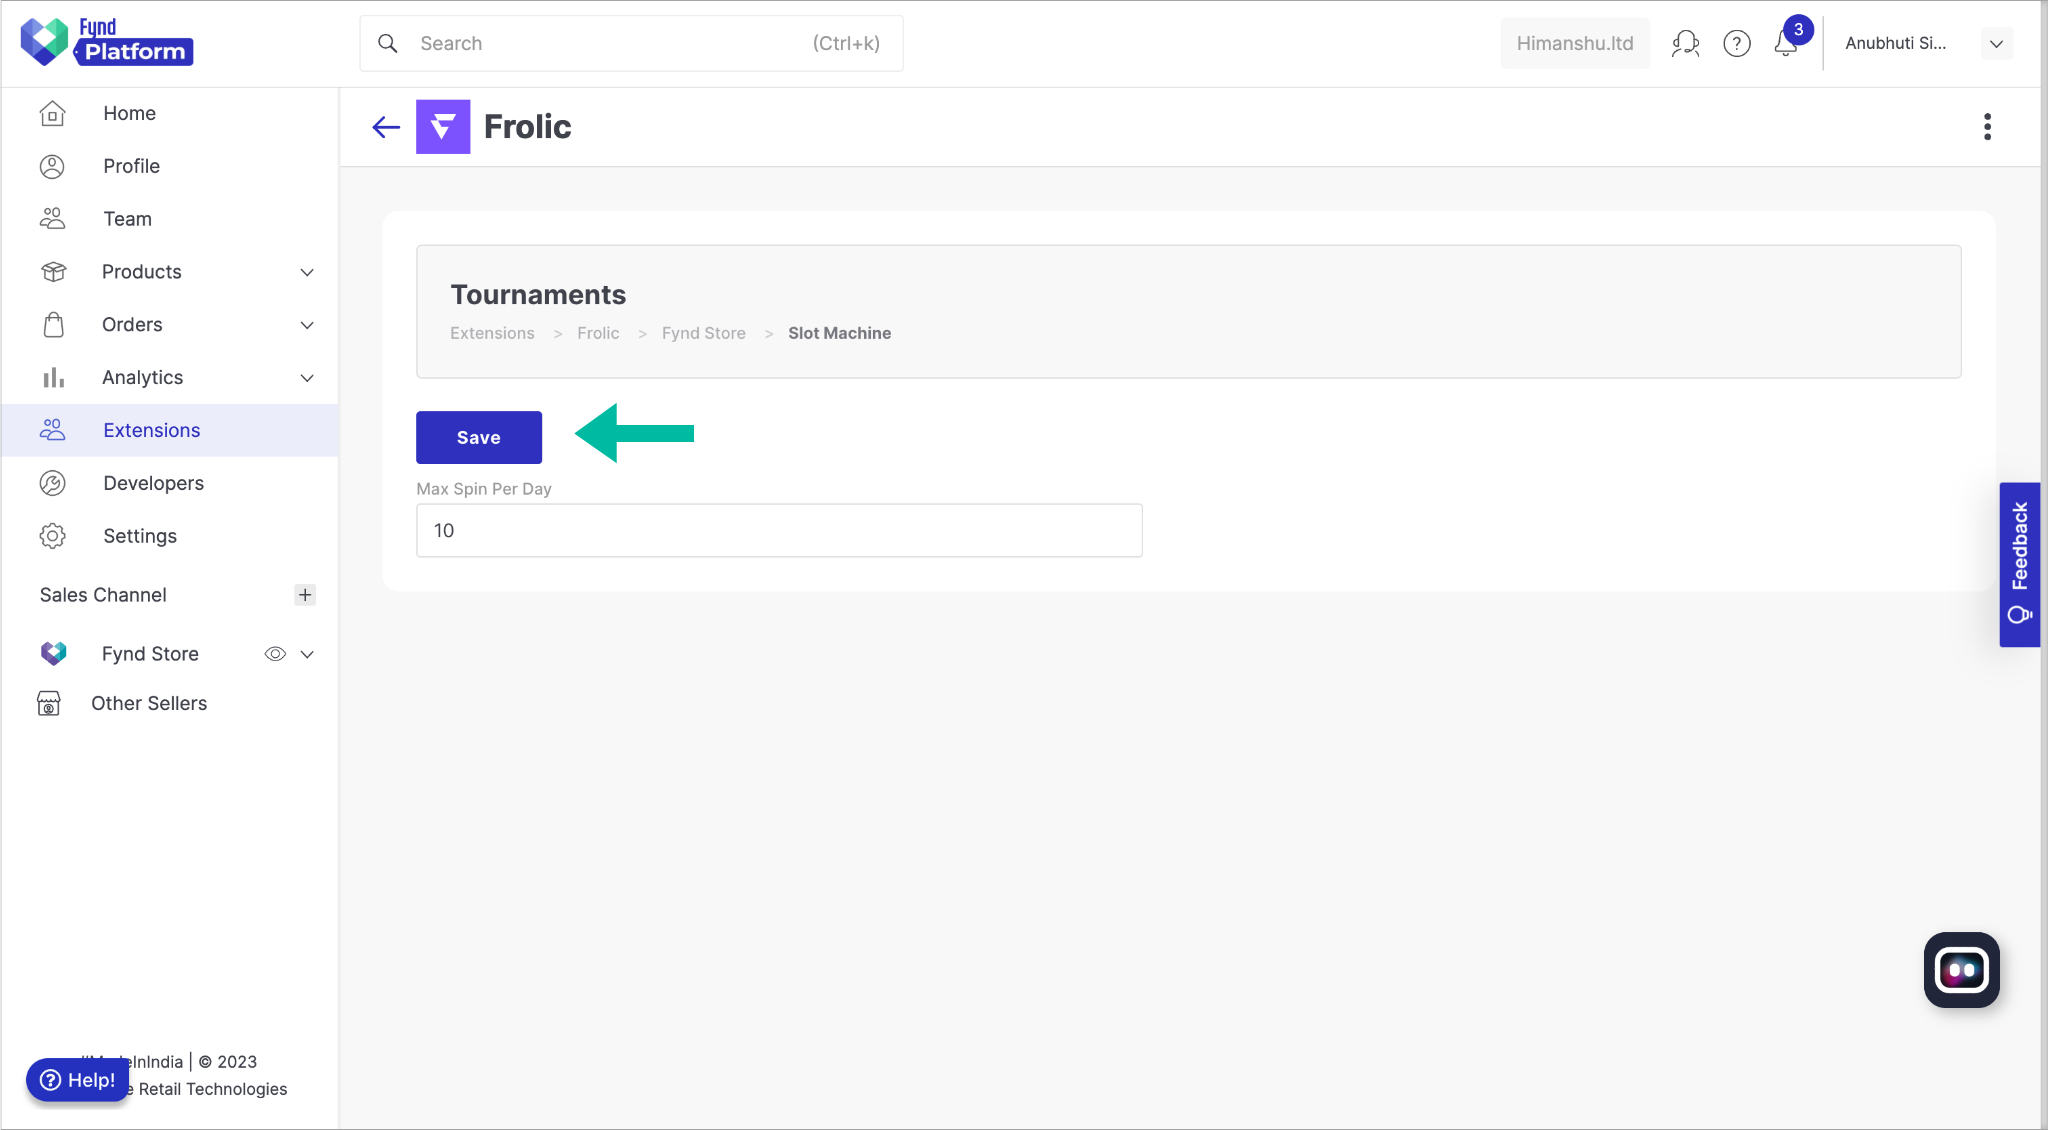
Figure 18: Configuring General Settings Click Distribution Channel.
.png)
Figure 19: Clicking Distribution Channel Select whether you want the extension to be visible as Popup or Banner on the page.
.png)
Figure 20: Selecting Popup or Banner Select the position on the page where you want the pop up to be displayed.
.png)
Figure 21: Selecting the position of the Popup Click Save.
.png)
Figure 22: Clicking Save Click Themes Settings.
.png)
Figure 23: Selecting Themes Settings Set the Primary, Secondary and Font colour as required. The preview of the slot machine will be visible on the screen as you set the colours.
.png)
Figure 24: Setting the colours as required Click Save to save the Themes Settings.
.png)
Figure 25: Saving the Themes Settings Toggle the button the activate Slot Machine Widget of Frolic extension on your sales channel.
.png)
Figure 26: Activate Slot Machine for sales cahnnel
Spin The Wheel Widget.
Click Spin The Wheel from the features
.png)
Figure 27: Clicking on Spin The Wheel Click Pool Settings
.png)
Figure 28: Pool Settings Configure the Pool Settings according to your requirements. You can add more than pools if required.
.png)
Figure 29: Configuring the Pool Settings Click Save to save the Pool Settings.
.png)
Figure 30: Saving the Pool Settings noteSum of all the Pool Probability should be equal to 100 (Provide Probability to the Try Again Pool Also). In Select Coupon Dropdown -> Select No Offer coupon for all the Try Again / Better Luck Next Time Pools. If the pool is not set, customers will see the message Better luck next time when using the Slot Machine.
Select General Settings.
.png)
Figure 31: General Settings Set Max Spin Per Day*. For example, if you set this value to 10, users will have a maximum of 10 spins on Spin The Wheel per day. Click Save.
.png)
Figure 32: Configuring General Settings Select Distribution Channel.
.png)
Figure 33: Clicking Distribution Channel Select whether you want the extension to be visible as Popup or Banner on the page.
.png)
Figure 34: Selecting Popup or Banner Select the position on the page where you want the pop up to be displayed.
.png)
Figure 35: Selecting the position of the Popup Click Save.
.png)
Figure 36: Clicking Save Select Themes Settings.
.png)
Figure 37: Selecting Themes Settings Set the Primary, Secondary and Font colour as required. The preview of Spin The Wheel will be visible on the screen as you set the colours.
.png)
Figure 38: Setting the colours as required Click Save to save the Themes Settings.
.png)
Figure 39: Saving the Themes Settings Toggle the button the activate Spin The Wheel Widget of Frolic extension on your sales channel.
.png)
Figure 40: Activate Spin The Wheel for sales cahnnel
In the upcoming sections, you'll learn about the way in which you can create a coupon to be used as a prize for the widgets and you will learn how to configure the redirection link of extension for your sales channel.
Creating Coupons for Slot Machine and Spin The Wheel Prizes
To offer enticing prizes for the widgets, you can create coupons that customers can redeem during the checkout process. Follow the steps below to create a coupon:
Click drop-down icon next to your sales channel and select Marketing from the list.
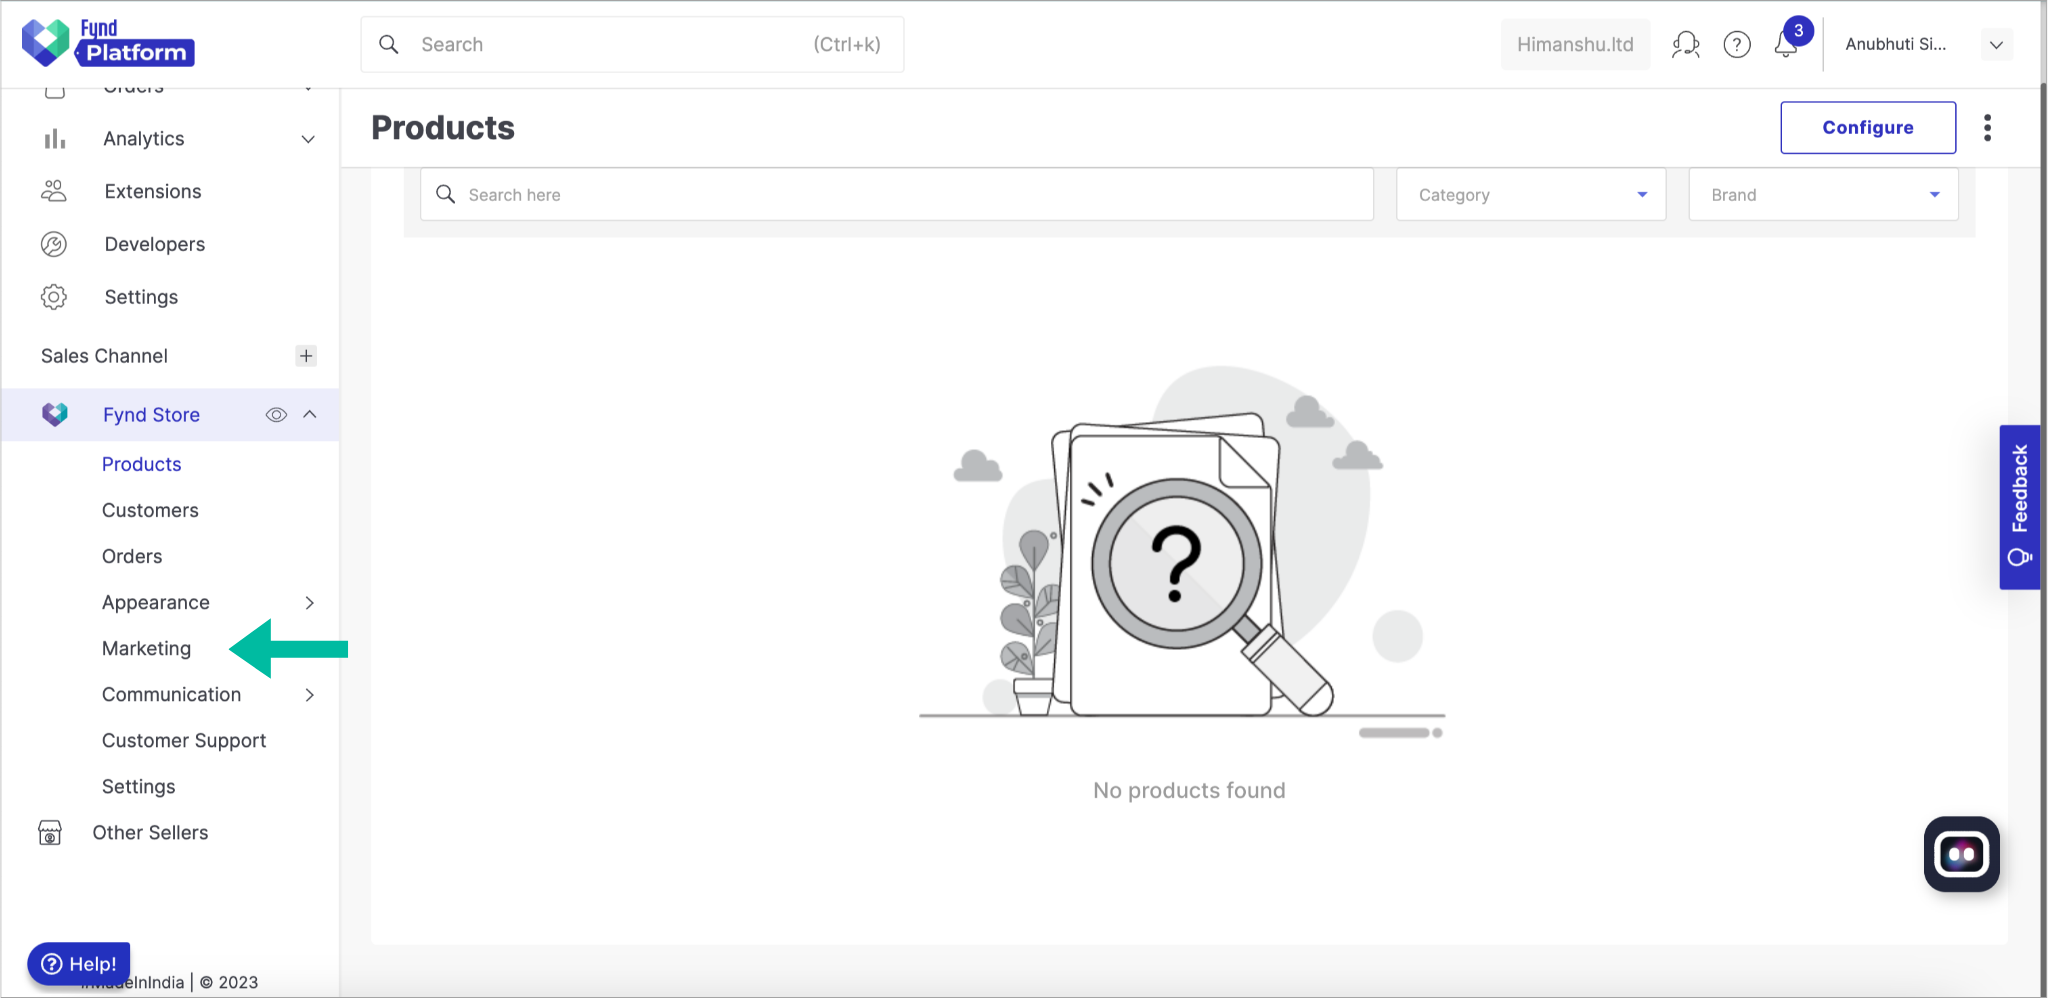
Figure 41: Selecting Marketing Select Coupons and you will be redirected to a page displaying all the coupons created before.
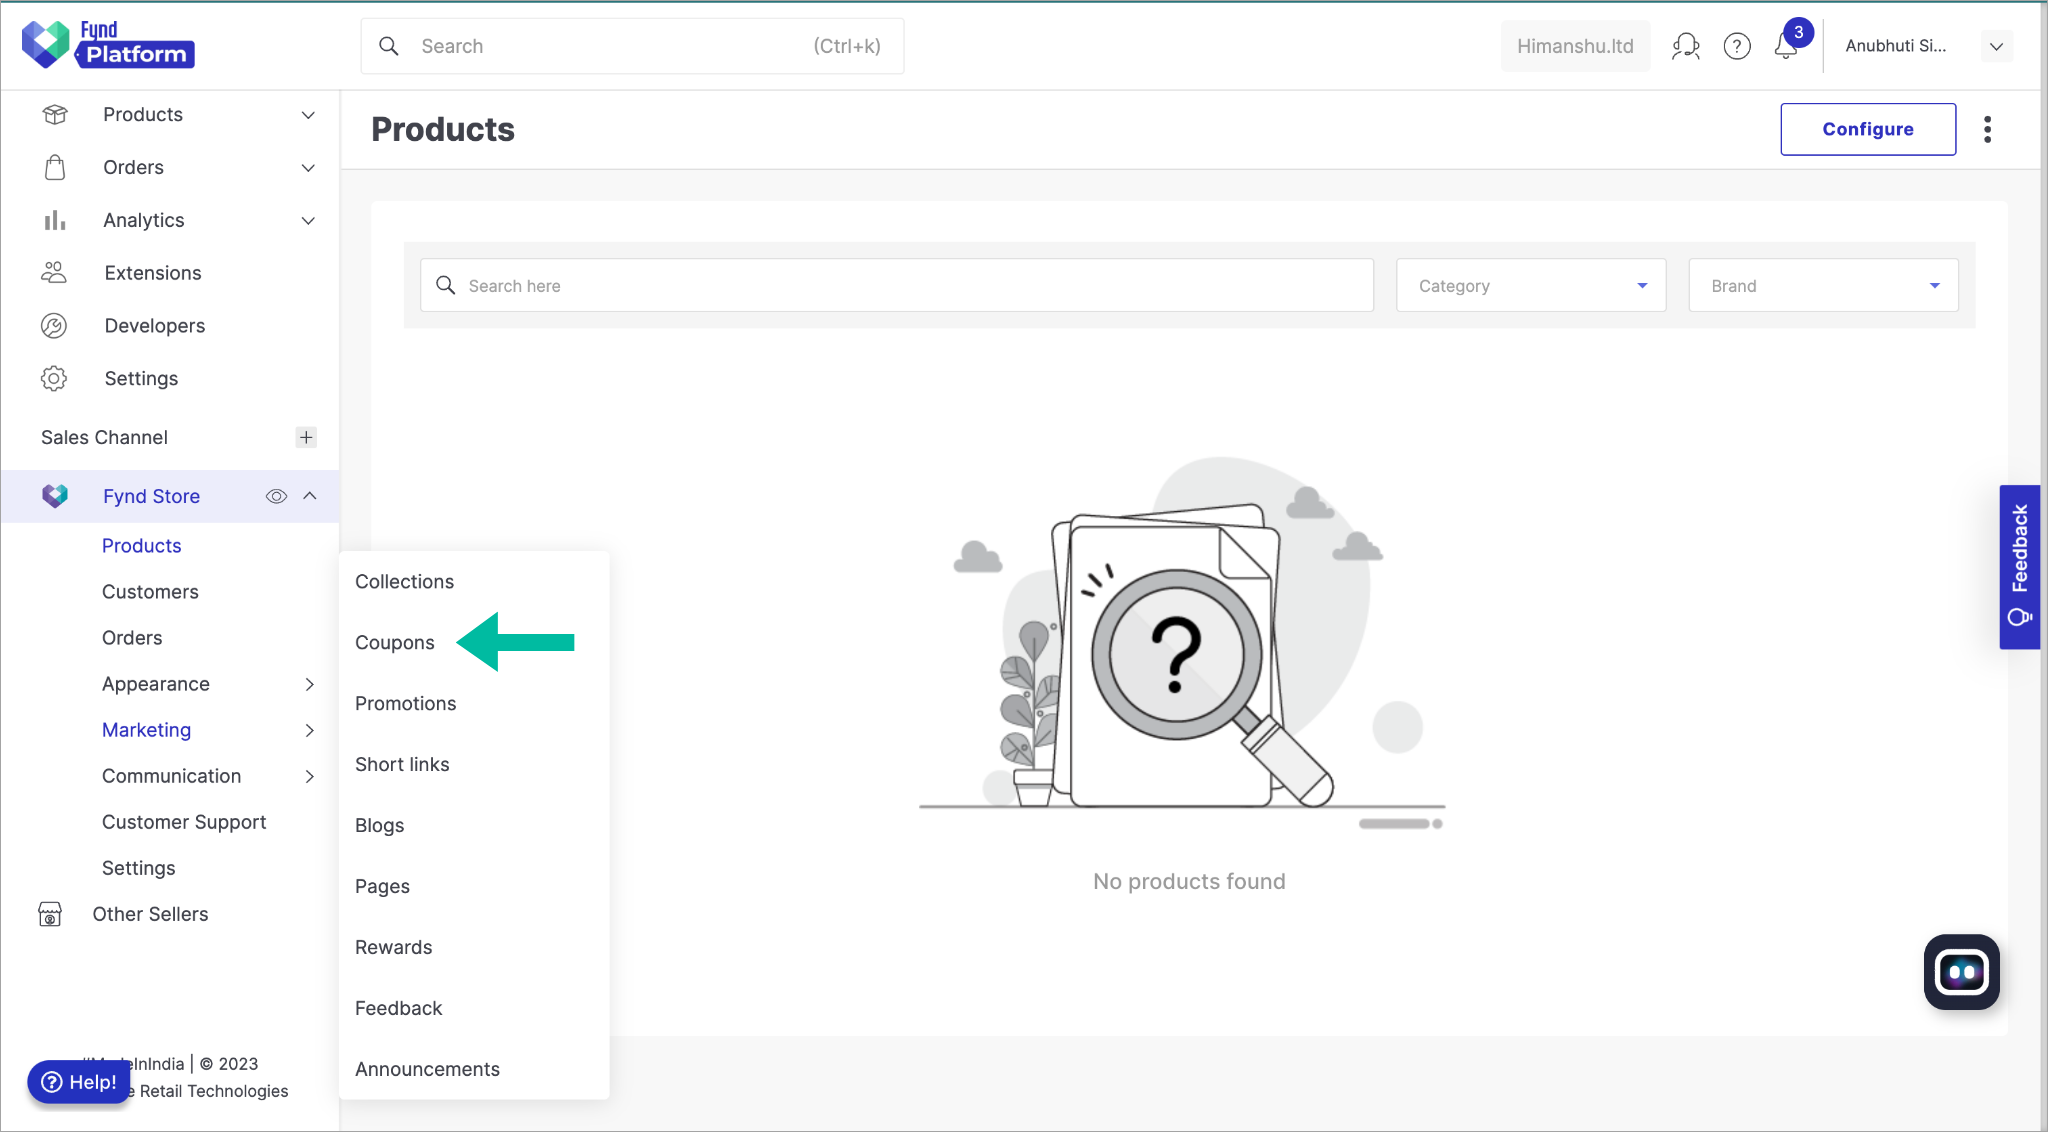
Figure 42: Selecting Coupons Click Create.
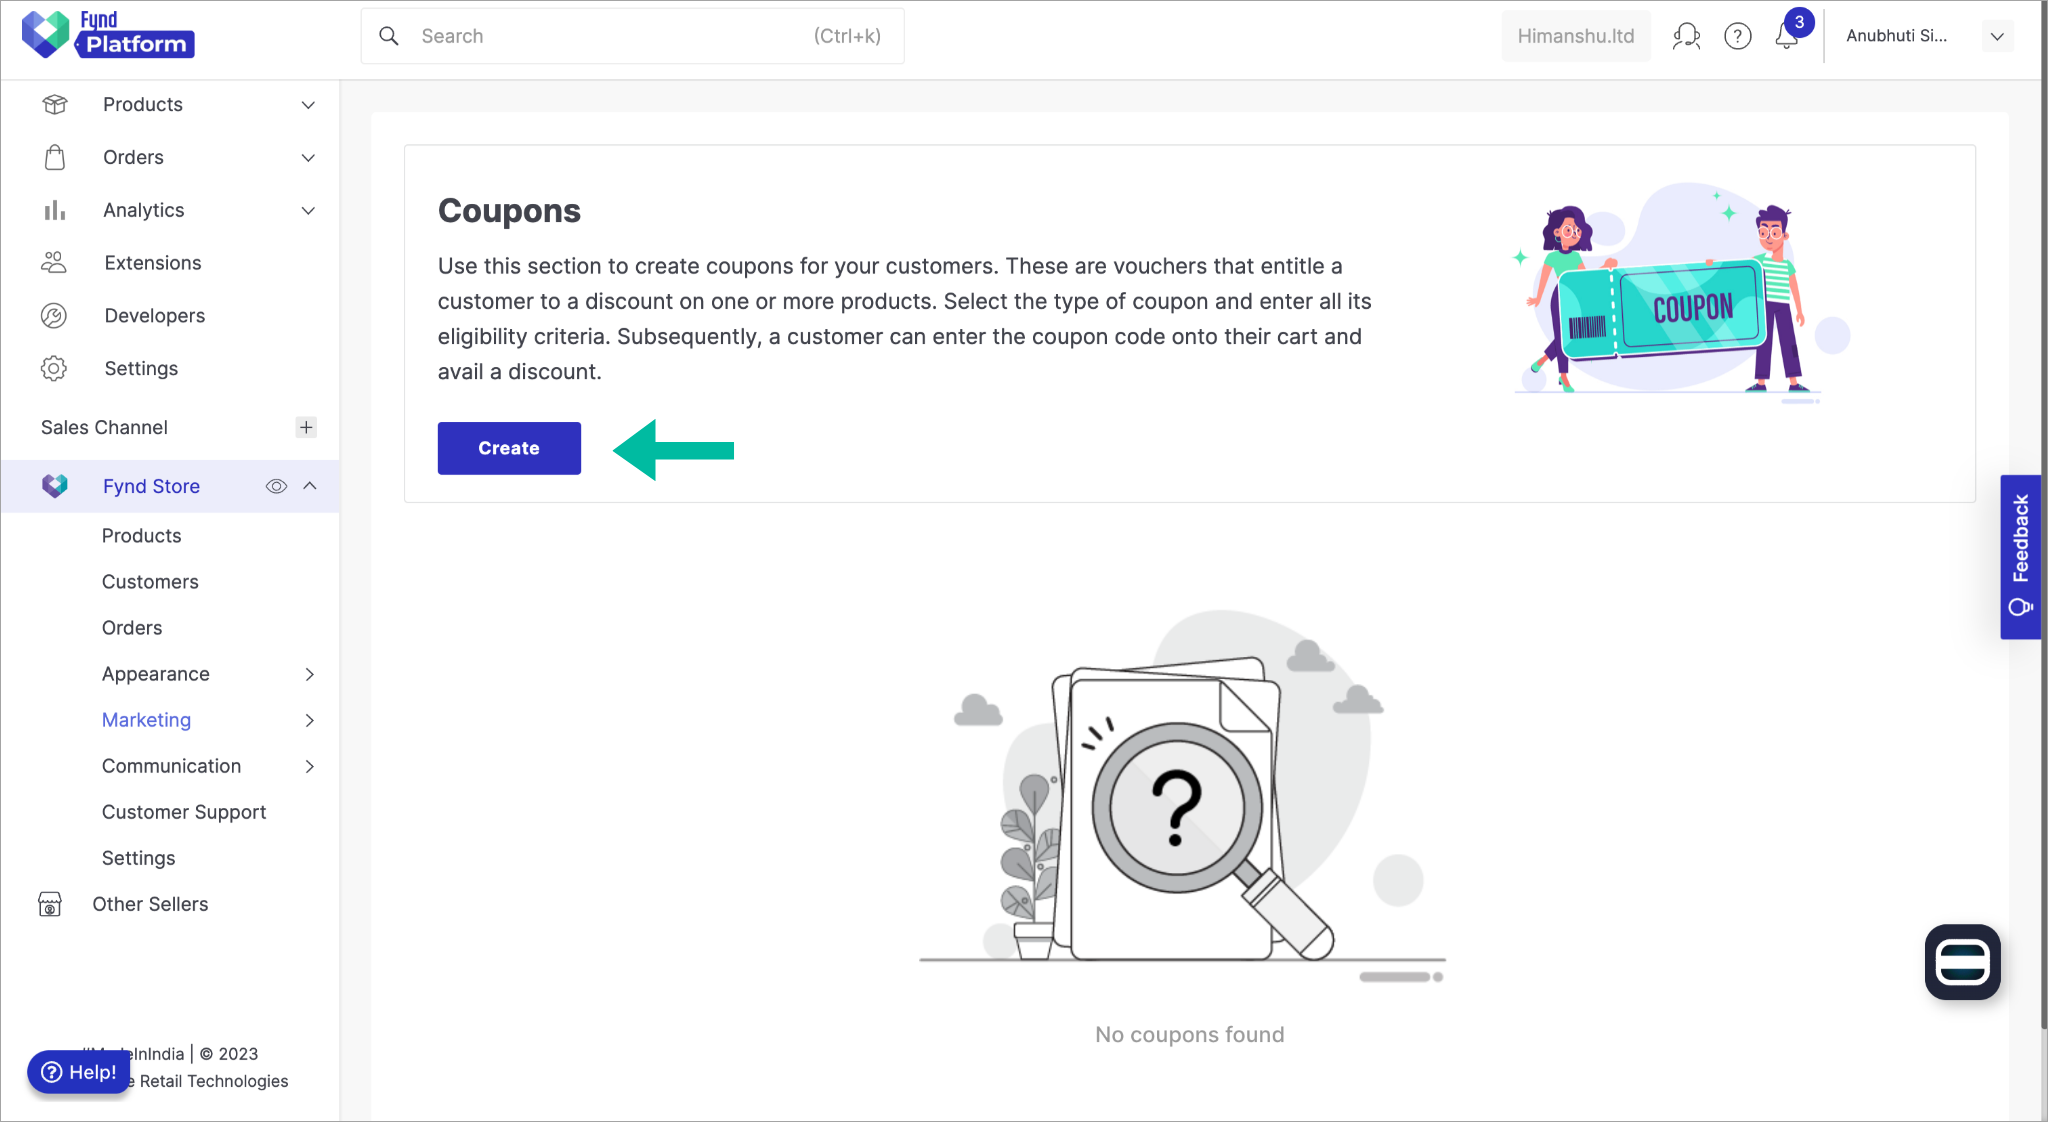
Figure 43: Creating a new Coupon Select the type of coupon you want to create. Here we have selected X percentage value.
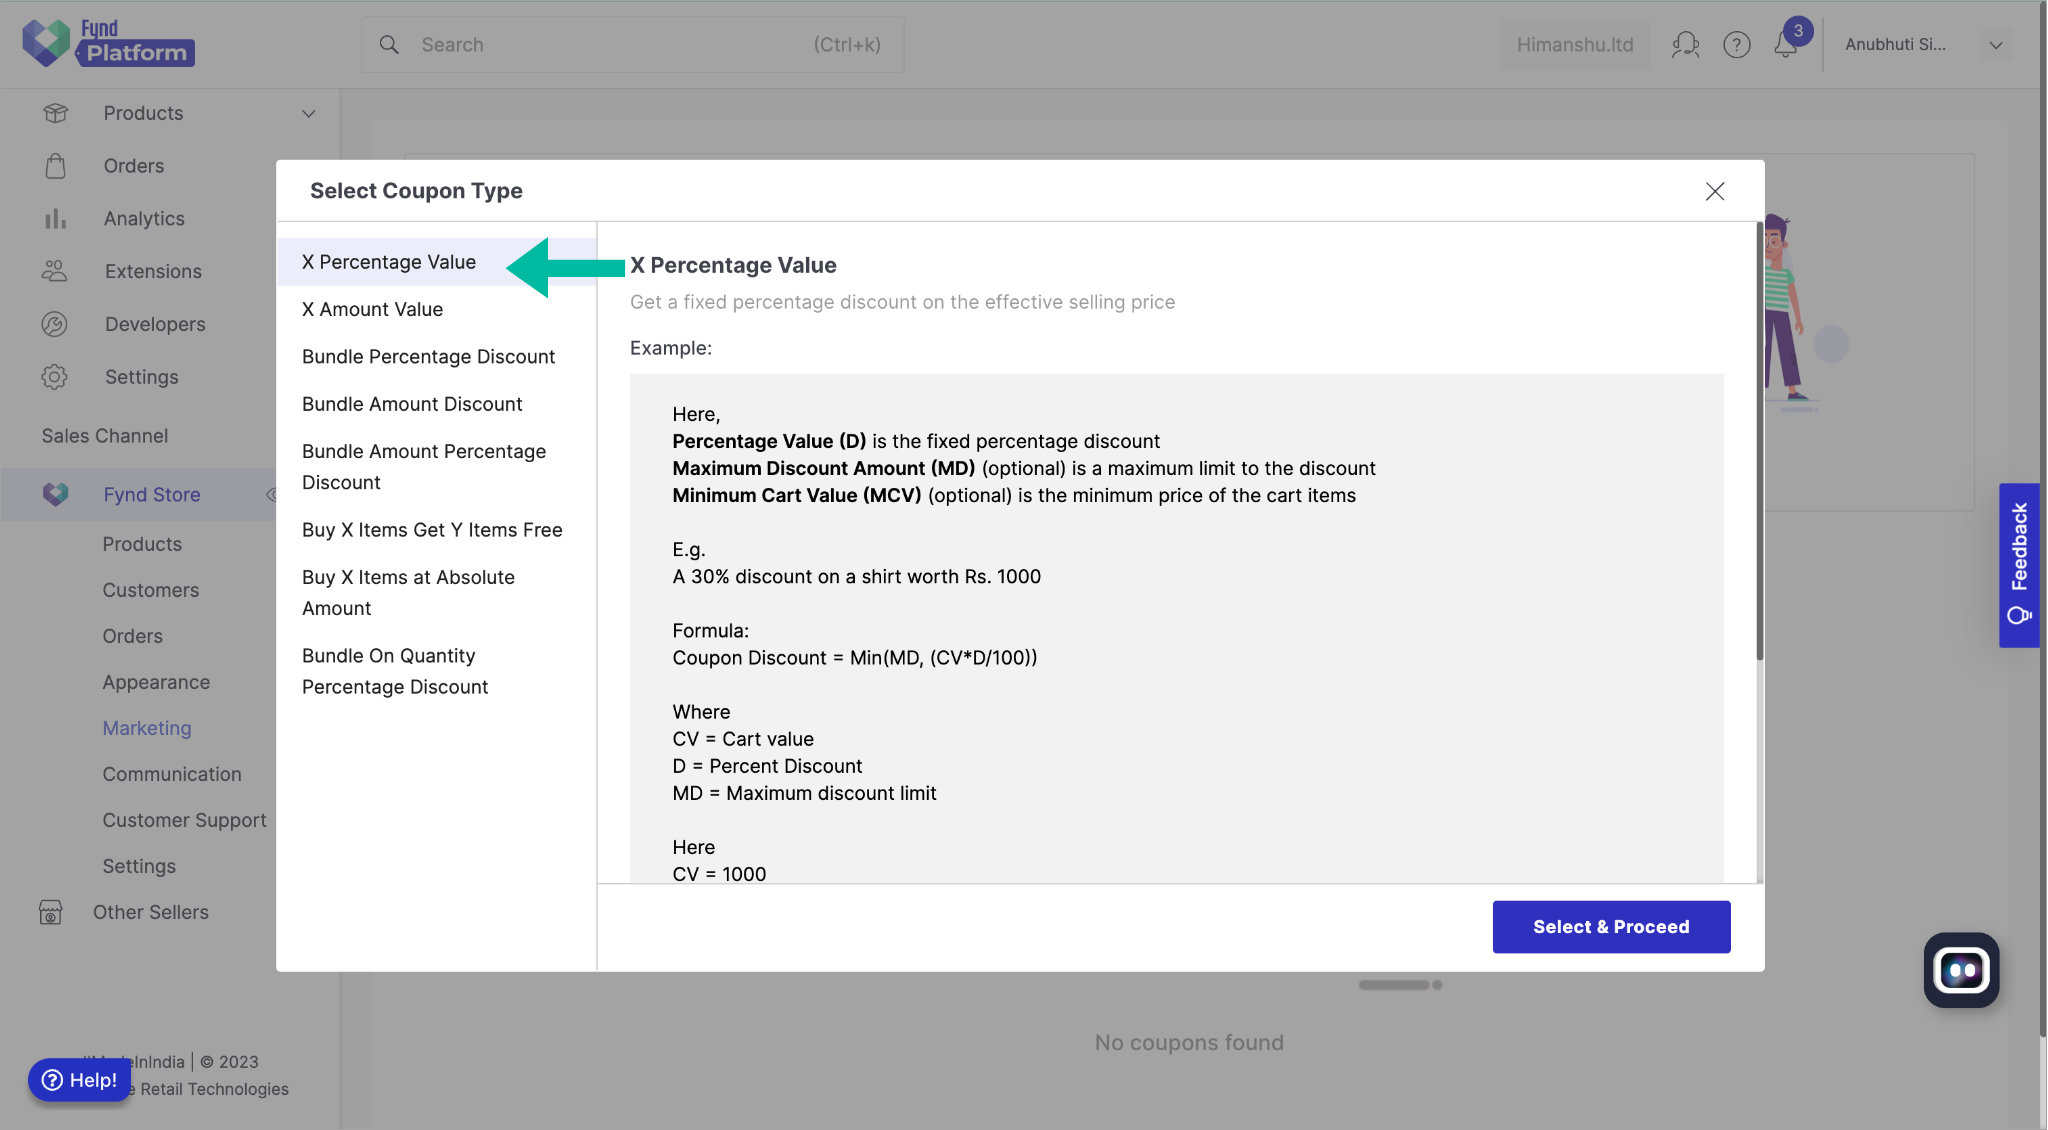
Figure 44: Selecting the Coupon Type Click Select & Proceed.
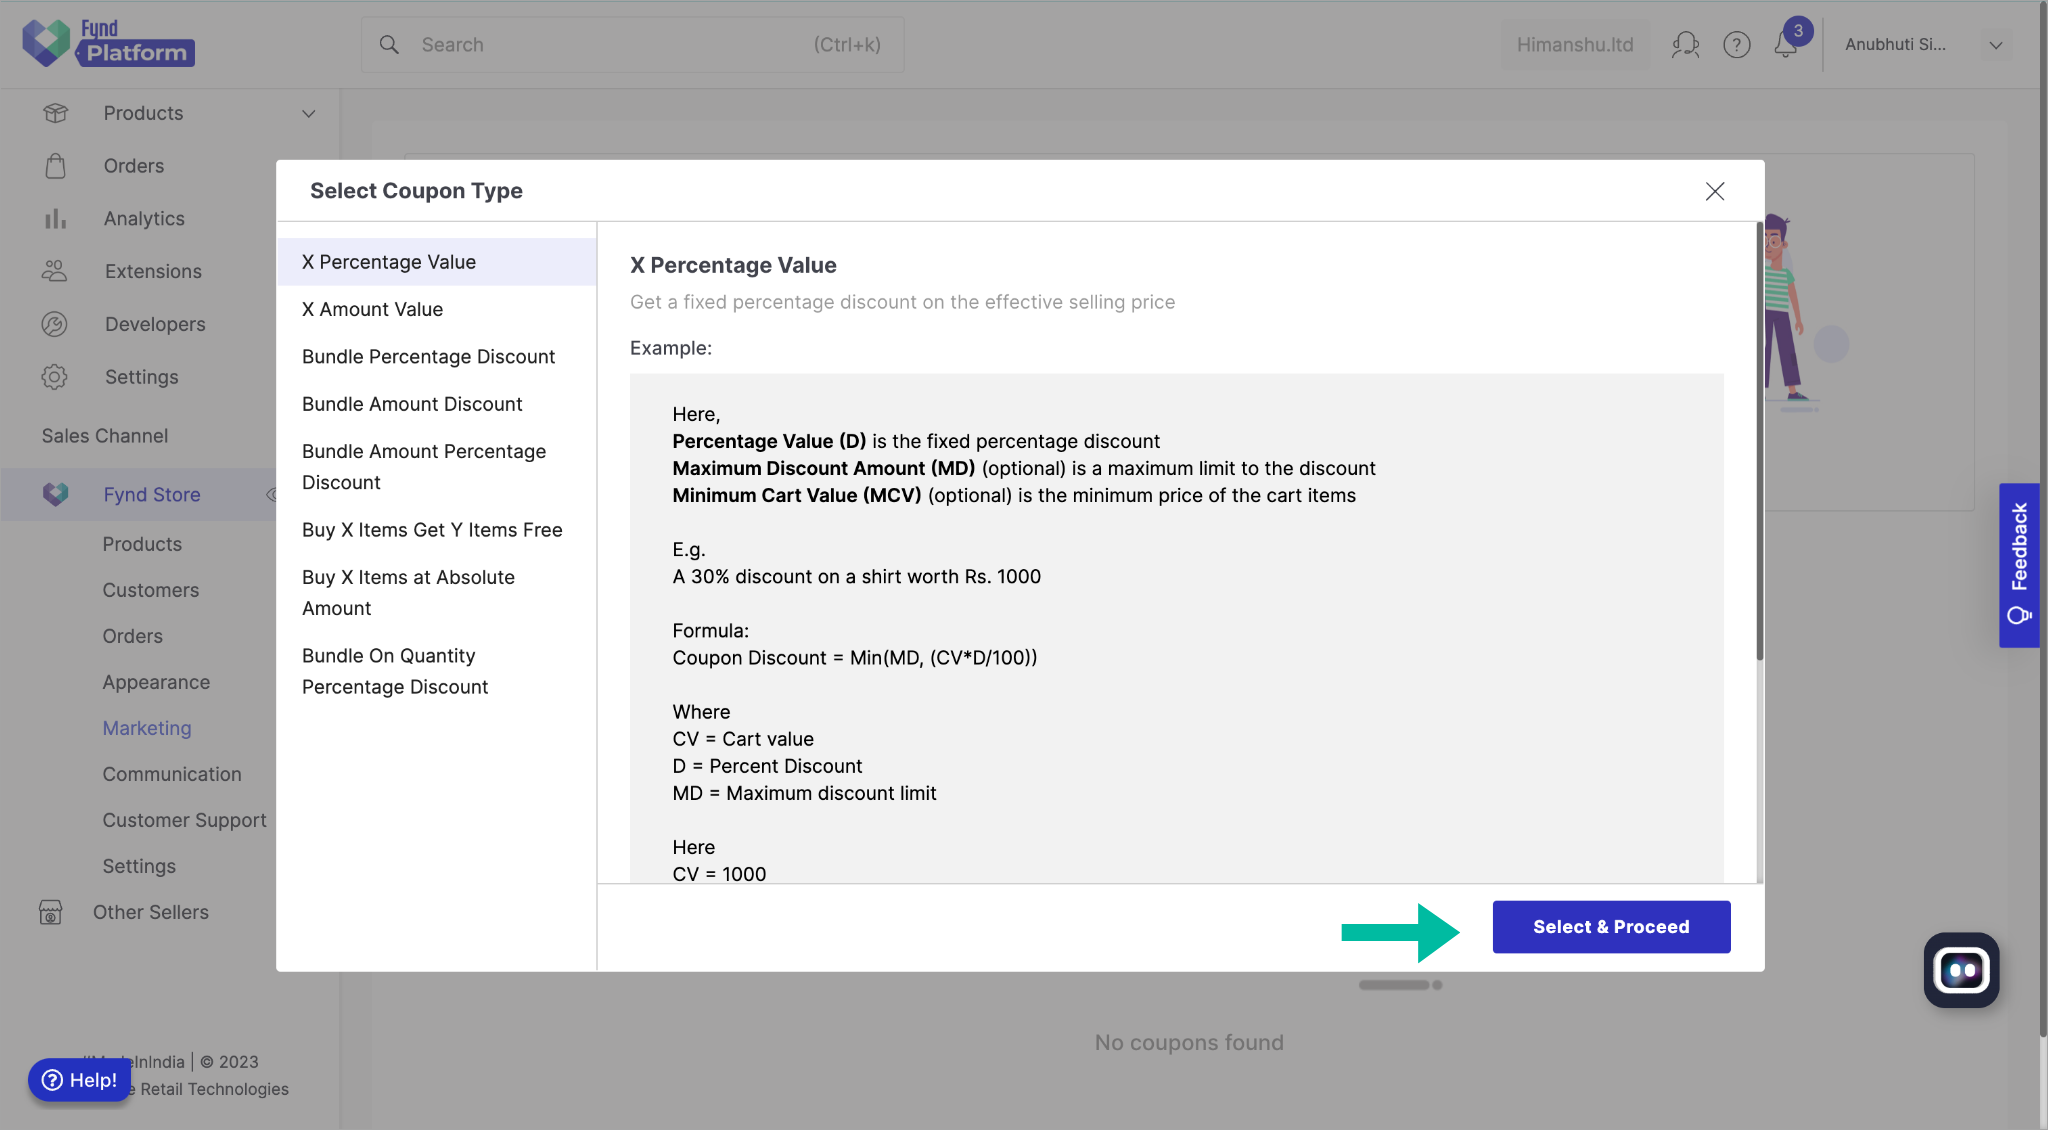
Figure 45: Clicking Select & Proceed Enter the required details for the coupon, such as the coupon code, discount percentage, and validity period.
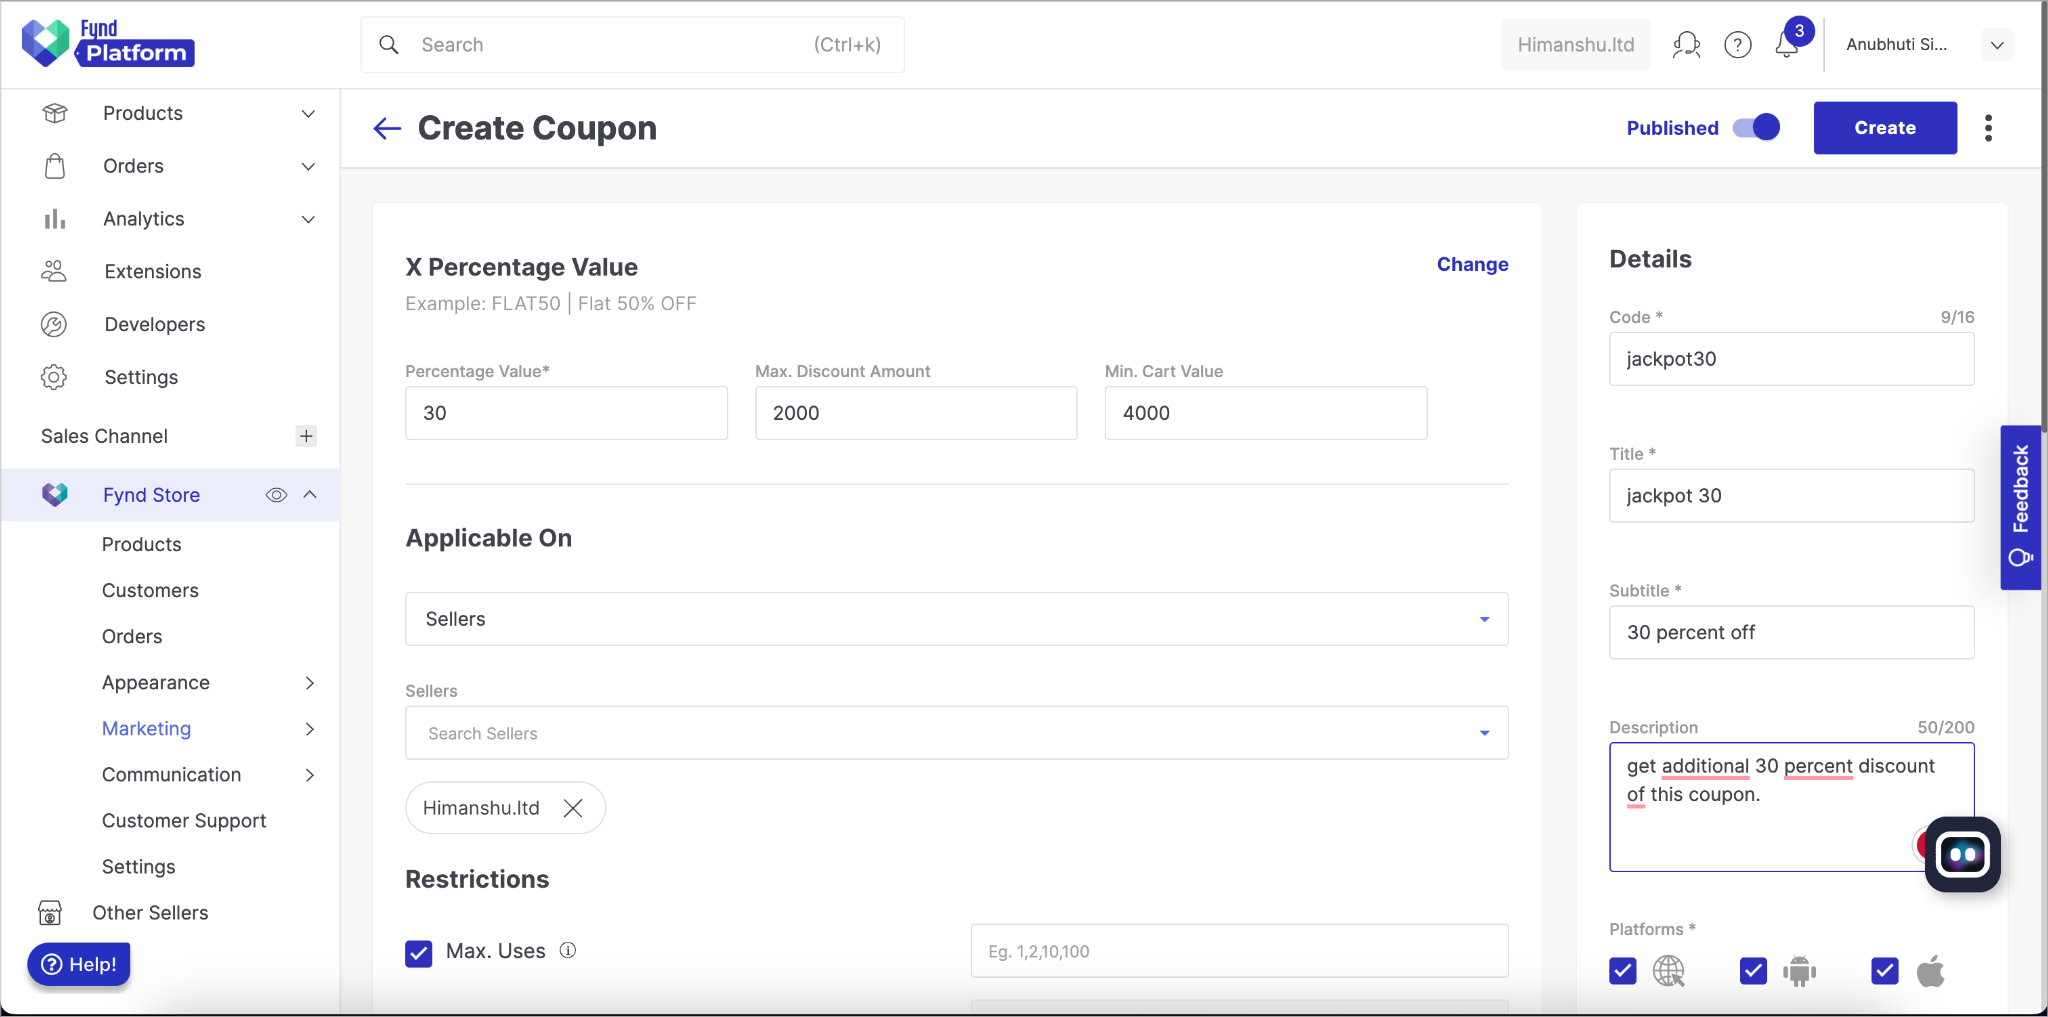
Figure 46: Coupon Configuration Choose Registered User, in the User-specific restriction section and enable the User Specific Coupon and add at least one user (you can add yourself as the user). This is a mandatory step to save the coupon.
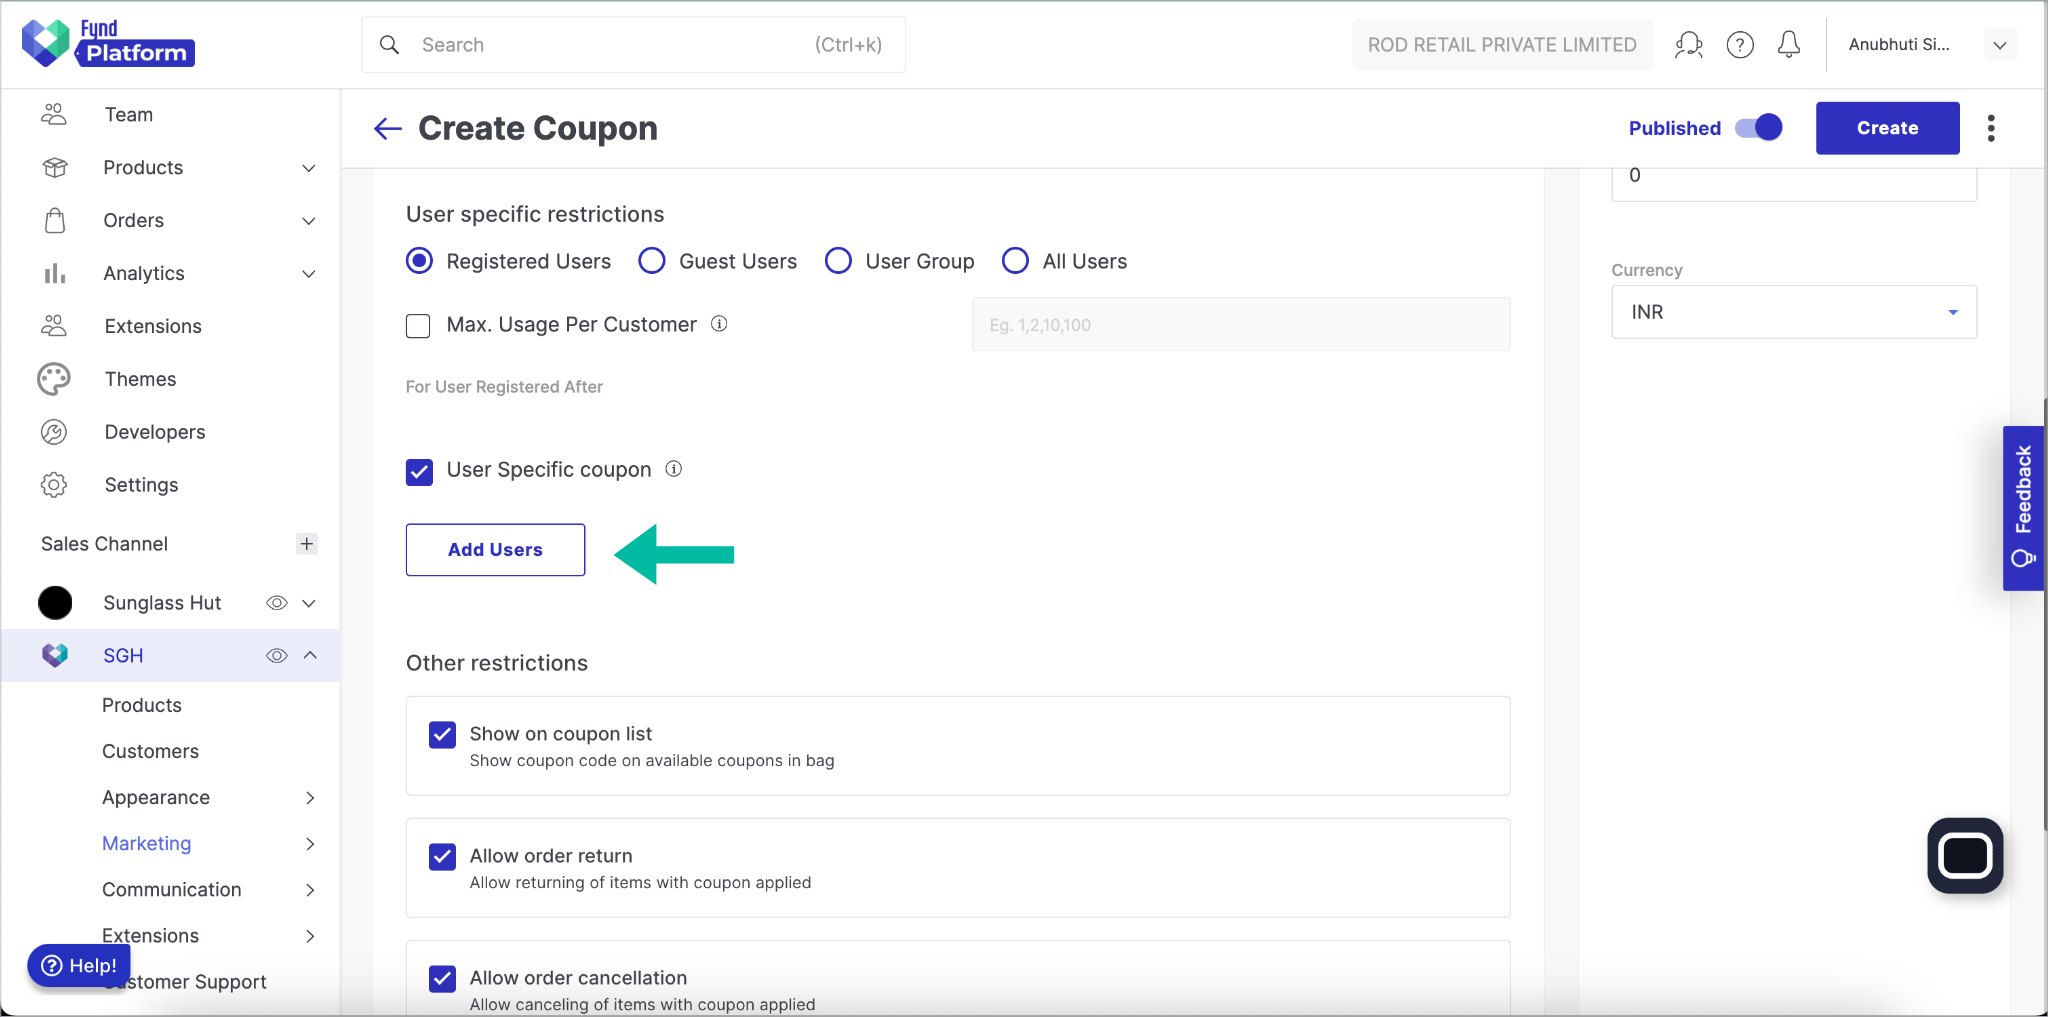
Figure 47: User Restrictions
This step ensures the visibility of the coupon along with the other coupons, in the sales channel for that particular user. If this is not configured properly or some other option is selected, the coupon will not be visible to the user and they will just receive the email notification of receiving the coupon.
Configure all settings according to your requirements, and then click Create to finalize the coupon creation.
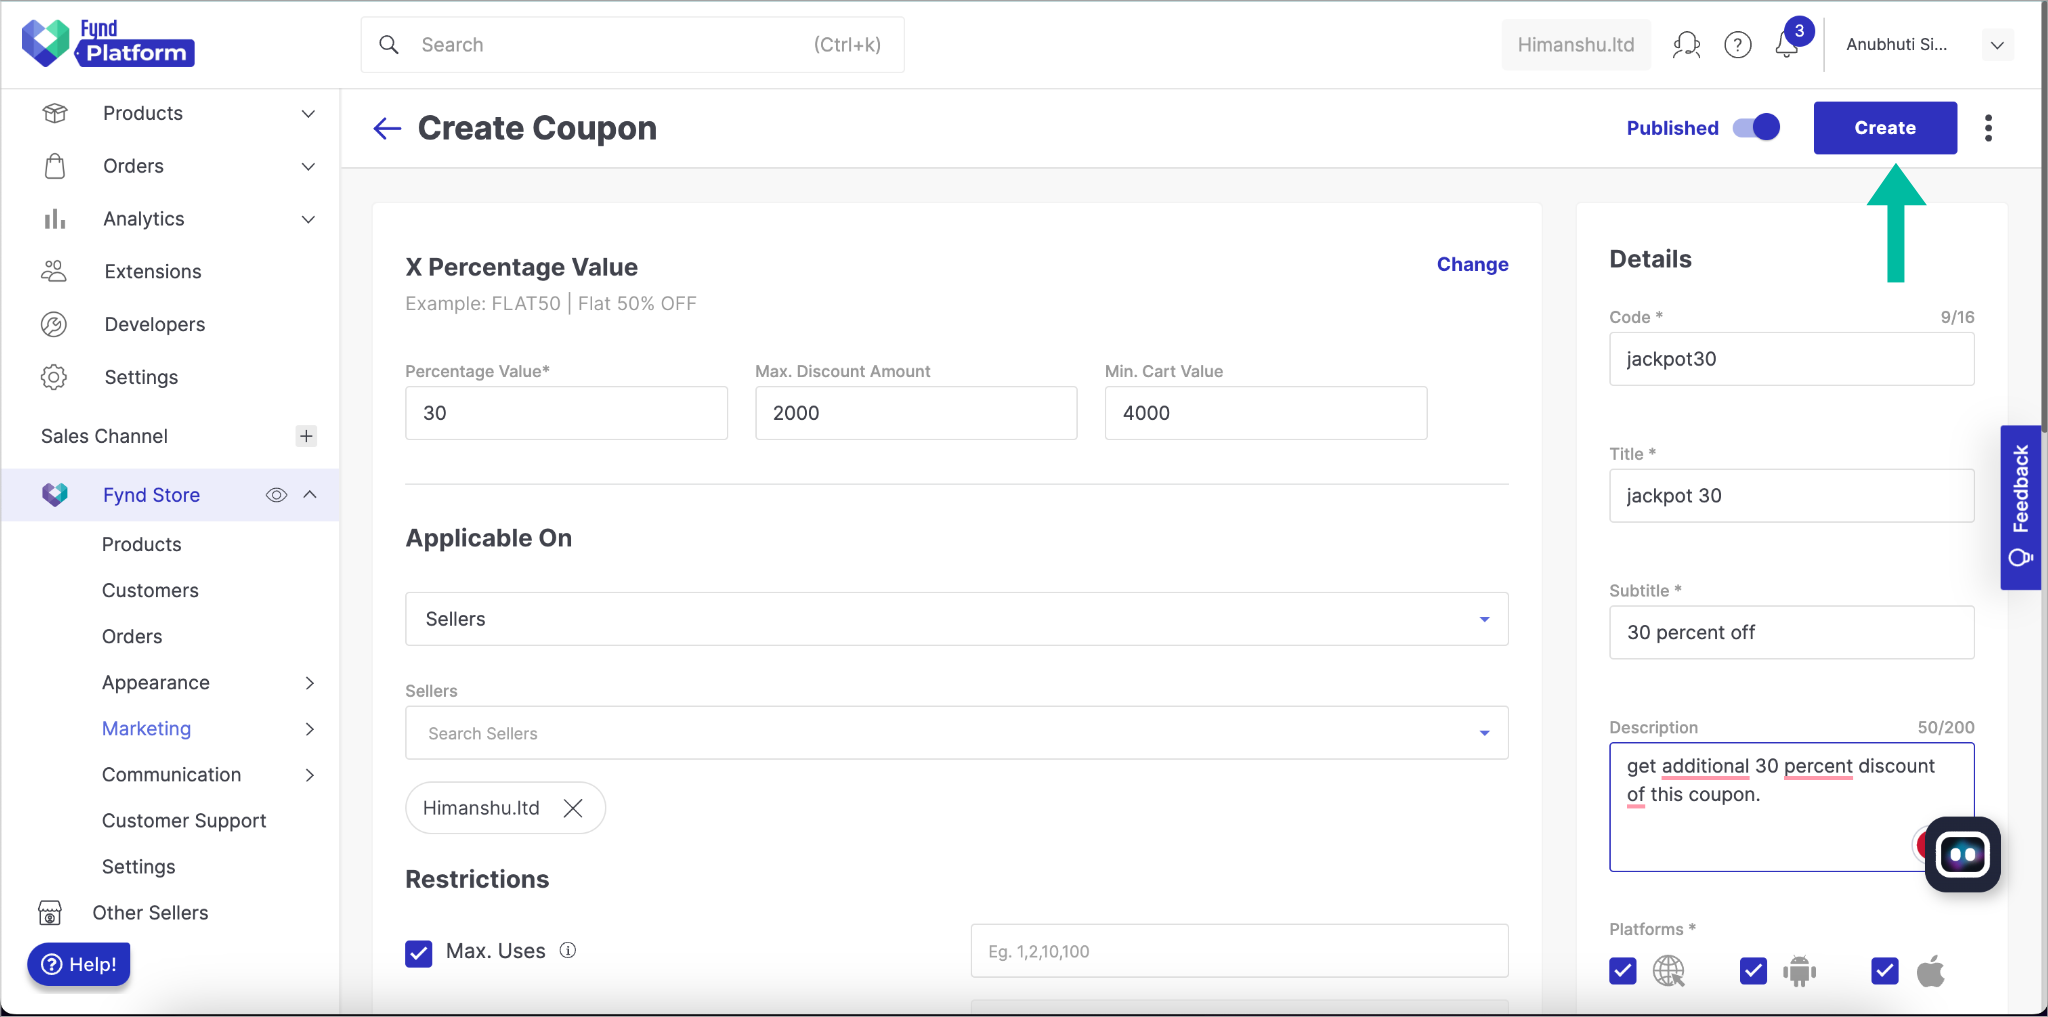
Figure 48: Saving the Coupon
By following these steps, you will successfully create a coupon that can be used as a prize while configuring the Slot Machine's and Spin The Wheel's pools.
Configuring the Redirection Link
Copy value of the query parameter as shown.
.png)
Figure 49: copying query parameter value Click on the sales channel and select Appearance.
.png)
Figure 50: Selecting Appearance Select Themes.
.png)
Figure 51: Selecting Themes Click Edit on the Themes page.
.png)
Figure 52: Clicking Edit Select the desired Page where you want the widget to be visible. Here we have selected Home.
.png)
Figure 53: Selecting the desired page for the widget Select Extension from the side bar
.png)
Figure 54: Selecting Extension
Select the Frolic extension from the drop down menu.
.png)
Figure 55: Selecting Frolic Select Frolic Slot Wrapper to enable the Slot Machine widget or Frolic Spin Wrapper to enable Spin the Wheel Widget.
.png)
Figure 56: Selecting the widget wrappers Select the element to enable the redirect link and select the link type. Here we have selected Application Banner.
.png)
Figure 57: Selecting the element for redirect link Paste the value that you have copied before in the Value section of the query
.png)
Figure 58: Adding the query parameter value Select multiple pages and add the Frolic extension as Binding to make the extension visible on them.
.png)
Figure 59: Adding the extension to multiple pages
The same process will be used for the other widgets.
Final Output
![]()
To configure the Frolic Games Extension, follow these steps:
Step 1: Enable Sales Channel Extensions
Navigate to the following location on the Fynd platform:
fynd platform > extensions > frolic games extension > Sales Channels.
Toggle the switch to activate the sales channel.
You will see the following options:
- Slot Machine
- Spin the Wheel
- Games
- Communication Configuration
Focus on the Games section for now.
Step 2: Access Frolic Games Settings
Click on Games to access the Frolic games settings section:
Fynd Platform > Extensions > Frolic > Sales Channel > Frolic Games
It is necessary to activate the toggle button for the settings of the Frolic Games to become active.
Game and Theme Settings
In the Frolic Games section, you'll find two settings options:
- Games Settings
- Themes Settings
![]()
Let's start by exploring the Games Settings and how they work.
Games Settings Configuration
![]()
To configure Games Settings, follow these steps:
Step 1: Create a Campaign
- Once you've entered the Games Settings page, locate the 'Create Campaign' button and click on it.
![]()
Creating a campaign involves setting up a specific game for the campaign.
Step 2: Select Game
- In the 'Select Game' dropdown, choose from various Frolic games such as Monster Striker, Color Switch, Dunkshot, Robo Fighter, Space Adventure, Block Puzzle, and more.
Step 3: Set Target Score
- Define a target score for customers to achieve in order to receive a coupon. For example, set the target score to 40.
![]()
Step 4: Number of Attempts
- Set the number of chances customers get to play for the coupon. For instance, you can set the number of attempts to 5.
![]()
Step 5: Select Coupons
- Choose a coupon from the available options in the dropdown menu. For example, select '20FLAT'.
![]()
The coupon dropdown will appear if you have already created coupons. Refer to the guide below if you need to create a coupon.
Step 6: Activate the Campaign
- Toggle the 'Active' button and click 'Save' to create the campaign.
![]()
![]()
Once the campaign is successfully created, a popup will confirm the successful saving of settings.
Checking Campaign Details
Return to the Games Settings to check if the campaign information, including game name, target score, attempts, and active status, is displayed.
If the Active status is shown as false, revisit the create campaign section and enable the toggle button to make it active. Save the changes, and the active status will be set to true in the game settings.
Theme Settings Configuration
To configure Theme Settings for Frolic Games, follow these steps:
![]()
Step 1: Change Game Theme Colour
- Access the Themes Settings page under Frolic Games:
Fynd Platform > Extensions > Frolic > Sales Channel > Frolic Games > Themes Settings
![]()
Modify the primary and secondary colors of the game theme. A live preview is available to visualise the theme colors. Add details such as the Game Logo and the coupon (e.g., 20FLAT). Click 'Save' after making changes.
Adding Extension to Website or Sales Channel
To add the created extension to your website or sales channel, follow these steps:
Step 1: Access Appearance Settings
- Go to the appearance section of your theme and select 'Edit'.
![]()
Step 2: Add Extension Section
Click on 'Add Section' below the list of other sections on the left side of the screen.
Select 'Extensions' from the left sidebar.
![]()
Step 3: Configure Extension Positions
- Click the '+' button to add an extension.
- Choose the type of extension, in this case, 'Frolic Games Extension'.
- Select the wrapper as 'Frolic Games'.
- Repeat the above steps to add another extension. Choose 'Slot Machine' as the wrapper.
- Click 'Save' in both cases to finalise the configuration.
![]()
![]()
Step 4: Verify the Extension
Visit your sales channel or storefront on the Fynd platform and navigate to the homepage. You should find the Games Slot Machine logo prominently displayed.
![]()
As a registered customer, clicking on the slot machine logo grants access to the slotmachine interface.
Game Play
After verifying the game settings and theme settings, you can play the game:
- Click 'Start Game' to initiate the game and ensure all elements are in place.
![]()
Ensure that the gameplay is functional and properly displayed.
To create coupons refer to figure 18 - figure 25
Coupons are only shown or sent to registered users.
Final Output
The outcome of these steps will result in a fully functional Frolic Games Extension with configured settings and game play. This extension enhances the user experience on your sales channel by providing interactive gameplay and enticing prizes.
![]()