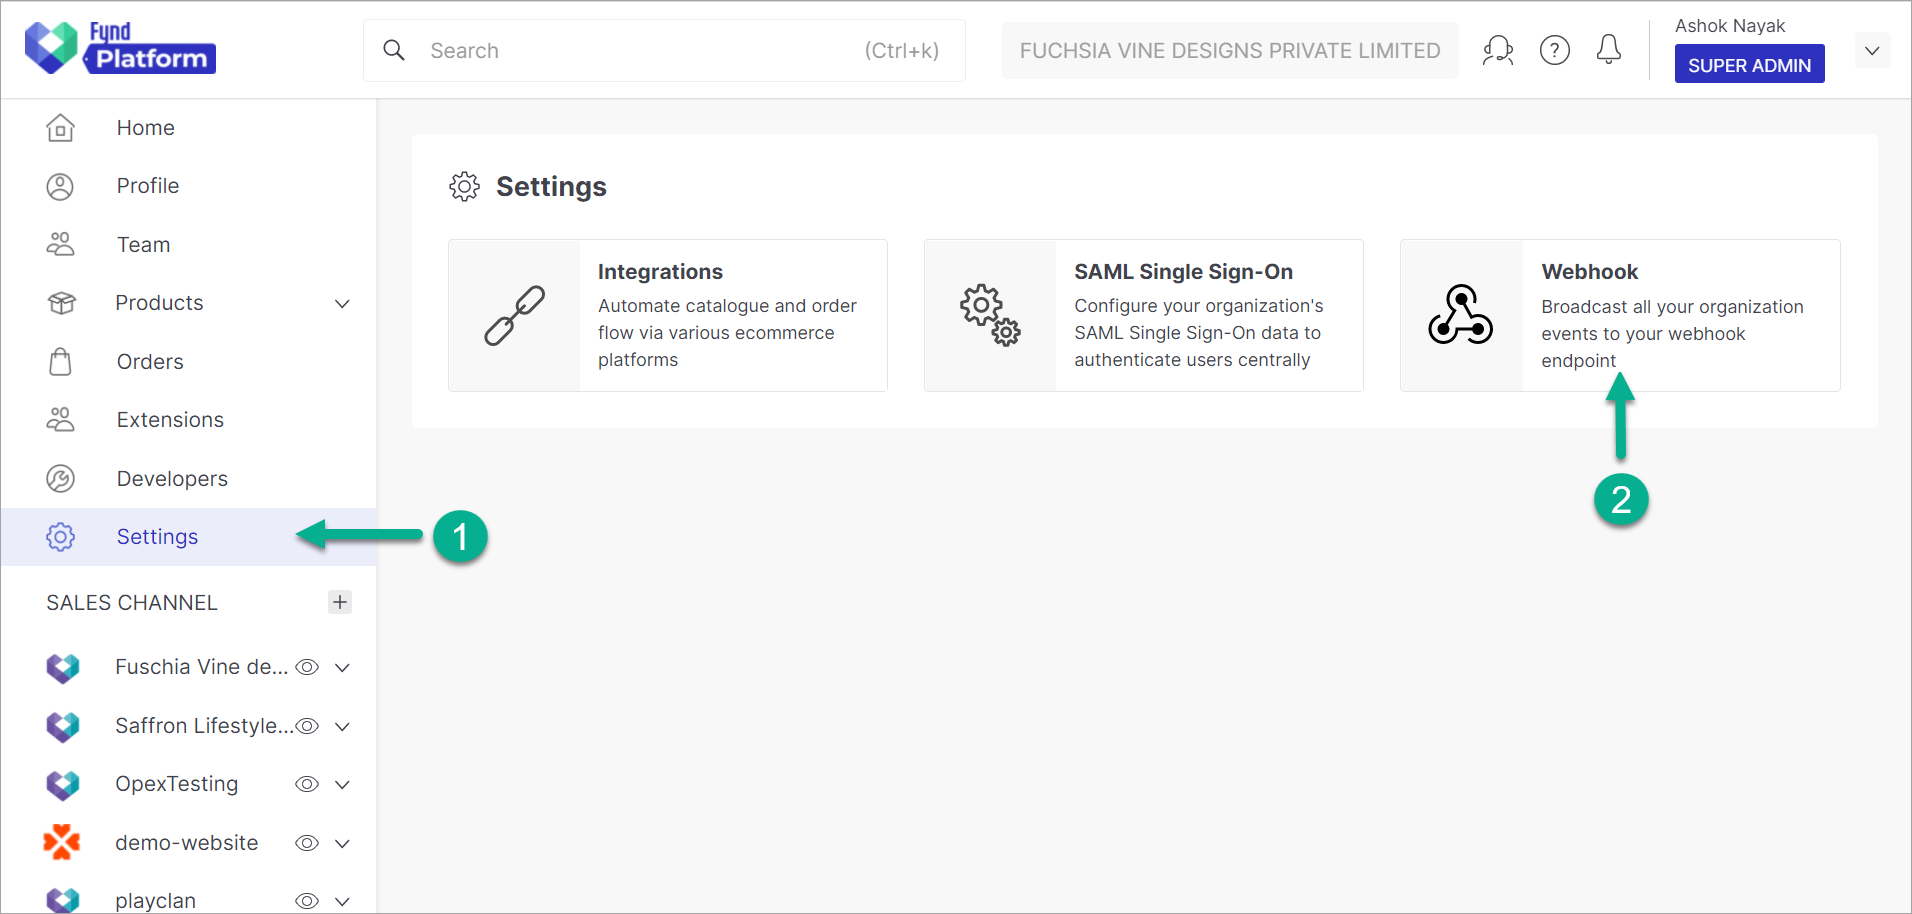
Configuring a Webhook
On Fynd Platform, you can create and configure a webhook. Moreover, there's an option to view the reports of all your configured webhooks in which you can check the event, the payload, status, and many more.
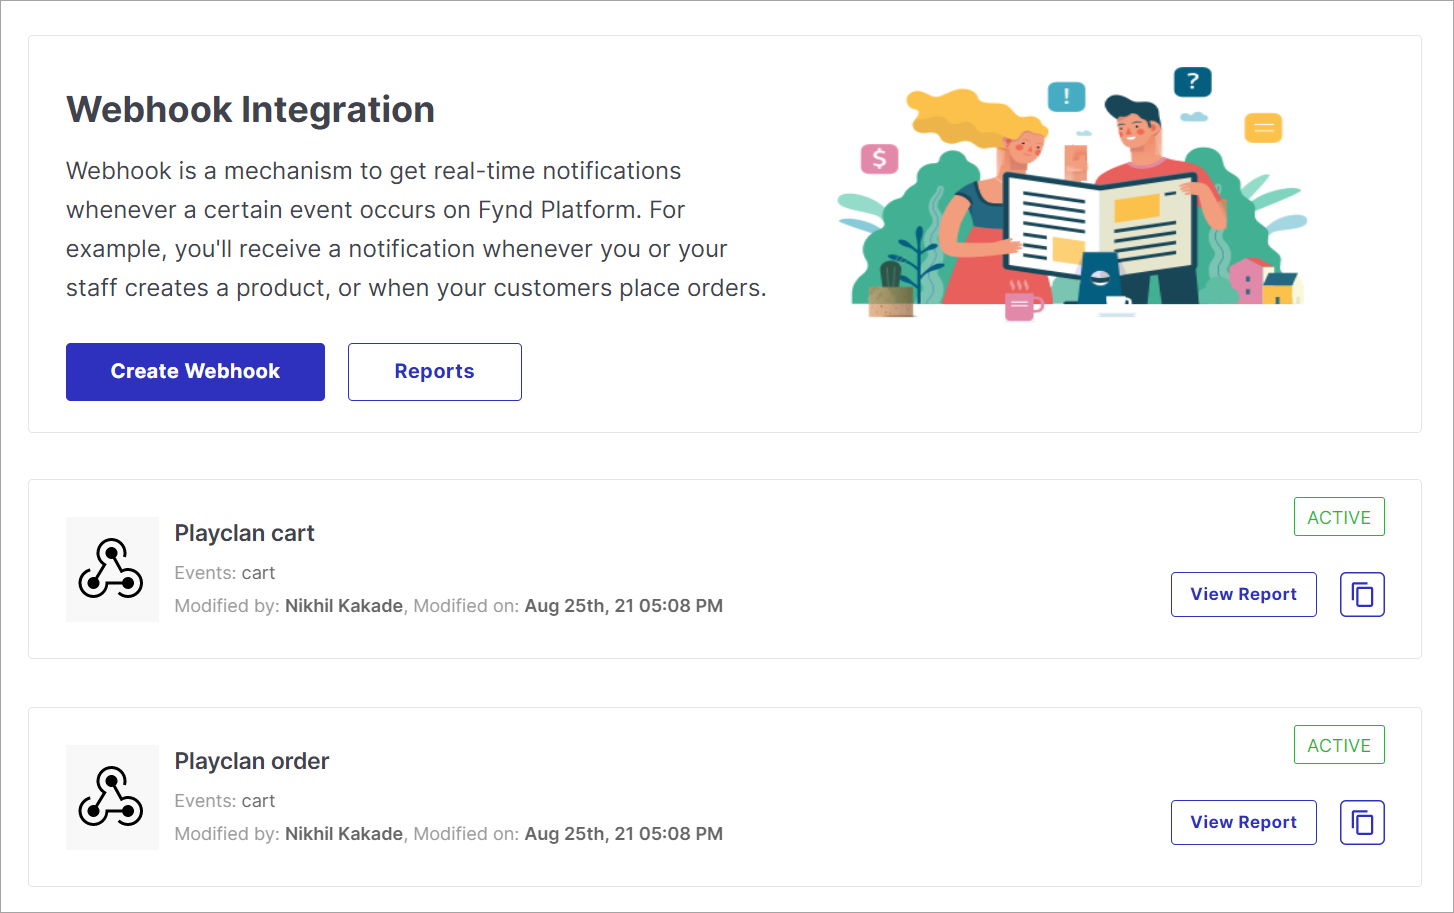
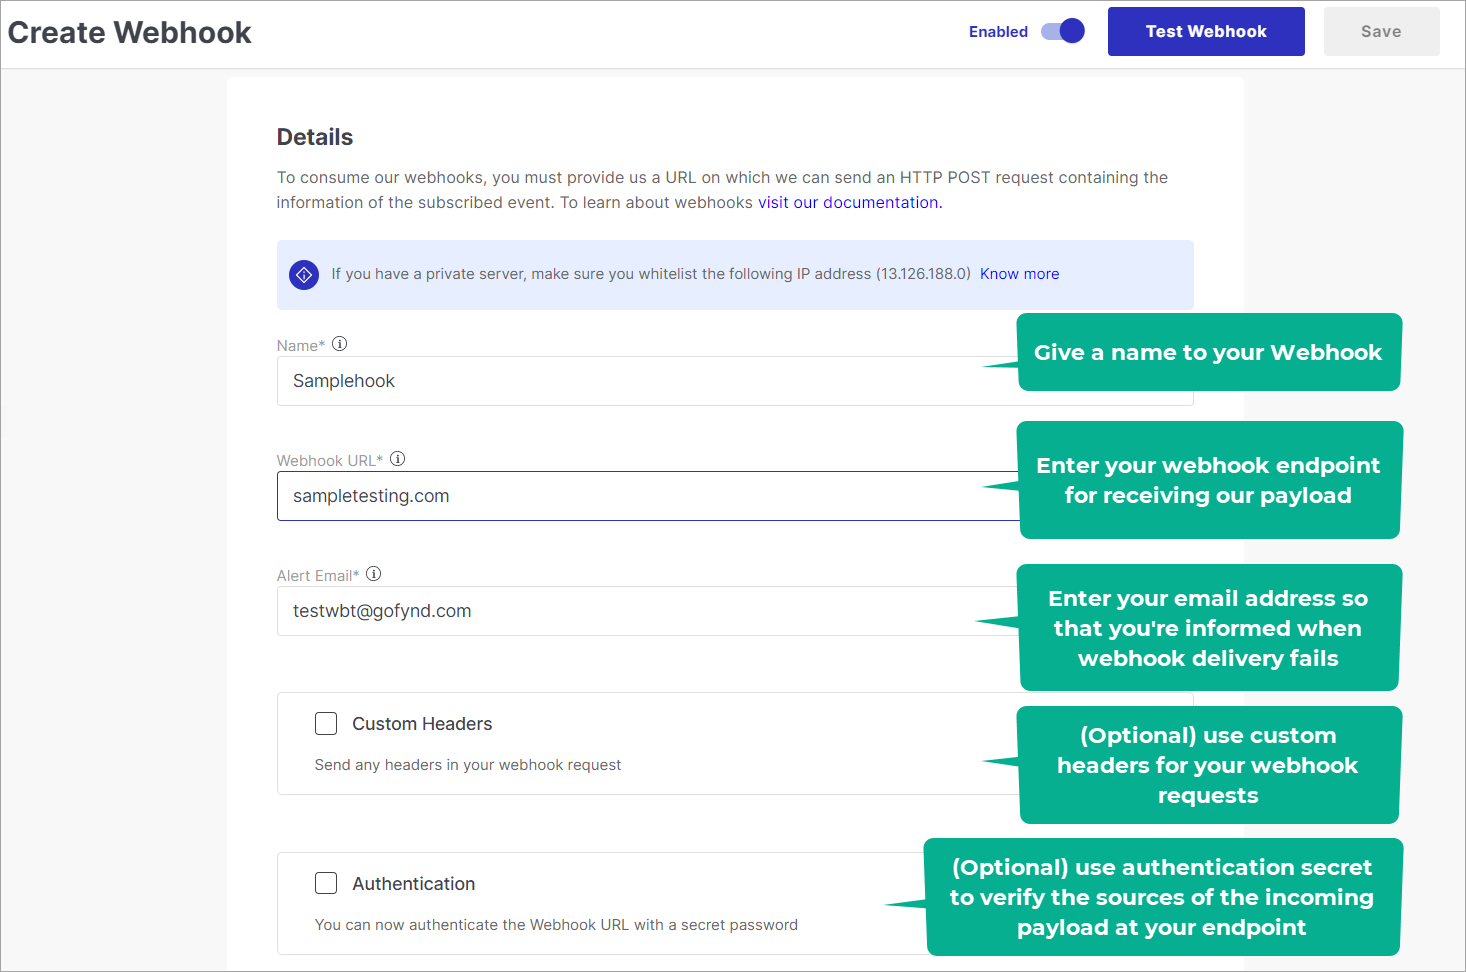
Creating a Webhook
You must have a webhook URL that is configured to receive a payload from us.
In the Webhook Settings section:
- Give a name to the webhook
- Enter your target endpoint in Webhook URL.
- Enter the email address on which you wish to receive alerts in case the webhook fails.
- (Optional) Use the toggle button and enter a
secretfor the webhook endpoint. This is useful when you want to validate a webhook for the authenticity of its source (read Webhook Validation). Ensure that you do not reveal or expose the secret publicly.
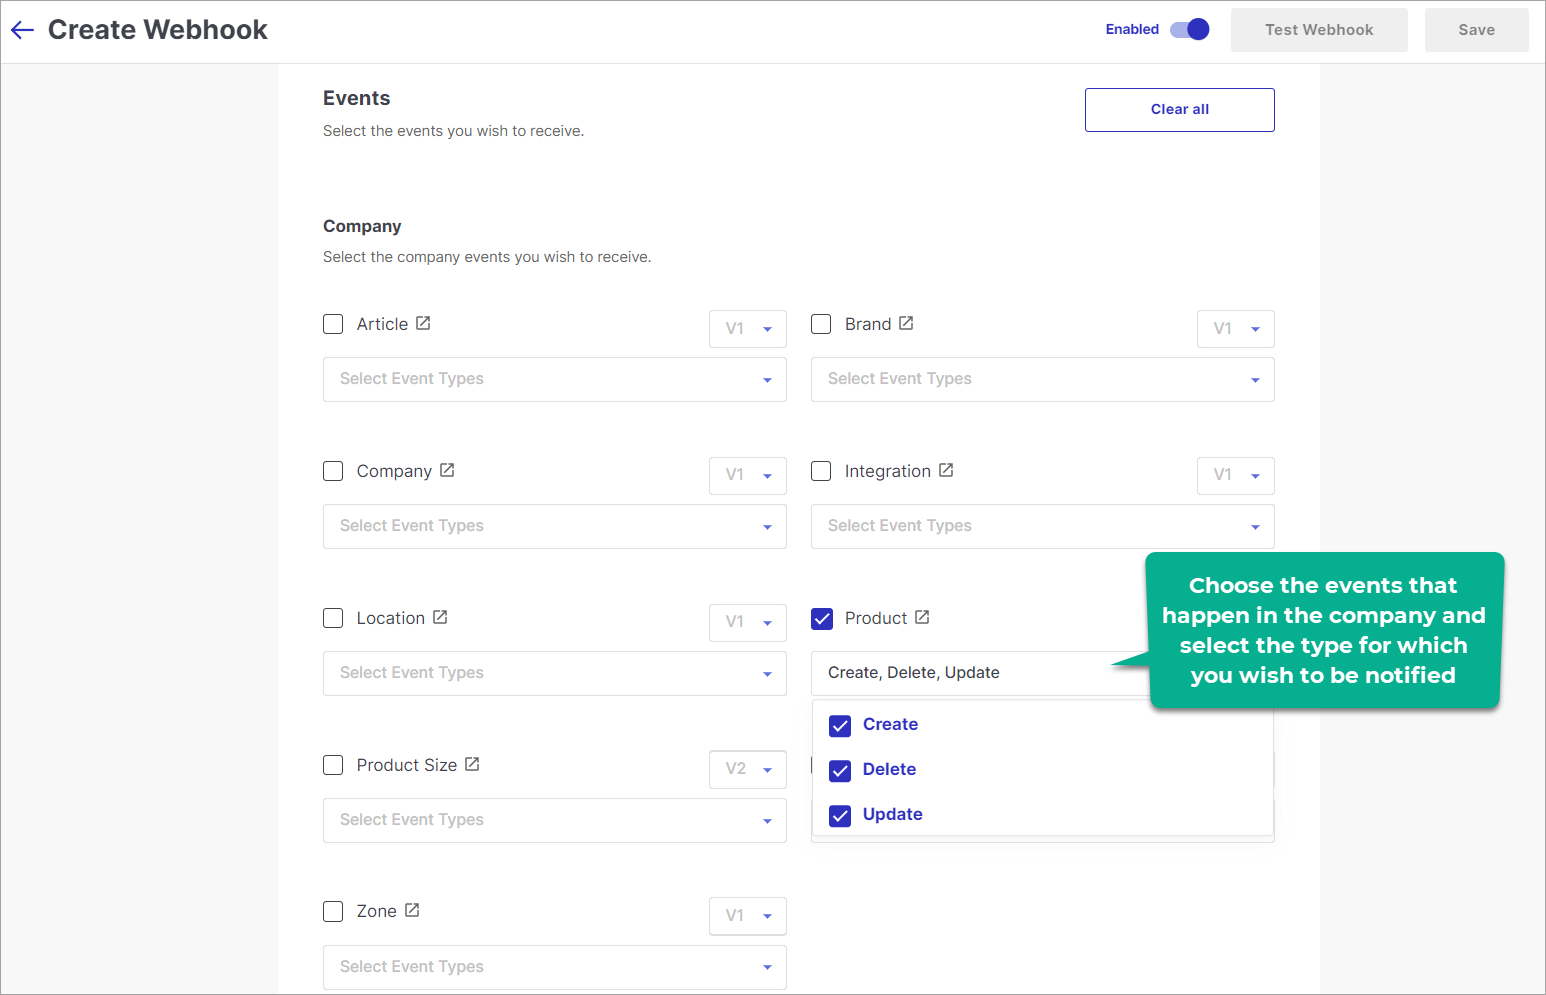
In the Events section:
- Choose one or more events of your company and select the event type from the drop-down. You may subscribe to more than one event. Else, create a separate webhook for other events. Also, you may click the external link icon
 to understand what to expect in the incoming payload.
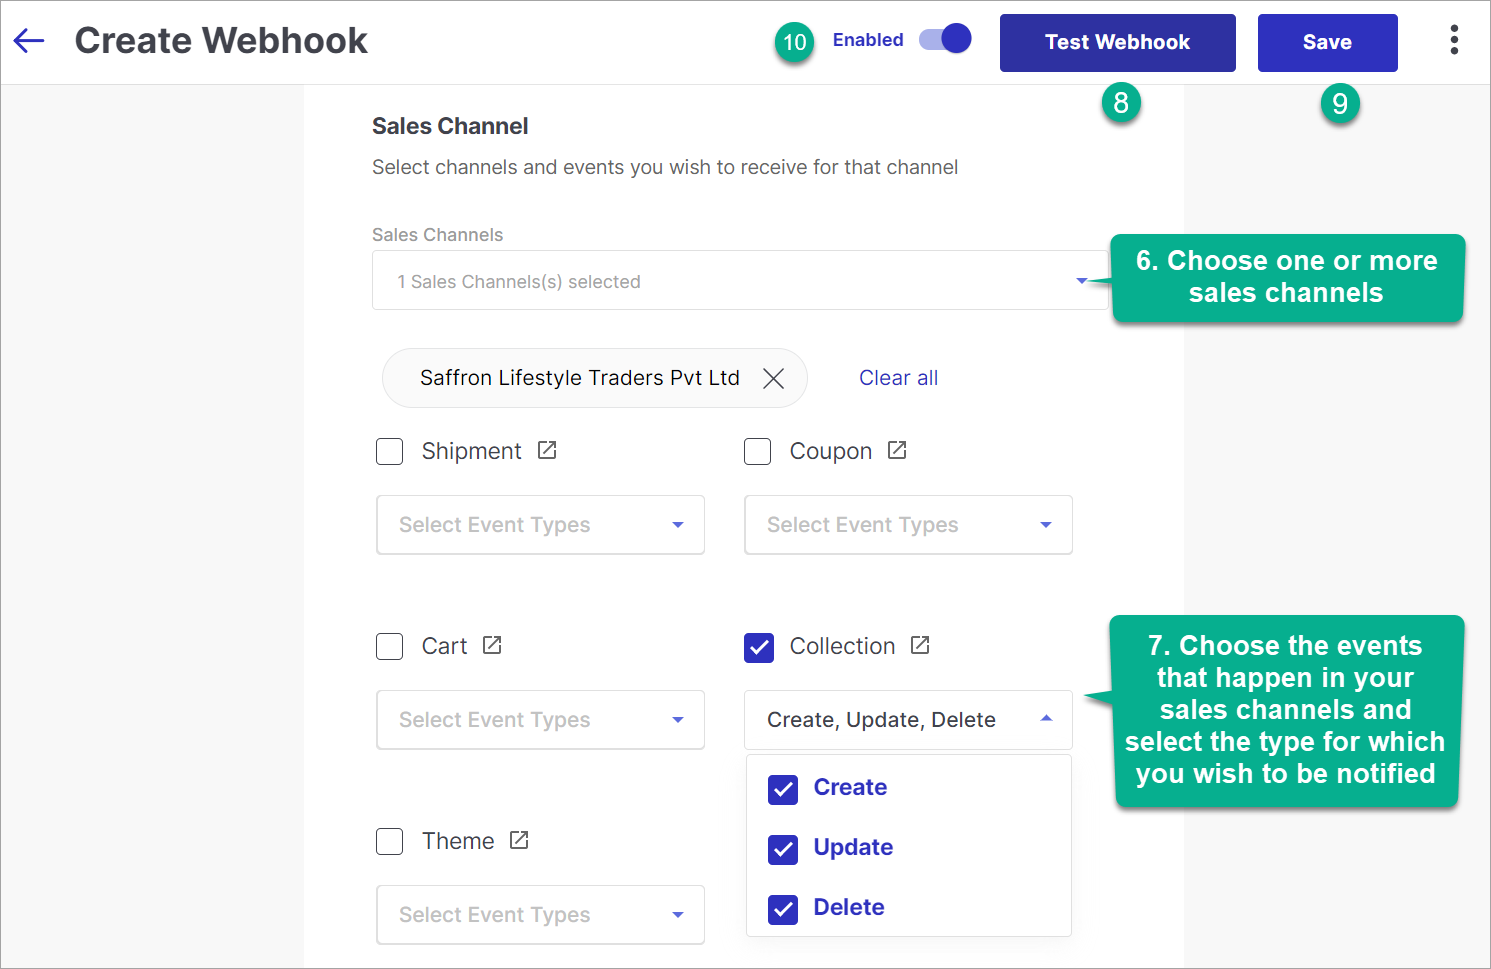
You can also subscribe to events of your sales channels. To do this, choose one or more sales channels from the drop-down.
Select an event along with its type. If your webhook URL can handle payloads of multiple events, you may select additional sales channel events or company events.
Test the webhook to check whether it works correctly (read more in Webhook Testing)
Click Save.
Turn ON the webhook.
You've successfully configured a webhook.
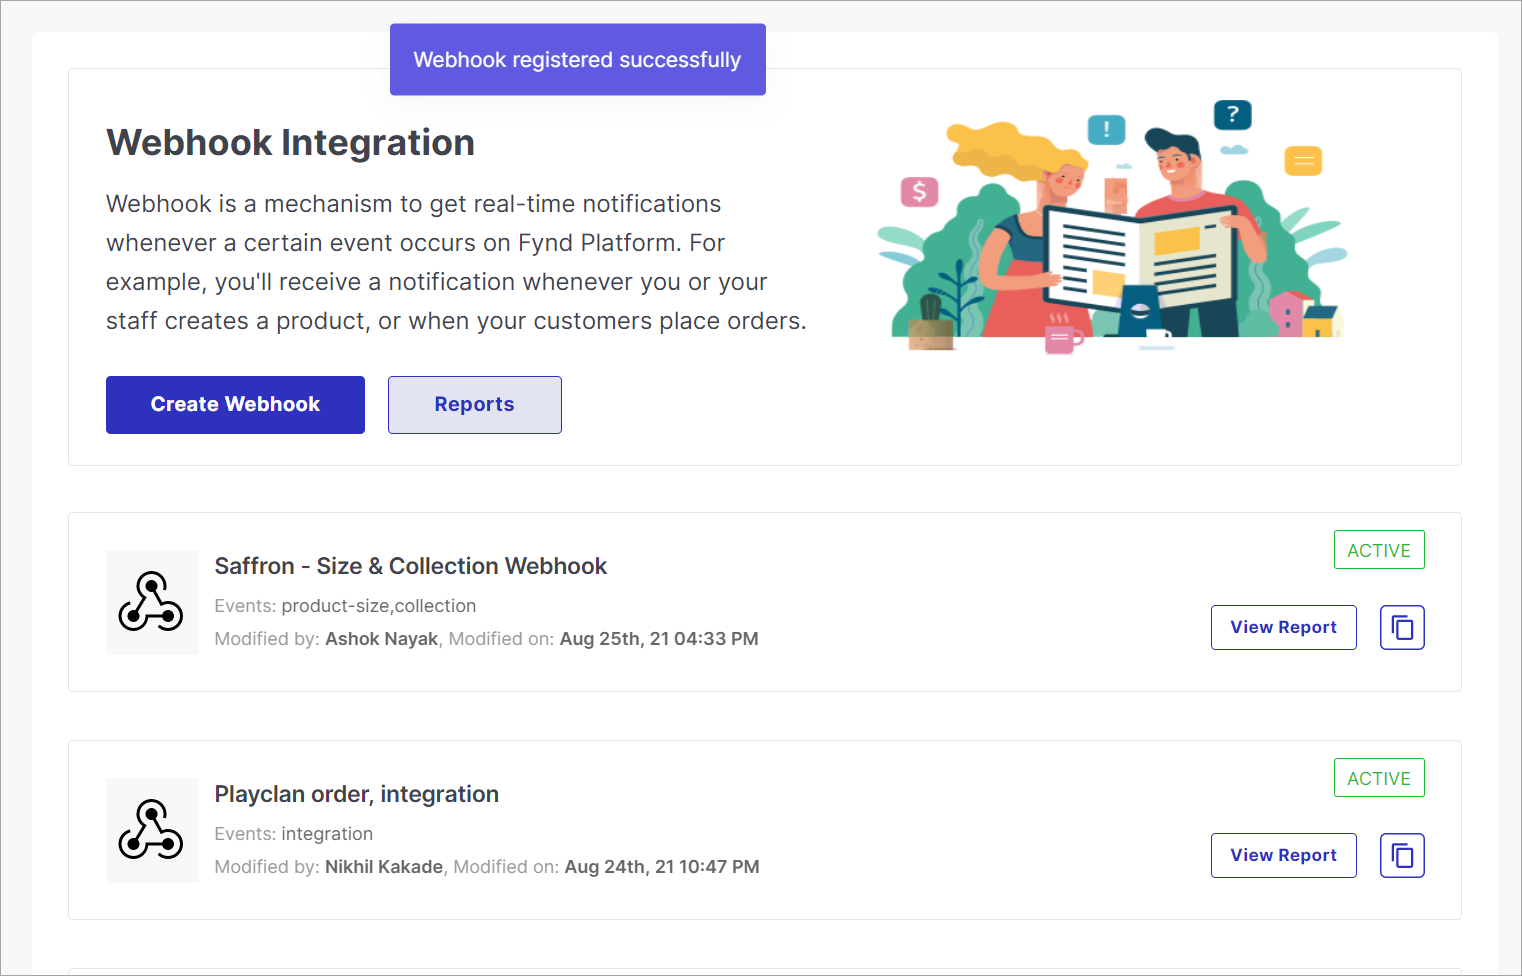
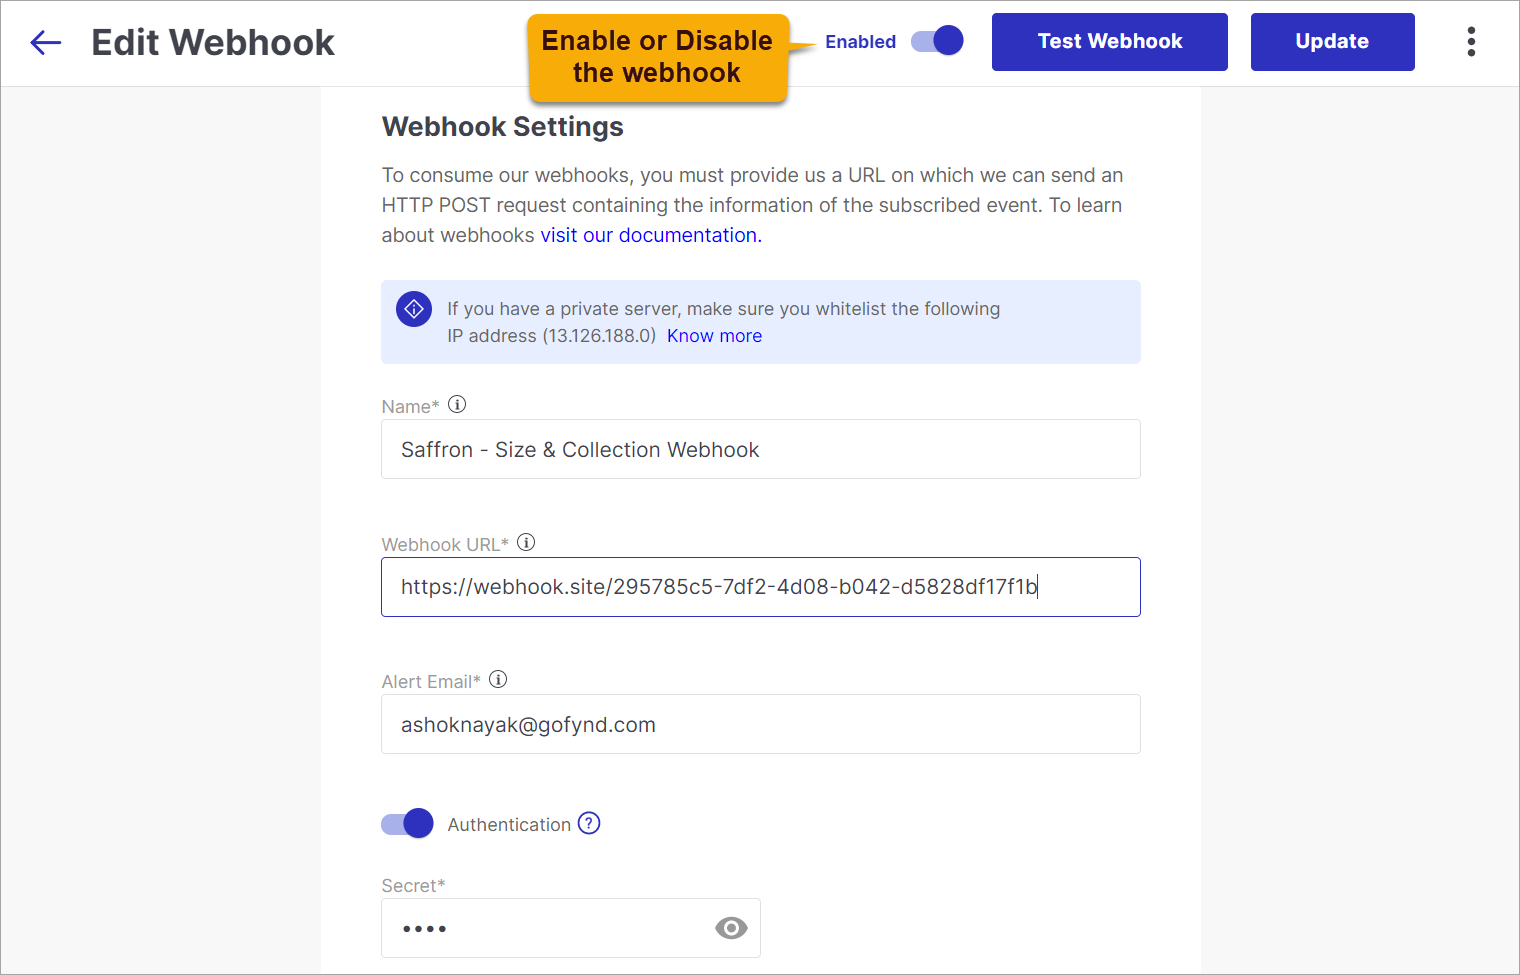
Editing and Updating an Existing Webhook
Once you create a webhook, it will appear in the list of webhooks as shown in fig. 1. You can click on an existing webhook and edit its details.
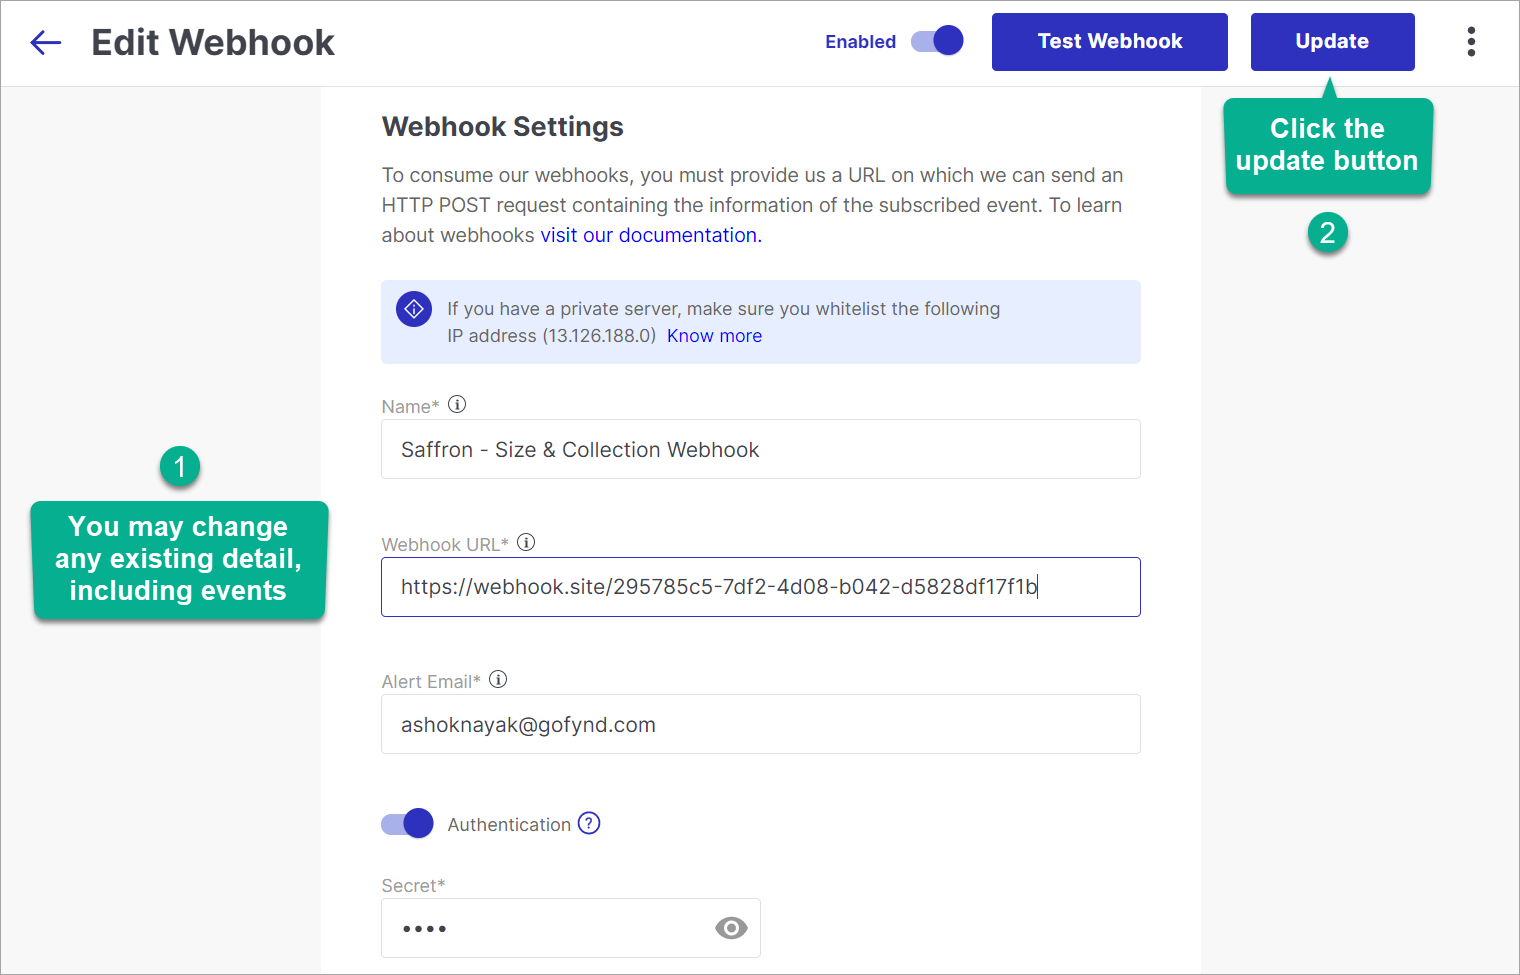
At any point in time, you can edit an existing webhook to do the following:
- Change the name
- Enter a new webhook URL
- Change the secret used for authentication
- Enter a new alert email
- Add or remove event types
Click Update once you're done editing the details.
Enabling or Disabling a Webhook
In case you wish to cancel a webhook subscription, use the toggle button to turn OFF the webhook. You'll no longer receive notifications for the subscribed event.
You can use the same toggle button to turn ON the webhook and re-subscribe to the event.